It can be very frustrating to encounter the "Could Not Complete OAuth 2.0 Login" error in Postman, due to how little Postman describes the error.
Equipped with the newest functionalities for seamless API development, click the button below to learn more about what Apidog has to offer!
This article will address how users can approach this error by accessing Postman's console. This allows users to effectively interpret the "Could Not Complete OAuth 2.0 Login" and other potential errors in the future.
What is Postman?

A popular API development platform, Postman, equips developers with a comprehensive suite of tools for creating, testing, and documenting APIs. Its diverse functionalities have cemented its place as a go-to resource for developers tackling any API-related challenge.

Potential Reasons for "Could Not Complete OAuth 2.0 Login" Error
The "Could Not Complete OAuth 2.0 Login" error in Postman can be caused by a few potential reasons. Here are some probable causes and troubleshooting tips to get your OAuth login flowing again:
Incorrect Credentials
- Double-check IDs and Secrets: Typos and misconfigurations are surprisingly common. Ensure your Client ID and Client Secret match exactly the authorization server's expectations.
- Are they in the right place? Postman might be auto-filling fields that shouldn't be populated with the Client ID and Secret for certain grant types (e.g., Password).
Invalid Redirect URI
- Check the Path, Twice: The redirect URI specified during OAuth setup in Postman might be incorrect or not match what you registered with the authorization server.
- Case Sensitivity Matters: Pay close attention to uppercase and lowercase characters. Even a slight difference can cause issues.
Insufficient Scopes
- Not Enough Permission? The requested scopes might not be authorized for your application. Scopes define the level of access your application has to user data.
- Consult the Docs: Refer to the authorization server's documentation to ensure you're requesting the appropriate scopes for the actions you need to perform.
Authorization Server Error
- Is it Down? Sometimes, the issue might lie outside your control. The authorization server itself could be down or experiencing temporary problems.
- Check the Status: Consult the server status page or documentation to see if any known outages are reported.
Network Issues
Network issues can disrupt the delicate dance of OAuth. Ensure a stable internet connection and firewalls aren't blocking communication between Postman and the authorization server.
Clock Skews
In rare cases, a significant time difference between your system clock and the authorization server's clock can cause issues. Synchronize your system time with a reliable source like https://www.time.gov/ to eliminate this possibility.
How to Access Postman's Console for Troubleshooting
This section will guide you on how to open the Postman console, allowing you to troubleshoot on your own!

Step 1 - Create a Postman Account
If you don't already have a Postman account, sign up for a free one. To get the full range of features, download the Postman app to your device – it's more powerful than the web version.
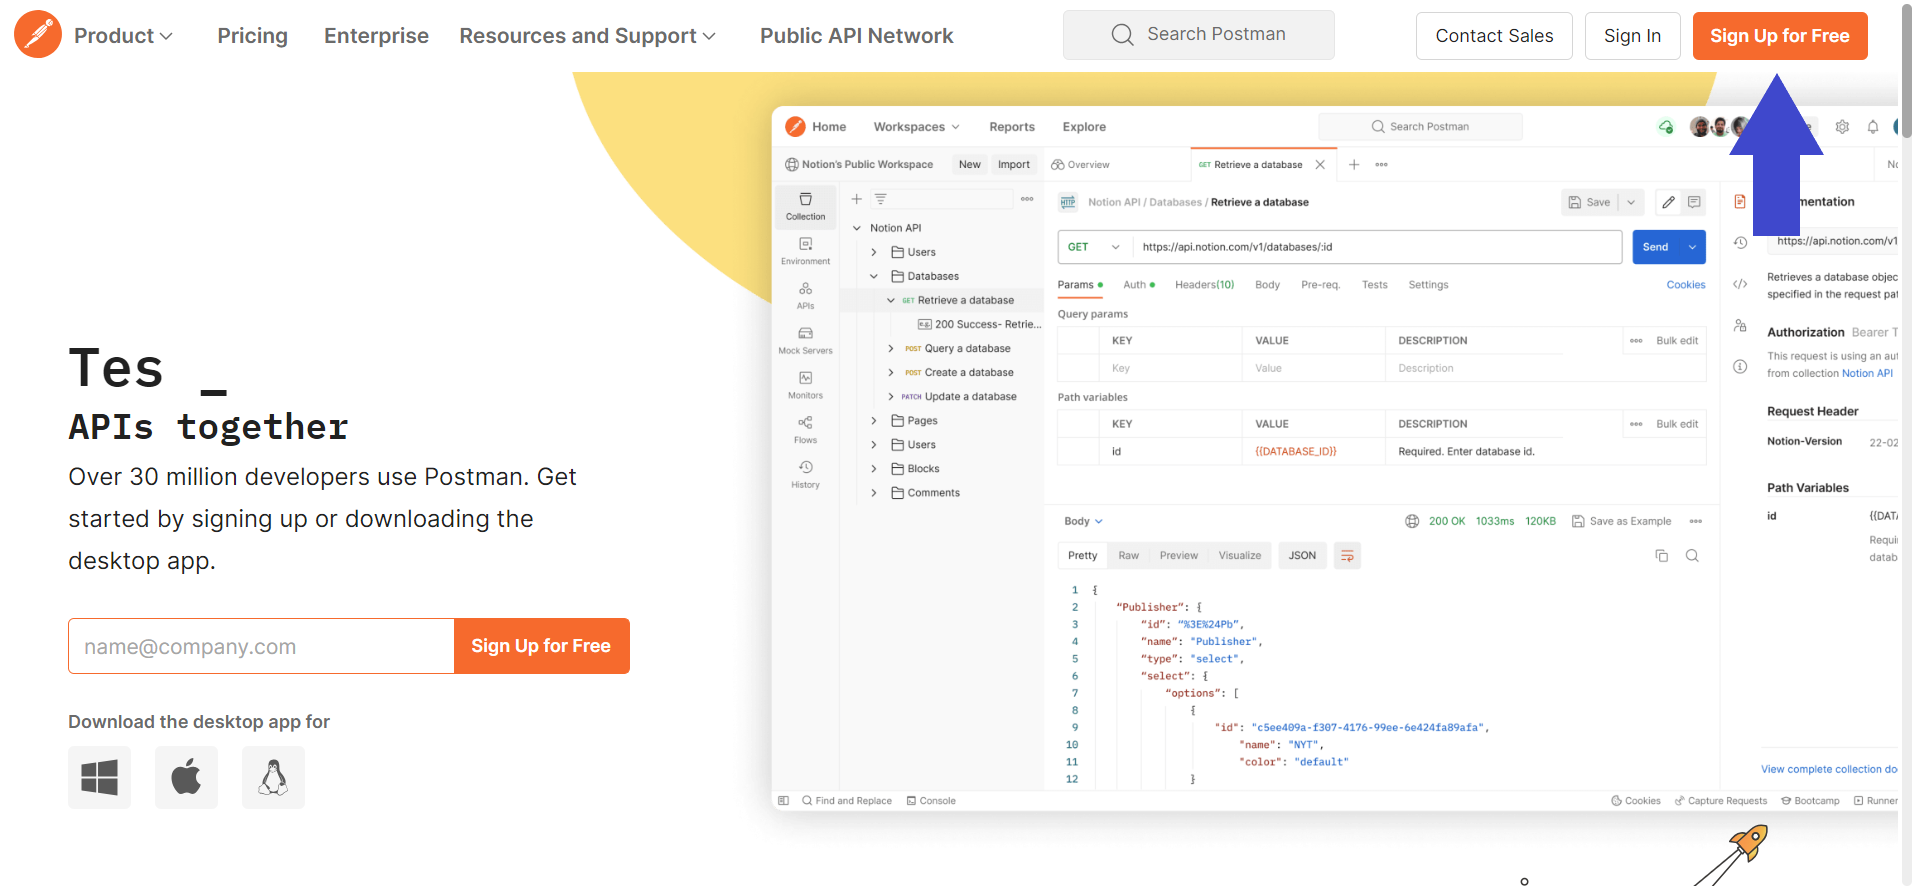
Step 2 - Create a New API Request on Postman
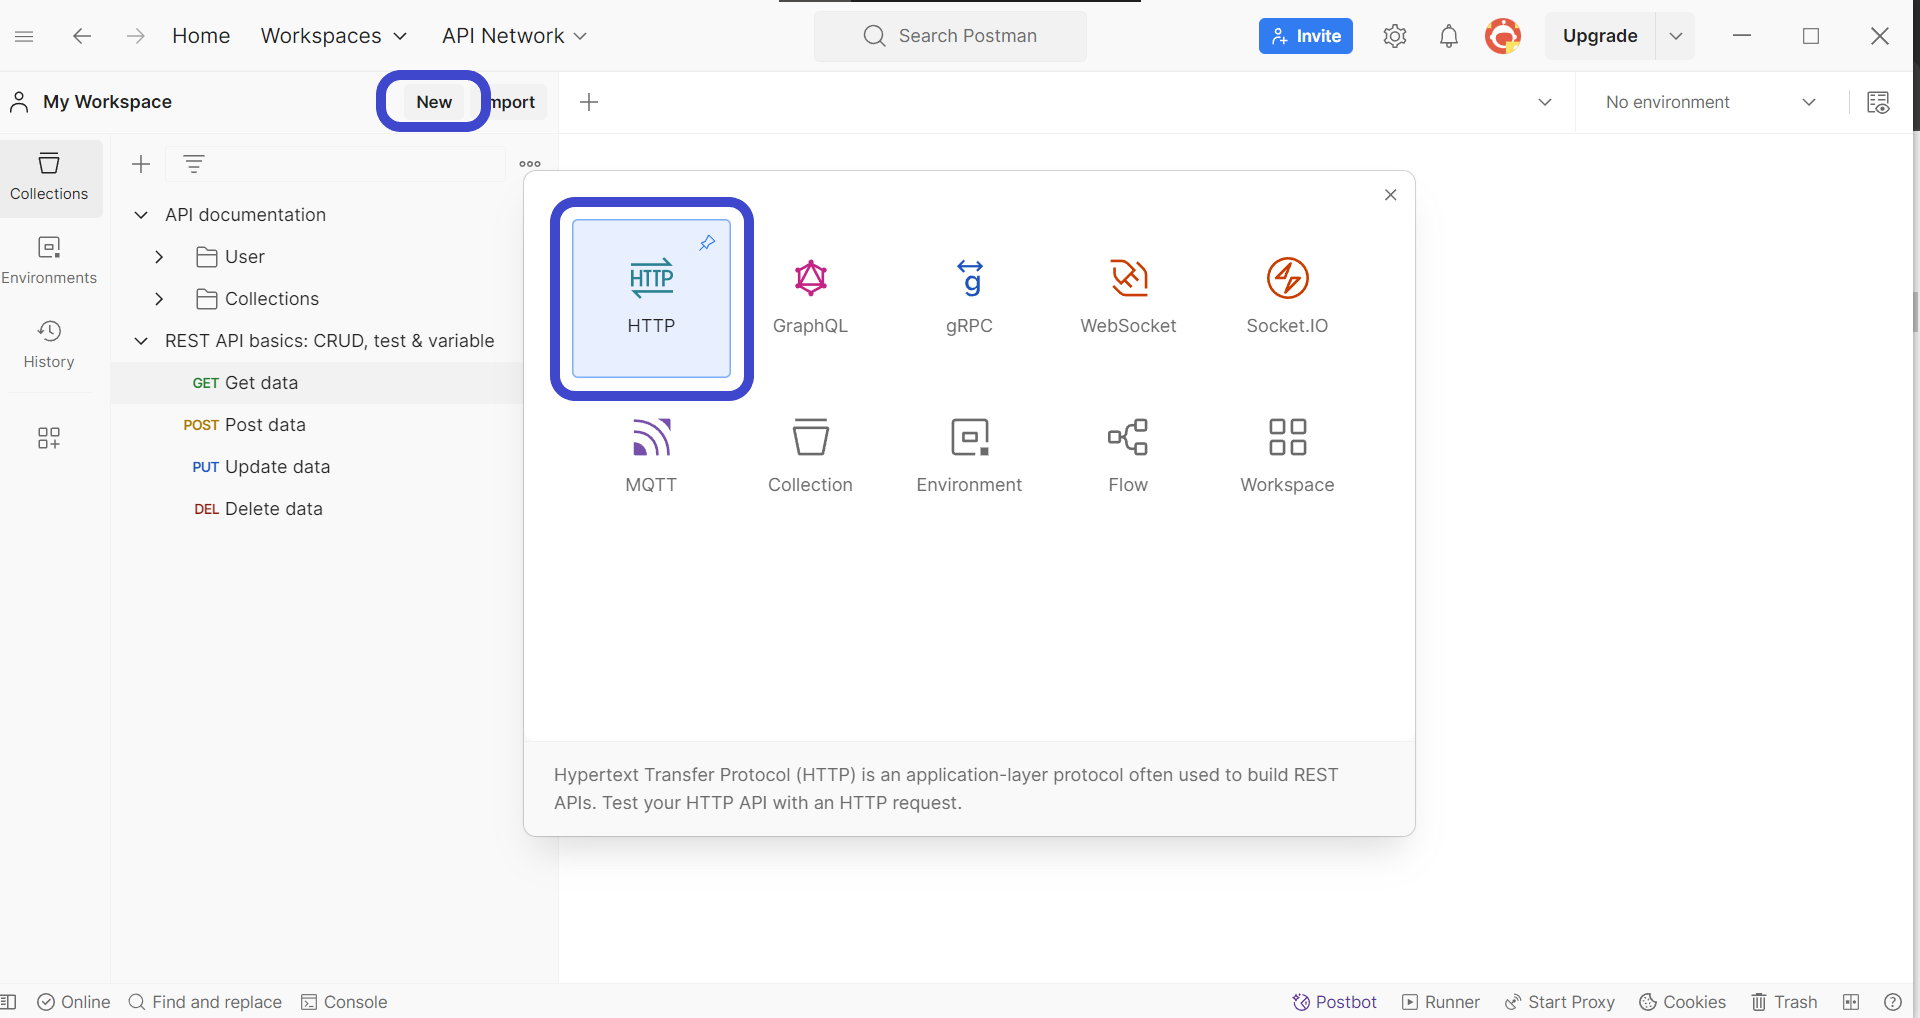
In Postman, after launching it, initiate a new request. Click the New button located in the top left corner. A dropdown menu will appear, choose HTTP Request to begin crafting your request.
Step 3 - Enter API Method and Details
Now, it's time to define the specifics of your API request. This includes three key parts:
- URL: The web address of the API endpoint you're interacting with.
- HTTP Method: HTTP methods specify the action you want to perform, such as retrieving data (GET) or sending new data (POST).
- Parameters (optional): Additional information the API might need, depending on its functionality.

Step 4 - Send API Request
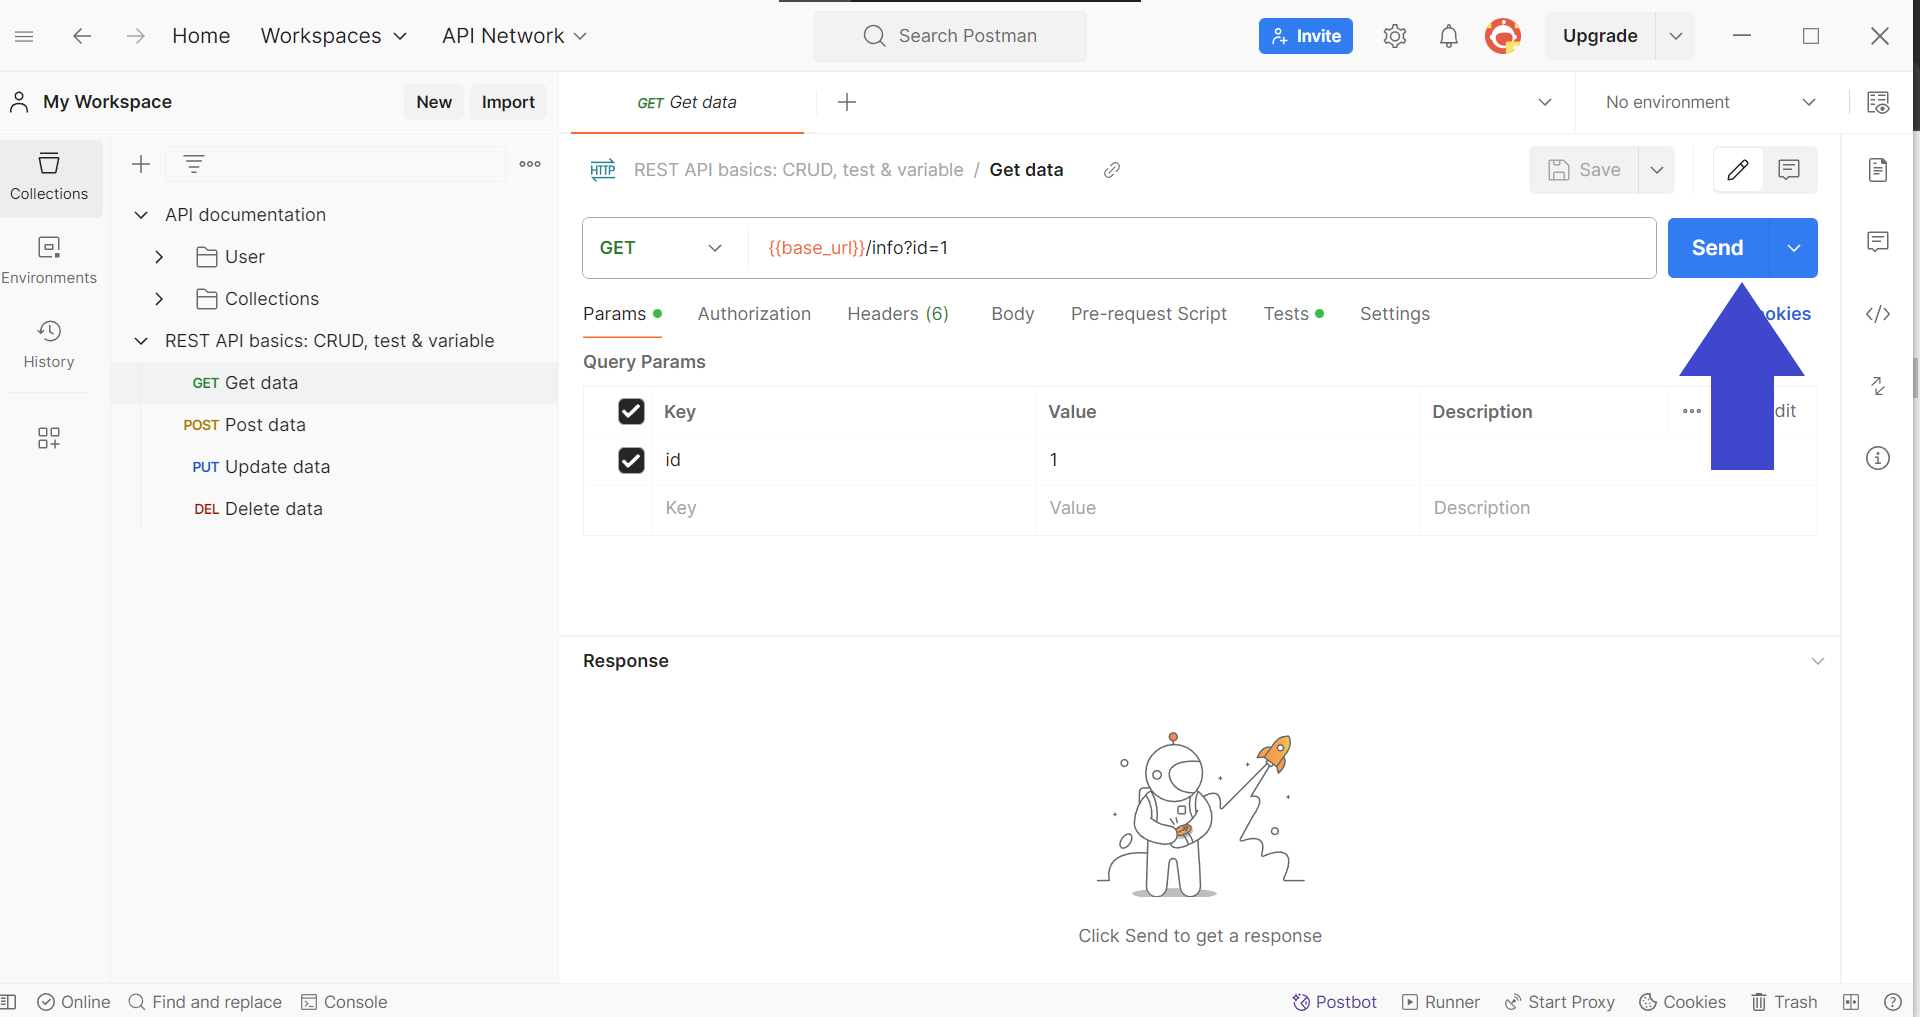
Press the Send button on the top right corner to send the API request in order to receive a response from the back end.
Step 5 - Open the Postman Console
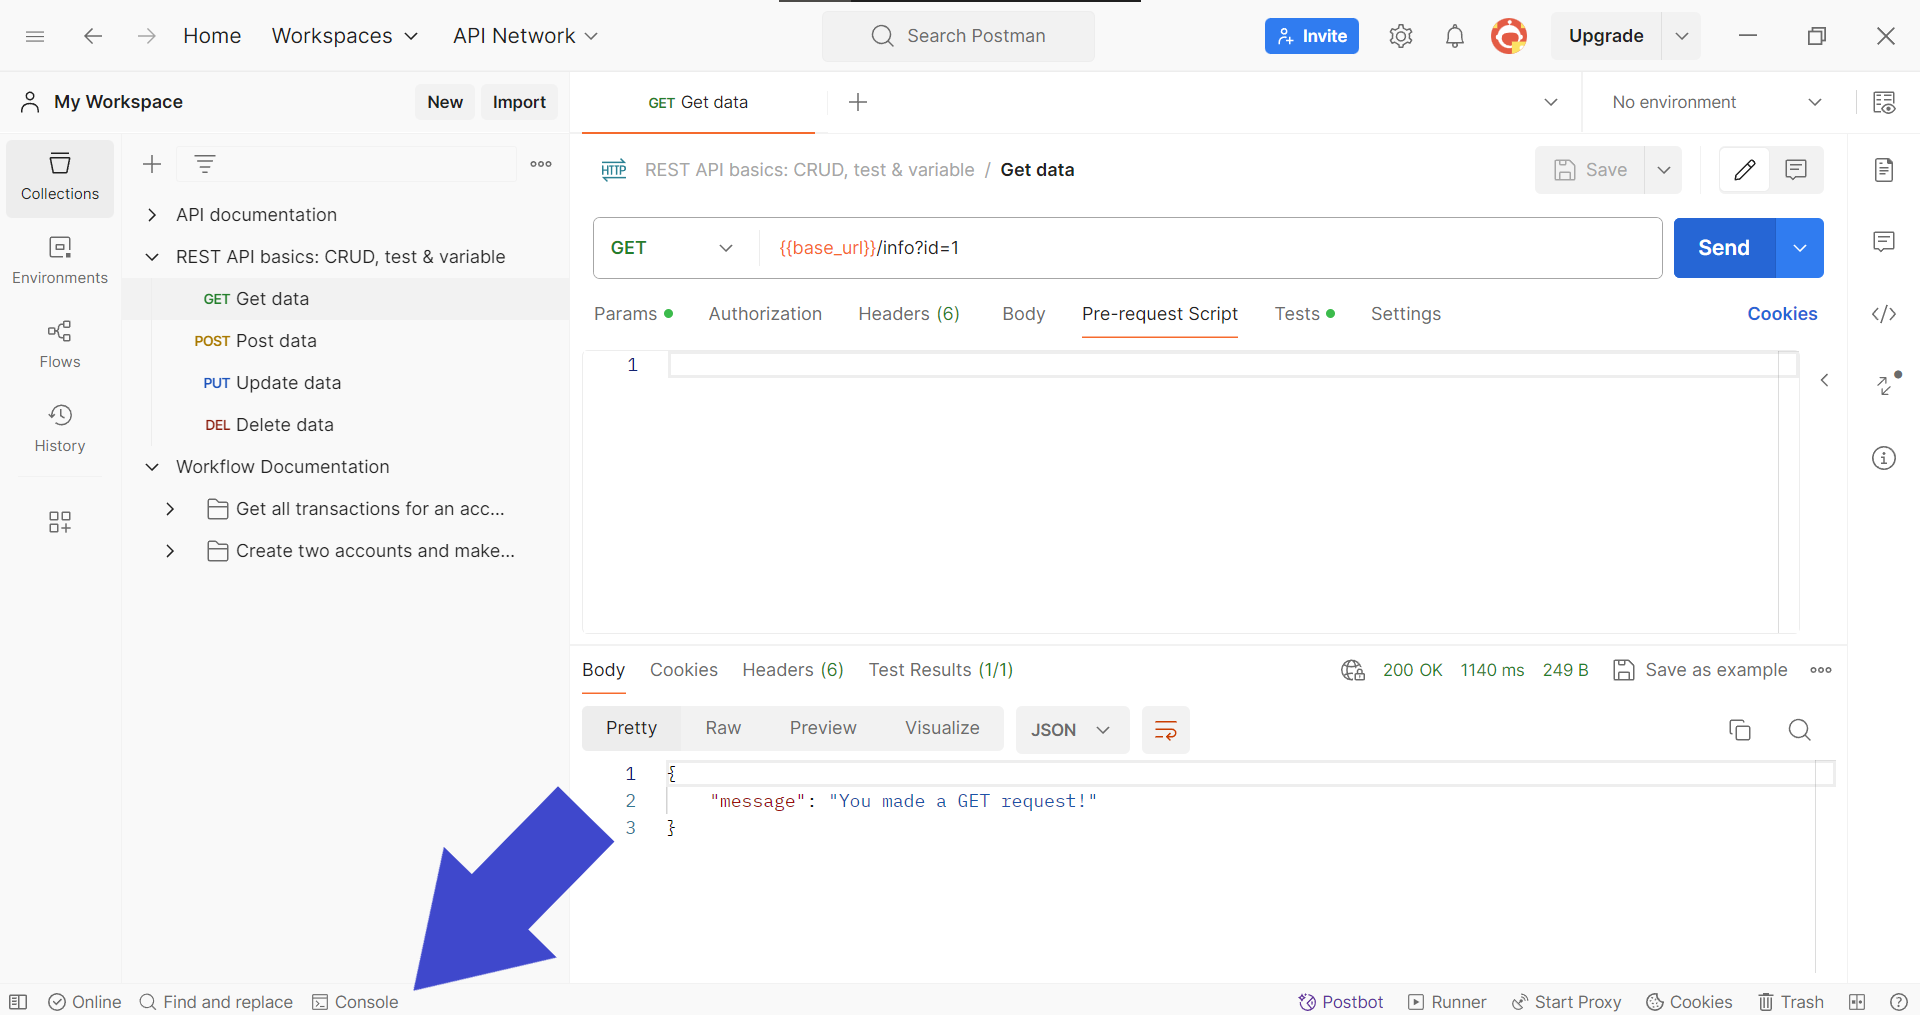
For a deeper look at the API's response, check out the Console panel. You'll find it in the bottom left corner of Postman (see image above). Bonus tip: access the Console with keyboard shortcuts:
- MacOS users:
⌘+Option+C - Windows users:
Ctrl+Alt+C
Step 6 - Expand API Response Details in the Postman Console
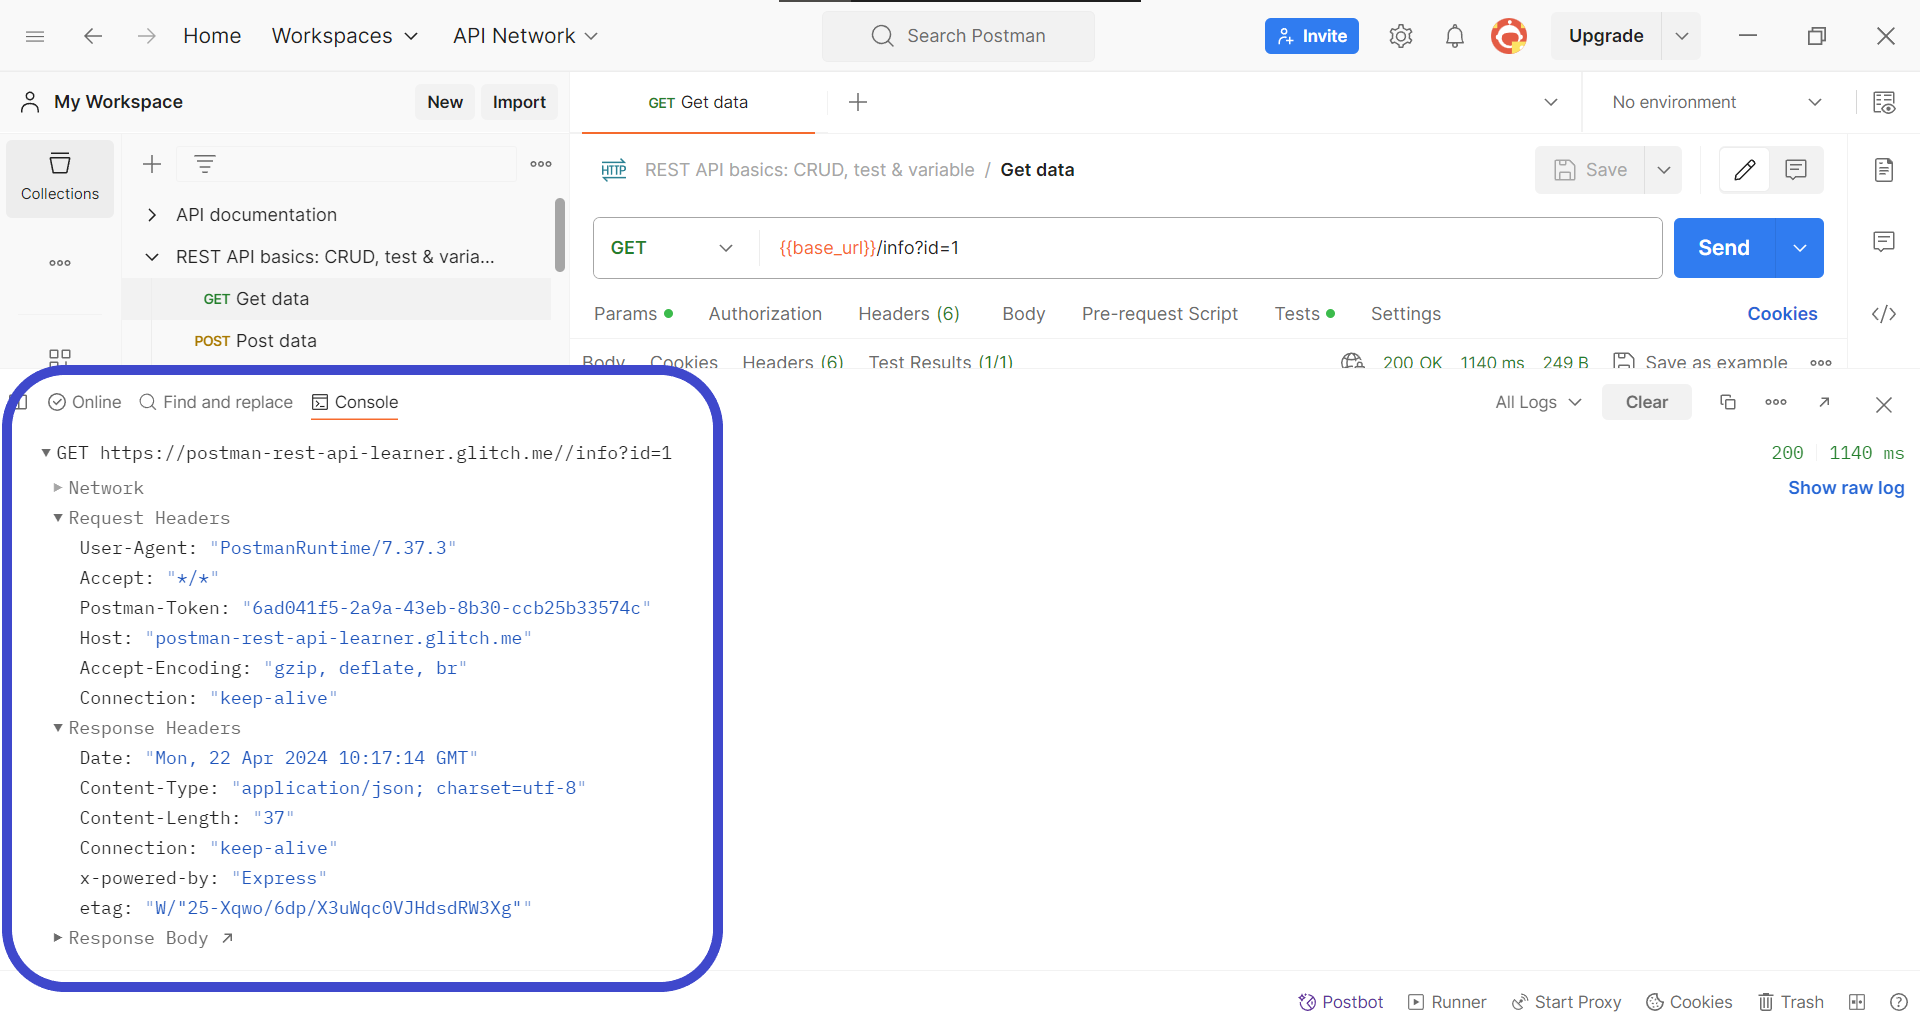
Expand the details of the API response by clicking on the response headers found within the Postman console section. This should enlighten you with the necessary details for troubleshooting your API.
Alternate Solution - Turn Off SSL Certificate Verification

Another method that you can use is to switch off the SSL certificate verification under the Request section found within the Postman desktop version, as shown in the image above.
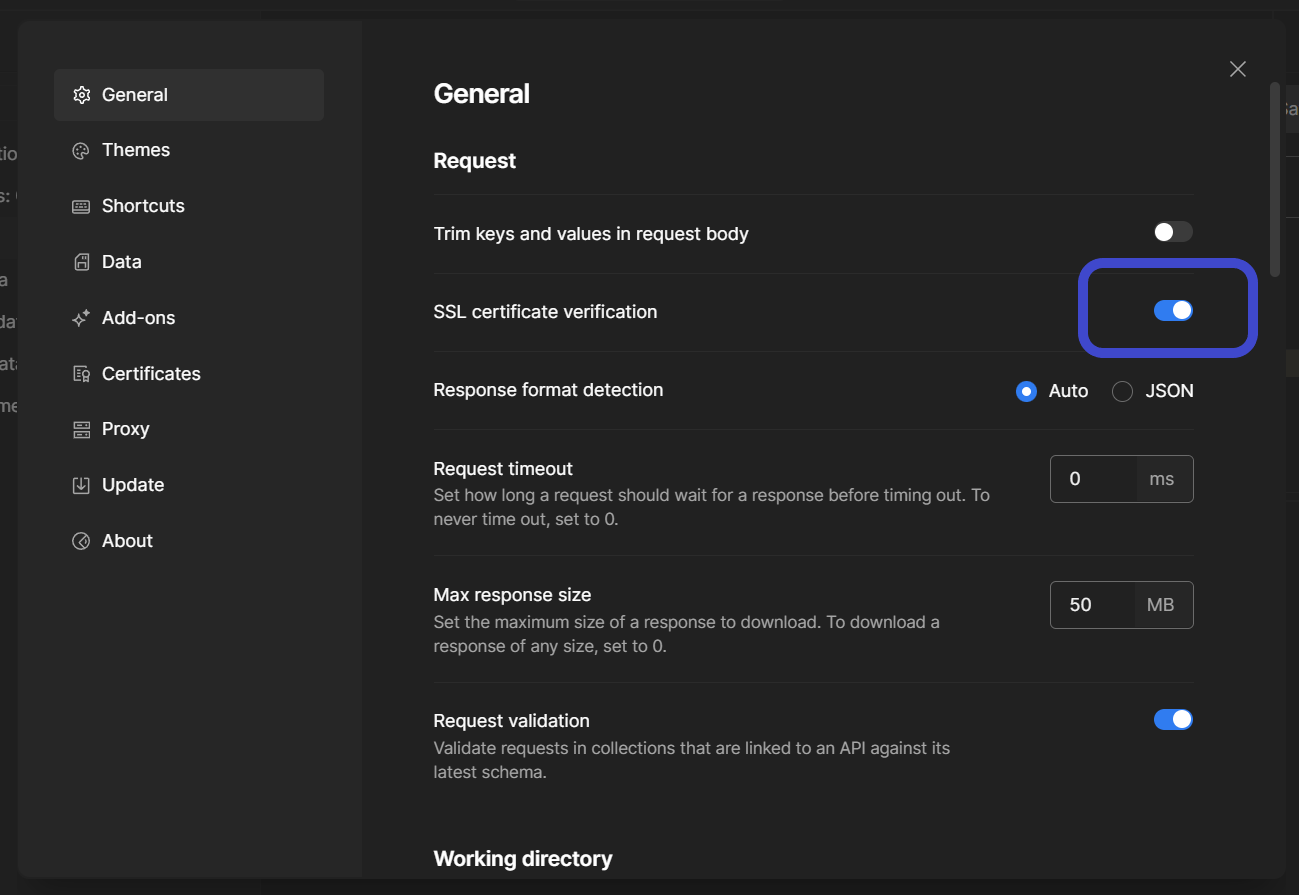
Locate the button shown in the image above, and turn it off so that Postman will no longer verify the SSL certificate when API requests are made.
Apidog - API Development Made Simple and Easy!
Apidog is an API development platform that allows users to build, test, mock, and document APIs - all within a single application!
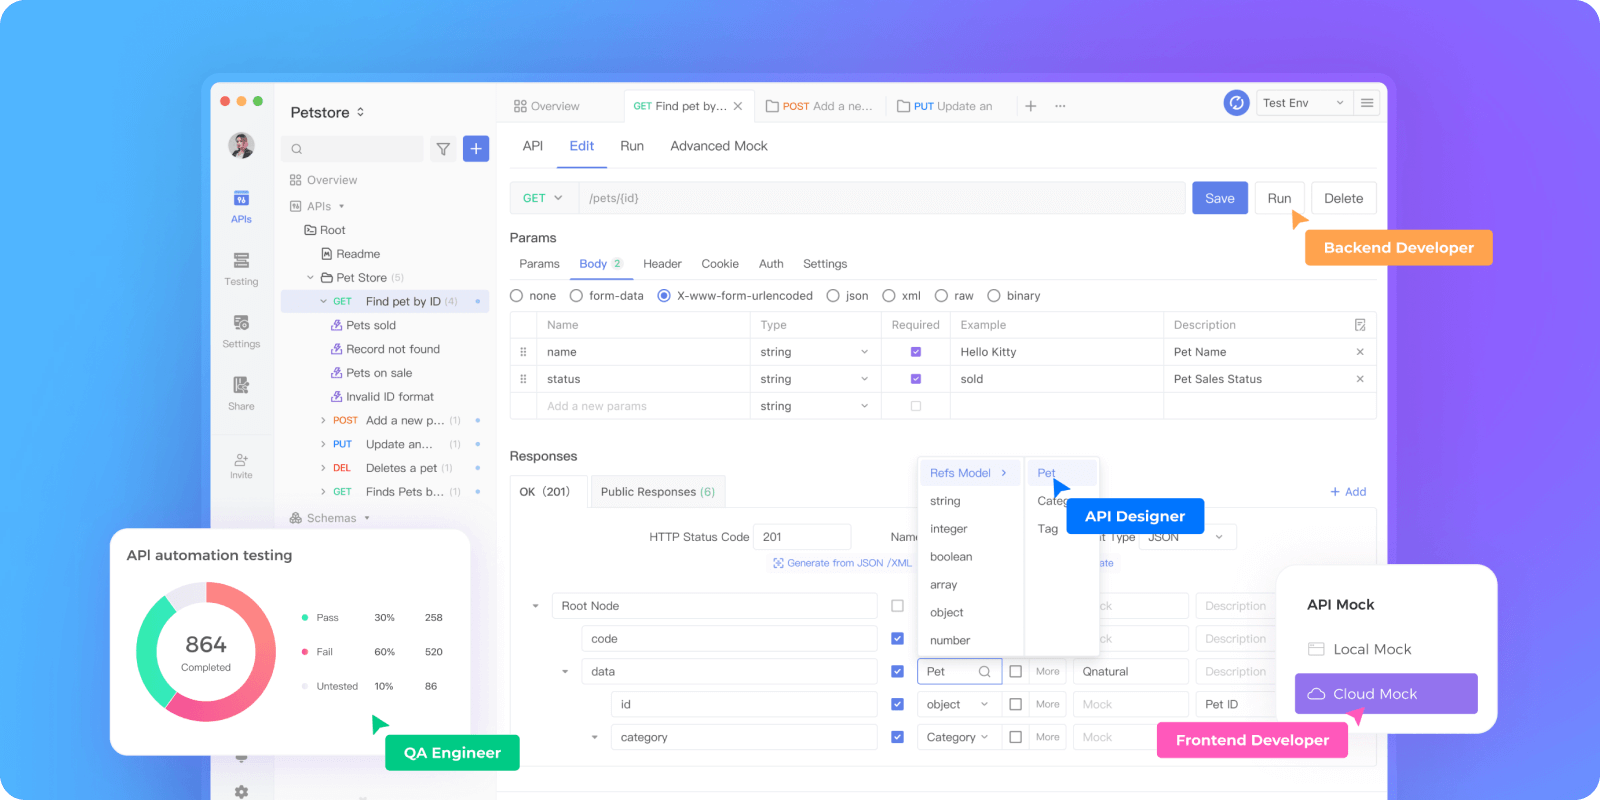

With a simple yet elegant user interface, Apidog is a suitable choice for new and experienced API and software developers - you can easily learn how to operate Apidog within a few minutes!
Let's look at the different functionalities users can enjoy when using Apidog!
Build Your Own APIs With Apidog
Apidog enables users to design APIs within a few clicks of a button.
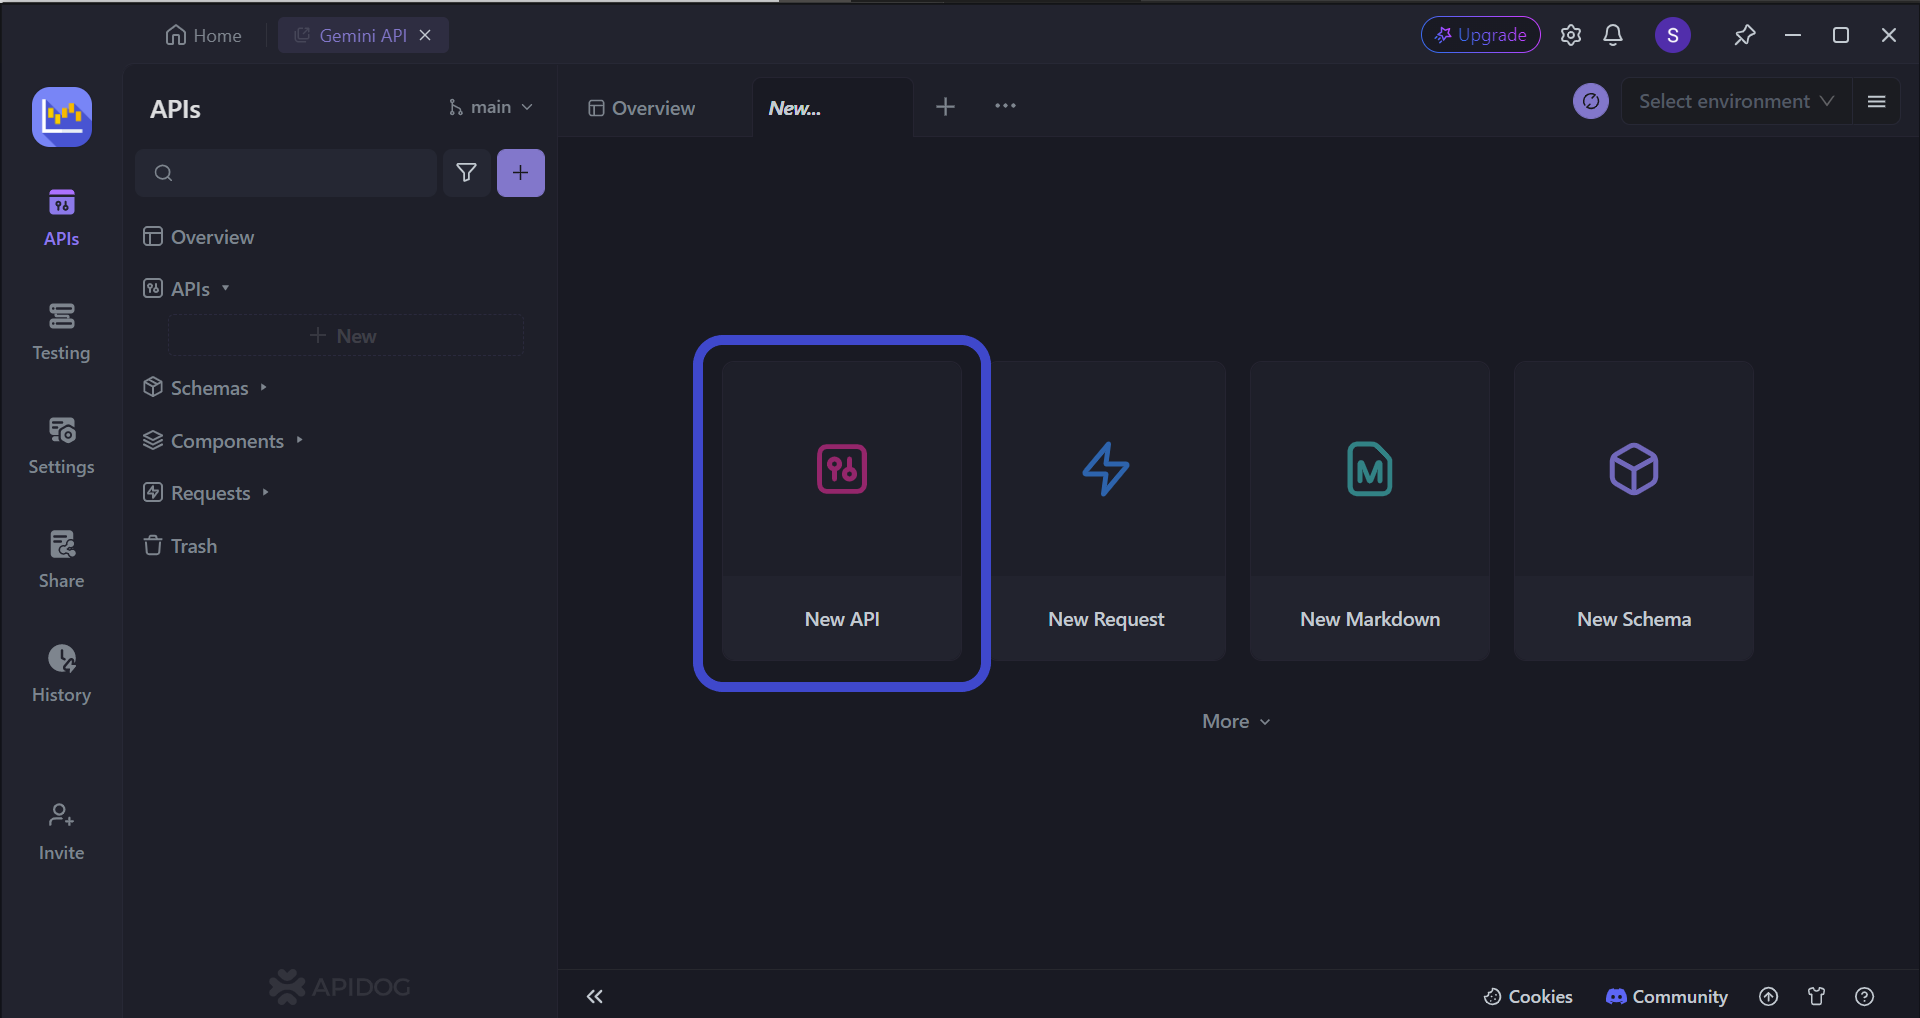
To begin, press the New API button, as shown in the image above.

This section serves as a comprehensive blueprint for outlining the functionalities of your application programming interface (API). Here, we will provide details for the various aspects that govern how external applications can interact with your API.
Key Components
Actions (Verbs): These define the permissible operations that external applications can perform on your API's data. Common verbs include:
- GET: Retrieves data from the API.
- POST: Creates new data within the API.
- PUT: Updates existing data within the API.
- DELETE: Removes data from the API.
Access Points (URLs): These establish the specific Uniform Resource Locators (URLs) that external applications will utilize to send requests to your API. Each endpoint serves a distinct purpose and is designed to handle specific actions.
Data Specificity (Parameters): Certain endpoints might necessitate the inclusion of parameters within the URL itself. These parameters act as filters or identifiers, allowing for the retrieval, creation, or modification of targeted data sets.
Functionality Explained: A comprehensive description of each endpoint should be provided. This explanation should clearly outline the intended purpose and expected behavior of each endpoint.
Remember, client-side and server-side APIs have different requirements, thus you will have very different consumers and demands!
Selecting OAuth 2.0 Authentication with Apidog
Apidog's user-friendly interface streamlines the selection process, allowing you to effortlessly configure OAuth 2.0 or any other authentication method in seconds.
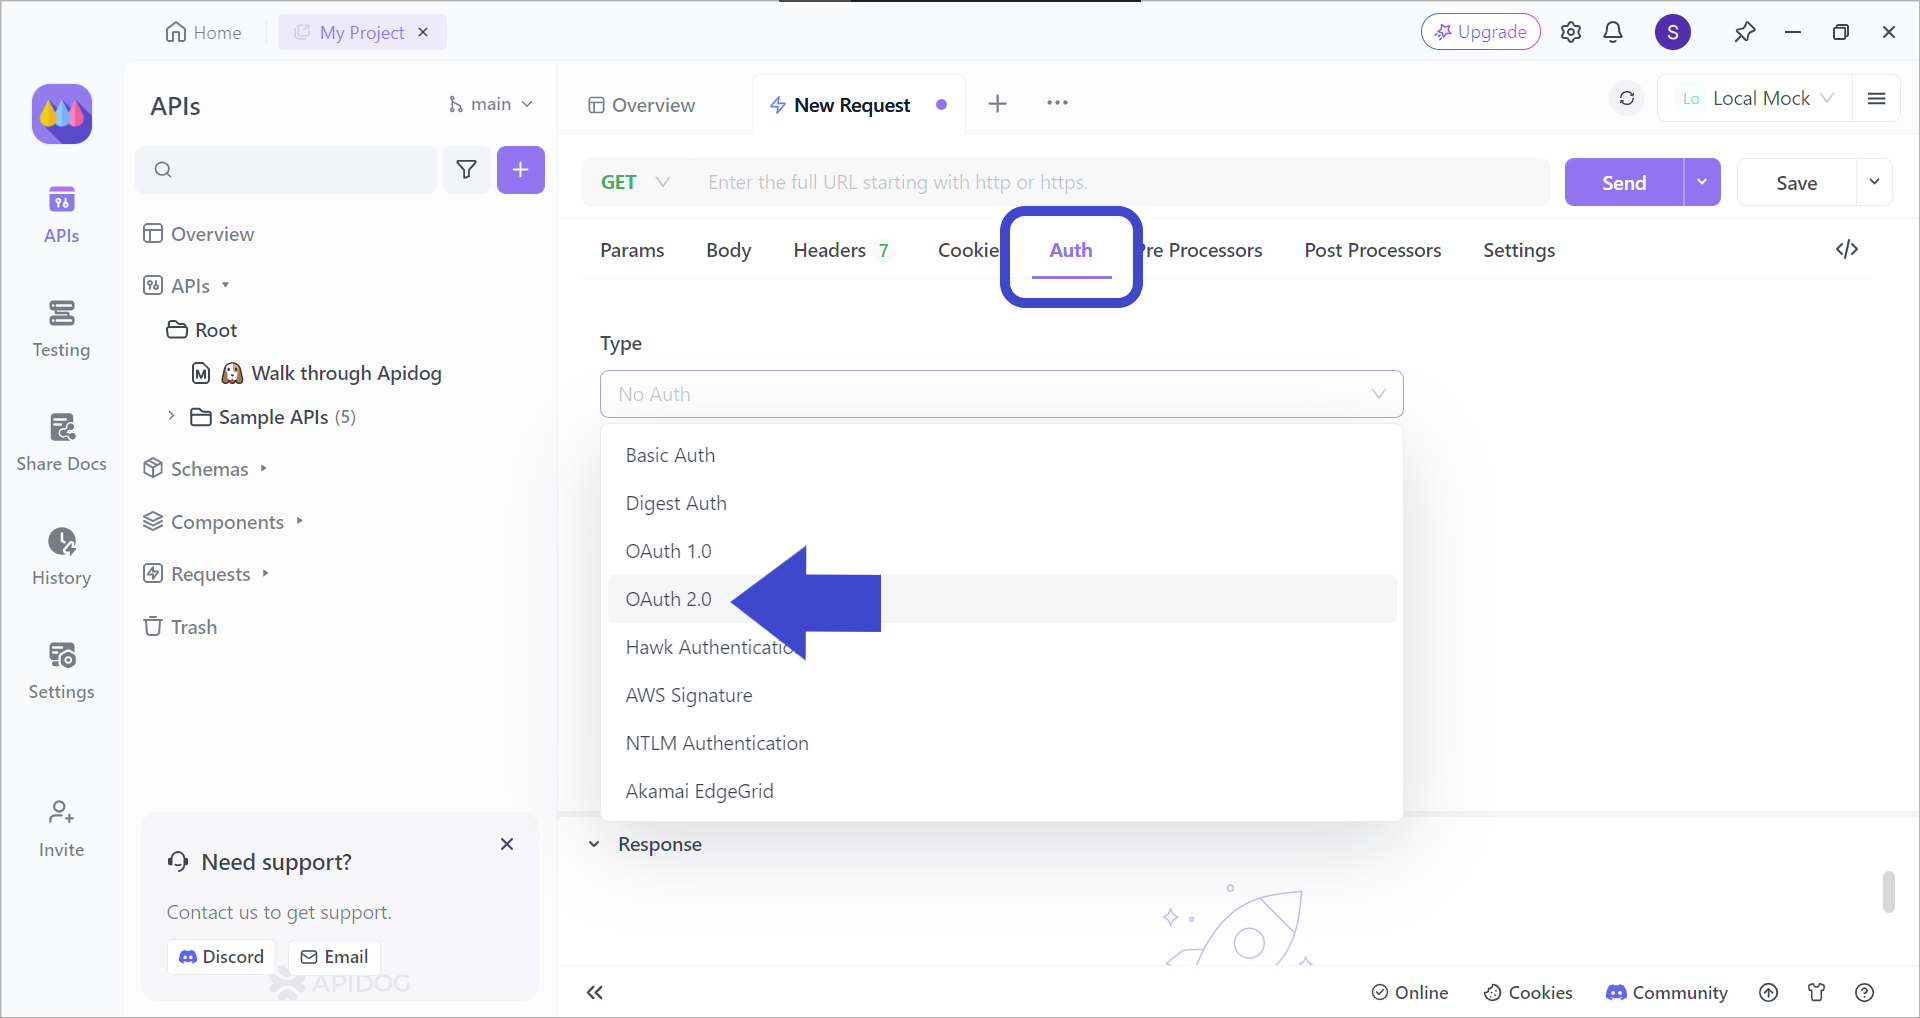
Firstly, locate the Auth header in order to change the authentication type to OAuth 2.0, as shown in the image above.
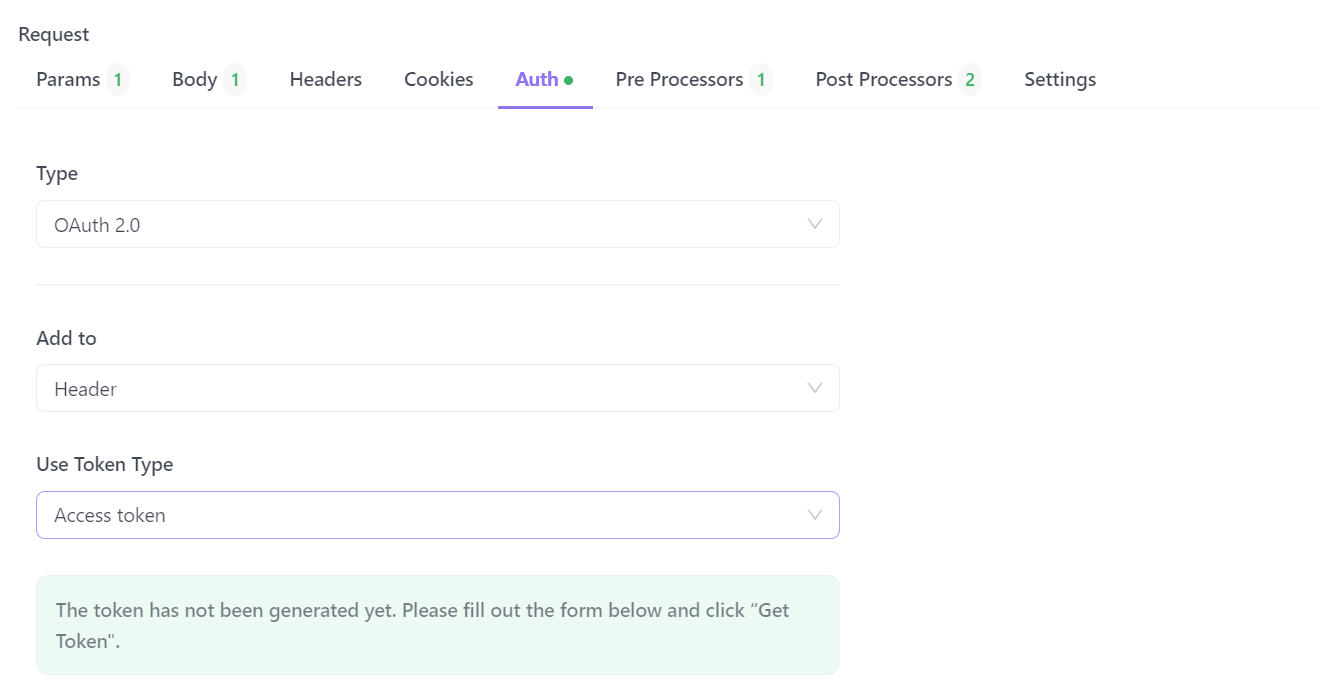
Once you have selected OAuth 2.0, you can add the necessary details for the OAuth 2.0 authentication.
Testing Individual API Functionality with Apidog
The ever-evolving nature of development can introduce unintended consequences within your API. Apidog provides a robust testing suite that allows you to meticulously evaluate each API endpoint after modifications, guaranteeing continued functionality as per your design.
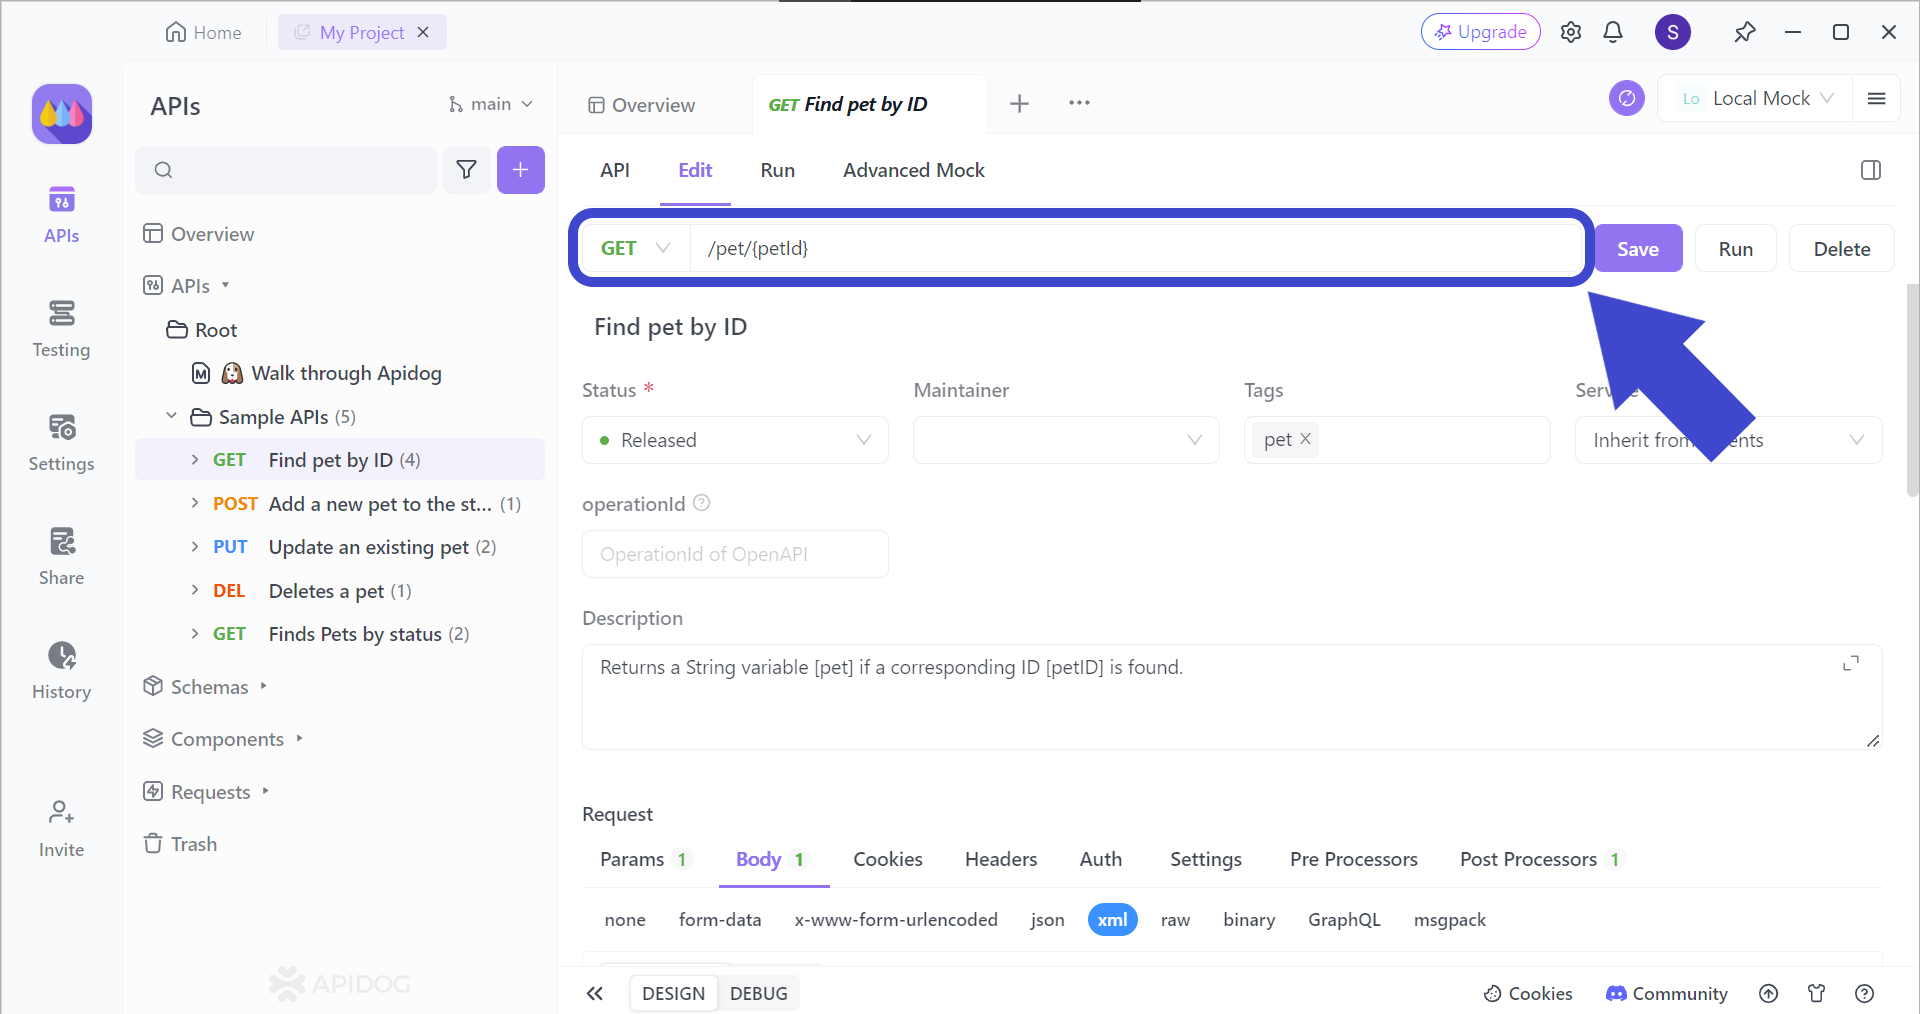
To invoke a specific function within an API, it's essential to provide the correct endpoint URL. Furthermore, certain endpoints may require additional parameters for their successful execution. Always ensure you include these parameters when necessary.
However, if Apidog does not seem like the proper tool for you, check out other prospective automation testing tools!
Conclusion
You can utilize the Postman console to effectively troubleshoot the "Could Not Complete OAuth 2.0 Login" error, and other potential issues that may arise in similar situations. By meticulously examining the details shown within the Postman console, you can pinpoint the root cause of the login issue.
![[Solved] How to Check Postman Console for "Could Not Complete OAuth 2.0 Login" Error](https://assets.apidog.com/blog/2024/05/postman-could-not-complete-oauth-2.0-login-cover.png)

