Hey there, fellow coders! Today, we're diving into the world of query parameters in Node.js Express. Whether you're a beginner or a seasoned developer, understanding how to handle query parameters efficiently is crucial for building robust APIs. So, buckle up and get ready to enhance your Express.js skills!
Before we jump in, a quick shoutout to Apidog – your go-to tool for API documentation and testing. It's free, powerful, and perfectly complements your API development journey. Don't forget to download Apidog for free and make your life easier!
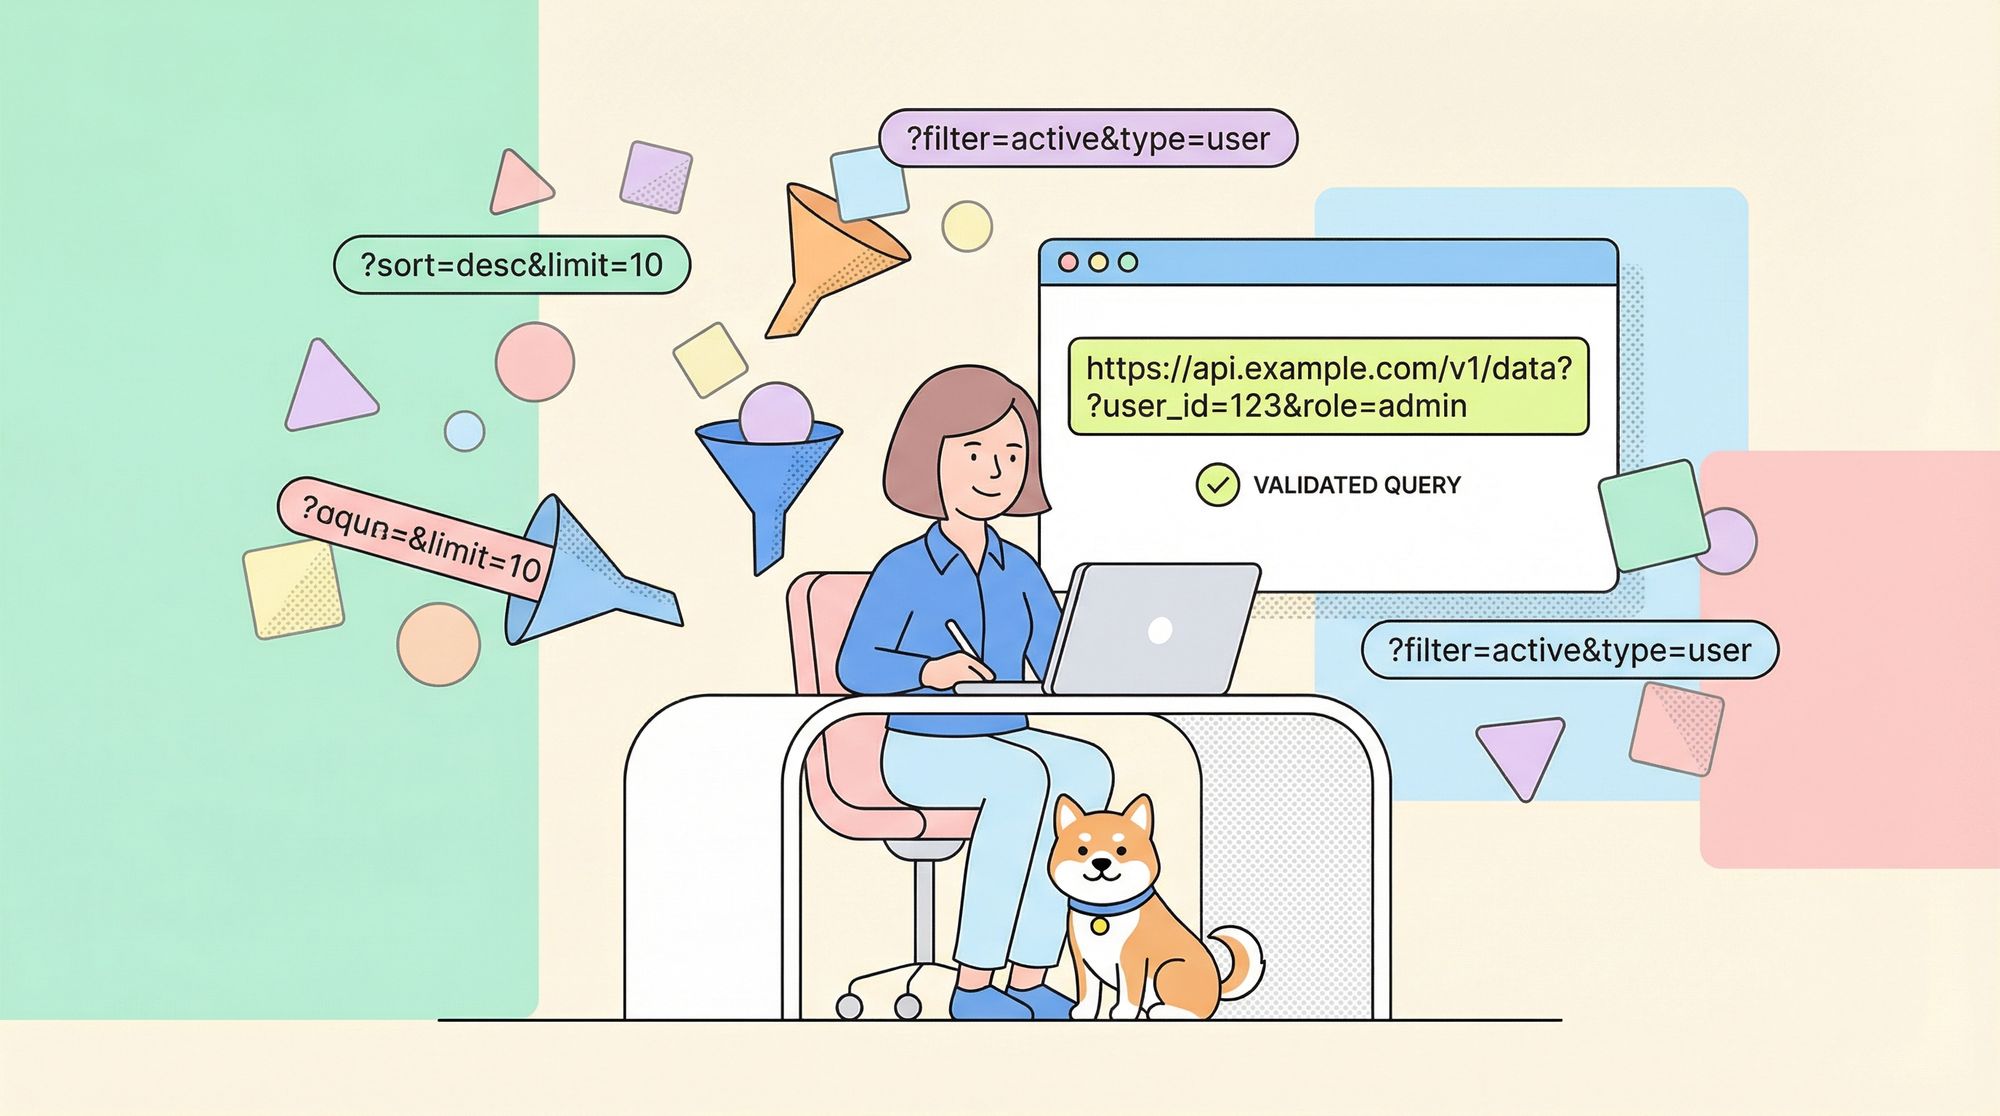
What Are Query Parameters?
First things first, let's clarify what query parameters are. When you send a GET request to a server, you can include additional data using query parameters. These parameters are part of the URL and are typically used to filter, sort, or customize the data returned by the server.
For example, if you're building an API to fetch user data, you might want to get users based on their age or location. Here's how a typical URL with query parameters might look:
http://example.com/users?age=25&location=NY
In this URL, age=25 and location=NY are query parameters.
Setting Up Your Node.js Environment
Before we can start working with query parameters, we need to set up our Node.js environment. If you haven't already, make sure you have Node.js installed. You can download it from the official Node.js website.
Once you have Node.js installed, create a new project directory and initialize it with npm:
mkdir express-query-params
cd express-query-params
npm init -y
Next, install Express:
npm install express
Creating a Basic Express Server
Now that our environment is set up, let's create a basic Express server. Create a new file called server.js and add the following code:
const express = require('express');
const app = express();
const port = 3000;

app.get('/', (req, res) => {
    res.send('Hello, world!');
});

app.listen(port, () => {
    console.log(`Server is running on http://localhost:${port}`);
});
Run your server using the following command:
node server.js
You should see the message "Server is running on http://localhost:3000". Open your browser and navigate to http://localhost:3000 to see "Hello, world!" displayed on the screen.
Handling GET Requests with Query Parameters
Now that we have a basic server up and running, let's add some functionality to handle query parameters.
Example 1: Simple Query Parameters
We'll start with a simple example. Let's modify our server to handle a GET request with query parameters. Update your server.js file as follows:
app.get('/users', (req, res) => {
    const age = req.query.age;
    const location = req.query.location;

    res.send(`Users with age: ${age} and location: ${location}`);
});
In this code, we're using req.query to access the query parameters. The req.query object contains all the query parameters sent in the URL.
Testing Your Endpoint
Restart your server and navigate to the following URL in your browser:
http://localhost:3000/users?age=25&location=NY
You should see the message "Users with age: 25 and location: NY".
Example 2: Handling Multiple Query Parameters
Let's take it a step further and handle multiple query parameters more effectively. Update your server.js file to handle more complex scenarios:
app.get('/search', (req, res) => {
    const { term, limit, page } = req.query;

    res.send(`Searching for: ${term}, Limit: ${limit}, Page: ${page}`);
});
In this example, we're destructuring the req.query object to extract the parameters directly. This makes the code cleaner and more readable.
Testing Your Endpoint
Restart your server and navigate to the following URL in your browser:
http://localhost:3000/search?term=nodejs&limit=10&page=2
You should see the message "Searching for: nodejs, Limit: 10, Page: 2".
Validating Query Parameters
While handling query parameters is great, it's essential to validate them to ensure your API behaves correctly and securely. Let's add some validation to our query parameters.
Example 3: Basic Validation
Update your server.js file to include validation logic:
app.get('/products', (req, res) => {
    const { category, price } = req.query;

    if (!category || !price) {
        return res.status(400).send('Missing category or price');
    }

    res.send(`Category: ${category}, Price: ${price}`);
});
In this example, we're checking if the category and price query parameters are present. If either of them is missing, we return a 400 status code with an error message.
Testing Your Endpoint
Restart your server and navigate to the following URL in your browser:
http://localhost:3000/products?category=electronics&price=100
You should see the message "Category: electronics, Price: 100".
Try accessing the URL without one of the query parameters:
http://localhost:3000/products?category=electronics
You should see the error message "Missing category or price".
Advanced Query Parameter Handling with Middleware
Middleware functions in Express are a powerful way to add additional functionality to your routes. Let's see how we can use middleware to handle query parameters more efficiently.
Example 4: Middleware for Query Parameter Validation
Create a new file called middleware.js and add the following code:
const validateQueryParams = (req, res, next) => {
    const { category, price } = req.query;

    if (!category || !price) {
        return res.status(400).send('Missing category or price');
    }

    next();
};

module.exports = validateQueryParams;
In this middleware function, we're validating the query parameters and calling next() to pass control to the next middleware or route handler if the validation is successful.
Using the Middleware in Your Routes
Update your server.js file to use the middleware:
const validateQueryParams = require('./middleware');

app.get('/products', validateQueryParams, (req, res) => {
    const { category, price } = req.query;

    res.send(`Category: ${category}, Price: ${price}`);
});
Now, the validateQueryParams middleware will be executed before the route handler, ensuring that the query parameters are validated.
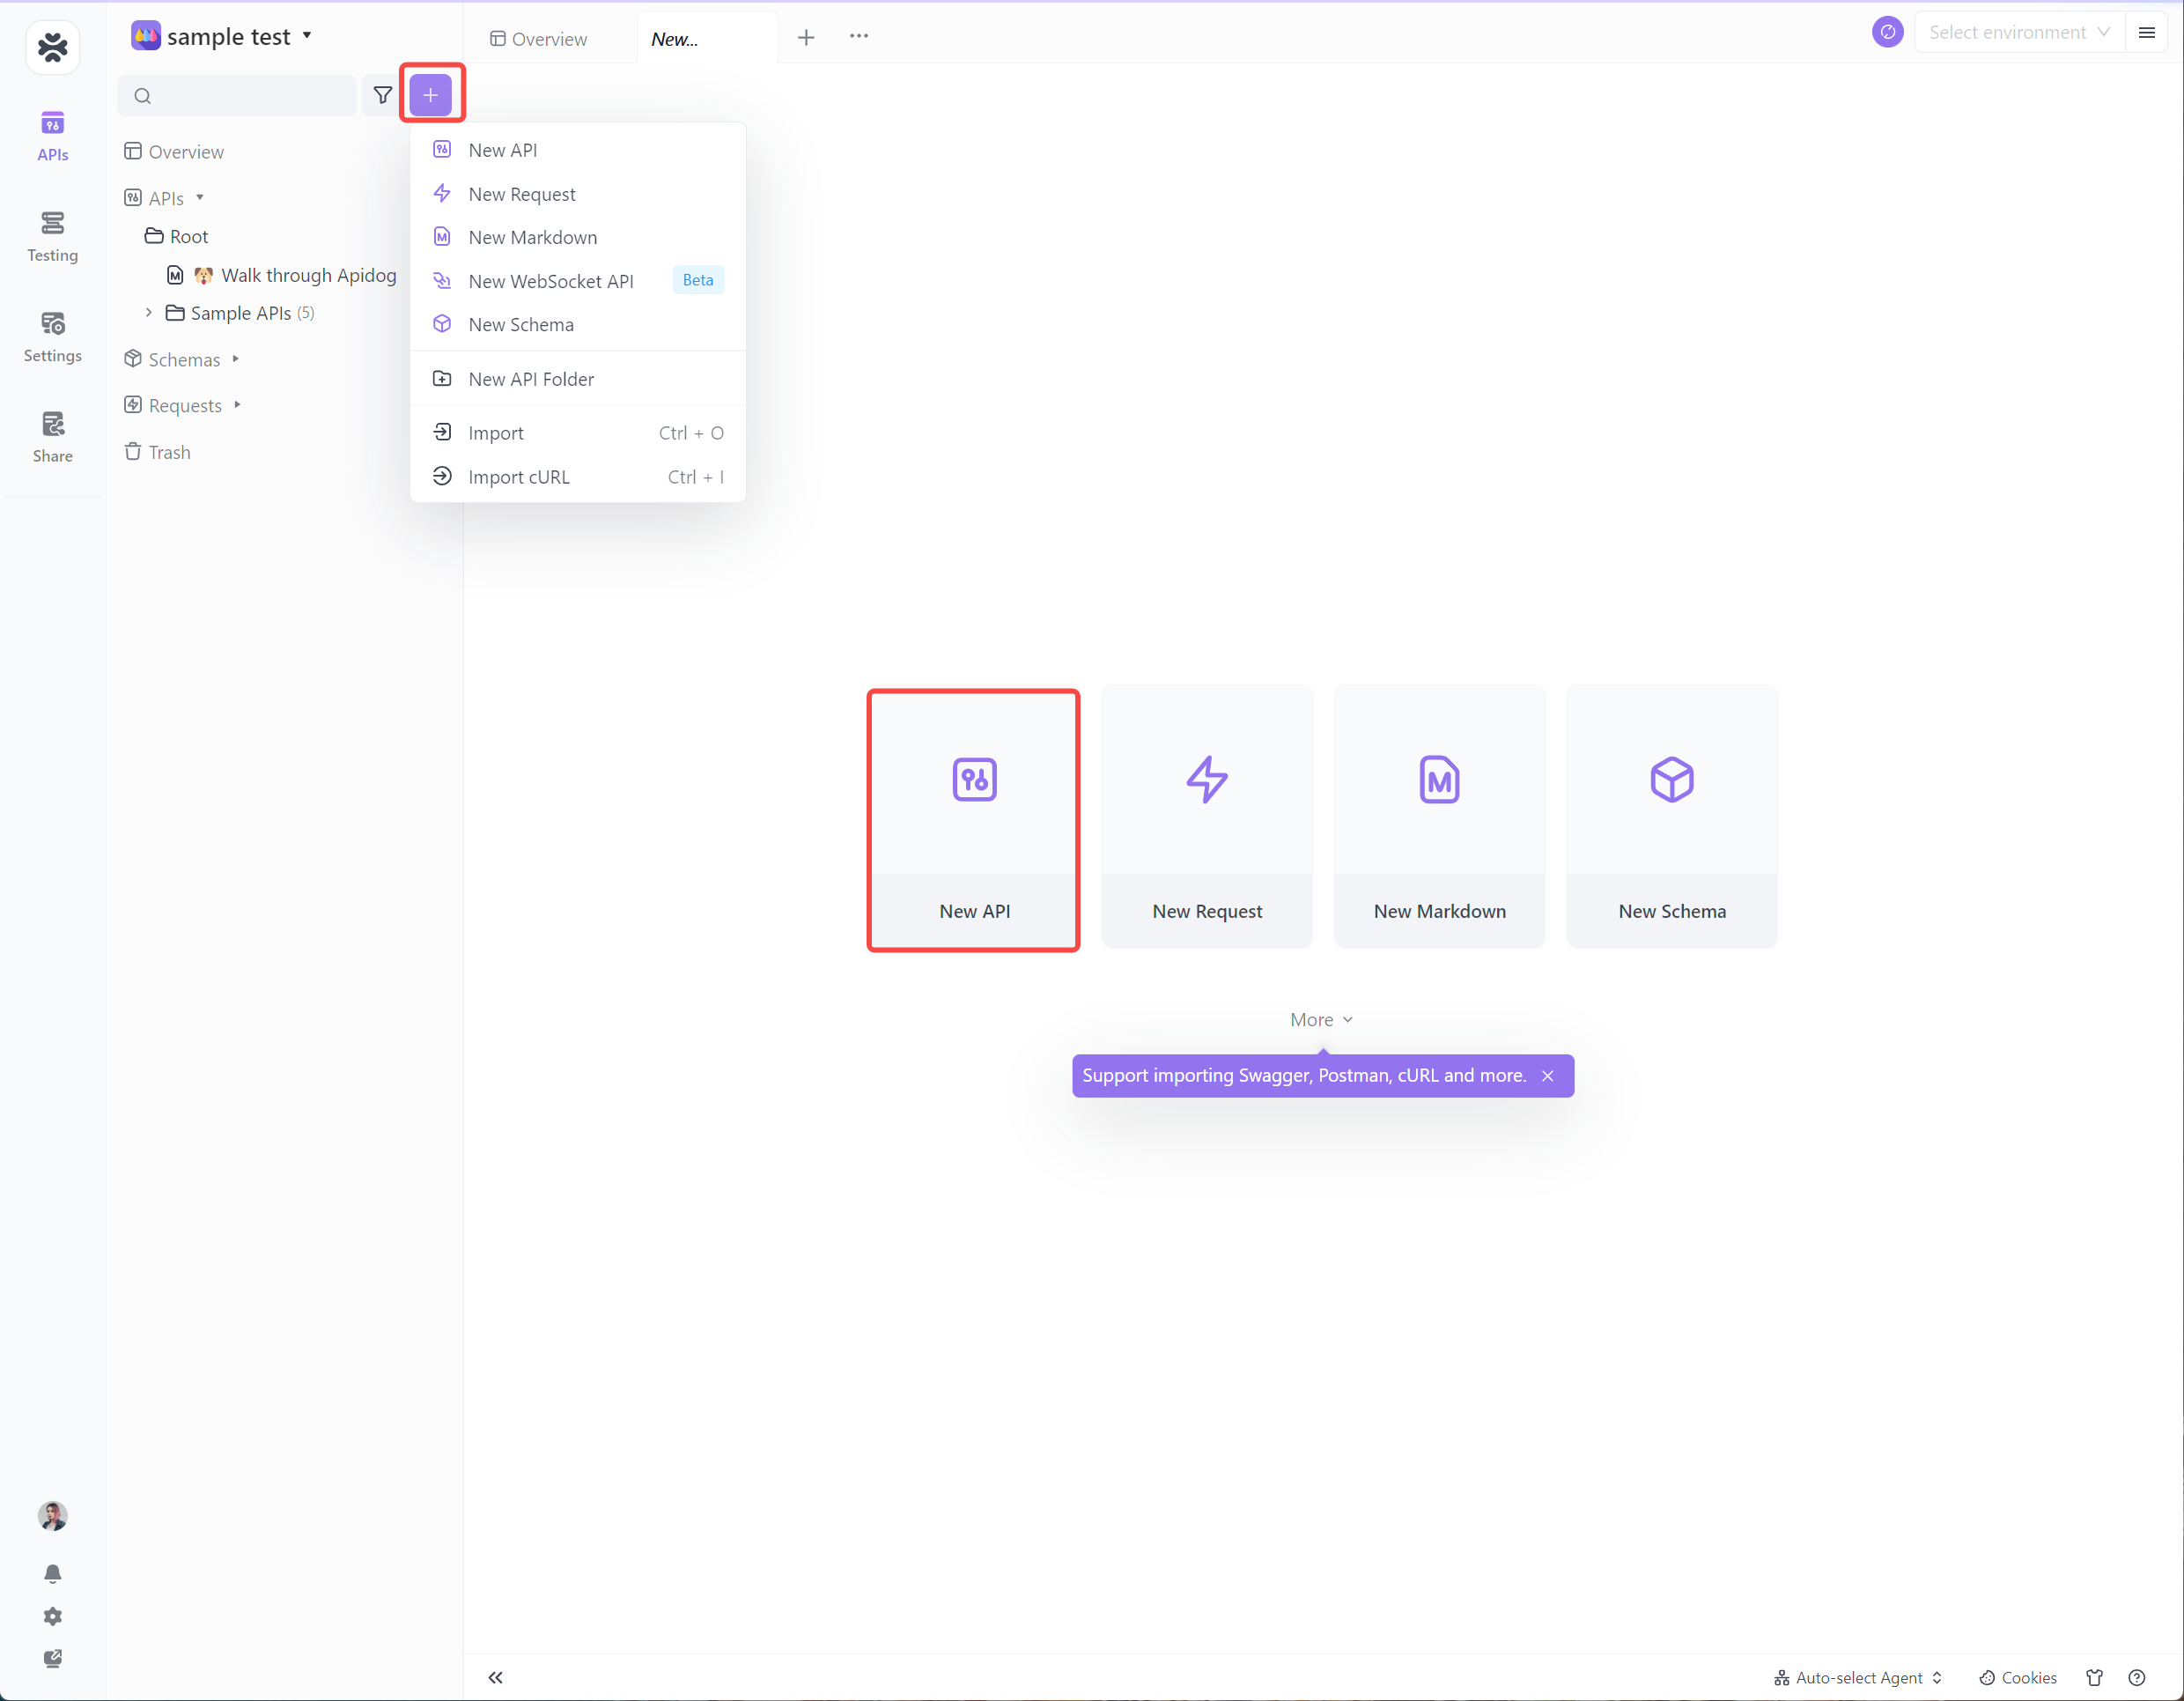
Using Apidog for API Documentation and Testing
As promised, let's talk about Apidog. It's an excellent tool for documenting and testing your APIs. With Apidog, you can create interactive API documentation, test your endpoints, and ensure everything is working as expected.
Creating API Documentation
To create API documentation for your Express app, you can use the Apidog. Within the project, you can create a new API. The documentation is the blueprint of the REST API, describing its resources, operations, and parameters. To create a new API, click the "+" button on the project page.
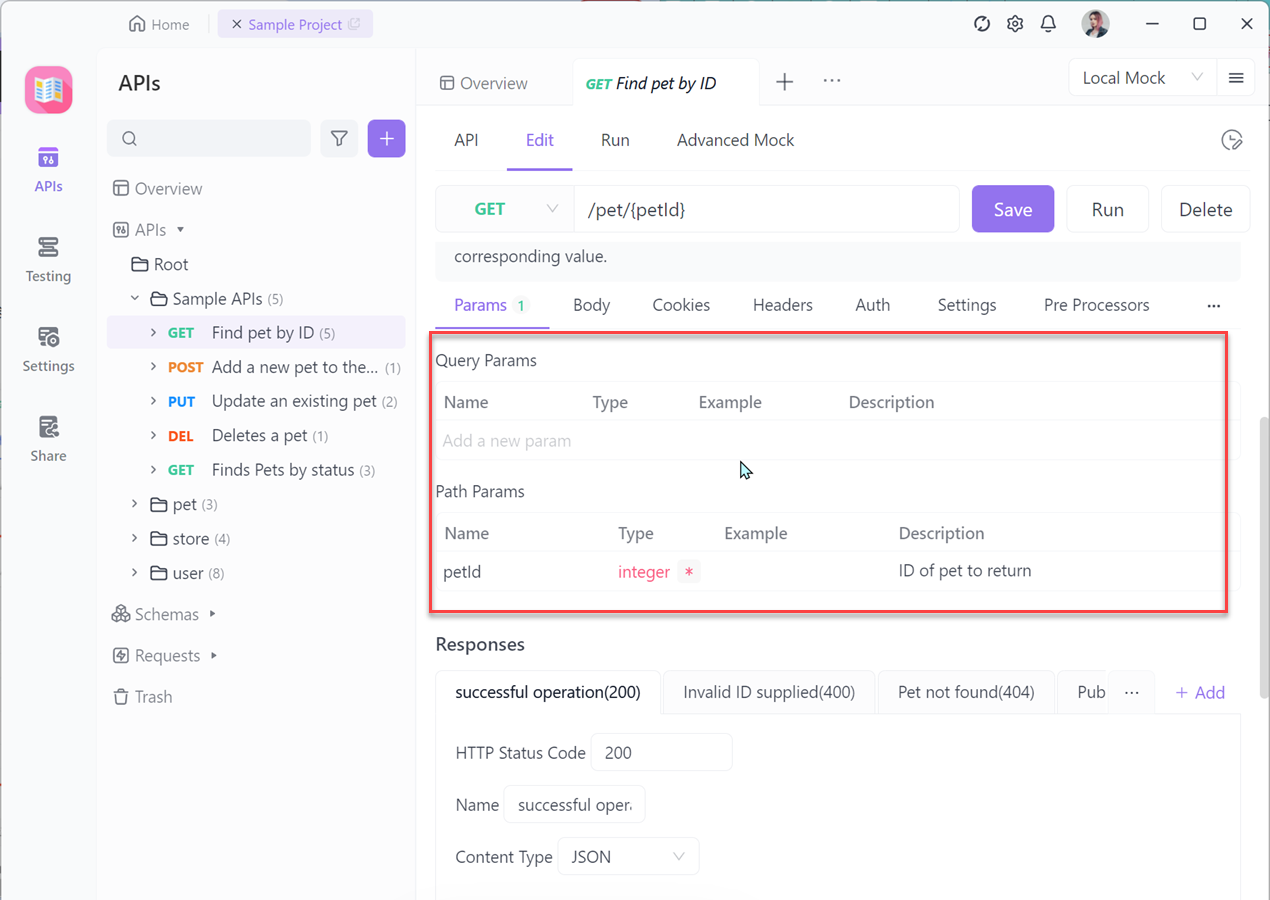
Testing Your API with Apidog
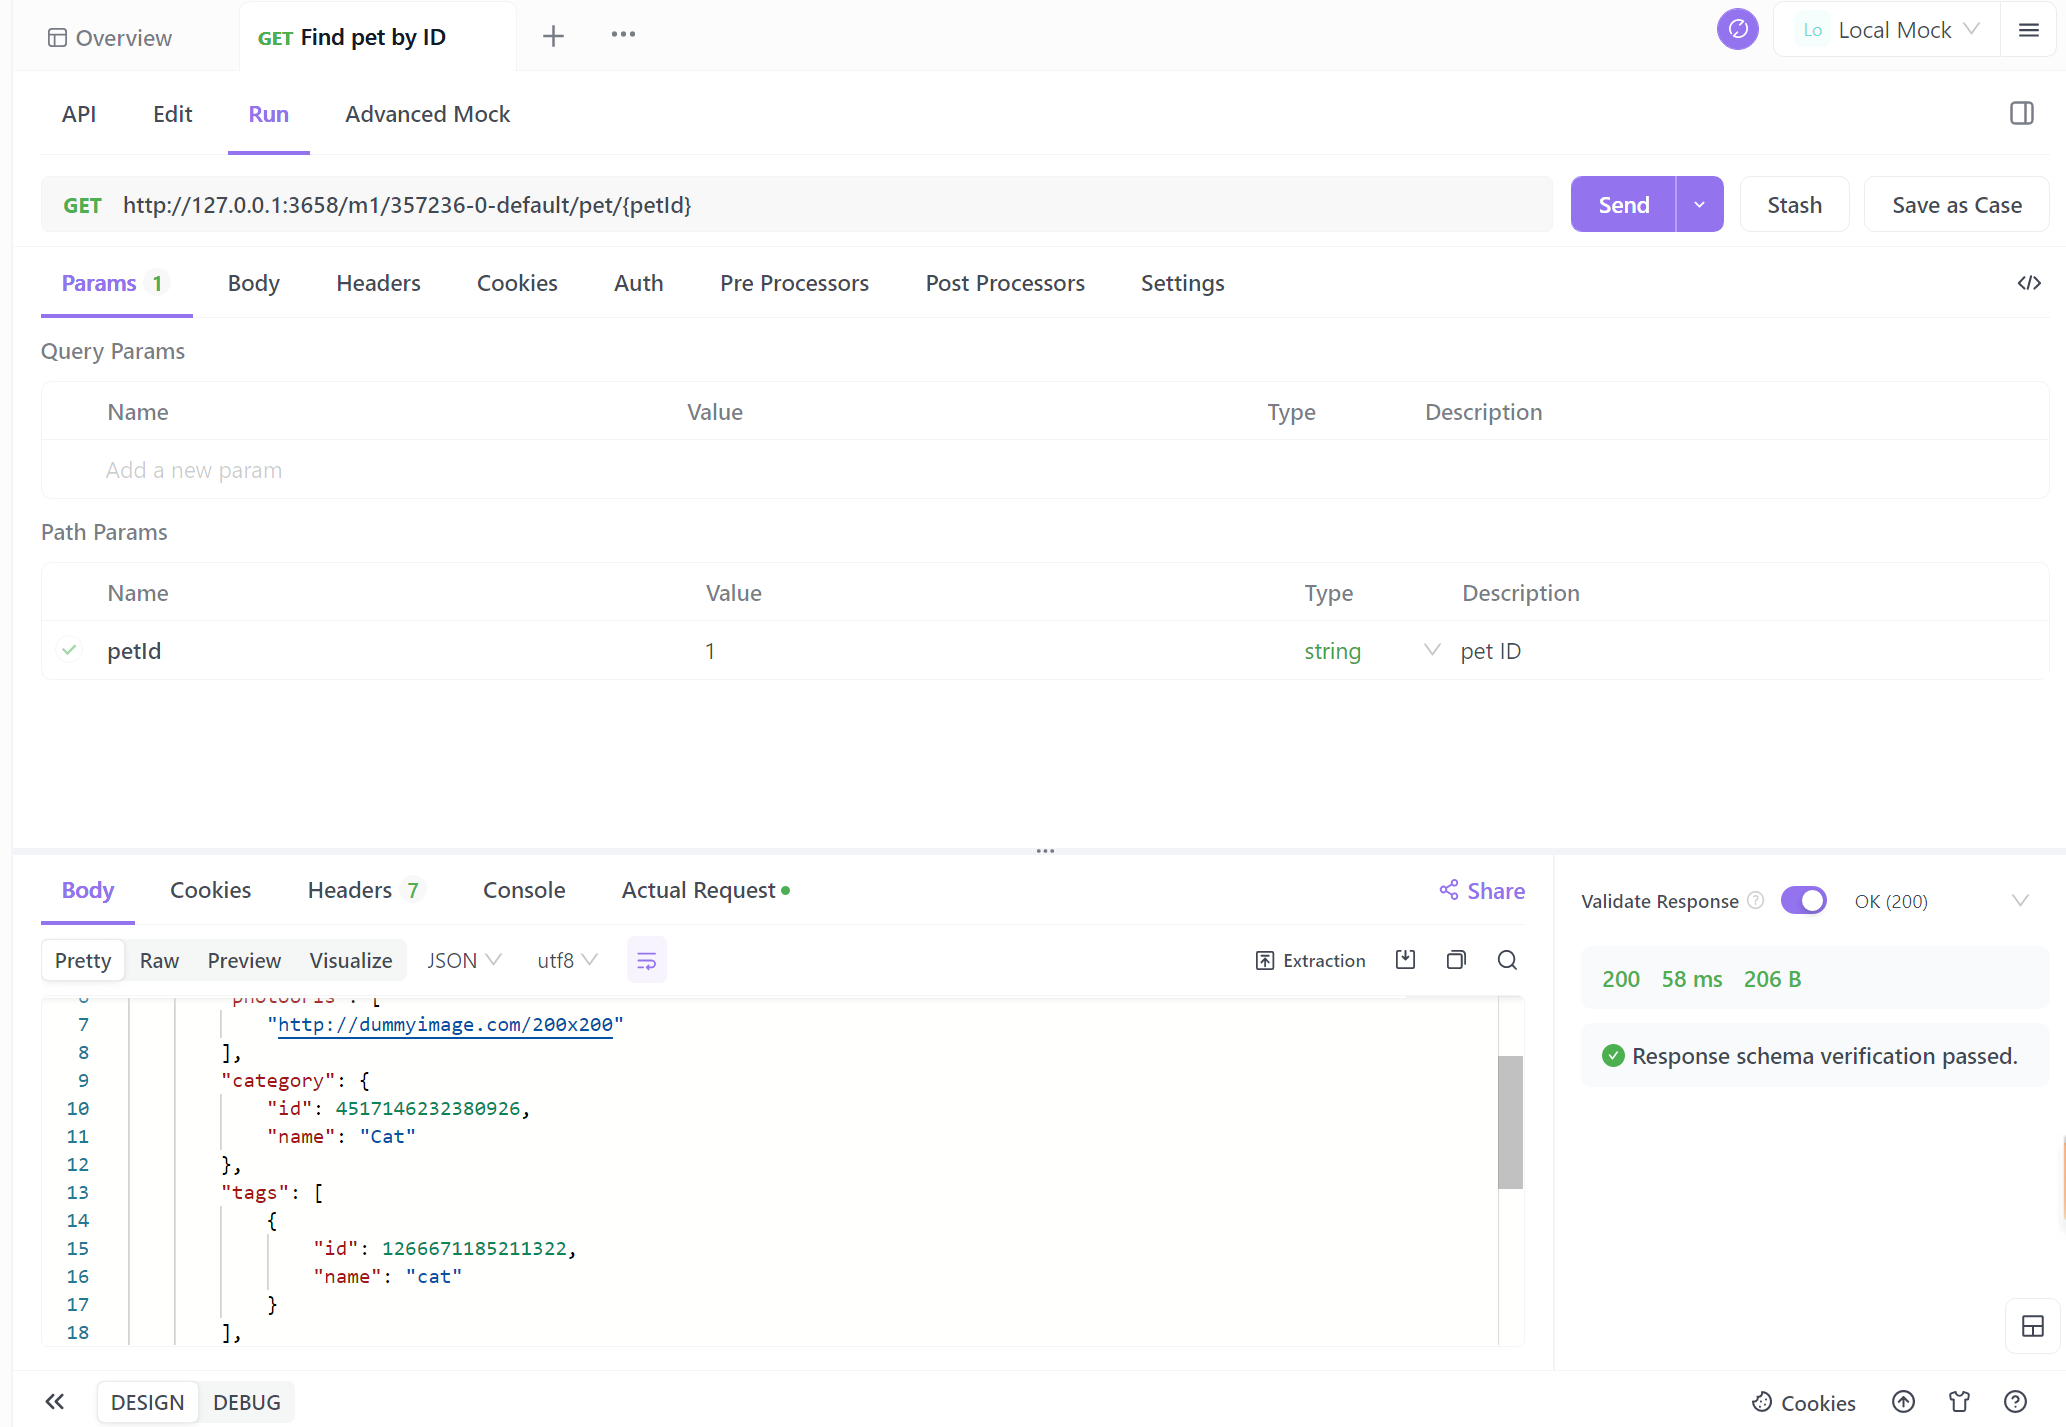
Once your documentation is set up, you can test your API endpoints directly from the Apidog interface. This makes it easy to verify that your query parameters and responses are working correctly.
Fill in the HTTP methods, request/response models, query parameters, headers, etc.
After all APIs have been developed, you can click the "Send" button to test your APIs.
Best Practices for Working with Query Parameters
Now that we've covered the basics, let's discuss some best practices for working with query parameters in Node.js Express.
Validate Your Parameters: Always validate query parameters to ensure your API is secure and reliable. Use middleware to keep your code clean and maintainable.
Use Default Values: Provide default values for optional query parameters to make your API more user-friendly. This can help avoid errors and improve the user experience.
Document Your API: Use tools like Apidog to document your API endpoints and query parameters. This makes it easier for other developers to understand and use your API.
Handle Errors Gracefully: Return meaningful error messages when query parameters are missing or invalid. This helps users understand what went wrong and how to fix it.
Keep It Simple: Avoid using too many query parameters in a single endpoint. If your API requires a lot of parameters, consider breaking it into multiple endpoints for better clarity and usability.
Conclusion
Handling query parameters in Node.js Express is a fundamental skill for any API developer. By following the examples and best practices in this guide, you'll be well-equipped to build robust and user-friendly APIs.
And remember, Apidog is here to make your API development journey smoother. Download Apidog for free and start documenting and testing your APIs like a pro!


