
In this blog post, I will show you how to use NextJS to fetch data from APIs and display it on your website and how to generate your NextJS code with Apidog
Understanding the Basics: What’s NextJS?
Next.js is a React framework used for building web applications. It enables features like server-side rendering and static site generation, which can improve performance and user experience. It also provides automatic code splitting, optimized loading, and simplified data fetching.

To install Next.js, you should have Node.js version 18.17 or later. Open your terminal and run the following command to create a new Next.js app:
npx create-next-app@latest
Follow the prompts to name your project and configure options like TypeScript, ESLint, and Tailwind CSS if desired. After installation, you can start developing your application using the React components and Next.js features.
How to Fetch Data Using NextJS
Alright, let’s roll up our sleeves and get to work. Fetching data in NextJS can be done in various ways, but today we’ll focus on two primary methods: getStaticProps and getServerSideProps.
Using getStaticProps for Static Generation
If you’re dealing with data that doesn’t change often, getStaticProps is your go-to option. This function allows you to fetch data at build time and pass it as props to your page.
export async function getStaticProps() {
  // Fetch data from an API
  const res = await fetch('https://your-api.com/data')
  const data = await res.json()

  // Pass data to the page via props
  return { props: { data } }
}
Leveraging getServerSideProps for Server-side Rendering
For data that changes frequently, getServerSideProps is the perfect choice. It fetches data on each request, ensuring your app always has the most up-to-date information.
export async function getServerSideProps() {
  // Fetch data from an API
  const res = await fetch('https://your-api.com/data')
  const data = await res.json()

  // Pass data to the page via props
  return { props: { data } }
}
Best Practices for API Calls in NextJS
When working with APIs in NextJS, there are a few best practices you should follow:
- Use environment variables to store API keys and endpoints.
- Handle errors gracefully to improve user experience.
- Cache API responses when possible to reduce load times.

How to use Apidog to generate client code
Apidog is a web-based platform that helps you discover, test, and integrate web APIs with ease. One of the features that Apidog offers is the ability to generate Fetch client code with one click, based on the API specification that you provide or select.
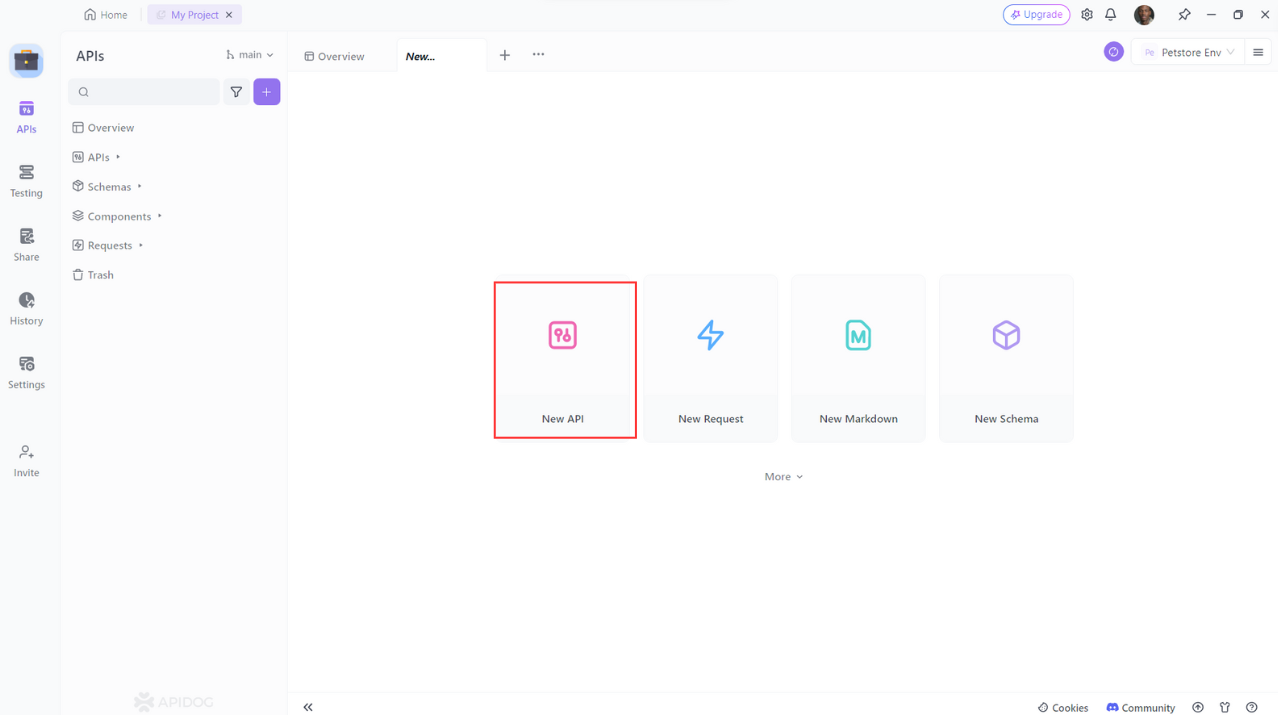
- Click on the “New API” button on the dashboard or select an existing API from the list.
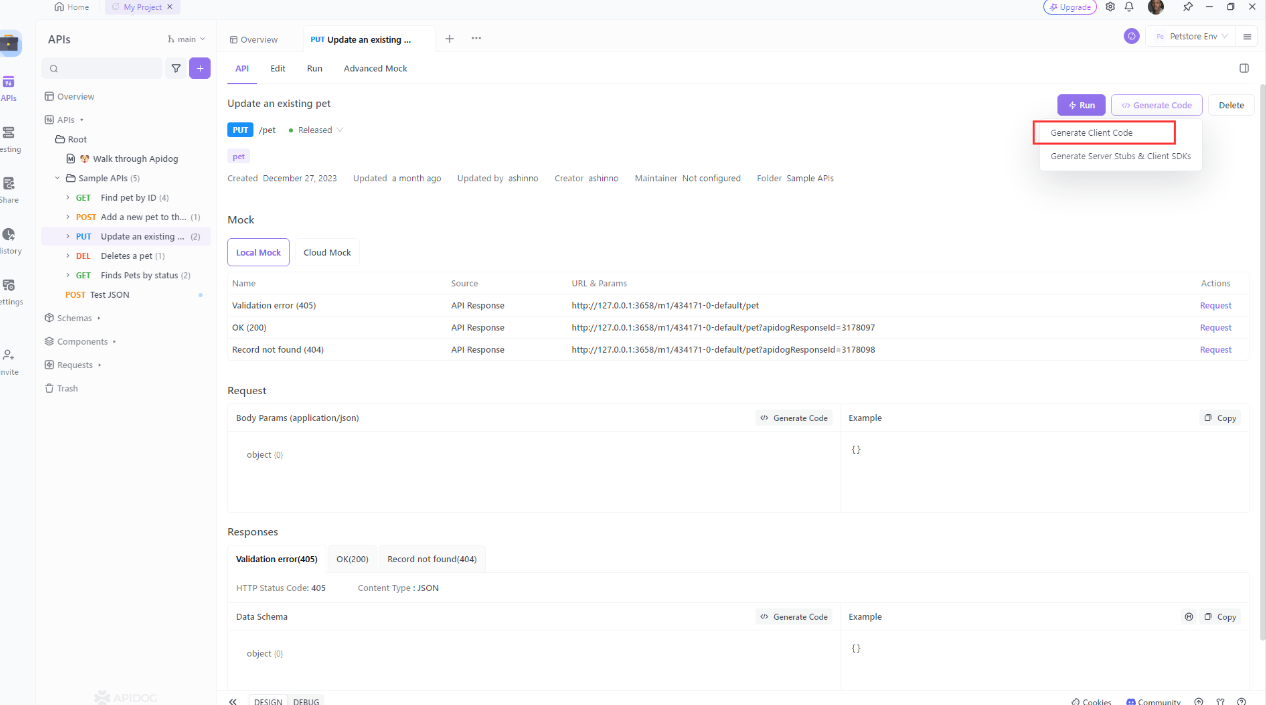
- Click on the “Generate Client Code”.Apidog will use the OpenAPI Generator engine to generate the Fetch client code for your API, matching the endpoints and data structures that you defined or selected.
- You will see a modal window with the generated code, which you can copy to your clipboard.
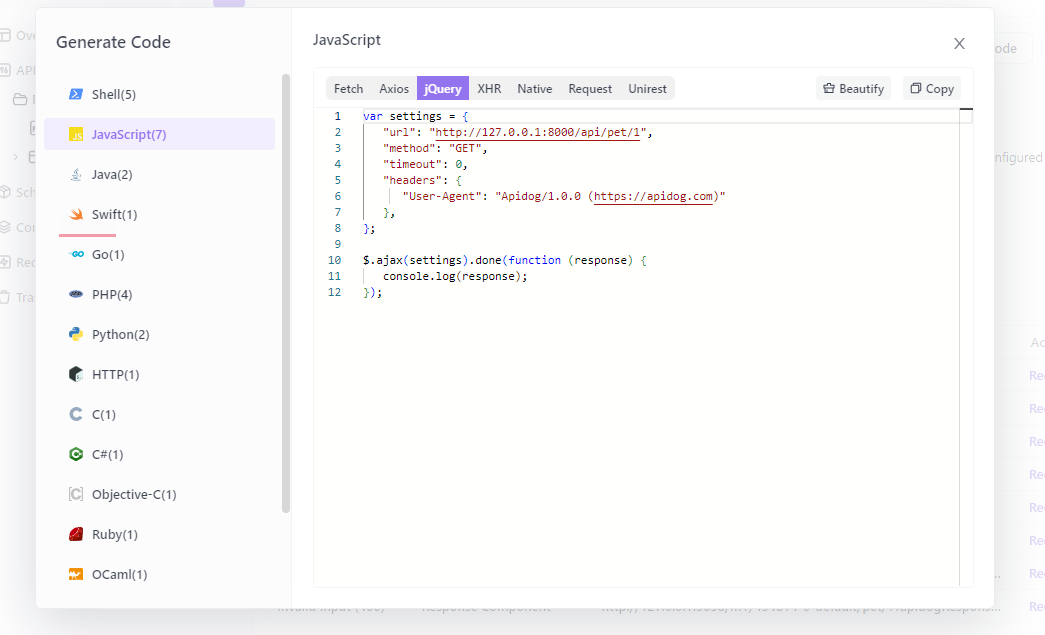
You can use the generated code in your own project, or modify it as you wish. You can also test the code with the Apidog mock server, which simulates the API responses based on your specification.
Conclusion
As we wrap up our journey through the realms of NextJS and API data fetching, it’s clear that the power and flexibility of this framework are unparalleled in the modern web development landscape. Whether you’re building a small project or a large-scale application, NextJS stands as a steadfast companion, ready to bring your data to life.
Remember, the key to mastering data fetching with NextJS lies in practice and exploration. Don’t be afraid to experiment with different APIs, play around with the code, and push the boundaries of what you can achieve. The world of web development is constantly evolving, and with NextJS, you’re well-equipped to evolve with it.
So go ahead, fetch that data, build something amazing, and watch as your ReactJS applications soar to new heights. With NextJS, the possibilities are just a function call away.


