Accelerate AI-Driven Coding with Kimi K2 Thinking
Artificial intelligence is transforming how developers write, test, and ship code. Leading this transformation are advanced reasoning models like Kimi K2 Thinking by Moonshot AI, a trillion-parameter agent built for multi-step reasoning, autonomous tool use, and deep code understanding.
If you’re a developer or technical lead looking to bring next-generation AI into your workflow, integrating Kimi K2 Thinking with popular tools like Claude Code and Cursor can unlock new levels of productivity and insight. This step-by-step guide will help you connect Kimi K2 Thinking to your favorite IDEs, maximizing your efficiency and code quality.
💡 Looking for a powerful API testing platform that generates beautiful API documentation and streamlines collaboration for your whole team? Apidog covers all your needs—see how it outperforms Postman at a better price.
What is Kimi K2 Thinking?
Moonshot AI’s Kimi K2 Thinking is a trillion-parameter, expert-level reasoning agent designed for developers and researchers who need advanced problem-solving and coding capabilities:
- 256K context window for long documents and codebases
- 300+ sequential tool calls for complex workflows
- SOTA benchmarks in reasoning, code generation, and decision-making
Kimi K2 Thinking doesn’t just answer questions—it can plan, analyze, and autonomously solve multi-step problems, making it ideal for programming, data science, and research.
Apidog Blog – Ashley Goolam

Getting Started: Moonshot AI API Key Registration
Before integrating Kimi K2 Thinking into your development tools, you’ll need access to the Moonshot AI platform and an API key.
1. Register for a Moonshot AI Account
- Visit platform.moonshot.ai
- Create a new account or sign in to your dashboard
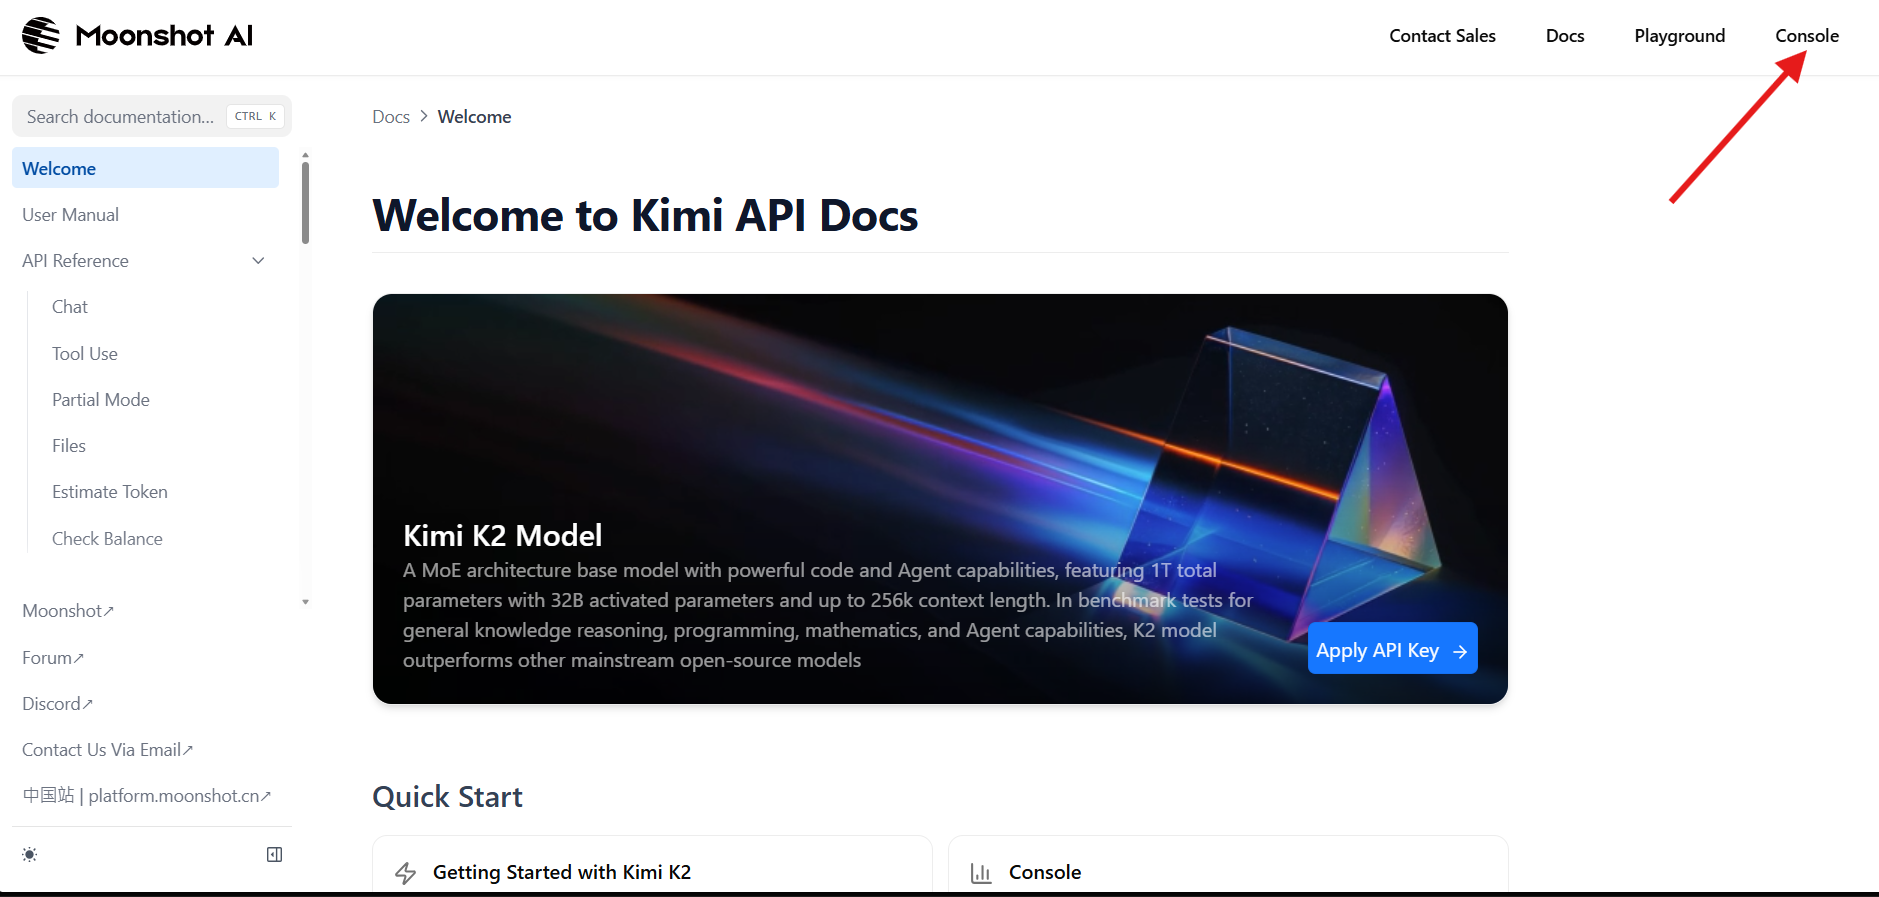
Your dashboard is your command center for managing API keys, usage statistics, and documentation.
2. Generate an API Key
- Go to the API Keys section in your dashboard
- Click “Create New Key” to generate a secret key (format:
sk-...) - Copy your key and store it securely (e.g., in a password manager)
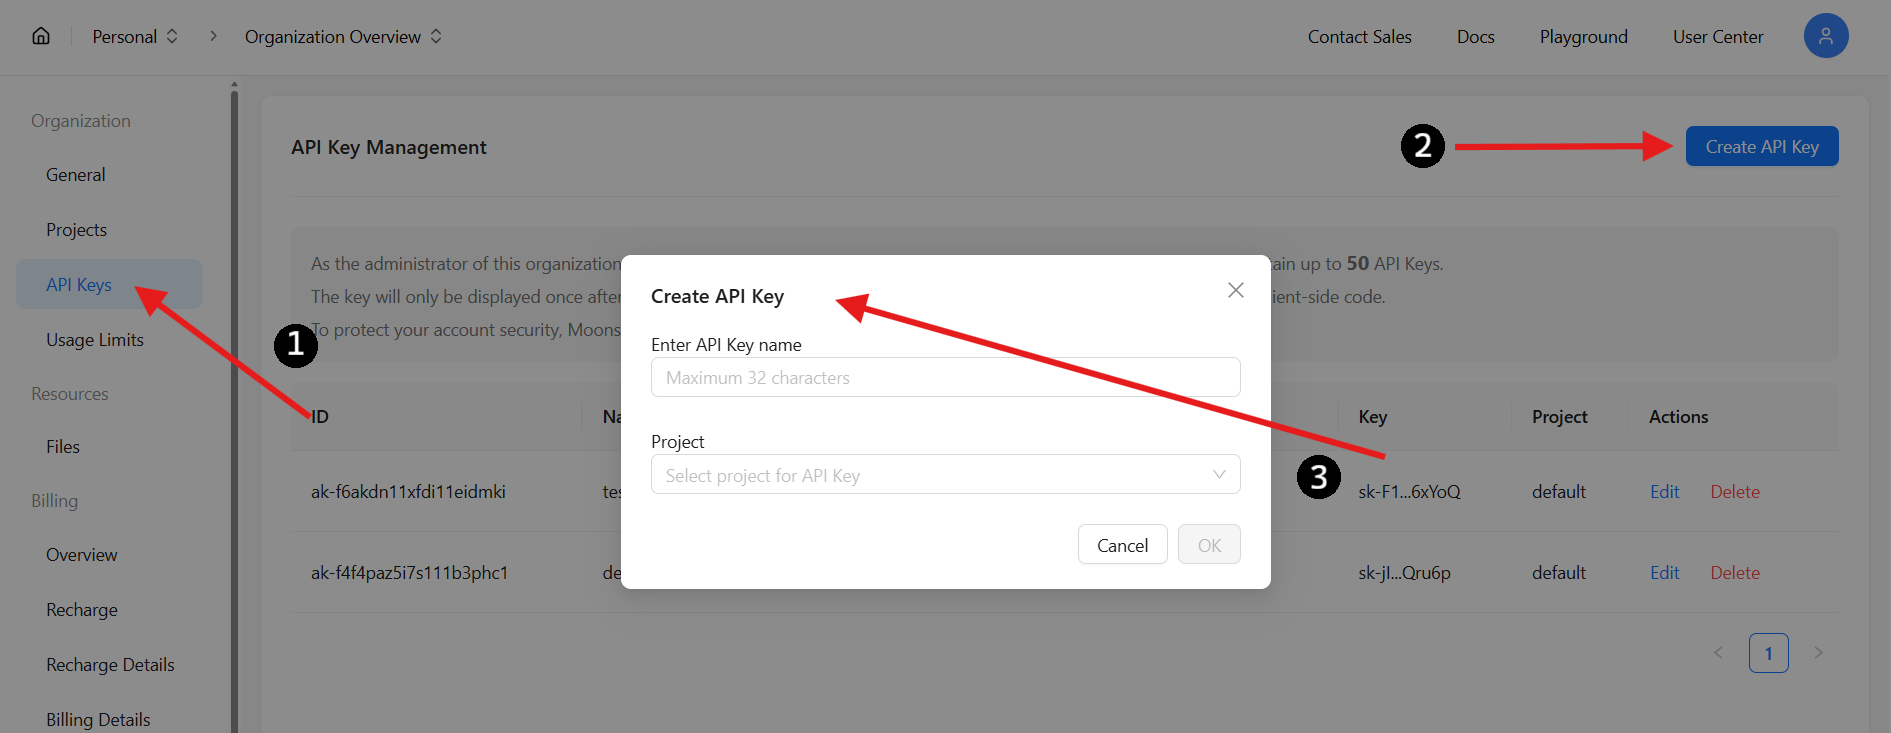
⚠️ Security Tip: You won’t be able to view this key again after closing the page. Never share your API key or commit it to public repositories.
3. Add Credits to Your Moonshot AI Account
Kimi K2 Thinking requires pre-paid credits for API access.
- Go to Billing: Open the Billing tab in your dashboard
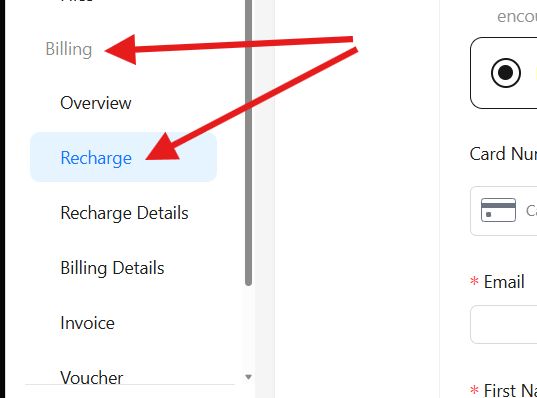
- Recharge Your Account: Choose the amount, enter payment info, and recharge

- Track Spending: Use the Overview section to monitor monthly/yearly usage and manage your budget
Once funded, your account is ready for uninterrupted API calls.
Integrating Kimi K2 Thinking with Claude Code
Claude Code (from Anthropic) is a popular AI coding assistant. Thanks to Moonshot AI’s compatibility with Anthropic’s API, you can seamlessly redirect Claude Code to use Kimi K2 Thinking as its engine.
Step 1: Point Claude Code to Moonshot AI
Set the API endpoint for Claude Code:
export ANTHROPIC_BASE_URL=https://api.moonshot.ai/anthropic
This sends all requests from Claude Code to Moonshot AI’s servers.

Step 2: Set Your API Authentication
Set your Moonshot AI API key:
export ANTHROPIC_AUTH_TOKEN=sk-YOURKEY
Replace sk-YOURKEY with your real API key.

For Windows users:
set ANTHROPIC_BASE_URL=https://api.moonshot.ai/anthropic
set ANTHROPIC_AUTH_TOKEN=sk-YOURKEY

Step 3: Launch Claude Code
Start Claude Code as usual:
claude
You’ll see the model name (e.g., kimi-k2-thinking-turbo) confirming you’re now using Kimi K2 Thinking with Claude Code.
Integrating Kimi K2 Thinking with Cursor
Cursor is a modern AI-powered code editor. While it doesn’t yet natively support Kimi K2 Thinking, you can connect it via OpenRouter or directly through Moonshot AI’s OpenAI-compatible API.
Option 1: Connect via OpenRouter
- Sign Up: Register at openrouter.ai
-
Add Credits: Top up at openrouter.ai/settings/credits
-
Create API Key: Go to openrouter.ai/settings/keys and generate a key
0
- Configure Cursor:
-
Open Cursor
-
Go to Settings → Models → API Keys
-
Replace the default URL
https://api.openai.com/v1with:https://openrouter.ai/api/v1 -
Paste your OpenRouter API key
-
1
- Add Kimi K2 Thinking as a Custom Model:
- Click “Add Custom Model”
- Enter:
moonshotai/kimi-k2-thinking
2
- Start Coding:
- Begin using Kimi K2 Thinking for code generation, refactoring, and reasoning in Cursor
💡 Note: Some agent features may be limited, but most core coding and reasoning functions will work smoothly.
Option 2: Connect Directly to Moonshot AI
Prefer a direct connection? Here’s how:
-
Register, create your API key, and add credits at platform.moonshot.ai as described above.
-
In Cursor settings, replace the API base URL with:
https://api.moonshot.ai/v1 -
Use your Moonshot AI API key in place of your OpenAI key.
3
Because Moonshot AI’s API matches OpenAI’s interface, this method works out-of-the-box for most workflows in Cursor.
Frequently Asked Questions
What is Kimi K2 Thinking?
Kimi K2 Thinking is Moonshot AI’s trillion-parameter reasoning agent—capable of code generation, long-context analysis, and expert-level logic for developers and researchers.
Is Kimi K2 Thinking API compatible with OpenAI or Anthropic?
Yes. Kimi K2 Thinking’s API is fully compatible with both OpenAI and Anthropic APIs. Simply update your base_url and api_key in your SDK or integration.
How do I switch Claude Code to use Kimi K2 Thinking?
Set the following environment variables:
export ANTHROPIC_AUTH_TOKEN=sk-YOURKEY
export ANTHROPIC_BASE_URL=https://api.moonshot.ai/anthropic
Then launch Claude Code.
Can I use Kimi K2 Thinking in Cursor?
Yes. Use either OpenRouter or direct Moonshot AI API integration for access to Kimi K2 Thinking in Cursor.
Where do I get my Kimi K2 Thinking API key?
Register at platform.moonshot.ai, generate a new API key from your dashboard, and store it securely.
Conclusion: Modernize Your Coding with Advanced AI Reasoning
Integrating Kimi K2 Thinking with Claude Code or Cursor puts state-of-the-art reasoning and code generation directly into your development environment. With Moonshot AI’s simple, compatible API, you can boost efficiency, automate complex tasks, and future-proof your workflow.
For API-focused teams, using a unified platform like Apidog can further streamline your API documentation, testing, and team collaboration—all at a lower cost than Postman. Explore how Apidog can help your engineering team maximize productivity.