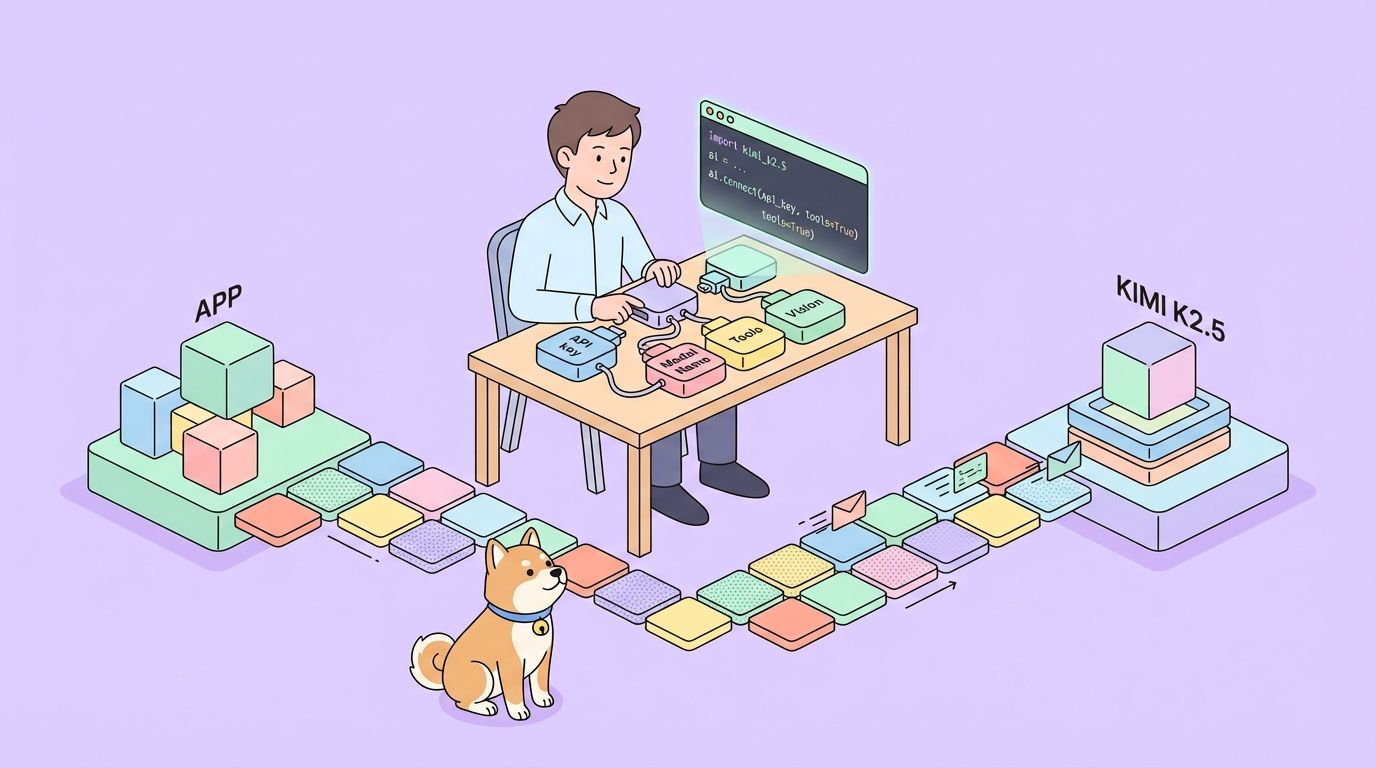
Developers increasingly seek robust APIs that handle complex multimodal inputs and deliver intelligent outputs. The Kimi K2.5 API stands out as a versatile tool from Moonshot AI, enabling applications to process text, images, and videos with advanced reasoning capabilities. This API empowers you to build sophisticated AI-driven solutions, from visual debugging in code to orchestrating agent swarms for parallel task execution.
What is Kimi K2.5?
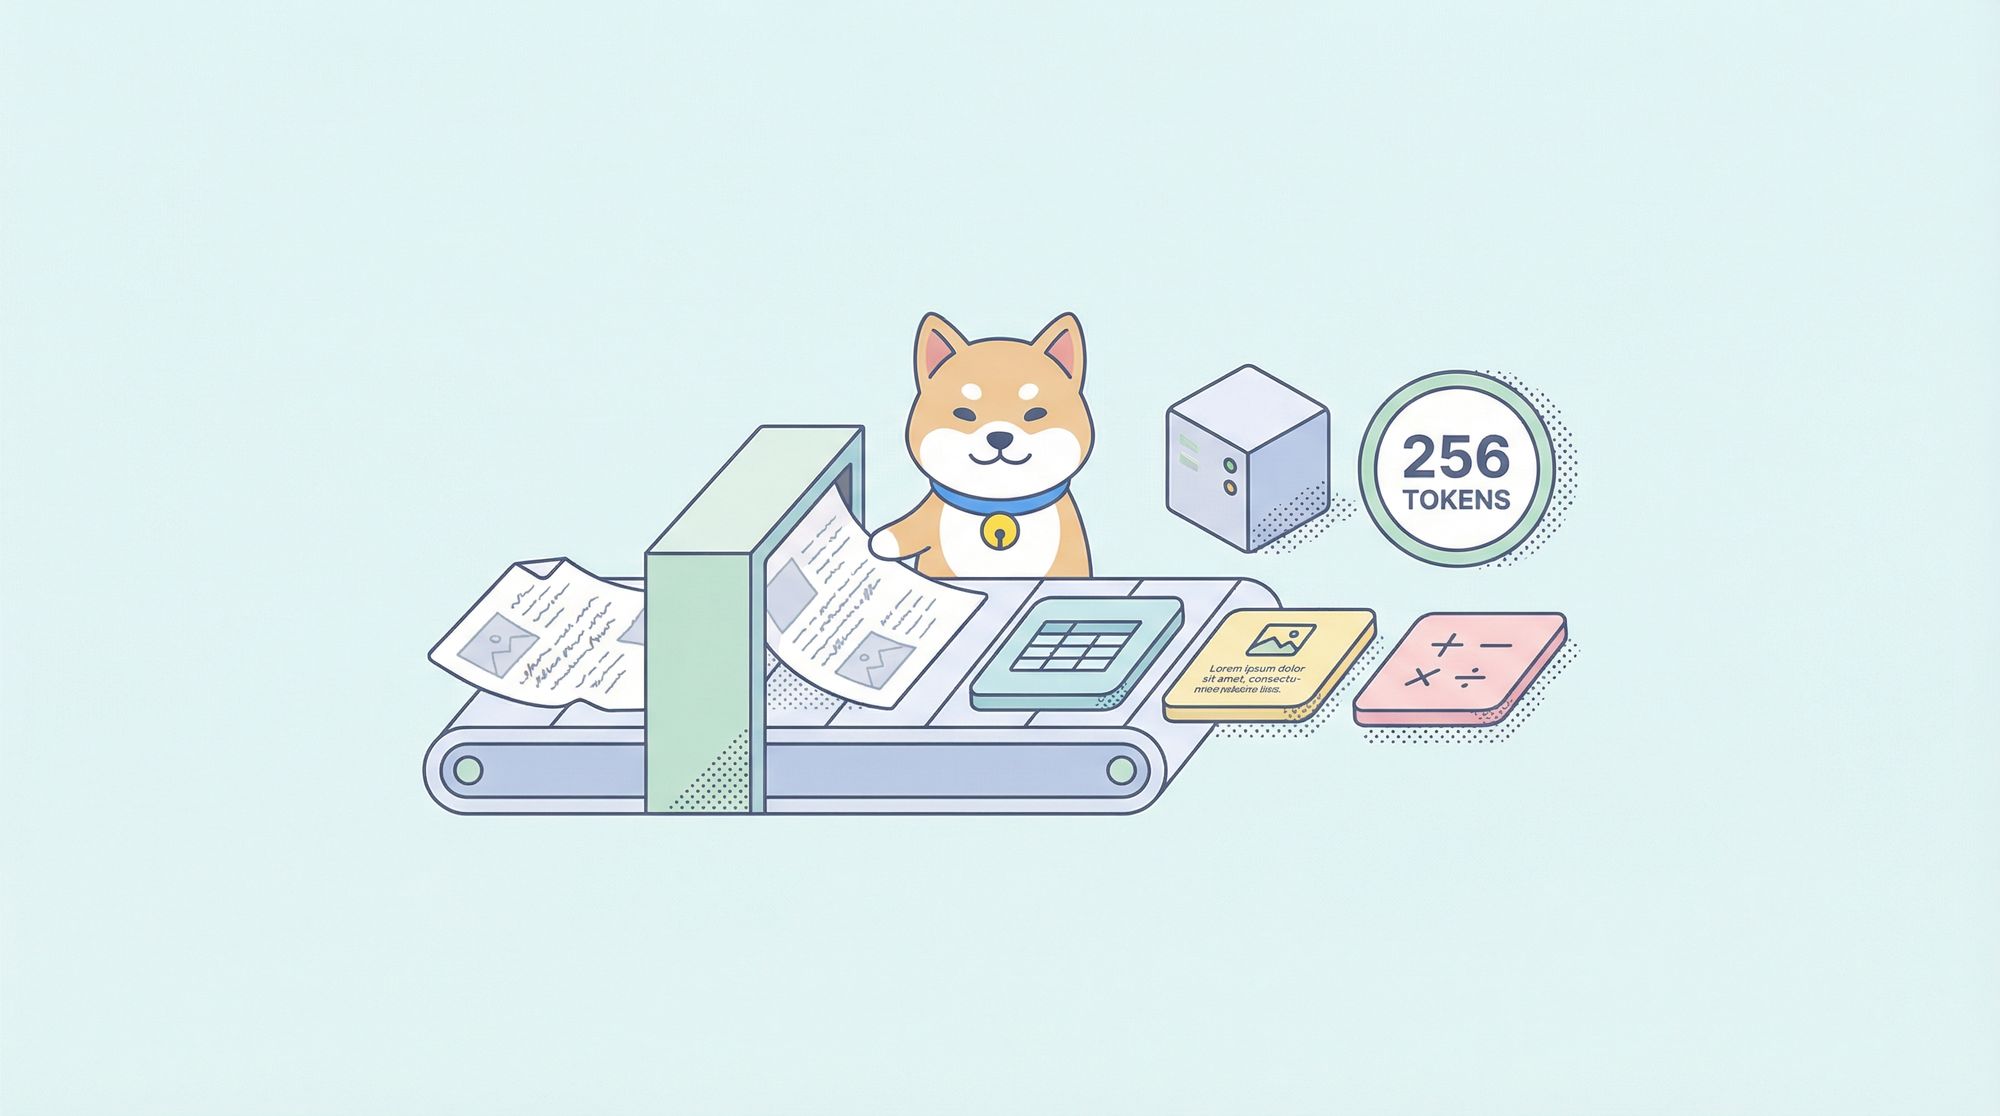
Kimi K2.5 represents Moonshot AI's most advanced open-source multimodal model, built through continual pretraining on approximately 15 trillion mixed visual and text tokens atop the Kimi-K2-Base architecture. Unlike its predecessor, K2.5 seamlessly integrates vision and language understanding with advanced agentic capabilities, making it particularly powerful for developers building AI-powered applications.
The model introduces several groundbreaking features that set it apart from other AI APIs. Its native multimodality means it was pre-trained on vision-language tokens from the ground up, rather than having vision capabilities bolted on as an afterthought. This approach results in superior performance in visual knowledge, cross-modal reasoning, and agentic tool use grounded in visual inputs.
Why Kimi K2.5 matters for developers:
- Open-source availability: Unlike many frontier models, K2.5's weights are publicly available on Hugging Face
- OpenAI-compatible API: Drop-in replacement requiring minimal code changes
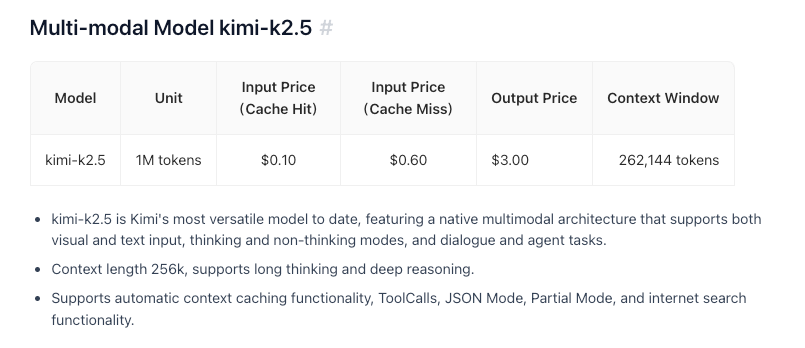
- Cost-effective: Competitive pricing at $0.60/M input tokens
- 256K context window: Handle extensive documents and conversations
- Agent Swarm capability: Decompose complex tasks into parallel sub-tasks
Key Features and Capabilities
Native Multimodal Intelligence
K2.5 excels in visual knowledge, cross-modal reasoning, and agentic tool use grounded in visual inputs. This isn't just image recognition—it's deep understanding of visual context that can inform complex decision-making.
Coding with Vision
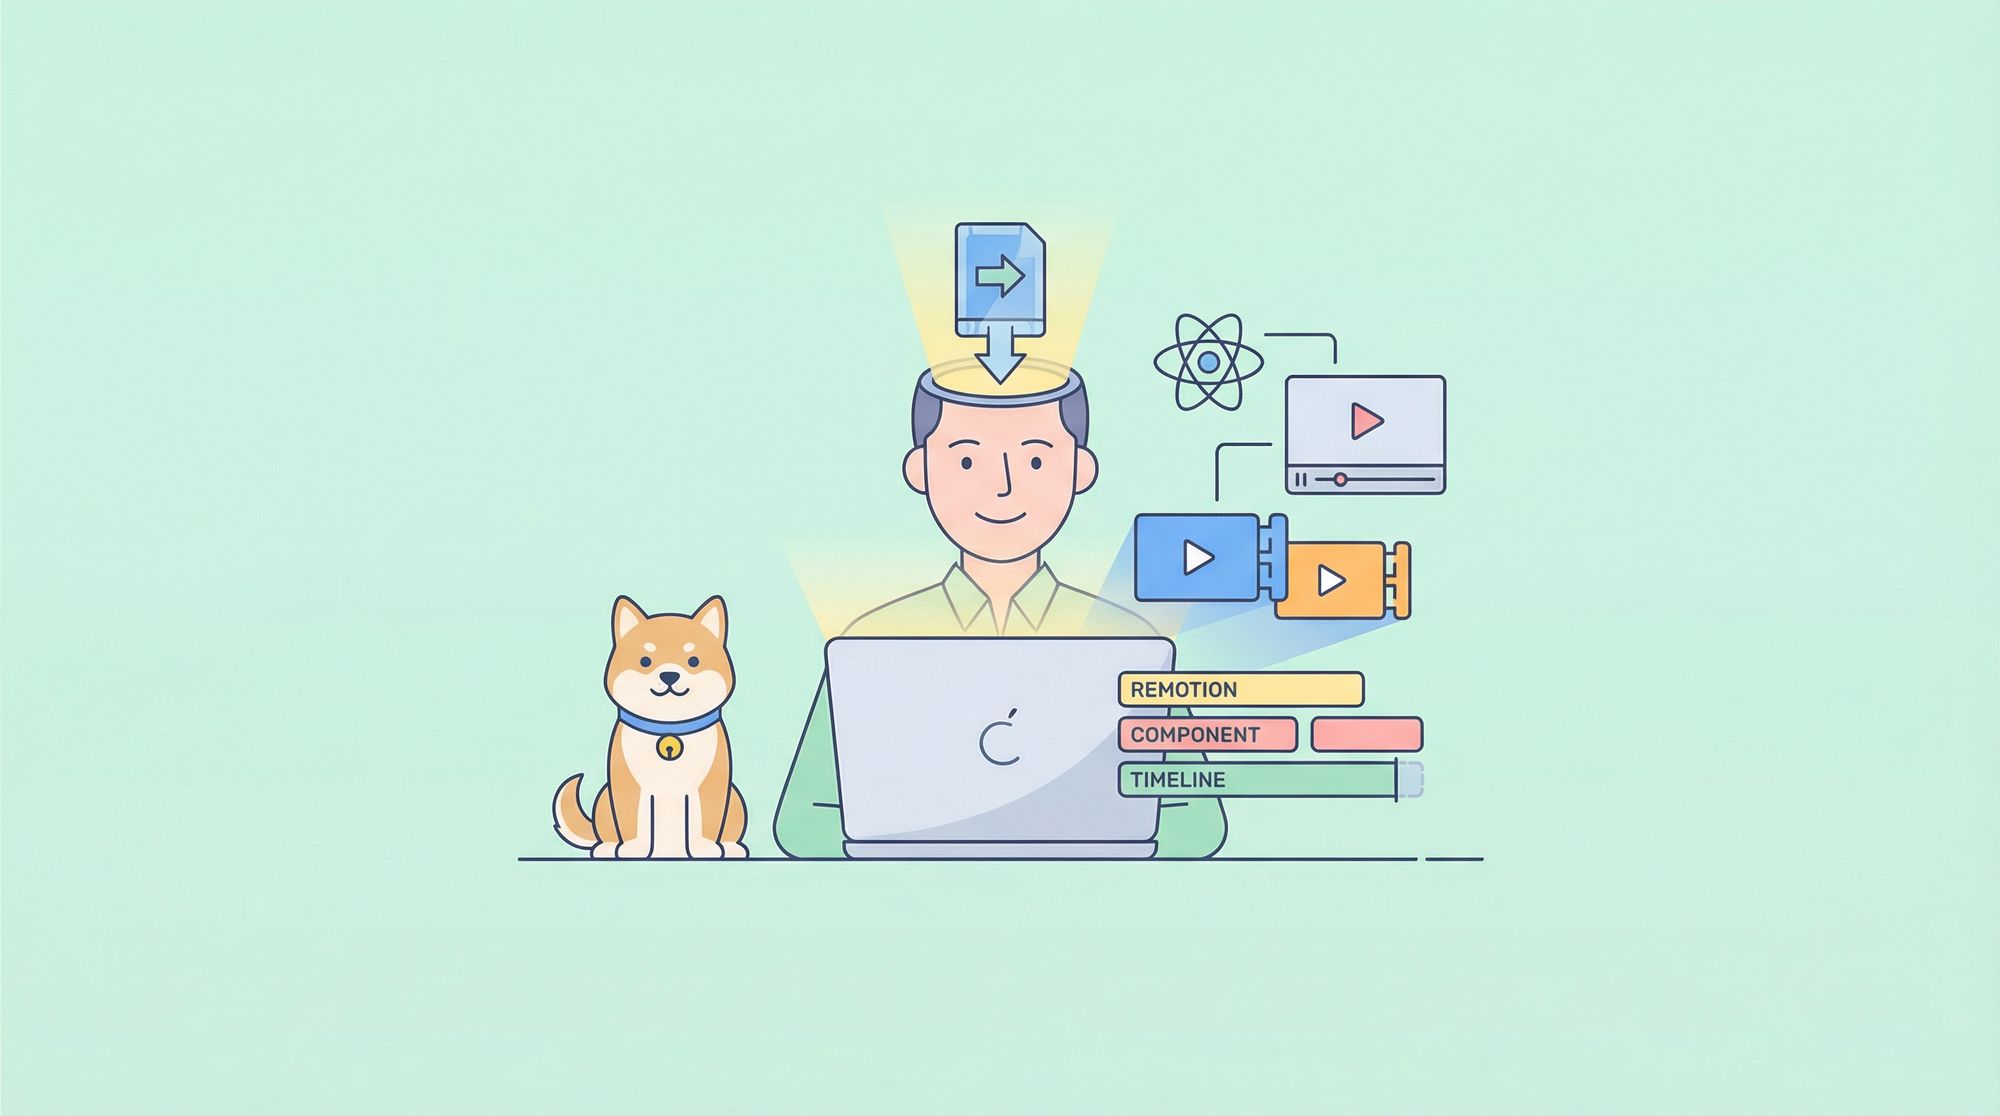
One of K2.5's standout capabilities is generating code from visual specifications. Point it at a UI design mockup, and it can produce functional front-end code. Show it a video workflow, and it can orchestrate tools for visual data processing. This makes it particularly valuable for:
- Converting Figma designs to React components
- Generating HTML/CSS from wireframes
- Building data visualization pipelines from chart examples
- Automating image processing workflows

Agent Swarm Architecture
K2.5 transitions from single-agent scaling to a self-directed, coordinated swarm-like execution scheme. When faced with complex tasks, it can:
- Decompose the problem into parallel sub-tasks
- Dynamically instantiate domain-specific agents
- Coordinate execution across multiple agents
- Synthesize results into coherent outputs
This architecture enables K2.5 to handle tasks that would overwhelm single-agent systems, such as comprehensive code refactoring, multi-file documentation generation, or complex data analysis pipelines.
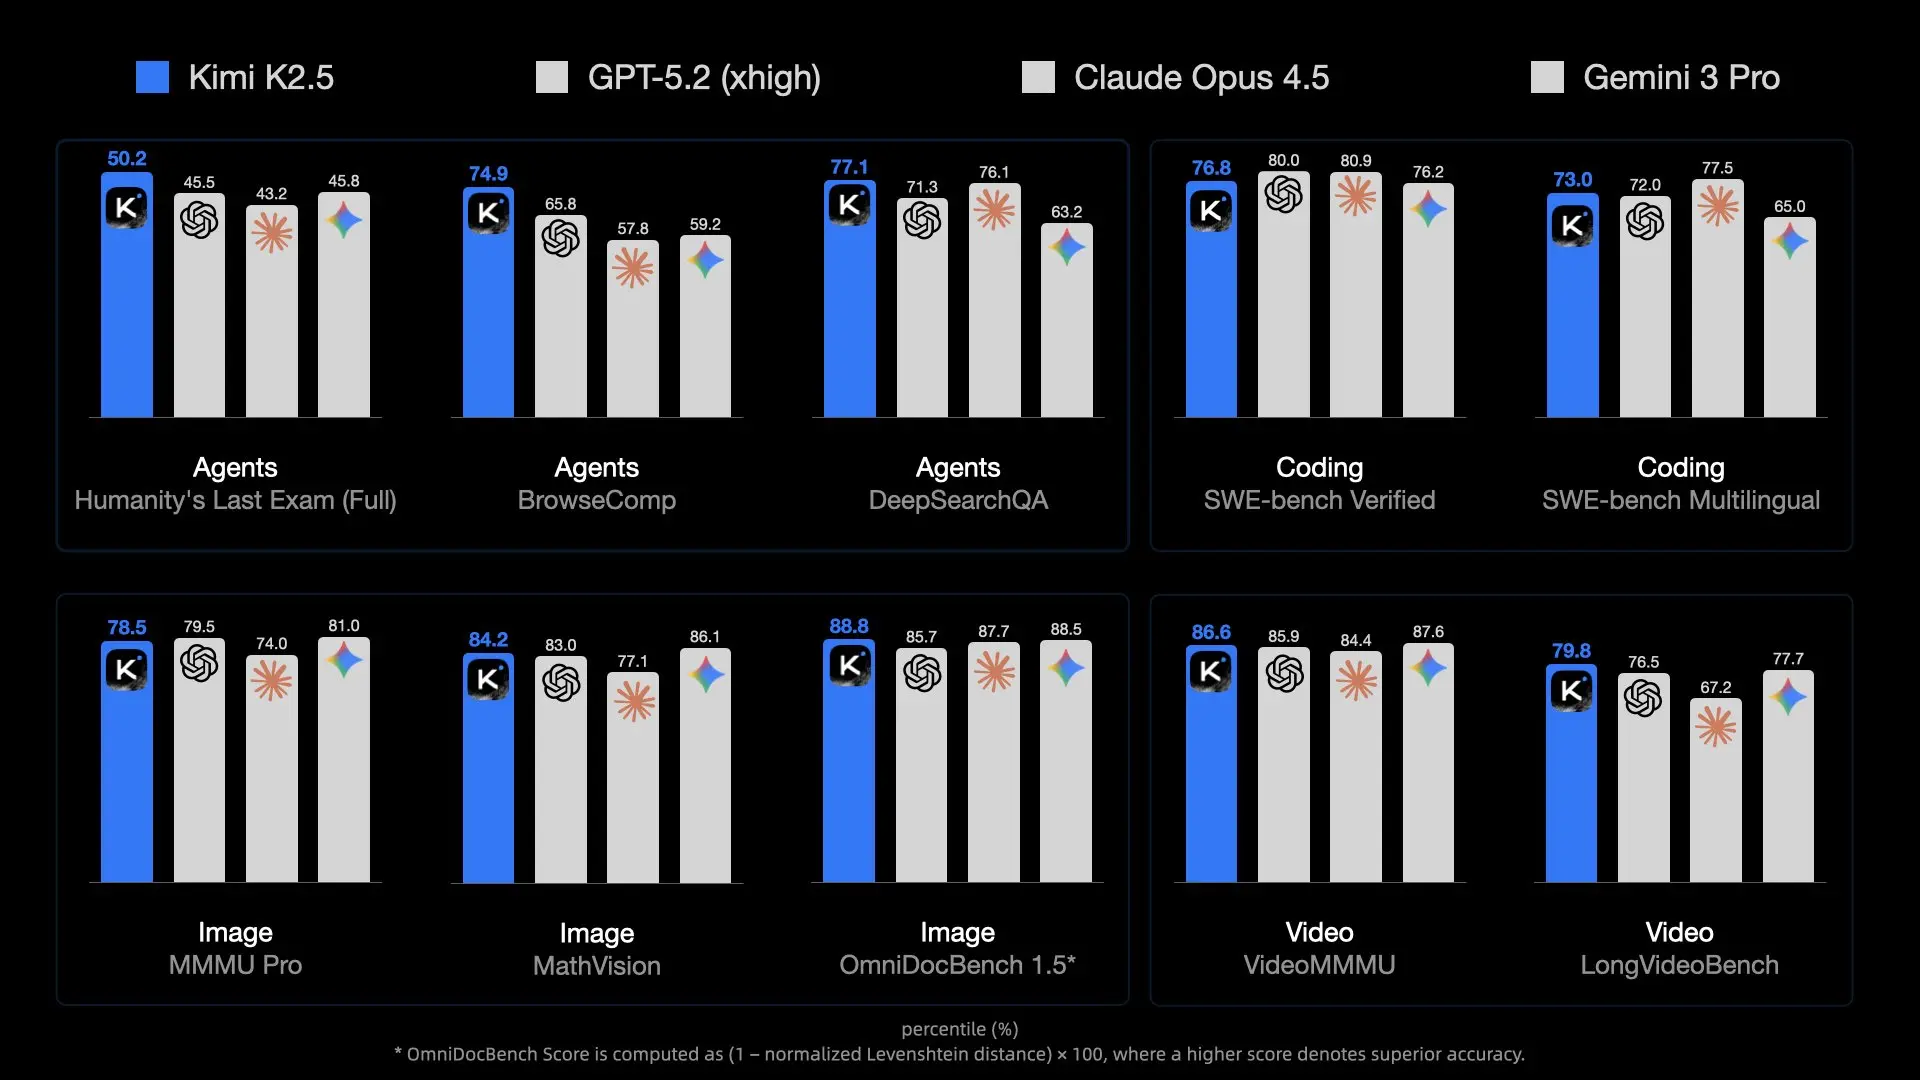
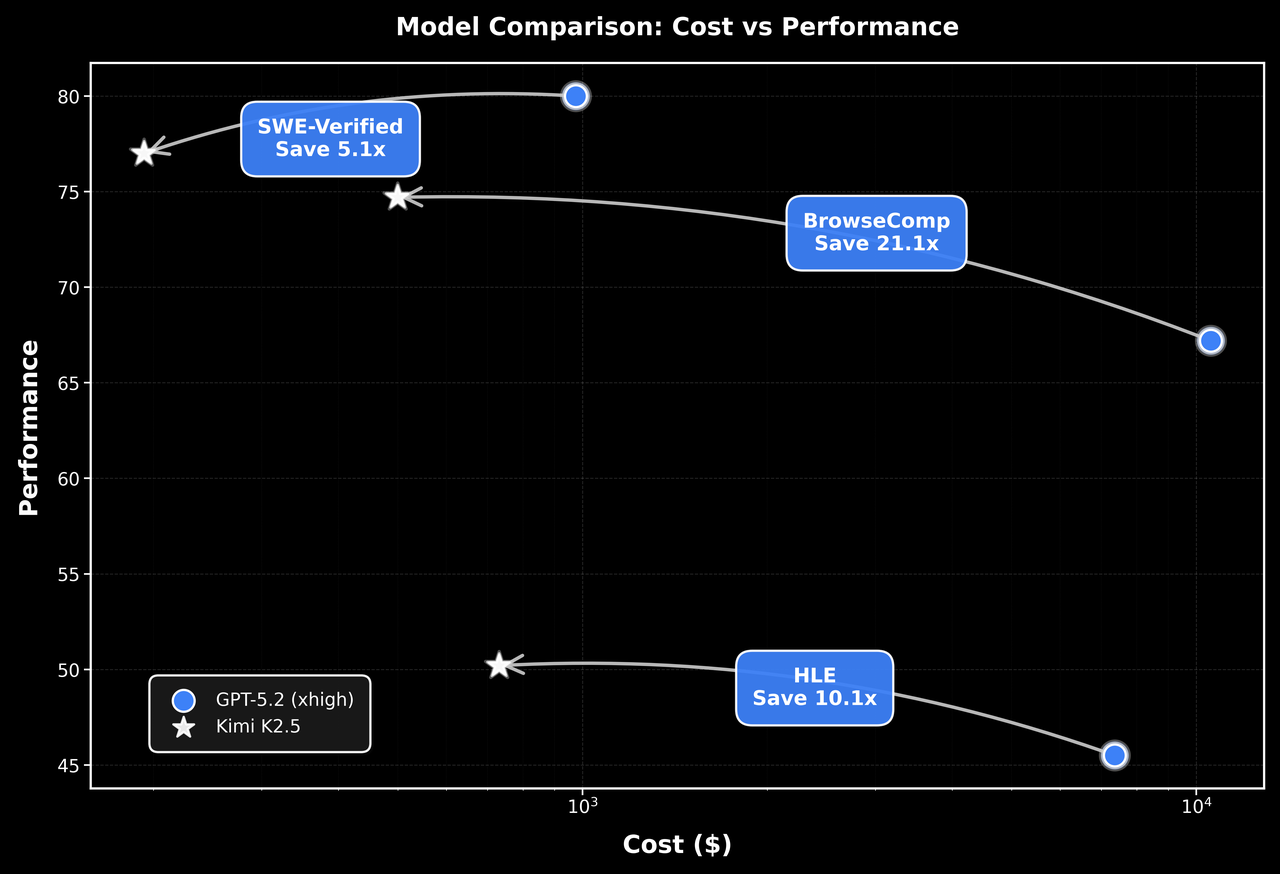
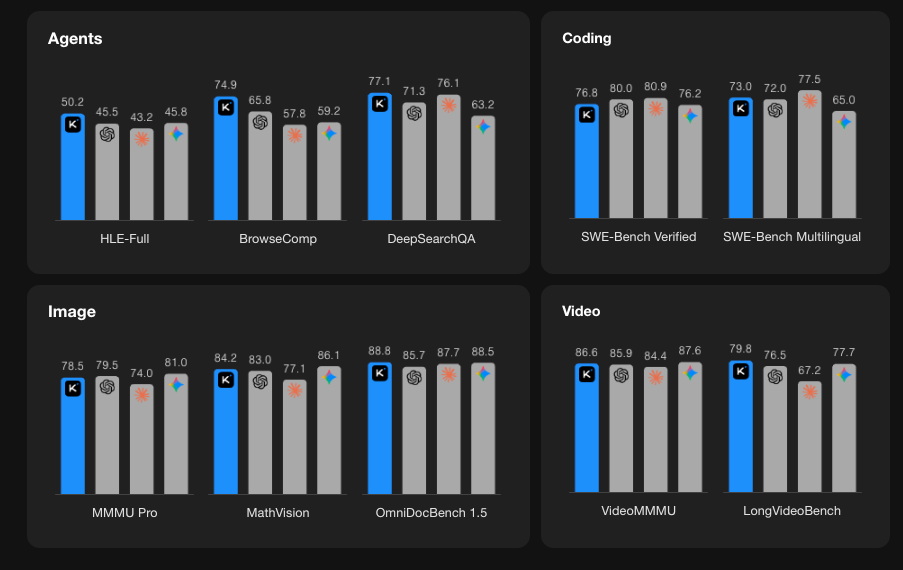
Benchmark Performance
Getting Started with Kimi K2.5 API
Step 1: Create Your Moonshot AI Account
Visit platform.moonshot.ai and sign up for an account. The registration process is straightforward:
- Click "Sign Up" or "Register"
- Provide your email and create a password
- Verify your email address
- Complete any required profile information
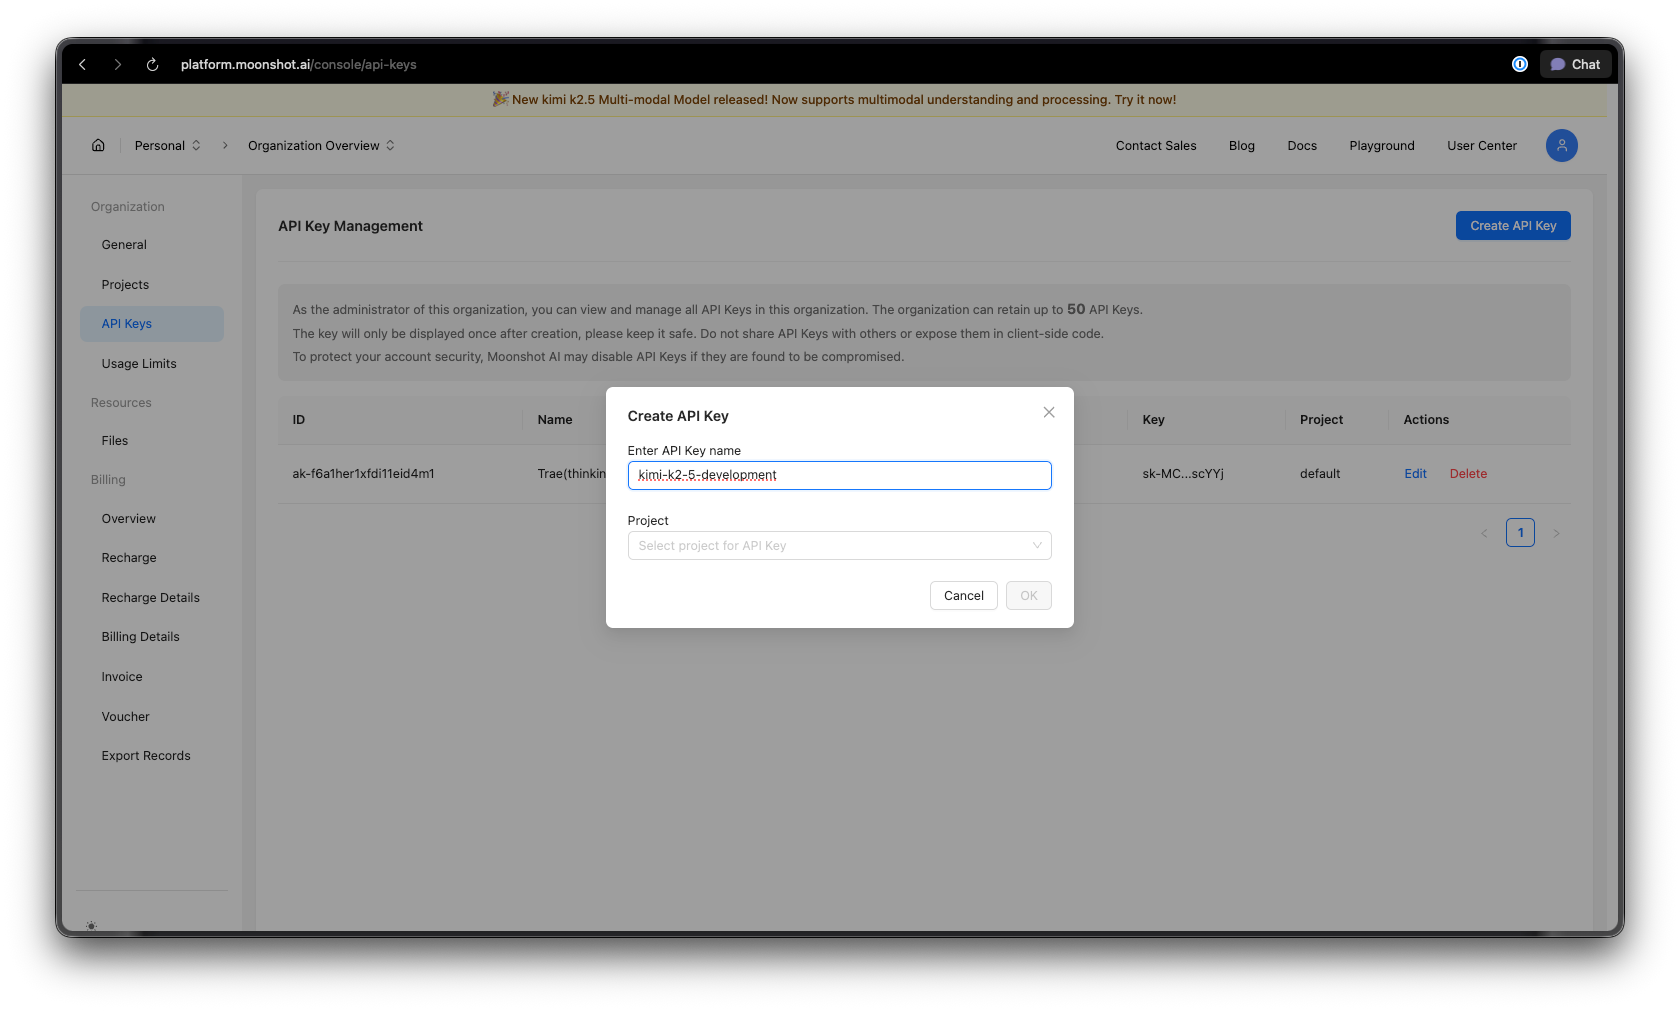
Step 2: Generate Your API Key
Once logged in:
- Navigate to the API Keys section in your dashboard
- Click "Create New API Key"
- Give your key a descriptive name (e.g., "kimi-k2-5-development")
- Copy and securely store your API key—you won't see it again
Security tip: Never commit API keys to version control. Use environment variables or a secrets manager.
Step 3: Set Up Your Environment
For Python:
pip install --upgrade 'openai>=1.0'
For Node.js:
npm install openai@latest
Step 4: Configure Your API Key
Set your API key as an environment variable:
macOS/Linux:
export MOONSHOT_API_KEY="your-api-key-here"
Windows (PowerShell):
[System.Environment]::SetEnvironmentVariable("MOONSHOT_API_KEY", "your-api-key-here", "User")
Windows (Command Prompt):
setx MOONSHOT_API_KEY "your-api-key-here"
Python Code Examples
Basic Chat Completion
Here's a simple example to get started with Kimi K2.5:
import os
from openai import OpenAI

# Initialize the client with Moonshot AI endpoint
client = OpenAI(
    api_key=os.environ.get("MOONSHOT_API_KEY"),
    base_url="https://api.moonshot.ai/v1",
)

# Create a chat completion
response = client.chat.completions.create(
    model="kimi-k2.5-preview",
    messages=[
        {
            "role": "system",
            "content": "You are Kimi, an AI assistant developed by Moonshot AI. You are helpful, harmless, and honest."
        },
        {
            "role": "user",
            "content": "Explain the concept of mixture-of-experts architecture in neural networks."
        }
    ],
    temperature=0.6,
    max_tokens=2048,
)

print(response.choices[0].message.content)
Streaming Responses
For real-time applications, use streaming to display responses as they're generated:
import os
from openai import OpenAI

client = OpenAI(
    api_key=os.environ.get("MOONSHOT_API_KEY"),
    base_url="https://api.moonshot.ai/v1",
)

# Stream the response
stream = client.chat.completions.create(
    model="kimi-k2.5-preview",
    messages=[
        {"role": "user", "content": "Write a Python function to implement binary search."}
    ],
    stream=True,
    temperature=0.3,
)

# Process the stream
for chunk in stream:
    if chunk.choices[0].delta.content:
        print(chunk.choices[0].delta.content, end="", flush=True)
Multi-Turn Conversation
Maintain context across multiple exchanges:
import os
from openai import OpenAI

client = OpenAI(
    api_key=os.environ.get("MOONSHOT_API_KEY"),
    base_url="https://api.moonshot.ai/v1",
)

conversation_history = [
    {"role": "system", "content": "You are a helpful coding assistant."}
]

def chat(user_message):
    conversation_history.append({"role": "user", "content": user_message})

    response = client.chat.completions.create(
        model="kimi-k2.5-preview",
        messages=conversation_history,
        temperature=0.6,
    )

    assistant_message = response.choices[0].message.content
    conversation_history.append({"role": "assistant", "content": assistant_message})

    return assistant_message

# Example conversation
print(chat("How do I create a REST API in Python?"))
print(chat("Can you show me how to add authentication to that?"))
print(chat("What about rate limiting?"))
Async Implementation
For high-performance applications, use async/await:
import os
import asyncio
from openai import AsyncOpenAI

async def main():
    client = AsyncOpenAI(
        api_key=os.environ.get("MOONSHOT_API_KEY"),
        base_url="https://api.moonshot.ai/v1",
    )

    # Run multiple requests concurrently
    tasks = [
        client.chat.completions.create(
            model="kimi-k2.5-preview",
            messages=[{"role": "user", "content": f"What is {topic}?"}],
        )
        for topic in ["REST API", "GraphQL", "gRPC"]
    ]

    responses = await asyncio.gather(*tasks)

    for response in responses:
        print(response.choices[0].message.content[:200])
        print("-" * 50)

asyncio.run(main())
JavaScript/Node.js Examples
Basic Chat Completion
import OpenAI from 'openai';

const client = new OpenAI({
  apiKey: process.env.MOONSHOT_API_KEY,
  baseURL: 'https://api.moonshot.ai/v1',
});

async function chat(userMessage) {
  const response = await client.chat.completions.create({
    model: 'kimi-k2.5-preview',
    messages: [
      {
        role: 'system',
        content: 'You are Kimi, a helpful AI assistant.',
      },
      {
        role: 'user',
        content: userMessage,
      },
    ],
    temperature: 0.6,
  });

  return response.choices[0].message.content;
}

// Usage
const answer = await chat('How do I implement a binary search tree in JavaScript?');
console.log(answer);
Streaming with Node.js
import OpenAI from 'openai';

const client = new OpenAI({
  apiKey: process.env.MOONSHOT_API_KEY,
  baseURL: 'https://api.moonshot.ai/v1',
});

async function streamChat(userMessage) {
  const stream = await client.chat.completions.create({
    model: 'kimi-k2.5-preview',
    messages: [{ role: 'user', content: userMessage }],
    stream: true,
  });

  for await (const chunk of stream) {
    const content = chunk.choices[0]?.delta?.content;
    if (content) {
      process.stdout.write(content);
    }
  }
}

await streamChat('Explain microservices architecture');
Using Fetch API (Browser/Edge Functions)
async function callKimiAPI(prompt) {
  const response = await fetch('https://api.moonshot.ai/v1/chat/completions', {
    method: 'POST',
    headers: {
      'Authorization': `Bearer ${process.env.MOONSHOT_API_KEY}`,
      'Content-Type': 'application/json',
    },
    body: JSON.stringify({
      model: 'kimi-k2.5-preview',
      messages: [{ role: 'user', content: prompt }],
      temperature: 0.6,
    }),
  });

  const data = await response.json();
  return data.choices[0].message.content;
}

// Usage
const result = await callKimiAPI('What are the best practices for API design?');
console.log(result);
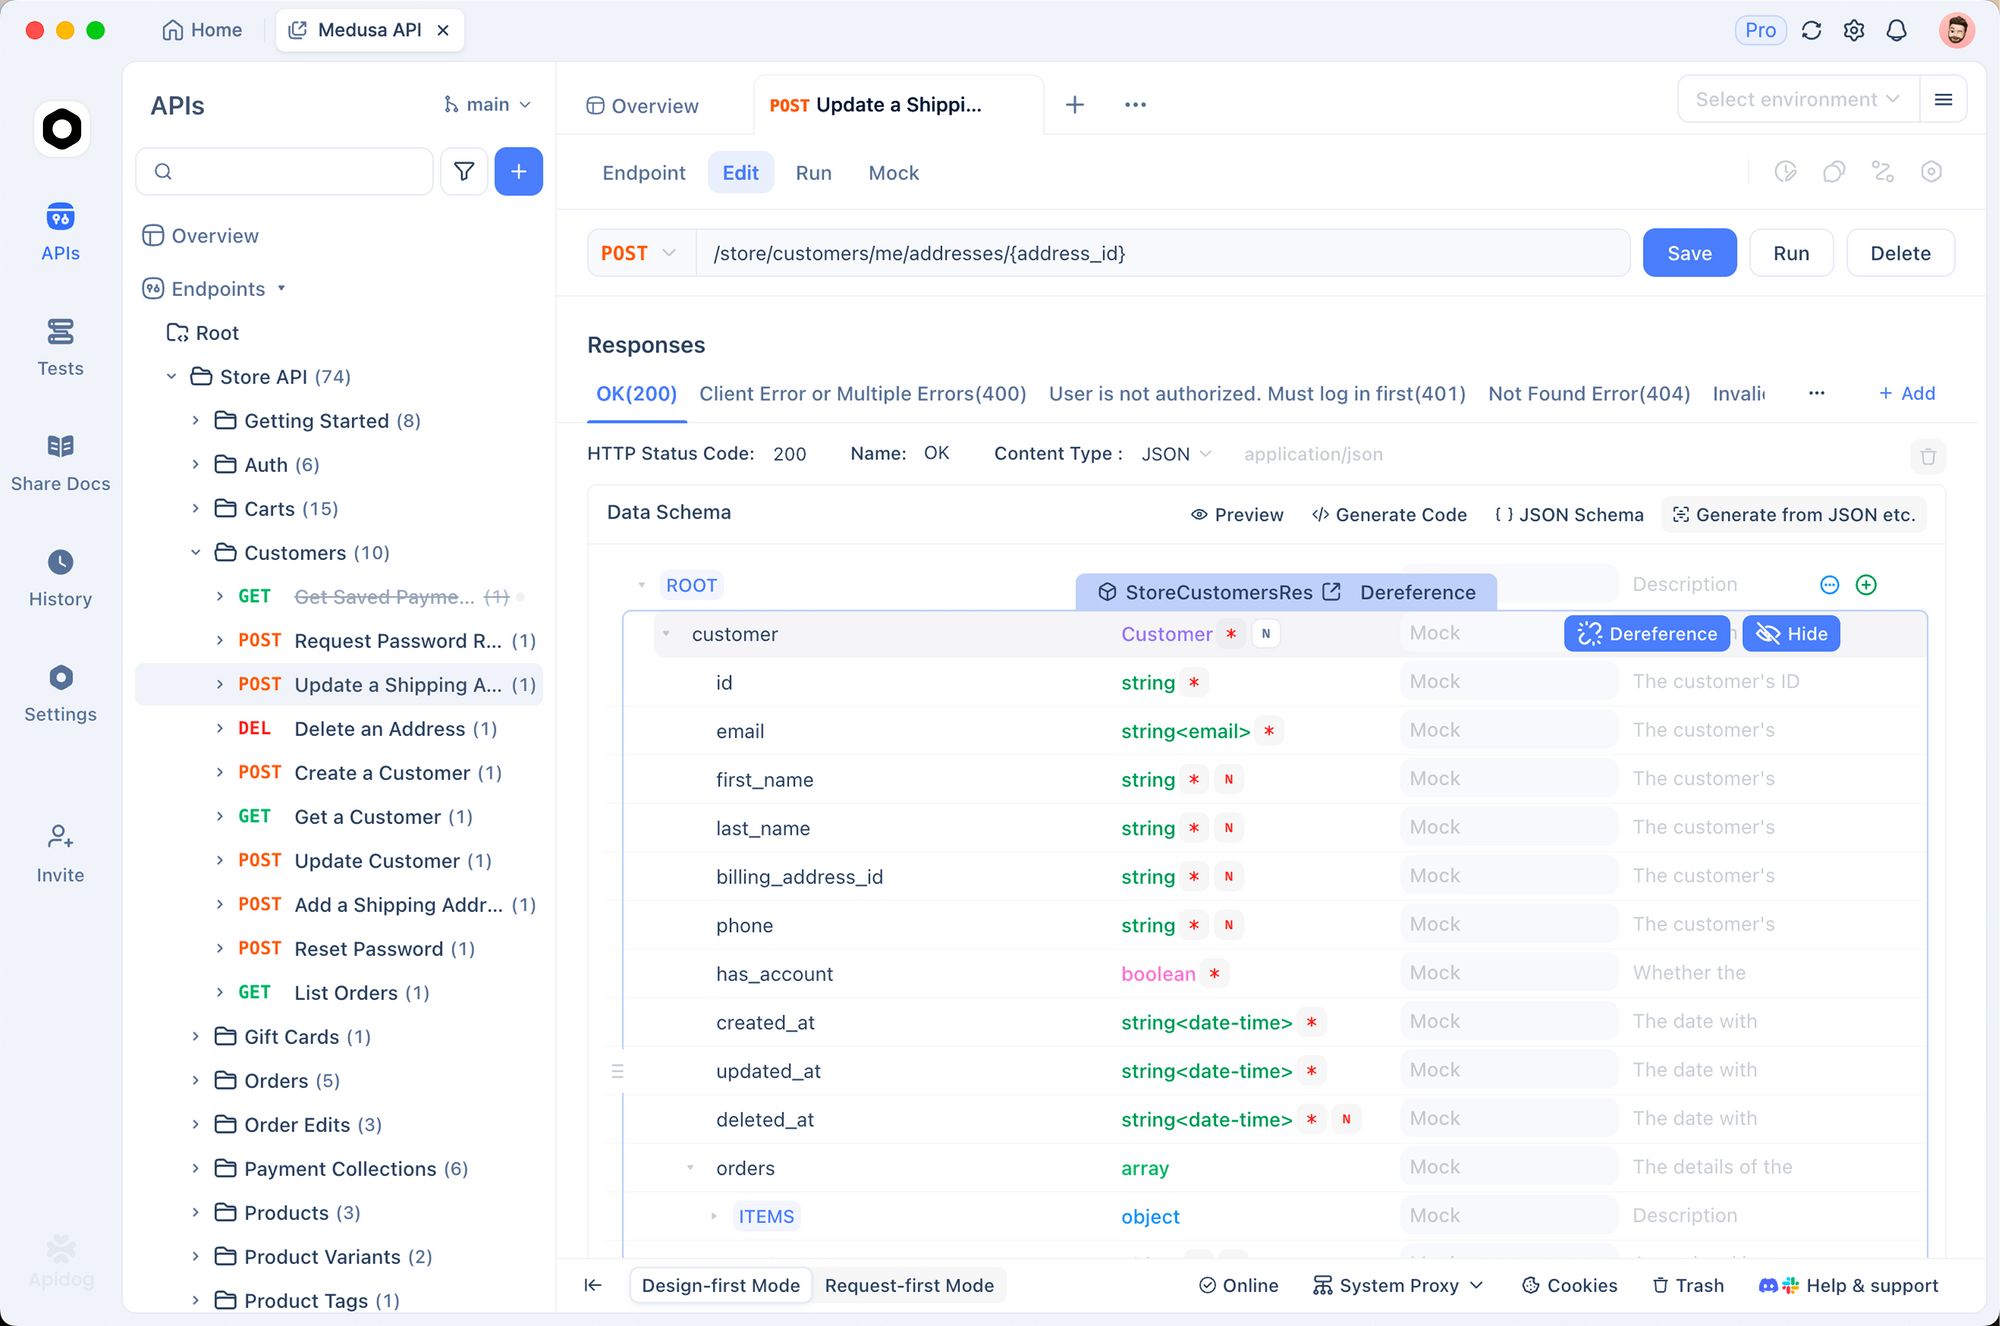
Testing Kimi K2.5 API with Apidog
Testing AI APIs effectively requires understanding request/response structures, handling streaming, managing authentication, and debugging issues. Apidog provides a comprehensive solution for API development that makes working with Kimi K2.5 straightforward.
Setting Up Kimi K2.5 in Apidog
Step 1: Create a New Project
- Open Apidog and create a new project named "Kimi K2.5 Integration"
- This organizes all your Kimi-related endpoints in one place
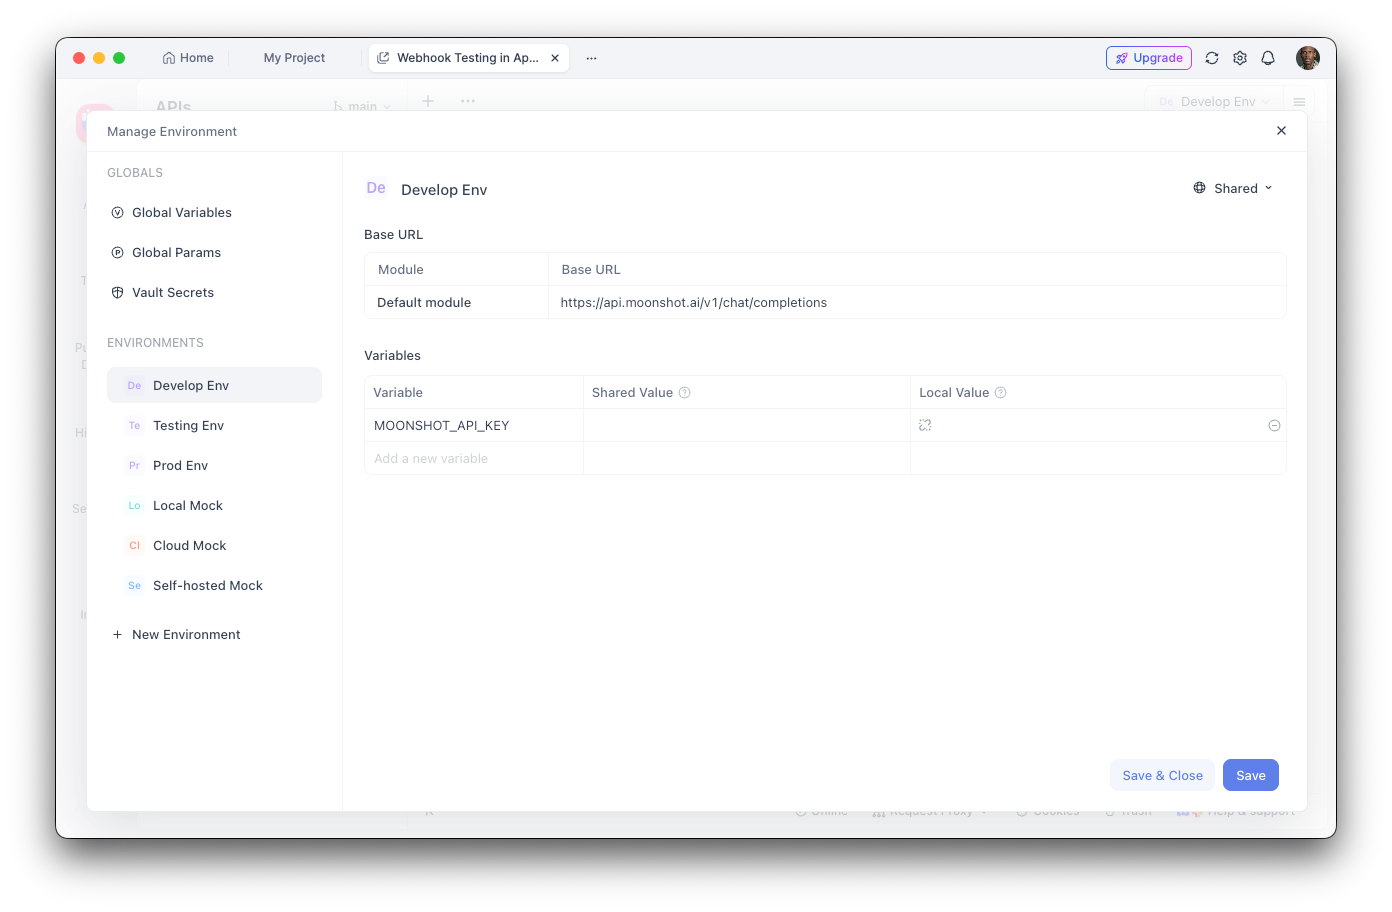
Step 2: Configure Environment Variables
- Navigate to Environment Settings
- Add a new environment variable:
- Name:
MOONSHOT_API_KEY - Value: Your API key
- Mark as "Sensitive" to hide the value
Step 3: Create the Chat Completions Endpoint
- Add a new POST request
- URL:
https://api.moonshot.ai/v1/chat/completions - Headers:
Authorization:Bearer {{MOONSHOT_API_KEY}}Content-Type:application/json

Step 4: Configure the Request Body
{
  "model": "kimi-k2.5-preview",
  "messages": [
    {
      "role": "system",
      "content": "You are a helpful AI assistant."
    },
    {
      "role": "user",
      "content": "Hello, how can you help me today?"
    }
  ],
  "temperature": 0.6,
  "max_tokens": 2048,
  "stream": false
}
Debugging with Apidog
Apidog's visual interface helps you:
- Inspect response structure: See the full JSON response with syntax highlighting
- Measure latency: Track response times for performance optimization
- View headers: Debug authentication and rate limit issues
- Save test cases: Create reusable request collections for regression testing
- Generate code: Export working code in Python, JavaScript, cURL, and more
Creating Automated Tests
With Apidog's test runner, you can verify your Kimi K2.5 integration:
// Post-response test script in Apidog
pm.test("Response status is 200", function () {
    pm.response.to.have.status(200);
});

pm.test("Response contains choices", function () {
    const response = pm.response.json();
    pm.expect(response.choices).to.be.an('array');
    pm.expect(response.choices.length).to.be.greaterThan(0);
});

pm.test("Response content is not empty", function () {
    const response = pm.response.json();
    pm.expect(response.choices[0].message.content).to.not.be.empty;
});
Tool Calling and Agent Capabilities
One of Kimi K2.5's most powerful features is its ability to call external tools. This enables building sophisticated AI agents that can interact with external systems.
Defining Tools
import os
from openai import OpenAI

client = OpenAI(
    api_key=os.environ.get("MOONSHOT_API_KEY"),
    base_url="https://api.moonshot.ai/v1",
)

# Define available tools
tools = [
    {
        "type": "function",
        "function": {
            "name": "get_weather",
            "description": "Get the current weather for a location",
            "parameters": {
                "type": "object",
                "properties": {
                    "location": {
                        "type": "string",
                        "description": "City and country, e.g., 'London, UK'"
                    },
                    "unit": {
                        "type": "string",
                        "enum": ["celsius", "fahrenheit"],
                        "description": "Temperature unit"
                    }
                },
                "required": ["location"]
            }
        }
    },
    {
        "type": "function",
        "function": {
            "name": "search_database",
            "description": "Search a database for information",
            "parameters": {
                "type": "object",
                "properties": {
                    "query": {
                        "type": "string",
                        "description": "Search query"
                    },
                    "limit": {
                        "type": "integer",
                        "description": "Maximum number of results"
                    }
                },
                "required": ["query"]
            }
        }
    }
]

# Make a request with tools
response = client.chat.completions.create(
    model="kimi-k2.5-preview",
    messages=[
        {"role": "user", "content": "What's the weather like in Tokyo?"}
    ],
    tools=tools,
    tool_choice="auto",
)

# Handle tool calls
if response.choices[0].message.tool_calls:
    for tool_call in response.choices[0].message.tool_calls:
        print(f"Tool: {tool_call.function.name}")
        print(f"Arguments: {tool_call.function.arguments}")
Executing Tool Calls
import json

def execute_tool_call(tool_call):
    """Execute a tool call and return the result."""
    name = tool_call.function.name
    args = json.loads(tool_call.function.arguments)

    if name == "get_weather":
        # Simulate weather API call
        return json.dumps({
            "location": args["location"],
            "temperature": 22,
            "unit": args.get("unit", "celsius"),
            "condition": "sunny"
        })
    elif name == "search_database":
        # Simulate database search
        return json.dumps({
            "results": [
                {"id": 1, "title": "Result 1"},
                {"id": 2, "title": "Result 2"}
            ]
        })

    return json.dumps({"error": "Unknown tool"})

# Complete the conversation with tool results
messages = [
    {"role": "user", "content": "What's the weather in Tokyo?"}
]

response = client.chat.completions.create(
    model="kimi-k2.5-preview",
    messages=messages,
    tools=tools,
)

if response.choices[0].message.tool_calls:
    # Add assistant message with tool calls
    messages.append(response.choices[0].message)

    # Execute each tool and add results
    for tool_call in response.choices[0].message.tool_calls:
        result = execute_tool_call(tool_call)
        messages.append({
            "role": "tool",
            "tool_call_id": tool_call.id,
            "content": result
        })

    # Get final response
    final_response = client.chat.completions.create(
        model="kimi-k2.5-preview",
        messages=messages,
        tools=tools,
    )

    print(final_response.choices[0].message.content)
Vision and Multimodal Features
K2.5's native multimodal capabilities allow processing images alongside text:
import os
import base64
from openai import OpenAI

client = OpenAI(
    api_key=os.environ.get("MOONSHOT_API_KEY"),
    base_url="https://api.moonshot.ai/v1",
)

def encode_image(image_path):
    """Encode image to base64."""
    with open(image_path, "rb") as image_file:
        return base64.b64encode(image_file.read()).decode("utf-8")

# Analyze an image
image_base64 = encode_image("screenshot.png")

response = client.chat.completions.create(
    model="kimi-k2.5-preview",
    messages=[
        {
            "role": "user",
            "content": [
                {
                    "type": "text",
                    "text": "Analyze this UI design and suggest improvements."
                },
                {
                    "type": "image_url",
                    "image_url": {
                        "url": f"data:image/png;base64,{image_base64}"
                    }
                }
            ]
        }
    ],
    max_tokens=2048,
)

print(response.choices[0].message.content)
Code Generation from Visual Input
# Generate code from a wireframe
response = client.chat.completions.create(
    model="kimi-k2.5-preview",
    messages=[
        {
            "role": "system",
            "content": "You are an expert frontend developer. Generate clean, production-ready code."
        },
        {
            "role": "user",
            "content": [
                {
                    "type": "text",
                    "text": "Convert this wireframe into a React component with Tailwind CSS styling."
                },
                {
                    "type": "image_url",
                    "image_url": {
                        "url": f"data:image/png;base64,{encode_image('wireframe.png')}"
                    }
                }
            ]
        }
    ],
    temperature=0.3,
)

print(response.choices[0].message.content)
Pricing and Rate Limits
Key points:
- Free tier includes 1.5M tokens/day
- Tier 1+ has unlimited daily tokens
- Token caching is automatic with no configuration needed
- Web search costs an additional $0.005 per call
Best Practices and Tips
Optimize Token Usage
# Use system prompts efficiently
system_prompt = """You are a concise technical assistant.
Rules: 1) Be brief 2) Use code blocks 3) Skip pleasantries"""

# Enable caching for repeated contexts
# Moonshot automatically caches similar prompts
Temperature Settings
- 0.0-0.3: Code generation, factual responses
- 0.4-0.6: Balanced creativity and accuracy
- 0.7-1.0: Creative writing, brainstorming
Error Handling
from openai import OpenAI, APIError, RateLimitError

client = OpenAI(
    api_key=os.environ.get("MOONSHOT_API_KEY"),
    base_url="https://api.moonshot.ai/v1",
)

def safe_chat(message, retries=3):
    for attempt in range(retries):
        try:
            response = client.chat.completions.create(
                model="kimi-k2.5-preview",
                messages=[{"role": "user", "content": message}],
            )
            return response.choices[0].message.content
        except RateLimitError:
            if attempt < retries - 1:
                time.sleep(2 ** attempt)  # Exponential backoff
            else:
                raise
        except APIError as e:
            print(f"API Error: {e}")
            raise

result = safe_chat("Hello, Kimi!")
Troubleshooting Common Issues
Authentication Errors
Problem: 401 Unauthorized error
Solutions:
- Verify your API key is correct
- Check that the key hasn't expired
- Ensure the
Authorizationheader format is correct:Bearer YOUR_KEY
Rate Limiting
Problem: 429 Too Many Requests
Solutions:
- Implement exponential backoff
- Upgrade your tier by adding funds
- Monitor
X-RateLimit-Remainingheaders
Context Length Exceeded
Problem: Request exceeds 256K token limit
Solutions:
- Summarize long conversations
- Use a sliding window approach
- Split into multiple requests
Timeout Issues
Problem: Requests timing out
Solutions:
- Use streaming for long responses
- Increase client timeout settings
- Break complex prompts into smaller tasks
Ready to build with Kimi K2.5? Download Apidog to streamline your API development workflow with visual testing, automatic documentation, and team collaboration features that make integrating AI APIs faster and more reliable.