
Modern AI development increasingly depends on integrating large language models (LLMs) with external tools and real-time data. The Model Context Protocol (MCP) offers a standardized way for LLMs to securely access APIs, functions, and resources during conversations. This guide will show backend engineers and API developers how to build a robust Java MCP server using the official Java SDK—enabling seamless AI-to-API connectivity for your applications.
What Is a Java MCP Server? (And Why Build One)
An MCP server acts as a bridge between AI clients (like LLMs) and custom tools, APIs, or datasets. By exposing tools, resources, and interaction prompts, MCP servers empower AI agents to:
- Invoke domain-specific functions on demand
- Fetch structured or real-time data (e.g., user info, database results)
- Leverage custom prompts for dynamic interactions
A Java MCP server using the official SDK provides:
- Tool Registration: Expose API operations to AI clients
- Resource Sharing: Supply structured data or context
- Transport Flexibility: Support for STDIO, HTTP/SSE, and more
- Concurrency Management: Handle multiple requests reliably
- Easy Extensibility: Add custom hooks, security, and integrations
Prerequisites: Setting Up Your Java MCP Environment
Before creating your MCP server, ensure you have:
- Java 24 (Download from Oracle)
- Maven 3.8+ (Get Maven)
- IntelliJ IDEA (or preferred IDE, Get IntelliJ)
- Node.js (Install Node.js) — needed for MCP Inspector testing
- Claude Desktop or Cursor (optional, for advanced AI integration)
Step 1: Start Your Java MCP Project
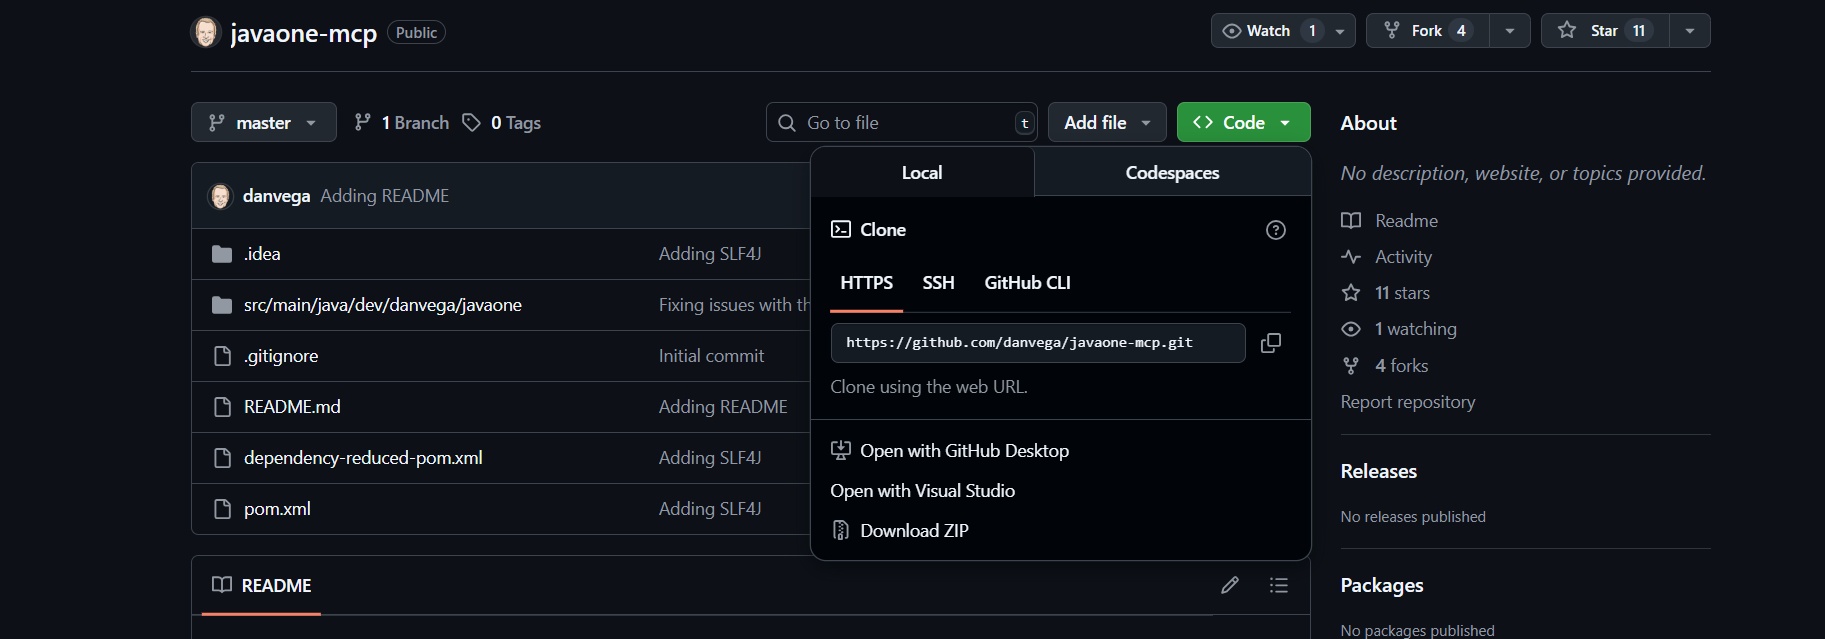
Option A: Clone the Example Repository (Recommended)
-
Open your terminal and run:
git clone https://github.com/danvega/javaone-mcp.git cd javaone-mcp -
Build the project with Maven:
mvn clean packageThe executable JAR will be in
target/javaone-mcp-0.0.2.jar.
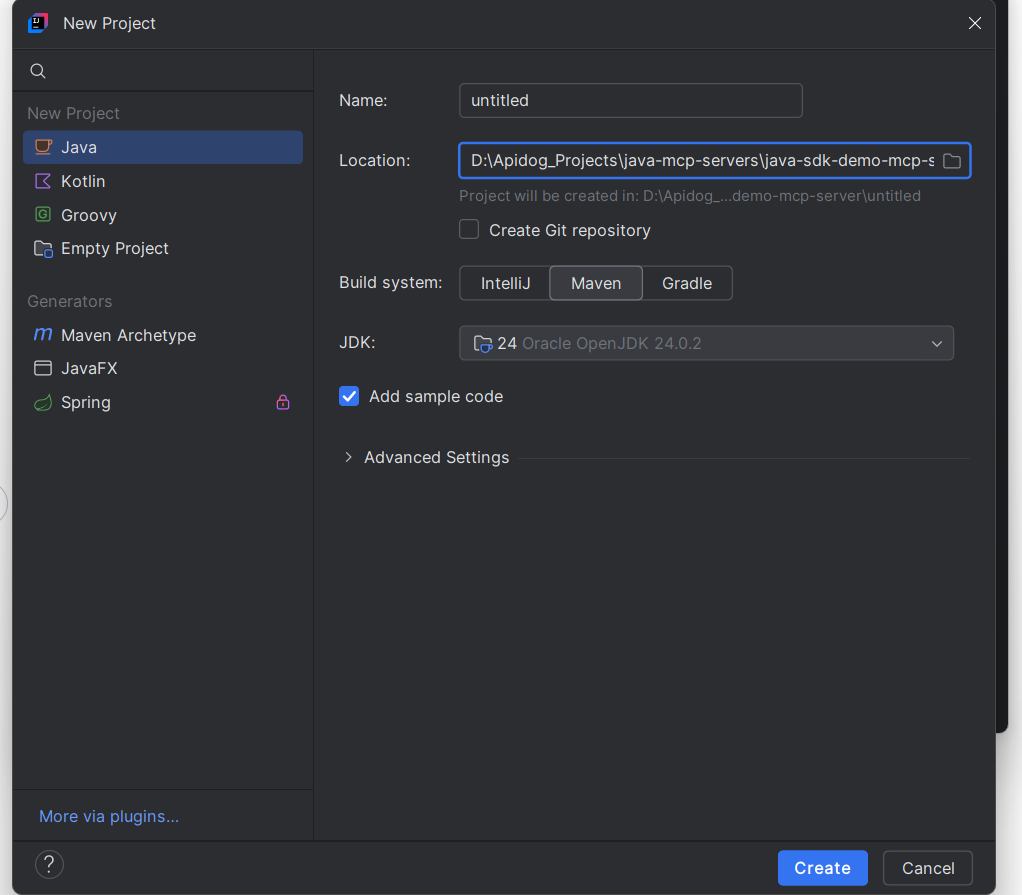
Option B: Create a Project from Scratch
- Launch IntelliJ IDEA and create a New Project using Maven.
- Set your project name (e.g.,
java-mcp-server) and confirm.
- Open your
pom.xmland add dependencies:<dependencies> <!-- MCP SDK --> <dependency> <groupId>io.modelcontextprotocol.sdk</groupId> <artifactId>mcp</artifactId> <version>0.9.0</version> </dependency> <!-- Logging --> <dependency> <groupId>org.slf4j</groupId> <artifactId>slf4j-api</artifactId> <version>2.0.16</version> </dependency> <dependency> <groupId>org.slf4j</groupId> <artifactId>slf4j-simple</artifactId> <version>2.0.16</version> </dependency> </dependencies>
Step 2: Explore the Project Structure
The sample project includes:
Application.java: Main entry point and server configurationPresentation.java: Data model for game or presentation dataPresentationTools.java: Contains MCP tool definitions and logic- Configuration for STDIO (default) transport

Step 3: Define Your Data Model
Create a minimal record for your data, for example, presentations or games:
public record Presentation(String title, String url) { }
This holds two fields: title (e.g., "GTA 6") and url.
Step 4: Implement MCP Tools
Define your MCP tools in PresentationTools.java so AI clients can query available data:
import io.modelcontextprotocol.sdk.McpSchema;
import java.util.ArrayList;
import java.util.List;

public class PresentationTools {
    private final List<Presentation> presentations = new ArrayList<>();

    public PresentationTools() {
        presentations.add(new Presentation("GTA 6", "https://example.com/gta6"));
        presentations.add(new Presentation("FC 26", "https://example.com/fc26"));
        presentations.add(new Presentation("Call of Duty: Black Ops 7", "https://example.com/codbo7"));
    }

    @McpSchema.Tool(name = "get_presentations", description = "Returns a list of all available games")
    public List<Presentation> getPresentations() {
        return presentations;
    }

    @McpSchema.Tool(name = "get_game", description = "Returns a specific game by title")
    public Presentation getGame(String title) {
        return presentations.stream()
            .filter(p -> p.title().equalsIgnoreCase(title))
            .findFirst()
            .orElse(null);
    }
}
These methods empower AI clients to fetch all games or query by title.
Step 5: Configure and Launch the MCP Server
Set up your main application in Application.java:
import io.modelcontextprotocol.sdk.McpServer;
import io.modelcontextprotocol.sdk.McpSchema;
import io.modelcontextprotocol.sdk.McpSyncServer;

public class Application {
    public static void main(String[] args) {
        PresentationTools tools = new PresentationTools();
        var syncToolSpecification = new McpServerFeatures.SyncToolSpecification(
            new McpSchema.Tool("get_presentations", "Returns a list of all available games", null),
            (exchange, arguments) -> tools.getPresentations()
        );

        McpSyncServer syncServer = McpServer.sync(new StdioTransportProvider())
            .serverInfo("javaone-mcp-server", "0.0.1")
            .capabilities(McpSchema.ServerCapabilities.builder().tools(true).logging().build())
            .tools(syncToolSpecification)
            .build();

        syncServer.start();
    }
}
This registers the get_presentations tool and starts the server with STDIO transport.
Step 6: Build and Run Your Java MCP Server
- Build the project:
mvn clean package
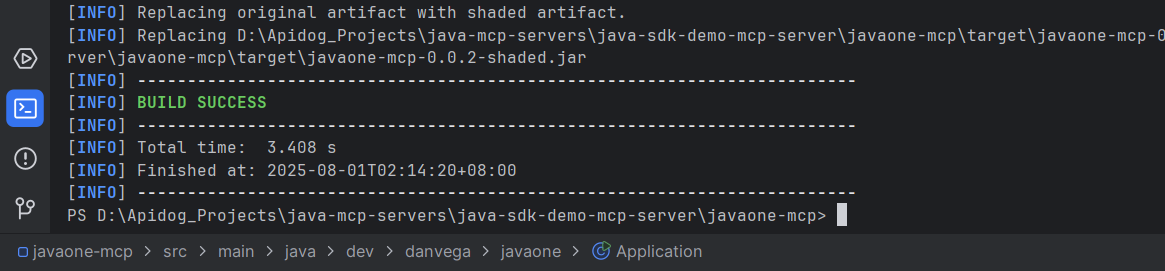
- Start the server:
Your server is now running and ready for AI integration.java -jar target/javaone-mcp-0.0.2.jar
Step 7: Test with MCP Inspector
The MCP Inspector helps debug and validate your server.
- Get the full JAR path:
- Linux/macOS:
FULL_PATH=$(pwd)/target/javaone-mcp-0.0.2.jar echo $FULL_PATH - Windows PowerShell:
$FULL_PATH="$(Get-Location)\target\javaone-mcp-0.0.2.jar"
echo $FULL_PATH
- Linux/macOS:
- Launch MCP Inspector:
npx @modelcontextprotocol/inspector java -jar $FULL_PATH - In the Inspector UI:
- Confirm connection
- Under Tools, select
get_presentationsand view the live JSON response - Use the Notifications pane for logs
Step 8: Connect to AI Clients (Claude Desktop or Cursor)
Integrate your Java MCP server with advanced AI clients:
-
Claude Desktop:
- Edit
claude_desktop_config.json(macOS:~/Library/Application Support/Claude, Windows:%APPDATA%\Claude) - Add:
Replace{ "mcpServers": { "javaone-mcp": { "command": "java", "args": ["-jar", "FULL_PATH"] } } }FULL_PATHwith your JAR path.
- Edit
-
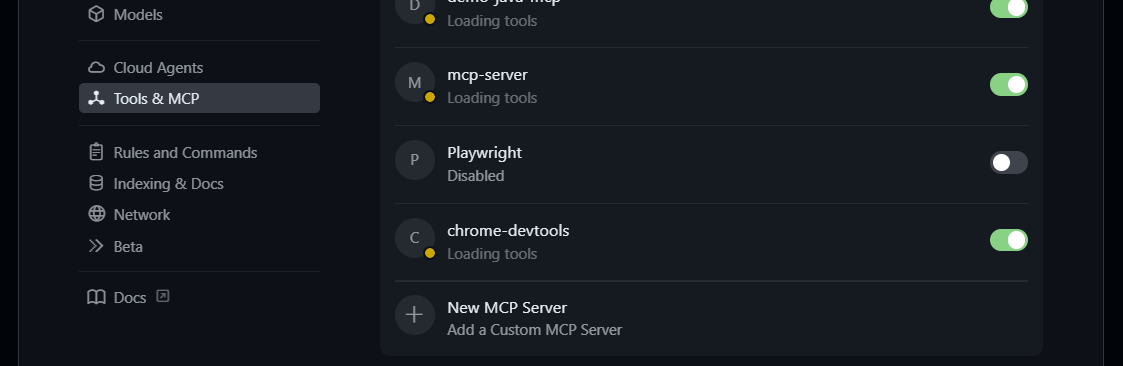
Cursor:
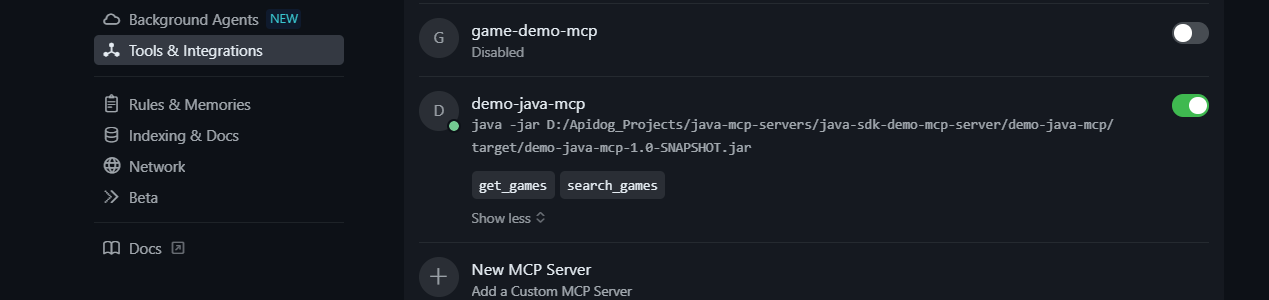
- Go to: Settings → Cursor Settings → Tools & MCP → New MCP Server
- Add the same config and save.
-
Restart Claude or Cursor to detect the new MCP server.
Step 9: Validate Integration
- Start the server:
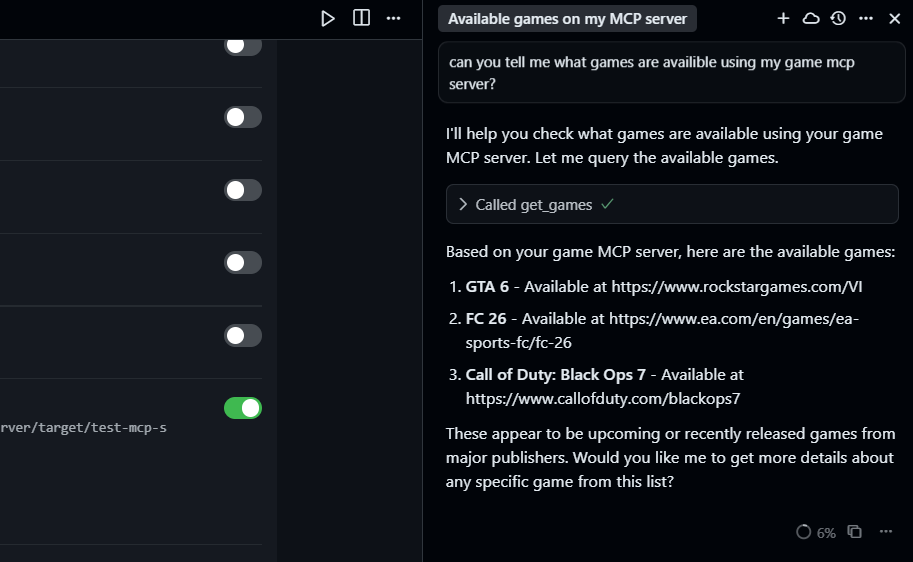
java -jar target/javaone-mcp-0.0.2.jar - In Claude or Cursor, use a command like:
Using the MCP server, get all available games. - Expected Response:
The available games are GTA 6, FC 26, and Call of Duty: Black Ops 7.
Step 10: Extend Your Java MCP Server for More Power
1. Add More Data
Enhance PresentationTools.java:
presentations.add(new Presentation("Spring Boot 3.5 Deep Dive", "https://example.com/spring-boot", 2025));
2. Implement Search
Add a search tool:
@McpSchema.Tool(name = "search_presentations", description = "Search presentations by title")
public List<Presentation> searchPresentations(String query) {
    return presentations.stream()
        .filter(p -> p.title().toLowerCase().contains(query.toLowerCase()))
        .collect(Collectors.toList());
}
Register the search tool in Application.java:
var searchToolSpec = new McpServerFeatures.SyncToolSpecification(
    new McpSchema.Tool("search_presentations", "Search presentations by title", null),
    (exchange, arguments) -> {
        String query = arguments.get("query").asText();
        return tools.searchPresentations(query);
    }
);

McpSyncServer syncServer = McpServer.sync(new StdioTransportProvider())
    .serverInfo("javaone-mcp-server", "0.0.1")
    .capabilities(McpSchema.ServerCapabilities.builder().tools(true).logging().build())
    .tools(syncToolSpecification, searchToolSpec)
    .build();
Try a search command:
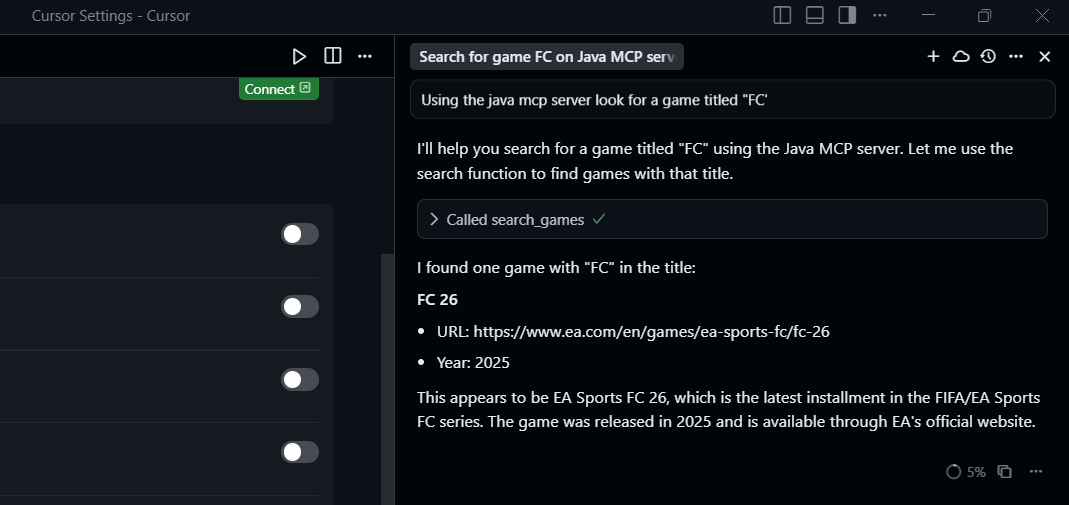
- Query:
Search for a game titled "FC". - Expected:
You have a game titled FC 26.
3. Go Further: Advanced Features
- Add resource subscriptions for real-time data
- Implement asynchronous tools for long-running tasks
- Integrate authentication (see below)
Troubleshooting Common Issues
- Server won’t start? Double-check Java/Maven versions and
pom.xmldependencies. - MCP Inspector errors? Ensure Node.js is installed and the JAR path is correct.
- AI client not connecting? Validate the JAR path in client config and restart the client.
- No data returned? Confirm tool annotations and proper data initialization in
PresentationTools.
Security & Authorization
The Java MCP SDK is security-agnostic by default, letting you connect your preferred security solution (Spring Security, JWT, etc.) for fine-grained access control. Use SDK hooks to enforce custom authorization or integrate with your enterprise policies.
Ensuring Quality: Testing Your MCP Server
For a production-ready MCP server:
- Write unit/integration tests for each tool
- Validate transport layers (idle timeouts, concurrency)
- Use structured logging for metadata tracking
- Integrate metrics/tracing (e.g., with Micrometer)
Apidog: API Testing for MCP-Driven Workflows
MCP servers often work alongside classic REST, GraphQL, or WebSocket APIs. While MCP is for AI-to-tool communication, Apidog helps you ensure your API endpoints remain robust as your system evolves.
With Apidog you can:
- Generate automated API test cases
- Run contract/validation tests for all endpoints
- Simulate API calls for regression and integration scenarios
This lets you confidently expose your APIs for both human and AI clients, ensuring reliability across your MCP-integrated architecture.
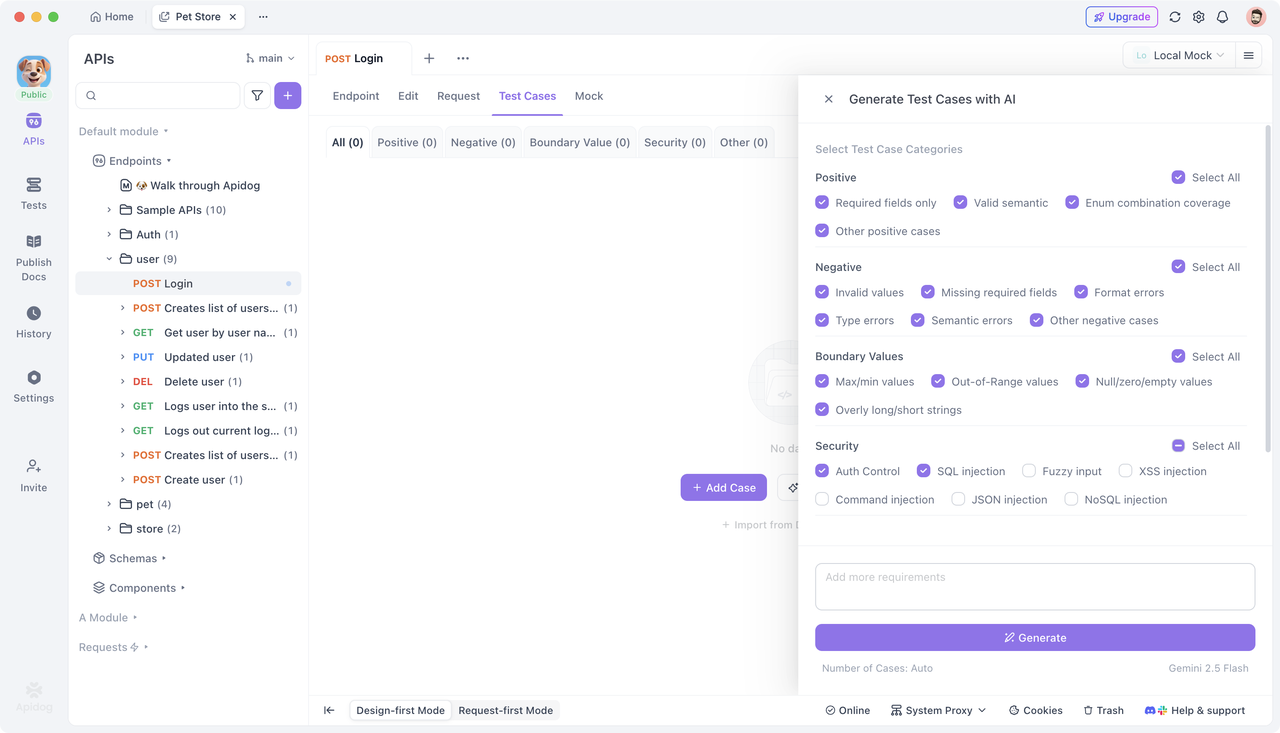
Automated API Test Case Generation in Apidog
Frequently Asked Questions
Q1. What is MCP?
MCP (Model Context Protocol) standardizes communication between AI clients and servers exposing tools/data.
Q2. Which Java versions are supported?
Java 17 or higher is required for the official Java MCP SDK.
Q3. How do clients connect to the MCP server?
Via STDIO or streaming protocols like SSE or HTTP streaming.
Q4. Can MCP servers coexist with existing web APIs?
Yes. MCP endpoints can run alongside REST/GraphQL APIs on shared infrastructure.
Q5. Do I need Spring for MCP?
No. Pure Java or lightweight transport layers work; Spring integration is optional.
Conclusion
Building a Java MCP server with the Java SDK allows API teams and backend engineers to expose powerful capabilities directly to AI agents, transforming how business logic and data are accessed in modern applications. By following these steps, you can quickly develop, test, and extend your MCP server for real-world AI workflows.
For comprehensive API quality and contract validation, integrate Apidog into your workflow—ensuring all your endpoints (MCP and classic APIs) deliver reliable, secure, and testable results for both human and AI clients.


