
In today’s digital landscape, web development relies heavily on the ability to integrate external data and functionality. APIs (Application Programming Interfaces) serve as essential bridges between different software applications, enabling them to communicate and share data seamlessly. This article explores how to effectively integrate APIs into your web development workflow, with a focus on using Apidog to streamline the process.
Understanding APIs and Their Benefits
APIs allow different software applications to communicate with each other, facilitating data exchange and functionality sharing. By integrating APIs into your website, you can:
- Enhance Functionality: APIs enable developers to leverage pre-built features and services, such as payment gateways, social media sharing, and mapping services, to expand the capabilities of their websites.
- Improve User Experience: By fetching real-time data from APIs, you can deliver dynamic and interactive experiences. For example, displaying live weather updates or stock prices can engage users and keep them informed.
- Reduce Development Time: Integrating with existing APIs saves time and resources that would otherwise be spent on developing custom solutions. This allows developers to focus on core features instead.
- Increase Scalability: Well-designed APIs can accommodate increased data flow and new integrations without significant modifications, making it easier to expand and enhance web applications.
- Foster Innovation: APIs enable developers to experiment with new ideas and features without extensive backend development, encouraging creativity and rapid prototyping.
Types of APIs
Understanding the different types of APIs can help you choose the right one for your project. Here are some common types of APIs:
1. Web APIs
Web APIs are designed to be accessed over the internet using standard protocols like HTTP. They are commonly used to interact with web services, allowing developers to retrieve and manipulate data. Examples include RESTful APIs and GraphQL APIs.
2. Library APIs
Library APIs provide a set of functions and procedures for developers to use within their applications. These APIs are often part of programming libraries or frameworks, enabling developers to leverage existing code for common tasks.
3. Operating System APIs
Operating system APIs allow applications to interact with the underlying operating system. These APIs provide access to system resources, such as file management, memory management, and hardware interaction.
4. Database APIs
Database APIs enable applications to communicate with databases, allowing for data retrieval, insertion, and manipulation. Common database APIs include SQL-based APIs and NoSQL APIs.
5. Remote APIs
Remote APIs allow applications to interact with services hosted on remote servers. These APIs are often used in cloud computing and microservices architectures, enabling seamless communication between distributed systems.
Steps for API Integration
To effectively integrate APIs into your website development process, follow these steps:
Step 1: Choose the Right API
Selecting the right API is crucial for the success of your integration. Consider the following factors when choosing an API:
- Documentation: Ensure the API has comprehensive and clear documentation. Well-documented APIs are easier to integrate and troubleshoot.
- Functionality: Verify that the API provides the features you need. Make a list of the specific functionalities you want to implement.
- Reliability: Check the API's uptime and performance history. A reliable API is essential for maintaining a smooth user experience.
- Security: Look for secure authentication methods and data protection measures. APIs that handle sensitive data should have robust security protocols in place.
Step 2: Set Up Your Development Environment
Before integrating an API, ensure that your development environment is set up correctly. This includes:
- Choosing a Frontend Framework: Select a frontend framework that suits your project needs, such as React, Angular, or Vue.js.
- Installing Necessary Libraries: Install libraries for making HTTP requests, such as Axios or Fetch API. These libraries simplify the process of interacting with APIs.
Step 3: Implement API Calls
Once your environment is set up, you can start implementing API calls. Here’s an example using Axios in a React application to fetch weather data:
import React, { useEffect, useState } from 'react';
import axios from 'axios';

const WeatherWidget = () => {
  const [weatherData, setWeatherData] = useState(null);
  const [error, setError] = useState(null);

  useEffect(() => {
    const fetchWeatherData = async () => {
      try {
        const response = await axios.get('https://api.openweathermap.org/data/2.5/weather', {
          params: {
            q: 'New York',
            appid: 'YOUR_API_KEY',
            units: 'metric',
          },
        });
        setWeatherData(response.data);
      } catch (error) {
        setError('Error fetching weather data');
        console.error('Error fetching weather data:', error);
      }
    };

    fetchWeatherData();
  }, []);

  if (error) return <div>{error}</div>;
  if (!weatherData) return <div>Loading...</div>;

  return (
    <div>
      <h2>Current Weather in New York</h2>
      <p>Temperature: {weatherData.main.temp}°C</p>
      <p>Description: {weatherData.weather[0].description}</p>
    </div>
  );
};

export default WeatherWidget;
Step 4: Handle Errors and Edge Cases
Robust error handling is essential for managing API failures and unexpected responses. Implement error boundaries in your application to catch errors and provide meaningful feedback to users. For example:
if (error) {
  return <div>Error fetching data. Please try again later.</div>;
}
Step 5: Test and Optimize
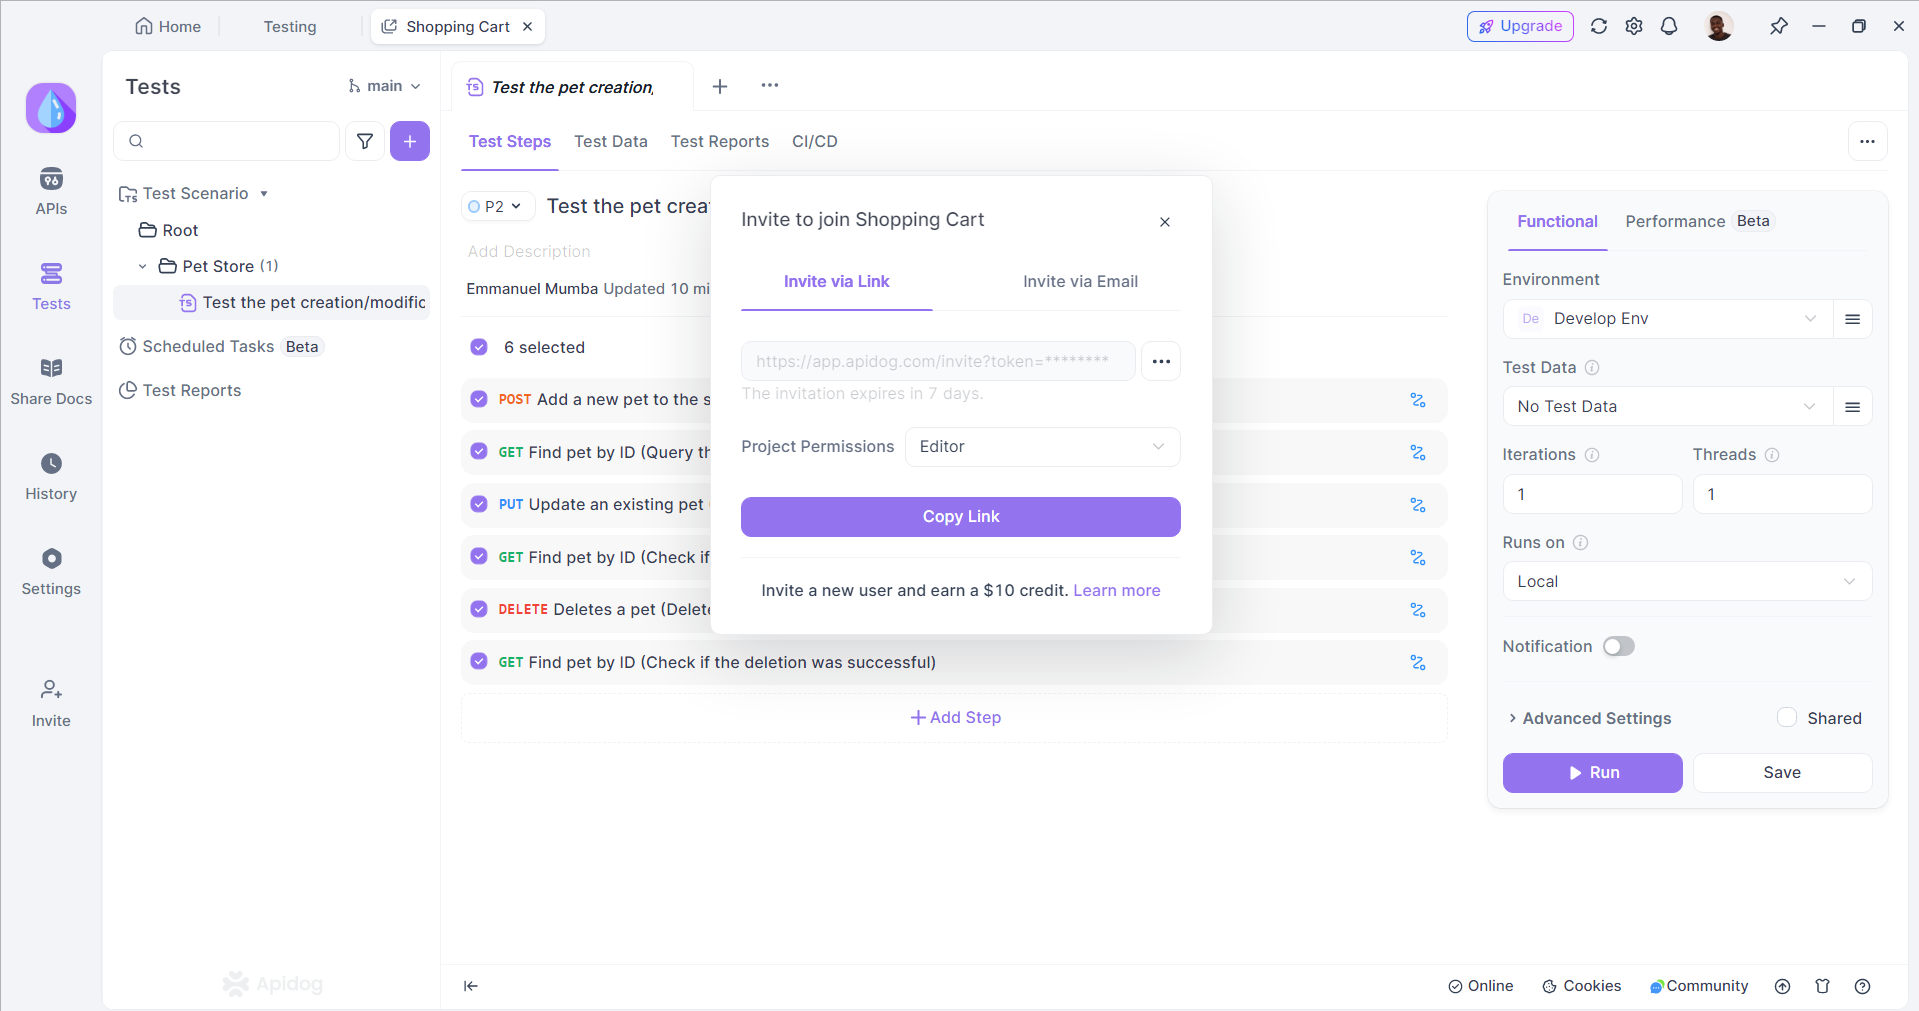
Thoroughly test your API integrations to ensure they work as expected. Use tools like Apidog to test API endpoints and validate responses. Apidog provides a user-friendly platform for testing and mocking APIs, allowing you to simulate various scenarios and ensure your application handles them gracefully.
Streamlining API Integration with Apidog
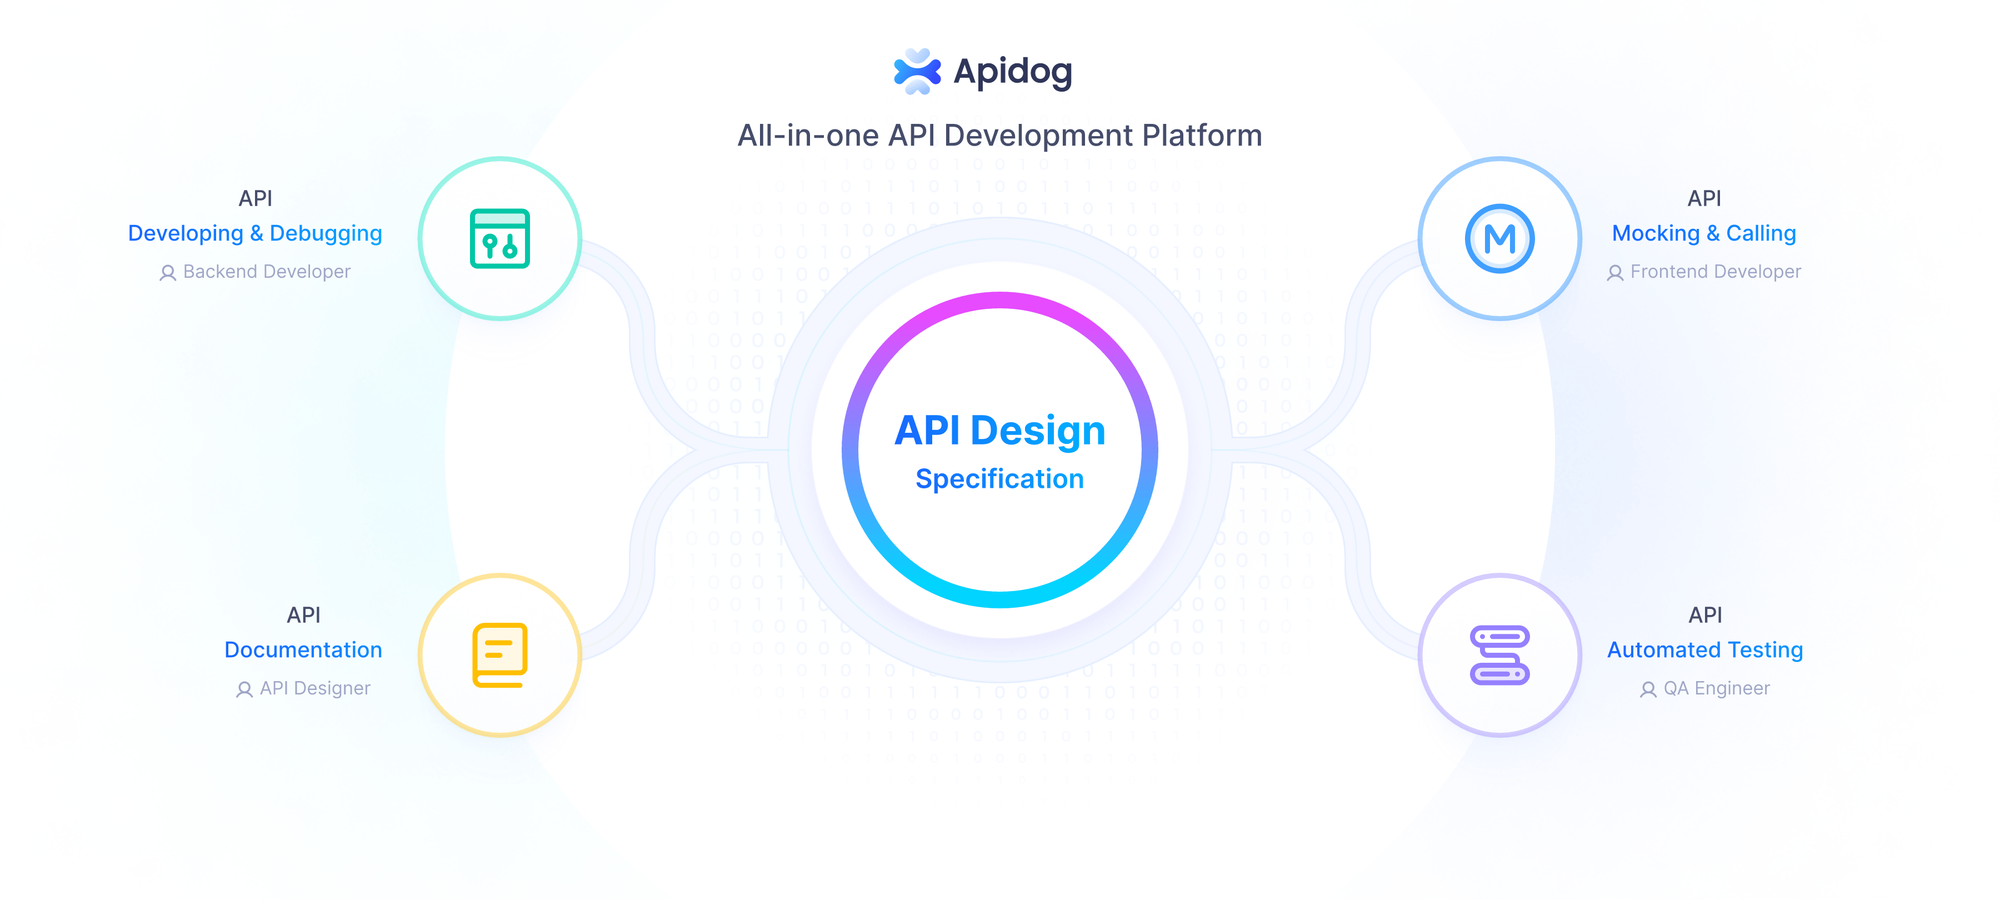
While integrating APIs can be a powerful way to enhance your website, managing multiple APIs can quickly become complex. This is where Apidog comes into play. Apidog is a comprehensive API development platform that simplifies the process of designing, testing, and documenting APIs.
Key Features of Apidog
- Visual API Design: Apidog's design-first approach allows you to quickly set up APIs with the desired characteristics, such as HTTP methods, endpoints, and parameters. This visual representation helps ensure that all stakeholders are aligned on the API's functionality.
- Testing and Mocking: Apidog provides a user-friendly interface for testing API endpoints and mocking responses. This enables you to develop and debug your website's API integrations more efficiently. You can simulate various scenarios and ensure your application handles them gracefully.
- Automated Documentation: Apidog automatically generates comprehensive API documentation, ensuring that your team and any external partners have access to the latest information about your website's API integrations. This documentation is essential for onboarding new developers and maintaining consistency.
- Collaboration Features: Apidog facilitates better communication and collaboration among developers by providing a centralized platform for managing API specifications and documentation. Team members can leave comments, suggest changes, and track revisions, making it easier to work together on API projects.
- Version Control: Apidog allows you to manage different versions of your APIs, making it easier to introduce changes without breaking existing integrations. This feature is especially useful when working on large projects with multiple teams.
Using Apidog in Your Development Workflow
Integrating Apidog into your development workflow can enhance your API management process. Here’s how to effectively use Apidog alongside your website development:
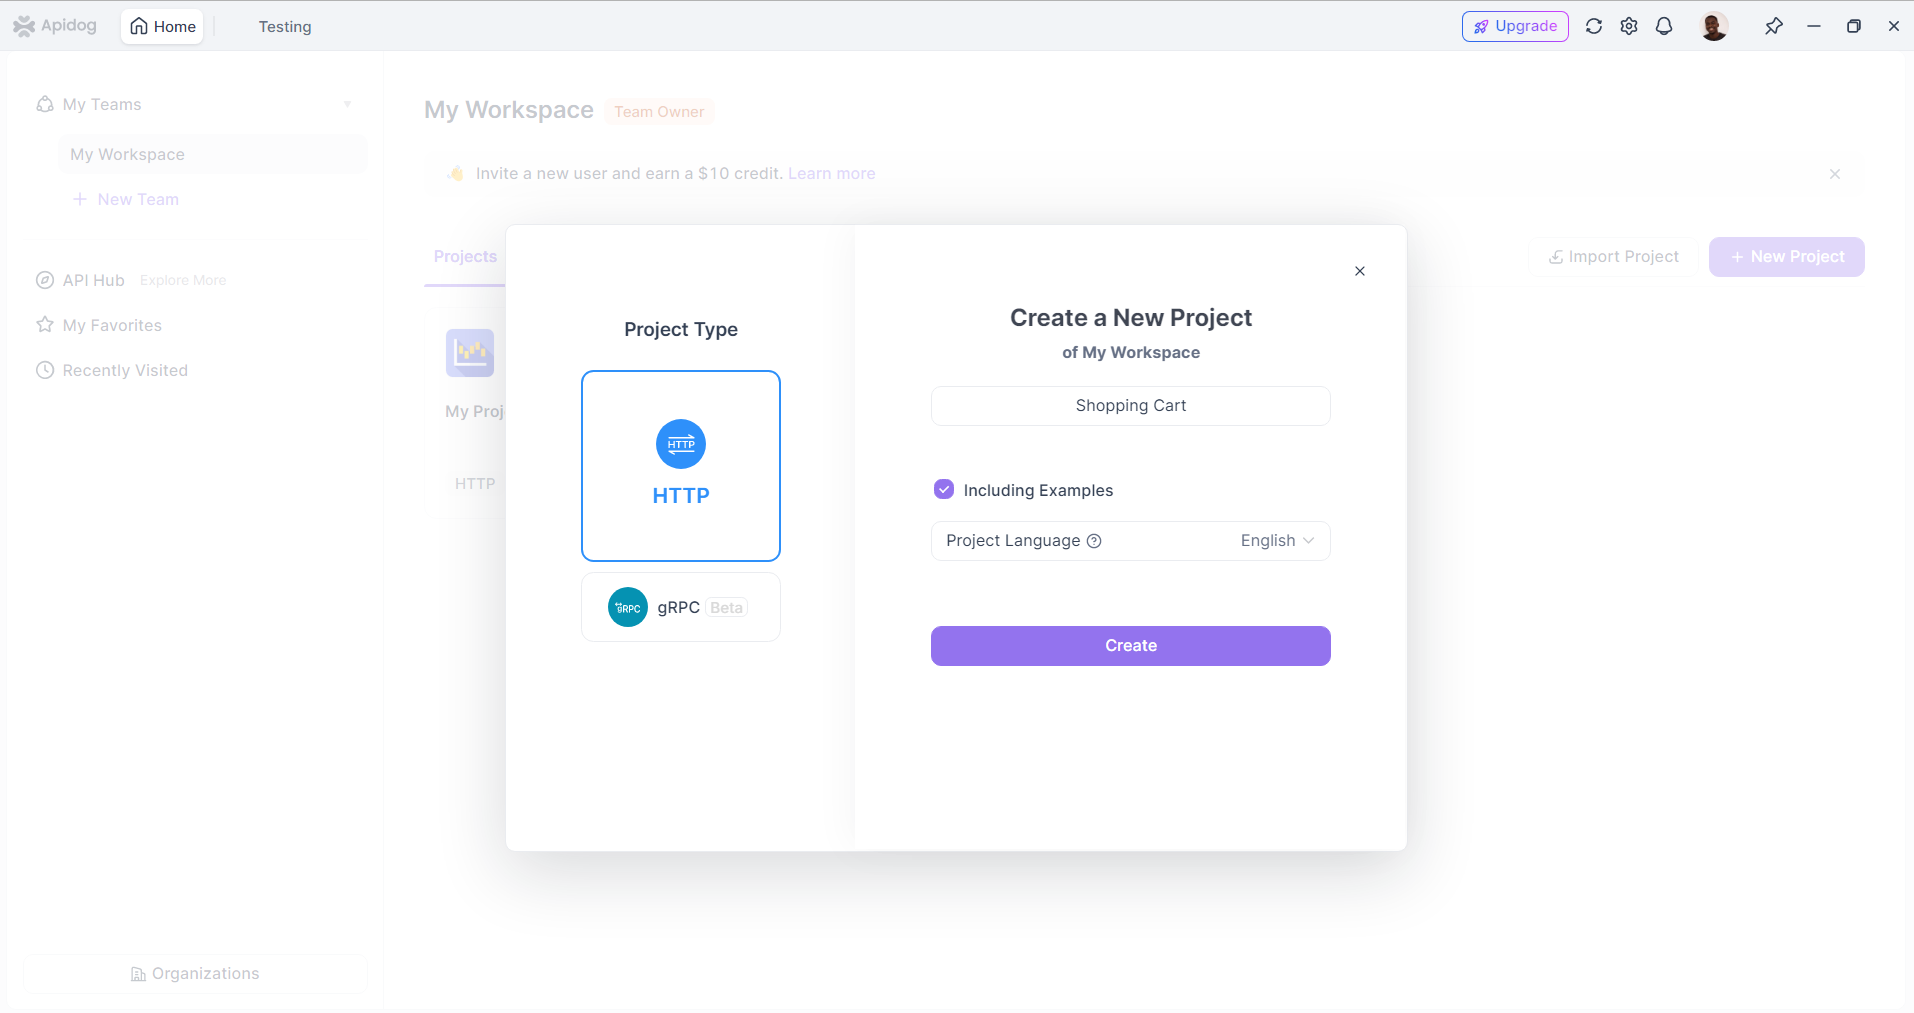
Step 1: Define Your API Specifications
Start by defining your API specifications in Apidog. Create a new API project and outline the endpoints, request parameters, and response formats. This documentation will serve as a reference for your development team.
Step 2: Generate Mock Responses
Use Apidog to generate mock responses for your API endpoints. This allows you to test your frontend application without relying on the actual API, which may be under development or unavailable. Mocking responses helps you identify issues early in the development process.
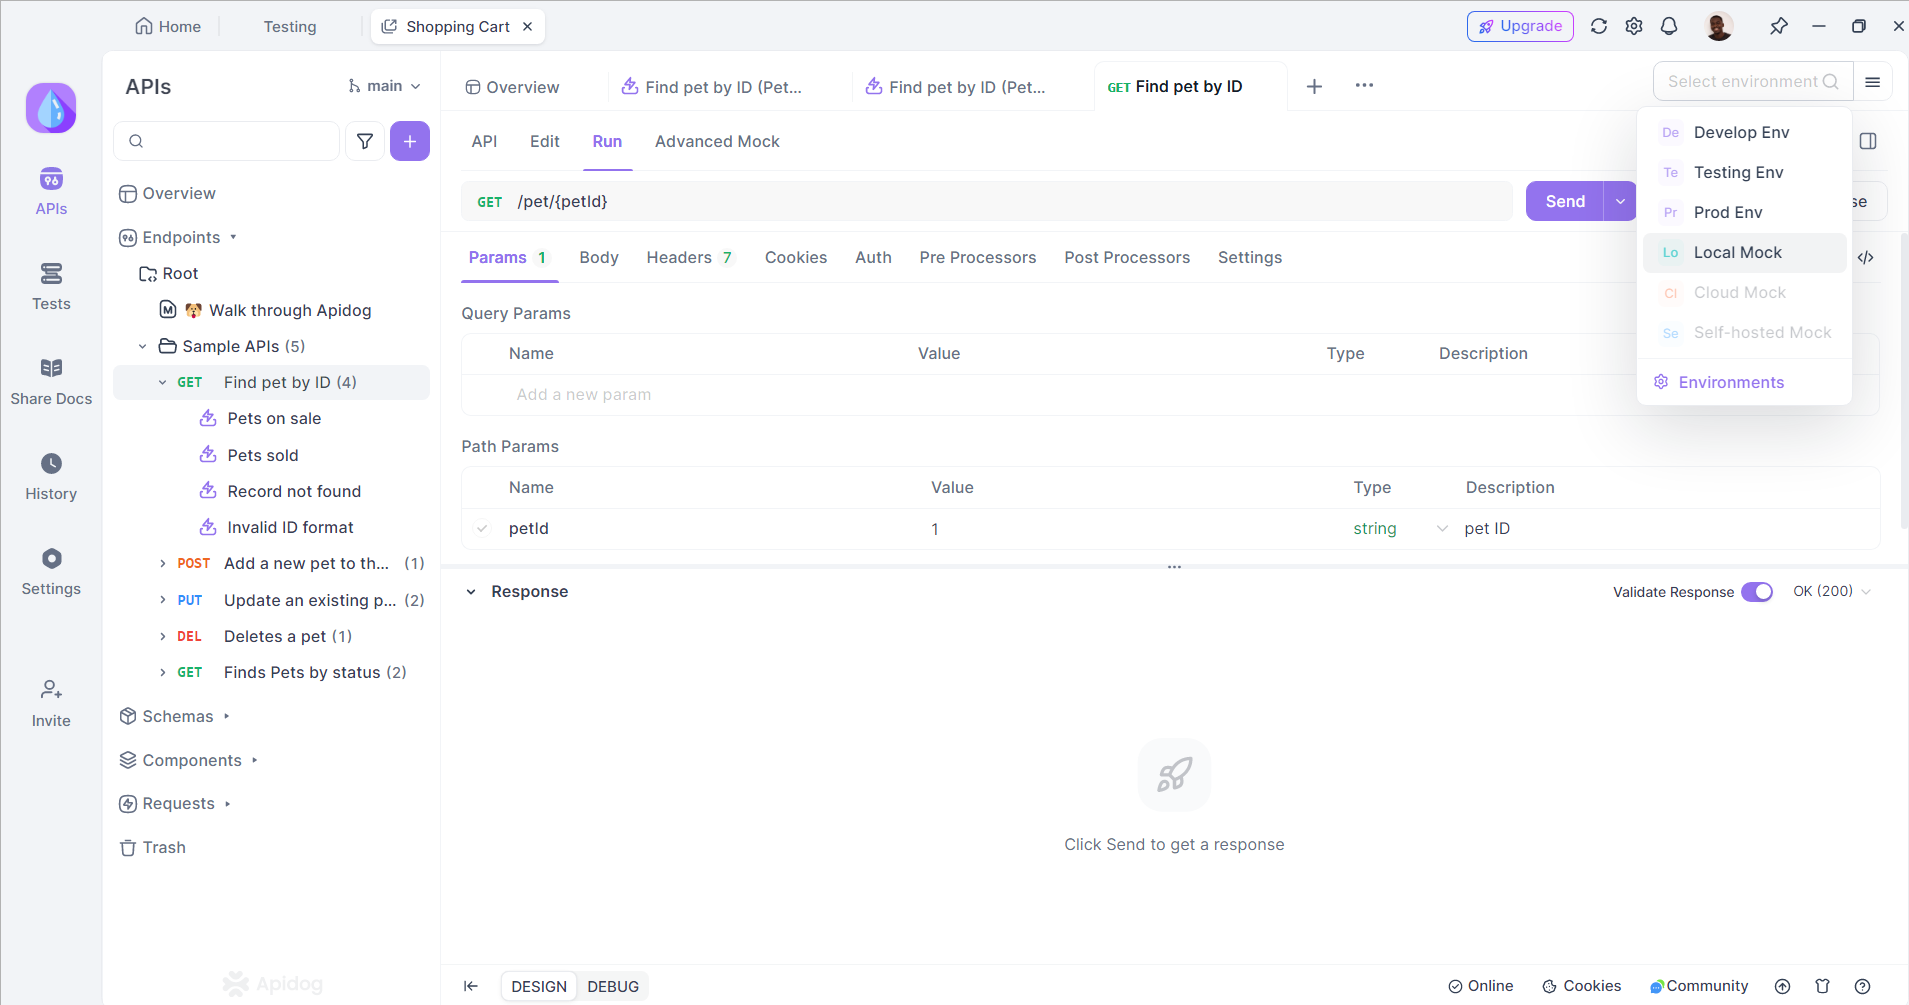
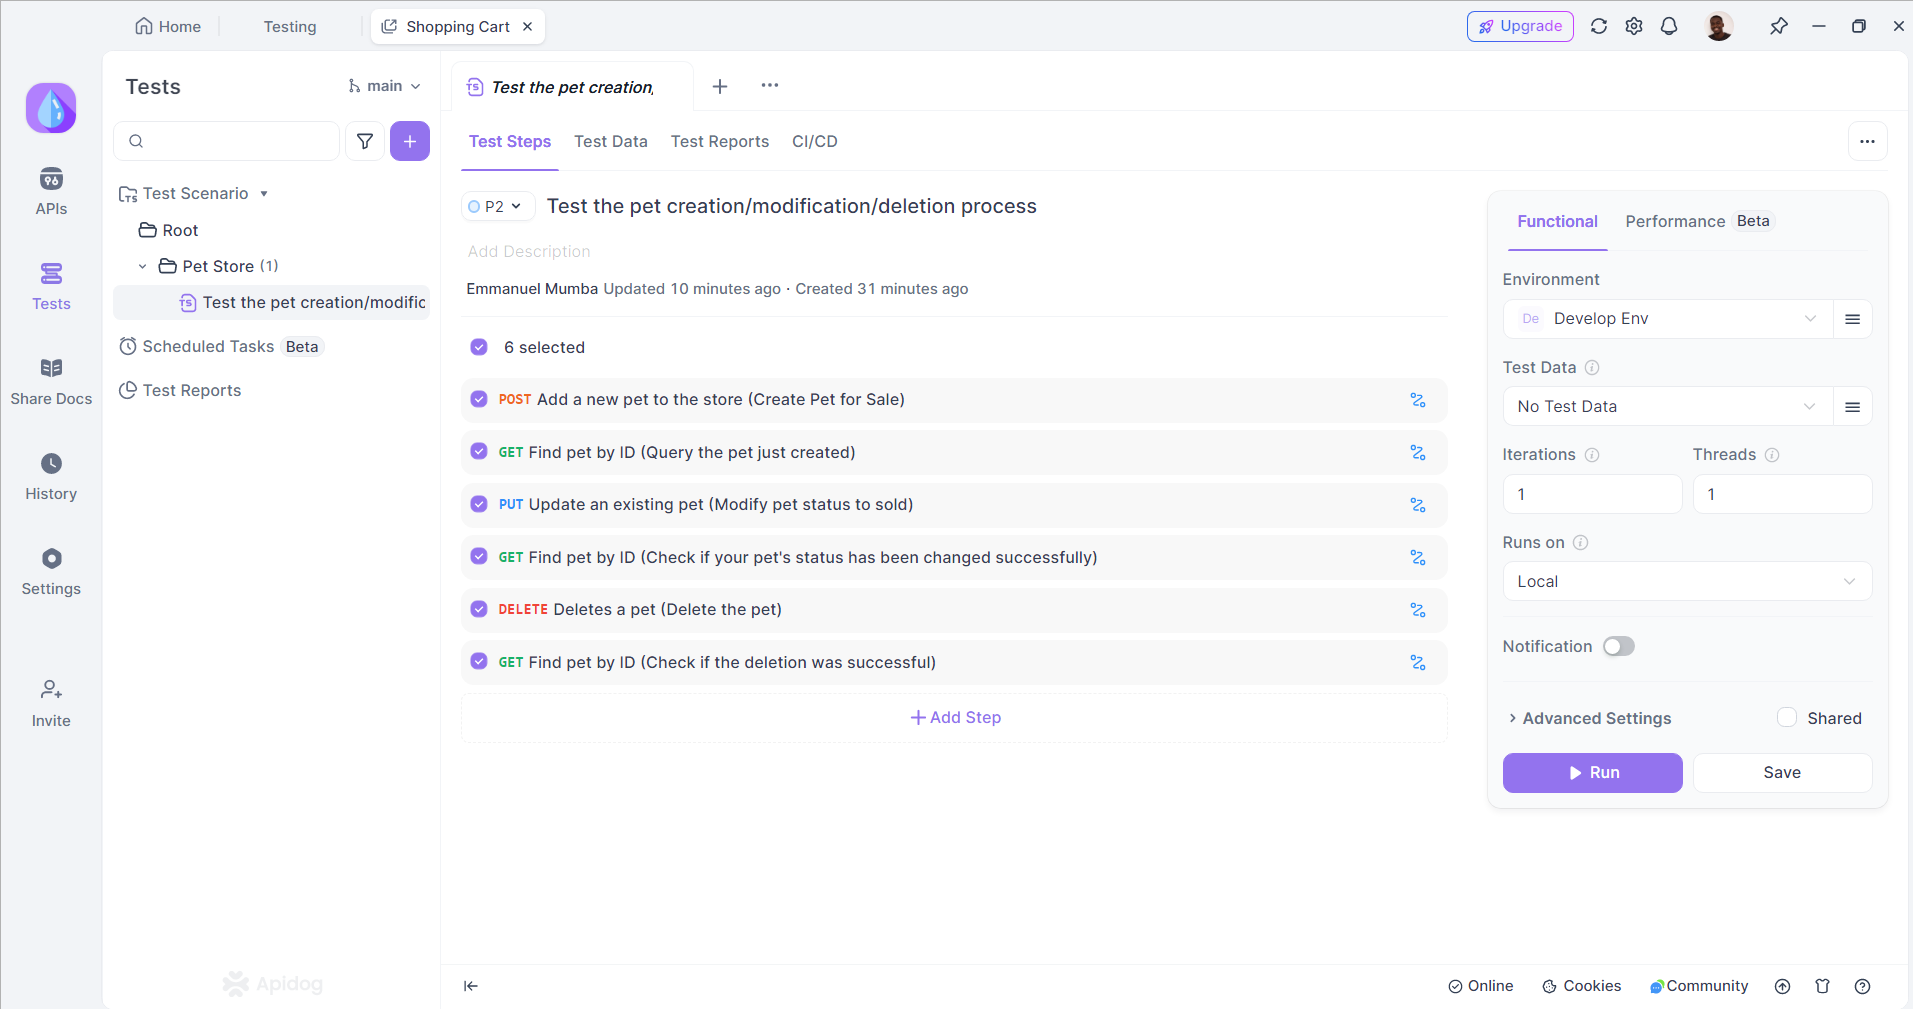
Step 3: Test API Endpoints
Once your API is ready, use Apidog to test the endpoints. This ensures that they return the expected data and handle errors correctly. You can also use Apidog's testing features to automate this process, saving time and reducing the risk of human error.
Step 4: Collaborate with Your Team
Encourage your team to use Apidog for collaboration. Developers can leave comments on API specifications, suggest changes, and track revisions. This collaborative approach fosters communication and ensures that everyone is on the same page.
Step 5: Maintain Documentation
As your API evolves, make sure to update the documentation in Apidog. This will help keep your team informed about changes and ensure that external partners have access to the latest information.
Sample Code: Integrating a Payment API
Let’s look at a practical example of integrating a payment API using Axios in a React application. This example demonstrates how to handle user payments through a service like Stripe.
Step 1: Set Up Your Payment API
First, you need to create a Stripe account and obtain your API keys. Once you have your keys, you can start integrating the payment functionality into your application.
Step 2: Install Axios
If you haven't already, install Axios in your React project:
npm install axiosStep 3: Create a Payment Component
Here’s a simple React component that integrates with the Stripe API to handle payments:
import React, { useState } from 'react';
import axios from 'axios';

const PaymentForm = () => {
  const [amount, setAmount] = useState('');
  const [error, setError] = useState(null);
  const [success, setSuccess] = useState(false);

  const handlePayment = async (e) => {
    e.preventDefault();
    setError(null);
    setSuccess(false);

    try {
      const response = await axios.post('https://api.stripe.com/v1/charges', {
        amount: amount * 100, // Amount in cents
        currency: 'usd',
        source: 'tok_visa', // Replace with a valid token
        description: 'Payment for order',
      }, {
        headers: {
          'Authorization': `Bearer YOUR_SECRET_KEY`,
          'Content-Type': 'application/x-www-form-urlencoded',
        },
      });

      if (response.status === 200) {
        setSuccess(true);
      }
    } catch (error) {
      setError('Payment failed. Please try again.');
      console.error('Error processing payment:', error);
    }
  };

  return (
    <div>
      <h2>Make a Payment</h2>
      <form onSubmit={handlePayment}>
        <input
          type="number"
          placeholder="Amount in USD"
          value={amount}
          onChange={(e) => setAmount(e.target.value)}
          required
        />
        <button type="submit">Pay</button>
      </form>
      {error && <div style={{ color: 'red' }}>{error}</div>}
      {success && <div style={{ color: 'green' }}>Payment successful!</div>}
    </div>
  );
};

export default PaymentForm;
Explanation of the Code
- State Management: We use React's
useStateto manage the amount to be paid, any errors, and the success status of the payment. - Handle Payment Function: This function is triggered when the form is submitted. It makes a POST request to the Stripe API to create a charge. The
amountis multiplied by 100 because Stripe expects the amount in cents. - Error Handling: If the payment fails, an error message is displayed. If successful, a success message is shown.
Step 4: Test the Payment Integration
Make sure to test your payment integration thoroughly. Use Stripe's test card numbers to simulate transactions without processing real payments.
Handling Authentication with API Keys
Many APIs require authentication using API keys. Here's an example of how to include an API key in your API requests using Axios:
import axios from 'axios';

const apiClient = axios.create({
  baseURL: 'https://api.example.com',
  headers: {
    'Content-Type': 'application/json',
    'X-API-Key': 'YOUR_API_KEY',
  },
});

const fetchData = async () => {
  try {
    const response = await apiClient.get('/data');
    console.log(response.data);
  } catch (error) {
    console.error('Error fetching data:', error);
  }
};

fetchData();
In this example, we create an Axios instance (apiClient) with a base URL and default headers, including the API key. We then use this instance to make API requests, ensuring that the API key is included in every request.
Using Apidog for API Testing and Mocking
Apidog provides a user-friendly interface for testing API endpoints and mocking responses. Here's an example of how to use Apidog to test an API endpoint:
- Define Your API Endpoint in Apidog:
- Set the HTTP method (e.g., GET, POST, PUT, DELETE).
- Specify the endpoint URL.
- Add any required parameters or headers.
2. Test the API Endpoint Using Apidog:
- Enter the necessary parameters and headers.
- Click the "Send" button to make the API request.
- Apidog will display the response status, headers, and body.
3. Mock the API Response in Apidog:
- Click on the "Mock" tab in Apidog.
- Set the mock response status code and headers.
- Enter the desired response body.
- Save the mock configuration.
4. Use the Mocked API Endpoint in Your Application:
- Point your application to the mocked API endpoint in Apidog.
- Apidog will return the predefined mock response when the endpoint is accessed.
By using Apidog for testing and mocking, you can efficiently develop and debug your API integrations without relying on the actual API being available.
Handling Errors and Retries
Robust error handling is essential when integrating APIs. Here's an example of how to handle errors and implement retry logic using Axios:
import axios from 'axios';

const fetchData = async (retryCount = 0) => {
  try {
    const response = await axios.get('https://api.example.com/data');
    console.log(response.data);
  } catch (error) {
    if (retryCount < 3 && error.response && error.response.status >= 500) {
      // Retry on server-side errors
      await new Promise((resolve) => setTimeout(resolve, 1000));
      return fetchData(retryCount + 1);
    } else {
      console.error('Error fetching data:', error);
    }
  }
};

fetchData();
In this example, we define a fetchData function that makes an API request using Axios. If an error occurs and the response status code is in the 500 range (indicating a server-side error), we implement a retry mechanism. The function will retry up to three times with a 1-second delay between each attempt.
Best Practices for API Integration
To ensure successful API integration, consider the following best practices:
- Understand API Documentation: Thoroughly read and understand the API documentation before integration. This will provide you with the necessary information about available endpoints, parameters, and request/response formats.
- Implement Authentication and Authorization: Ensure that your API calls are secure by implementing proper authentication and authorization mechanisms. Use API keys, OAuth, or JWT tokens as needed.
- Optimize API Calls: Minimize the number of API calls by batching requests or caching responses. This can significantly improve the performance of your application.
- Handle Errors Gracefully: Implement robust error handling to manage API failures and provide meaningful feedback to users. Consider using retry logic for transient errors.
- Monitor API Usage: Keep track of API usage and performance metrics. This can help you identify bottlenecks and optimize your integration over time.
- Stay Updated: Regularly check for updates to the APIs you are using. Changes to the API can affect your integration, so it's essential to stay informed.
Common API Integration Challenges
While integrating APIs can offer numerous benefits, it also comes with its own set of challenges. Understanding these challenges can help you prepare and mitigate potential issues.
1. Rate Limits
Many APIs impose rate limits on the number of requests you can make within a specific timeframe. Exceeding these limits can result in errors or temporary bans. It's essential to read the API documentation to understand the limits and implement strategies to manage your request rates effectively.
2. Data Format Changes
APIs may change their response formats over time, which can break your integration. To minimize disruptions, monitor the API for updates and implement versioning in your application to handle different data formats gracefully.
3. Authentication Issues
Authentication is a common challenge when integrating APIs. Ensure you understand the authentication methods required by the API and implement them correctly. Use libraries or tools like Apidog to manage authentication tokens and securely store sensitive information.
4. Network Reliability
Network issues can impact API performance and reliability. Implement error handling and retry logic in your application to manage transient network failures. Additionally, consider caching responses to reduce the impact of network outages.
5. Security Concerns
APIs can expose sensitive data, making security a top priority. Use HTTPS for secure communication, implement proper authentication, and regularly audit your API integrations for vulnerabilities.
Once you're comfortable wiring an API into a web page, a natural next project is building a chatbot with the Telegram Bot API, which exercises the same request-and-response fundamentals in a new context.
Once you're comfortable with the integration pattern, applying it to a real social platform—the TikTok Display API—shows how authentication and endpoint structure work in production.
Once the integration fundamentals are solid, a real-world data source like the Facebook Ad Library API puts those skills to work through authentication tokens, query parameters, and paginated ad data in a single project.
Conclusion
Integrating APIs into your website development process can unlock a world of possibilities, enabling you to deliver dynamic, feature-rich experiences to your users. By leveraging tools like Apidog, you can streamline the API integration process, reduce development time, and ensure that your website's API integrations are well-documented and maintainable. As you embark on your next website development project, consider how APIs and Apidog can help you build more robust, scalable, and user-friendly websites that stand out in today's competitive digital landscape. By following best practices and utilizing the right tools, you can create a seamless integration experience that enhances both your development workflow and your users' experience.
Additional Resources
To further enhance your understanding of API integration and Apidog, consider exploring the following resources:
- Apidog Official Documentation: Familiarize yourself with the features and capabilities of Apidog by visiting the official website.
- API Design Principles: Learn about best practices for API design and development through resources like API University.
By investing time in learning and applying these best practices, you will be well-equipped to tackle your API integration challenges and create exceptional user experiences.