As an API developer, testing and documenting APIs is a crucial part of the job. Postman, a user-friendly API testing tool, can help you easily accomplish these tasks. It allows you to make HTTP requests and view responses directly in the interface, eliminating the need to write code. This enables quickly verifying if an API works properly but supports limited API collection runners.
One of the most useful features of Postman is the ability to upload files and JSON data. This can be helpful when testing APIs that require file uploads or when sending complex JSON payloads. In this blog post, we will explore how to upload files and JSON data in Postman and alternative ways to make it well. Let's dive in.
A Step-by-Step Guide to Upload a File in Postman
When testing APIs, it's common to need to upload files as part of the request. Postman uploads files this process is easy with its built-in file-uploading feature.
Step 1. Select the POST request in Postman
To upload a file in Postman, start by creating a new request or opening an existing API. Here is a POST request as an example.
Step 2. Choose the "from-data"
Select the "Body" tab and choose "form-data" as the type of body. In addition, Postman provides uploading binary request bodies too.

Step 3. Click on "Files" Set the Value Type
and select the file or text you want to upload. You can also specify a key for the file, which will be used in the API request. Here we set the "File" to upload.
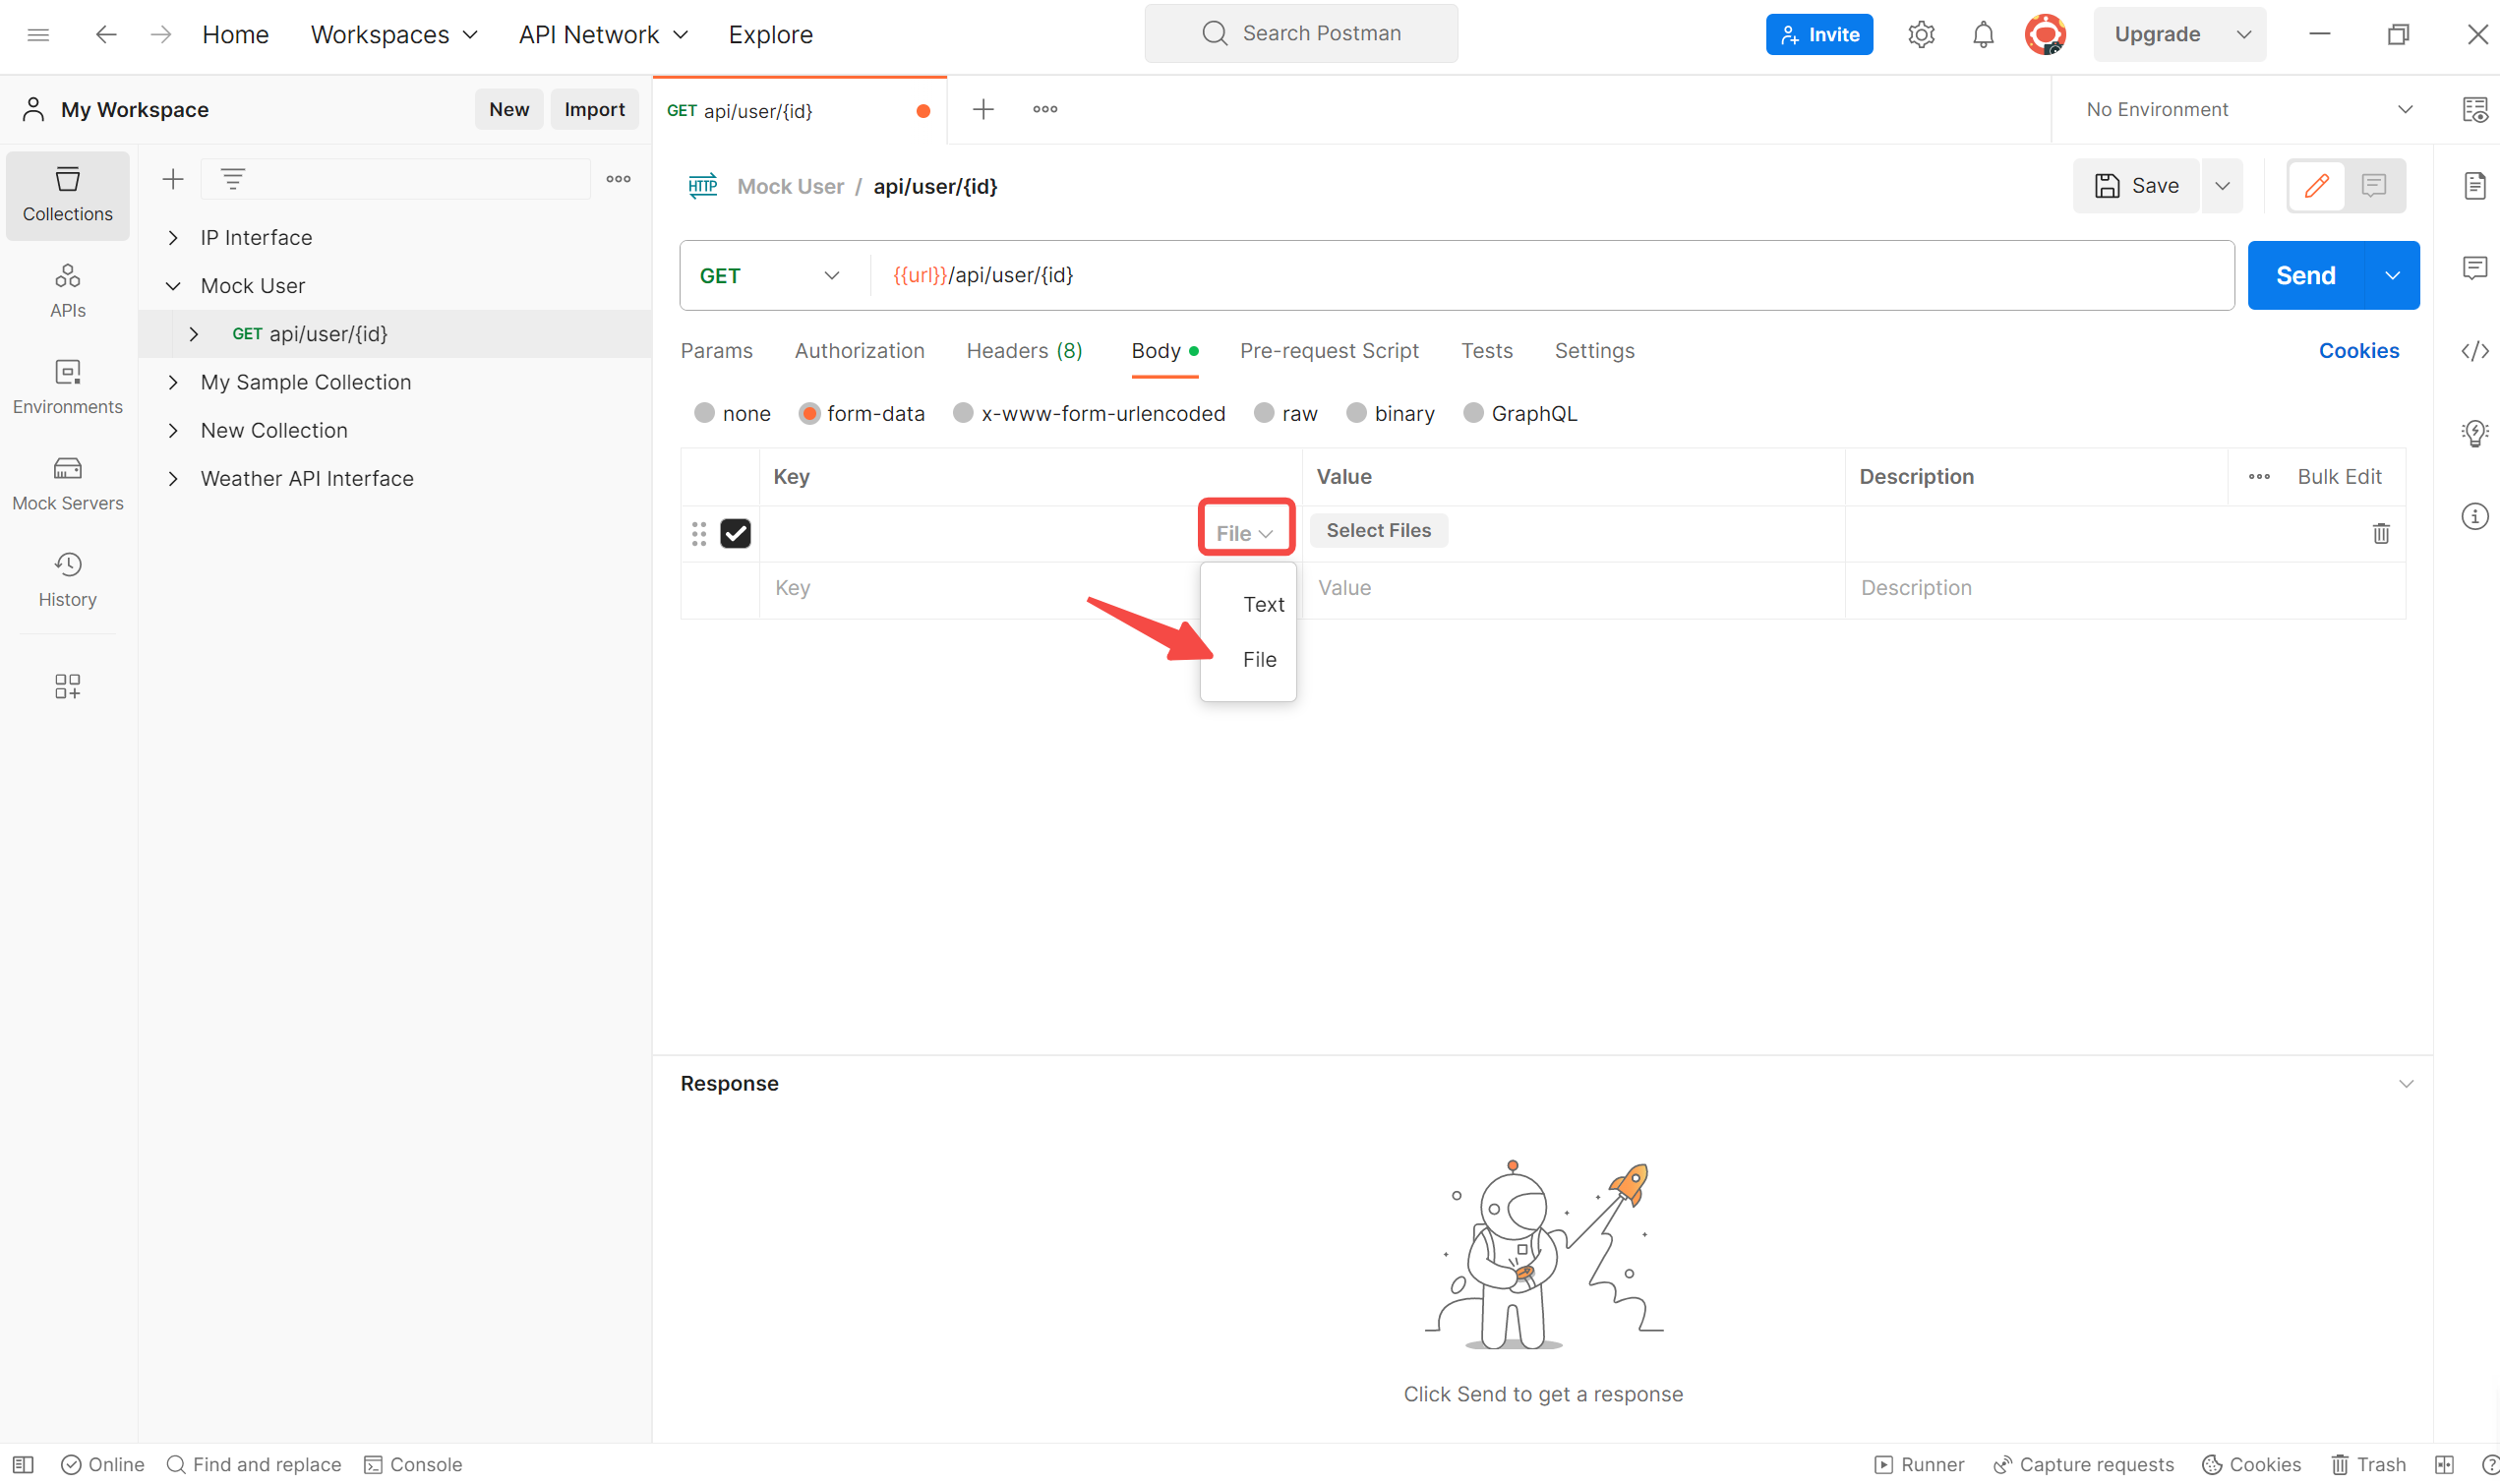
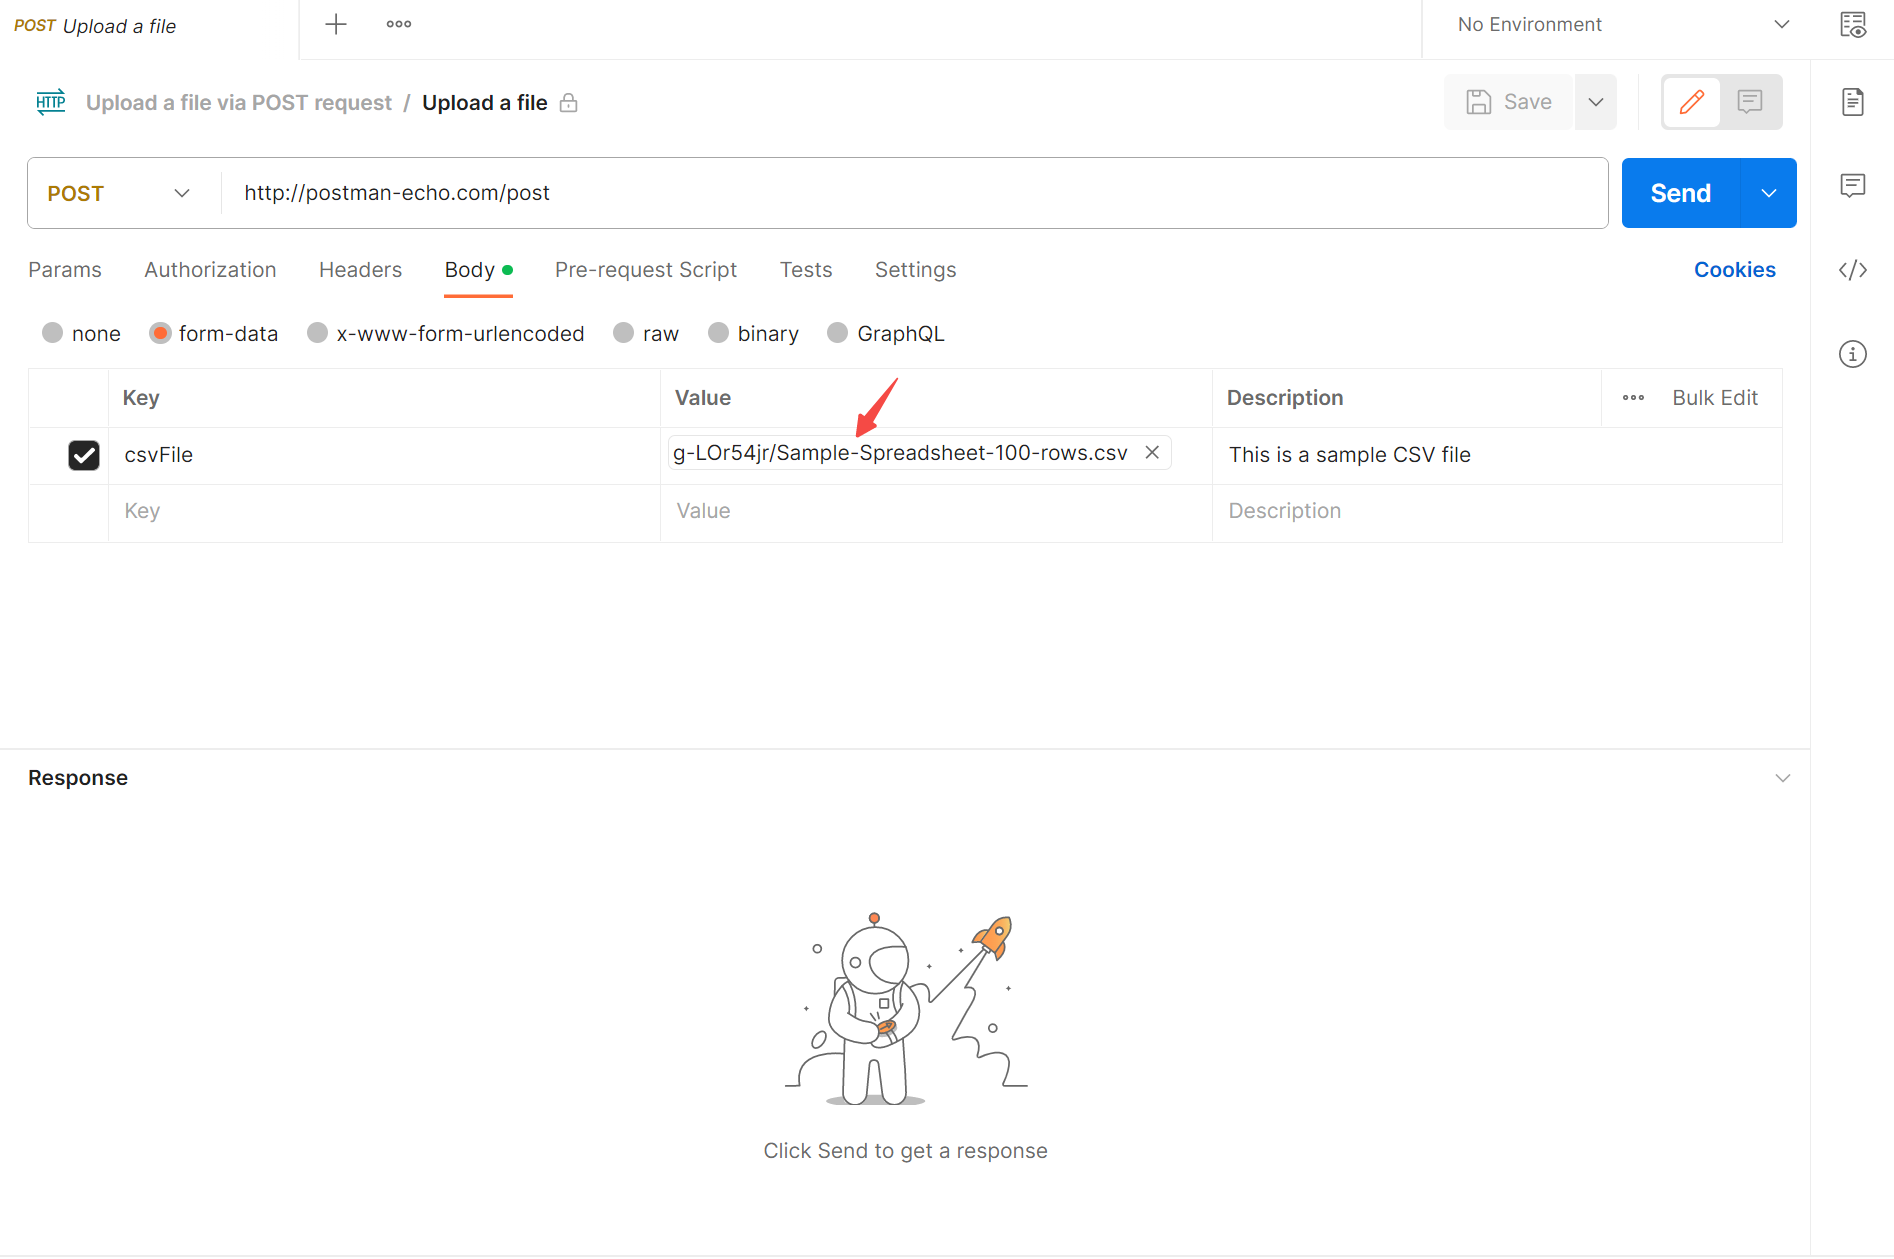
Step 4. Upload Your File to Postman
Once you have uploaded your file to Postman and set the key, you can send the request as usual. The file will be included in the request and click the "Send" button to the API to view the result.
However, in the ever-evolving landscape of file uploads, there are alternative solutions that can significantly enhance your API testing experience.
Enter Apidog, a robust API toolkit with a user-friendly interface and support for various file formats. Let's explore how Apidog simplifies the process of uploading files for testing purposes.
The Best Postman Alternative: Apidog
Apidog is a powerful Postman alternative toolkit that boasts a user-friendly interface and supports the uploading of multiple file formats. Apidog's file uploading capability is designed to make API testing more efficient and effective, allowing developers and testers to seamlessly incorporate file upload functionality into their API testing workflows.
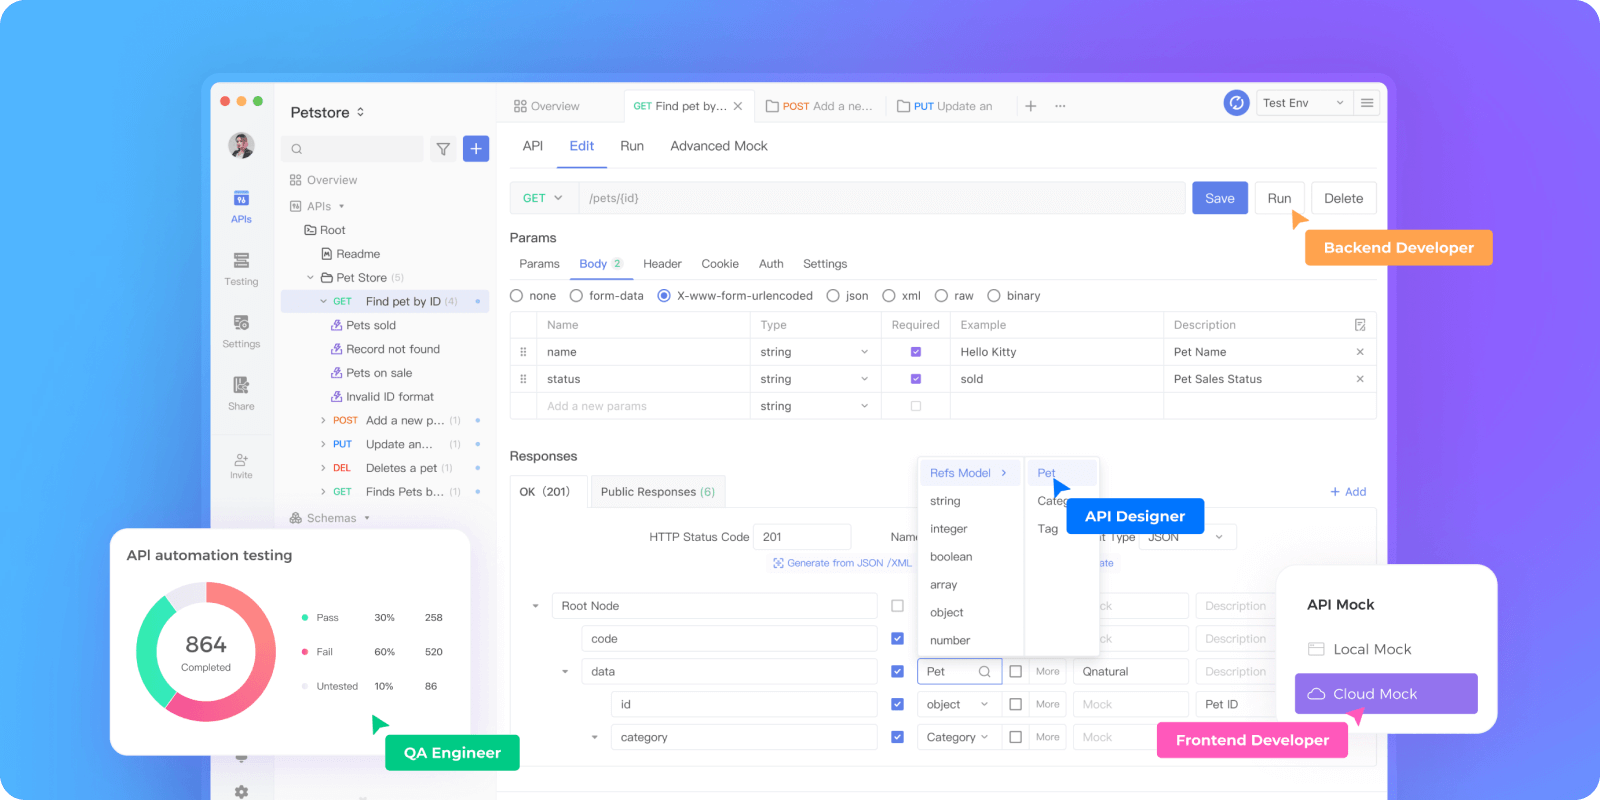
In Apidog, you can easily upload files for testing by creating a new request and navigating to the "Body" tab. From there, you can select various parameters, such as from-data, binary, JSON, etc. You can easily switch from Postman to Apidog as a beginner.
How to Upload Files in Apidog quickly
Now, we will introduce the guide on how to upload a file in Apidog quickly. First, you can get started on Apidog web or free download to log in via Google or Github.
- To open the API, switch to the Edit page. If you're a new user, you can quickly create a new request by clicking on the "+" icon in the left sidebar.
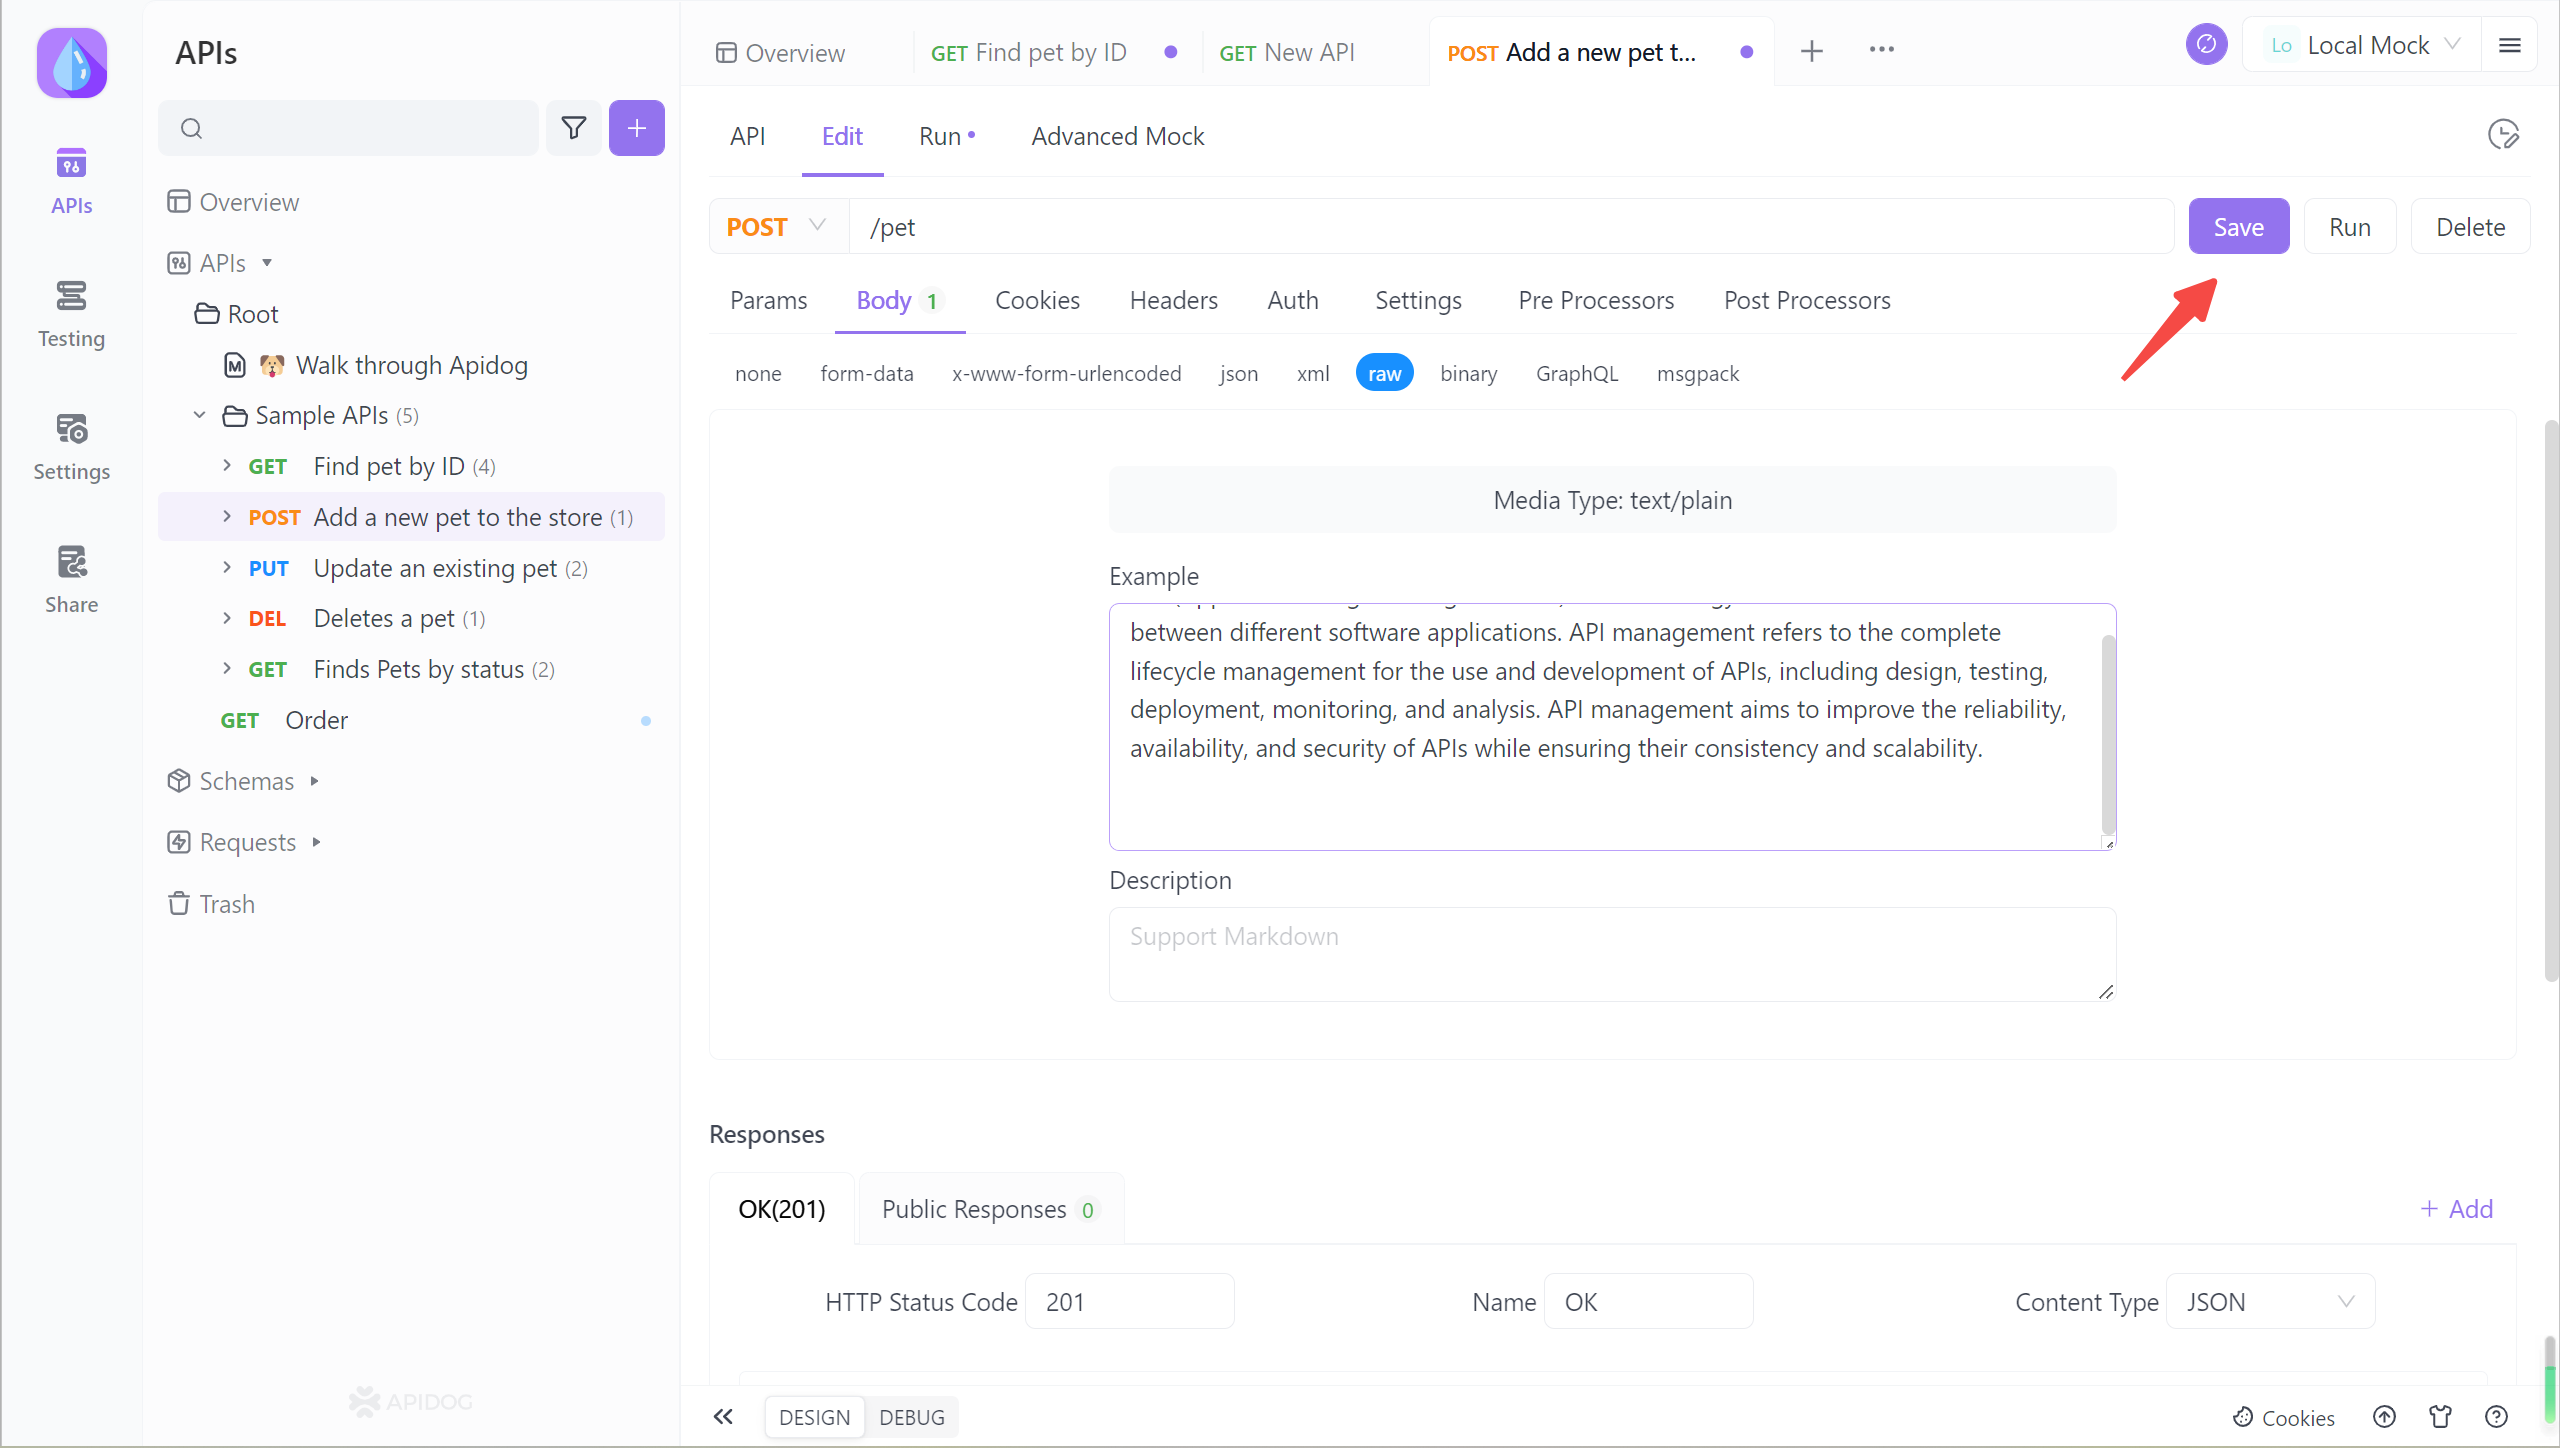
- Next, in the "Body", you can select the media type or data type you want to upload. Select "raw", and input text or plain below.
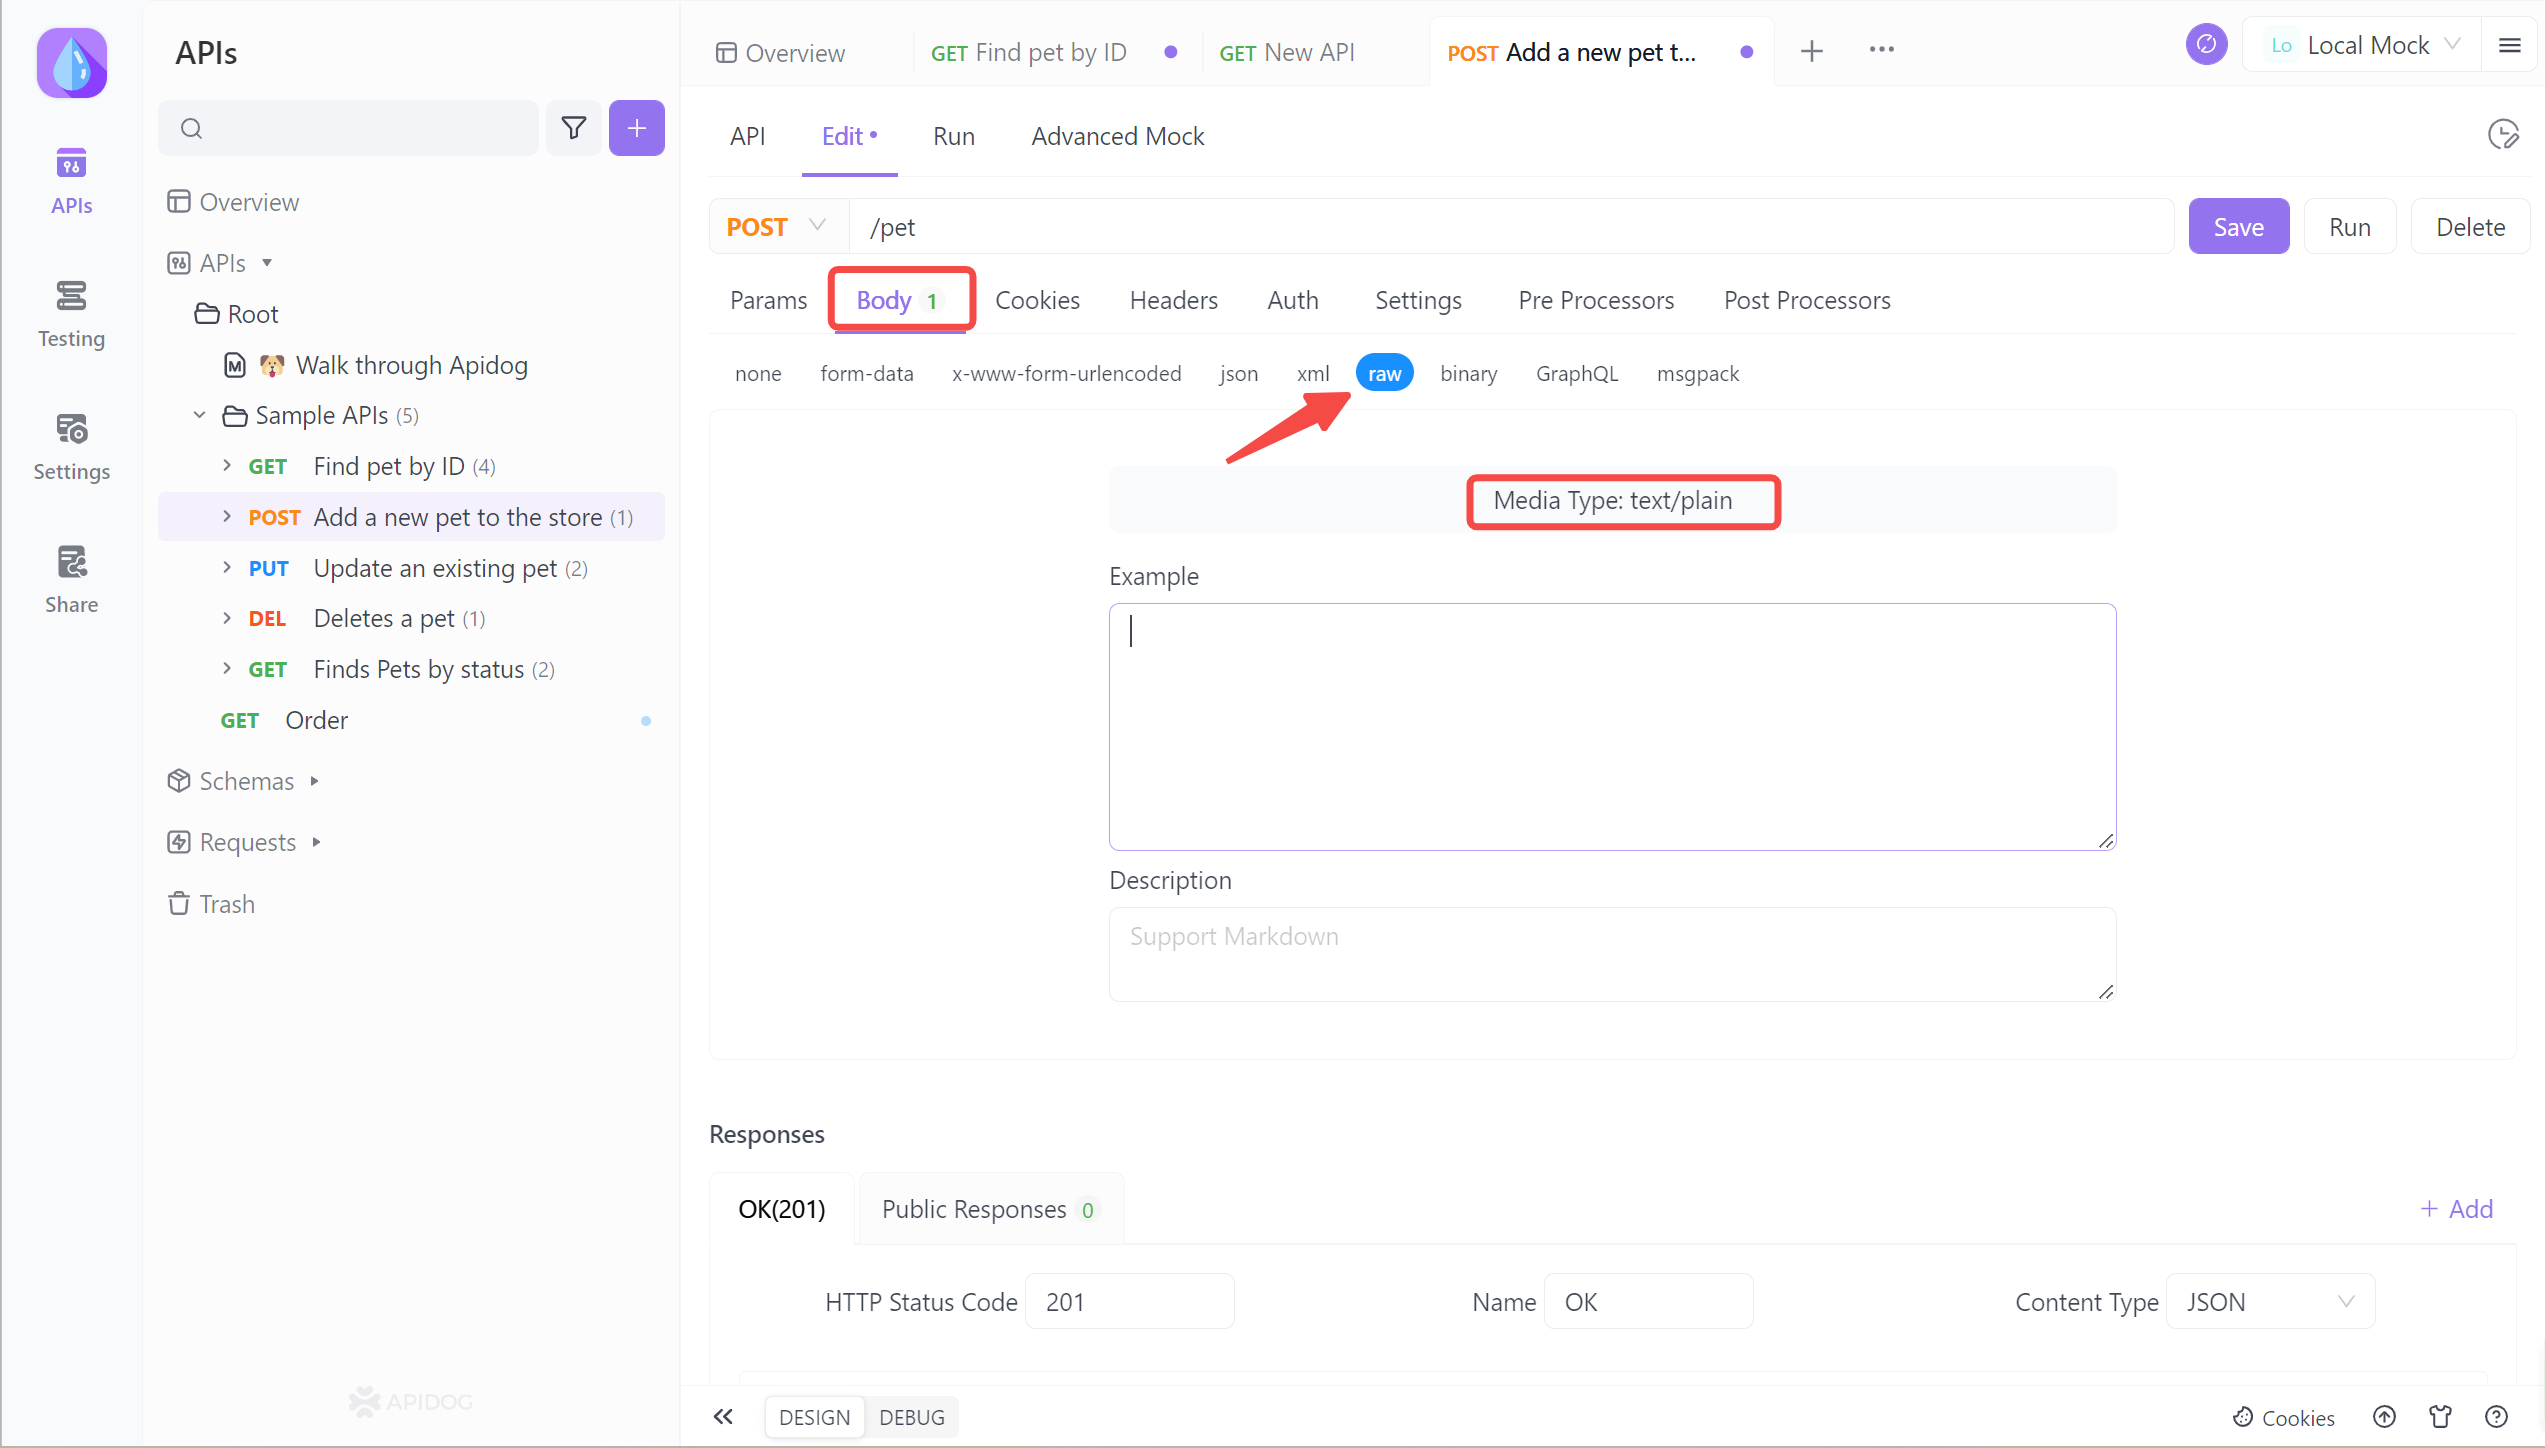
Raw: This is a data type used to send raw data in the HTTP request body. When using the RAW parameter, a user can directly specify the data to be sent in the request body without using a specific encoding or format. This method is more flexible and can be used to send various types of data, including plain text, JSON, XML, etc.
Note: When the Body parameter type is set to raw, the Content-Type can be manually set without any restrictions.
Optional: Apidog also supports uploading applications and octet-stream. You can click the "Upload" button to choose which file you want to upload in Apidog.
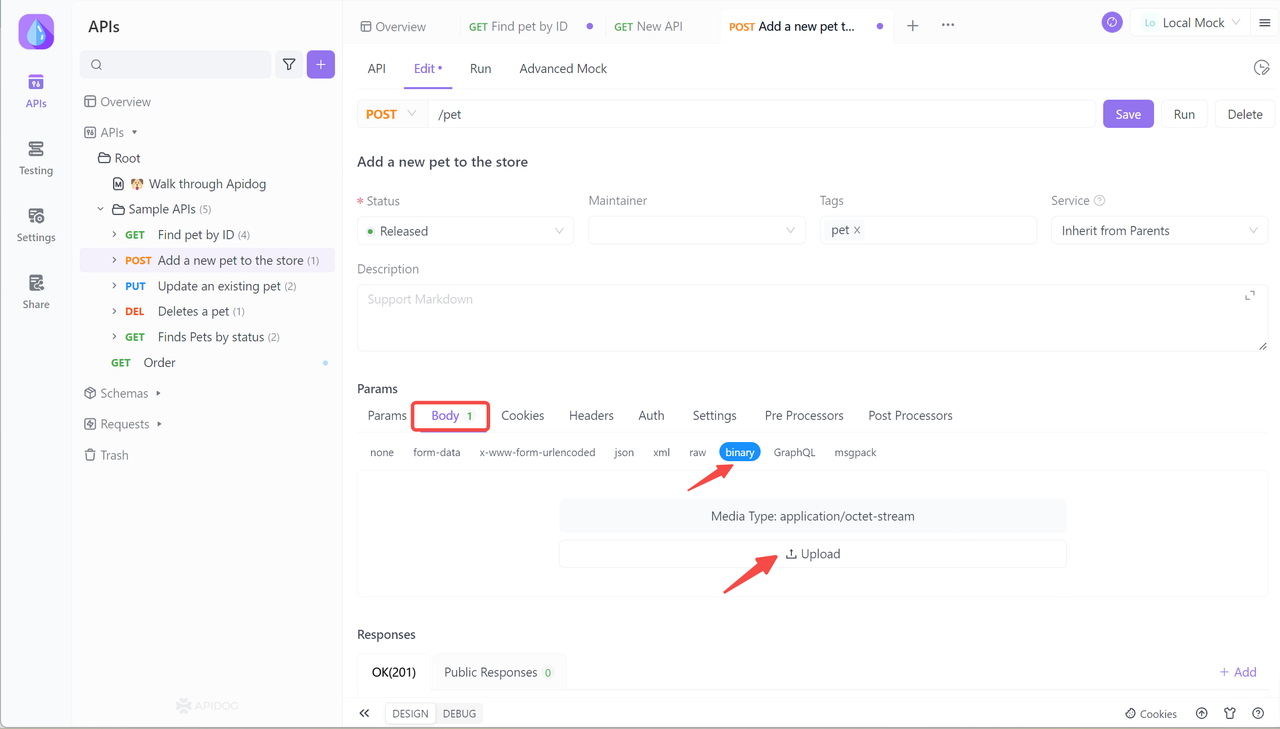
Note: Binary refers to binary data. When uploading files or images as binary data, you can pass this data as the Body parameter in the request to the server. Usually, the type of this data is also specified in the request header.
1. Select the Text document to be uploaded, that supports Markdown format. When finished, click the Save button.
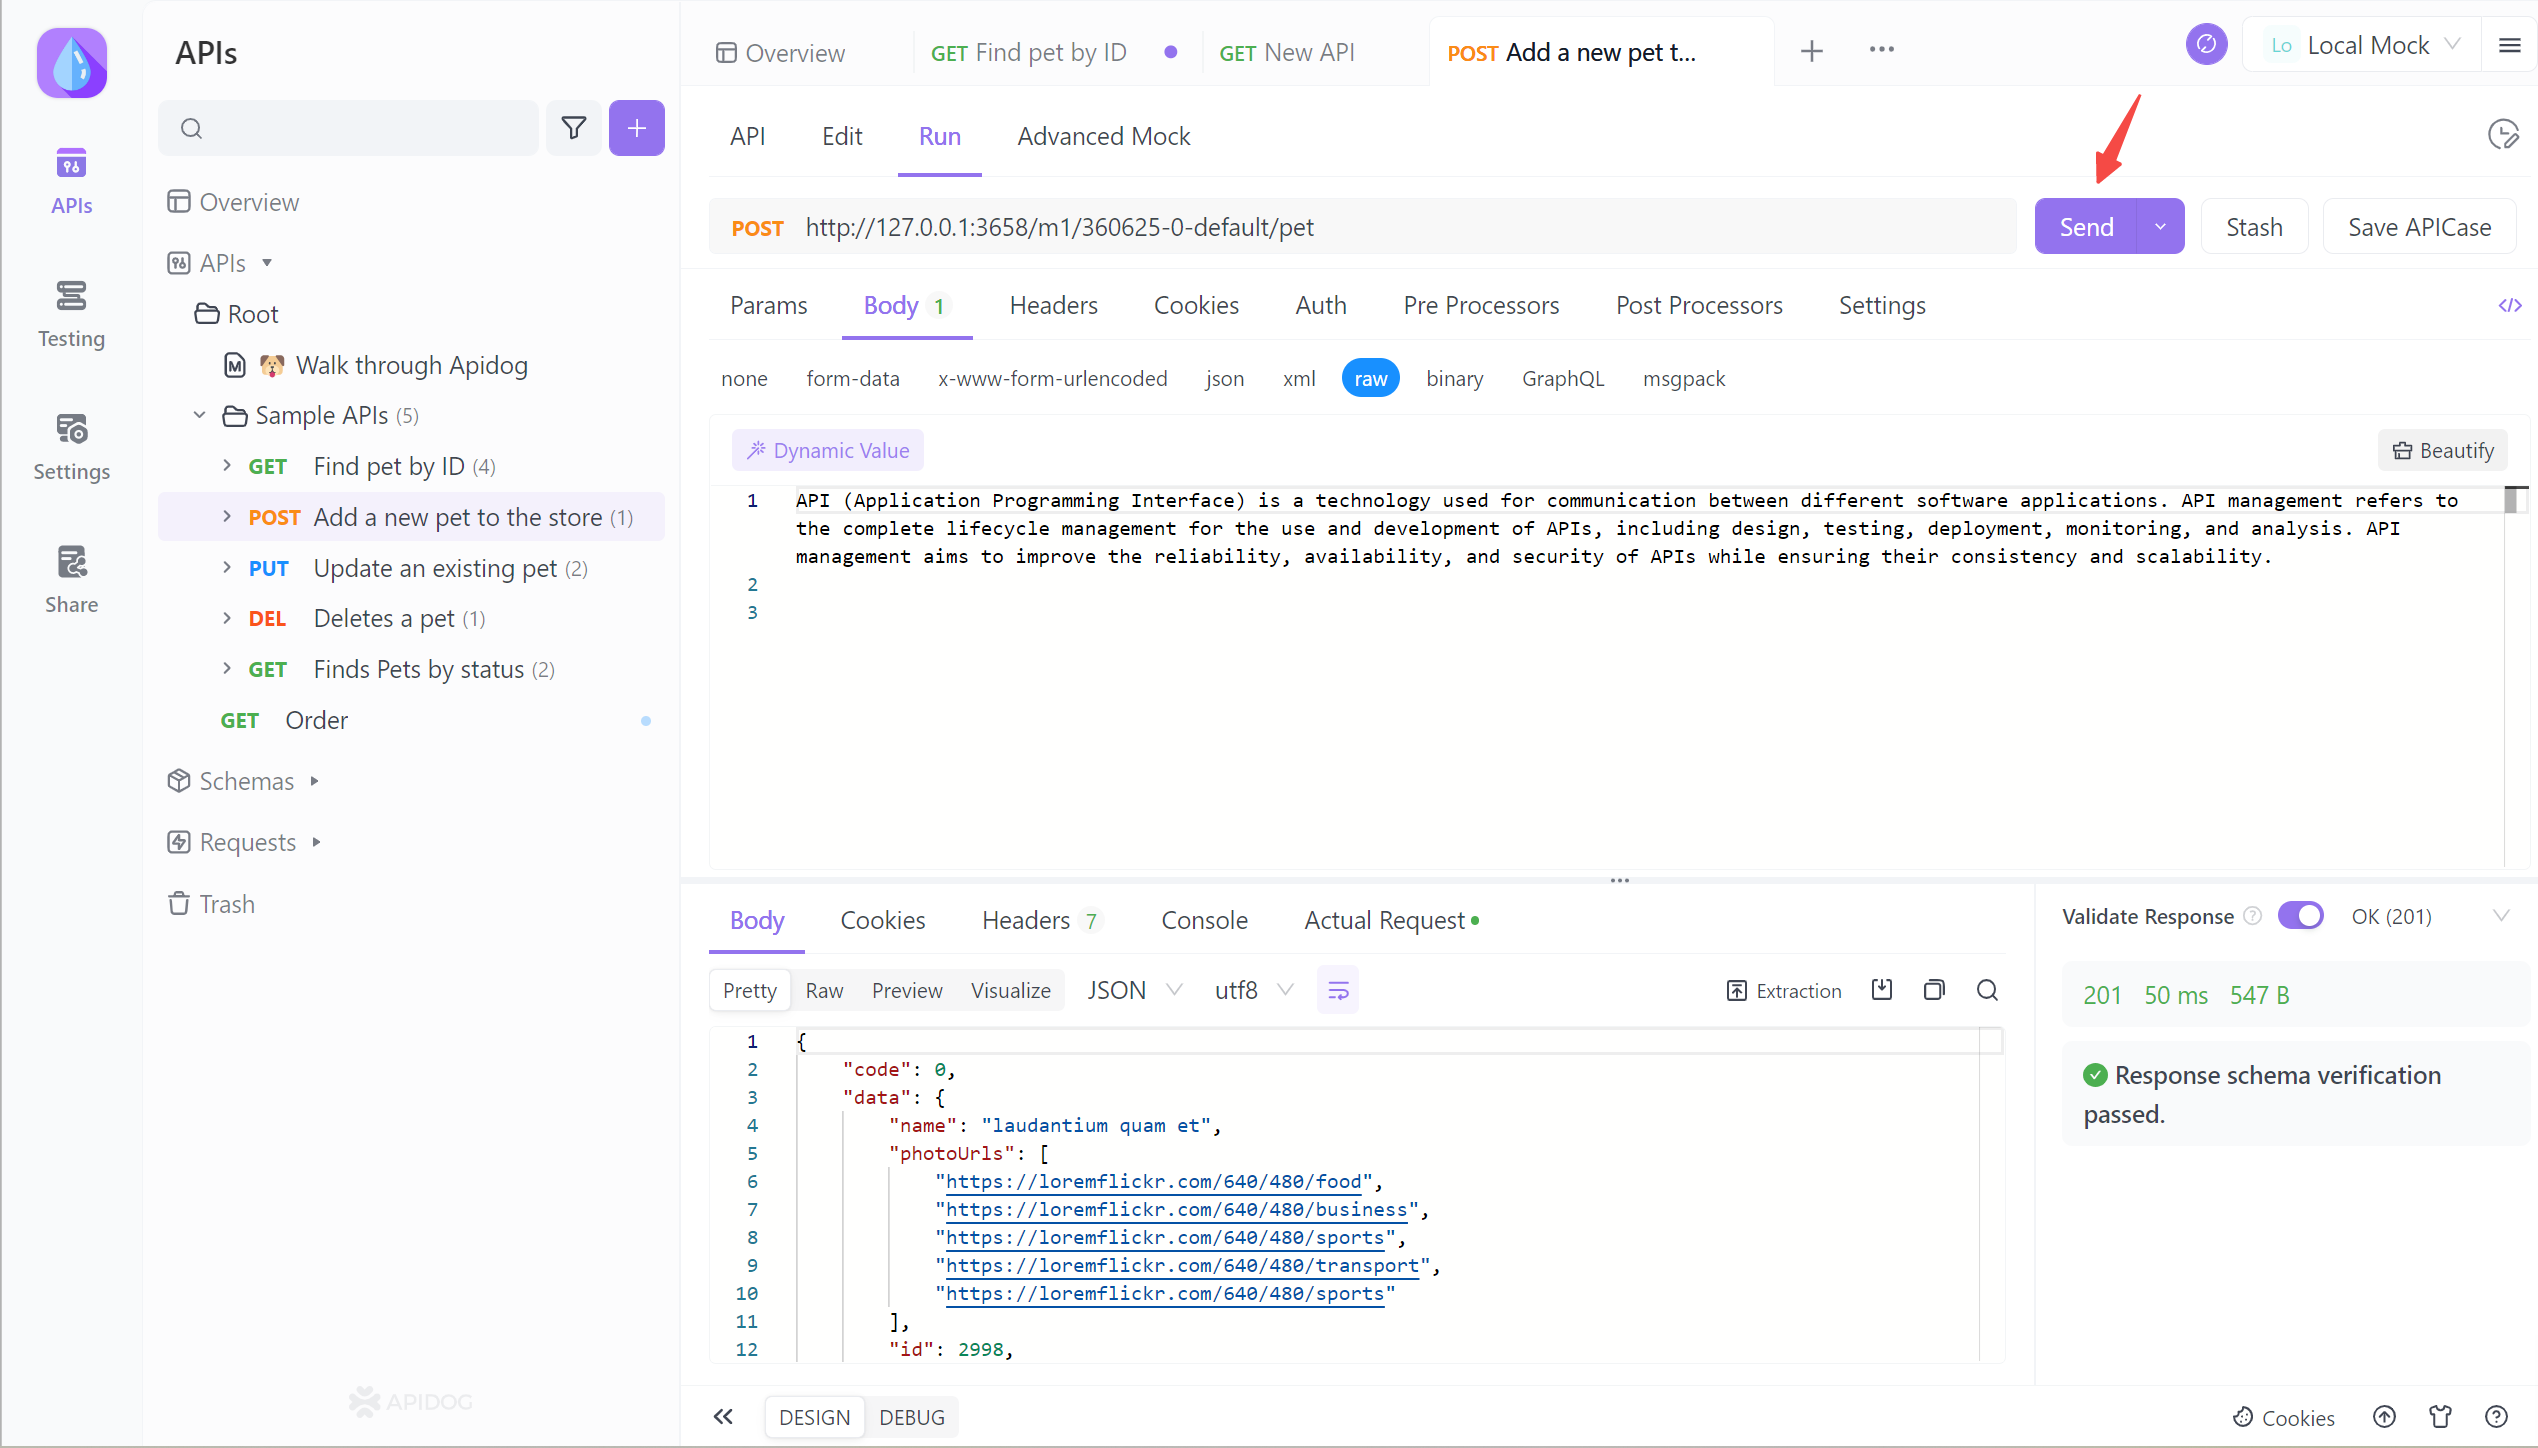
2. Send the request and Response schema verification passed.
Apiodg stands out as an API documentation generator due to its exemplary ease of use, combined with a broad range of feature offerings. Additionally, the learning curve for using this tool is notably low, making it accessible to users of all experience levels and technical proficiency.
A Detailed Guide to Upload JSON Data Into Postman
When working with APIs, sending JSON data is a common requirement. Postman provides a user-friendly interface to streamline the process of uploading JSON data. Now, we'll walk you through the steps with a practical example.
To upload JSON data in Postman, follow these steps:
- Open Postman and create a new request.
- Select the HTTP method you want to use (e.g. POST).
- Enter the URL you want to send the request to.
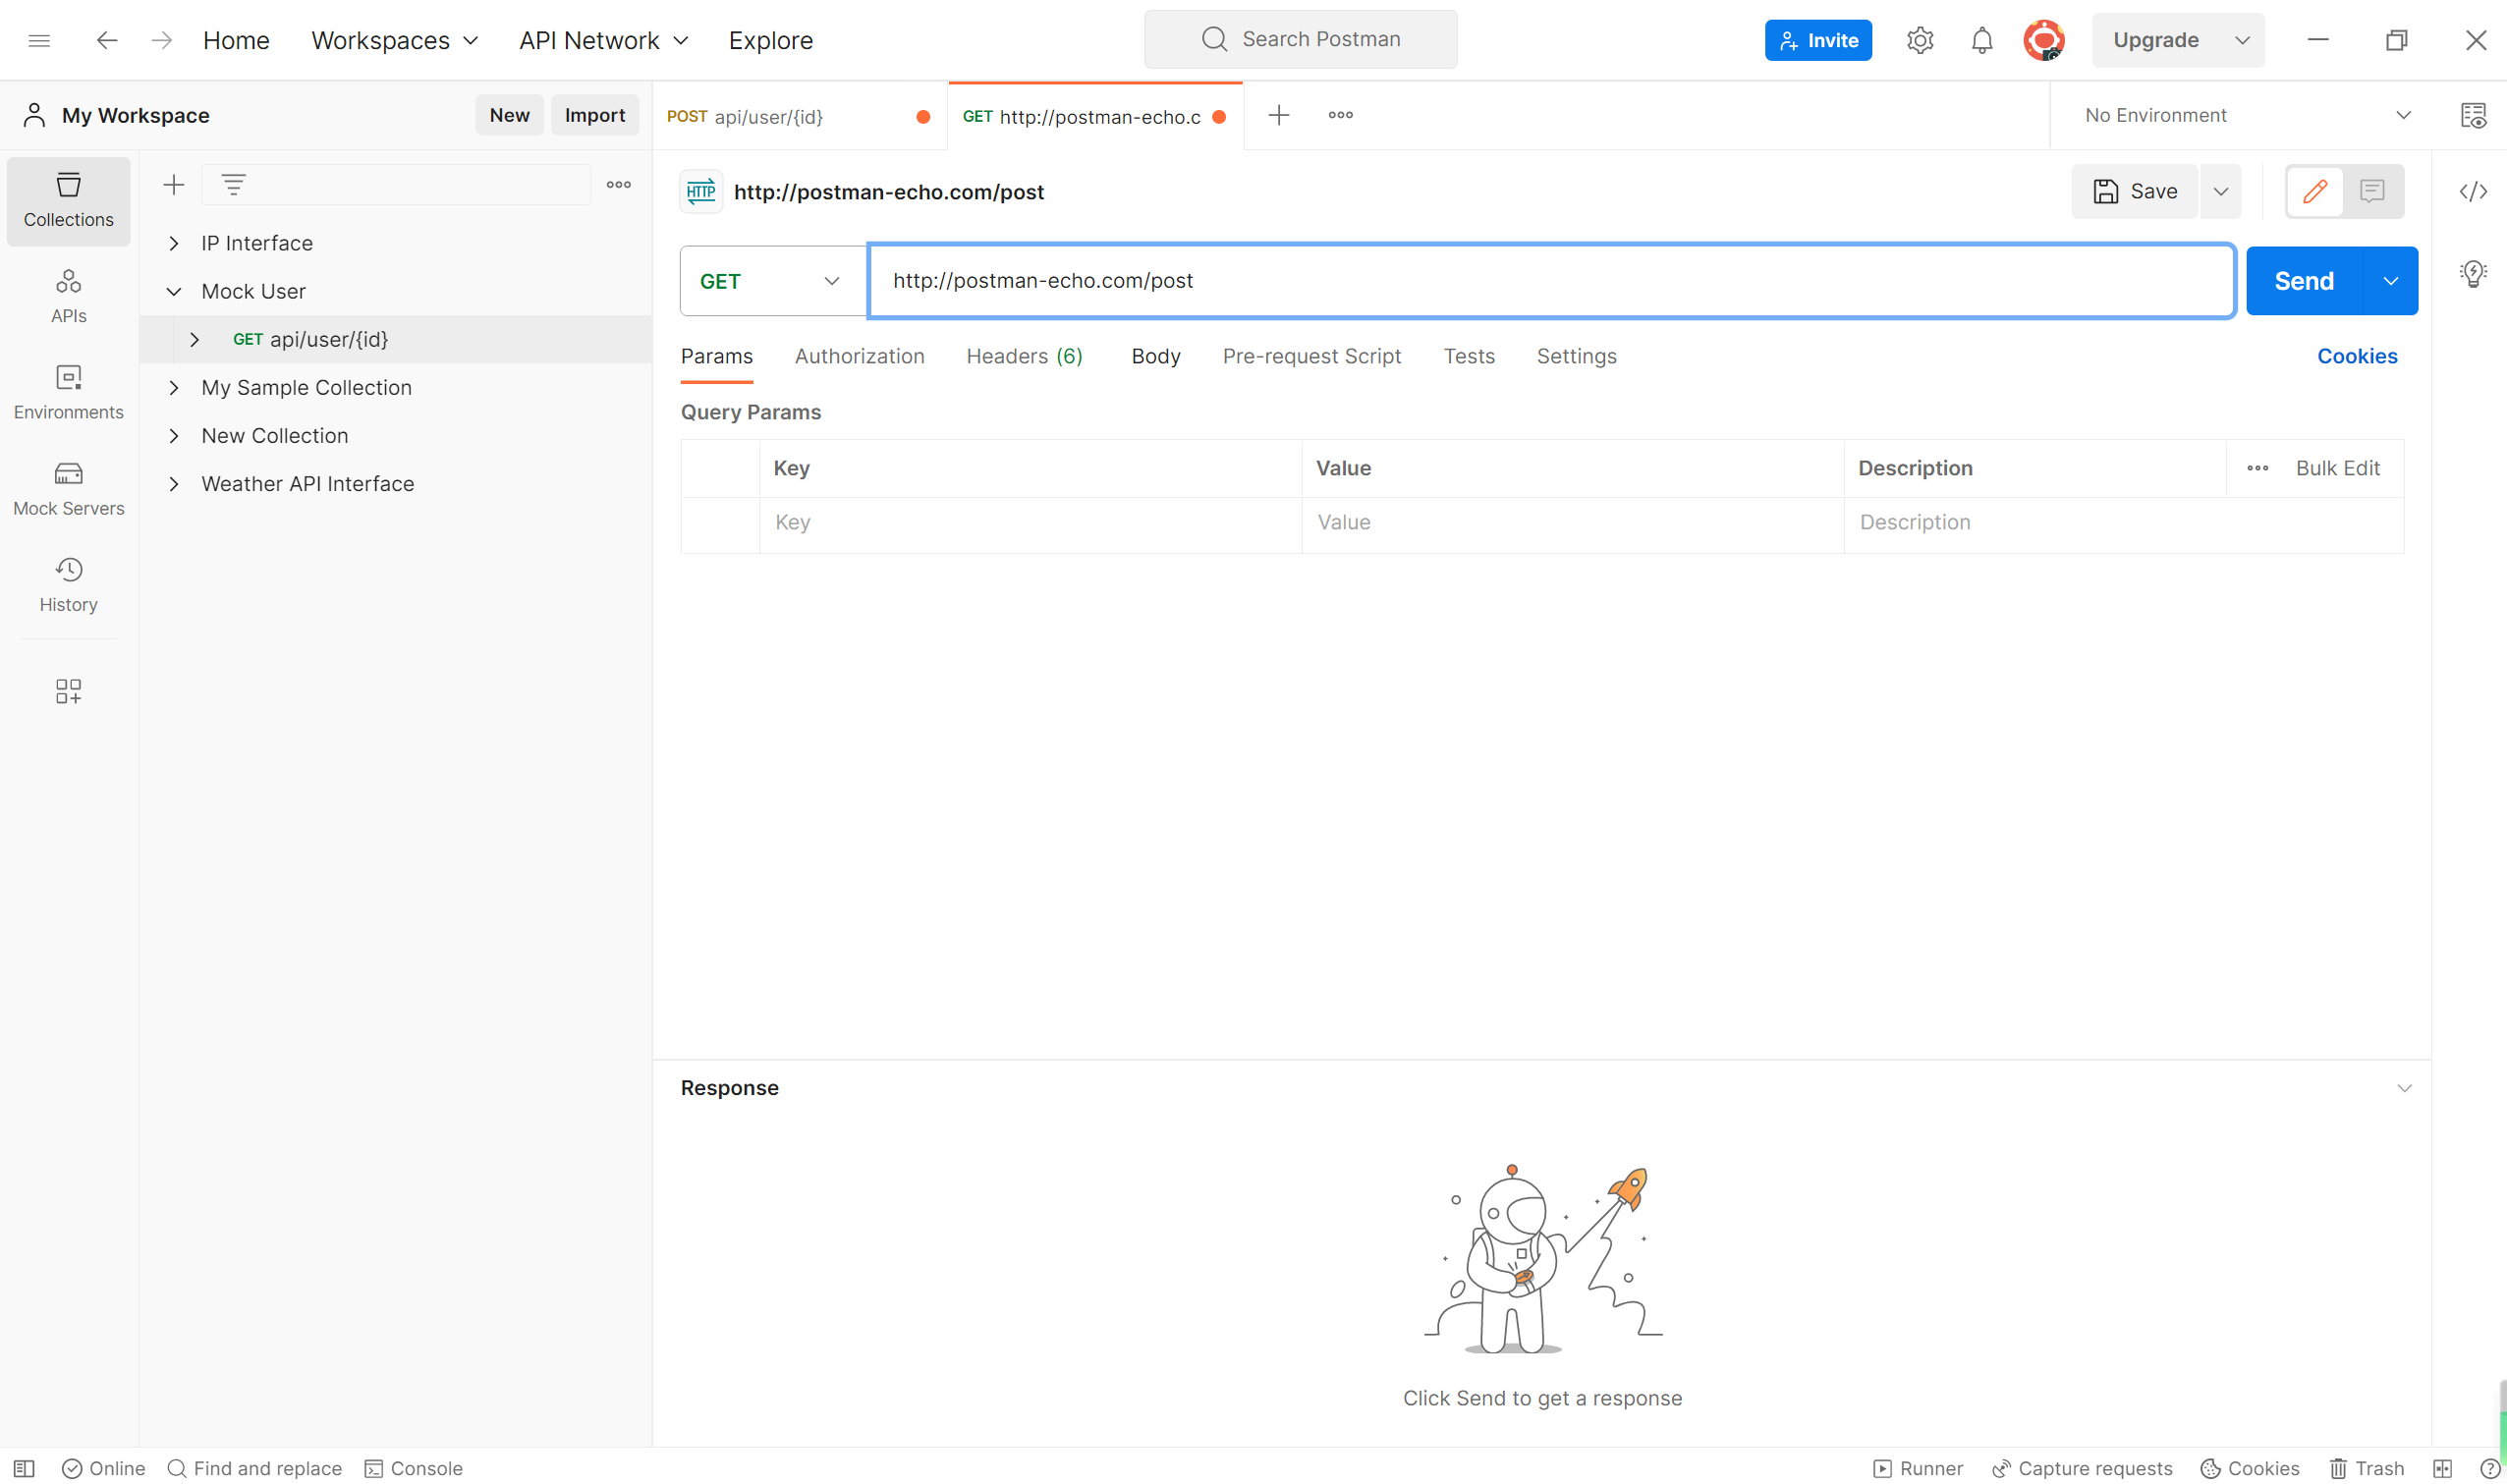
4. Click on the "Body" tab.
5. Select "raw" from the list of options.
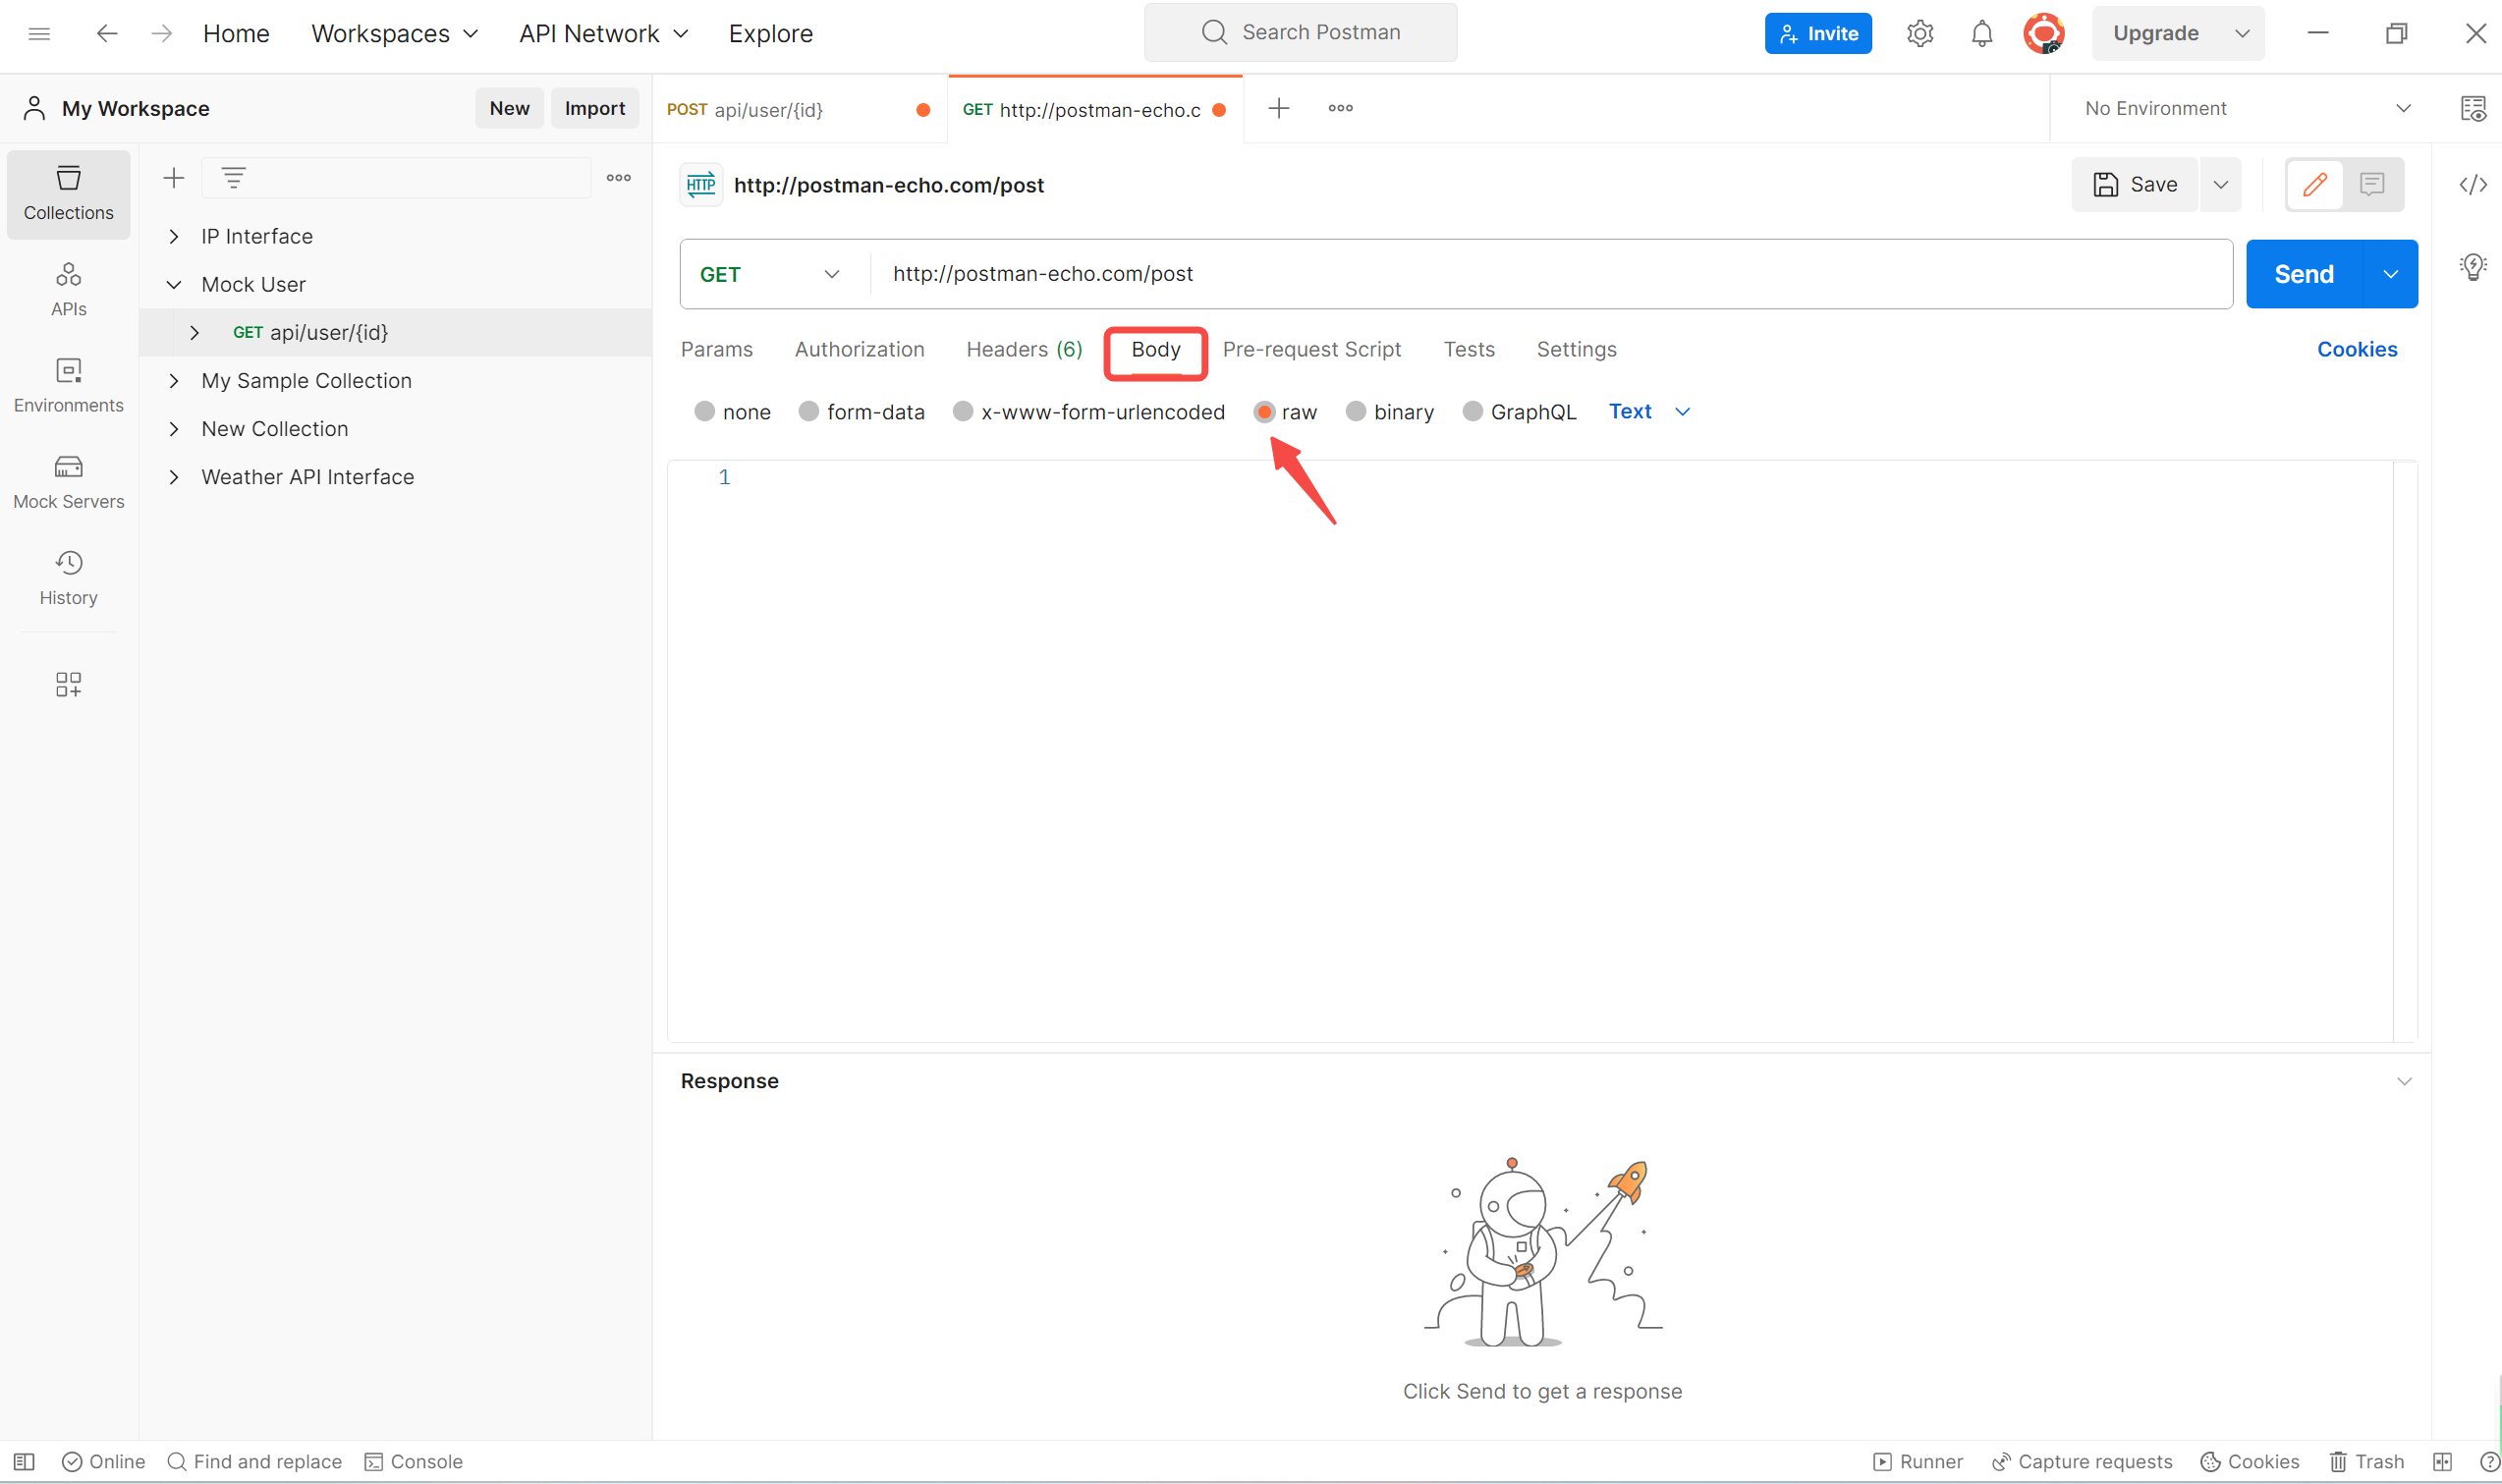
6. Select "JSON (application/json)" from the dropdown menu.
7. Enter your JSON data in the text area.
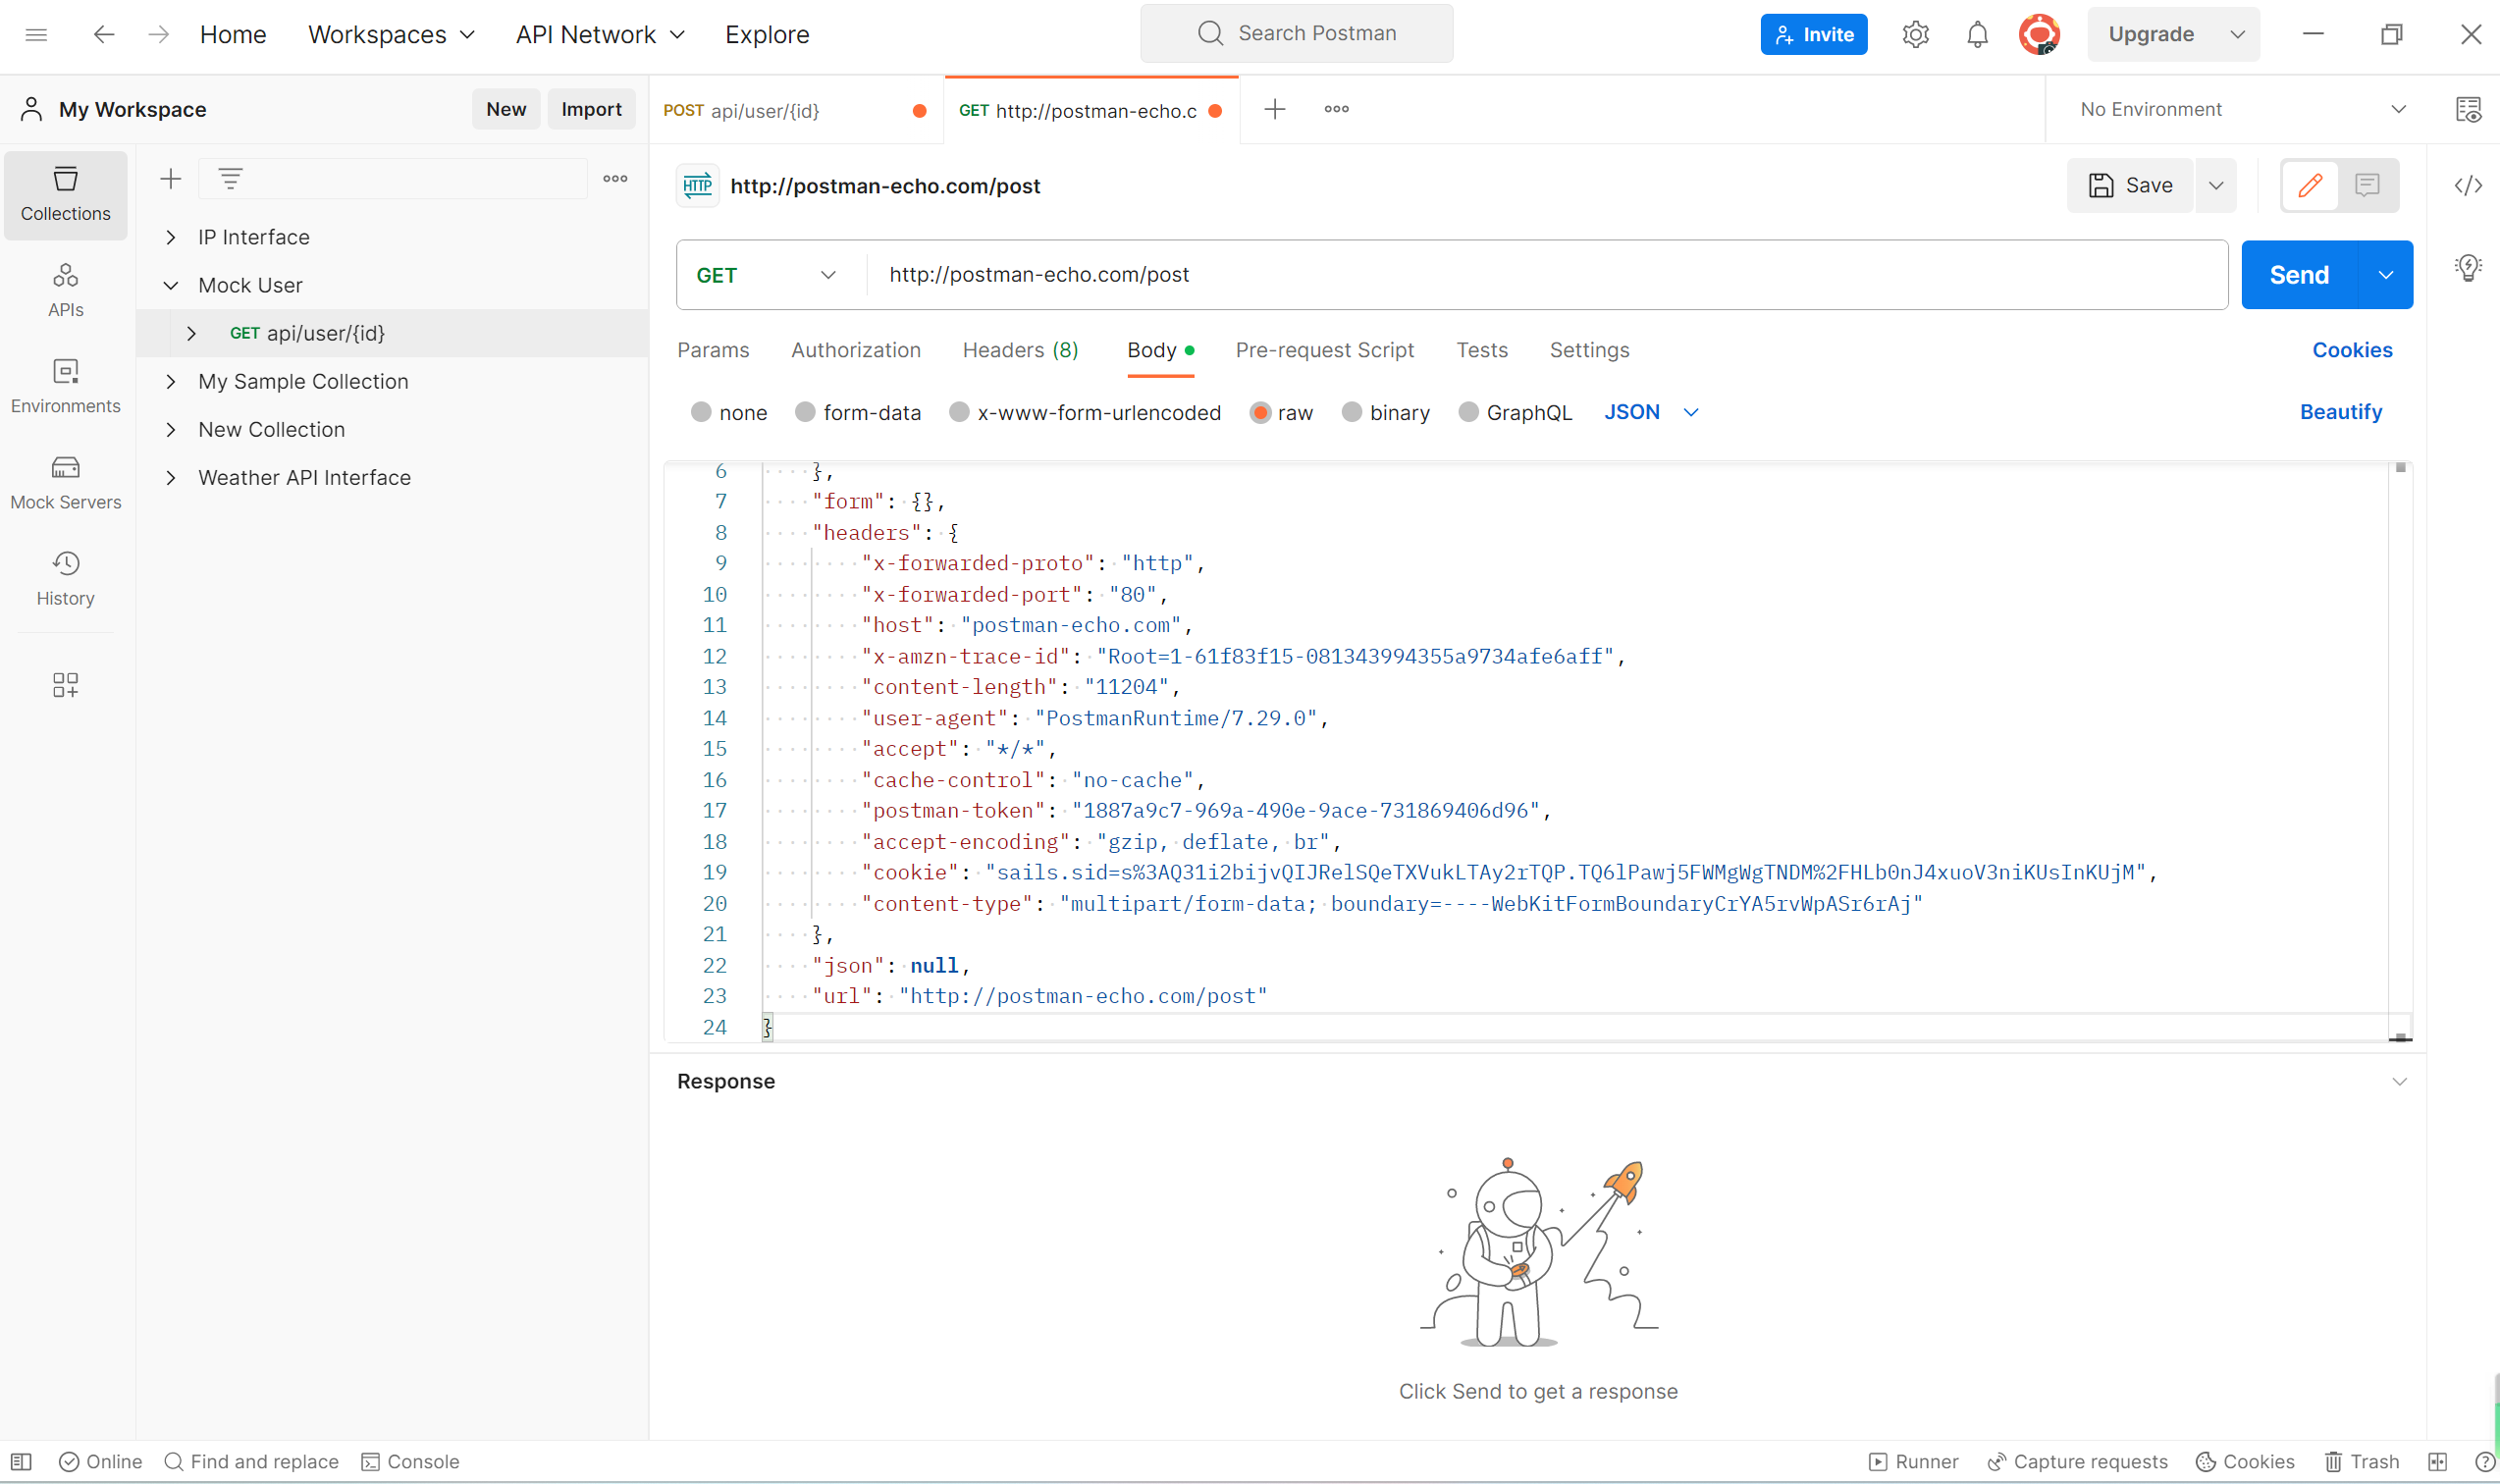
Once you've entered your JSON data, you can send the request and see the response in the "Response" tab.
One important thing to consider is that you can use variables in your JSON data by enclosing them in double curly braces (e.g. {{variable_name}}). This feature is especially useful when you need to send dynamic data to your requests.
Postman Tutorial: Upload a File and JSON Data Together
When it comes to testing APIs, Postman is one of the most popular tools used by developers. In the previous sections, we learned how to upload a file and JSON data separately in Postman.
But what if we need to upload a file and JSON data together? In this section, we will learn how to do that.To upload a file and JSON data together in Postman, we need to use the form-data option. Follow the steps below:
- Open Postman and create a new request.
- Select the HTTP method (e.g. POST) and enter the URL of the API endpoint you want to test.
- Select the Body tab and choose the form-data option.
- Add a key-value pair for the file you want to upload. Set the key to "file" and the value to the file you want to upload.
- Add another key-value pair for the JSON data you want to upload. Set the key to "data" and the value to the JSON data you want to upload.
- Click the Send button to send the request.
Note that when using the form-data option, we need to set the Content-Type header to "multipart/form-data". Postman will automatically set this header for us when we choose the form-data option.
Conclusion
These are the detailed steps for uploading files in Postman, follow the steps and you will be able to master them. Apidog is not only easy to use and visualize, but also has the ability to design, manage and mock documents in addition to the testing features supported by Postman, and the ability to import APIs in Postman format with one click for seamless conversion to Apidog.


