
Thunder Client is a lightweight REST API client extension designed for Visual Studio Code. Tailored to simplify API testing within the VS Code environment, using variables can improve productivity. In this tutorial, we will introduce the Thunder Client environment variable in detail for you.
Thunder Client Variable
Thunder Client allows users to harness the power of variables, acting as placeholders for dynamic values that may change between different API requests. These variables can be stored within a selected environment, offering flexibility and ease of maintenance.

Variables can be defined in the environment tab, or set environment variables from response, allowing for adaptability and reusability across requests. In tests, Thunder Client follows the format {{variableName}}. Nonexistent variables or typos remain in white font while matching variables turn green.
Environment Variables in Thunder Client:
Environments in Thunder Client provide a way to manage sets of variables based on different testing scenarios or environments (e.g., development, testing, production). Switching between environments allows for quick changes to variable values associated with each environment, ensuring flexibility in API testing.
Common variables such as {{request_name}}, {{collection_name}}, and {{folder_name}} are available for all requests. The following environments can be used, ranked from least to highest precedence:
- Global Environment: Save and share variables across collections, with values stored in the main thunderEnvironment.json file.
- Local Environment: Save secrets and transient tokens locally, excluding them from version control. Variables are global, but values aren't stored in the main thunderEnvironment.json file.
- .env File: Create an environment, link a .env file, and save it for use in requests using {{variable}}. Variables in the .env file should be in the format key=value.
Managing Active Environment and Attachments:
To use an environment's variables, make it active through the options menu by selecting Set Active. Optionally, you can attach an environment to a collection from the Collection Settings view, linking multiple collections to multiple environments.
Collection and Request Variables:
Set collection and request-specific env variables in scripting using request scope. These variable values are available only during the execution of the request. For example, in the Pre Run Tab, use the Scripting tab to set variables:
tc.setVar("example_variable", "example_value", "request");
tc.setVar("baseUrl", "http://example-api.com", "request");
Thunder Client provides a comprehensive environment for managing variables, enhancing the efficiency of API testing in Visual Studio Code.
3 Steps to Set Environment Variable on Thunder Client
Thunder Client simplifies the process of setting environment variables, providing flexibility in managing dynamic values across your API requests. Follow these streamlined steps:
Prerequisite:
Installation of the Thunder Client on your computer. Input "Thunder Client" in the search box of the Extensions, then install the Thunder Client extension.
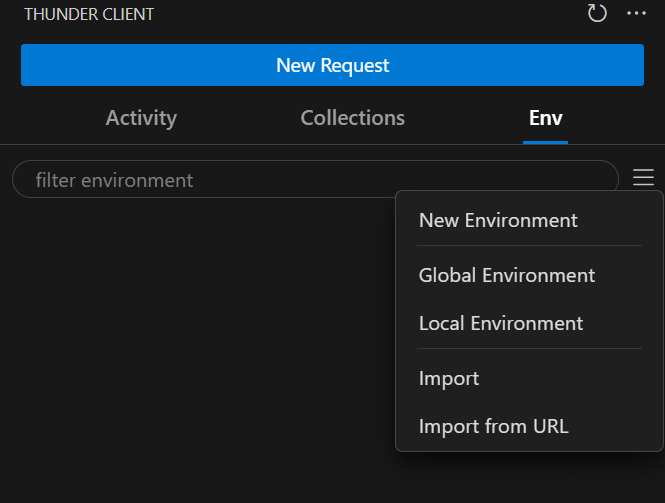
Step 1. Select the Environment Variable Types.
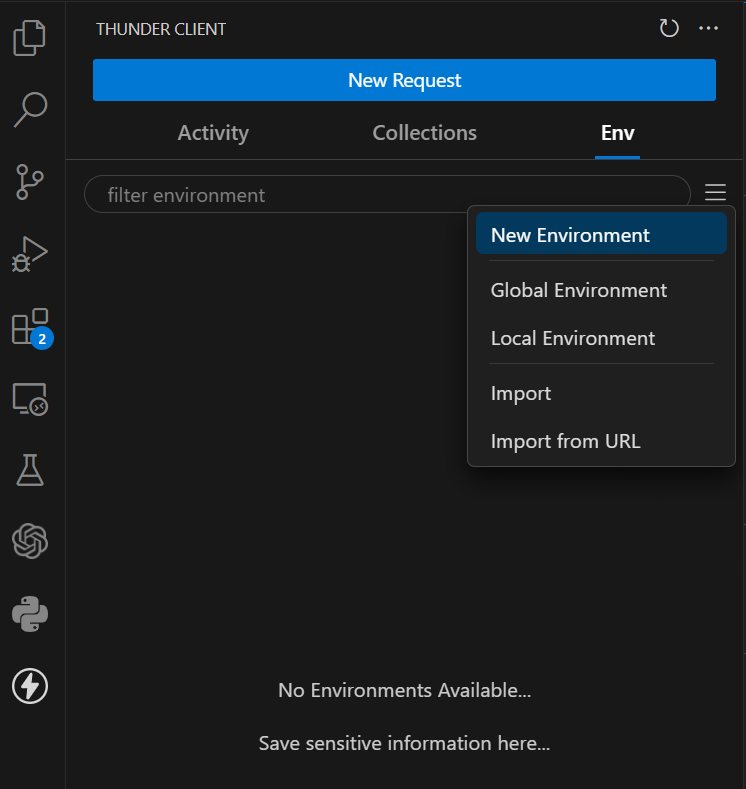
Click the "Env" on Thunder Client to set New Environment/Global Environment/Local Environment. You can also import the existing environment variable to Thunder Client.
Step 2. Define the New Environment Name and Value
After you have selected "New Environment", it will display the tip as follows.

Configure the other environment variables' name and values in here.
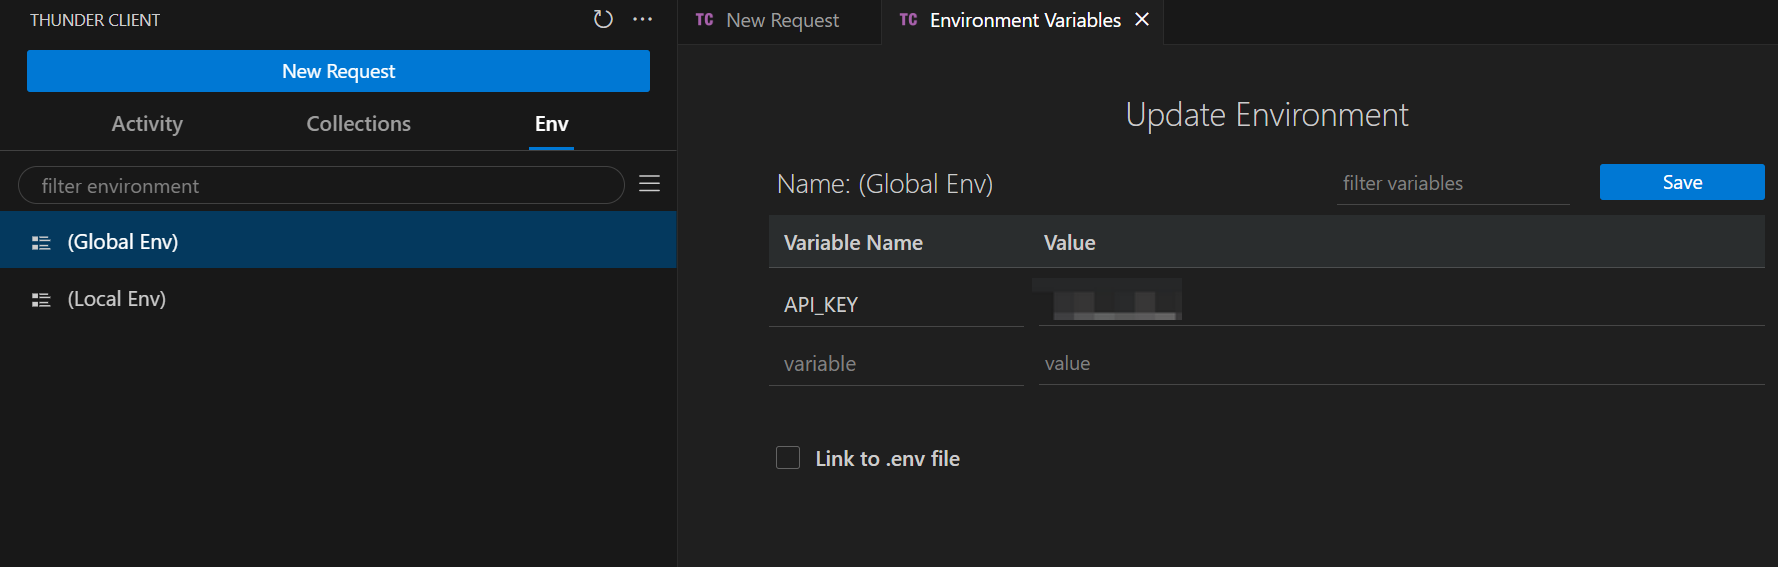
Note: Consistent Naming Matters: Maintain a uniform and descriptive naming convention for files, variables, and elements to enhance code readability and ease of understanding.
Avoid Ambiguity in Names: Choose clear and concise names that reflect the purpose of the entity, reducing confusion and promoting efficient collaboration within your codebase.
Step 3. Save the Environment Variables
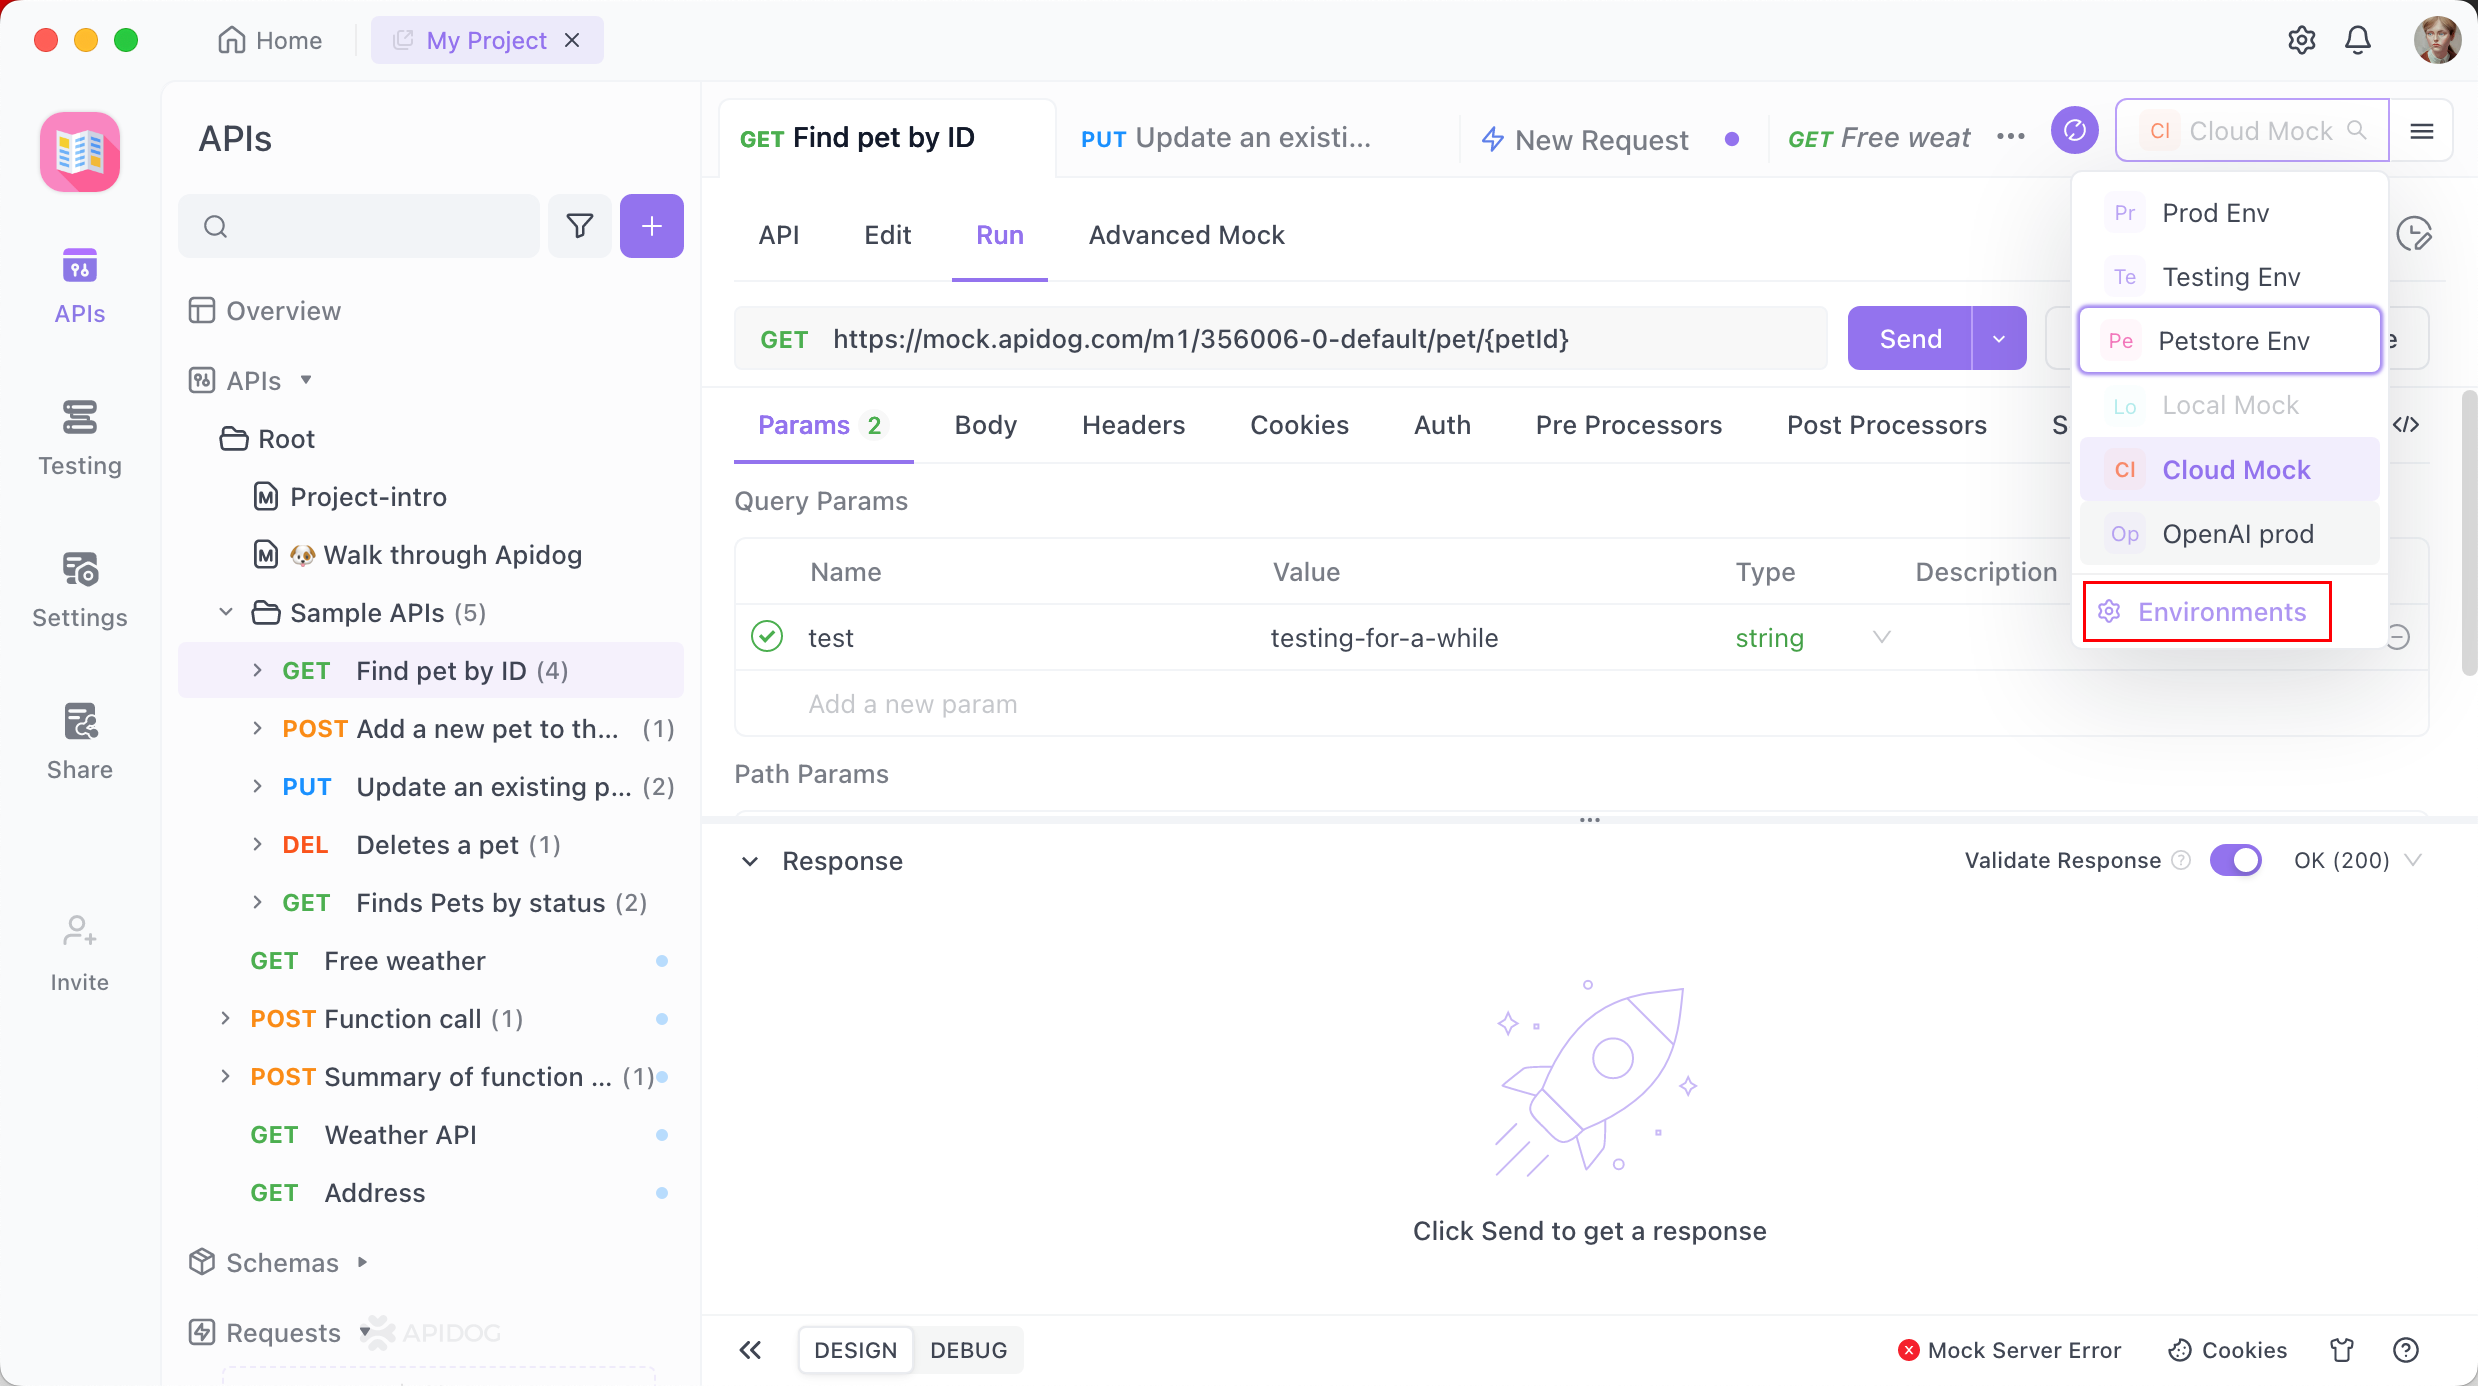
After setting up environment variables in Thunder Client, you can choose the applicable scope when making requests. This feature allows you to flexibly control the scope of environment variable usage to meet different needs and scenarios.
Selecting a scope in Thunder Client ensures that requests use only the specified environment's variables. This is handy for managing multiple environments or switching configurations seamlessly.
Thunder Client's flexible scope selection makes it adaptable to complex development workflows. Once you set up variables and choose the scope, managing API requests becomes more convenient, ensuring proper execution in diverse environments.
Apidog Environment Variables with a visual way
Apidog is an all-in-one API tool for documenting, testing, and mocking API. Apidog's Environment Variables feature simplifies project management across various stages, offering an intuitive environment setup for different base URLs and parameters.
With easy access to the Environment Management portal, users can seamlessly create, edit, and switch between environments, streamlining the testing process.
Additionally, Apidog distinguishes between Services and Environments, allowing users to set up distinct functionalities and base URLs. This ensures efficient configuration for different scenarios, promoting a straightforward approach to environment and service management in development and testing workflows.


