Ever wanted to run a powerful language model on your local machine? Introducing QwQ-32B, Alibaba's newest and most powerful LLM available. Whether you’re a developer, researcher, or just a curious techie, running QwQ-32B locally can open up a world of possibilities—from building custom AI applications to experimenting with advanced natural language processing tasks.
In this guide, we’ll walk you through the entire process, step by step. We’ll use tools like Ollama and LM Studio to make the setup as smooth as possible.
Since you want to use APIs with Ollama with an API Testing Tool, don’t forget to check out Apidog. It’s a fantastic tool for streamlining your API workflows, and the best part? You can download it for free!
Ready to dive in? Let’s get started!
1. Understanding QwQ-32B?
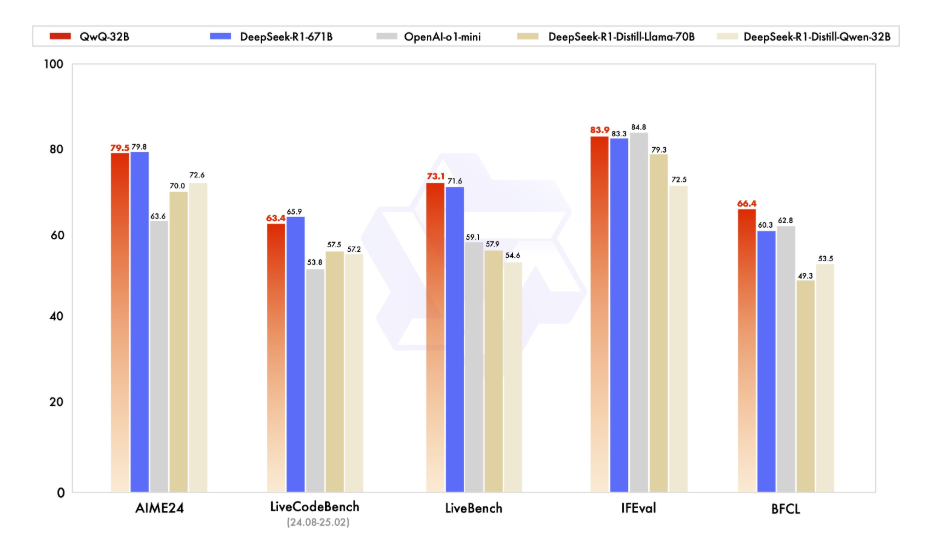
Before we jump into the technical details, let’s take a moment to understand what QwQ-32B is. QwQ-32B is a state-of-the-art language model with 32 billion parameters, designed to handle complex natural language tasks like text generation, translation, and summarization. It’s a versatile tool for developers and researchers looking to push the boundaries of AI.
Running QwQ-32B locally gives you full control over the model, allowing you to customize it for specific use cases without relying on cloud-based services. Privacy, Customization, Cost-Effectiveness, and Offline Access are few of the many features you take advantage of when running this model locally.
2. Prerequisites
Your local machine will need to meet the following requirements before you can run QwQ-32B locally:
- Hardware: A powerful machine with at least 16GB of RAM and a high-end GPU with a minimum of 24GB of VRAM (e.g., NVIDIA RTX 3090 or better) for optimum performance.
- Software: Python 3.8 or later, Git, and a package manager like pip or conda.
- Tools: Ollama and LMStudio (we’ll cover these in detail later).
3. Run QwQ-32B locally using Ollama
Ollama is a lightweight framework that simplifies the process of running large language models locally. Here’s how to install it:
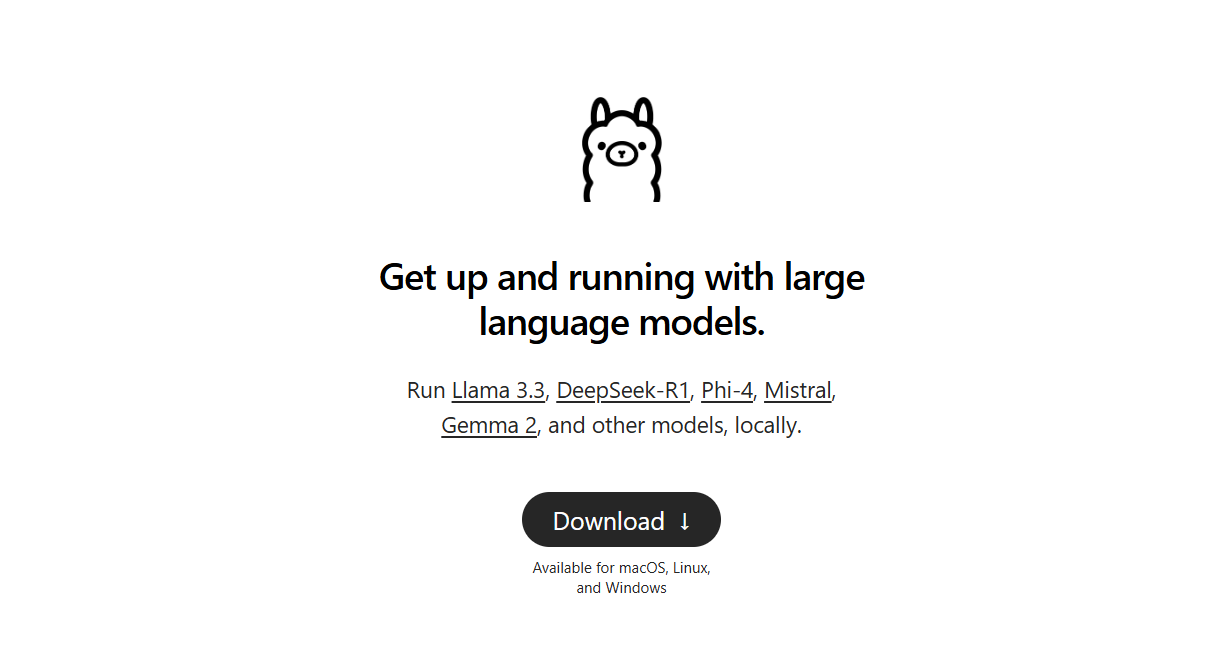
Step 1: Download and Install Ollama:
- For Windows and macOS, download the executable file from the official Ollama website and run it to install. Then follow the simple installation instructions provided in the installation setup.
- For Linux users, you can use the following command:
curl -fsSL https://ollama.ai/install.sh | sh
- Verify Installation: After installation, if you would like to verify that you correctly installed Ollama, open a terminal and run:
ollama --version
- If the installation is successful, you’ll see the version number.
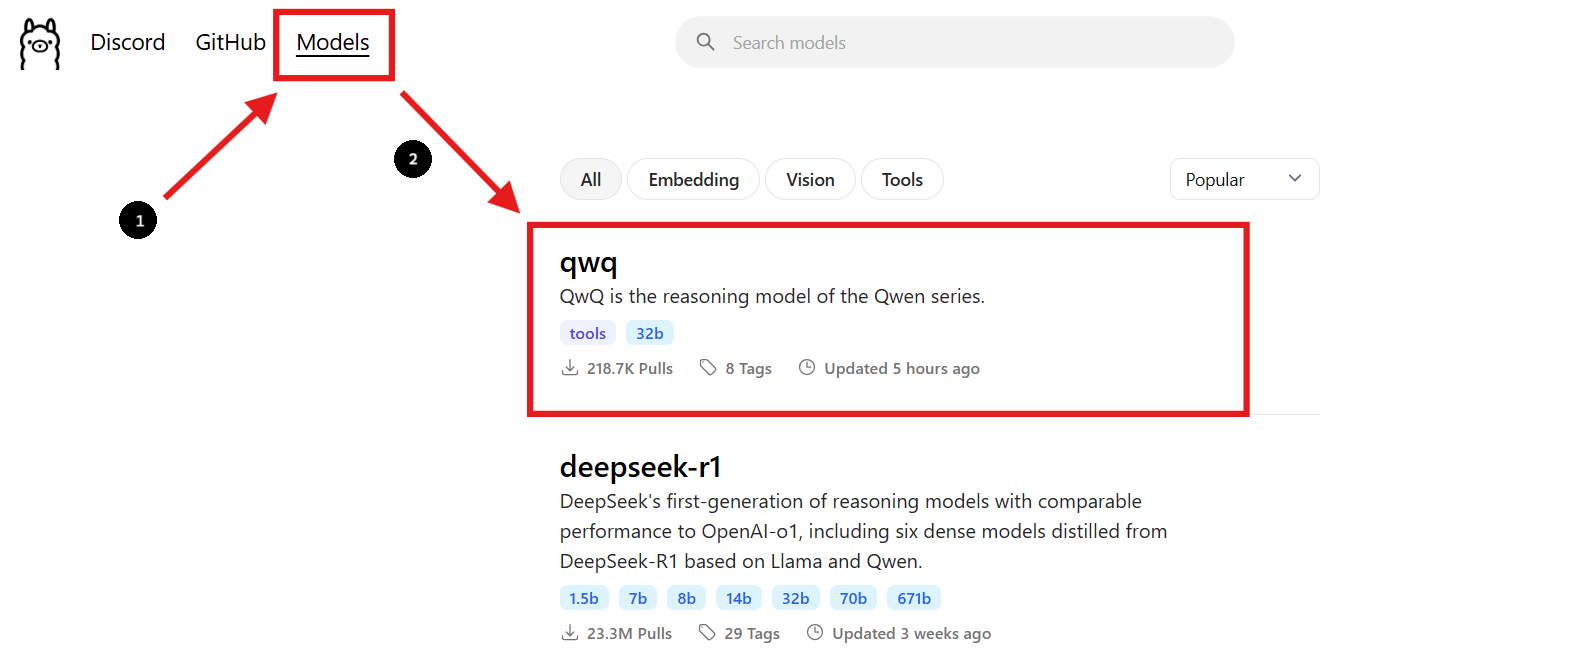
Step 2: Find the QwQ-32B Model
- Go back to the Ollama website and navigate to the "Models" section.
- Use the search bar to find "QwQ-32B."
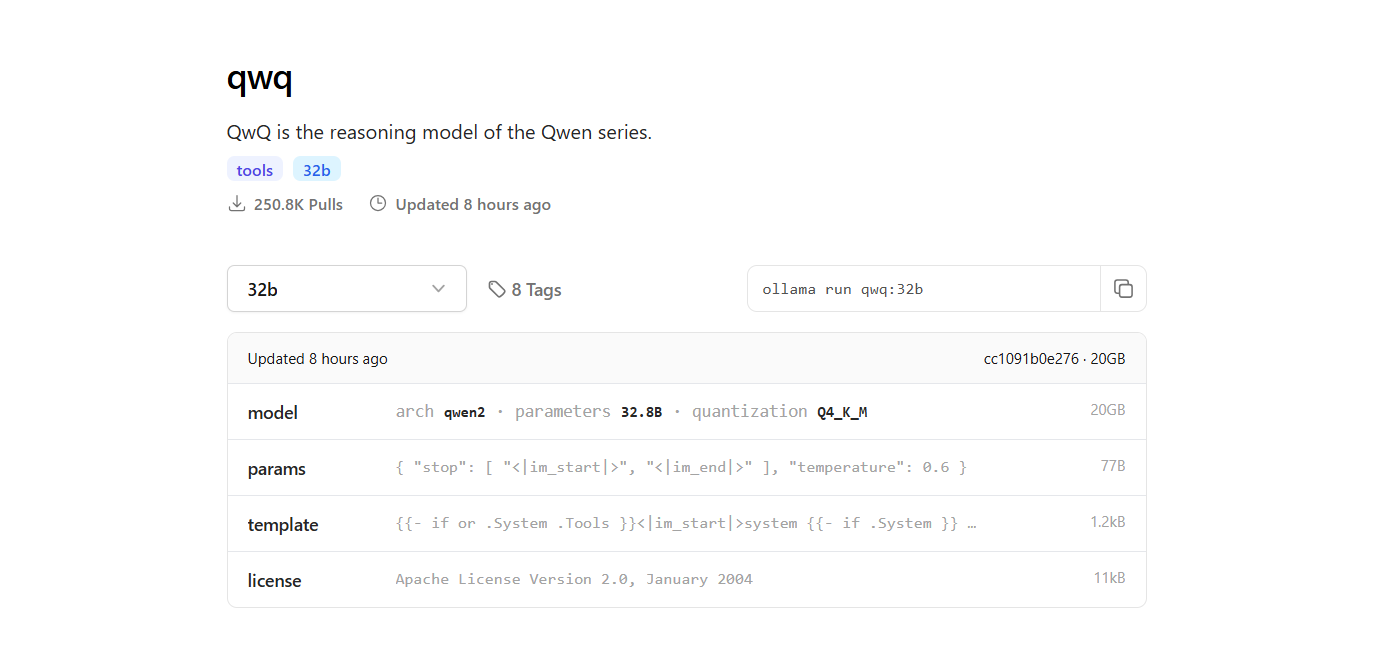
- Once you find the QwQ-32B model, you will see the installation command provided on the page.
Step 3: Download the QwQ-32B Model
- Open a new terminal window to download the model and run the following command:
ollama pull qwq:32b- After the download completes, you can verify that the model is installed by running the following command:
ollama list
- The command will list all the models you have downloaded using Ollama, confirming that QwQ-32B is available.
Step 4: Run the QwQ-32B Model
Run the Model in Terminal:
- To interact with the QwQ-32B model directly in the terminal, use the following command:
ollama run qwq:32b
- You can ask questions or provide prompts in the terminal, and the model will respond accordingly.
Use an Interactive Chat Interface:
- Alternatively, you can use tools like Chatbox or OpenWebUI to create an interactive GUI for chatting with the QwQ-32B model.
- These interfaces provide a more user-friendly way to interact with the model, especially if you prefer a graphical interface over a command-line interface.
4. Run QwQ-32B locally using LM Studio
LM Studio is a user-friendly interface for running and managing language models locally. Here’s how to set it up:
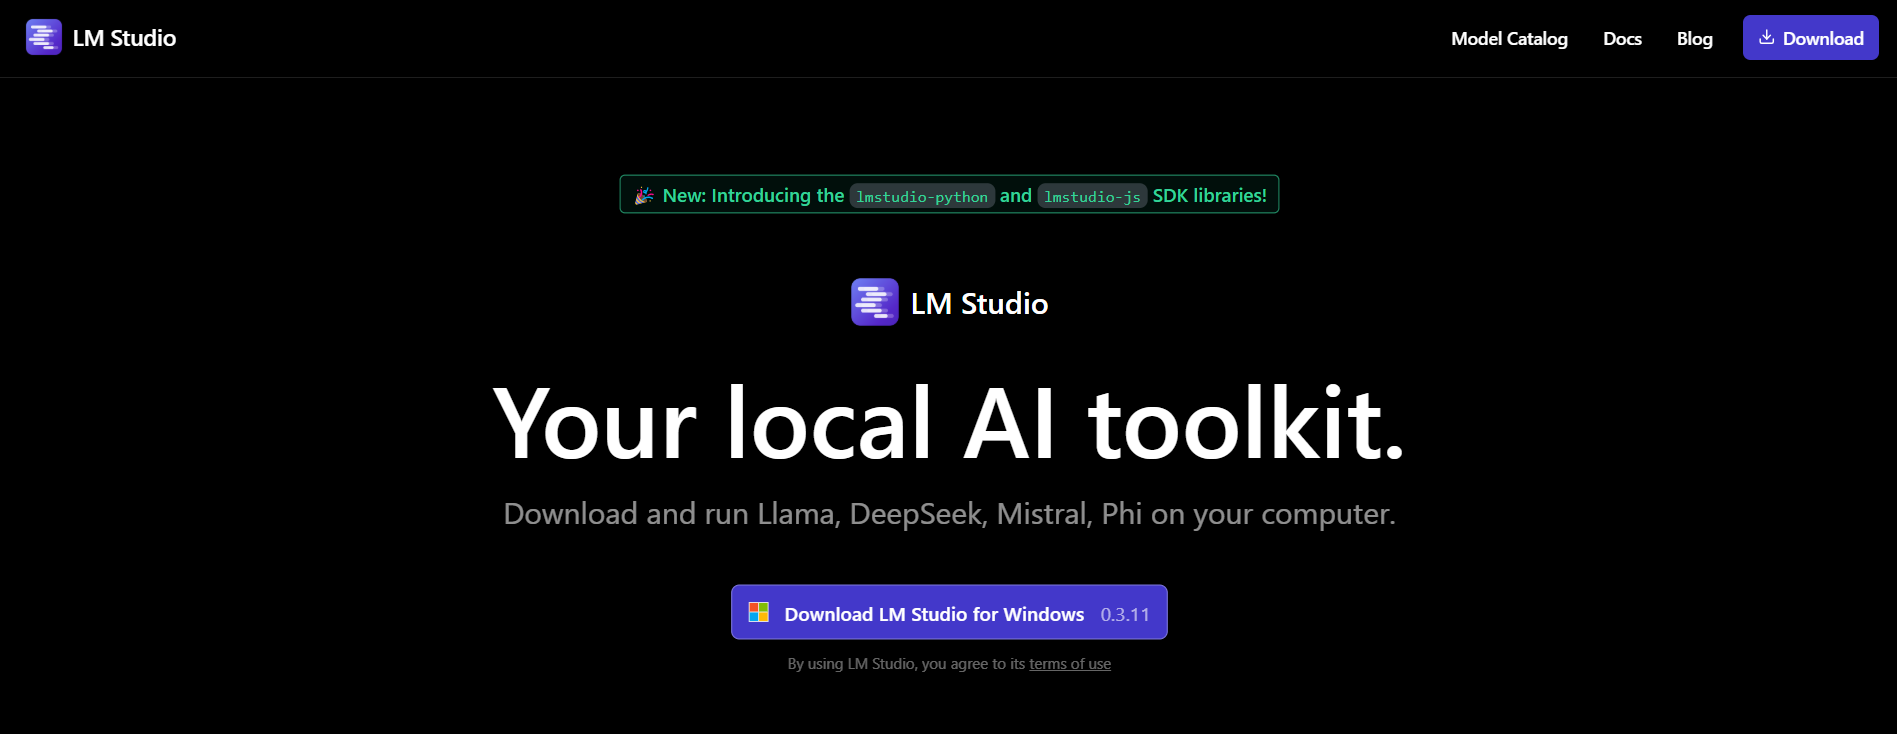
Step 1: Download LM Studio:
- To start, visit the official LM Studio website at lmstudio.ai. This is where you can download the LM Studio application for your operating system.
- On their page, navigate to the download section and select the version that matches your operating system (Windows, macOS, or Linux).
Step 2: Install LM Studio:
- Follow the simple installation instructions for your operating system.
Step 3: Find and Download QwQ-32B Model:
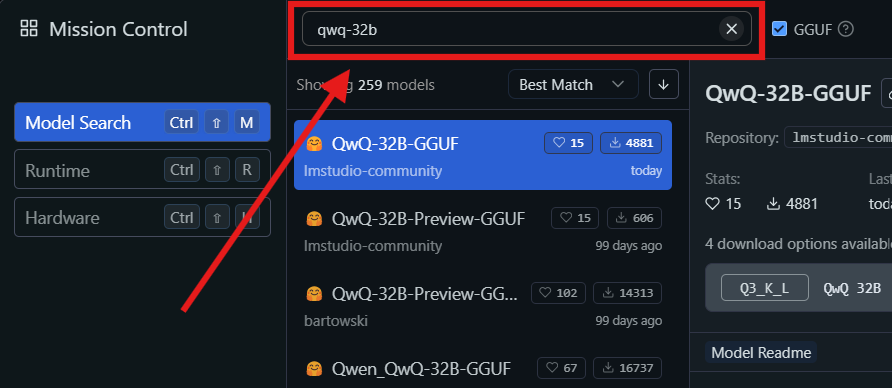
- Open LM Studio and navigate to the “My Models” section.
- Click on the search icon and type "QwQ-32B" in the search bar.
- Select the desired version of the QwQ-32B model from the search results. You might find different quantized versions, such as a 4-bit quantized model, which can help reduce memory usage while maintaining performance.
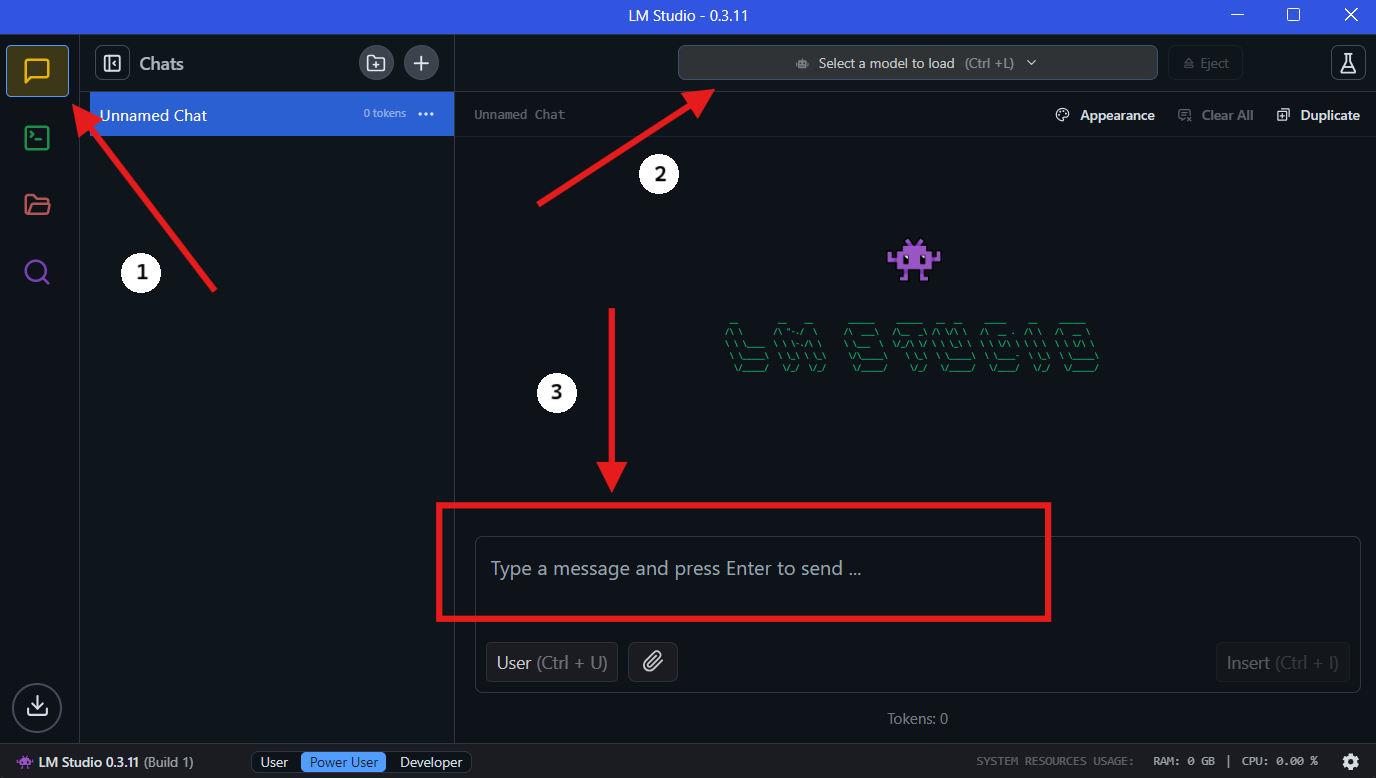
Step 4: Run QwQ-32B Locally in LM Studio
- Select the Model: Once the download is complete, go to the "Chat" section in LM Studio. In the chat interface, select the QwQ-32B model from the dropdown menu.
- Interact with QwQ-32B: Start asking questions or providing prompts in the chat window. The model will process your input and generate responses.
- Configure Settings: You can adjust the model's settings based on your preferences in the "advanced configuration tab".
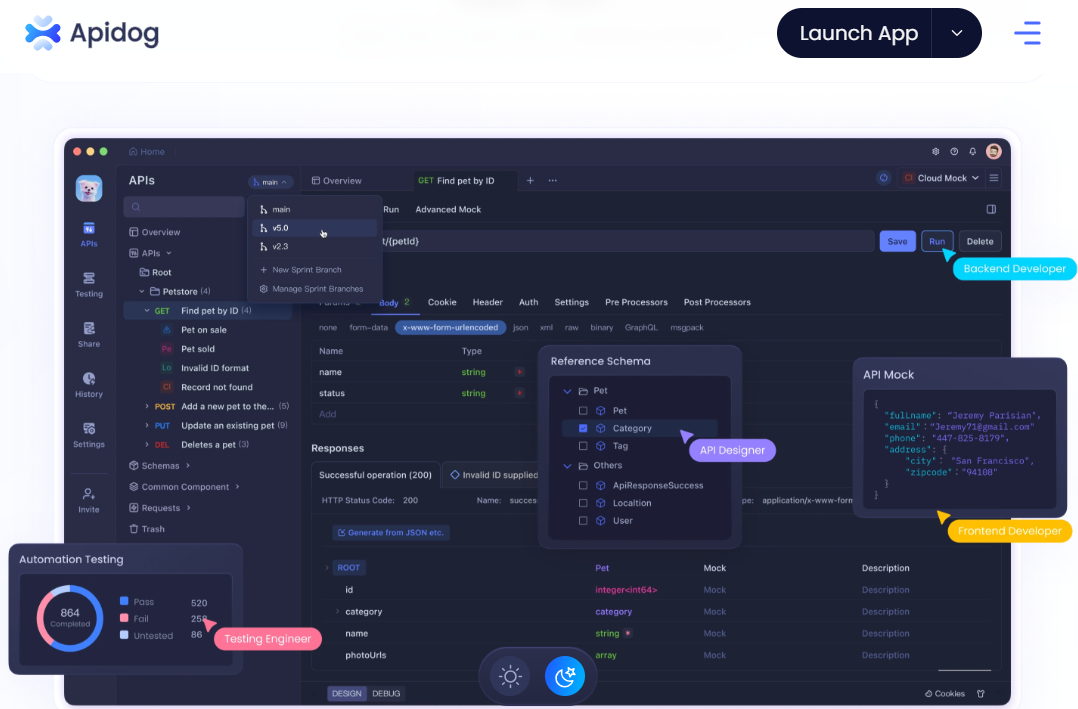
5. Streamlining API Development with Apidog
Integrating QwQ-32B into your applications requires efficient API management. Apidog is an all-in-one collaborative API development platform that simplifies this process. Key Features of Apidog include API Design, API Documentation and API Debugging. To make the integration process seamless, follow these steps to set up Apidog for managing and testing your APIs with QwQ-32B.

Step 1: Download and Install Apidog
- Visit the Apidog official website and download the version compatible with your operating system (Windows, macOS, or Linux).
- Follow the installation instructions to set up Apidog on your machine.
Step 2: Create a New API Project
- Open Apidog and create a new API project.
- Define your API endpoints, specifying request and response formats for interacting with QwQ-32B.
Step 3: Connect QwQ-32B to Apidog via Local API
To interact with QwQ-32B through an API, you need to expose the model using a local server. Use FastAPI or Flask to create an API for your local QwQ-32B model.
Example: Setting Up a FastAPI Server for QwQ-32B:
from fastapi import FastAPI
from pydantic import BaseModel
import subprocess

app = FastAPI()

class RequestData(BaseModel):
	prompt: str

@app.post("/generate")
async def generate_text(request: RequestData):
	result = subprocess.run(
    	["python", "run_model.py", request.prompt],
        capture_output=True, text=True
    )
    return {"response": result.stdout}
# Run with: uvicorn script_name:app --reload
Step 4: Test API Calls with Apidog
- Open Apidog and create a POST request to
http://localhost:8000/generate. - Enter a sample prompt in the request body and click "Send".
- If everything is configured correctly, you should receive a generated response from QwQ-32B.
Step 5: Automate API Testing and Debugging
- Use Apidog's built-in testing features to simulate different inputs and analyze how QwQ-32B responds.
- Adjust request parameters and optimize the API performance by monitoring response times.
🚀 With Apidog, managing your API workflows becomes effortless, ensuring smooth integration between QwQ-32B and your applications.
6. Tips for Optimizing Performance
Running a 32-billion-parameter model can be resource-intensive. Here are some tips to optimize performance:
- Use a High-End GPU: A powerful GPU will significantly speed up inference.
- Adjust Batch Size: Experiment with different batch sizes to find the optimal setting.
- Monitor Resource Usage: Use tools like
htopornvidia-smito monitor CPU and GPU usage.
7. Troubleshooting Common Issues
Running QwQ-32B locally can sometimes be tricky. Here are some common issues and how to fix them:
- Out of Memory: Reduce the batch size or upgrade your hardware.
- Slow Performance: Ensure your GPU drivers are up to date.
- Model Not Loading: Double-check the model path and file integrity.
8. Final Thoughts
Running QwQ-32B locally is a powerful way to harness the capabilities of advanced AI models without relying on cloud services. With tools like Ollama and LM Studio, the process is more accessible than ever.
And remember, if you’re working with APIs, Apidog is your go-to tool for testing and documentation. Download it for free and take your API workflows to the next level!