Migrating APIs managed by Swagger to Apidog involves several methods. This guide will outline 4 simple ways to export the Swagger file to import it into Apidog, using online links for scheduled imports, utilizing the IDEA plugin for one-click uploads, and importing through the Open API. Below are the detailed steps for each method.
Method 1: Export Swagger File and Import into Apidog
This is the most straightforward approach, suitable for one-time migrations, especially when your API documentation is stable. Here are the specific steps:
Step 1. Export the Swagger File
In the Swagger UI, export your API documentation as a .yaml or .json file. Typically, you can find an option to download the file in the upper left corner of the Swagger UI.

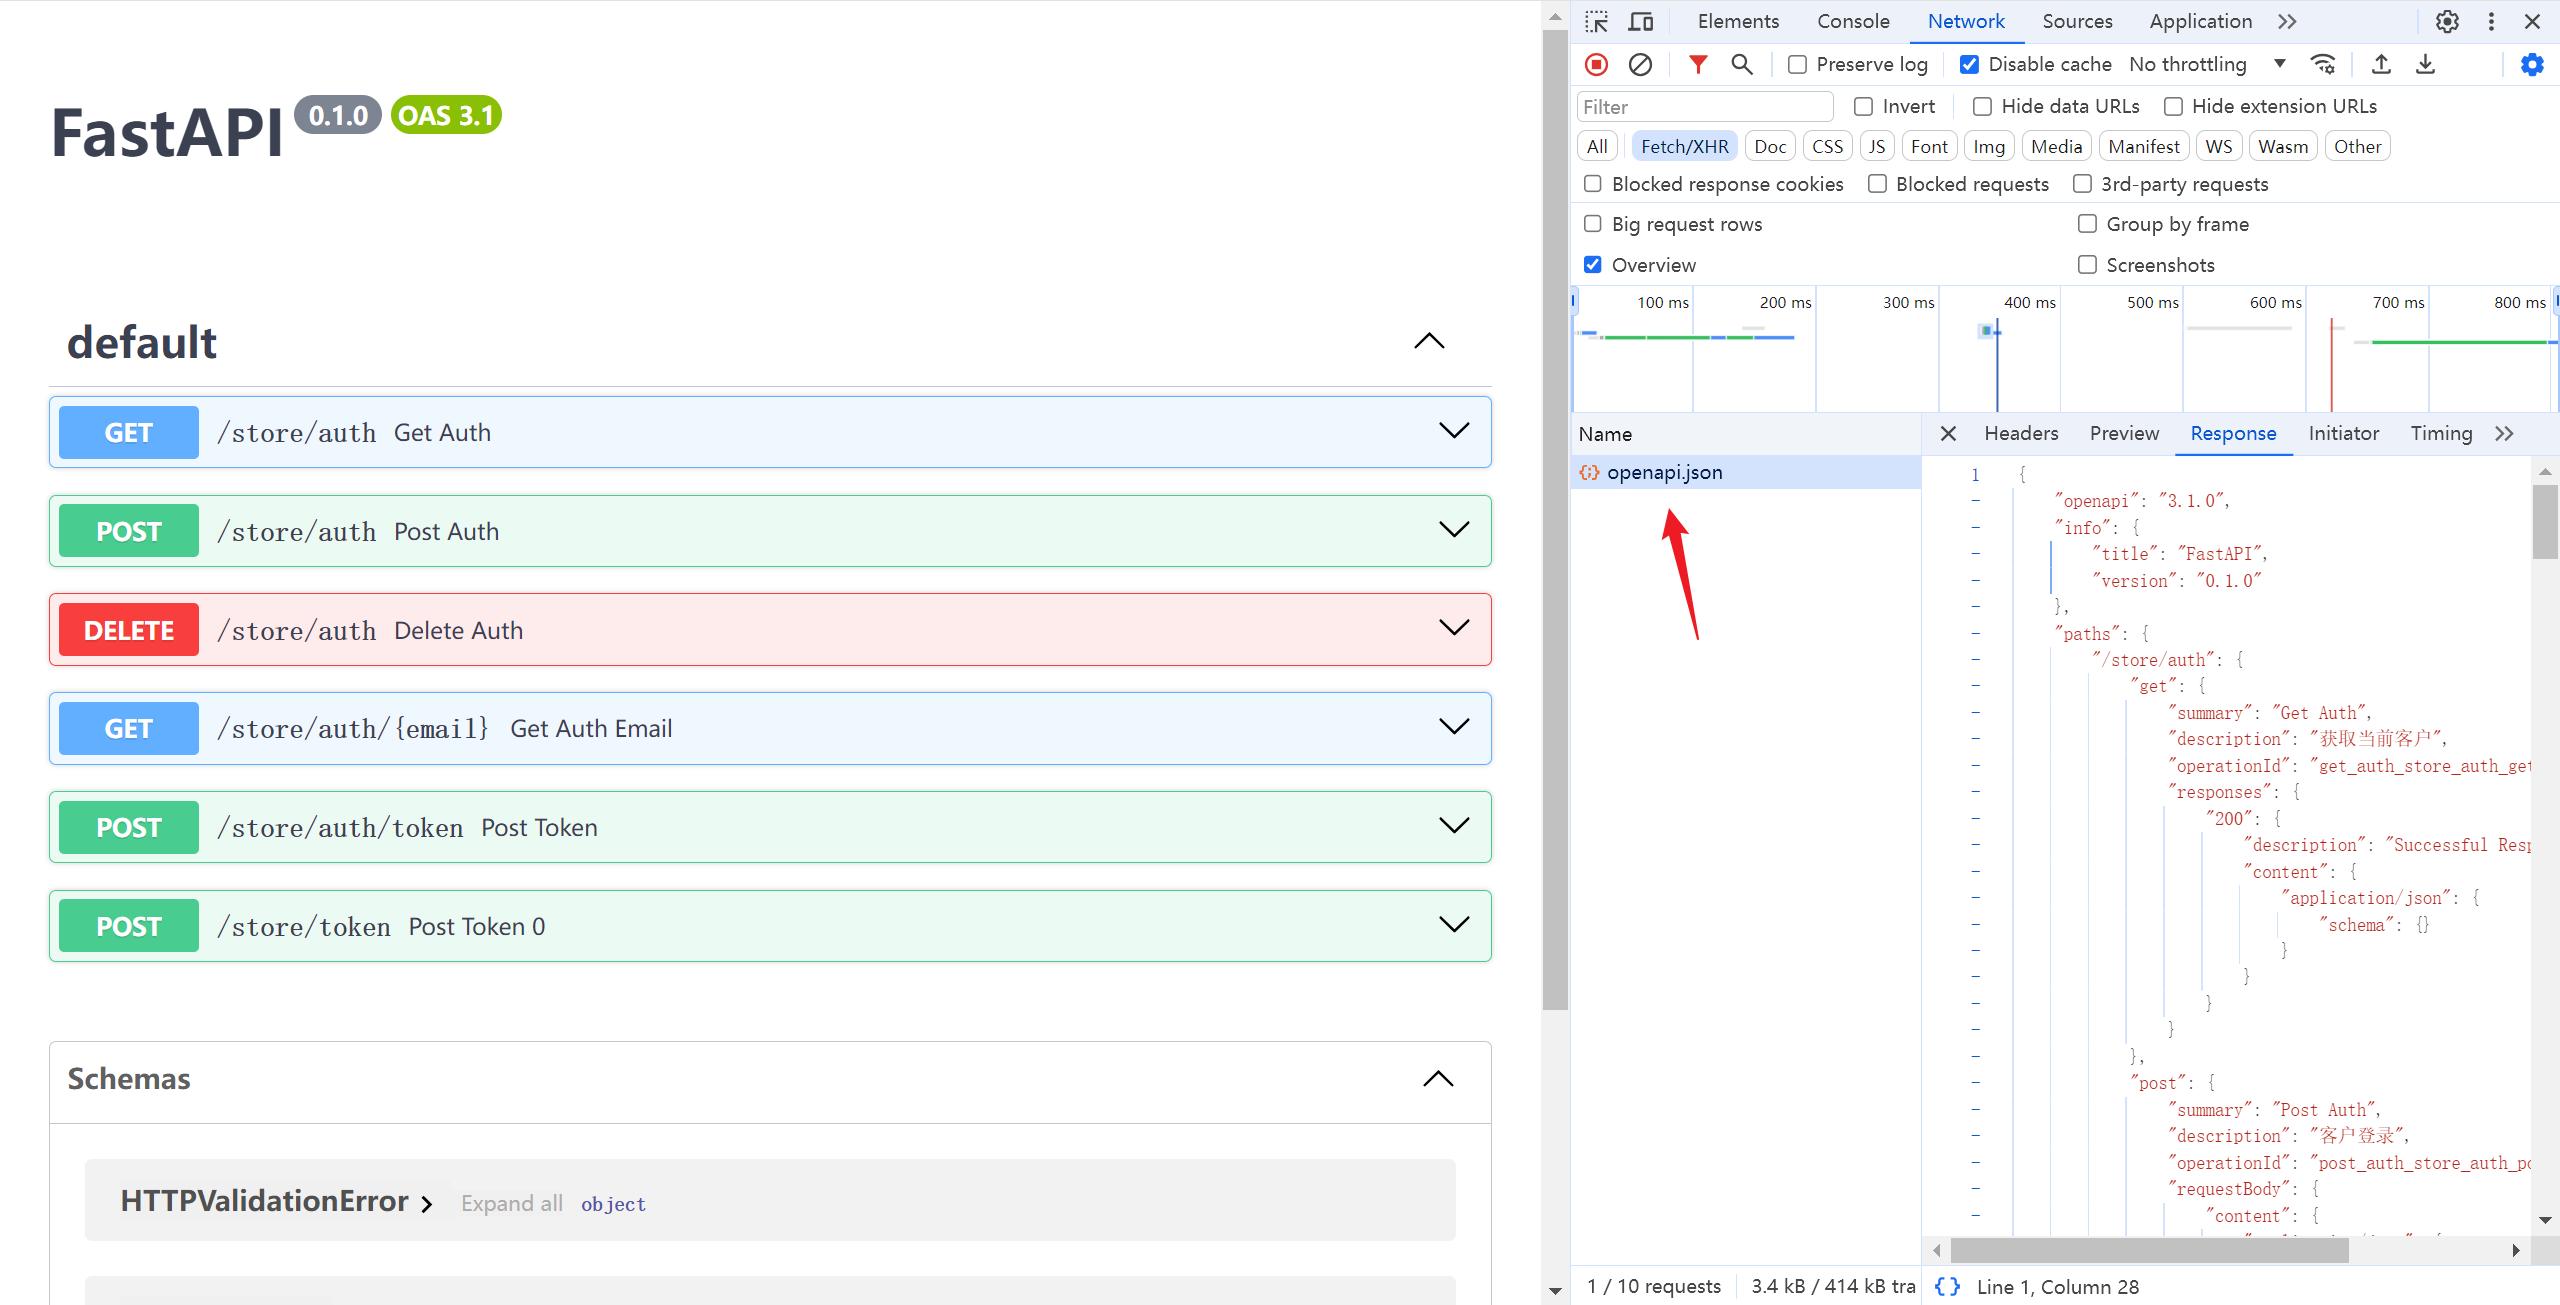
If the interface does not show a URL link, you can open the browser console by pressing “F12” or “Ctrl+Shift+I,” then navigate to Network -> Fetch/XHR and refresh the page. This should reveal a .json file that you can open in a new window and download.
Step 2. Import Swagger Docs into Apidog
Open Apidog, navigate to your project, and select Project Settings -> Import Data -> OpenAPI/Swagger. Upload the previously exported .yaml or .json file. If you have a publicly accessible source file URL, you can also import it via the URL.

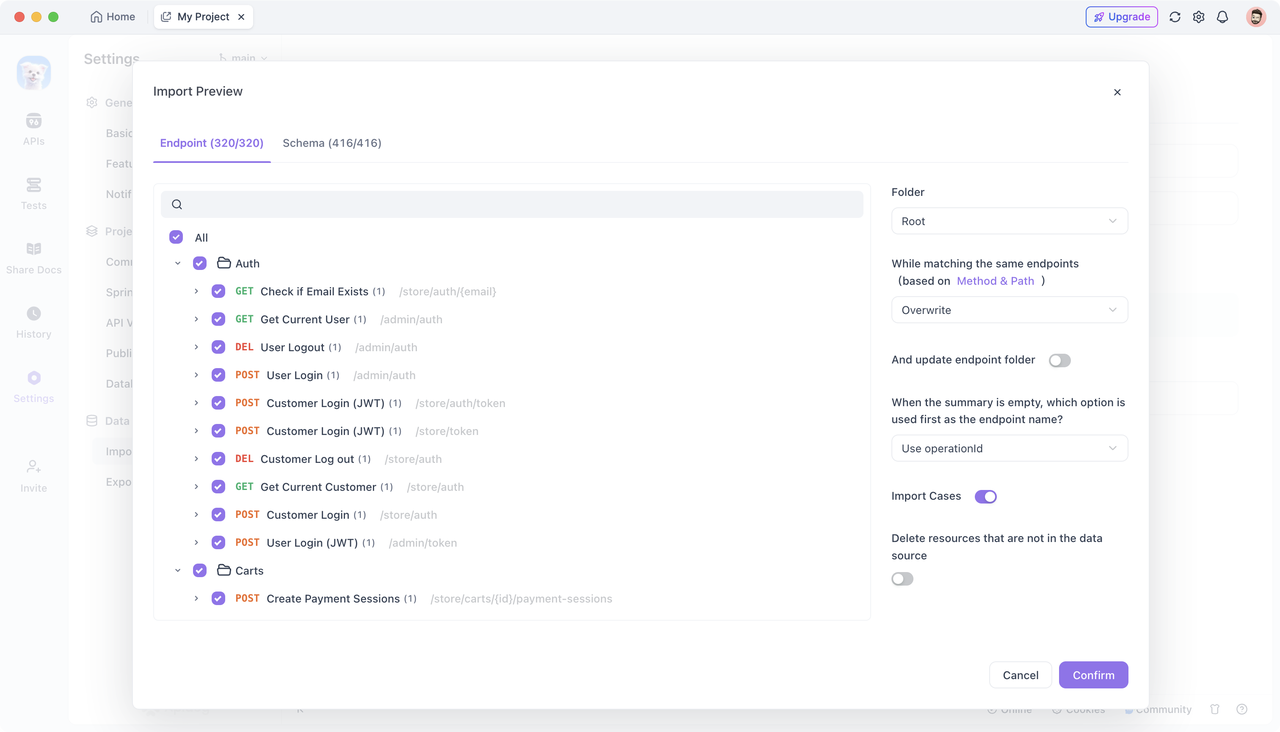
After uploading, Apidog will automatically parse and import your API documentation, and you can further edit and manage it in the preview interface.

Method 2: Scheduled Import via Online Link
If your Swagger API documentation is frequently updated, manual exports and imports may become cumbersome. In this case, you can utilize Apidog's scheduled import feature to synchronize the online Swagger document automatically. Here are the steps:
Step 1. Obtain the Online Link
Ensure that your Swagger document can be accessed via a public URL.
https://petstore.swagger.io/v2/swagger.jsonStep 2. Set Up Scheduled Task to Import OpenAPI Docs
Import In Apidog, navigate to the project where you want to set up the scheduled import, select Project Settings -> Import Data -> Scheduled Import, and create a new task. Enter your online Swagger document URL (data source URL) and set the import interval (e.g., every 3 hours, every 12 hours, etc.).

After saving, Apidog will automatically fetch and update the latest API documentation based on your specified interval.
Method 3: One-Click Upload via IDEA Plugin
The Apidog IDEA plugin recognizes local Java and Kotlin project source code, automatically generates API documentation, and syncs it to your Apidog project. It supports common frameworks such as Spring Boot, enabling a truly zero-intrusion code experience.
To make the migration process more efficient, here are the steps for using the IDEA plugin:
Step 1. Install the Apidog IDEA Plugin
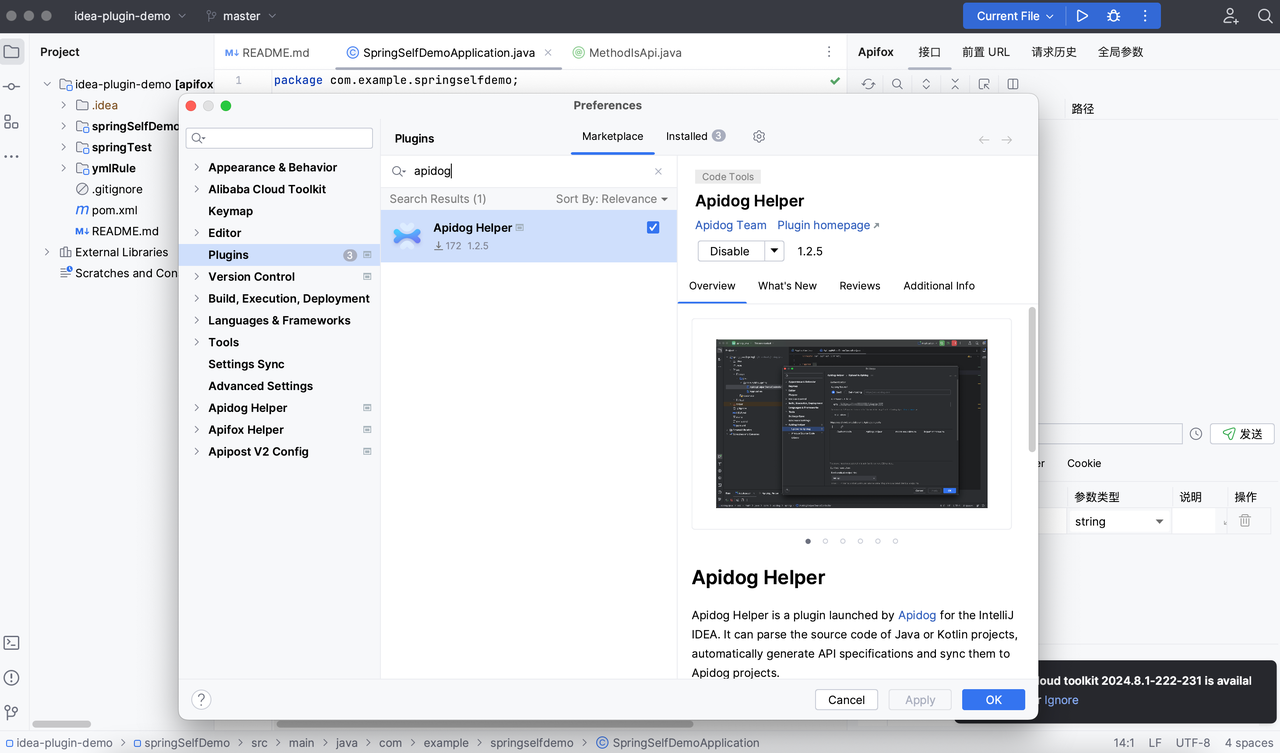
Open IntelliJ IDEA (version 2019.3 or higher), go to Settings -> Plugins, search for “Apidog Helper,” and install it. Restart IDEA after installation.
Step 2. Configure the API Access Token
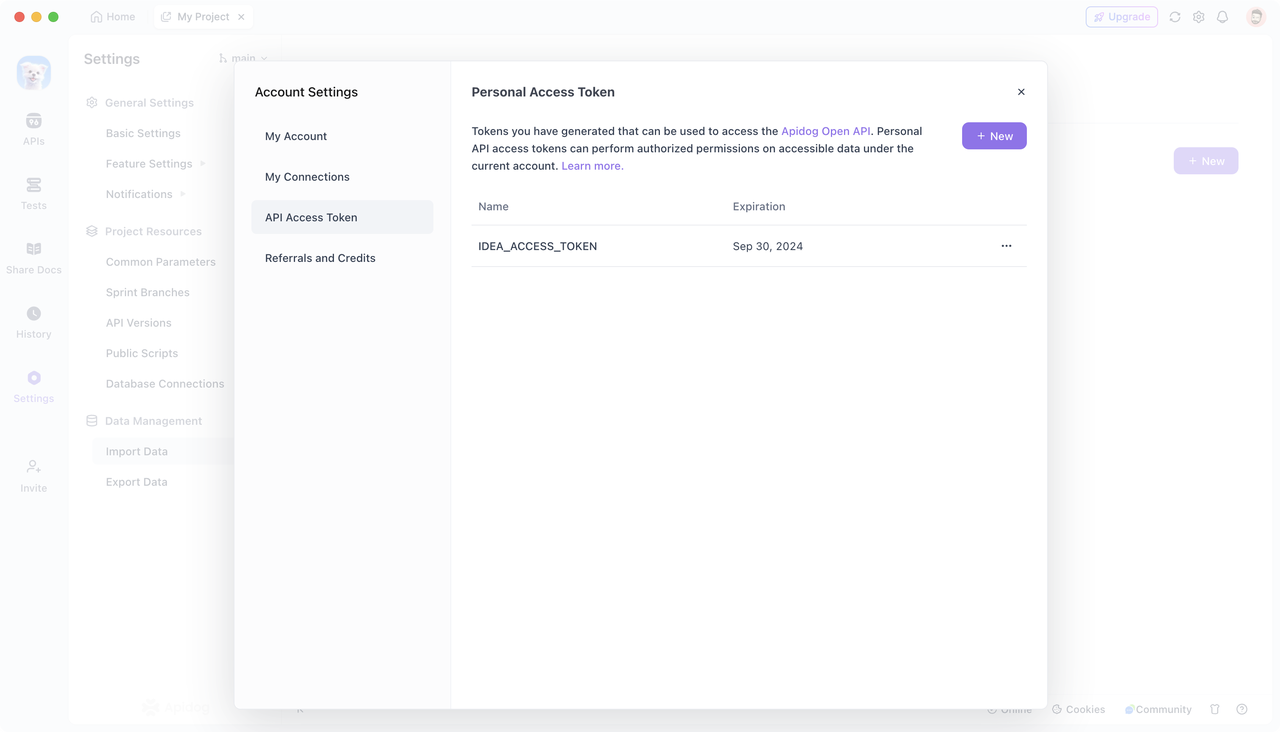
In Apidog, click on your profile picture in the upper right corner and select Account Settings -> API Access Token. Generate an API access token here and set its validity period as needed.

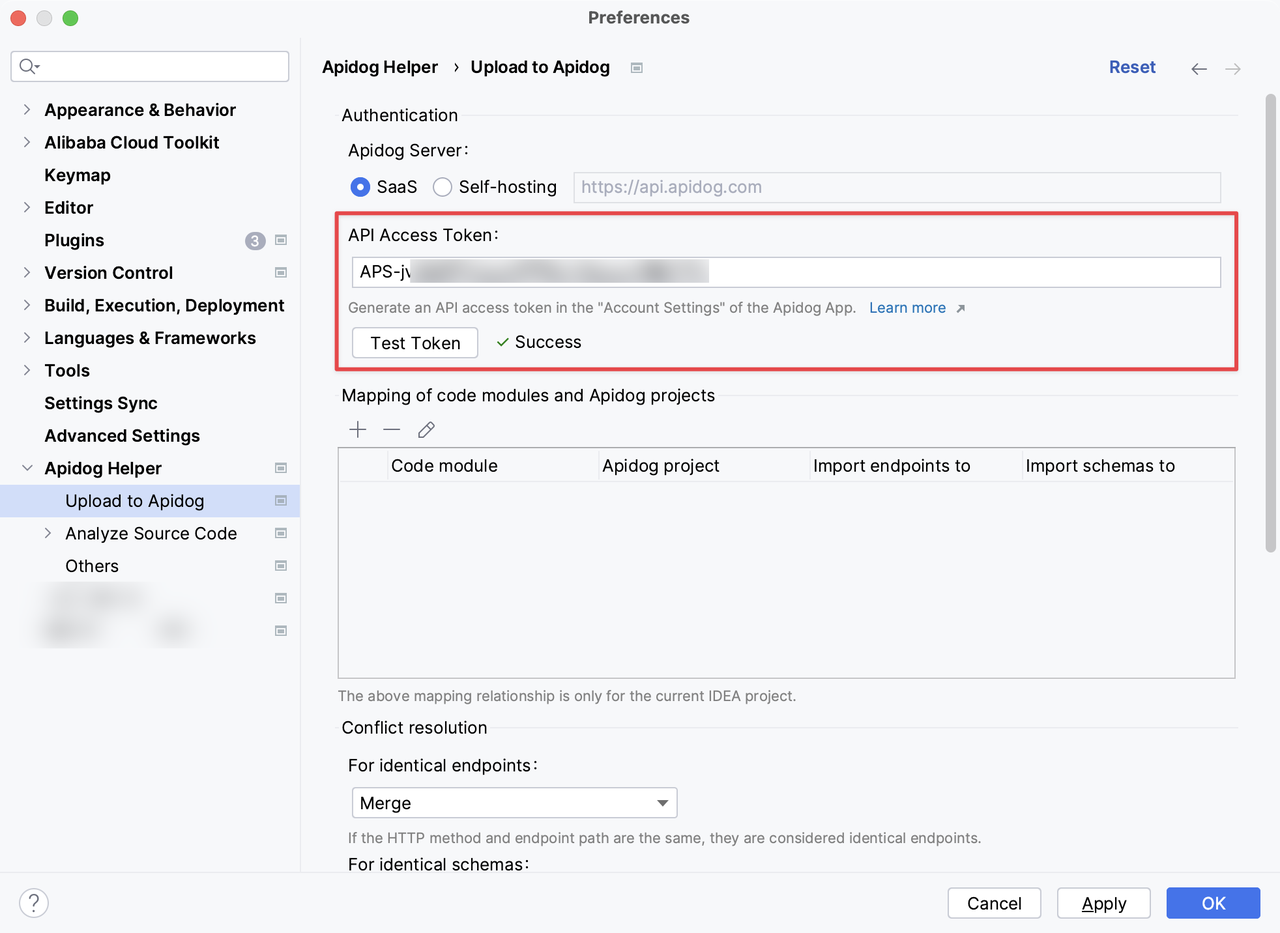
In IDEA, open the "Apidog Helper" plugin configuration, enter the API access token, and click “Test Token.” If successful, save the configuration by clicking “Apply” or “OK.”
Step 3. Sync API
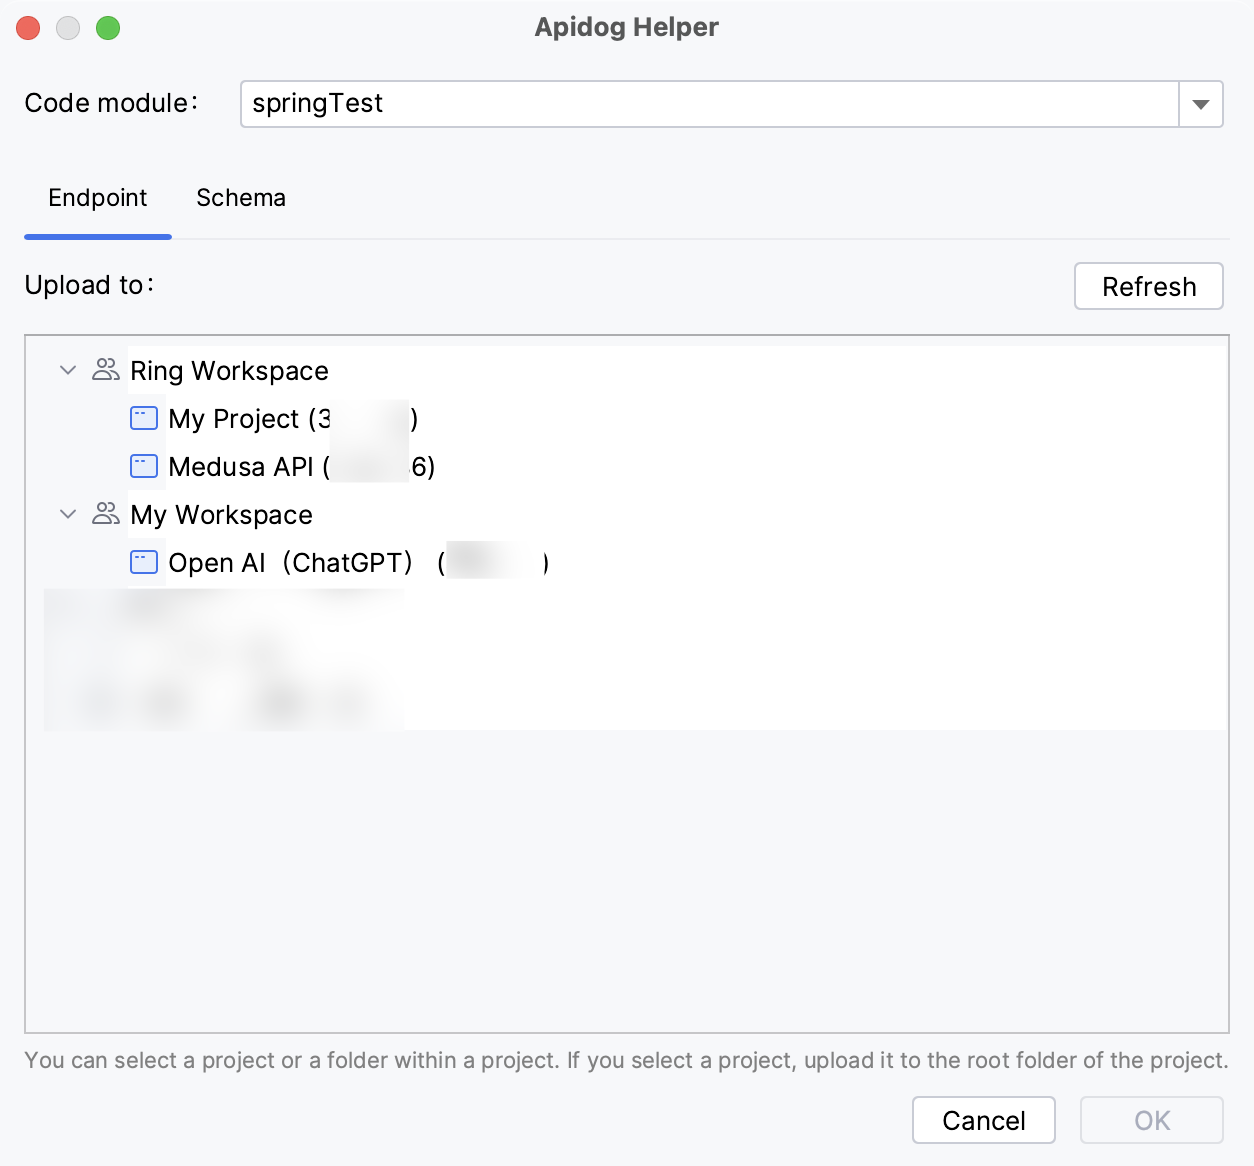
Right-click on the module node in your project directory tree and select “Upload to Apidog” to synchronize all interfaces within the module. Alternatively, open the Controller file, right-click, and select “Upload to Apidog” to sync all interfaces within the Controller.
Upon first synchronization, a configuration dialog will prompt you to select the relevant team and project, and the interfaces will be uploaded to the project's root directory by default.
Step 4. View the API Documentation
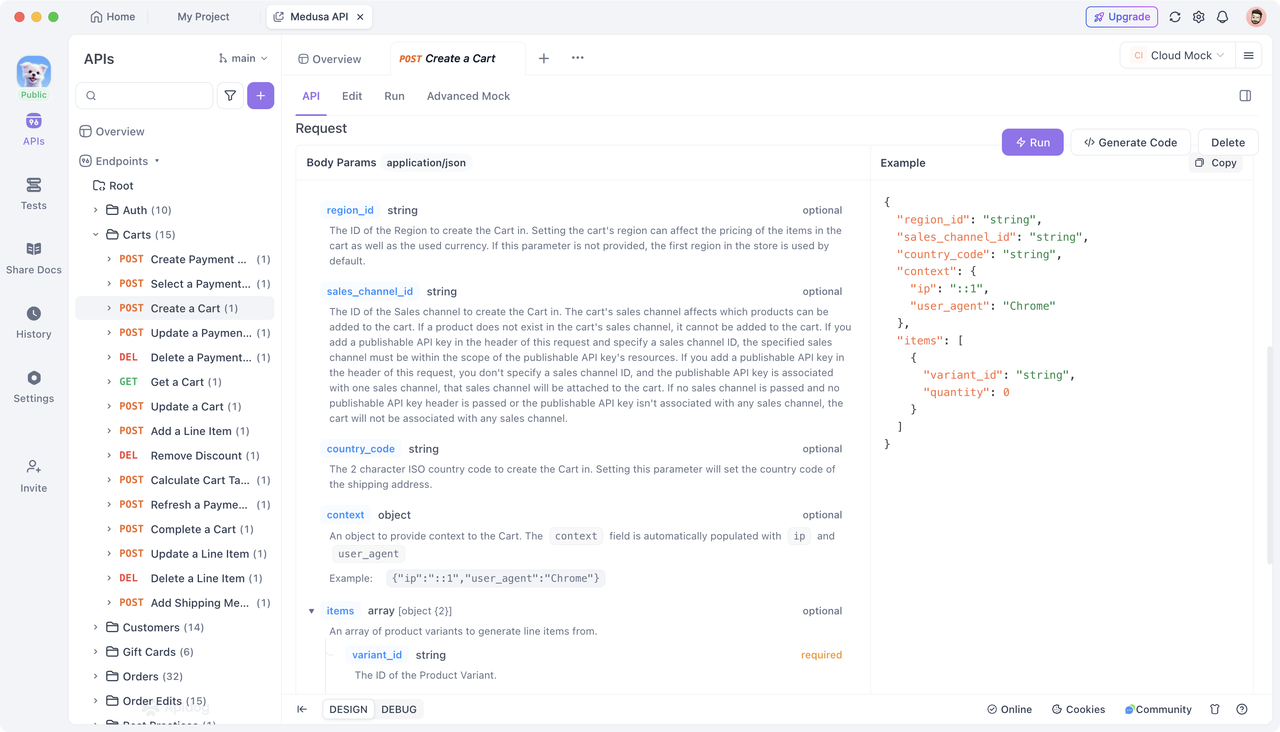
Once the synchronization is successful, open Apidog to view the automatically generated API documentation.
Method 4: Import via Open API
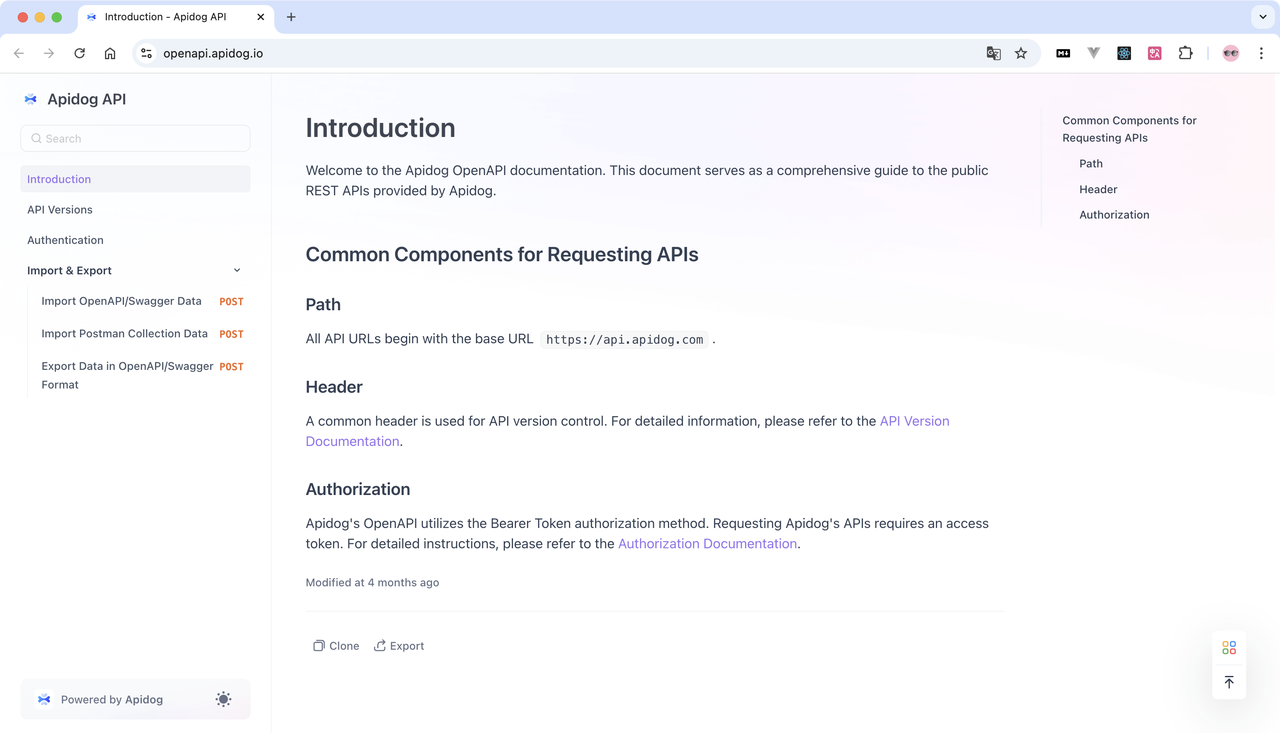
Apidog provides an open API that allows developers to directly import API data in Swagger/OpenAPI format through the API, and the open API documentation is available at https://openapi.apidog.io/.
Here are the steps for importing via the Open API:
Step 1. Obtain API Access Token
In Apidog, click on your profile picture in the upper right corner and select Account Settings -> API Access Token to generate an API access token (access_token) for authentication. Adjust the token's validity period as necessary.
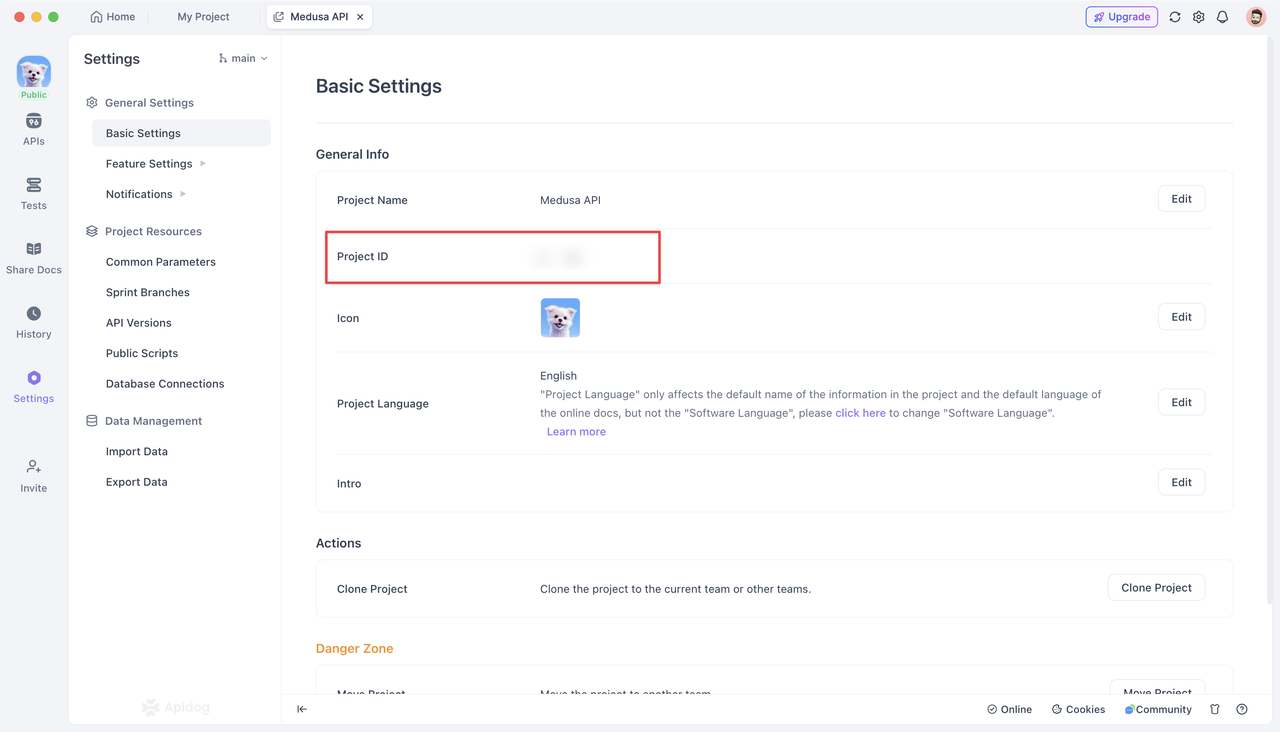
Step 2. Get the Project ID
In Apidog, navigate to Project Settings -> Basic Settings to view your project ID. The project ID is a unique identifier for each project and is necessary when calling the API to ensure that data is imported into the correct project.
Step 3. Call the Open API
To import OpenAPI/Swagger format data into Apidog, you can call the following endpoint: https://api.apidog.com
Path Parameters
| Parameter Name | Parameter Type | Required | Description |
|---|---|---|---|
| projectId | String | Required | Project ID, used to specify the target project for data import. |
| Example: | https://api.apidog.com/v1/projects/3760990/import-openapi |
Body Parameters
| Parameter Name | Parameter Type | Required | Description |
|---|---|---|---|
| input | String/Object | Required | OpenAPI/Swagger data to import, can be a JSON/YAML string or a URL wrapped in an object. |
| options | Object | Optional | Advanced options for setting target directory ID, import interface overwrite behavior, etc. Relevant parameters can be viewed in detail in the Apidog Open API documentation. |
Request Body Example:
{
    "input": {
        "url": "https://petstore.swagger.io/v2/swagger.json"
    },
    "options": {
        "endpointOverwriteBehavior": "CREATE_NEW",
        "endpointCaseOverwriteBehavior": "CREATE_NEW",
        "updateFolderOfChangedEndpoint": false
    }
}
Note: The value of the input parameter can be either a string or an object.If you directly provide an OpenAPI data string, you can pass it in the following format. The string can be in JSON, YAML, or X-YAML format:
{
  "input": "{'openapi':'3.0.0','info':{'title':'Sample API','version':'1.0.0'},'paths':{'/sample':{'get':{'summary':'Sample endpoint','responses':{'200':{'description':'successful operation'}}}}}}"
}
If you provide a publicly accessible URL pointing to OpenAPI/Swagger format data, you can pass it in the following format:
{
    "input": {
        "url": "https://petstore.swagger.io/v2/swagger.json"
    }
}
If the data source requires authentication, you can also provide Basic Auth information for authentication:
{
    "input": {
        "url": "https://petstore.swagger.io/v2/swagger.json",
        "basicAuth": {
            "username": "apiUser",
            "password": "securePassword123"
        }
    }
}
Header Parameters
In addition to the required parameters mentioned above, relevant authentication information must also be included in the request header, as follows:
| Parameter Name | Parameter Type | Required | Description |
|---|---|---|---|
| X-Apidog-Api-Version | String | Required | Open API version number; currently supported version is 2024-03-28. |
| Authorization | String | Required | Authentication format; should be Bearer followed by the personal access token obtained in step 1. |
Example:
'X-Apidog-Api-Version': '2024-03-28'
'Authorization': 'Bearer APS-OVWel6j5103zaaaaaaQle99fGNBw8ucH'
Response Example
Upon successful API call, a JSON response similar to the following will be returned, containing statistics from the import process, such as the number of created, updated, and ignored interfaces, as well as the number of created and updated data models. If an error message is returned, carefully check if any required parameters are missing or if the imported data format is correct.
{
    "data": {
        "counters": {
            "endpointCreated": 20,
            "endpointUpdated": 0,
            "endpointIgnored": 0,
            "endpointFailed": 0,
            "endpointFolderCreated": 3,
            "endpointFolderUpdated": 0,
            "endpointFolderIgnored": 0,
            "endpointFolderFailed": 0,
            "schemaCreated": 0,
            "schemaUpdated": 7,
            "schemaIgnored": 0,
            "schemaFailed": 0,
            "schemaFolderCreated": 0,
            "schemaFolderUpdated": 0,
            "schemaFolderIgnored": 0,
            "schemaFolderFailed": 0
        }
    }
}
Step 5. View Import Results
After completing the import, you can view the generated API documentation in the corresponding Apidog project. For more detailed information on input parameters and response messages, please refer to the Apidog Open API documentation.
Frequently Asked Questions
- What to do if an error occurs during file import? If you receive a parsing error when importing a
.yamlfile, this indicates that the file does not conform to OpenAPI specifications and needs to be modified. You can upload the file to Swagger Editor to diagnose errors. After resolving any issues, attempt the import again.
Conclusion
With the four methods outlined above, you can easily migrate your Swagger-managed APIs to Apidog. Each method is suitable for different scenarios, allowing you to choose the most appropriate one based on your needs. Whether through manual import, scheduled online synchronization, plugin uploads, or Open API integration, Apidog provides an efficient and convenient API management experience.