Developers comfortable with CLI tooling know the power of a well-integrated command-line agent. Codex CLI from OpenAI brings intelligent coding assistance directly into your terminal, enabling you to inspect, modify, and generate code, run shell actions, and automate tasks without leaving your development environment.
This guide covers how to install and use Codex CLI, compares its workflow to tools like Claude Code, and provides practical examples for real-world usage.
What Is the OpenAI Codex CLI?
The OpenAI Codex CLI is a terminal-based coding agent designed to help you interact with your codebase using natural language prompts. Built in Rust for performance, it can:
- Read and modify files
- Run commands in your project context
- Suggest refactors and patch diffs
- Perform code reviews
- Automate repeatable workflows
The CLI runs locally, so your source code doesn’t leave your machine unless you explicitly choose to share it.
Unlike Claude Code (a separate coding assistant), Codex CLI integrates directly with OpenAI’s models and supports a rich set of commands and approval modes for safe and efficient code manipulation.
Prerequisites
Before installing Codex CLI, make sure you have:
- Node.js installed (18+ recommended)
- npm (Node package manager)
- A terminal on macOS, Linux, or WSL on Windows (Windows native support remains experimental)
If you plan to use Codex with Cloud tasks or advanced reasoning models, ensure your ChatGPT plan includes Codex access (Plus, Pro, Business, Edu, or Enterprise).

Step 1 — Install Codex CLI
Installation is straightforward using npm or Homebrew.
Using npm (recommended):
npm install -g @openai/codex
This installs the codex binary globally, making it accessible in your terminal.
Using Homebrew (macOS):
brew install --cask codex
This is an alternative if you’re on macOS and prefer Homebrew.
Direct Binary Download:
You can also download prebuilt executables from the Codex GitHub releases. Rename the extracted binary to codex and place it on your PATH.

Step 2 — Authenticate Codex CLI
After installation, run:
codex
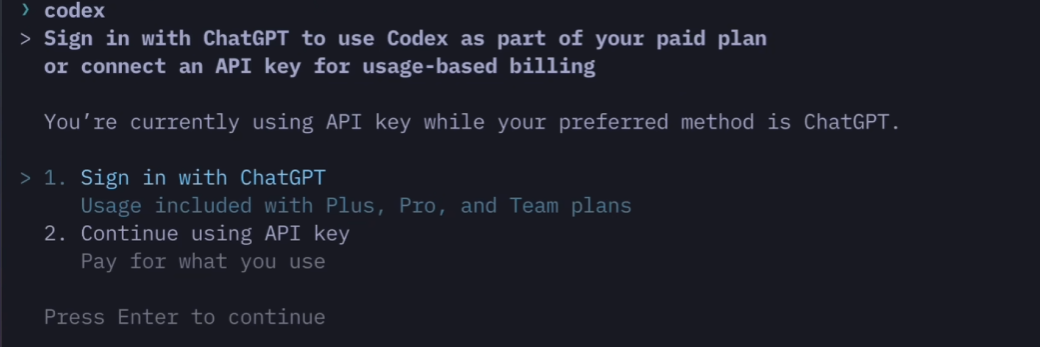
On your first run, Codex will prompt you to authenticate. You can:
- Sign in with your ChatGPT account (Plus/Pro/etc.)
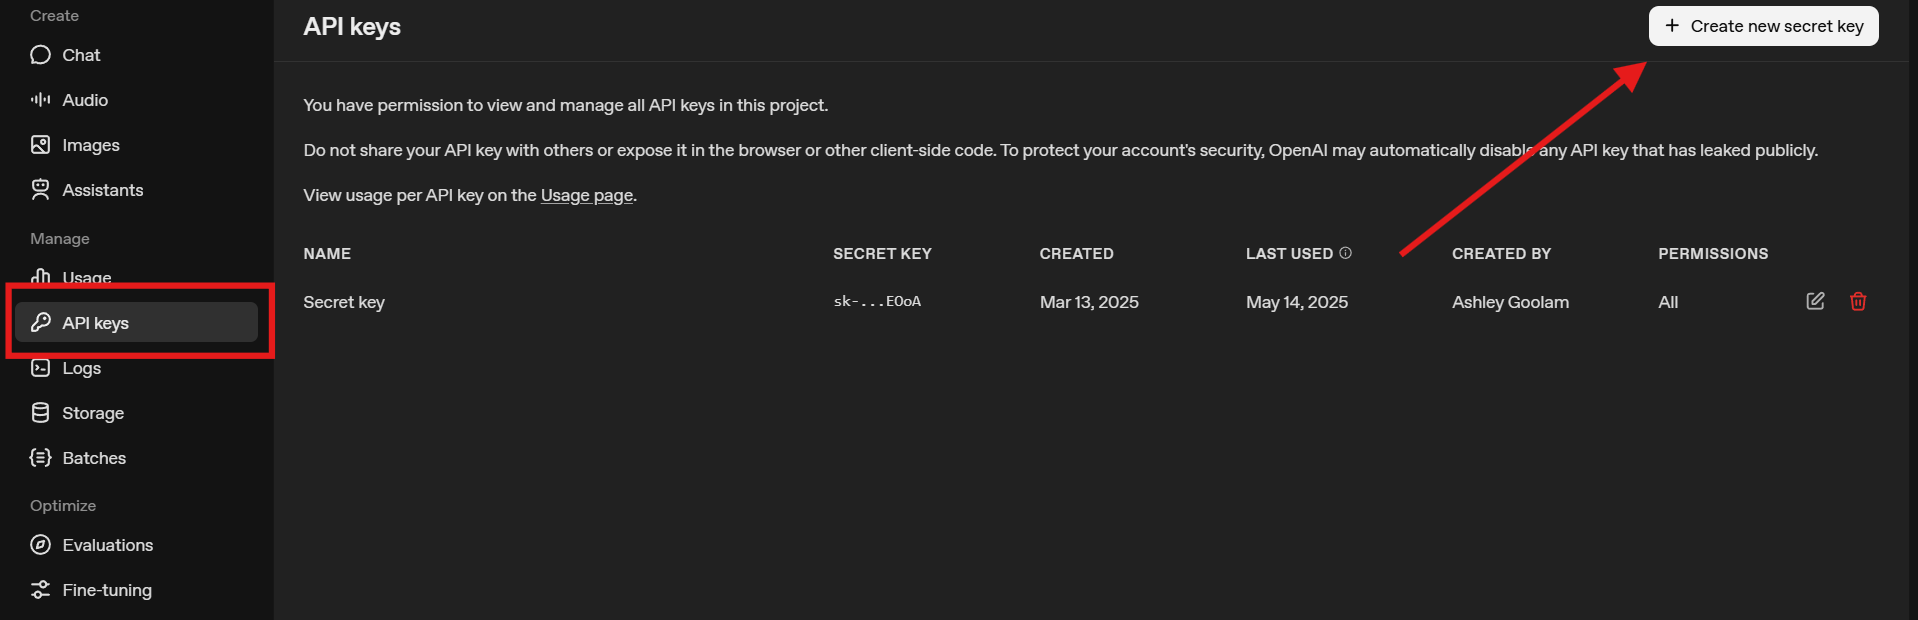
- Connect with your OpenAI API key from platform.openai.com/api-keys.
Authenticating with ChatGPT smoothly links your subscription to CLI usage without manual token management.
Alternatively, set your API key via environment variable (useful for CI workflows):
export OPENAI_API_KEY="sk-xxxxxxxxxxxxxxxxxxxxxxxx"
Step 3 — Launch and Use Codex CLI
With authentication complete, navigate to your project root and start the interactive session:
codex
This opens Codex’s terminal UI (TUI). From here, you can write prompts directly or enter slash commands for tasks.
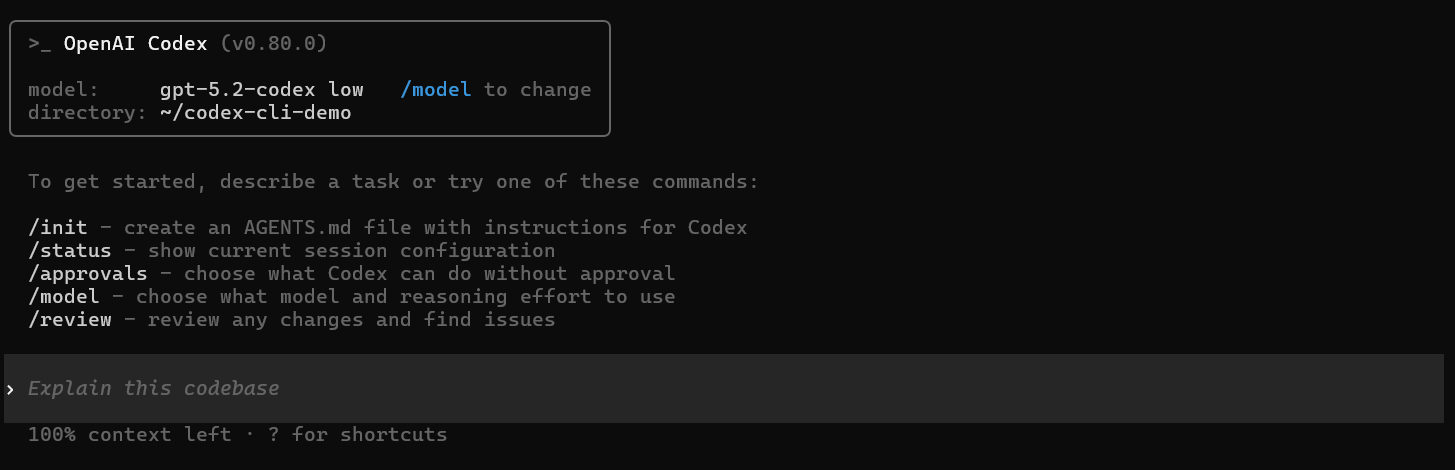
Example: Basic Prompt
Explain the purpose of the utils/math.js module
Codex will parse and reason about that file, returning a structured summary.
Slash Commands You Should Know
Codex provides built-in commands:
| Command | Description |
|---|---|
/status | Shows session info and model configuration |
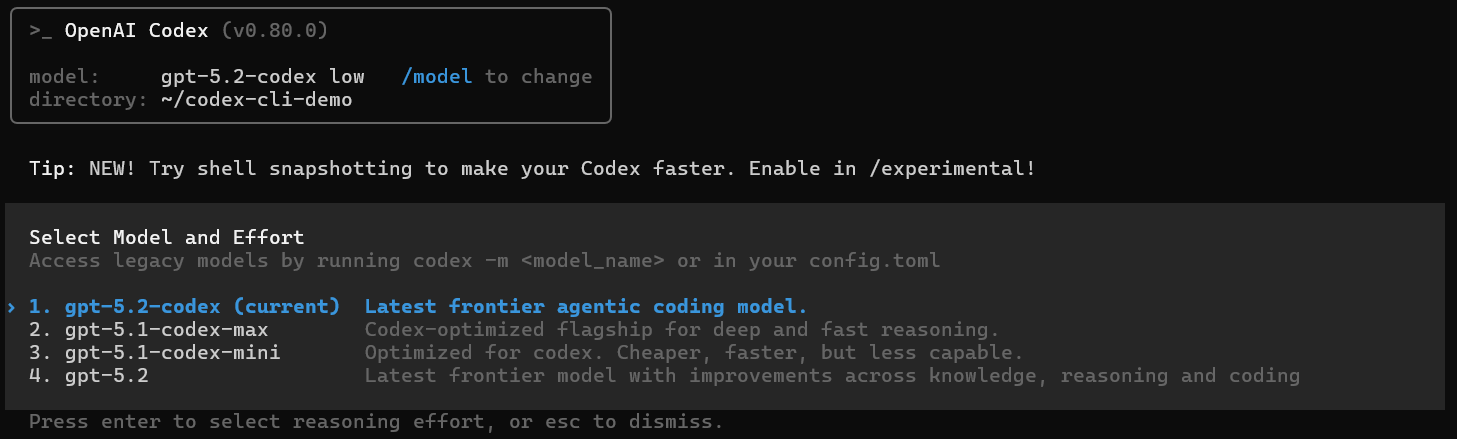
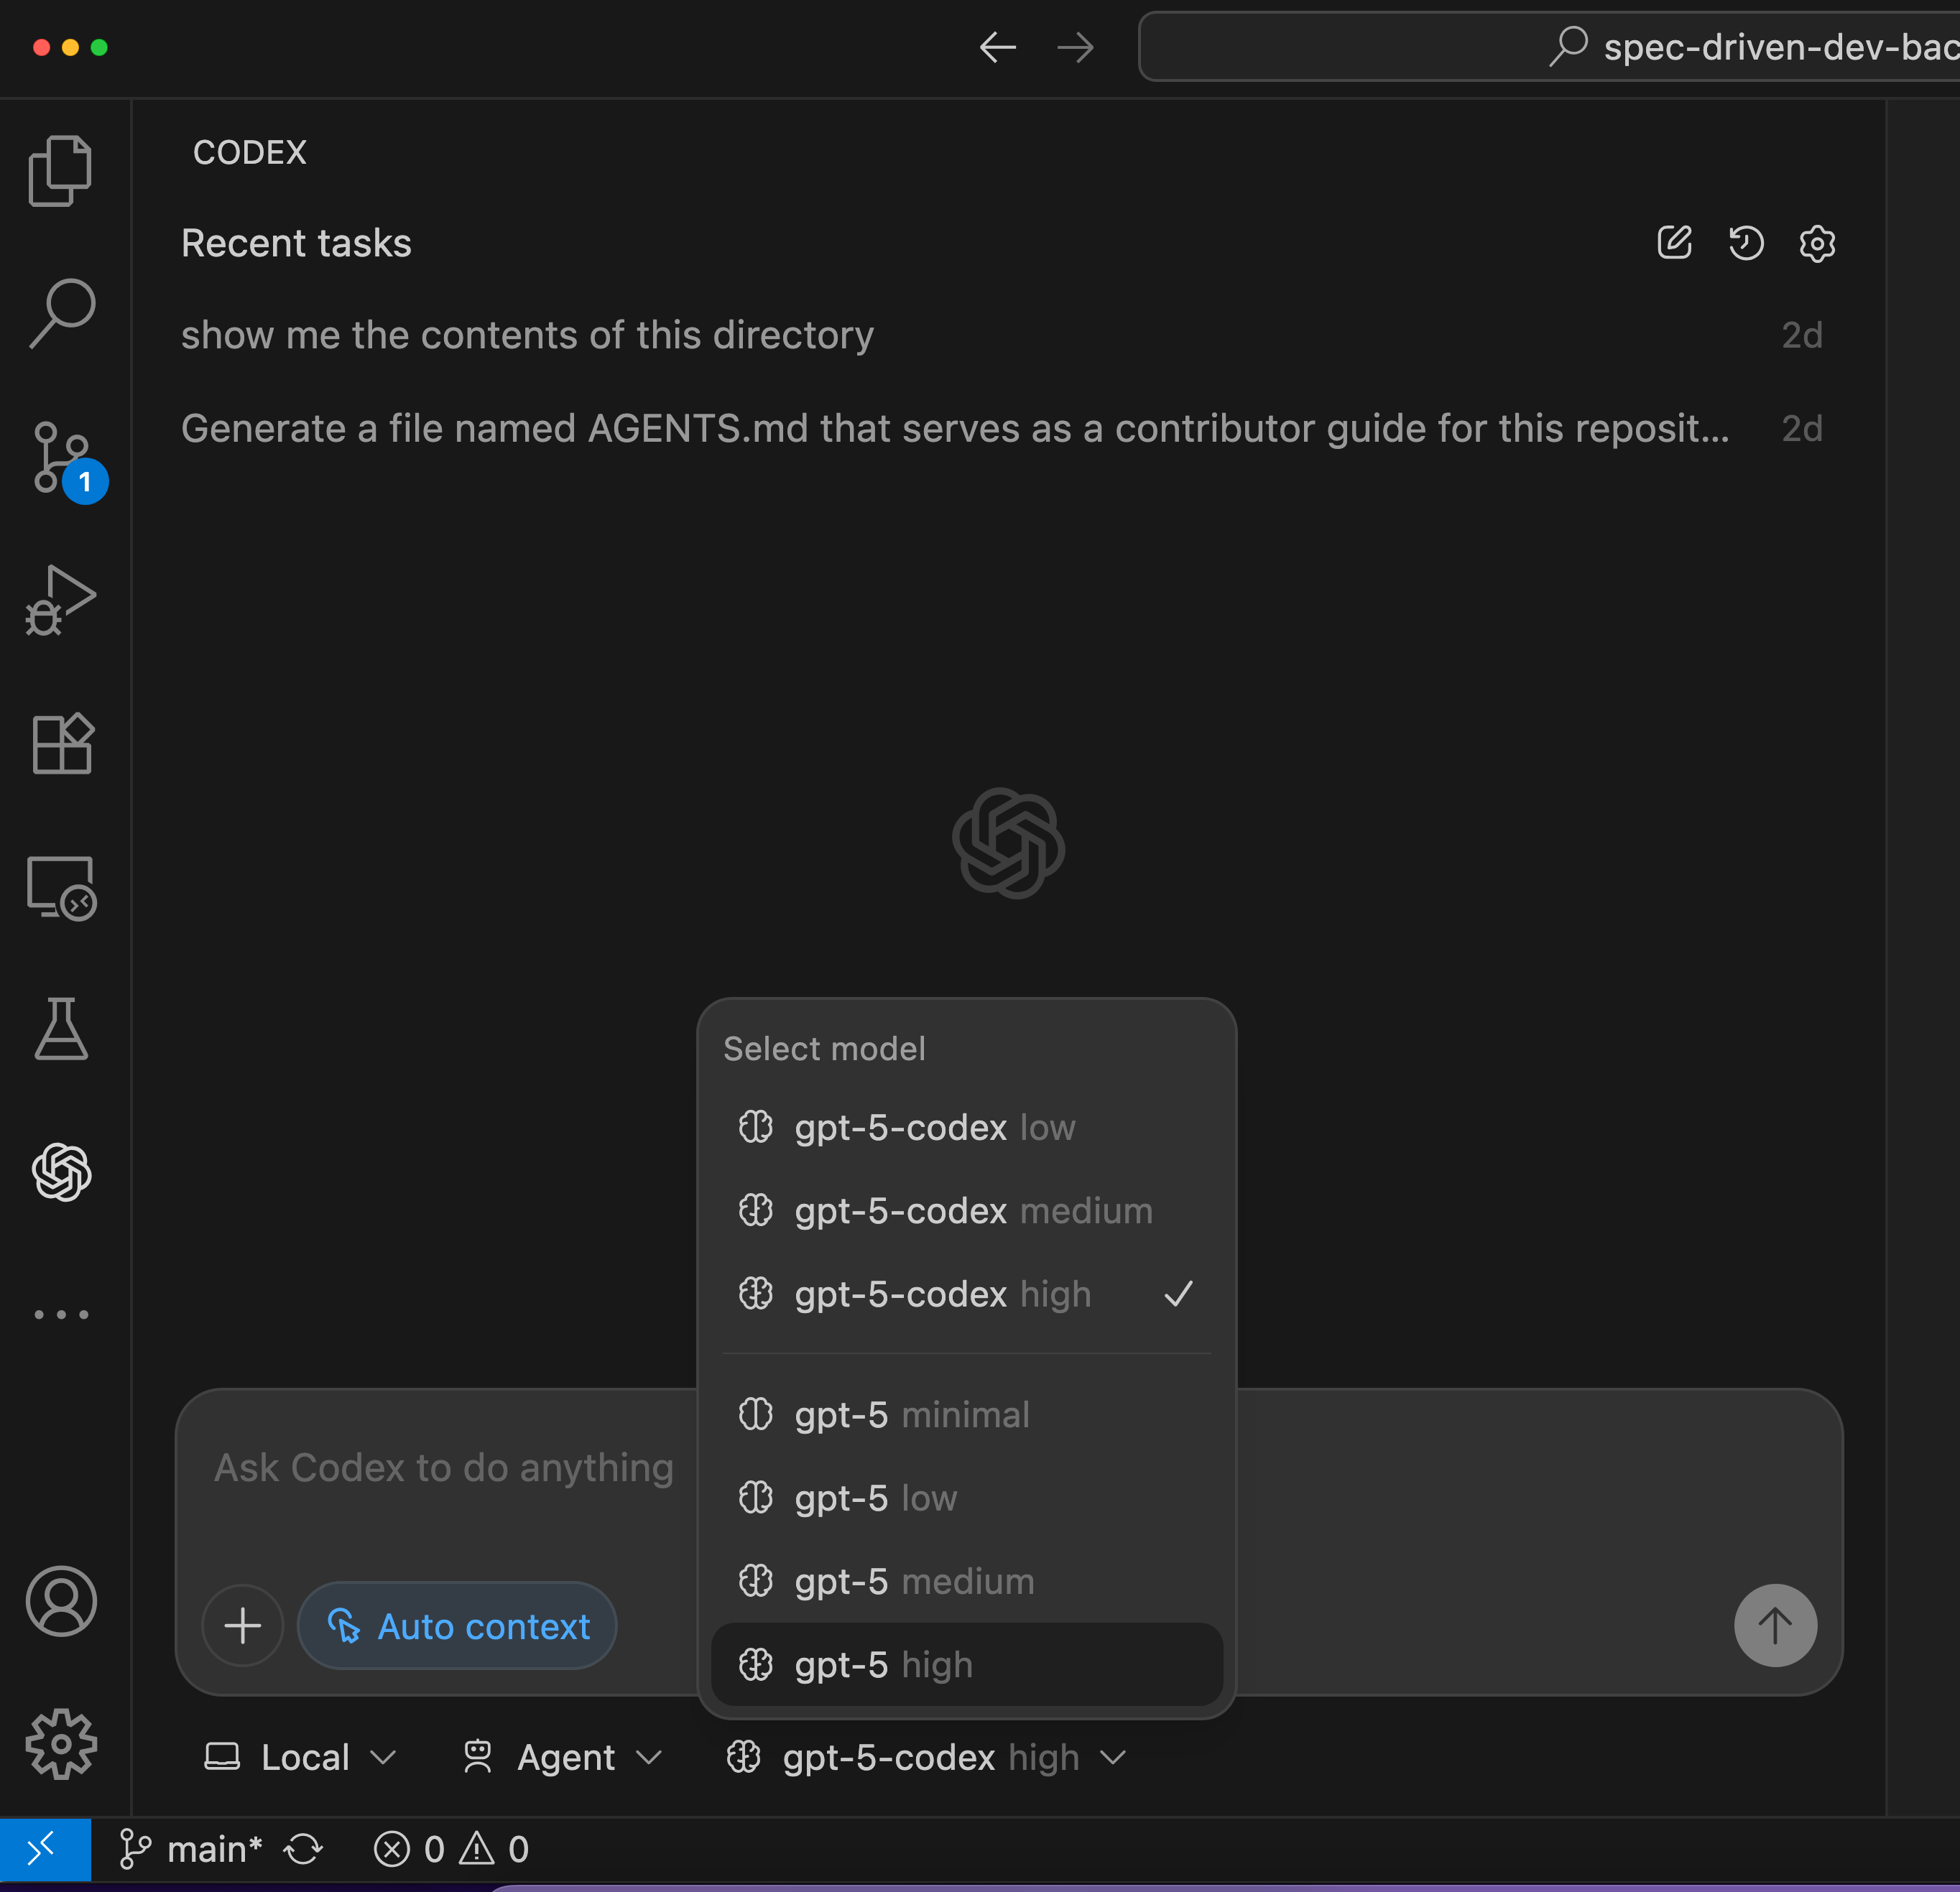
/model | Switch the Codex model (e.g., gpt-5-codex vs gpt-5) |
/review | Analyze changes or code quality suggestions |
/init | Create an AGENTS.md with project conventions |
/approvals | Control how much Codex auto-applies changes |
Step 4 — Codex CLI Approval Modes and Safety
Safety and control are critical. The Codex CLI includes multiple approval modes to control how assertively it edits your code.
Approval Modes:
- Read Only (default): Proposes edits and commands, but requires approval before making changes or executing shell operations.
- Agent: Applies changes automatically but still asks before executing commands.
- Agent (Full Access): Runs commands and edits autonomously in a sandboxed environment (e.g., ideal for larger tasks or refactors).
These modes help you balance speed with safety, especially in larger repositories where unintended changes can be costly.

Practical Debugging Examples in Codex
Using Codex CLI to debug code in your repo is as simple as prompting it with context:
Find and fix the null reference error in the auth service
Codex will:
- Analyze relevant file contexts
- Suggest a root cause
- Propose a fix and patch diff
If you prefer automation:
codex --auto-edit
adds fixes directly without interactive approvals.
Non-Interactive Usage: codex exec
For scripting and automation or CI use, the codex exec subcommand runs Codex in a non-interactive mode.
Usage:
codex exec "Generate unit tests for src/api/users.ts"
This streams results to standard output or JSONL, which can then be consumed by scripts or integrated into pipelines.
Advanced Codex Configuration and Features
- Switch Models
By default, Codex may use a standard agent mode, but you can override the model:
codex --model gpt-5-codex
Or select from other available models if needed (e.g., for faster responses or different reasoning behaviors).
2. Shell Completion Scripts
Generate convenience scripts for shells:
codex completion bash
codex completion zsh
These enhance your CLI experience with tab completion.
3. Resume Previous Sessions
Codex supports codex resume to continue a previous session, useful for multi-step tasks.
Codex CLI in IDEs
Codex also integrates into several IDEs via extensions:
- VS Code: Codex panel and sidebar
- Cursor: Inline AI editing
- Windsurf: Integrated AI workflows
You can authenticate and run CLI commands directly from integrated terminals, or combine both for hybrid workflows.
Pairing Codex with Apidog for API-Centric Projects
Codex excels at code generation and modifications, but when you’re building or testing APIs, you also need runtime verification.
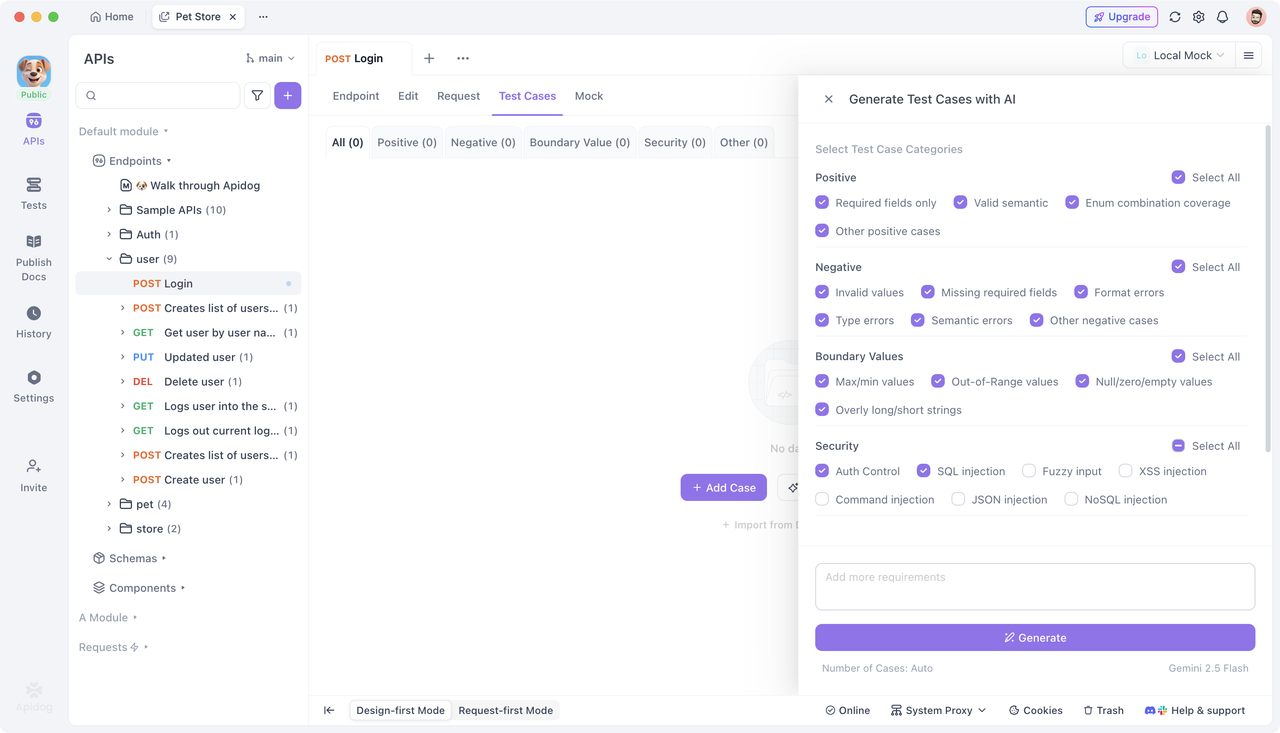
Apidog helps with:
- Automated API testing
- API test case generation
- API contract validation
- Integration with CI/CD
This ensures the code you generate or review with Codex behaves correctly at runtime. You can start using Apidog for free, integrating API checks directly into your development pipeline.
Frequently Asked Questions
Q1. Do I need a specific ChatGPT plan for Codex CLI?
Yes. Codex is included with Plus, Pro, Business, Edu, or Enterprise plans. You can also use an API key if you prefer usage-based access.
Q2. Can I use Codex CLI on Windows?
Windows native support is experimental; running Codex via WSL is recommended for stable performance.
Q3. How do I update Codex CLI?
Run:
npm install -g @openai/codex@latest
to upgrade to the newest release.
Q4. Does Codex upload my source code?
No. Code reads and writes happen locally; only prompt and diff summaries are sent to the model.
Q5. Can Codex execute tests automatically?
Yes—using modes like --full-auto allows Codex to run shell commands and tests in a sandboxed environment.
Conclusion
Installing and using the OpenAI Codex CLI brings powerful AI-assisted coding workflows into your terminal. It’s a flexible, interactive agent capable of reading and editing code, running commands, generating tests, and automating workflows—all while preserving control and safety. Use Codex CLI to augment your development velocity, and pair it with Apidog to validate API behavior and ensure contract correctness.