
WebSocket is a powerful communication protocol used for real-time, bidirectional data exchange between a client and a server. Its ability to establish and maintain a long-lived connection makes it ideal for applications requiring instant data updates. If you're interested in implementing WebSocket in C language, this article will provide you with a concise guide to get started.
Installing libwebsockets
Currently, Tornado is a popular library for implementing WebSocket in Python. However, libwebsockets is a flexible and easy-to-use cross-platform WebSocket library written in C language.
libwebsockets is a cross-platform WebSocket library written in C, which enables the creation of WebSocket protocol-related servers and clients. It is a flexible and user-friendly library that allows for the rapid development of high-performance WebSocket applications. Thanks to its simple and lightweight design, it is particularly well-suited for building applications on embedded systems or high-load server applications handling a large number of connections.
You can install libwebsockets like this:
git clone https://github.com/warmcat/libwebsockets.git
cd libwebsockets
mkdir build
cd build
cmake ..
make && sudo make install
pkg-config --modversion libwebsockets
Adding libwebsockets.h
#include <libwebsockets.h>
#include <stdio.h>
#include <stdlib.h>
#include <string.h>
#include <time.h>
Writing logic code
#include <libwebsockets.h>
#include <stdio.h>
#include <stdlib.h>
#include <string.h>
#include <time.h>

// Structure to store data for each WebSocket session
struct per_session_data {
};

// Callback function for WebSocket server messages
int callback(struct lws *wsi, enum lws_callback_reasons reason, void *user, void *in, size_t len) {
    switch (reason) {
        case LWS_CALLBACK_ESTABLISHED: // Handle new connection event
            // Add a timer to send a timestamp every second
            lws_callback_on_writable(wsi);
            break;
        case LWS_CALLBACK_SERVER_WRITEABLE: // Handle send data event
            // Send the timestamp
            time_t t = time(NULL);
            char timestamp[20];
            sprintf(timestamp, "%ld", t);
            lws_write(wsi, timestamp, strlen(timestamp), LWS_WRITE_TEXT);
            lws_callback_on_writable(wsi);
            break;
        // Other events omitted
    }
    return 0;
}

int main(int argc, char **argv) {
    // Create the WebSocket protocol
    static struct lws_protocols protocols[] = {
        {
            "demo-protocol", // Protocol name, should match the WebSocket protocol in the frontend code
            callback, // Callback function pointer
            sizeof(struct per_session_data), // Size of data for each session (connection)
            0, // No additional protocol parameters
            NULL, NULL, NULL
        },
        { NULL, NULL, 0, 0 } // Protocol list ends with NULL
    };

    // Create the WebSocket context
    struct lws_context_creation_info info = {
        .port = 3001, // Listening port number
        .protocols = protocols // Protocol list
    };
    struct lws_context *context = lws_create_context(&info);

    // Check if WebSocket context creation was successful
    if (!context) {
        printf("Failed to create WebSocket context.\n");
        return -1;
    }

    // Enter the loop and wait for WebSocket connections
    while (1) {
        lws_service(context, 50);
    }

    // Clean up and close the WebSocket context
    lws_context_destroy(context);

    return 0;
}
The Front-end Page Connect WebSocket
Writing page
You need to create a index.html, and fill in the code below:
<!DOCTYPE html>
<html lang="en">
<head>
  <meta charset="UTF-8">
  <meta http-equiv="X-UA-Compatible" content="IE=edge">
  <meta name="viewport" content="width=device-width, initial-scale=1.0">
  <title>Document</title>
  <script>
    window.onload = () => {
        if ('WebSocket' in window) {
            // Create a WebSocket connection
            let ws = new WebSocket('ws://127.0.0.1:3001/websocket');
            // Push a message when the connection is successfully established, and the server can start pushing data
            ws.onopen = () => {
                console.log('websocket success---');
                ws.send('success');
            }
            ws.onmessage = (message) => {
                let data = message.data;
                console.log('get websocket message---', data);
            }
            ws.onerror = () => {
                console.error('websocket fail');
            }
        } else {
            console.error('dont support websocket');
        };
    };
</script>

</head>
<body>

</body>
</html>
Running the Page
Right-click on index.html and open this file:

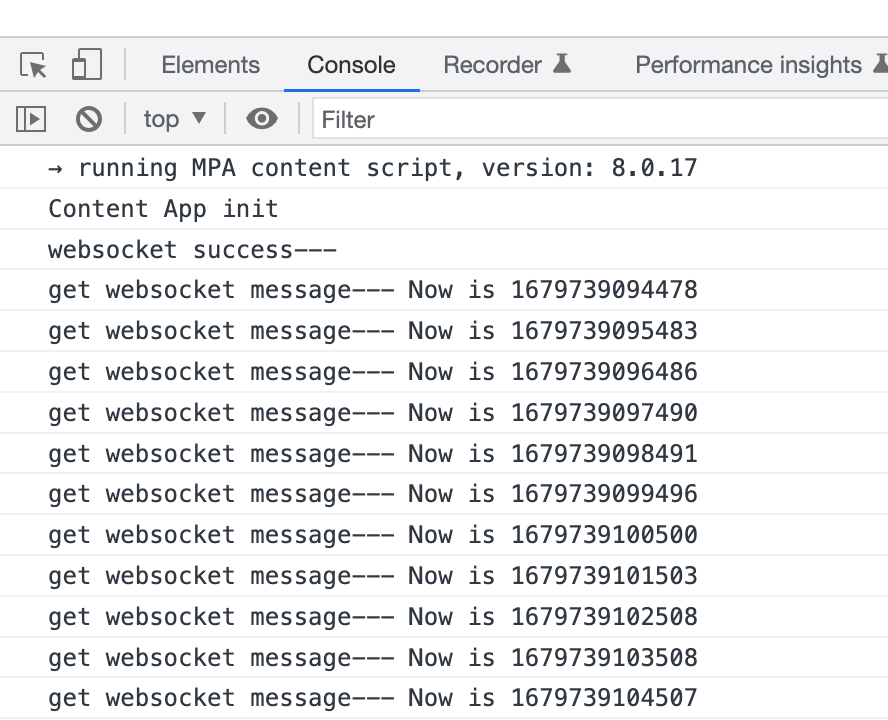
View the Results
You can see that the back end receives the message"open success" from the front end first and the open build is successful.
Then, after the connection has been established, the back end has been outputting information for the front end.
How to Send WebSocket with Apidog
Now that we have covered implementing WebSocket in C language, let's explore how to send WebSocket requests using Apidog. While the previous section focused on the fundamentals and techniques of WebSocket programming in C, Apidog offers a convenient way to interact with WebSocket APIs through its user-friendly interface.
Step 1. Creating WebSocket Request
- Click the "+" button, and choose "New WebSocket API". Then specify the WebSocket URL, usually starting with
ws://orwss://, in the endpoint configuration.
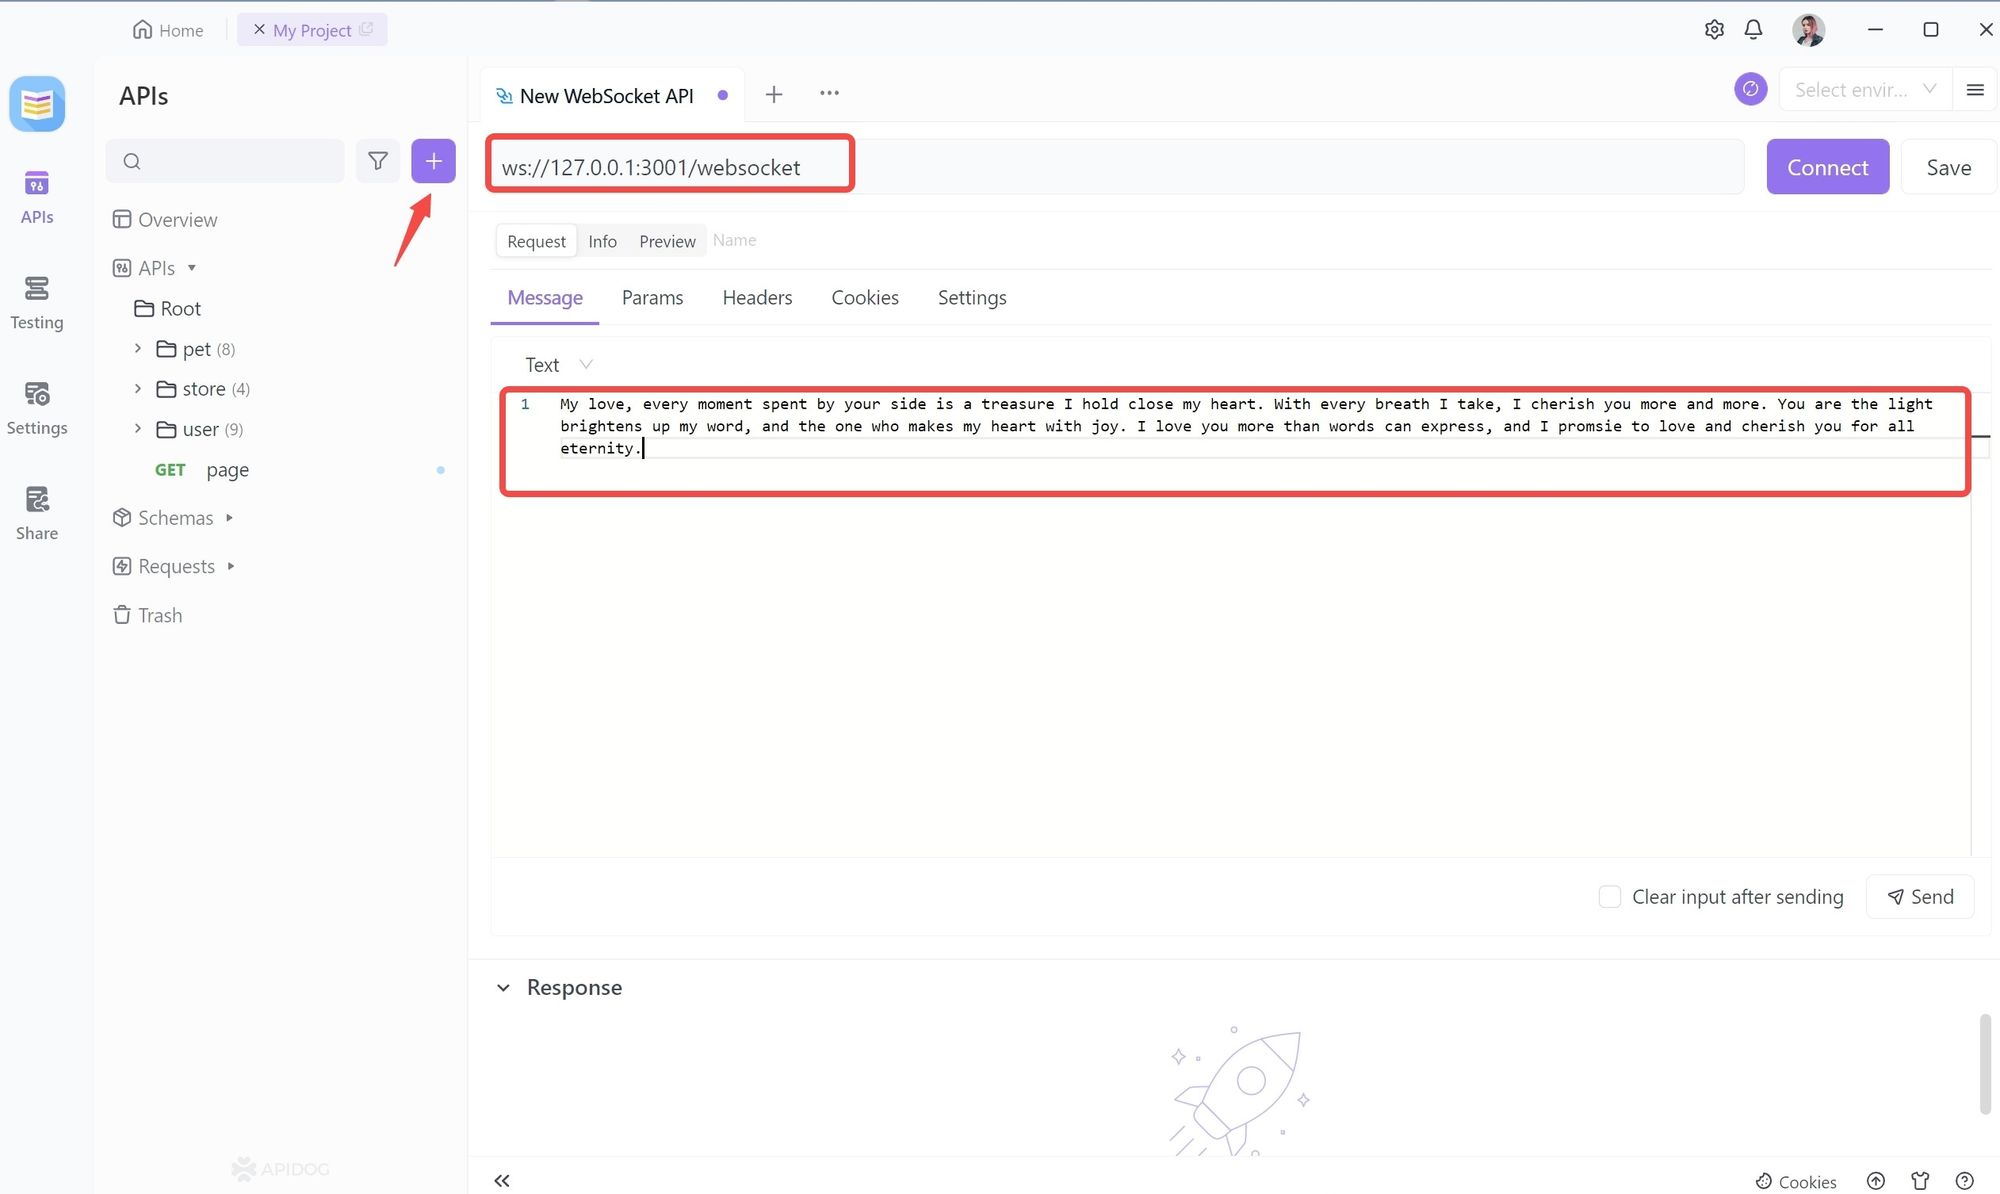
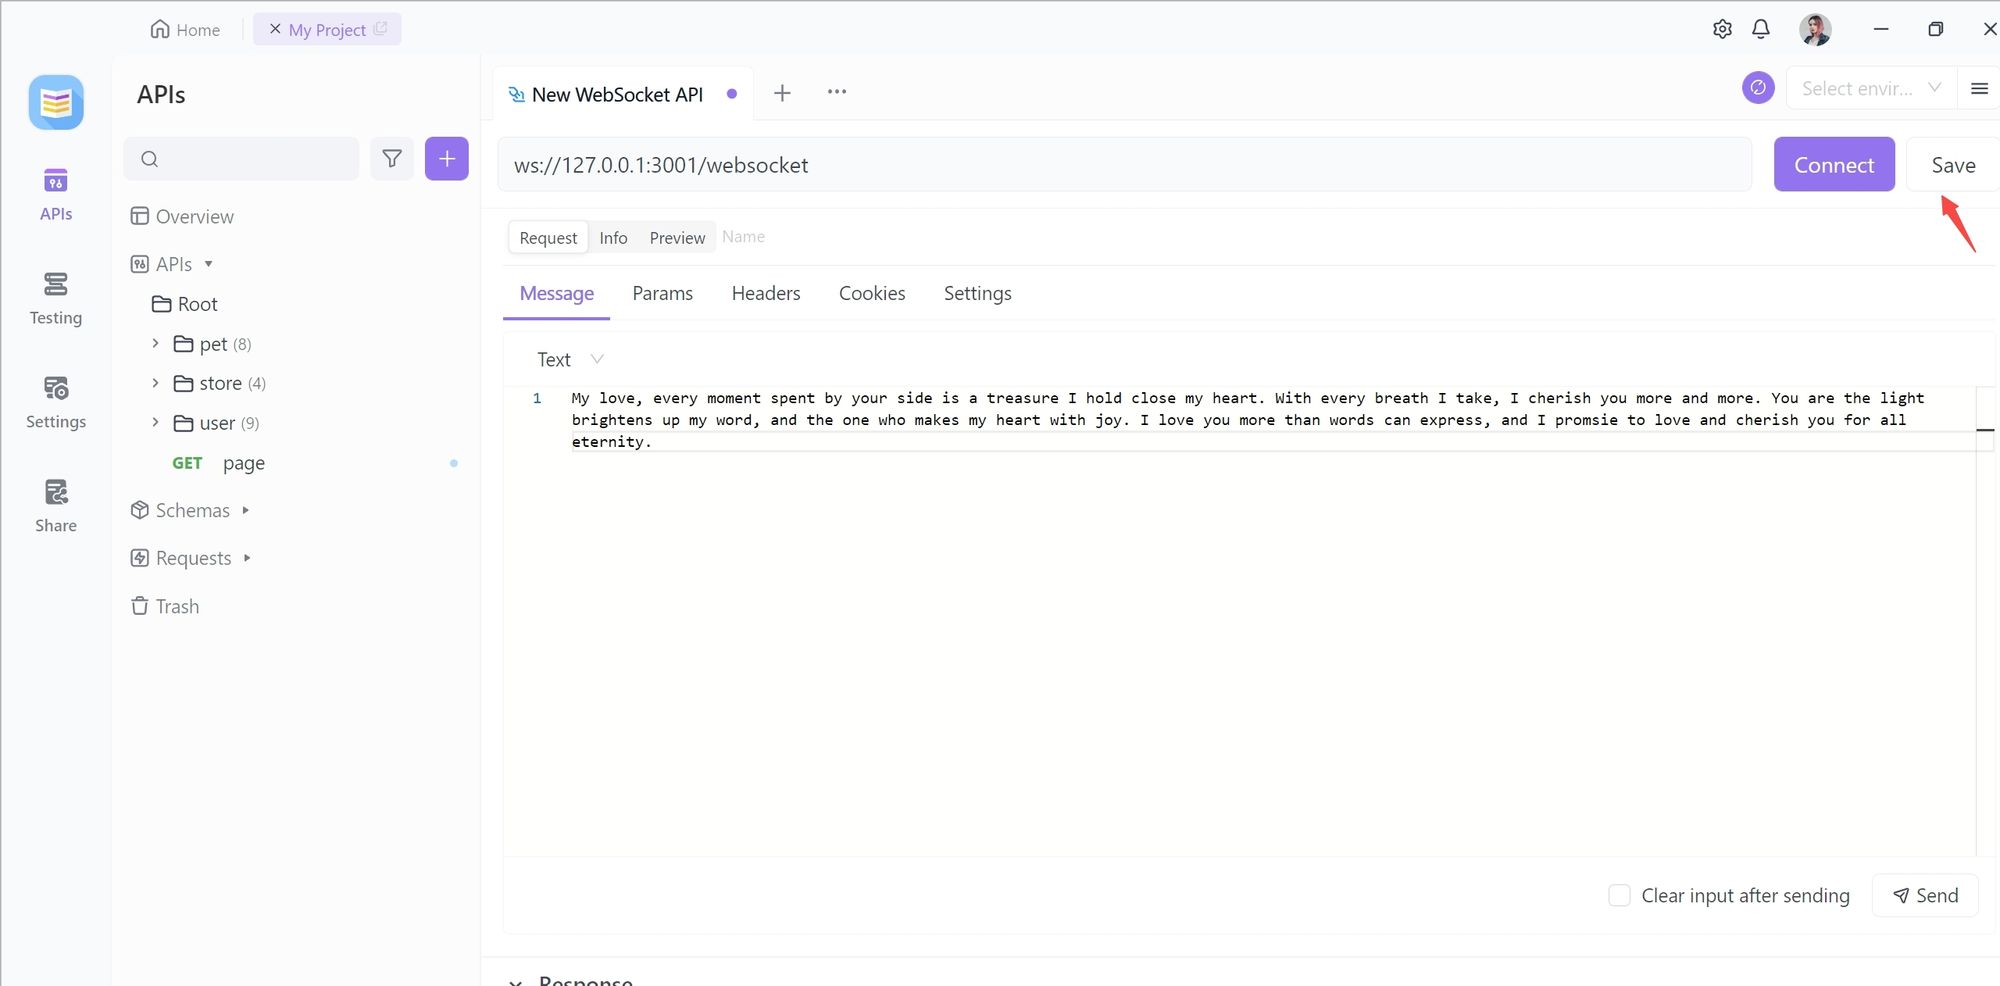
Step 2. Send a Message
In Message you can fill in the message to be delivered to the server, after sending it, the server will receive the message you send.
Note: Make sure the WebSocket server is running and accessible for successful communication with Apidog.
Step 3. Saving the Request
When you have finished writing, you can click Save to save the request, which is reused quickly the next time.
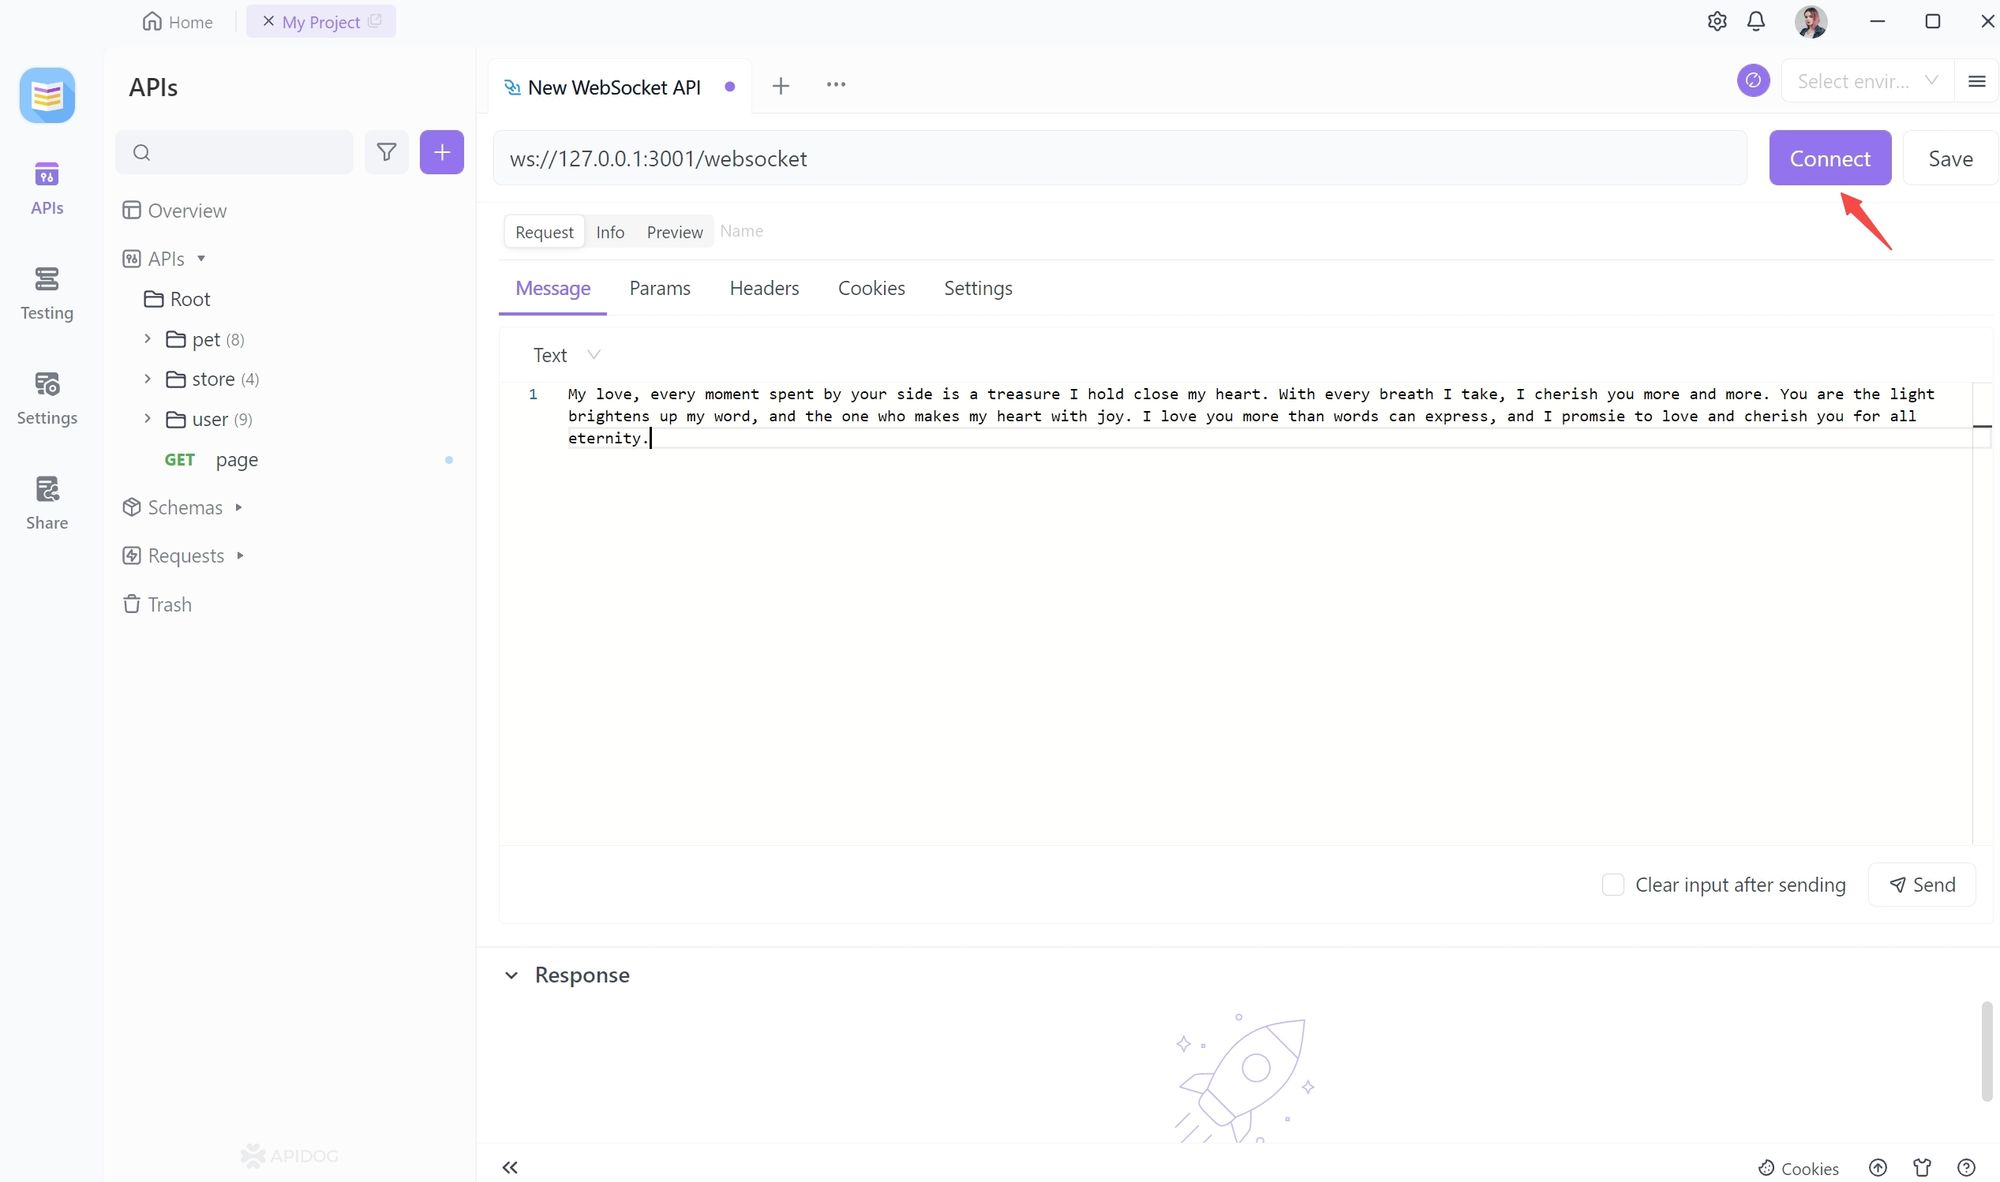
Step 4. Connecting to a WebSocket Server
First, click on the Connect button to make a WebSocket connection.
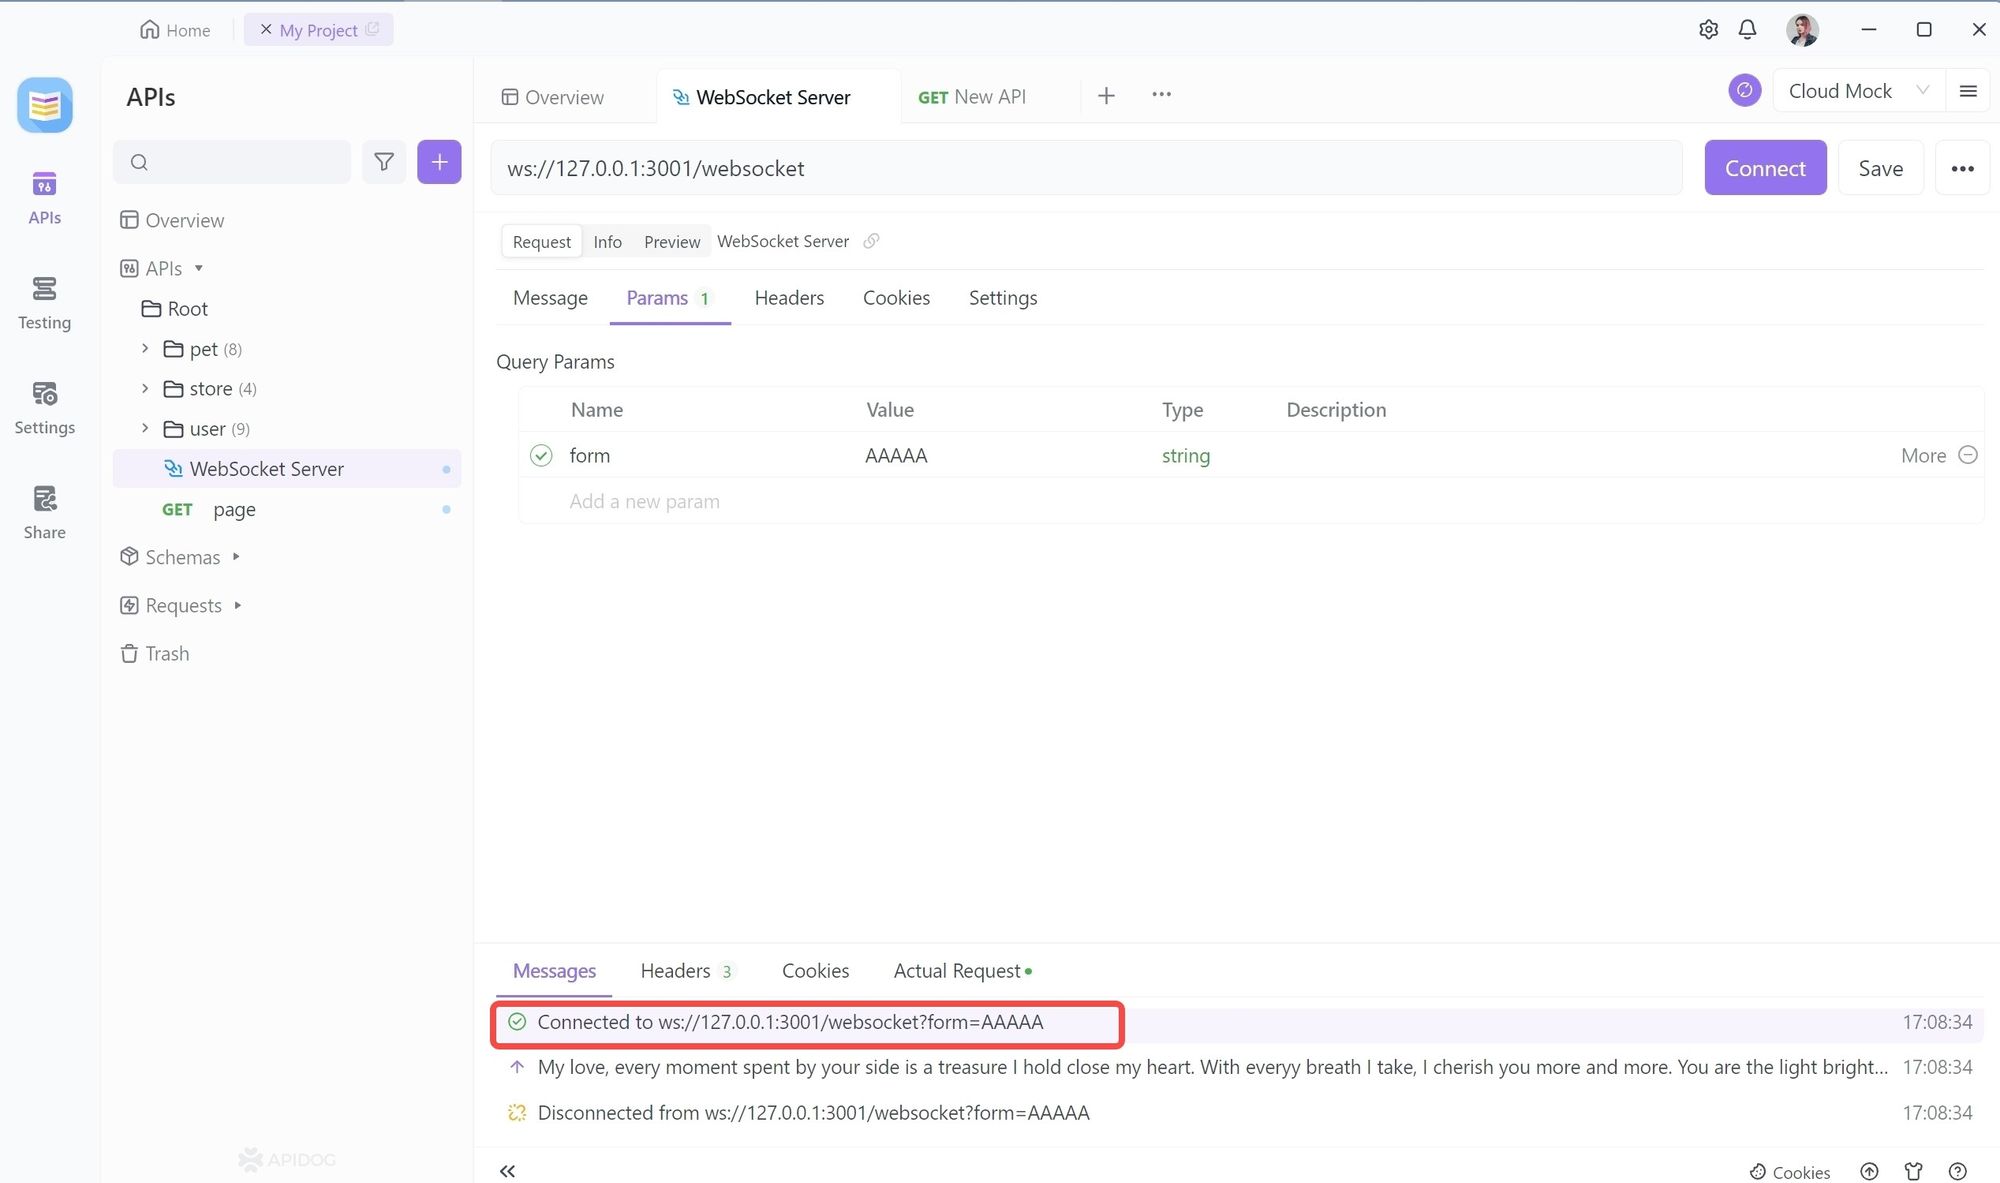
After a successful connection, Apidog has a success message. The server side will also respond because the connection is successful.
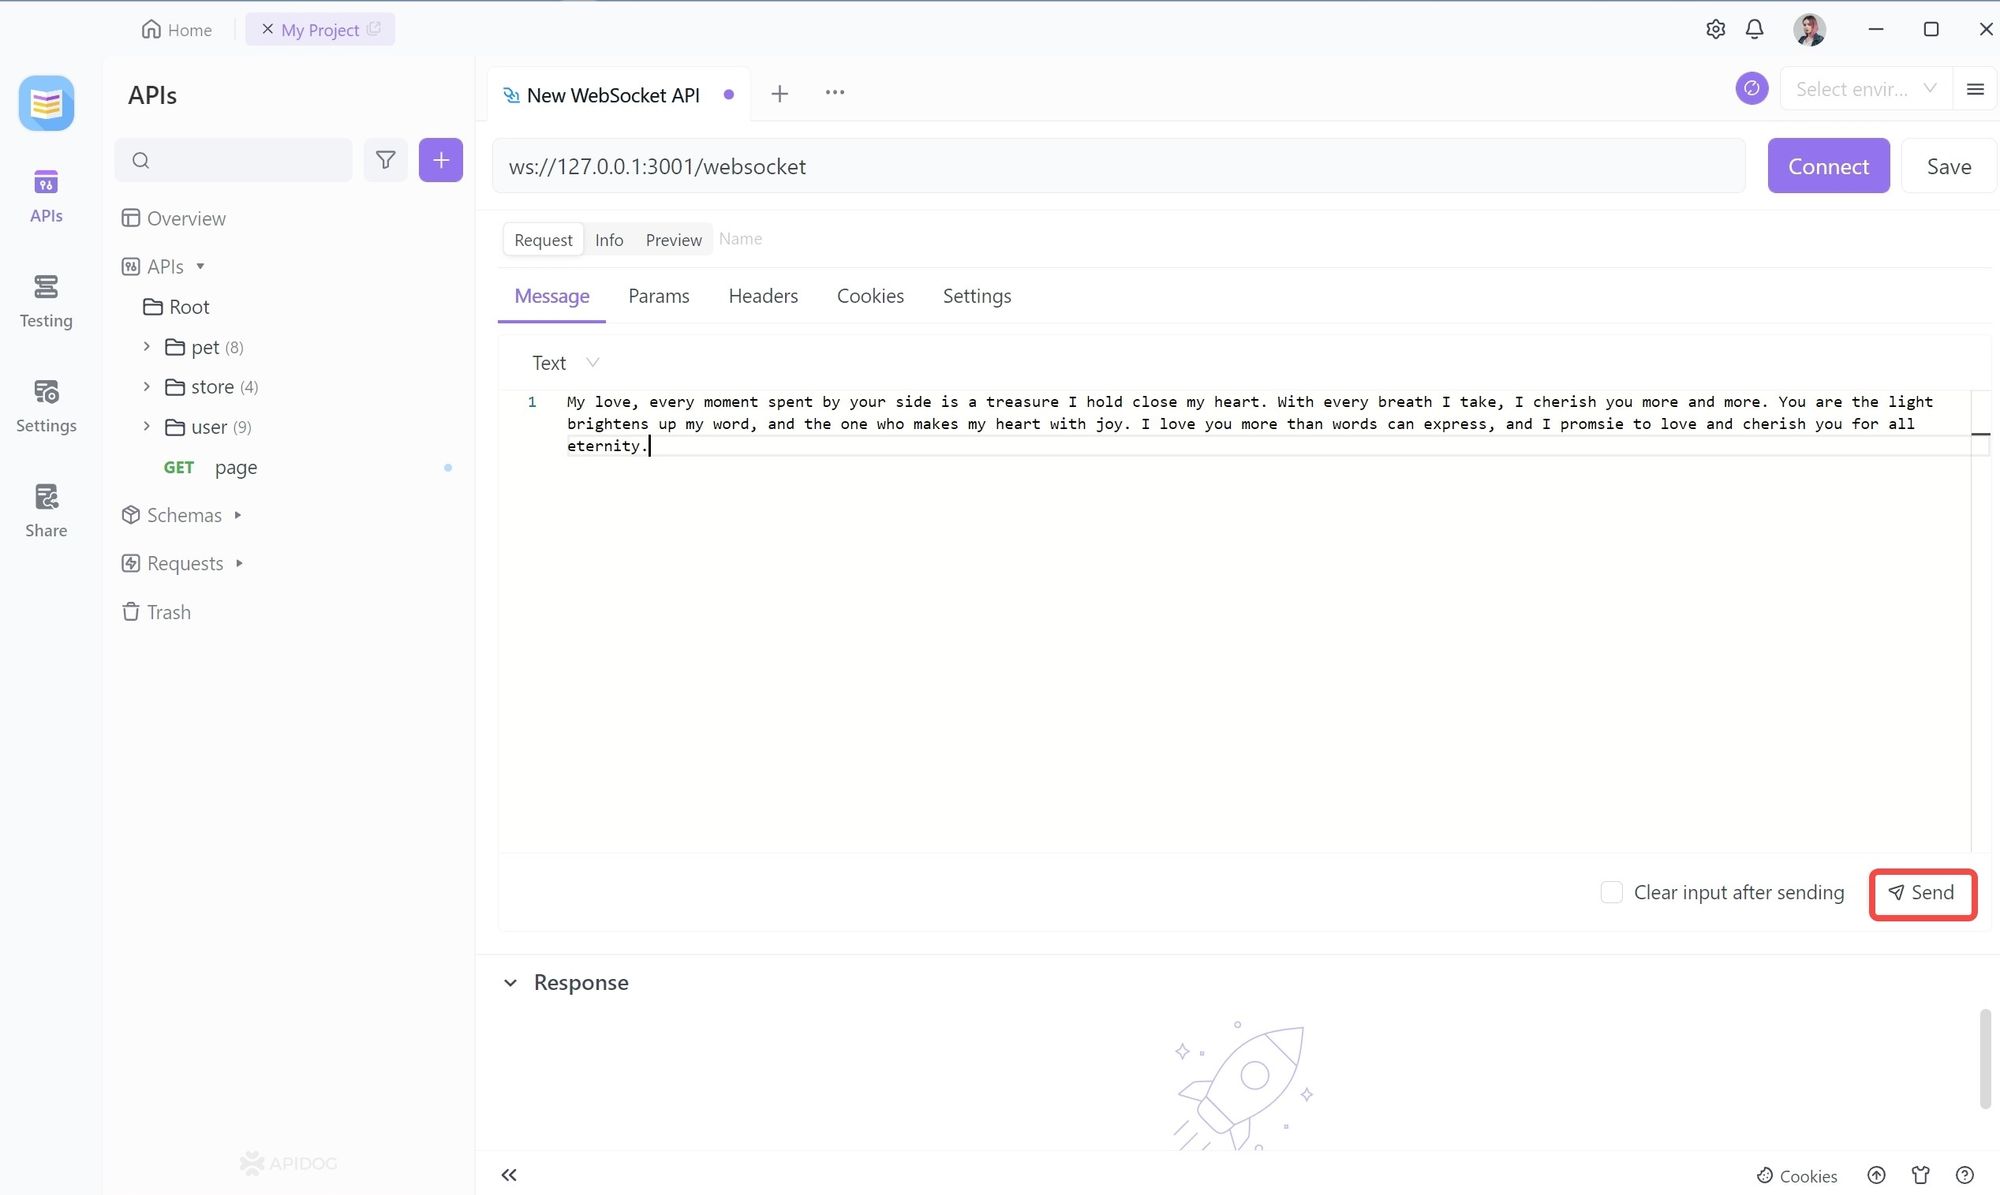
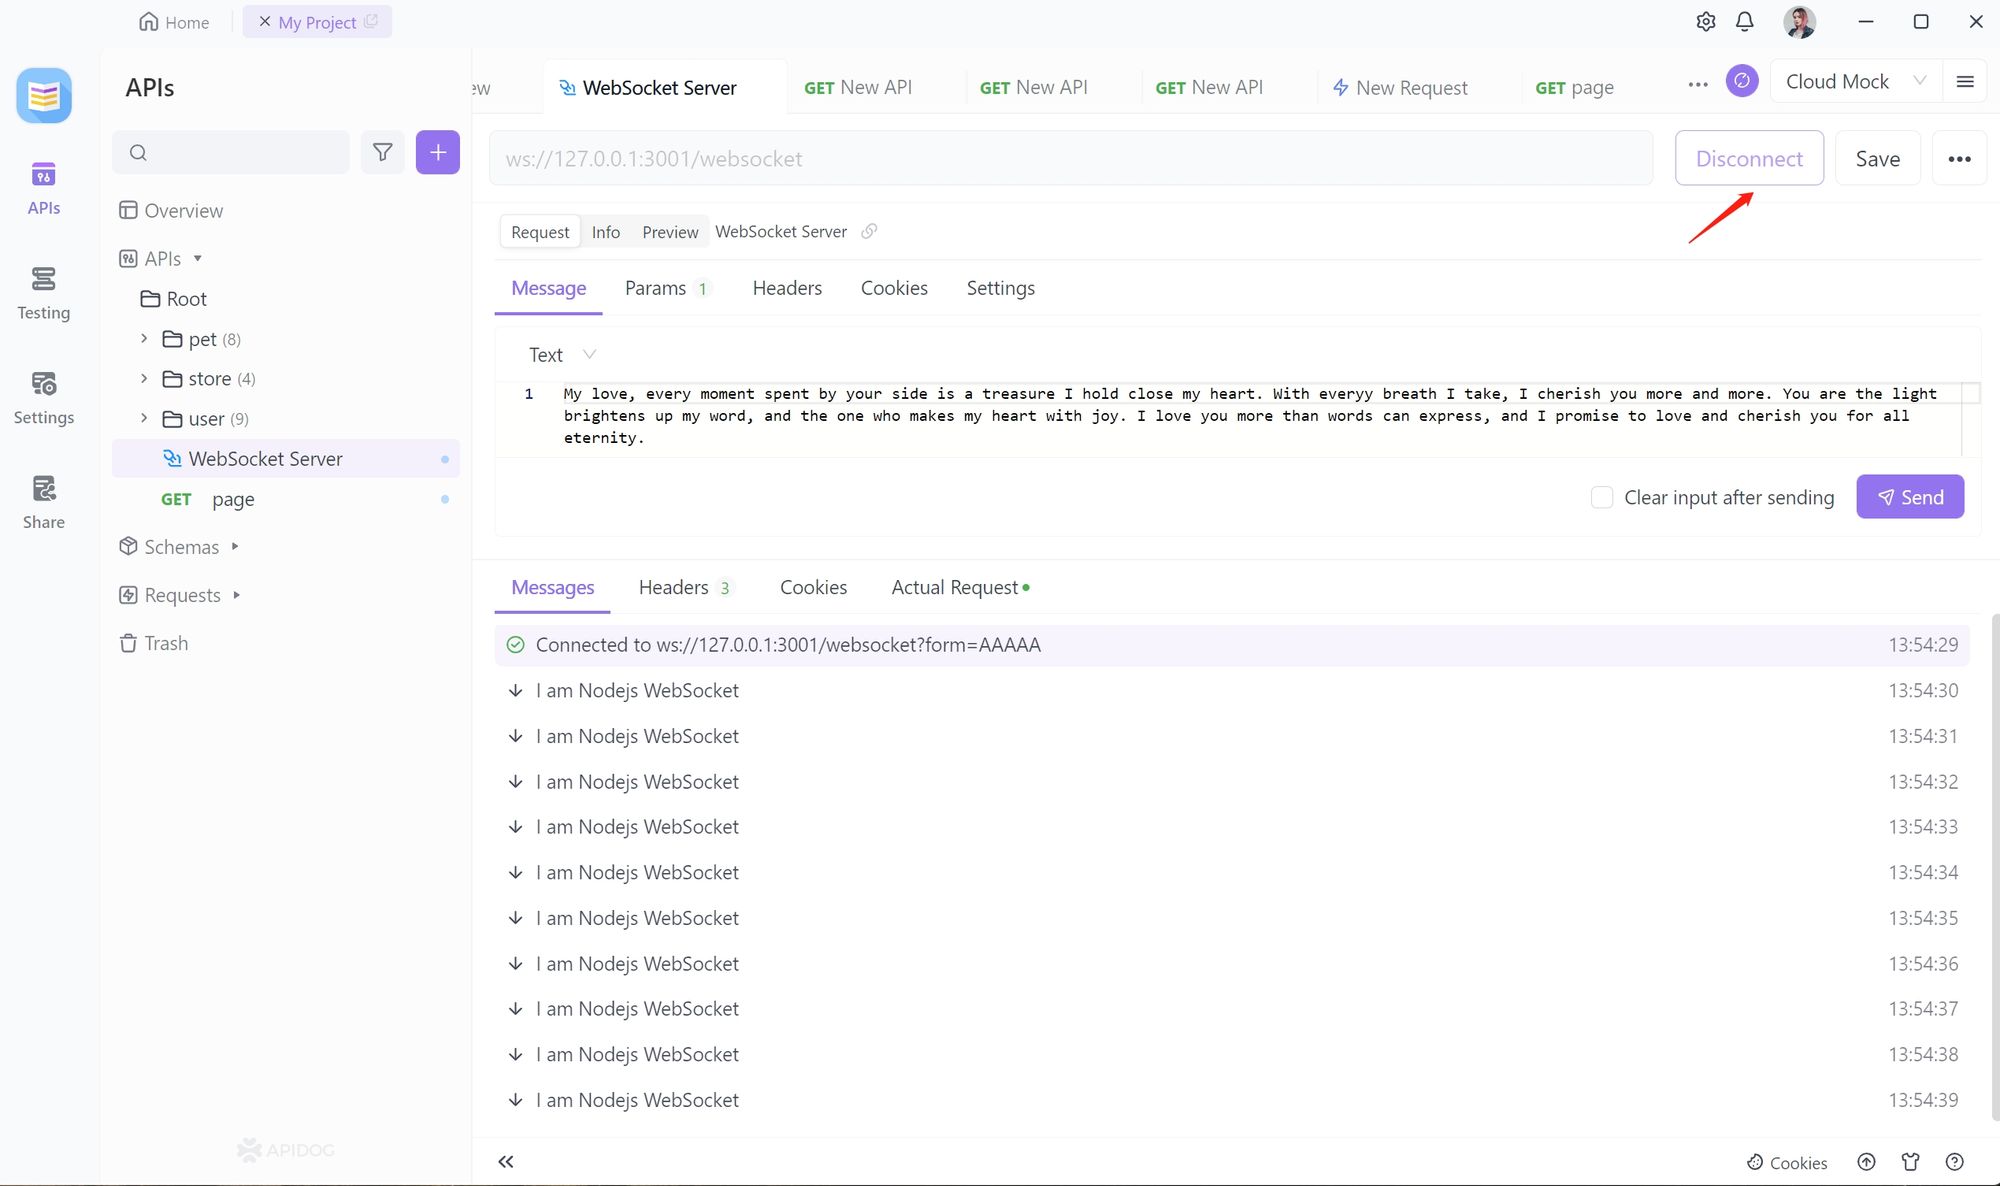
Step 5. Sending WebSocket Request
We can then communicate with the server via WebSocket. You can use Apidog to send Message and Params to the server by clicking on the Send button.
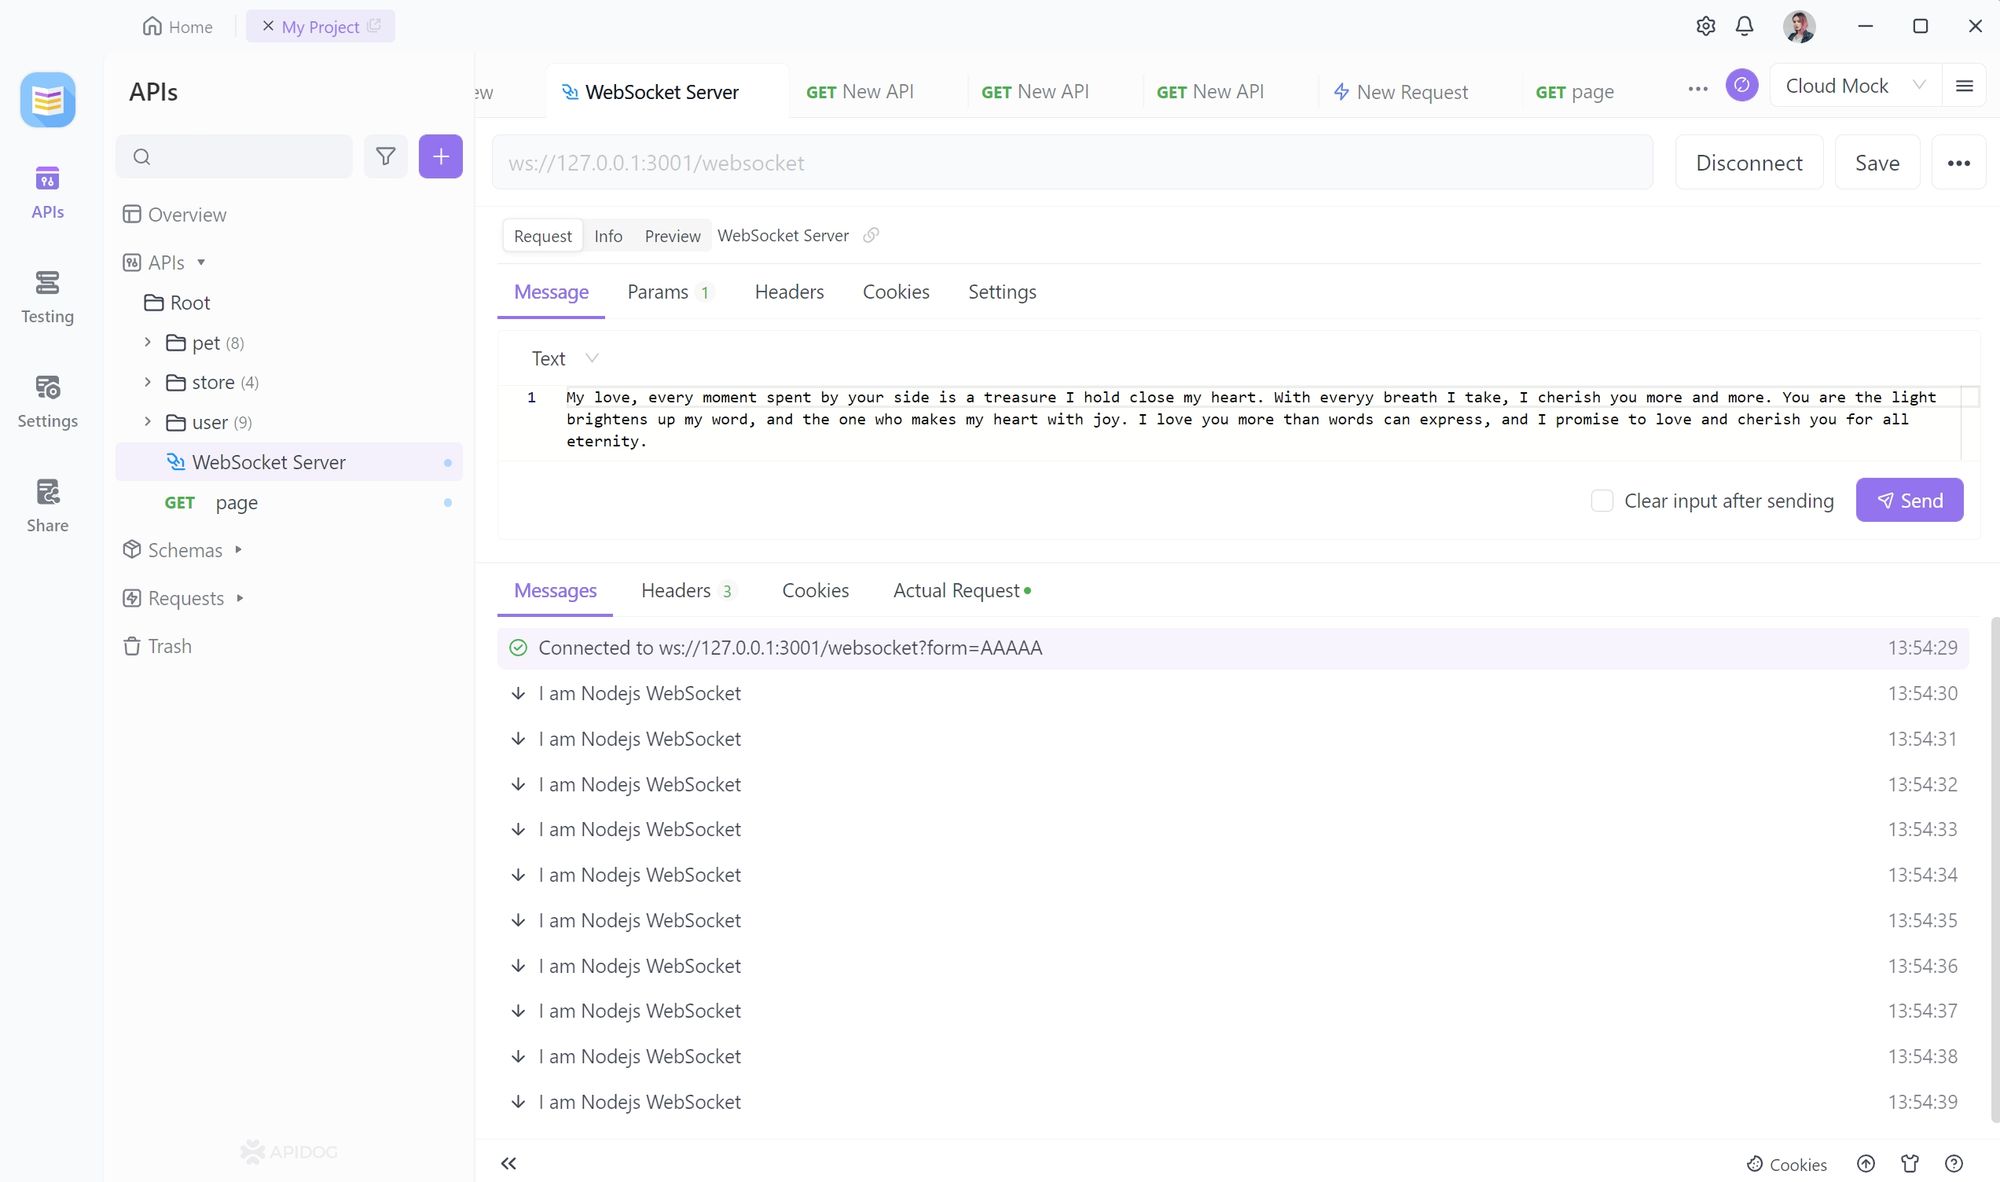
You can click on the disconnect button if you no longer wish to be connected.
Note:
Apidog has both a web side and a client side. If you are using the web side and want to debug local services, you need to install the Google plugin for Apidog.
Download here: Apidog Browser Extension
Conclusion
In conclusion, implementing WebSocket in C language involves installing the "libwebsockets" library, including the necessary header file, and writing the logic code. Additionally, you can utilize tools like Apidog to send WebSocket requests and test your WebSocket functionality.


