Let's be honest, GraphQL has completely changed the API game.
Its flexibility, efficiency, and client-driven data fetching have made it a favourite among developers building modern web and mobile apps.
But here's the catch: while GraphQL is powerful, testing and mocking it can be tricky. Traditional REST API testing tools don't always handle GraphQL queries gracefully, and setting up mock servers for complex schemas can take hours.
But what if I told you it doesn't have to be this complicated? What if you could handle both your GraphQL testing and mocking in one single, intuitive tool, without the context-switching and complex setups? The good news is, you can.
So, grab your favorite beverage, and let's dive into the world of efficient GraphQL testing and mocking. By the end, you'll see why thousands of developers are switching to Apidog for their GraphQL workflows.
Why GraphQL Testing and Mocking are Non-Negotiable
First off, let's solidify why we need to put in this extra effort. GraphQL's flexibility is its greatest strength and its biggest weakness from a quality assurance perspective.
The Testing Imperative:
- It's Not Just a 200 OK Anymore: With REST, a successful endpoint call often means a successful test. With GraphQL, you always get a
200 OKeven when your query has errors! The response body contains the data and the errors. This means your testing has to be much more sophisticated, inspecting the response payload deeply. - Infinite Query Combinations: A single GraphQL endpoint can return completely different data structures based on the query. You need to test not just for valid queries, but for invalid fields, deep nested queries, and performance under heavy, complex data requests.
- Schema Validation is Key: The schema is your contract. Your tests need to ensure that this contract is upheld, that fields are of the correct type, and that changes don't break existing clients.
The Mocking Imperative:
- Unblock Frontend Development: This is the big one. Frontend developers can't wait for all backend resolvers to be completed. With a mock GraphQL server, they can build UI components with realistic data immediately.
- Parallel Development: Mocks enable true parallel workstreams. Backend and frontend teams can agree on the schema and then work independently, dramatically accelerating project timelines.
- Testing Edge Cases: How does your UI handle a
nullfield? Or an empty list? With mocking, you can easily simulate these edge cases and error states without having to manipulate a real database or backend service.
Introducing Apidog: the Best Tool for GraphQL Testing and Mocking
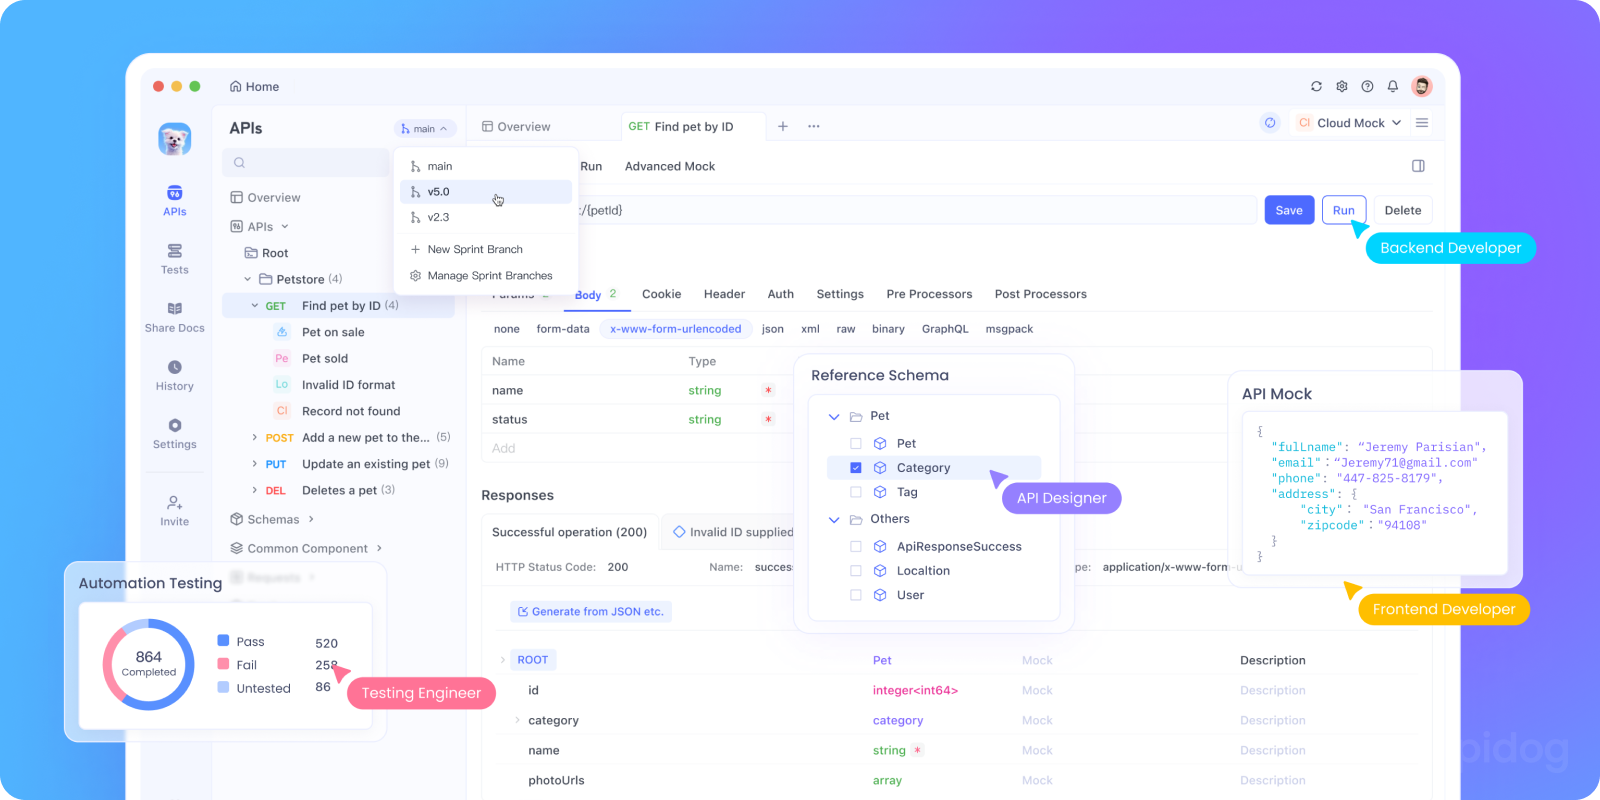
Now, let's talk about the solution. While there are niche tools out there, many teams find themselves juggling multiple applications. This is where Apidog truly shines. It's not just another API client; it's an all-in-one platform that understands the entire API lifecycle, including the unique demands of GraphQL.
Apidog stands out because it brings testing and mocking together under one roof in a deeply integrated way. You don't need a separate tool for sending queries and another for setting up a mock server. The schema you use for testing can be the very same one that powers your mocks, ensuring consistency across your entire development process.
Let's break down exactly how to use Apidog to conquer GraphQL testing and mocking.
How to Test a GraphQL Request in Apidog (Step-by-Step)
Testing GraphQL in Apidog is a straightforward process. It treats GraphQL as a first-class citizen, not an afterthought.
Step 1: Create a New GraphQL Request
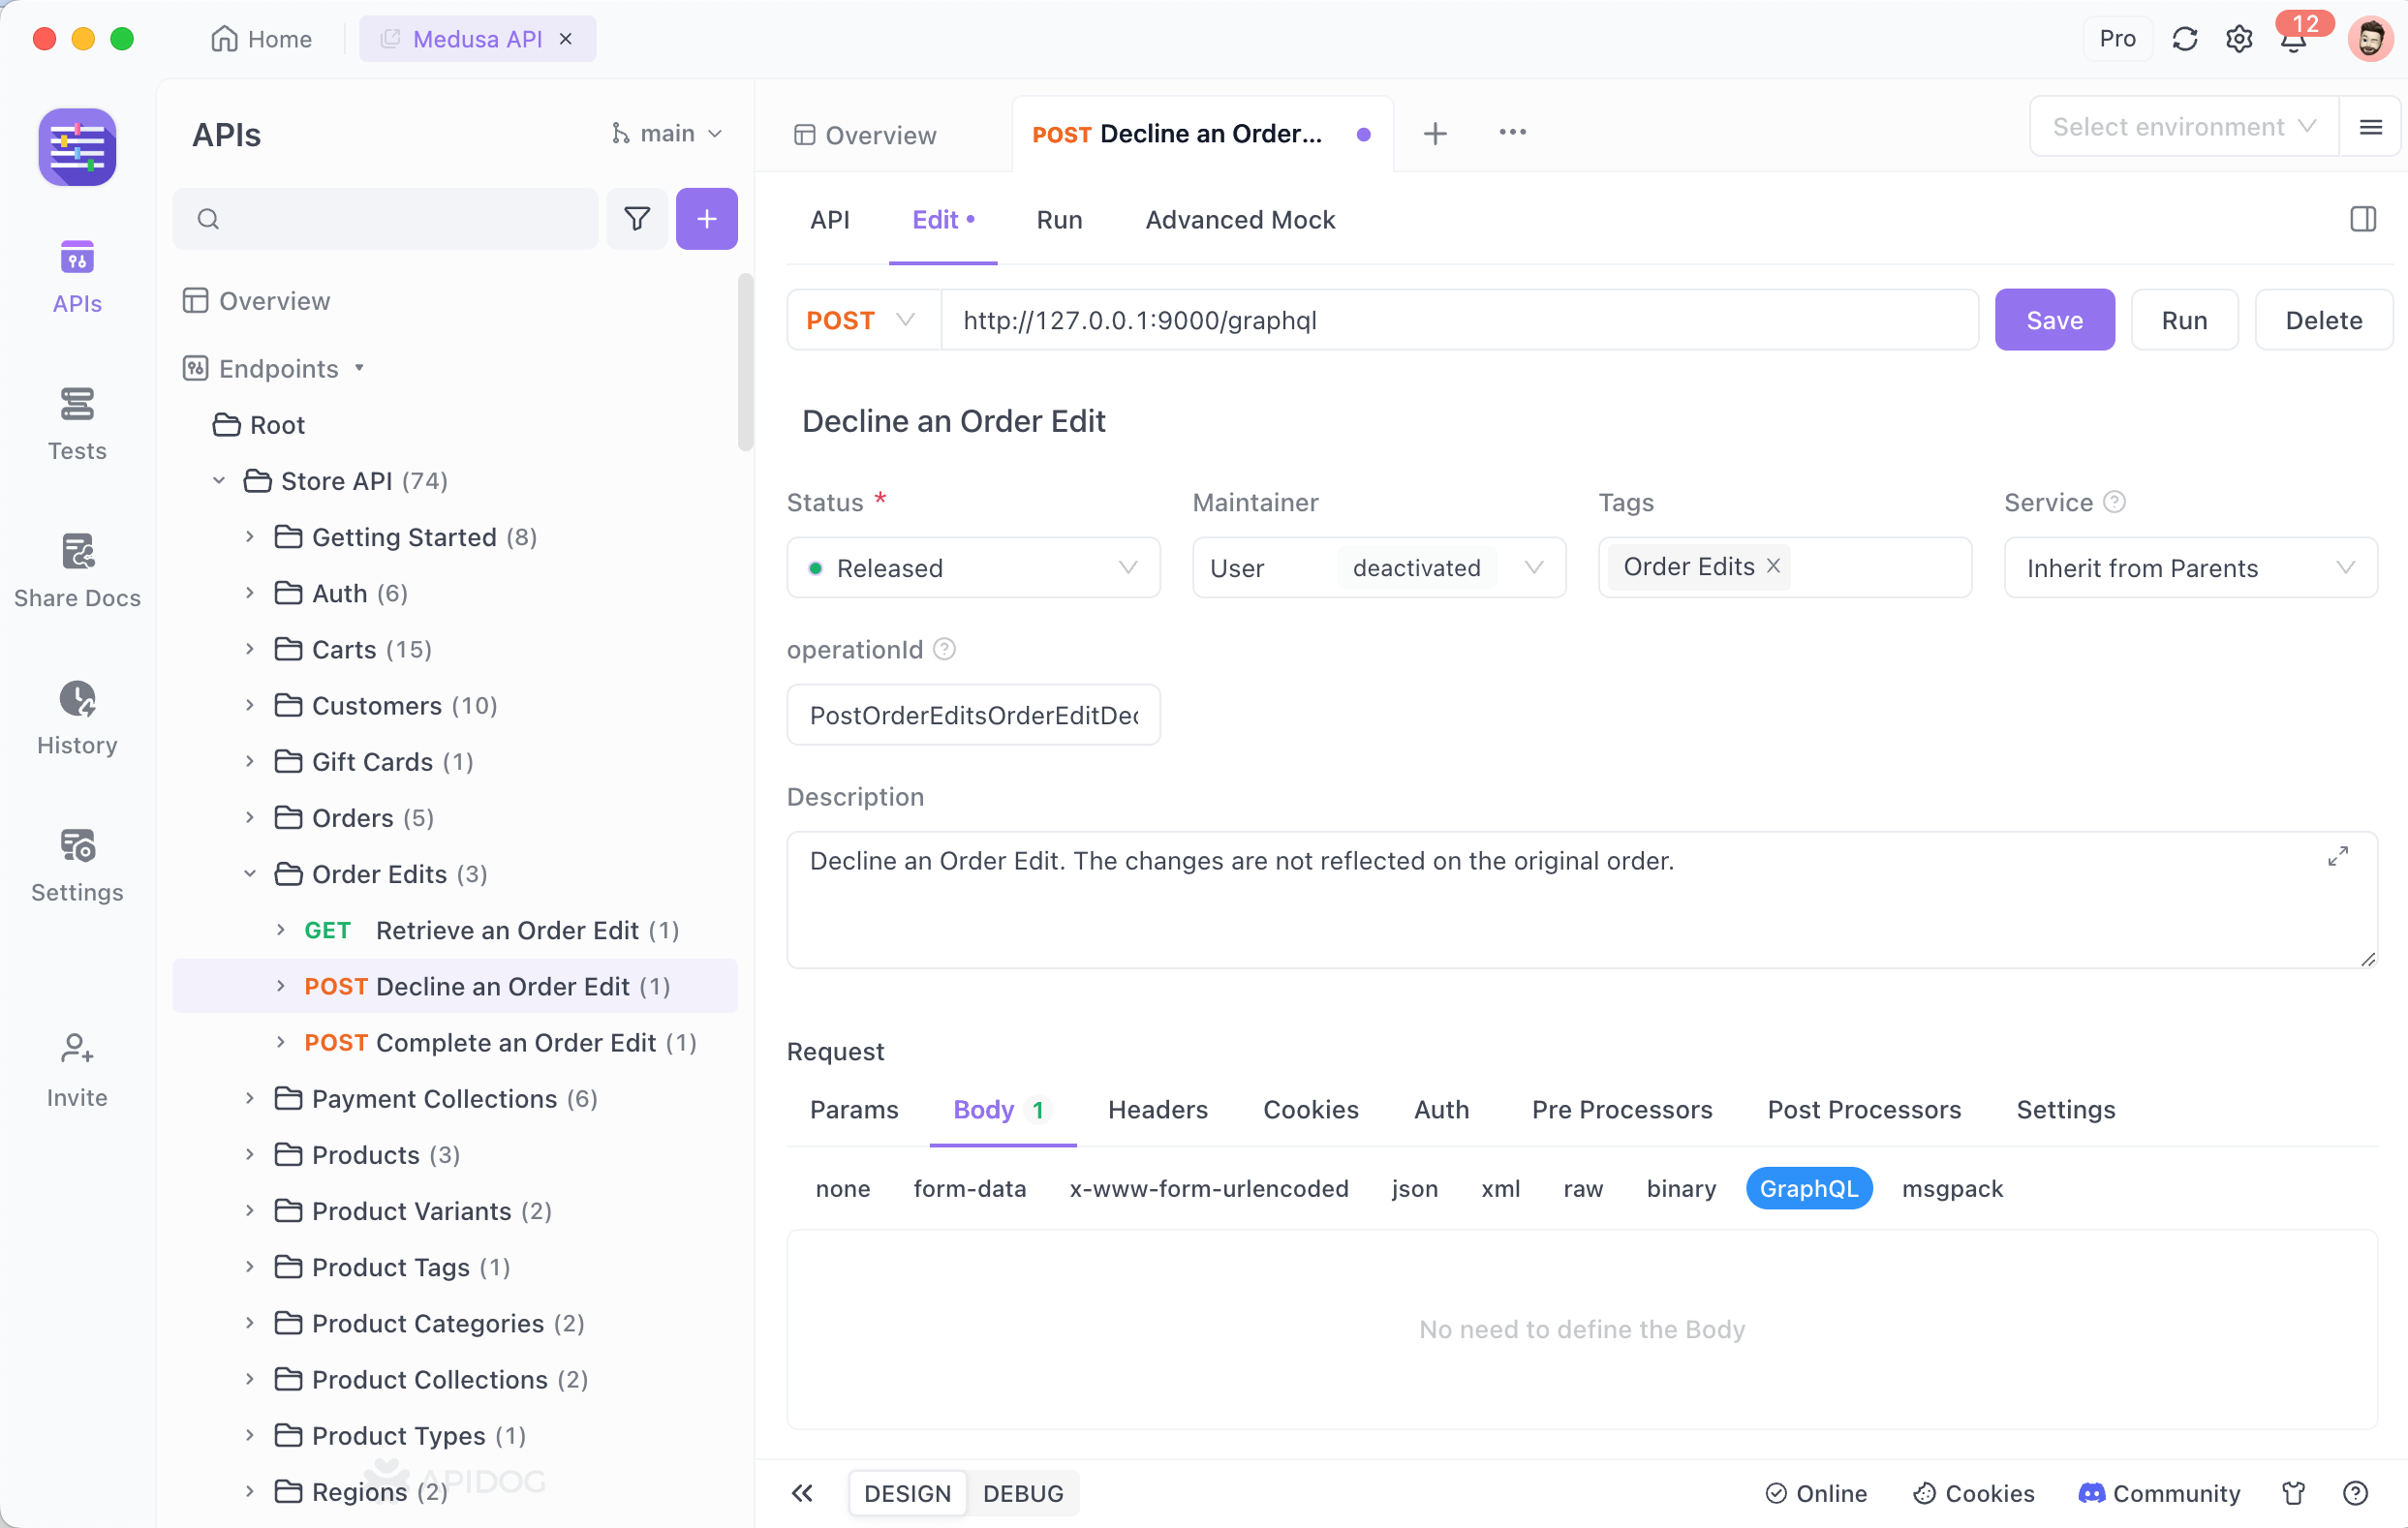
First, fire up Apidog and create a new request. Select GraphQL as the request type in the request body. This changes the interface to provide a dedicated GraphQL query editor and a built-in documentation explorer, which is a game-changer.
Step 2: Configure Your Endpoint and Headers
In the URL bar, enter your GraphQL endpoint (e.g., https://your-api.com/graphql). Next, head to the Headers tab. This is crucial. You almost always need to set the Content-Type header to application/json. Furthermore, if your API requires authentication, this is where you'll add your Authorization header (e.g., Bearer <your-token>).
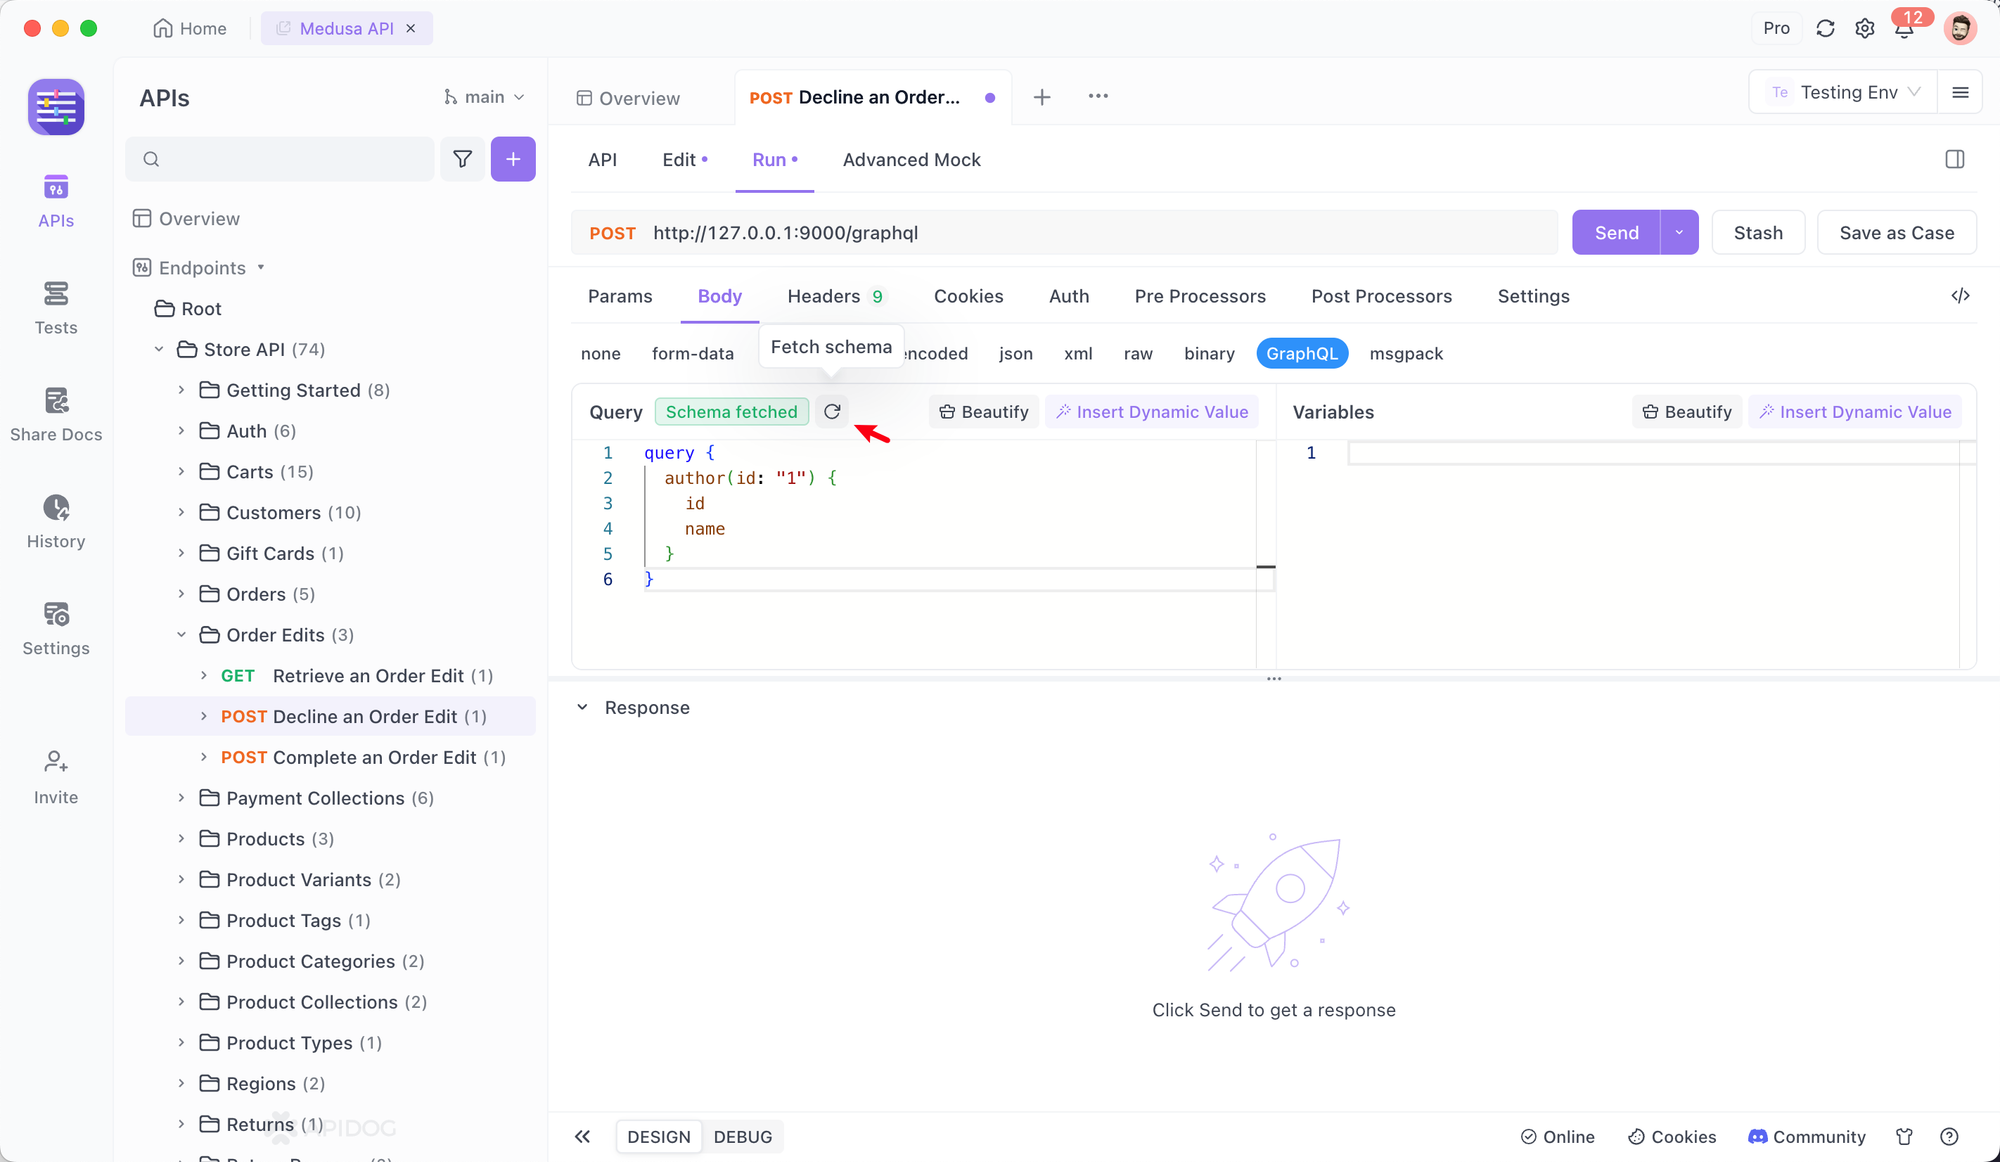
Step 3: Craft Your Query or Mutation
This is the core of it. In the dedicated Query tab, you write your GraphQL operation.
- For Queries: Write your data-fetching query. You can also click the manual
Fetch Schemabutton in the input box to enable the "code completion" feature for Query expressions, assisting in entering Query statements. - For Mutations: Write your data-modifying operation. The process is identical; you just use the
mutationkeyword.
Step 4: Use Query Variables (The Professional Touch)
Never hardcode your mutation inputs or filter parameters in the query string! Instead, use the Query Variables section at the bottom of the request editor. This is a best practice that Apidog fully supports.

Define your variables in JSON format. For example:
{
  "userId": "123",
  "newName": "Alice"
}
And then in your query, reference them:
mutation UpdateUser($userId: ID!, $newName: String!) {
  updateUser(id: $userId, name: $newName) {
    id
    name
  }
}
This keeps your queries clean, reusable, and easy to maintain.
Step 5: Execute and Analyze the Response
Hit the Send button! Apidog will execute your GraphQL request and display the response in the panel below. The response viewer is smart; it formats JSON beautifully, making it easy to navigate complex, nested data. Crucially, you can see the exact structure of the data object and any errors that were returned, allowing for comprehensive validation.
Step 6: Save and Organize Your Tests
Once you have a request working, save it to a project or collection. This allows you to build a suite of regression tests for your GraphQL API. You can then run these tests individually or in sequence, and even automate them as part of your CI/CD pipeline.
How to Mock a GraphQL Request in Apidog (Step-by-Step)

This is where Apidog moves from being a great client to a transformative collaboration tool. Setting up a mock server for your GraphQL API can be done in minutes.
Step 1: Define or Import Your GraphQL Schema
The foundation of any good mock is a solid schema. In Apidog, you can either:
- Import an existing schema from a URL (like your backend's GraphQL introspection endpoint).
- Define it manually within an Apidog project.
Having the schema allows Apidog to understand the types of data it should be generating.
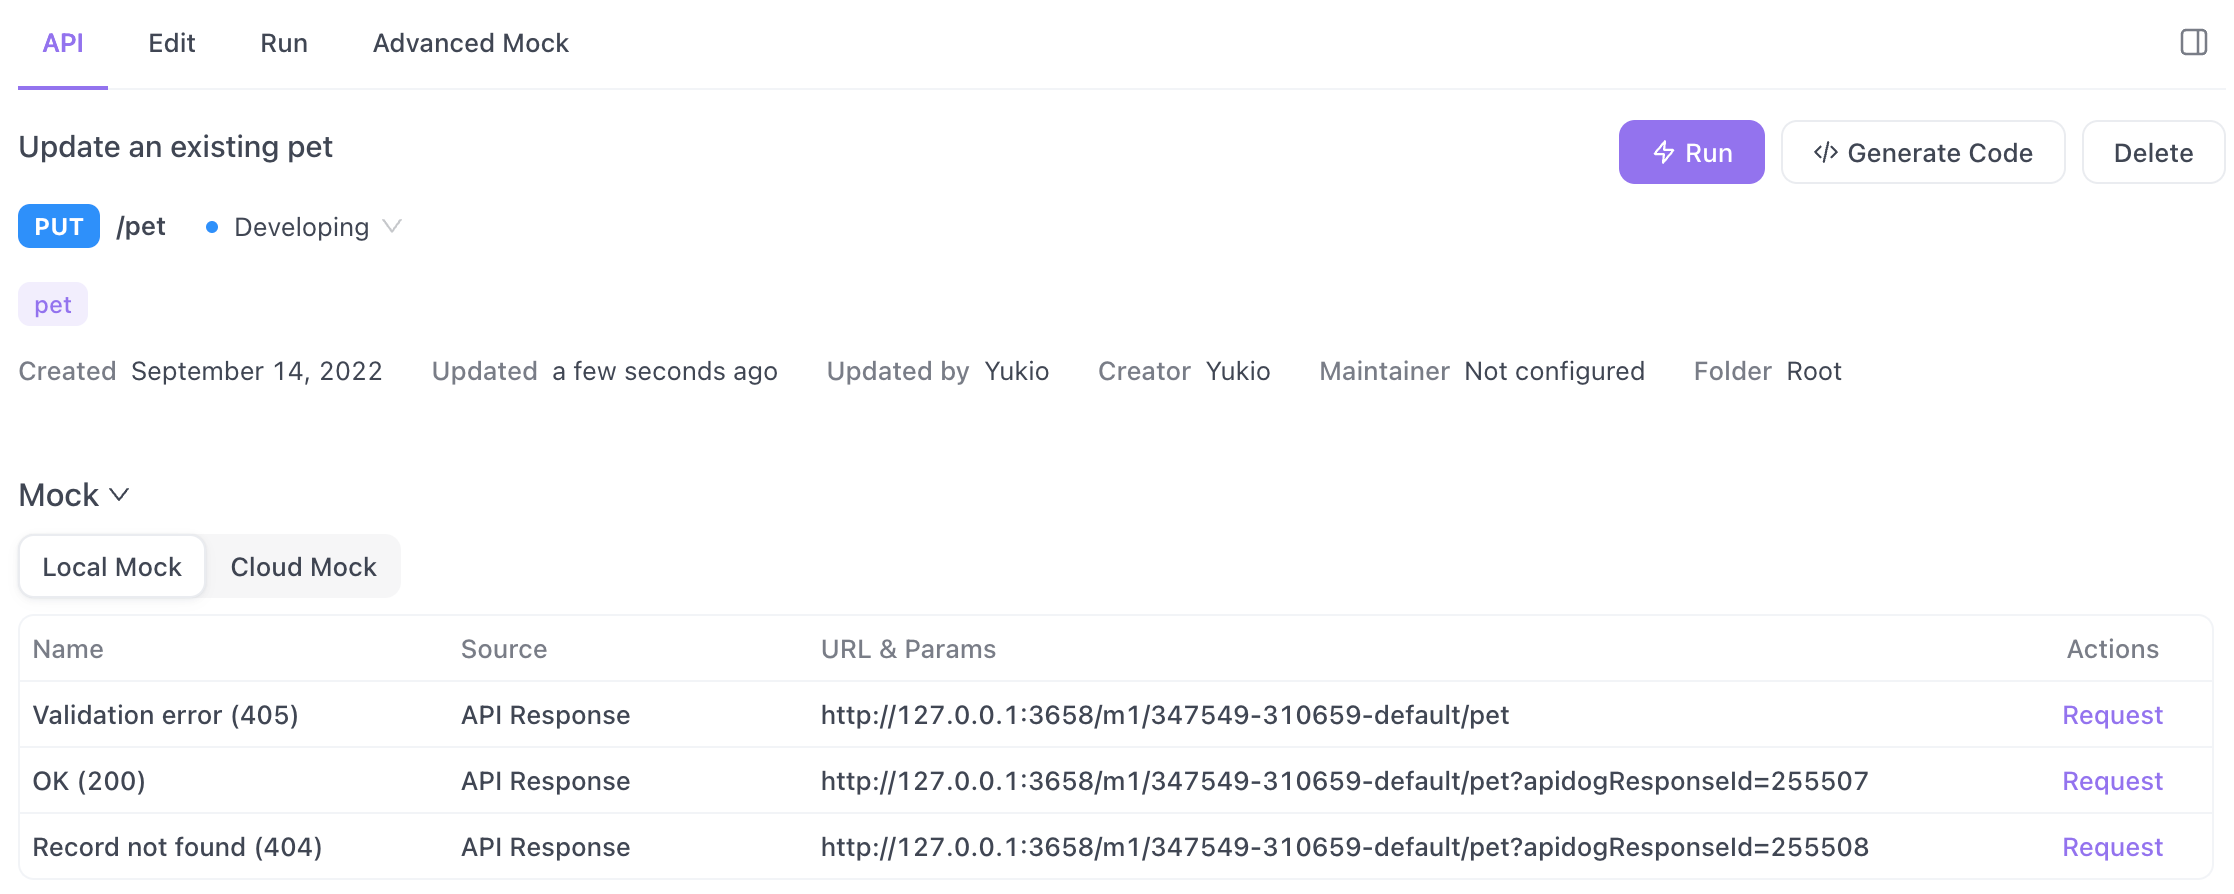
Step 2: Create a Mock Service
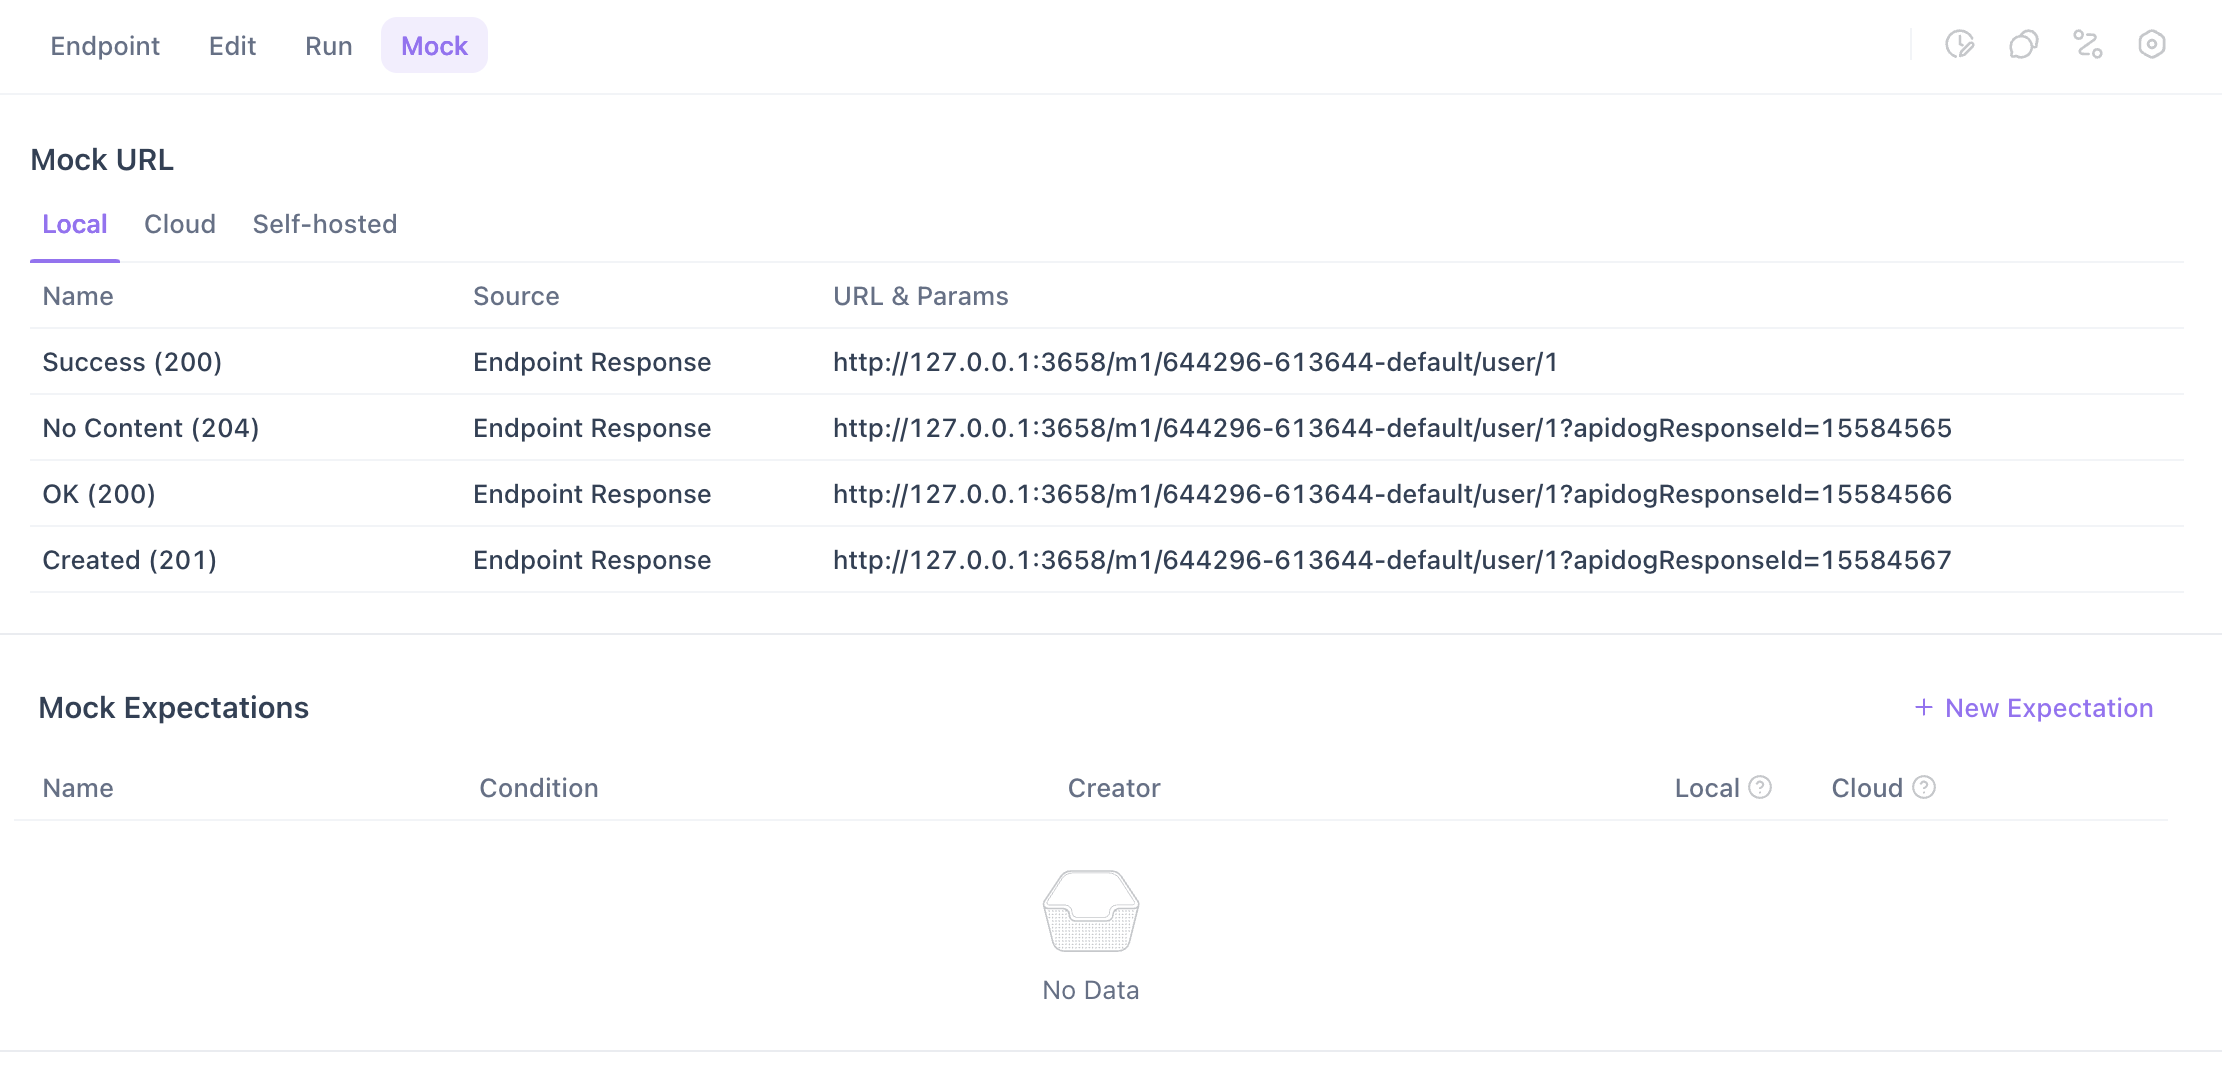
Within your project, Apidog will automatically generate a unique, public URL for your mock server. This URL is what your frontend applications will point to during development.
Step 3: Configure Mock Rules for Intelligent Data
This is the magic. Apidog doesn't just return random strings. You can configure mock rules to return realistic, dynamic data. The platform can generate smart data based on the field name and type.
- For a field named
email, it can return a realistic-looking email address. - For a field named
firstName, it can return a common first name. - For a list of
Posts, it can return an array of 1-5 items, each with their own mockedtitle,body, etc.
This is the "Mock in one minute without coding" promise delivered. You get realistic, structured data instantly, without writing a single line of custom logic.
Step 4: Refine with Advanced Mocking (Optional)
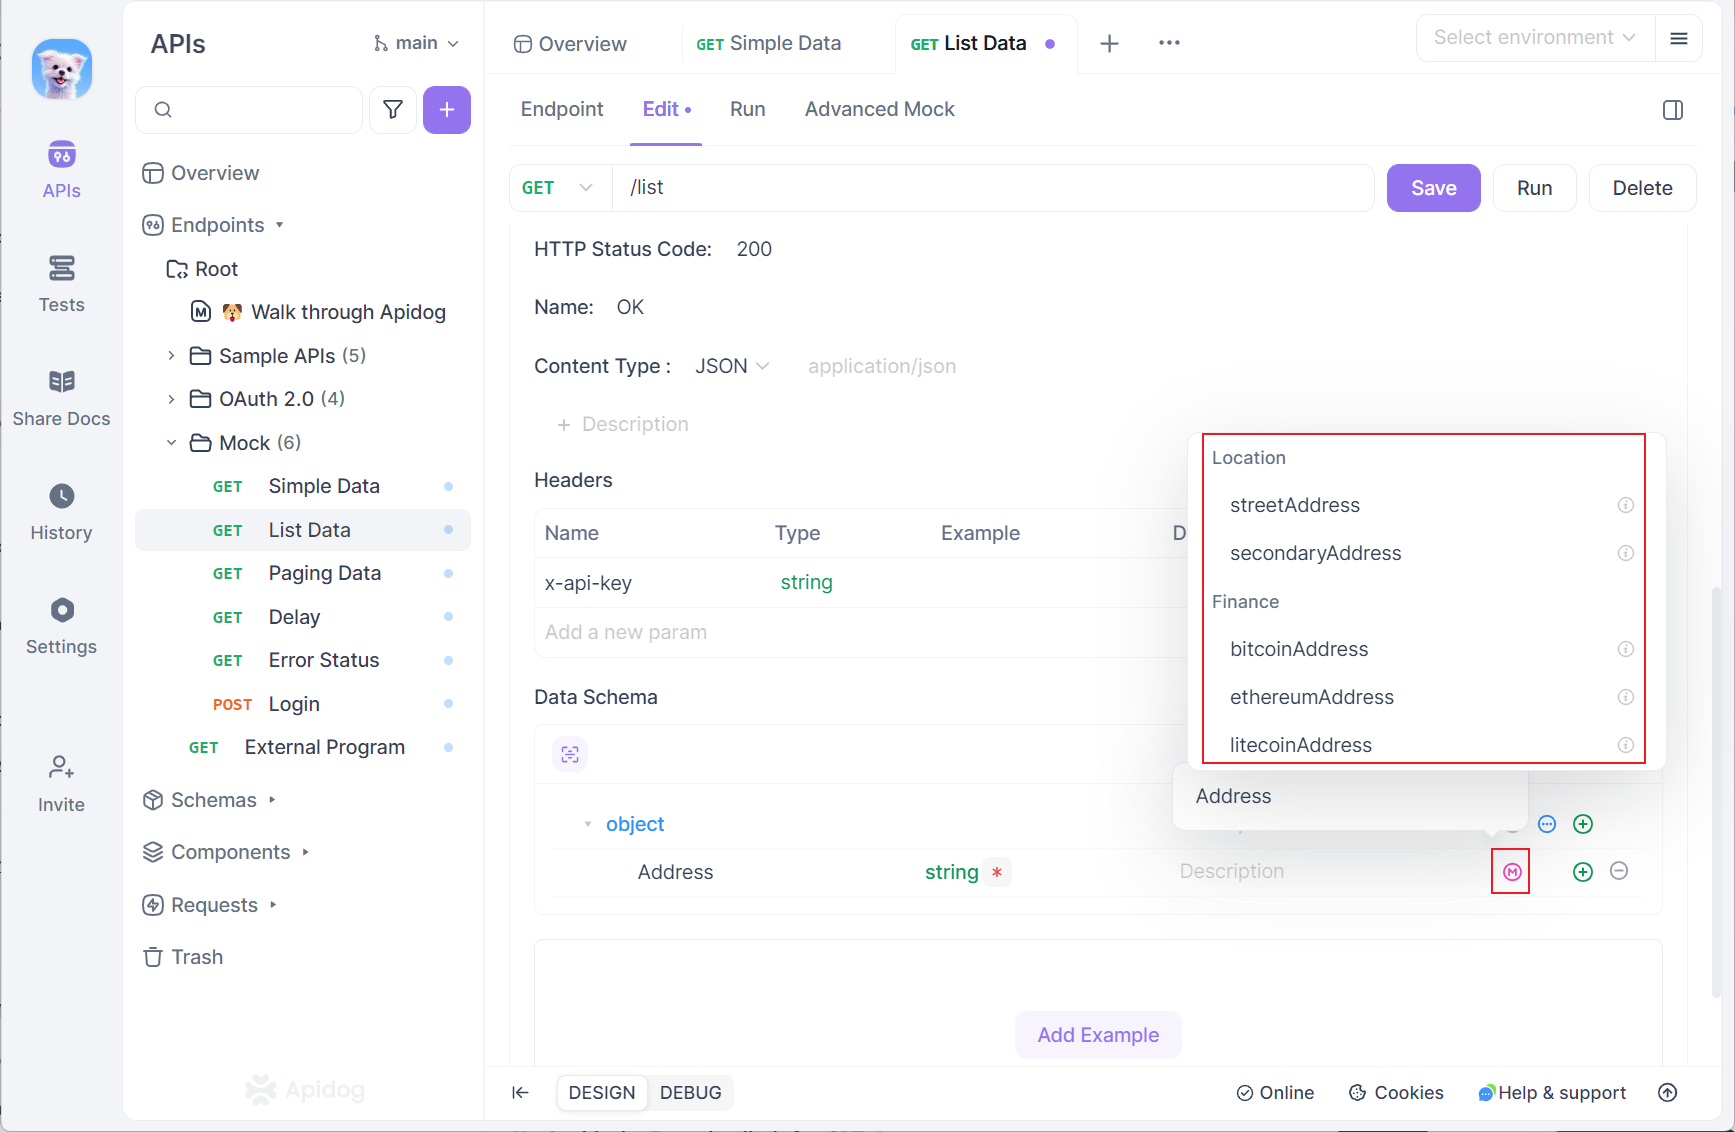
For more complex scenarios, Apidog allows for even finer control. You can write custom JavaScript snippets to define exactly how a specific field should be mocked. This is perfect for when you need very specific data formats or business logic in your mock responses.
Step 5: Integrate the Mock URL and Develop!
Once your mock server is running, simply copy the mock URL provided by Apidog. Your frontend team can now configure their GraphQL client (like Apollo Client or URQL) to use this URL. They can run any query or mutation defined in your schema and get back immediate, intelligent responses. This unblocks their development entirely.
Why Apidog is the Superior Choice for Your GraphQL Workflow
Now that you've seen the "how," let's recap the "why." Choosing Apidog isn't just about picking a tool; it's about streamlining your entire process.
- The Single Source of Truth: Your GraphQL schema is the foundation for both your tests and your mocks. This eliminates the drift that can happen when using separate, disconnected tools.
- Unbeatable Collaboration: Backend developers can design the schema and create tests. Frontend developers can use the instantly generated mocks. Everyone stays in sync within the same platform.
- Radical Efficiency: The time saved from not configuring a standalone mock server and not context-switching between applications is immense. You go from zero to a working, mocked GraphQL API in under a minute.
- Beyond GraphQL: Remember, Apidog also handles REST APIs, WebSocket, and gRPC. It's a universal API platform that simplifies your entire tech stack.
Conclusion: Stop Juggling, Start Building
GraphQL was supposed to make our lives easier, and with the right tools, it absolutely does. The complexity of testing and mocking doesn't have to be a barrier. By using a unified platform like Apidog, you can harness the full power of GraphQL without the associated headaches.
You can move faster, collaborate better, and build more reliable applications. So, stop wrestling with multiple tools and complex setups. Embrace a workflow where your testing and mocking efforts work in harmony, letting you and your team focus on what you do best: building amazing software.