
Have you ever wanted to fetch post-JSON data from any API? If yes, then you are in luck. In this blog post, we will focus on how to fetch post-JSON data from any API. By post-JSON data, we mean data that is sent in the body of a POST request.
This is a common way to send data to an API, especially when you want to create or update a resource. Then we will show you how to use a simple and powerful tool called Apidog to do just that.
What is Fetch API?
In the context of JavaScript, Fetch is a modern API for making HTTP requests. It provides a simpler and more intuitive interface than the older XMLHttpRequest object, and it is easier to use.
What does a Fetch Request do?
The Fetch API is used to make requests to servers and receive responses in a format such as JSON, XML, or HTML.
Here is an example of how to use the Fetch API to POST JSON data:
fetch('https://example.com/api/data', {
  method: 'POST',
  headers: {
    'Content-Type': 'application/json'
  },
  body: JSON.stringify({
    key: 'value'
  })
})
.then(response => response.json())
.then(data => console.log(data))
.catch(error => console.error(error));
In this example, we are sending a POST request to https://example.com/api/data with a JSON payload containing a single key-value pair. The Content-Type header is set to application/json to indicate that the payload is in JSON format. The JSON.stringify() method is used to convert the JSON object to a string before sending it in the request body.
The fetch() method returns a Promise that resolves to the Response object representing the response to the request. We can then use the json() method of the Response object to extract the JSON data from the response. Finally, we log the JSON data to the console.


What Data Can be Passed via POST Request?
In HTTP requests, the POST method is typically used to send data to the server for creating a new resource or updating an existing one. The data can be sent in various formats via request body, and the choice of data type depends on the requirements of the server and the nature of the data being sent.
Here are some common data types used in POST requests:
- This is the most common data type used in web forms.
- The data is encoded as a URL-encoded string, with key-value pairs separated by
=and pairs separated by&. - Example:
name=John+Doe&email=john%40example.com - Suitable for small amounts of data and simple key-value pairs.
JSON (JavaScript Object Notation):
- JSON is a lightweight data-interchange format that is easy for humans to read and write, and easy for machines to parse and generate.
- It is widely used in modern web applications for transmitting structured data.
- JSON data is typically sent with the
Content-Typeheader set toapplication/json. - Example:
{"name": "John Doe", "email": "john@example.com"} - Suitable for complex data structures and APIs.
XML (Extensible Markup Language):
- XML is a markup language used for structuring data.
- It was widely used in the past for data exchange, but its usage has declined in favor of JSON in recent years.
- XML data is typically sent with the
Content-Typeheader set toapplication/xmlortext/xml. - Example:
<user>
  <name>John Doe</name>
  <email>john@example.com</email>
</user>
- Still used in some legacy systems and specific domains.
Binary Data:
- Binary data, such as images, videos, or other files, can be sent in
POSTrequests. - The binary data is typically encoded using Base64 or sent as multipart/form-data.
- Suitable for file uploads or sending binary content.
Raw Data:
- Raw data can be sent in the request body without any specific encoding or structuring.
- The
Content-Typeheader should be set appropriately, such astext/plainfor plain text data. - Suitable for sending custom or non-standard data formats.
The choice of data type depends on the server's requirements, the complexity of the data being sent, and the preferences of the API or system you're working with. JSON has become the de facto standard for modern web APIs due to its simplicity, readability, and widespread support across programming languages and platforms.
Guideline: POST JSON Data Using Fetch API
There are many reasons why you might want to fetch post-JSON data from any API. For example, you might want to:
- Test an API that you are developing or using
- Learn how an API works and what data it expects and returns
- Debug an issue or error with an API
- Explore the features and capabilities of an API
- Integrate an API with your own application or project
Whatever your reason is, fetching post JSON data from any API can help you achieve your goal faster and easier. You don't need to write any code, install any software, or set up any environment. You just need a web browser and an internet connection.
Step-by-step Tutorial to Fetch Post JSON Data
Now that we have a basic understanding of APIs, JSON, and Fetch, let’s dive into the details of how to fetch post JSON data using API.
Fetch Post request JSON Data method is used to send a JSON object as the payload of an HTTP POST request using the Fetch API. This method is similar to the Send JSON Object with POST Request method, but it uses the Fetch API to send the request instead of the XMLHttpRequest object. The Fetch API is a newer and more modern way of making HTTP requests in JavaScript, and it provides a simpler and more intuitive interface than the older XMLHttpRequest object. To fetch post JSON data using API, you need to follow these steps:
fetch('https://example.com/api/data', {
  method: 'POST',
  headers: {
    'Content-Type': 'application/json'
  },
  body: JSON.stringify({
    key1: 'value1',
    key2: 'value2'
  })
})
.then(response => response.json())
.then(data => console.log(data))
.catch(error => console.error(error));
In this example, we are sending a POST request to https://example.com/api/data with a JSON payload containing two key-value pairs. The Content-Type header is set to application/json to indicate that the payload is in JSON format. The JSON.stringify() method is used to convert the JSON object to a string before sending it in the request body.
The fetch() method returns a Promise that resolves to the Response object representing the response to the request. We can then use the json() method of the Response object to extract the JSON data from the response. Finally, we log the JSON data to the console.

Errors Handling When Using Fetch API
When using the Fetch API, it’s important to handle errors properly to ensure that your application behaves as expected. Here are some general guidelines for handling errors when using the Fetch API:
- Use the
catch()method to handle network errors and other errors that may occur during the request. - Check the
okproperty of the response object to determine if the request was successful or not. - Use the
statusproperty of the response object to determine the HTTP status code of the response. - Use the
json()method of the response object to extract JSON data from the response.
Here’s an example of how to handle errors when using the Fetch API:
fetch('https://example.com/api/data', {
  method: 'POST',
  headers: {
    'Content-Type': 'application/json'
  },
  body: JSON.stringify({
    key: 'value'
  })
})
.then(response => {
  if (!response.ok) {
    throw new Error('Network response was not ok');
  }
  return response.json();
})
.then(data => console.log(data))
.catch(error => console.error(error));
In this example, we are sending a POST request to https://example.com/api/data with a JSON payload containing a single key-value pair. The Content-Type header is set to application/json to indicate that the payload is in JSON format. The JSON.stringify() method is used to convert the JSON object to a string before sending it in the request body.
The fetch() method returns a Promise that resolves to the Response object representing the response to the request. We can then use the ok property of the Response object to check if the request was successful or not. If the request was not successful, we throw an error. If the request was successful, we use the json() method of the Response object to extract the JSON data from the response. Finally, we log the JSON data to the console.
Fetch Alternative: Post JSON data Easier with Apidog
Apidog is a web-based tool that helps you test and debug APIs. It allows you to send HTTP requests to any API endpoint and get the response in various formats, such as JSON, XML, HTML, etc. You can also inspect the headers, cookies, status codes, and other details of the response. Apidog also lets you manipulate the response data using JavaScript, filter the data using JSONPath, and validate the data using JSON Schema. You can also save your API requests and share them with others using a unique URL.
Apidog is a great tool for anyone who works with APIs, whether you are a developer, a tester, a designer, or a student. It helps you to:
- Learn how to use different APIs and explore their features
- Test and debug your own APIs and find errors and bugs
- Experiment with different parameters and options and see how they affect the response
- Document and demonstrate your API usage and results
- Collaborate and communicate with other API users and developers
Apidog is easy to use, fast, and reliable. It works with any API that supports HTTP requests, such as RESTful, SOAP, GraphQL, etc. It also supports various authentication methods, such as Basic, Bearer, OAuth, etc. You can use Apidog on any device and browser, as long as you have an internet connection.
Generate Fetch Post JSON Data in Apidog
Apidog is an all-in-one collaborative API development platform that provides a comprehensive toolkit for designing, debugging, testing, publishing, and mocking APIs. It can also help to generate Fetch code.
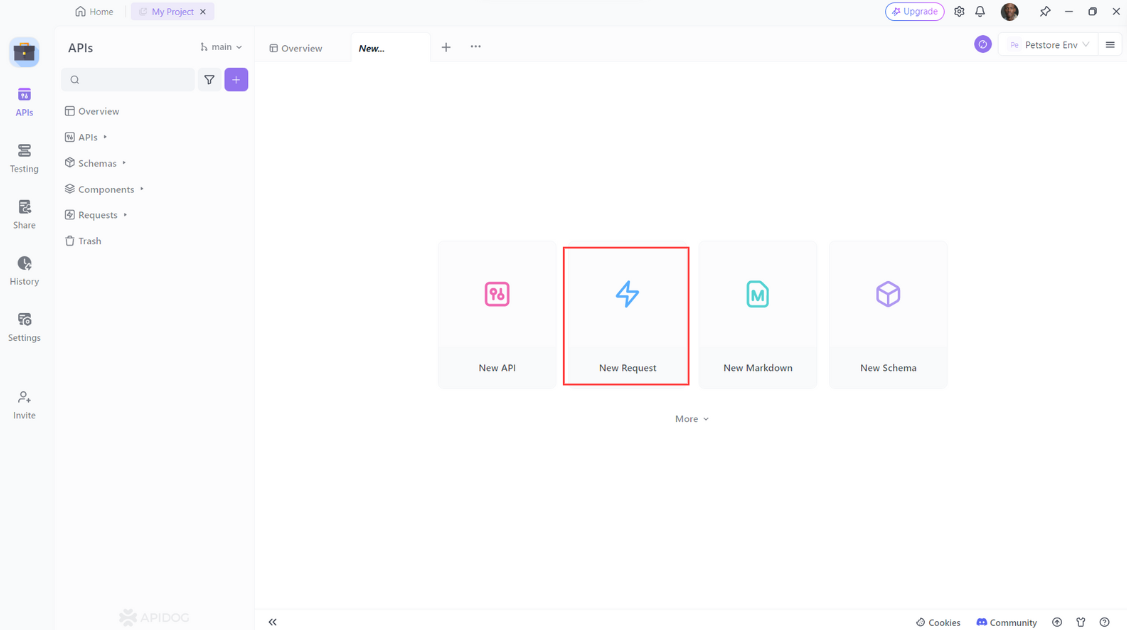
Step 1: Open Apidog and click on the "New Request" button to create a new request.
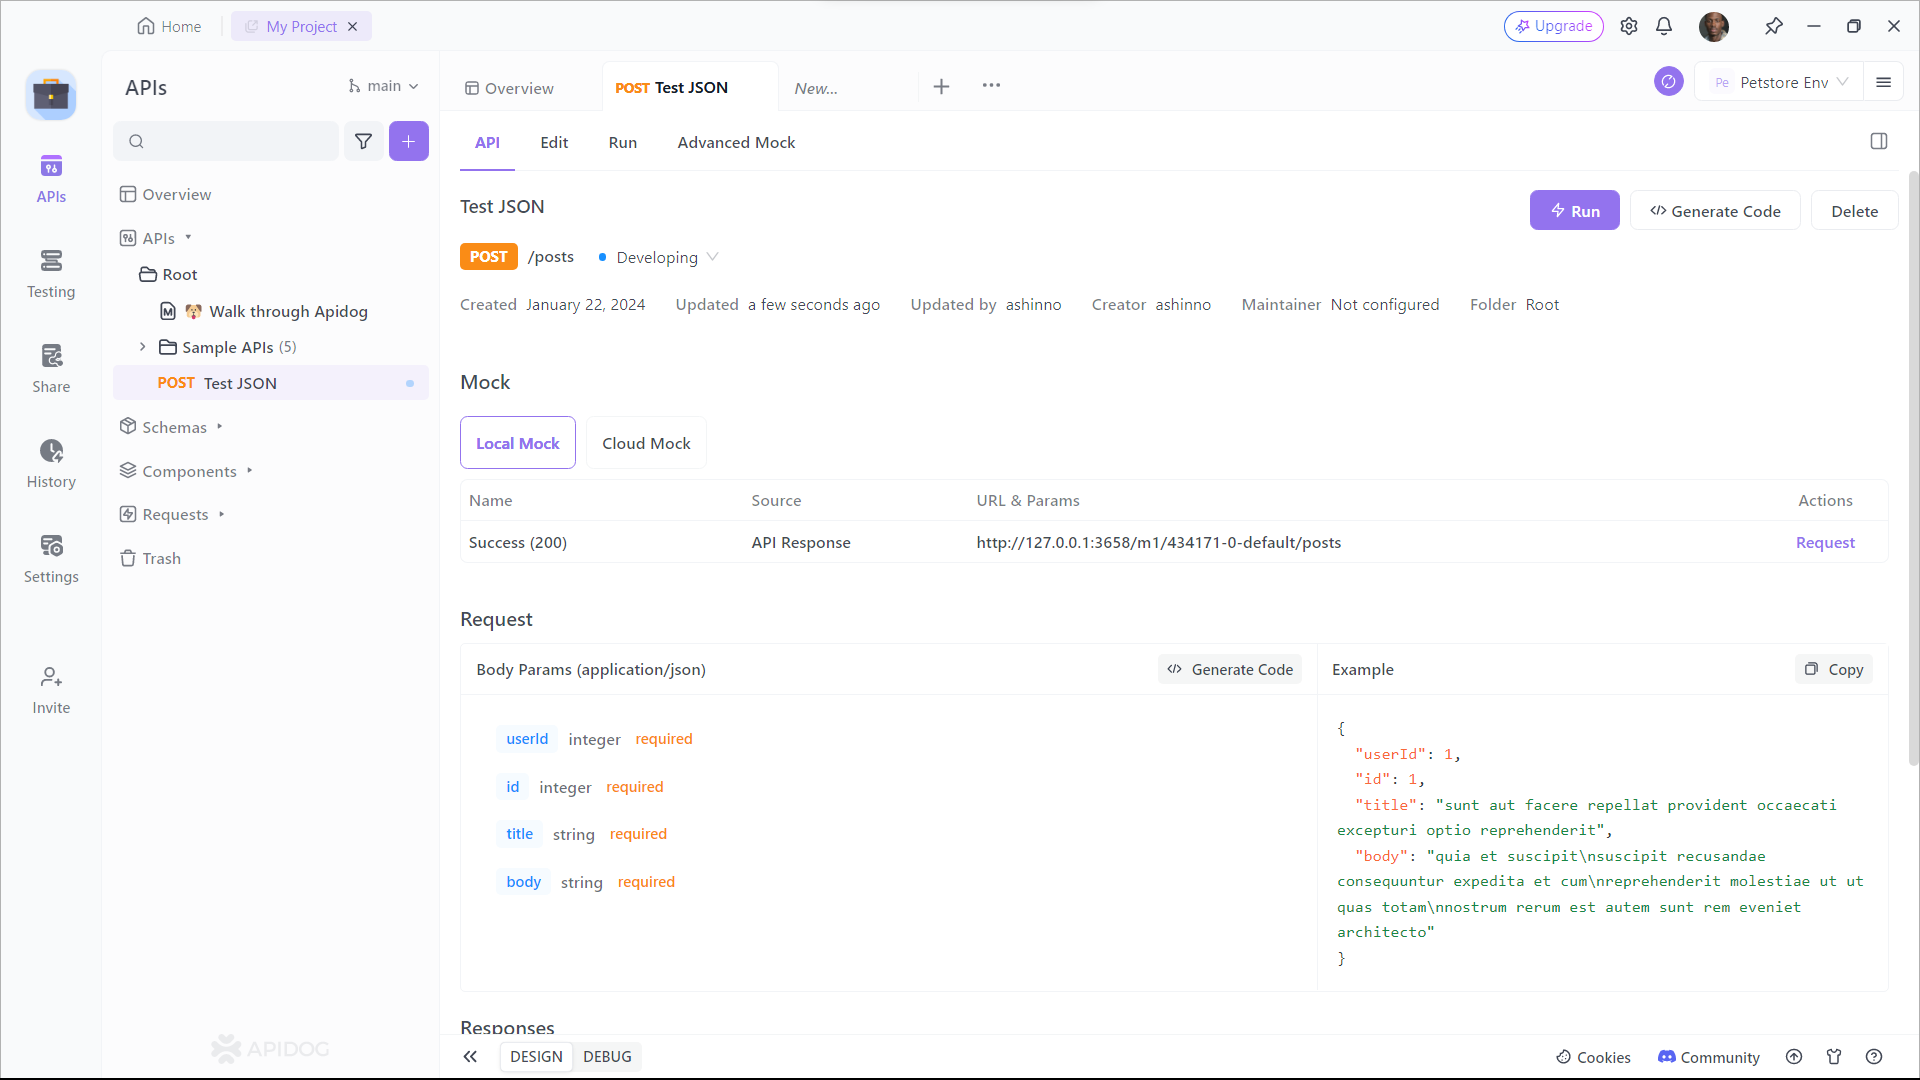
Step 2: Enter the URL of the API endpoint that you want to fetch post JSON data from and switch to the Design interface.
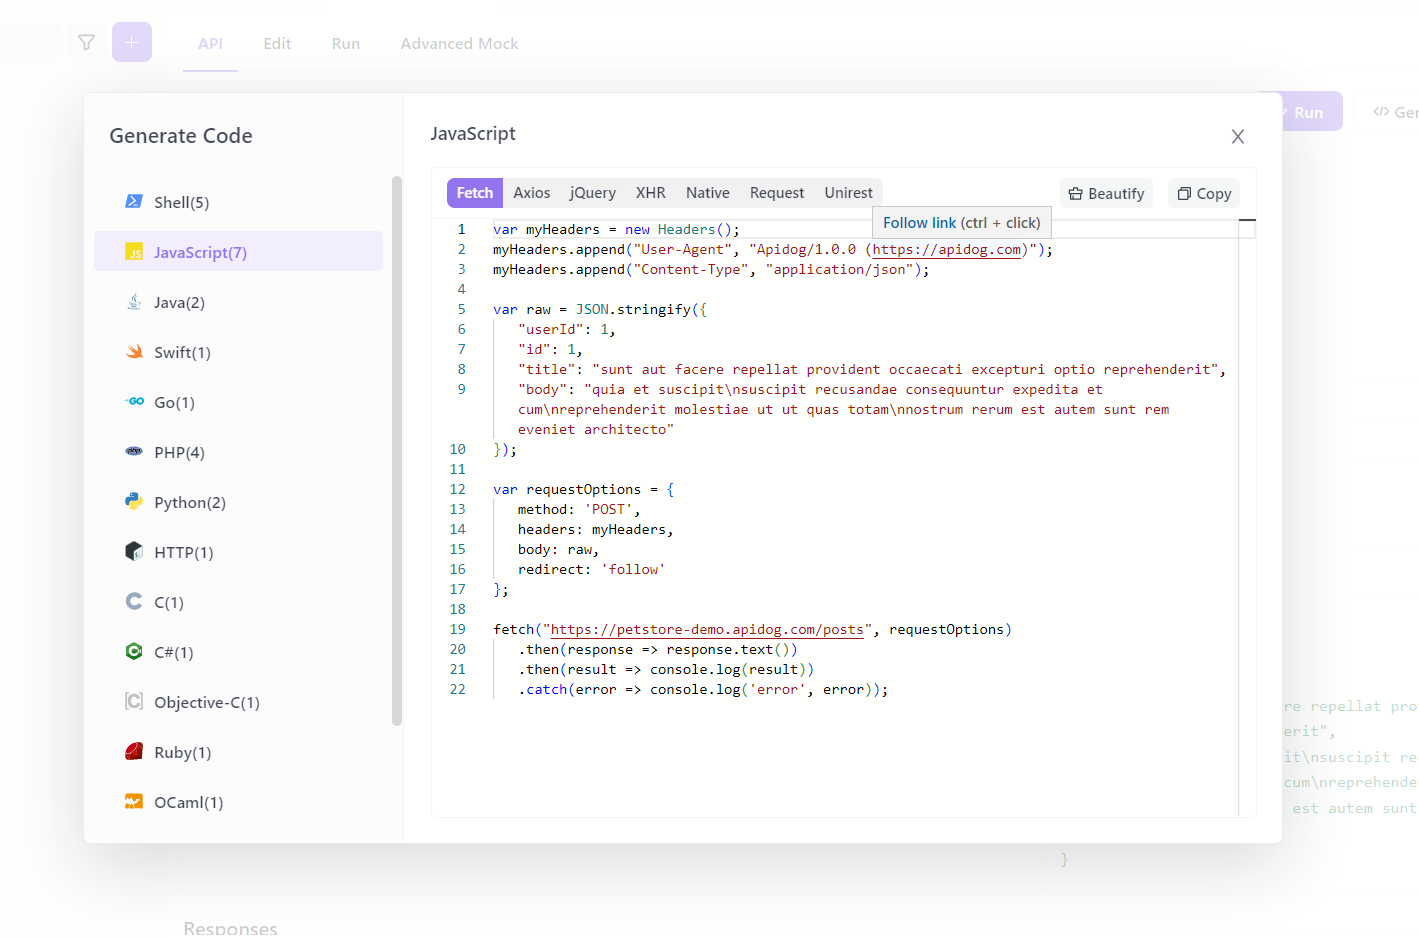
Step 3: Click Generate Client Code.
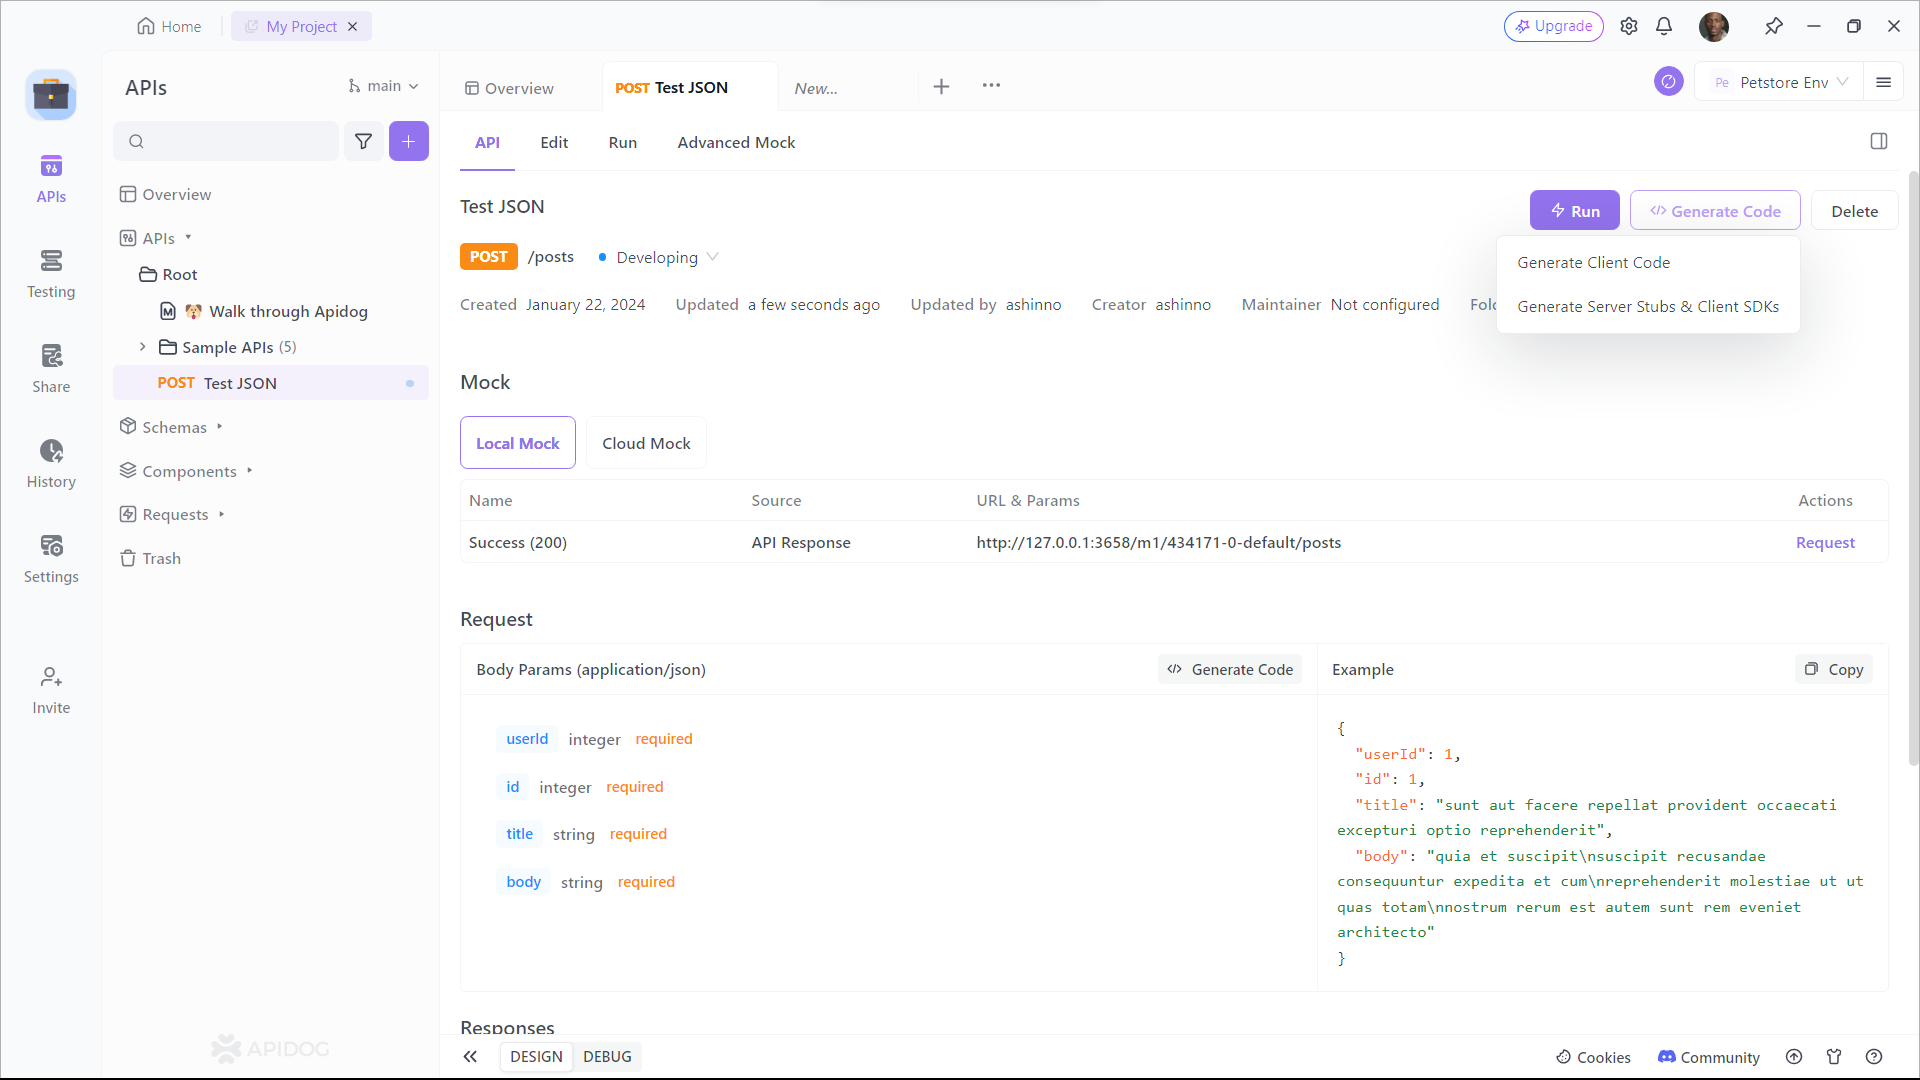
Step 4: Select the code you want to generate, in our case is Fetch, Copy and copy to your project
POST JSON Data from Any API Using Apidog
To Test fetch post-JSON data from any API using Apidog, you need to follow these simple steps:
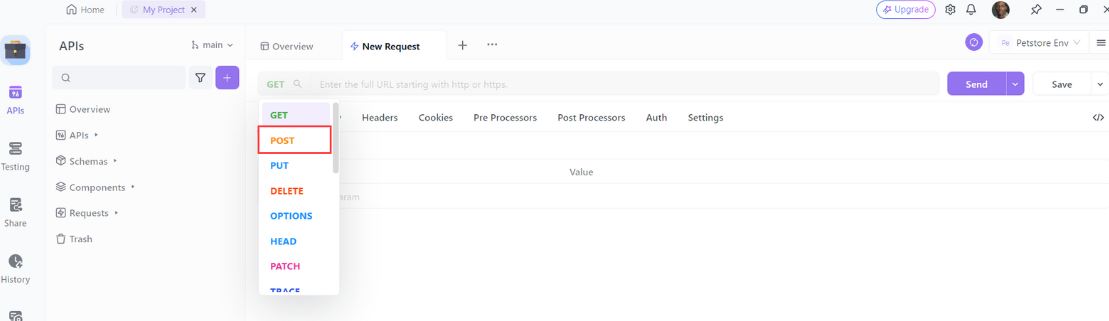
- Open Apidog and click on the "New Request" button to create a new request.
- Select "POST" as the method of the request.
3. Enter the URL of the API endpoint that you want to fetch post JSON data from. For example, if you want to fetch post JSON data from the JSON Placeholder API, which is a fake online REST API for testing and prototyping, you can enter https://jsonplaceholder.typicode.com/posts as the URL.
Then click on the "Body" tab and select "JSON" as the type of the body. Enter the post JSON data that you want to send to the API in the text area. For example, if you want to create a new post with the JSON Placeholder API, you can enter the following post JSON data:
{
    "userId": 1,
    "id": 1,
    "title": "sunt aut facere repellat provident occaecati excepturi optio reprehenderit",
    "body": "quia et suscipit\nsuscipit recusandae consequuntur expedita et cum\nreprehenderit molestiae ut ut quas totam\nnostrum rerum est autem sunt rem eveniet architecto"
  }
Click on the “Send” button to send the request to the API and fetch the post JSON data.
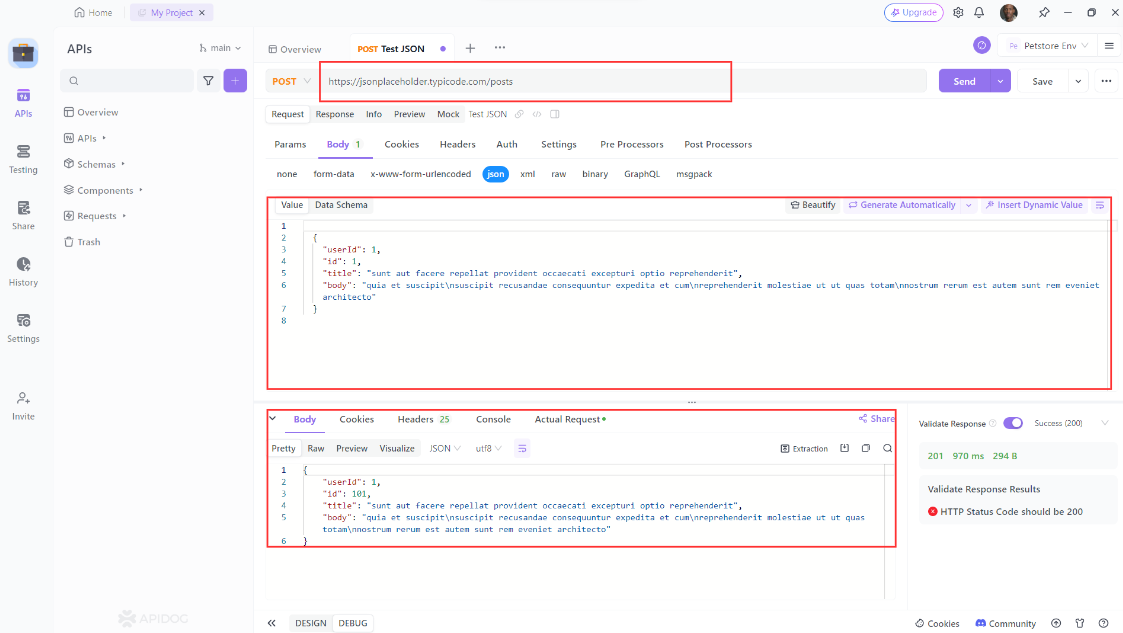
View the response from the API in the “Response” tab. You can see the status code, the headers, and the body of the response. You can also switch between different formats of the response, such as JSON, HTML, XML, or Raw. For example, if you fetch post JSON data from the JSON Placeholder API, you can see the following response in JSON format:
{
    "userId": 1,
    "id": 101,
    "title": "sunt aut facere repellat provident occaecati excepturi optio reprehenderit",
    "body": "quia et suscipit\nsuscipit recusandae consequuntur expedita et cum\nreprehenderit molestiae ut ut quas totam\nnostrum rerum est autem sunt rem eveniet architecto"
}
Congratulations! You have successfully fetched post JSON data from any API using Apidog. You can now modify, save, or share your request as you wish.
What are the Benefits of Fetching Post JSON Data Using Apidog?
Fetching post JSON data from any API using Apidog has many benefits, such as:
- It is easy and convenient. You don’t need to write any code, install any software, or set up any environment. You just need a web browser and an internet connection.
- It is fast and reliable. You can send and receive requests and responses in seconds. You can also see the status code, the headers, and the body of the responses in different formats.
- It is flexible and versatile. You can fetch post JSON data from any API, whether it is public or private, simple or complex, RESTful or not. You can also add headers, query parameters, body parameters, and authentication to your requests.
- It is fun and educational. You can learn how an API works and what data it expects and returns. You can also explore the features and capabilities of an API. You can also integrate an API with your own application or project.
Conclusion
The Fetch API is a web-standard interface for HTTP communication in JavaScript. In this blog post, we have learned how to fetch post-JSON data and we introduce Apidog.
Apidog supports various types of requests, such as GET, POST, PUT, PATCH, DELETE, and more. You can also add headers, query parameters, body parameters, and authentication to your requests. Apidog can handle any kind of JSON data, whether it is an array, an object, or a nested structure.