
In today’s tech-driven world, building fast, efficient, and scalable APIs is crucial for developers. One powerful combination that’s gaining popularity is using FastAPI with MongoDB. FastAPI, as its name suggests, is a modern, high-performance web framework for building APIs with Python 3.7+ that’s fast to code and run. Meanwhile, MongoDB is a NoSQL database known for its scalability and flexibility. Together, they provide a robust solution for creating APIs that can handle anything from a small project to a large-scale application.
So, why should you consider this duo for your next project? Let’s dive in!
Getting Started: Setting Up Your Environment
Before we start building our API, let's set up our environment. You’ll need Python installed on your system, along with pip for managing packages.
Step 1: Install FastAPI and Uvicorn
First, let's install FastAPI. Open your terminal and run the following command:
pip install fastapi
Next, we’ll install Uvicorn, an ASGI server implementation for Python, which will serve our FastAPI application:
pip install uvicorn
Step 2: Install Motor
Motor is the async driver for MongoDB that works seamlessly with FastAPI. To install it, run:
pip install motor
Great! Now we have everything we need to start coding.
Creating Your First FastAPI Application
Now, let's create a basic FastAPI application and connect it to MongoDB.
Step 1: Initialize FastAPI App
Create a new Python file (let’s name it main.py) and start by importing FastAPI and initializing the app:
from fastapi import FastAPI

app = FastAPI()

@app.get("/")
async def read_root():
    return {"message": "Welcome to the FastAPI with MongoDB tutorial!"}
This code sets up a basic FastAPI application with a single endpoint.
Step 2: Connect to MongoDB
Next, let's connect our FastAPI application to MongoDB using Motor. We’ll create a new file called database.py to manage our database connection.
from motor.motor_asyncio import AsyncIOMotorClient

MONGO_DETAILS = "mongodb://localhost:27017"

client = AsyncIOMotorClient(MONGO_DETAILS)
database = client.mydatabase
In this example, we connect to a MongoDB instance running locally. Make sure MongoDB is installed and running on your system.
Step 3: Define Pydantic Models
Pydantic models are a great way to define data structures and ensure data validation in FastAPI. Create a models.py file:
from pydantic import BaseModel

class Item(BaseModel):
    name: str
    description: str
    price: float
    available: bool = True
This model defines the structure of an item in our inventory.

Creating API Endpoints
With the basic setup out of the way, let's create some API endpoints to interact with our MongoDB database.
Step 1: Create Items Collection
First, we need a collection in our MongoDB database to store items. In main.py, let’s create an endpoint to add new items to the database:
from fastapi import FastAPI, HTTPException
from database import database
from models import Item
from bson import ObjectId

app = FastAPI()

@app.post("/items/")
async def create_item(item: Item):
    item_dict = item.dict()
    result = await database["items"].insert_one(item_dict)
    item_dict["_id"] = str(result.inserted_id)
    return item_dict
This endpoint allows us to create new items in the MongoDB collection. Notice how we convert the inserted ID to a string for better readability.
Step 2: Retrieve Items
Next, we’ll create an endpoint to retrieve all items from the database:
@app.get("/items/")
async def get_items():
    items = await database["items"].find().to_list(1000)
    for item in items:
        item["_id"] = str(item["_id"])
    return items
This endpoint fetches all items from the items collection and converts their IDs to strings.
Step 3: Retrieve a Single Item
To retrieve a single item by its ID, we’ll add another endpoint:
@app.get("/items/{item_id}")
async def get_item(item_id: str):
    item = await database["items"].find_one({"_id": ObjectId(item_id)})
    if item:
        item["_id"] = str(item["_id"])
        return item
    raise HTTPException(status_code=404, detail="Item not found")
This endpoint fetches an item by its ID and returns it, or raises a 404 error if the item is not found.
Step 4: Update an Item
Updating an item is straightforward with FastAPI and Motor. Add the following code to update an item by its ID:
@app.put("/items/{item_id}")
async def update_item(item_id: str, item: Item):
    result = await database["items"].update_one(
        {"_id": ObjectId(item_id)}, {"$set": item.dict()}
    )
    if result.modified_count == 1:
        updated_item = await database["items"].find_one({"_id": ObjectId(item_id)})
        updated_item["_id"] = str(updated_item["_id"])
        return updated_item
    raise HTTPException(status_code=404, detail="Item not found")
This endpoint updates an item by its ID and returns the updated item.
Step 5: Delete an Item
Finally, let’s add an endpoint to delete an item by its ID:
@app.delete("/items/{item_id}")
async def delete_item(item_id: str):
    result = await database["items"].delete_one({"_id": ObjectId(item_id)})
    if result.deleted_count == 1:
        return {"message": "Item deleted"}
    raise HTTPException(status_code=404, detail="Item not found")
This endpoint deletes an item and returns a success message or a 404 error if the item is not found.
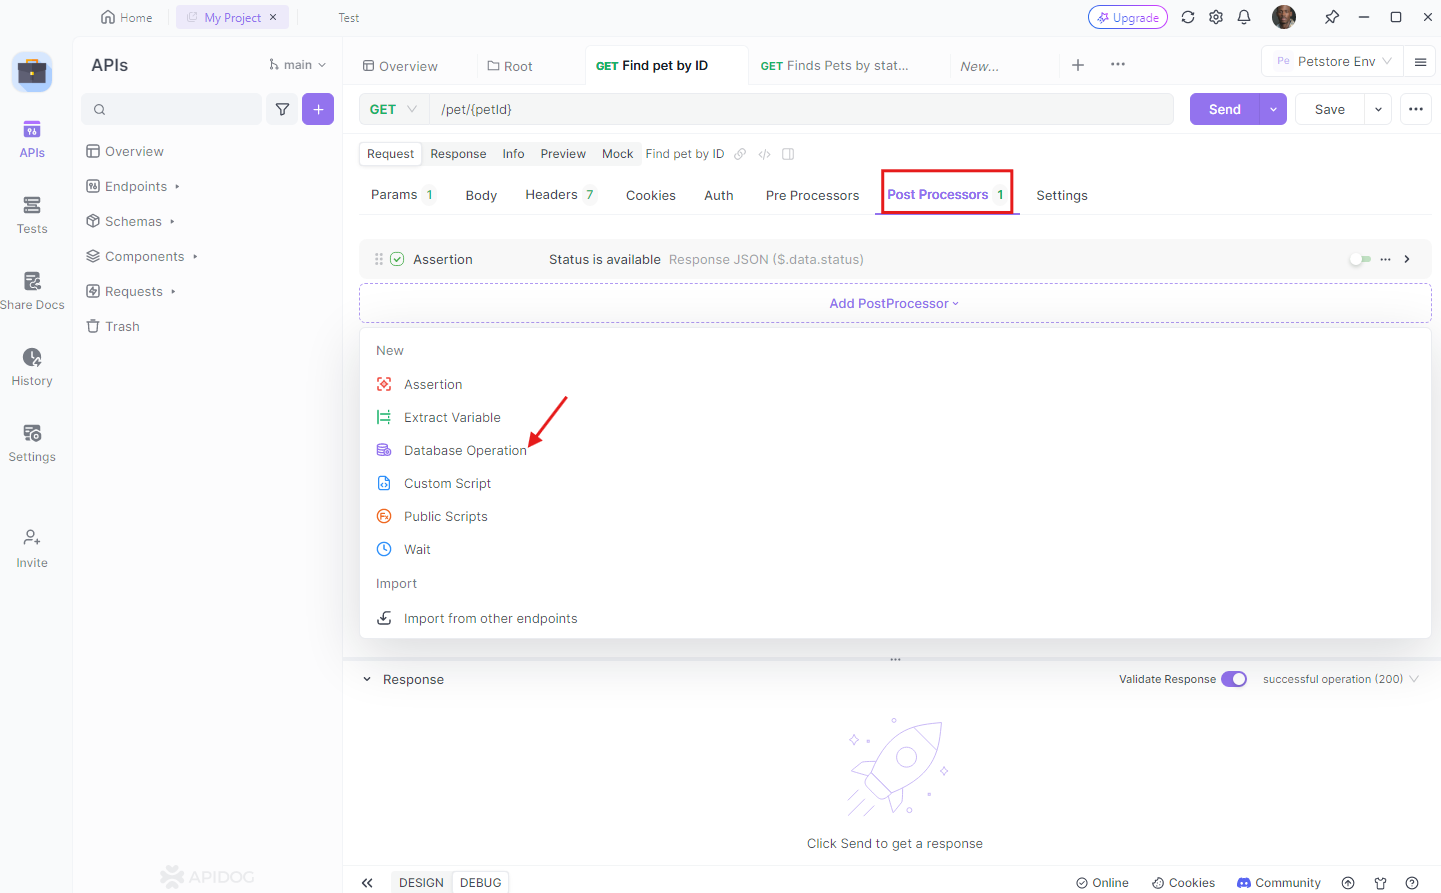
How to Connect to the MongoDB Database to Apidog
- Click "Processors Operation" in the API and select "Database Operations".
2. Click "Manage Database Connection" in the dropdown box under "Database Connection", then click the "New" button in the upper right corner.
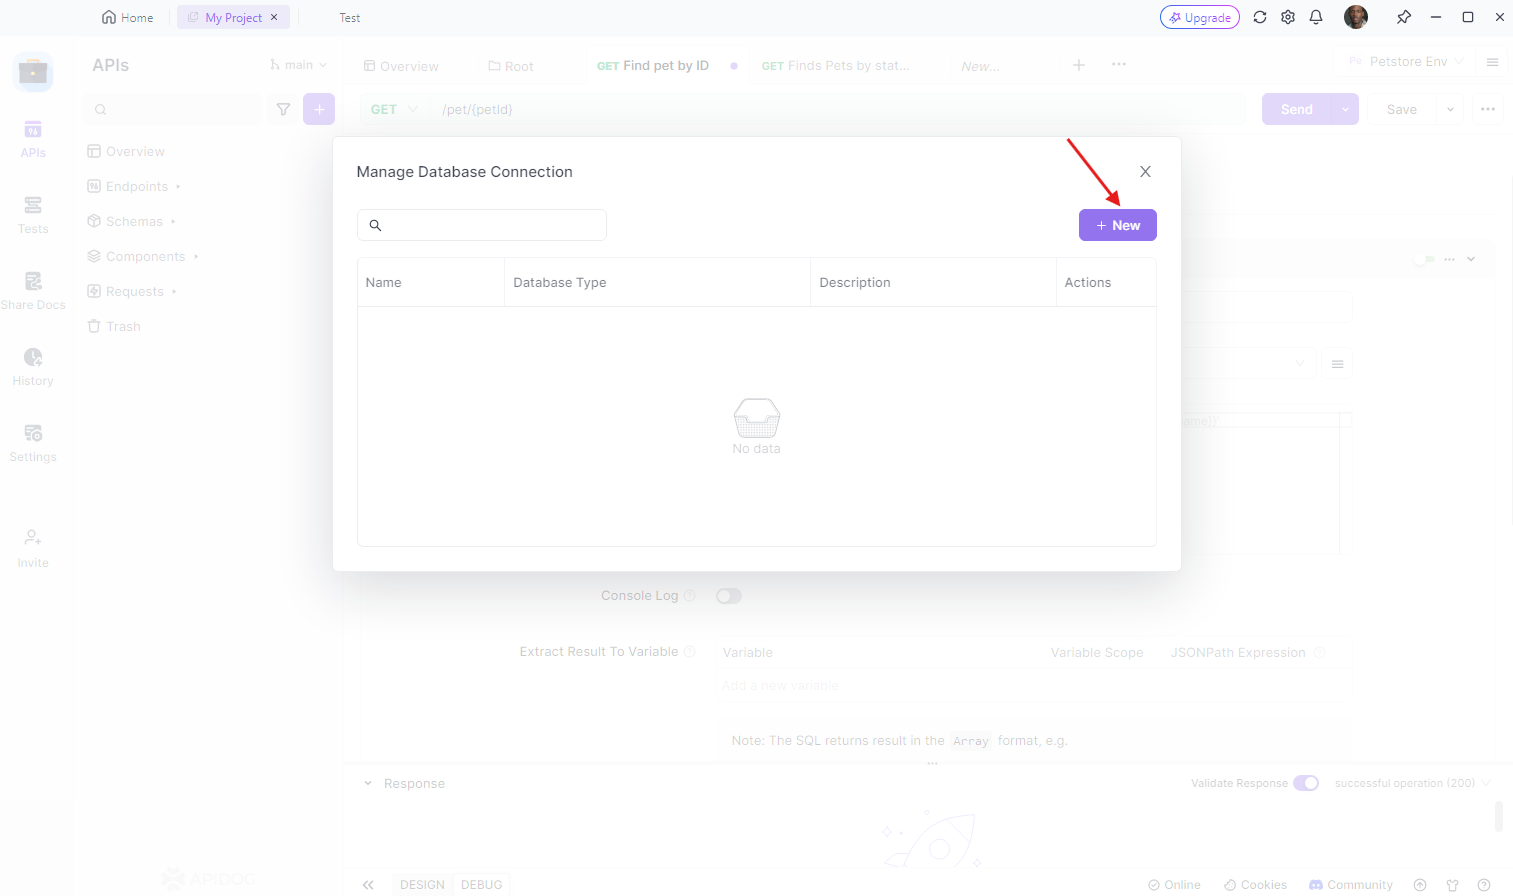
3. Select MongoDB database type, then fill in the corresponding connection information.

Operate MongoDB Database
MongoDB stores data in BSON document format. For convenience of most user's usage habits, when modifying MongoDB databases in Apidog, submit JSON format files. The system will automatically map each field to the corresponding BSON data type based on the actual content of the JSON.
Among them, the _id field is relatively special. According to MongoDB specifications, each document must have an _id field as the primary key, and the default data type of this field is ObjectId rather than String.
If you need to declare an _id field of type ObjectId, you can use the conventional string format. If the string content conforms to the ObjectId format, Apidog will automatically map it to the ObjectId type in BSON.
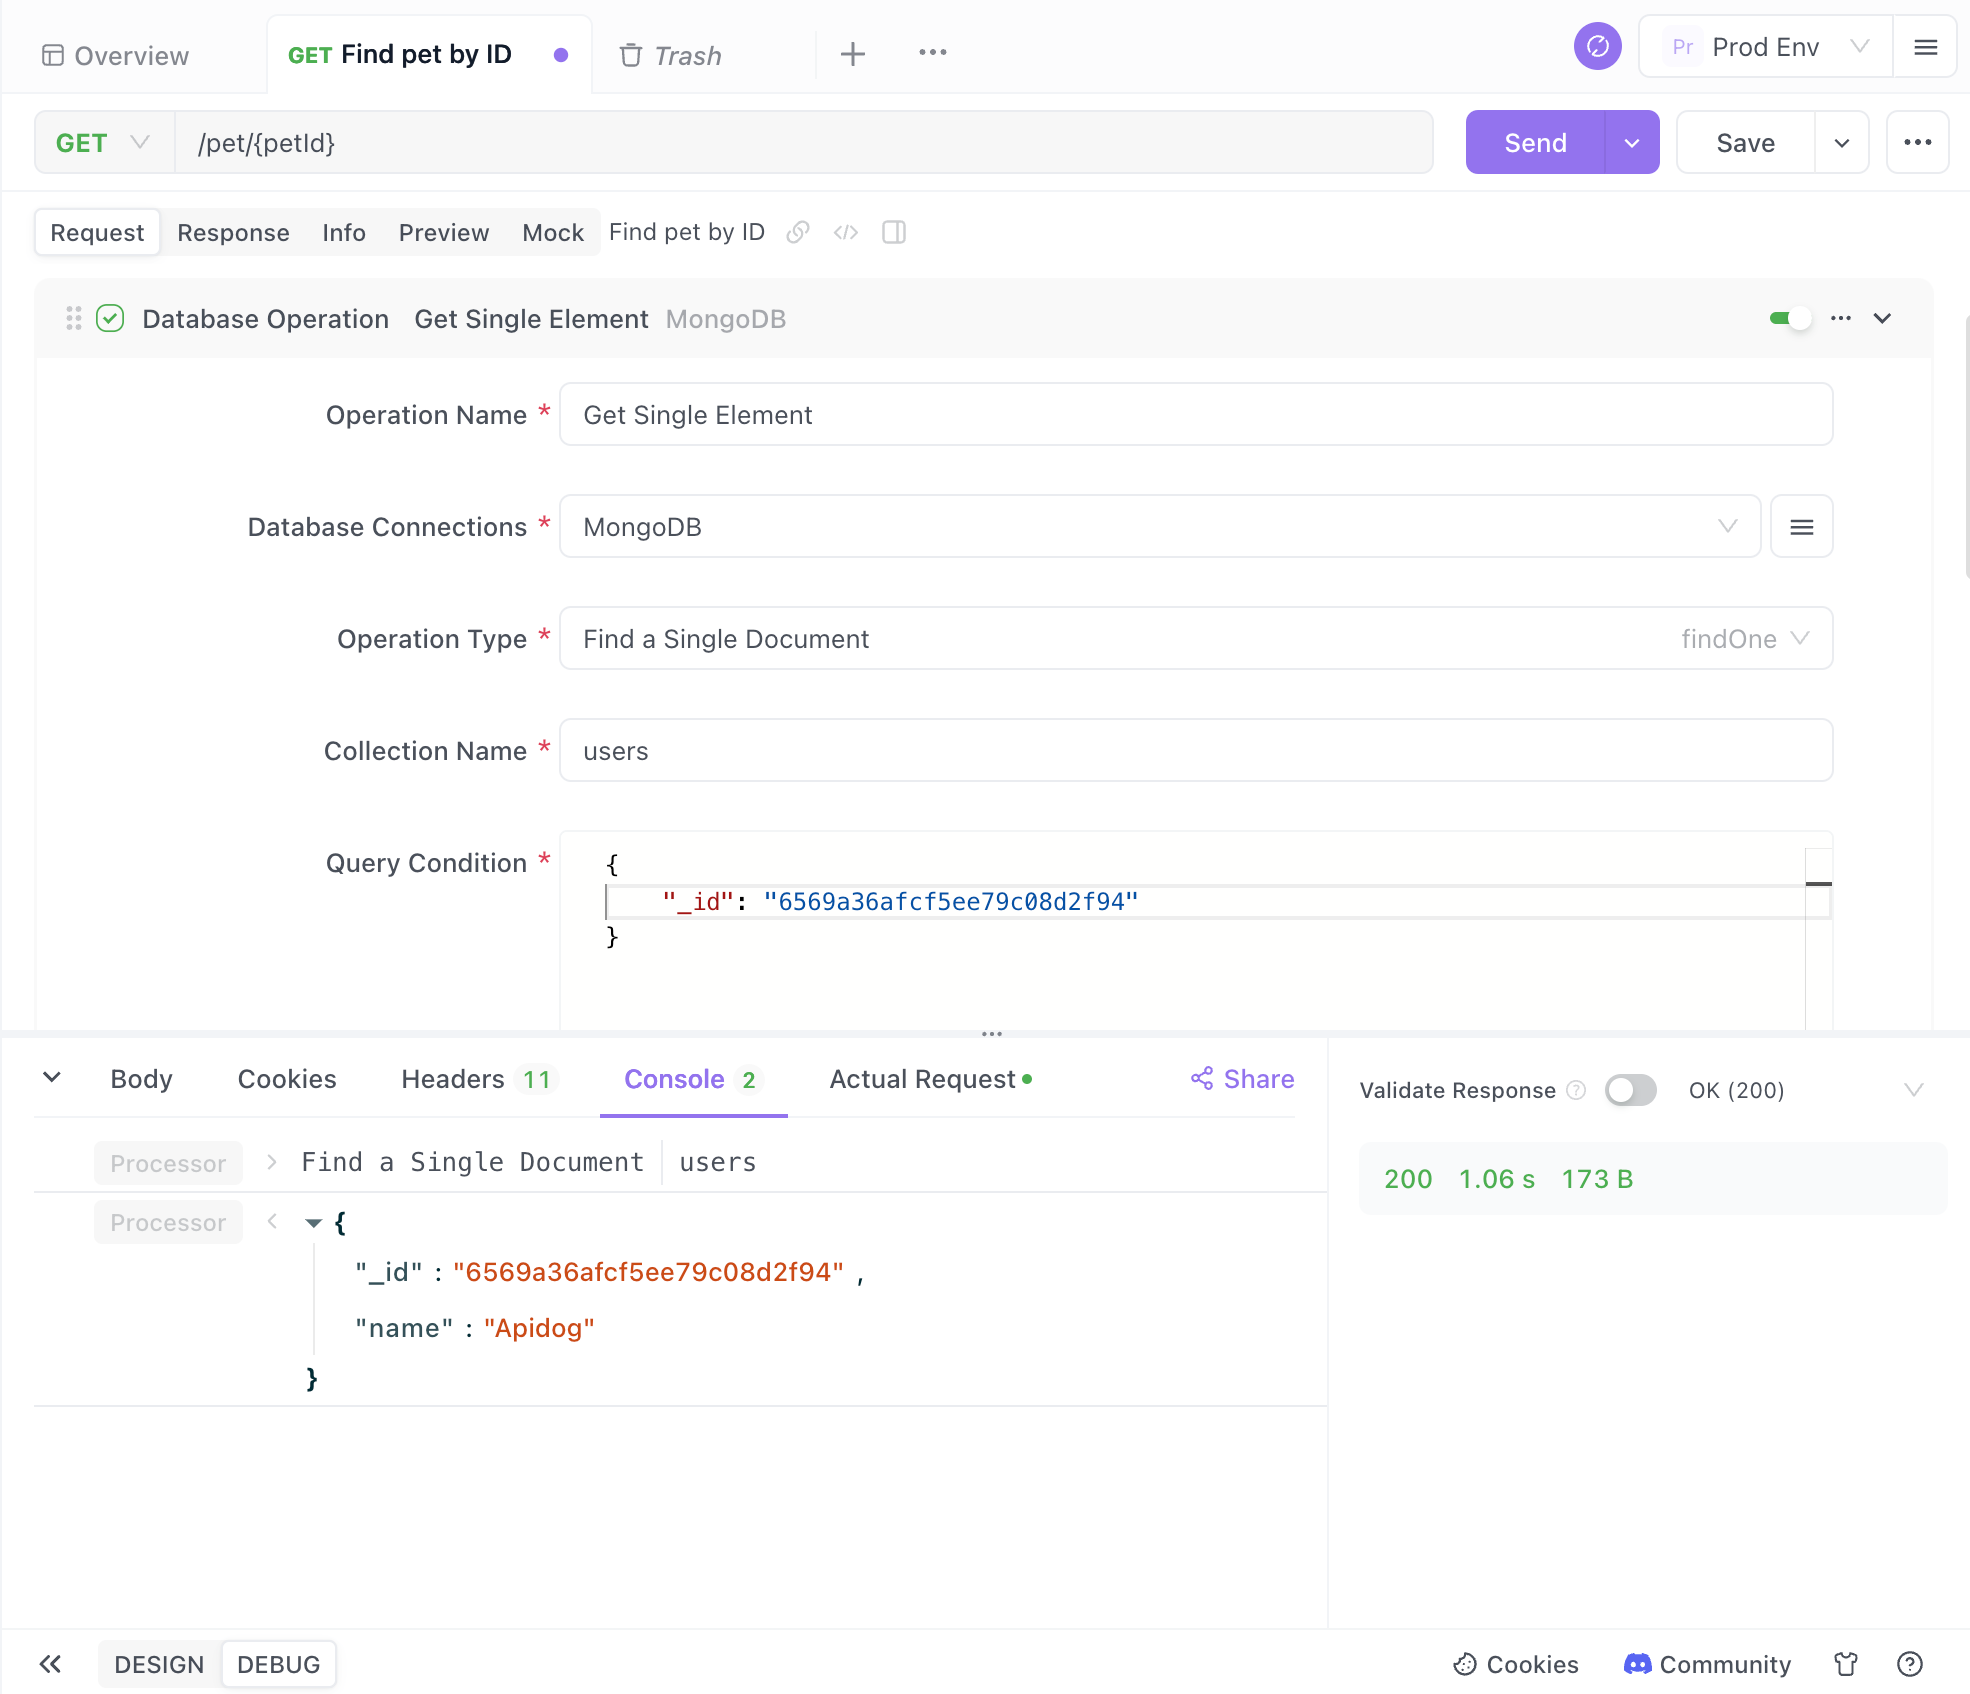
Assume there is such a BSON document in MongoDB now:
{ _id: ObjectId('6569a36afcf5ee79c08d2f94'), name: "Apidog"}So when using Apidog to query the document via _id, the JSON value that needs to be entered in the "Query Conditions" is:
{ "_id": "6569a36afcf5ee79c08d2f94" }Common Operations
For common CRUD operations, support via visual API operations. No need to write any JavaScript code, just specify the action in the "Operation Type", then specify the "Collection Name", and then write the corresponding content in JSON in "Query Conditions".
For example, for the query operation mentioned above, you can view the queried document in the console after entering the command and enabling "Console Log".
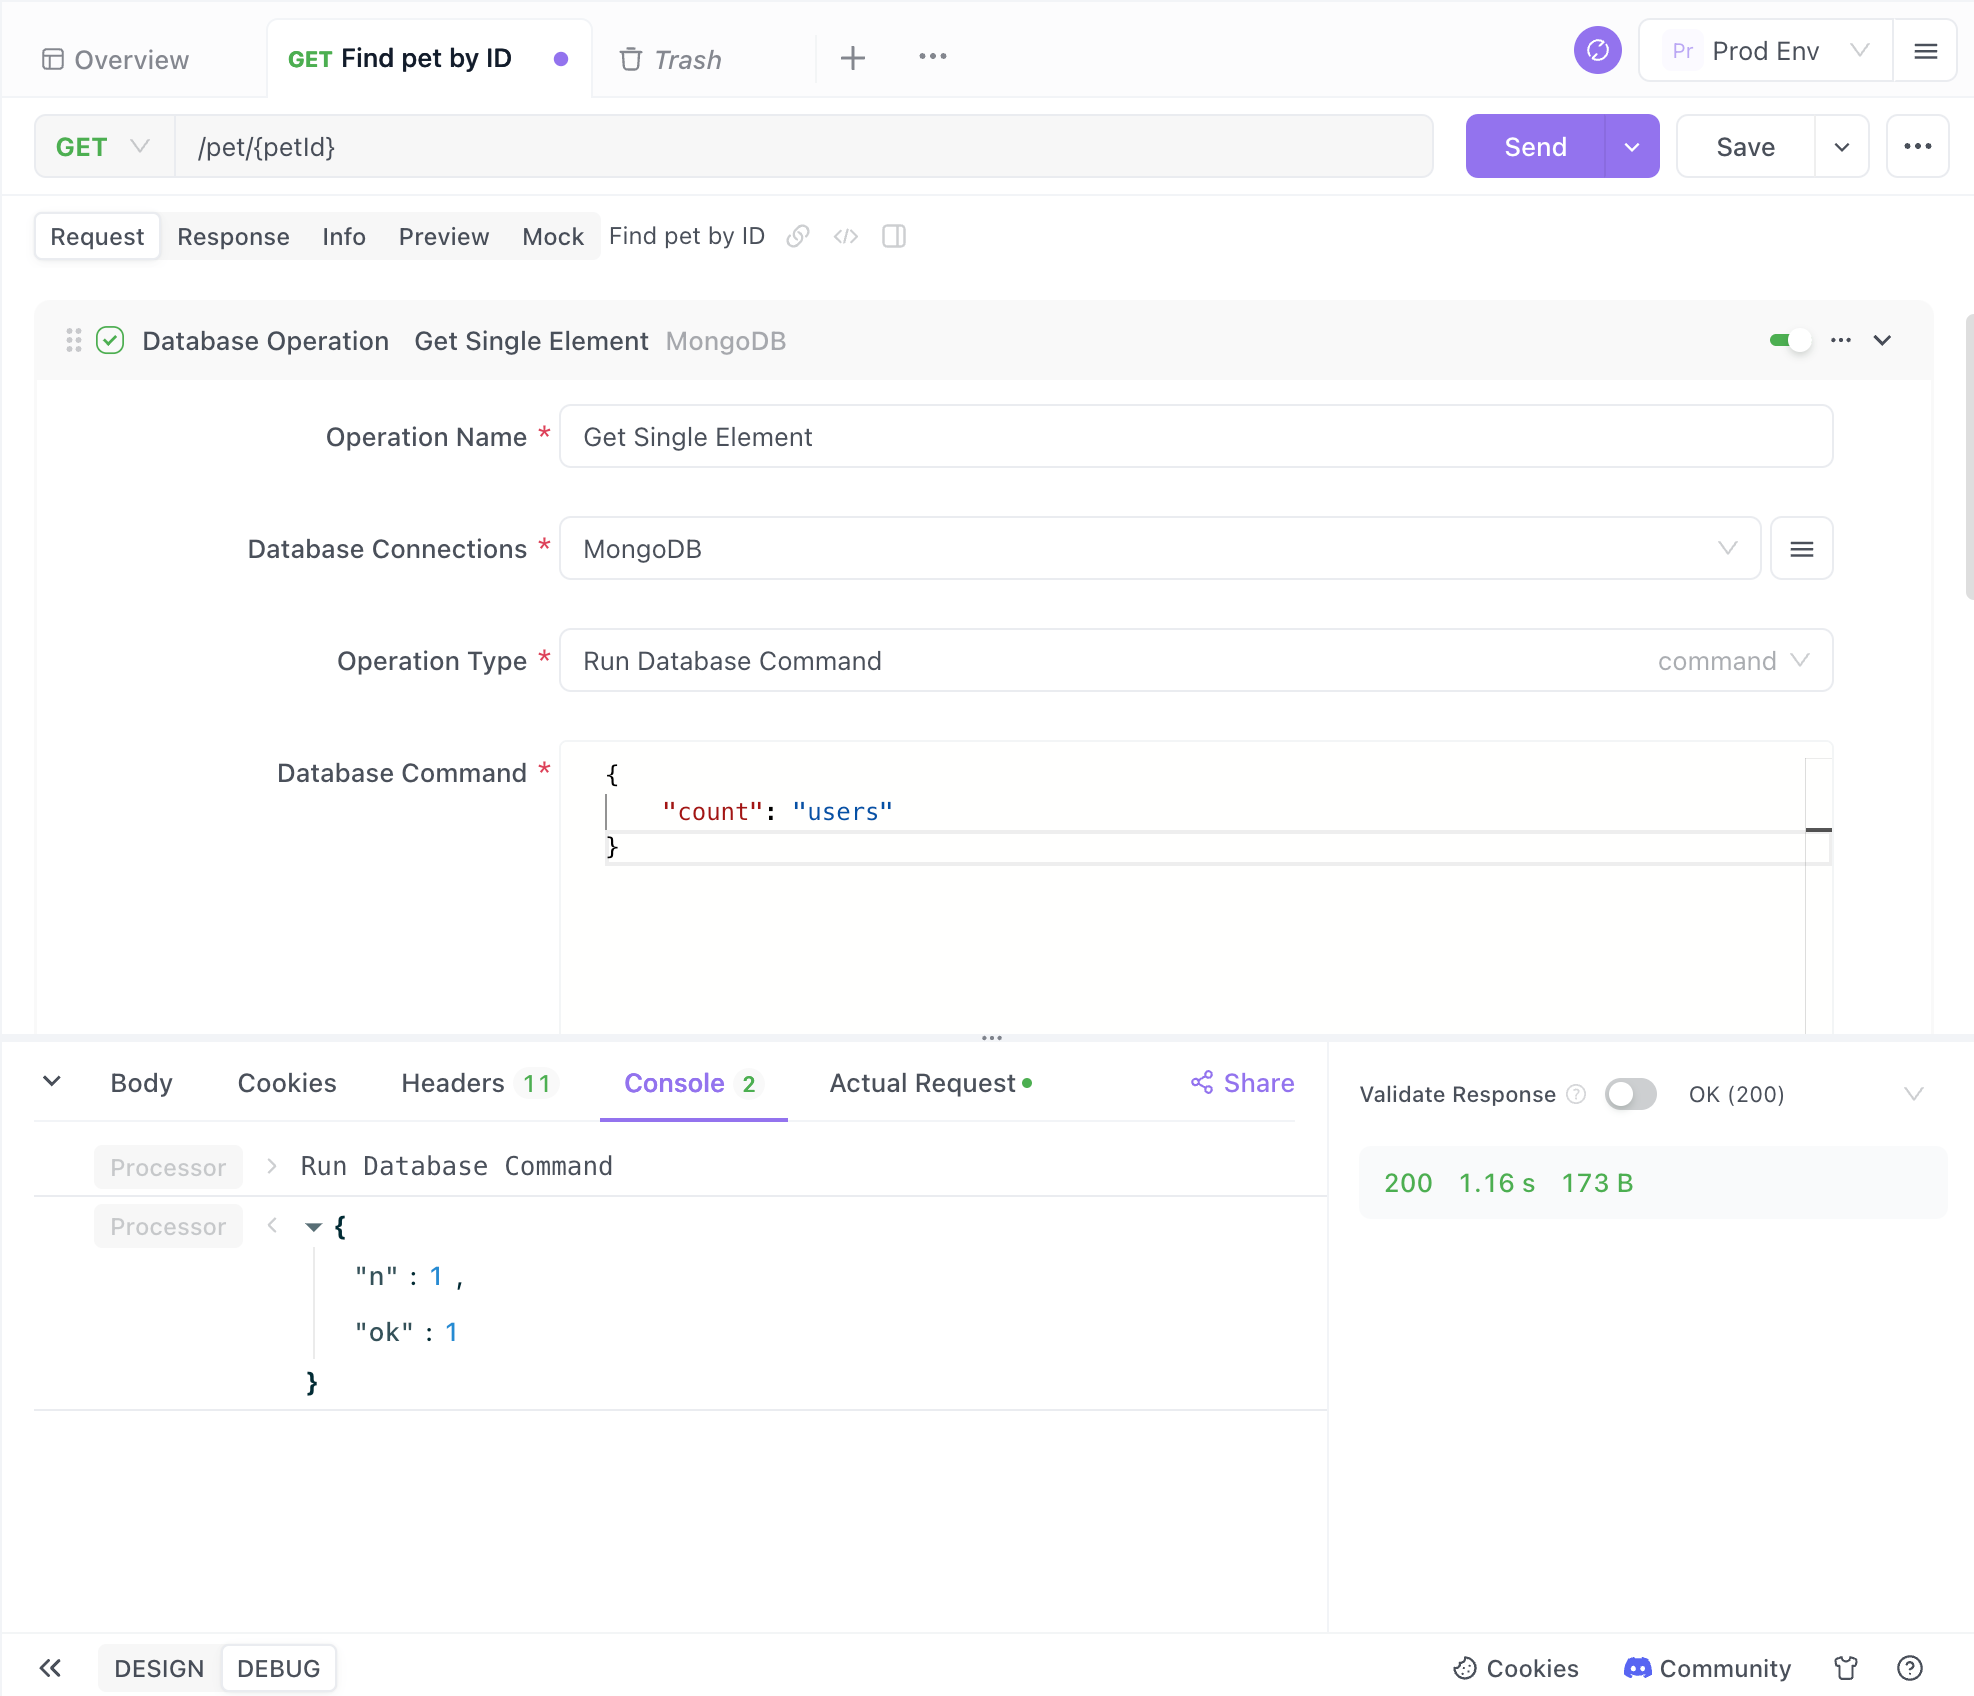
Advanced Commands
If you need more advanced operations, you can also directly run database commands. In "Operation Type", select "Run Database Command" and then enter the database command in JSON format. Note that the database command does not refer to method calls like db.collection.findOne(), but JSON data in a specific format.
For example, to query the number of documents in the users collection, you can use the count database command:
{ "count": "users"}After entering the command, you can view the result in the console.
Testing Your API
To test your API, you can use tools like Postman or Apidog. These tools allow you to send requests to your endpoints and see the responses, making it easier to debug and ensure everything is working correctly.
Using Apidog for Testing
Apidog is a powerful API development and testing tool that simplifies the process of creating, testing, and managing APIs. Here's how you can use Apidog to test your FastAPI MongoDB application:
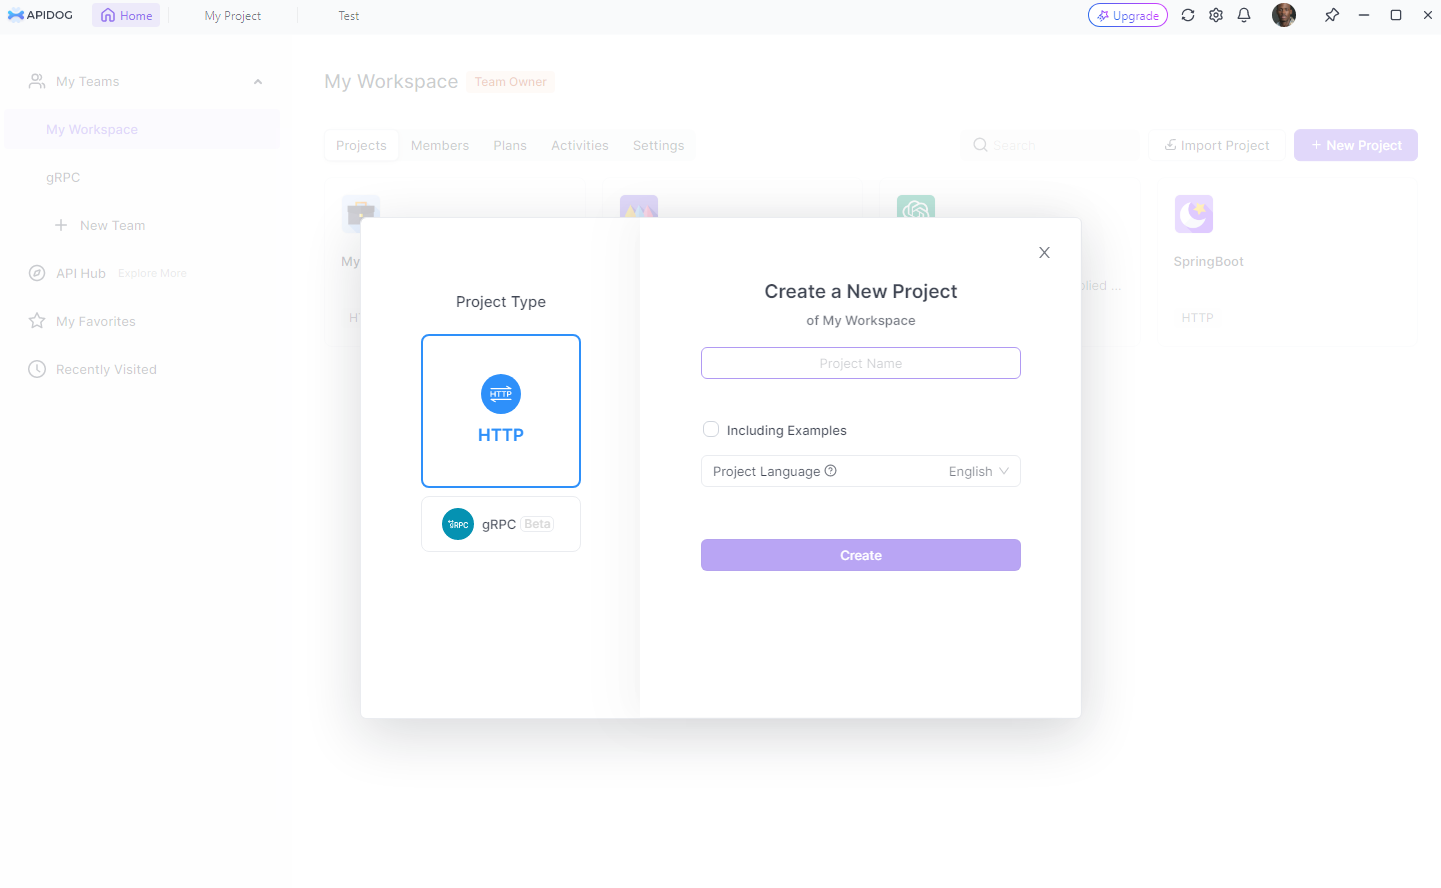
- Create a New Project: Open Apidog Client and Create a new project in Apidog.
2 Add Endpoints: Add the endpoints you’ve created (/items/, /items/{item_id}, etc.) to the project.
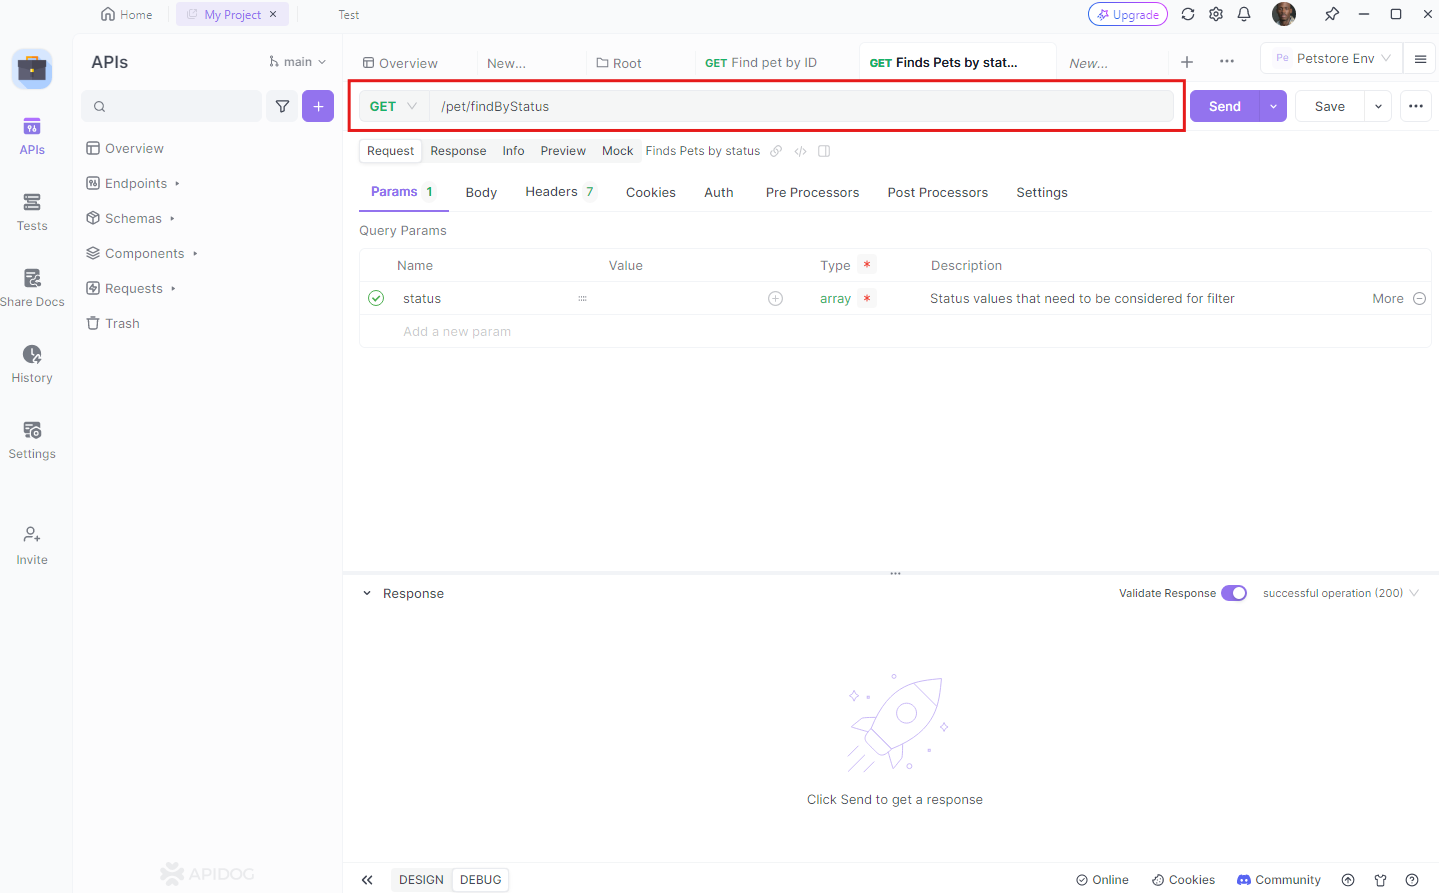
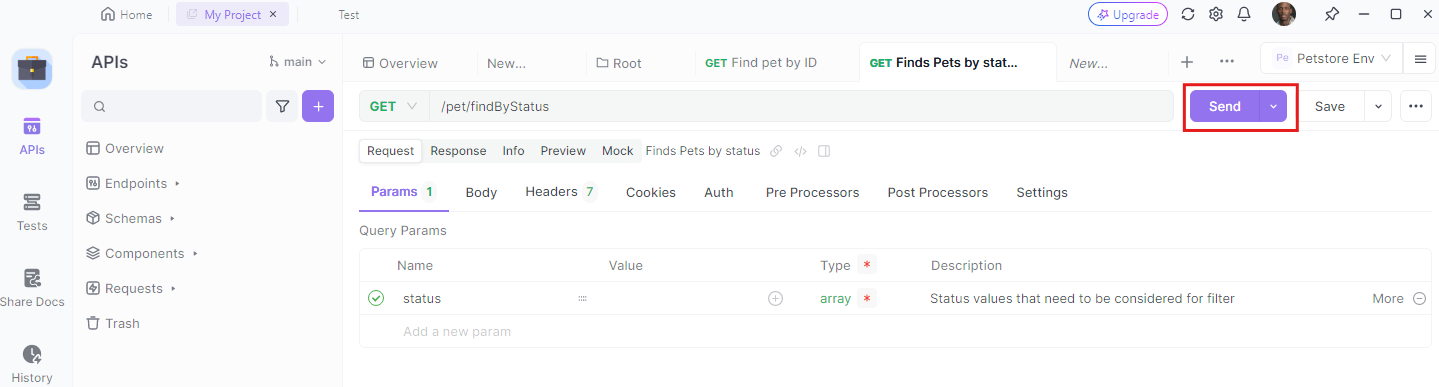
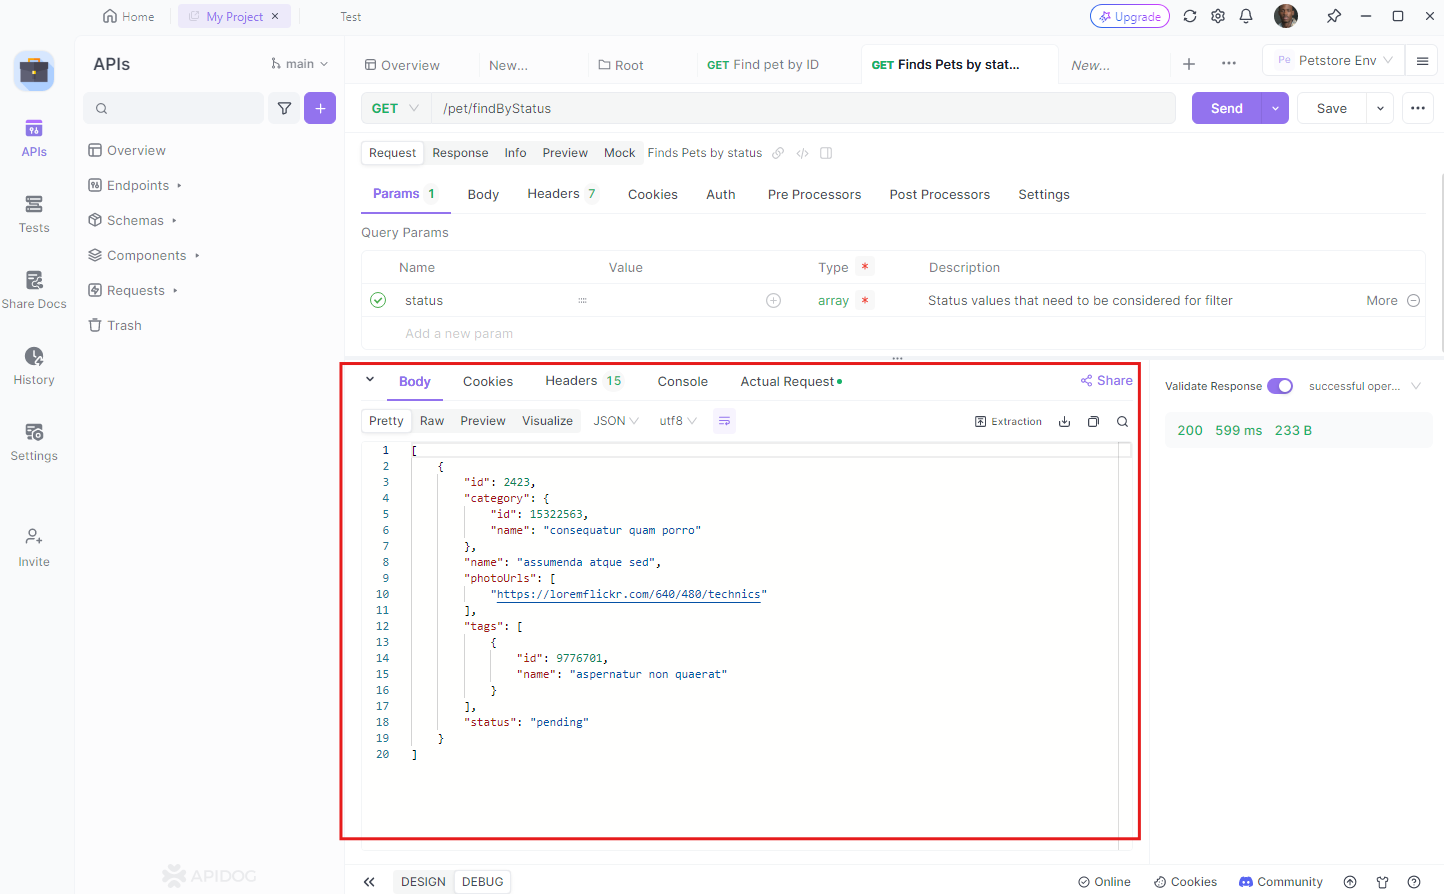
3. Send Requests: Use the tool to send GET, POST, PUT, and DELETE requests to your endpoints and observe the responses.
4. Validate Responses: Ensure that the responses match the expected outputs, and use the detailed error messages to fix any issues.
Conclusion
In this tutorial, we’ve covered the basics of setting up a FastAPI application with MongoDB. We created a simple inventory API that allows you to create, retrieve, update, and delete items. FastAPI's speed and ease of use, combined with MongoDB's flexibility and scalability, make them a perfect pair for building robust APIs.
By leveraging tools like Apidog, you can streamline the development and testing process, ensuring your APIs are reliable and performant.
So, what are you waiting for? Dive into FastAPI and MongoDB, and start building amazing APIs today!


