
Looking to deploy a high-performance, globally accessible Model Context Protocol (MCP) server? Cloudflare provides the perfect platform to launch, secure, and scale your MCP infrastructure. This comprehensive guide walks you through the entire deployment process, leveraging Cloudflare's cutting-edge edge network, robust security features, and serverless architecture to maximize your server's performance and reliability.
What is an MCP Server?
An MCP server acts as a bridge, allowing applications to communicate using a standardized protocol, making it easier to integrate different systems. It’s especially valuable when integrating Large Language Models (LLMs) with other services or applications.

Why Deploy to Cloudflare?
Deploying to Cloudflare ensures global scalability and low latency, thanks to its edge network spanning over 300 cities. Unlike traditional cloud providers, Cloudflare Workers use a serverless model, executing code closer to users—ideal for real-time applications like LLM-powered chatbots, which benefit from faster response times.
Cloudflare offers robust security, including a customizable Web Application Firewall (WAF) to block threats like prompt injection attacks. Its DDoS protection automatically mitigates traffic spikes, while SSL/TLS encryption secures data by default. Strict HTTPS policies further prevent man-in-the-middle attacks, making it a secure choice for sensitive applications.
From a cost perspective, Cloudflare is highly efficient. The free tier supports 100,000 daily requests, while larger projects can use Workers Unbound for unlimited compute at just $0.15 per million requests—cheaper than AWS Lambda. This makes Cloudflare a budget-friendly option for scaling LLM and MCP server deployments.
Overall, deploying an MCP server on Cloudflare is a strategic decision for developers prioritizing performance, security, and cost-efficiency. Its edge computing capabilities, combined with enterprise-grade security and competitive pricing, make it an excellent platform for modern, scalable applications.
Prerequisites
Before you start, ensure you have the following:
Cloudflare Account: Sign up for a Cloudflare account by visiting their official website if you don't already have one.
Domain Name: A domain is essential for routing traffic through Cloudflare’s DNS. If you don’t own one, Cloudflare offers a *.workers.dev subdomain as a temporary solution.
Node.js and npm: Ensure you have Node.js and npm installed on your local machine for server setup and deployment.
MCP Server Code: Ensure your code is stateless, as Cloudflare Workers don’t maintain persistent connections. For example, avoid storing session data in memory—use Cloudflare KV or Durable Objects instead.
Step 1: Setting Up the MCP Project
Before deploying, we need to create a project structure for the MCP server. This will serve as the foundation for development and integration.
Create a New Project Directory
1. Open your terminal or command prompt.
2. Create a new folder for your MCP project:
mkdir MCP-Project
cd MCP-Project
This directory will contain all necessary files and configurations for your MCP server.
Initialize a Cloudflare Worker
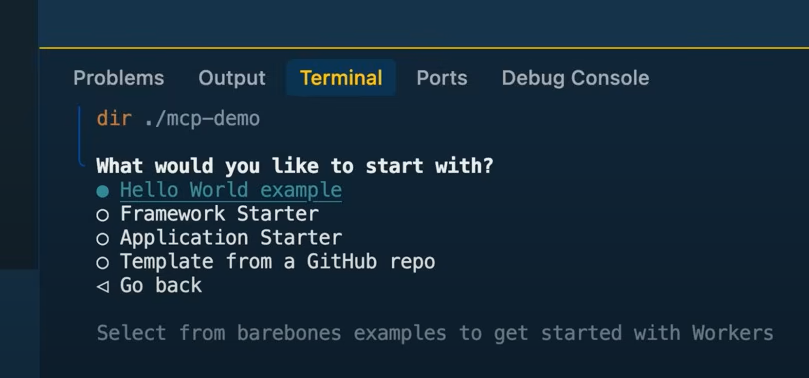
1. Run the following command to create a new Cloudflare Worker project:
npx create-cloudflare@latest mcp-demo
This command initializes a new Cloudflare worker with predefined templates.
2. Select "Hello World Example" as the template. This provides a basic worker structure.
3. Choose TypeScript as the project language. TypeScript offers better tooling and error handling.

4. If prompted to set up Git for version control, select No (optional but recommended for version tracking).
5. When asked to deploy immediately, you can select Yes or optionally select No (we will still deploy later).
6. Navigate to the project directory:
# Replace "mcp-demo" with your project name
cd mcp-demo
7. Set up the MCP server by running:
npx workers-mcp setup
8. When prompted, press Enter to confirm "Yes".
9. Press Enter again to replace the contents of src/index.ts.
10. Your worker is now successfully deployed to the MCP server.
Step 2: Integrating the MCP Server with Claude
Claude is an AI assistant that can interact with MCP servers. Integration ensures that Claude can communicate with the deployed MCP server (this is a continuation from the steps above).
- You will be prompted to name your MCP server (e.g.,
mcp-demo).
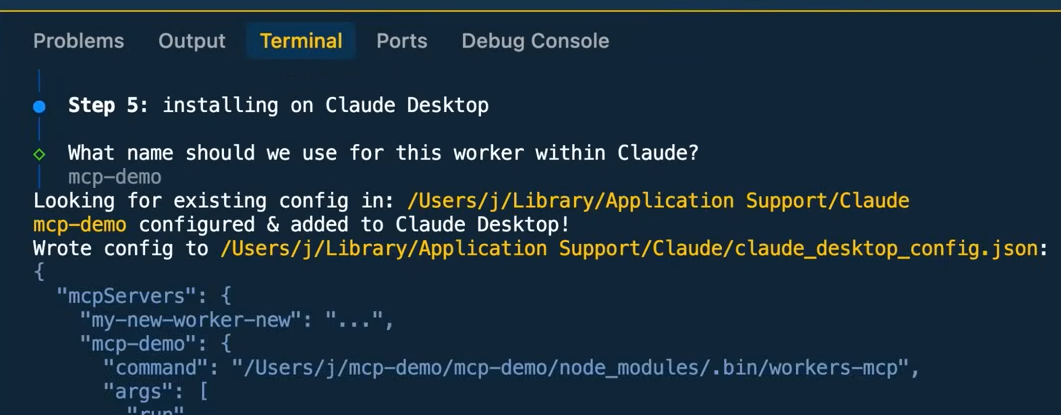
2. If Claude Desktop is installed, the configuration will be automatically added to its configuration file (.json).
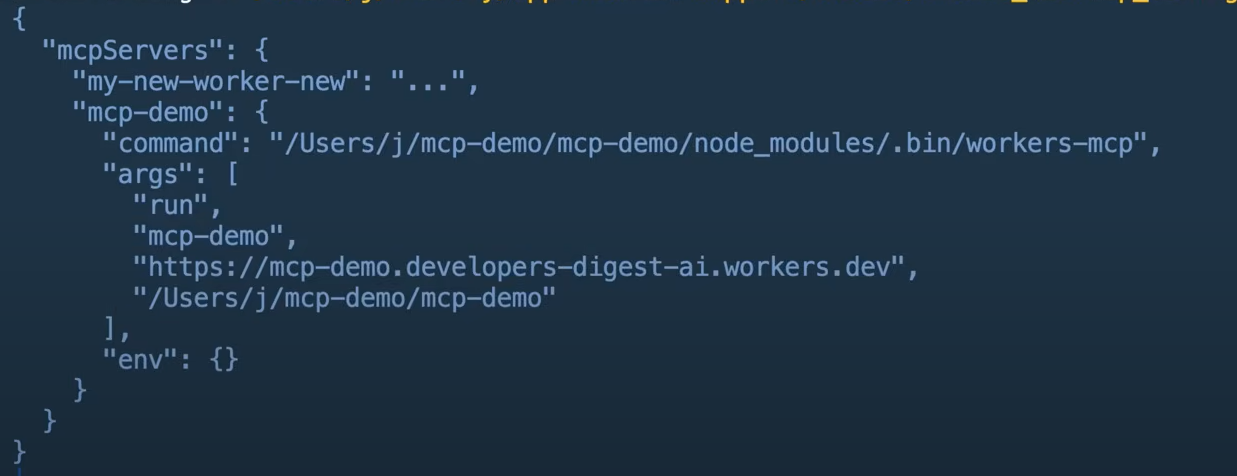
3. The .json file keeps track of all MCP servers you have installed, allowing seamless interaction between Claude and multiple MCP environments.
4. This integration enables Claude to access your MCP server’s tools and functions.
Step 3: Exploring MCP Server Functions
The MCP server provides various tools that can be explored and documented to enhance usability.
- Open
index.tsin your project folder.
2. Use docstrings to document each tool in detail. Proper documentation helps the AI and developers understand the tool’s functionality.
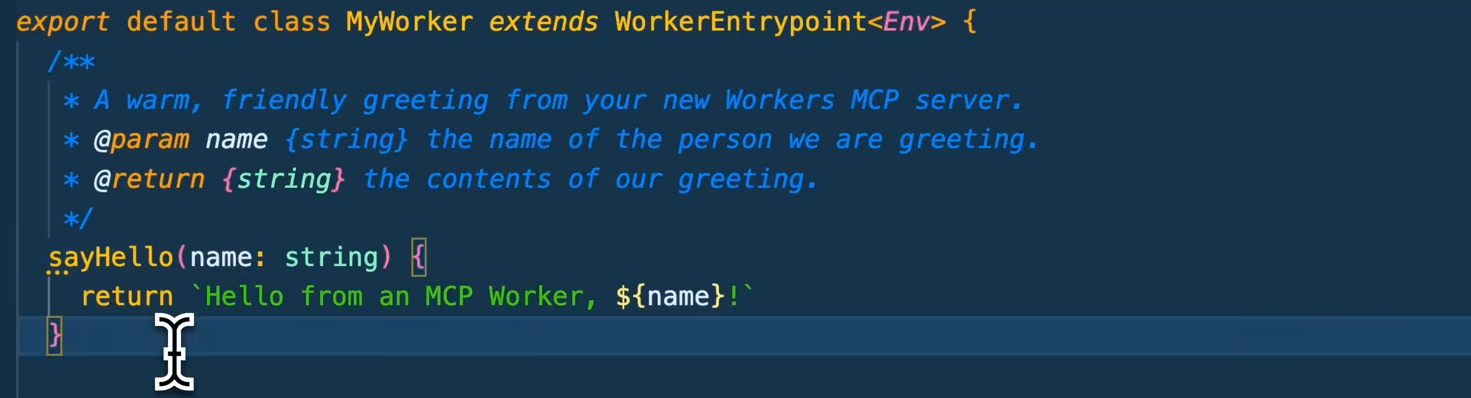
3. A docstring should include:
- A brief description of what the tool does.
- The parameters required, including types and expected values.
- The expected return format, explaining the output structure.
Example of a well-documented function:
/**
 * Adds two numbers together.
 * @param {number} a - The first number.
 * @param {number} b - The second number.
 * @returns {number} - The sum of both numbers.
 */
function addNumbers(a: number, b: number): number {
  return a + b;
}
4. Well-structured documentation ensures that tools can be effectively used in Claude and other MCP clients.
Step 4: Testing the MCP Server
Testing ensures your MCP server functions correctly before deploying it.
1. Open a new terminal and run:
npx @modelcontextprotocol/inspector@latest
This command launches the MCP Inspector, an interactive client for testing MCP tools.
2. Open MCP Inspector in a web browser by navigating to:
http://localhost:5173
3. Add the URL path that points to your MCP server and connect.
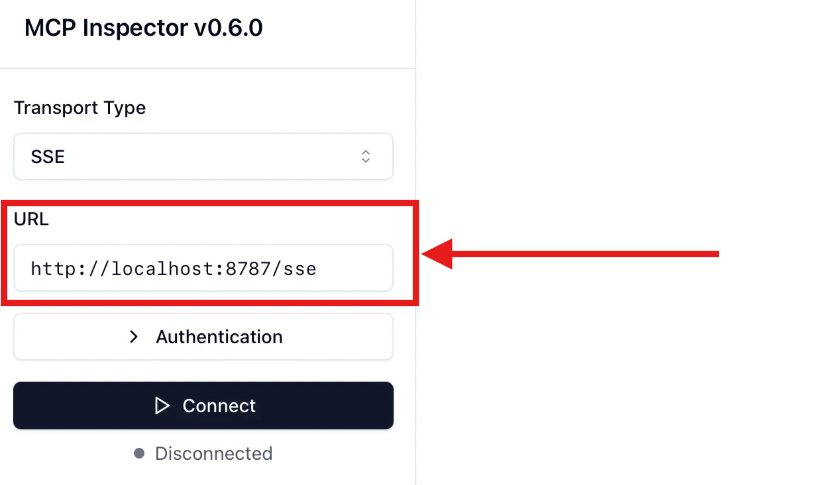
4. Click "List Tools" to view the available tools your MCP server exposes.
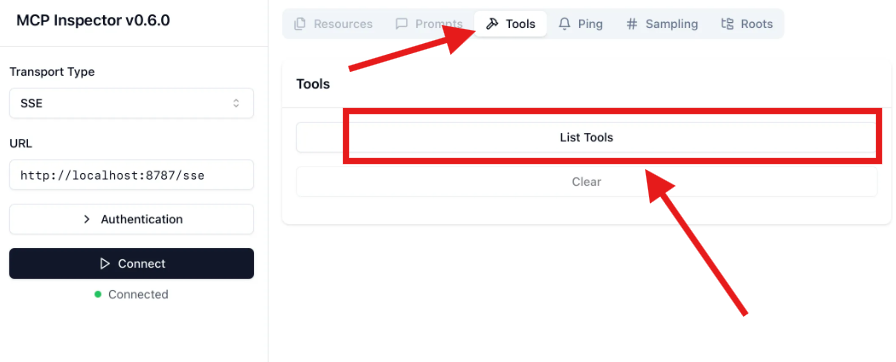
5. Invoke a tool and verify that it responds correctly.
Step 5: Running the MCP Server with Claude
Once integrated with Claude, you can interact with your MCP server through AI-driven commands.
- Open Claude Desktop.
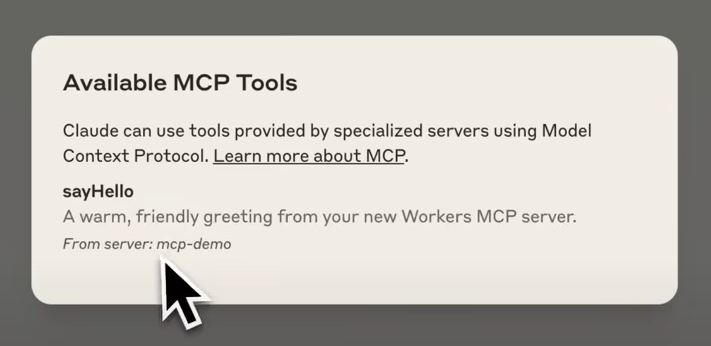
- A notification will appear: "You have one new MCP tool available."

3. The description from the docstring will be displayed in Claude, explaining the tool’s function.
4. You will be prompted to allow Claude to communicate with the MCP server. Click "Allow for this chat".
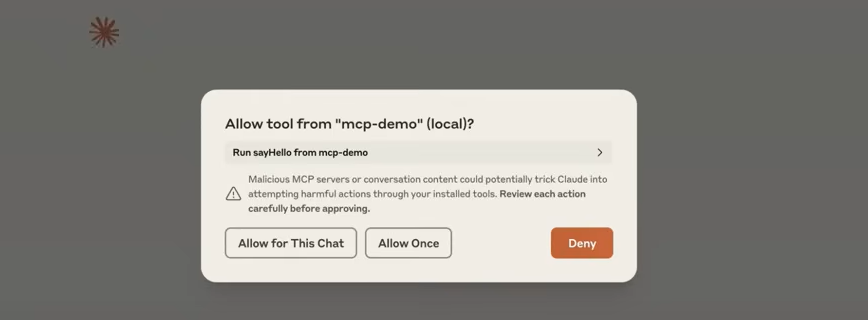
5. Your MCP server is now connected and accessible via Claude, allowing for seamless AI-driven automation. Enter a sample prompt to test the interaction and view the response:
>> Say hello to John Doe.
Step 6: Deploying Your MCP Server
For remote access, deploy your MCP server to Cloudflare.
7. Open a new terminal and run:
npx wrangler@latest deploy
8. If using Git, you can deploy by pushing changes or merging a pull request into the main branch.
9. Once deployed, copy the Cloudflare URL of your MCP server and enter this URL in MCP Inspector at http://localhost:5173. Your MCP server is now live and accessible remotely.
Step 7: Connecting Your Remote MCP Server via Local Proxy
Once deployed, you can connect Claude Desktop to your remote MCP server using a local proxy.
- Use mcp-remote to allow Claude and other MCP clients to communicate with your remote server.
- Update your Claude Desktop configuration file (
.json) with your MCP server’s URL:
{
  "mcpServers": {
    "math": {
      "command": "npx",
      "args": [
        "mcp-remote",
        "https://your-worker-name.your-account.workers.dev/sse"
      ]
    }
  }
}
3. Restart Claude Desktop and complete the authentication flow.
4. Test the integration by asking Claude:
>> Could you use the math tool to add 23 and 19?
5. Claude should invoke the math tool and return the correct result from your MCP server.
Conclusion
Deploying your MCP server to Cloudflare can significantly enhance its scalability, security, and performance. By following this step-by-step guide, you can leverage Cloudflare's infrastructure to manage your MCP server effectively and you would have successfully:
✔ Set up an MCP server. ✔ Integrated it with Claude. ✔ Explored and documented server functions. ✔ Tested the server locally using MCP Inspector. ✔ Deployed the MCP server to Cloudflare. ✔ Connected the remote MCP server to Claude Desktop.
Your MCP server is now scalable, secure, and globally accessible through Cloudflare! This setup is ideal for integrating LLMs and other services that require a robust and reliable server environment. 🚀


