
Level up your coding workflow by integrating Deepseek V3, a leading open-source AI model, directly into Cursor—the AI-powered VS Code editor. In this hands-on guide, you’ll learn how to set up Deepseek V3 with Cursor on Windows, streamline code generation, debugging, and more. As a practical example, we’ll generate and run a Python factorial function, giving you an immediate feel for the power of this AI-assisted workflow.
Why Use Deepseek V3 with Cursor?
Deepseek V3, developed by DeepSeek AI, is an advanced Mixture-of-Experts (MoE) open-source model that rivals industry leaders like GPT-4o and Claude 3.5 Sonnet—especially for coding, algorithmic tasks, and reasoning. Cursor is a next-generation code editor built on top of VS Code, designed for developers who want integrated AI assistance for code generation, refactoring, and debugging.
Pairing Deepseek V3 with Cursor brings:
- Efficient code generation and completion
- Robust debugging and refactoring support
- Seamless integration with your existing VS Code workflows
This guide will walk you through setup, configuration, and testing—ideal for backend engineers, API developers, and technical leads aiming to boost productivity.
Prerequisites: Preparing Your Environment
Before diving in, ensure your environment is ready for smooth integration:
Required Tools:
- Python (v3.10+):
Verify withpython --version.
Download from python.org if needed. - VS Code:
Cursor is built on VS Code technology. Check withcode --versionor install from code.visualstudio.com. - Node.js:
Needed for some Cursor dependencies. Confirm withnode --versionor get it at nodejs.org.
If you’re missing any, install them first to avoid interruptions.
Install Cursor
Download Cursor for your OS (Windows, macOS, Linux) from cursor.com. Install and launch—it offers a familiar VS Code interface with built-in AI features.
Organize Your Workspace
-
Create a Project Folder:
mkdir deepseek-coding cd deepseek-coding -
Set Up a Python Virtual Environment:
python -m venv venvActivate it:
- Mac/Linux:
source venv/bin/activate - Windows:
venv\Scripts\activate
When you see
(venv)in your terminal, you’re working in an isolated Python environment—ideal for managing dependencies. - Mac/Linux:
-
Open in Cursor:
Launch Cursor, then go to File > Open Folder and select your new project folder.
Installing Dependencies (Optional but Recommended)
While our example is simple, installing common Python libraries like requests prepares your environment for API work:
pip install requests
This makes future API integrations smoother—including those you might build or test with Apidog.
Configure Deepseek V3 in Cursor
As of Cursor version 0.44+, Deepseek V3 is natively supported. Here’s how to enable and verify it:
1. Check Your Cursor Version
- Go to Help > About in Cursor.
- If below 0.44, update Cursor from cursor.com.
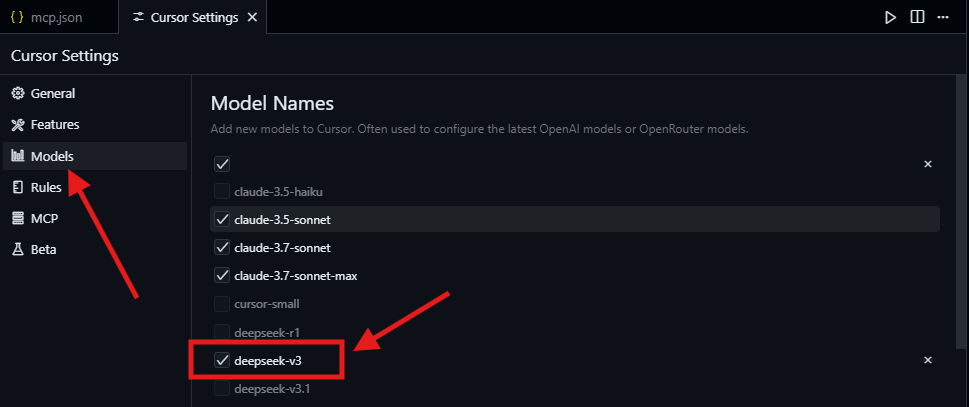
2. Enable Deepseek V3
- Open Settings (
Ctrl+,orCmd+,on Mac). - Navigate to the Models section.
- Find
deepseek-v3and enable it (toggle or select). - Cursor hosts Deepseek V3 on US servers (via Fireworks.ai)—no external API key needed by default.
- Save changes.
To confirm, open the Chat UI (Ctrl+L), select deepseek-v3, and enter a prompt like “Hello.” The model should respond instantly.
Optional: Custom Deepseek API Key or Local Model
- For advanced users wanting more control or speed, you can set up Deepseek V3 via OpenRouter or run it locally with Ollama.
- Note: DeepSeek API sign-ups may be restricted outside mainland China.
- For a local setup:
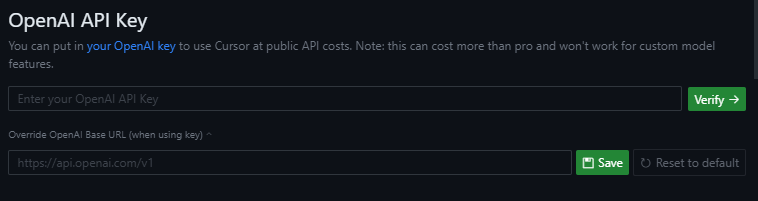
- Install Ollama, pull the
deepseek-v3model, and set Cursor’s OpenAI Base URL tohttp://localhost:11434/v1with a dummy API key.
- Install Ollama, pull the
- For most, Cursor’s hosted Deepseek V3 is the simplest and most reliable route.
Deepseek V3 Usage & Pricing in Cursor
- Cursor Pro Plan ($20/month):
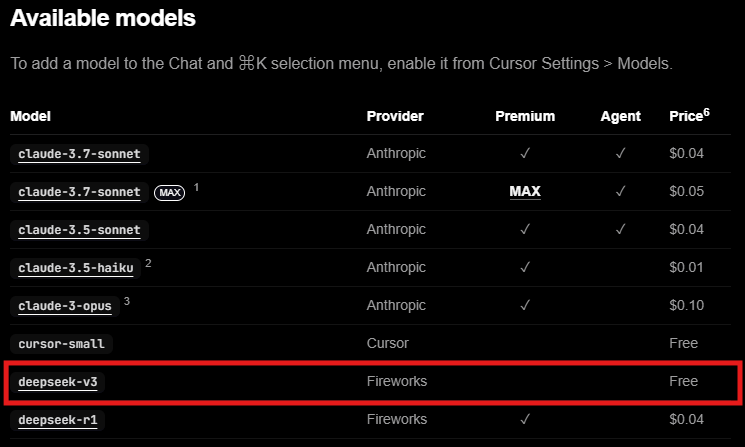
Includes 500 “Fast Use” credits monthly for all models, then unlimited “Slow Use.” - Deepseek V3:
Treated as a non-premium model in Cursor—so usage is essentially free. - Official DeepSeek API (via OpenRouter):
V2.5 is priced at $0.27 per 1M tokens; expect similar for V3. For most code tasks, costs are negligible, but always check your provider’s dashboard.
Test Drive: Generate a Python Factorial Function
Let’s see Deepseek V3 in action by generating and running a Python function to calculate a factorial—perfect for validating setup and showcasing code quality.
Using Cursor Chat
-
Open the Chat UI (
Ctrl+L). -
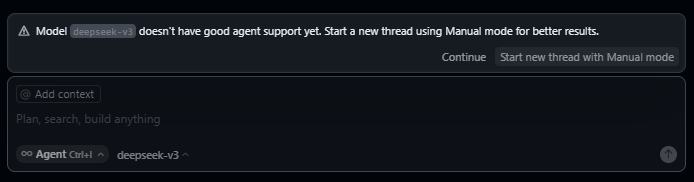
Ensure
deepseek-v3is selected. -
Prompt:
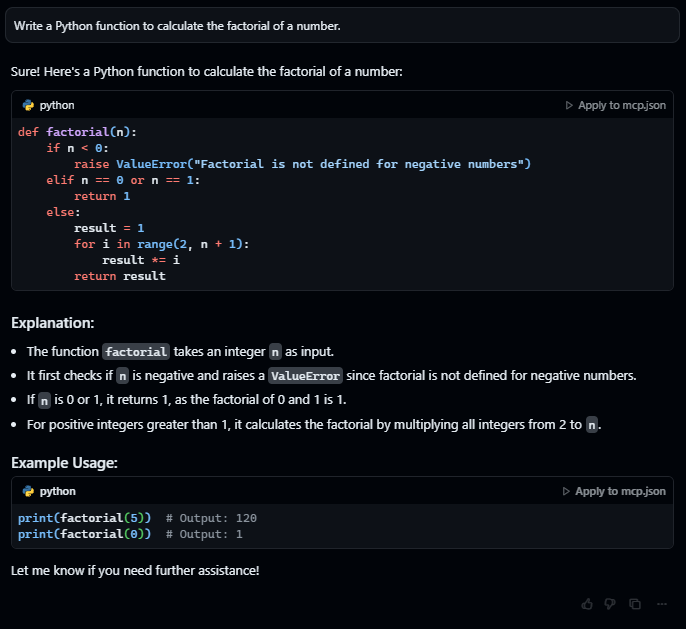
Write a Python function to calculate the factorial of a number. -
Deepseek V3 should generate something similar to:
def factorial(n): if n < 0: raise ValueError("Factorial is not defined for negative numbers") elif n == 0 or n == 1: return 1 else: result = 1 for i in range(2, n + 1): result *= i return result print(factorial(5)) # Outputs: 120 -
Copy the code into
factorial.pyin Cursor, and run it (Ctrl+Enteror use the Run button).
You should see120as output.
Using Cursor Composer
- Open Composer (
Ctrl+I). - Use the same prompt.
- Accept the generated code and run as above.
If the Composer feature isn’t working, check your model selection and ensure your Fast Use credits aren’t depleted (switches automatically to “Slow Use” if needed).
Validate the Output
The factorial function is a straightforward test but demonstrates Deepseek V3’s accuracy and understanding of Python. If the code fails, double-check model selection and internet connectivity.
Pro Tips: Maximizing Deepseek V3 with Cursor
- Be Specific in Prompts:
Clear, concise instructions yield better results.
Example: “Write a Python function to check if a string is a palindrome.” - Leverage Composer for Refactoring:
Use Composer to iteratively improve code—see diffs and apply changes seamlessly. - Monitor Usage:
On Pro plans, watch your “Fast Use” credits to avoid slowdowns. - Chat UI for Quick Brainstorming:
Use Chat UI for rapid prototyping or debugging ideas.
For more advanced API integration, pair Deepseek V3 with tools like Apidog to design, mock, and test your endpoints in a unified workflow. Apidog’s intuitive interface can streamline API development alongside your AI-powered coding in Cursor. Explore more at apidog.com.
Learn how to automate browser tasks with DeepSeek and Ollama in this beginner’s guide.
Developer Insights: Real-World Experience
After hands-on testing, here’s what stands out:
- Speed:
Deepseek V3 generates robust code in seconds—perfect for rapid prototyping. - Integration:
Cursor’s Chat UI and Composer make AI-assisted coding frictionless. - Cost-Effective:
As a non-premium model, Deepseek V3 keeps usage costs minimal. - Limitation:
The 64k token context window may be restrictive for very large codebases—break prompts into smaller pieces for best results.
If you encounter issues, check model selection and keep Cursor updated for the latest features.
Conclusion: Unlock AI-Driven Coding in Cursor
With Deepseek V3 set up in Cursor, you’re ready to supercharge your development workflow—from generating algorithms to debugging and API prototyping. Try more complex tasks, like building a REST API client or writing test suites, and see how Deepseek V3 accelerates your process. For end-to-end API design and testing, integrate Apidog into your stack for a seamless, developer-centric experience.


