AI-powered tools are transforming software development, making coding easier for developers of all skill levels. Cursor is at the forefront of this shift, offering an intuitive coding environment enhanced by AI. Unlike traditional code editors, Cursor doesn’t just provide a space to write code—it actively assists you throughout the development process.
Built on the familiar foundation of VS Code, Cursor is easy to use for both beginners and experienced developers. What makes it unique is its integration with advanced AI models like Claude 3.5 Sonnet, allowing you to write, modify, and understand code using natural language instructions.
Before diving into Cursor’s AI magic, here’s a game-changer for API workflows:
Integrate Apidog MCP Server to give Cursor direct access to your API specifications. This dynamic duo:
✔ Generates precise API client code aligned with your docs (no more manual copy-pasting!)
✔ Auto-suggests endpoints, params, and auth as you type—like Copilot but for APIs
✔ Keeps code in sync with API changes to avoid "works on my machine" surprises
Psst… Scroll to the "Enhancing Cursor with Apidog MCP Server" section to set this up in 5 minutes!
Why Cursor is a Game-Changer?
For beginners, Cursor removes the need to master complex syntax or memorize programming rules. Simply describe what you want, and Cursor generates the code for you. This lowers the barrier to entry, enabling new developers to focus on creativity and problem-solving instead of struggling with technical details.
But Cursor isn’t just for beginners—it’s a powerful tool for all developers. It can:
- Analyze code and explain it in plain English
- Suggest improvements for better efficiency and readability
- Debug errors by identifying and fixing issues
- Generate entire projects based on high-level descriptions
- Implement features when you describe what you need
This makes Cursor useful for everything from simple scripts to web applications, mobile apps, and browser extensions. Whether you're writing your first "Hello World" program or building a complex project, Cursor provides AI-driven support to bring your ideas to life.
As we walk through the setup process, keep in mind that Cursor is more than just a tool—it’s a new way to code, blending human creativity with AI efficiency to unlock possibilities that were once limited to expert developers.
Installing Cursor: First Steps to AI-Enhanced Coding Setup
Setting up Cursor on your system is a straightforward process that requires minimal technical knowledge. This section will guide you through each step of the installation, ensuring you can quickly begin your AI-assisted coding journey.
System Requirements and Compatibility
Before downloading Cursor, ensure your system meets the basic requirements:
- Operating System: Windows 10/11, macOS, or Linux
- Storage: At least 500MB of free disk space
- Memory: Minimum 4GB RAM (8GB or more recommended for optimal performance)
- Internet Connection: Required for AI features as they operate via cloud services
Cursor is designed to work across multiple platforms, making it accessible regardless of your preferred operating system. The installation process varies slightly between systems, but the core functionality remains consistent.
Download and Installation Process
1. Visit the Official Website: Navigate to cursor.com using your preferred web browser.
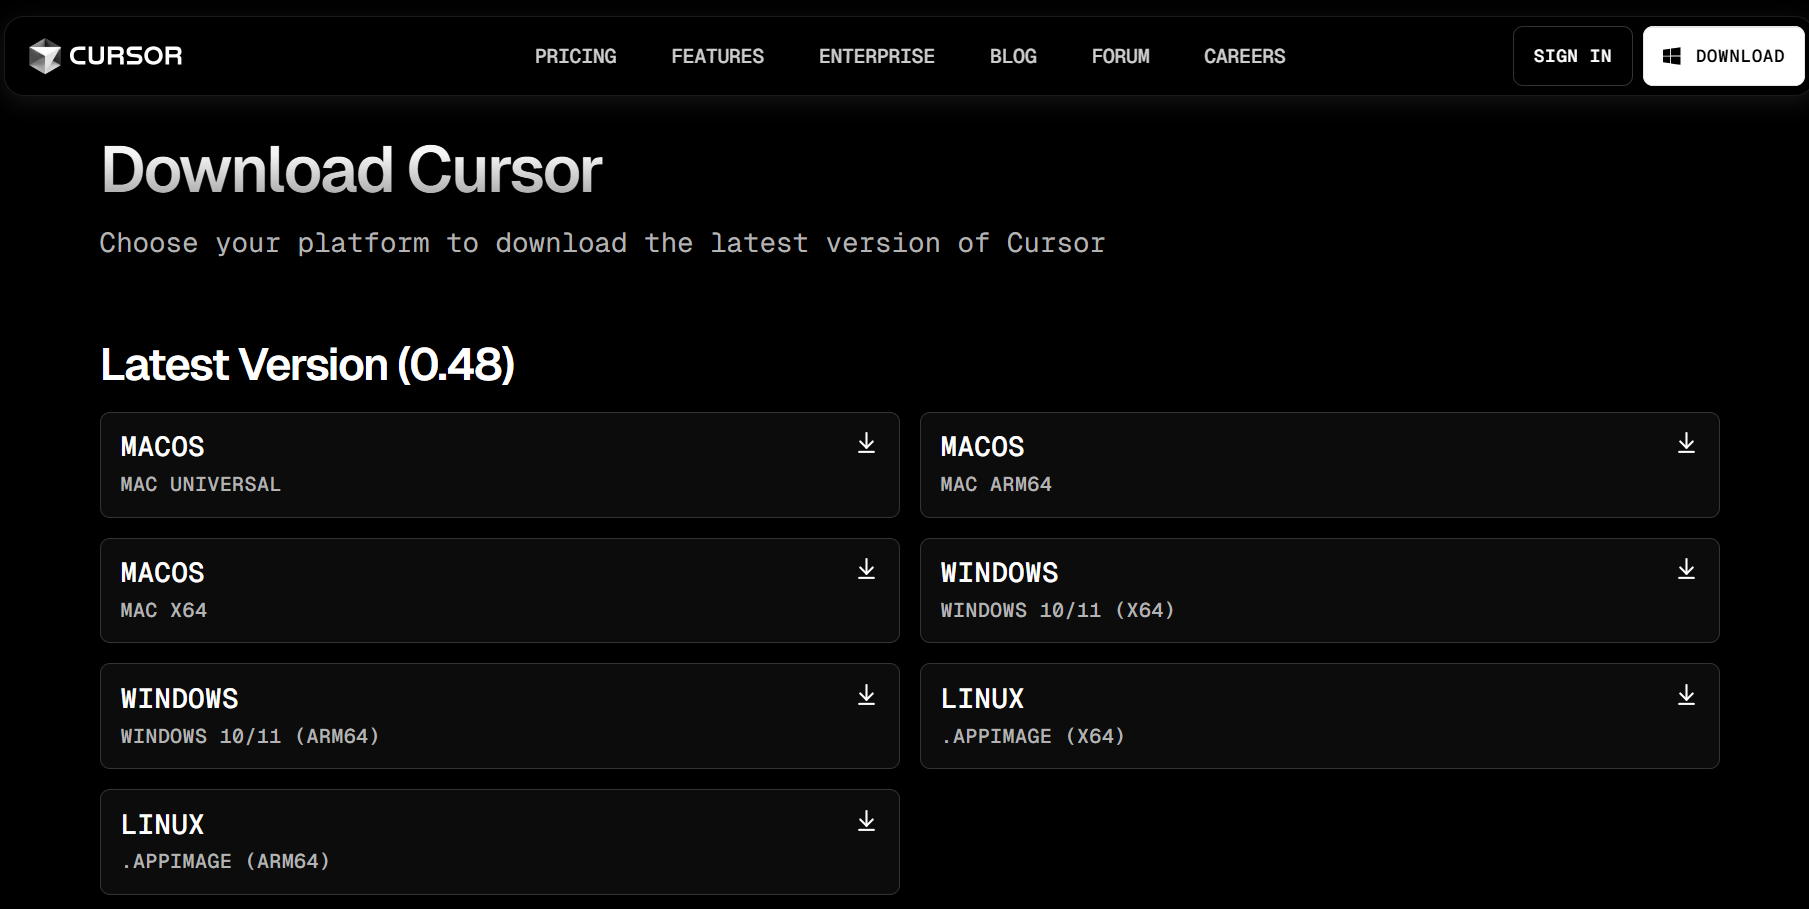
2. Download the Appropriate Version: On the downloads page, select the version that matches your operating system. The website should automatically detect your system and suggest the correct version.
3. Run the Installer: Once the download completes, locate the installer file in your downloads folder and run it.
- On Windows: Double-click the .exe file and follow the on-screen instructions
- On macOS: Open the .dmg file, drag Cursor to your Applications folder
- On Linux: Make the AppImage executable and run it, or use the provided package manager commands
4. Complete the Setup Wizard: The installer will guide you through a series of simple steps. In most cases, accepting the default options is sufficient, but you can customize installation paths if needed.
5. First Launch Configuration: When you first open Cursor, you'll be prompted to create an account or sign in. Creating an account is free and gives you access to a 14-day trial of the Pro features without requiring payment information.
6. Import Existing Settings (Optional): If you've previously used VS Code, Cursor will offer to import your settings, extensions, and preferences. This option can make the transition smoother if you're already familiar with VS Code.
Initial Configuration and Preferences
After installation, take a moment to configure Cursor according to your preferences:
1. Theme Selection: Choose a visual theme that suits your working style. Cursor offers light and dark modes, along with various color schemes.
2. Font Customization: Adjust the font size and family to ensure code readability. This is particularly important if you plan to spend extended periods coding.
3. Key Bindings: Review the default keyboard shortcuts or customize them to match your workflow. The most essential shortcuts include:
- Ctrl+K/Cmd+K: Inline AI editing
- Ctrl+L/Cmd+L: Toggle AI chat panel
- Tab: Accept AI code suggestions
4. Extensions: Browse and install extensions that enhance your development experience. Since Cursor is built on VS Code, many VS Code extensions are compatible.
5. AI Settings: Configure AI-specific settings such as auto-completion behavior and code indexing preferences. These settings determine how proactively the AI suggests code as you type.
By taking the time to properly set up and configure Cursor, you create an environment tailored to your needs, maximizing both comfort and productivity as you begin exploring the powerful AI features that make Cursor unique in the coding landscape.
Navigating the Cursor Interface: Essential Setup for Efficient Coding
Understanding Cursor's interface is crucial for harnessing its full potential. The layout combines familiar code editor elements with innovative AI features, creating a workspace that balances traditional coding with AI assistance. This section explores the key components of the interface and how to navigate them effectively.
The Main Editor Window and File Management
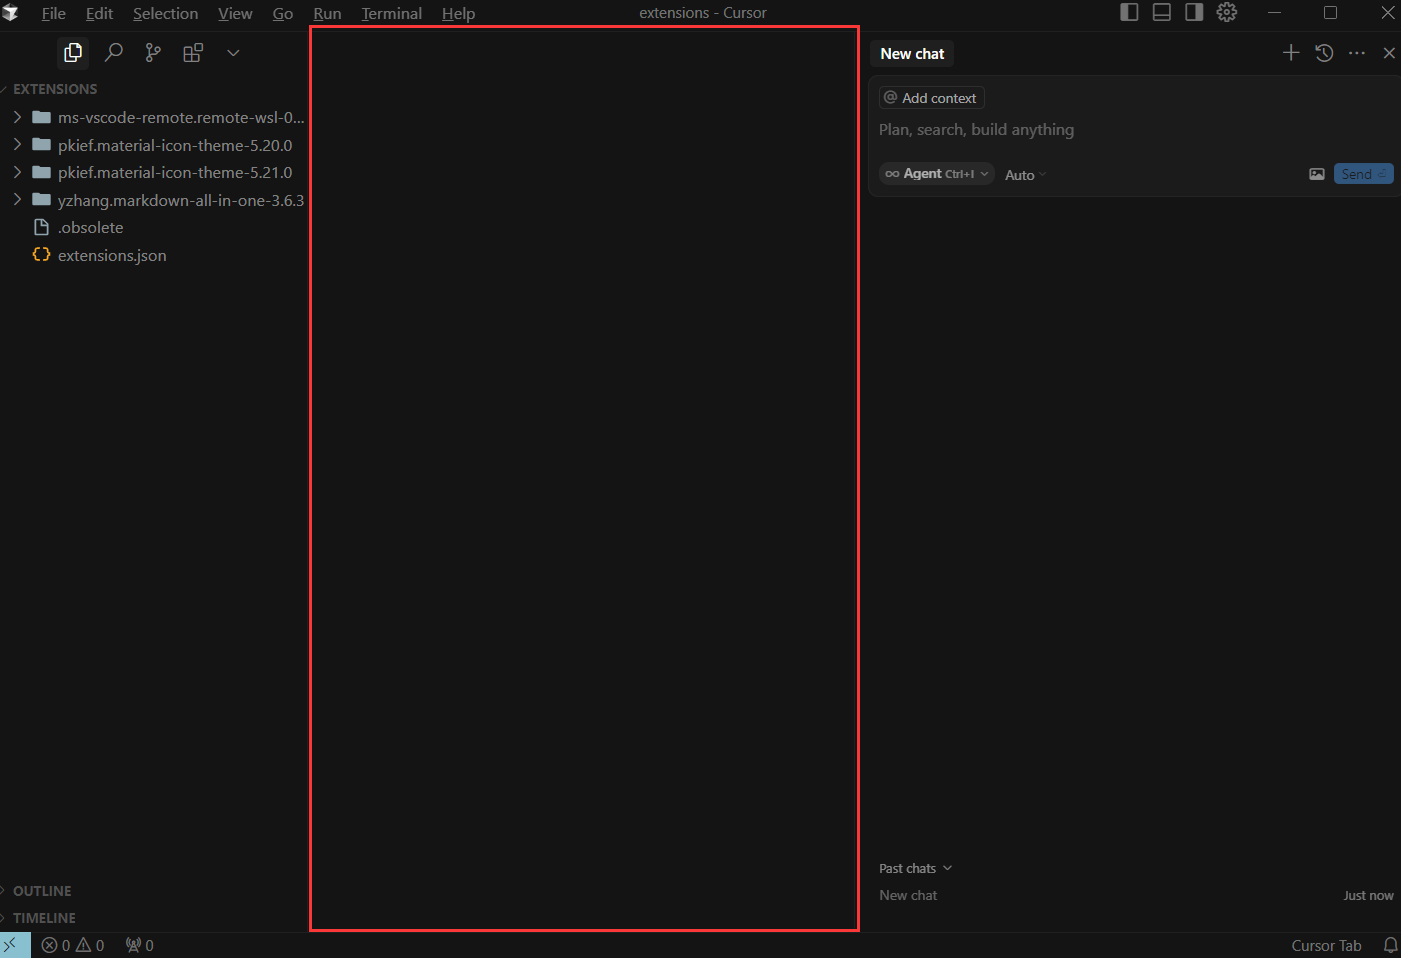
The central area of Cursor is the editor window, where you'll spend most of your time writing and editing code. This space functions similarly to other code editors, with syntax highlighting, line numbers, and multiple tabs for working with several files simultaneously.
To start a new project:
- Select File > Open Folder (or use Ctrl+Shift+P and type "Open Folder")
- Choose an empty directory or an existing project folder
- The folder structure will appear in the Explorer panel on the left side
The Explorer panel provides a hierarchical view of your project files and folders. Right-clicking in this area reveals options for creating, renaming, and deleting files—essential operations for organizing your codebase. For beginners, creating a logical folder structure from the start helps maintain organization as your projects grow in complexity.
When working with multiple files, Cursor allows you to split the editor window horizontally or vertically, enabling side-by-side comparison and editing. This feature is particularly useful when implementing features that span multiple files or when referencing documentation while coding.
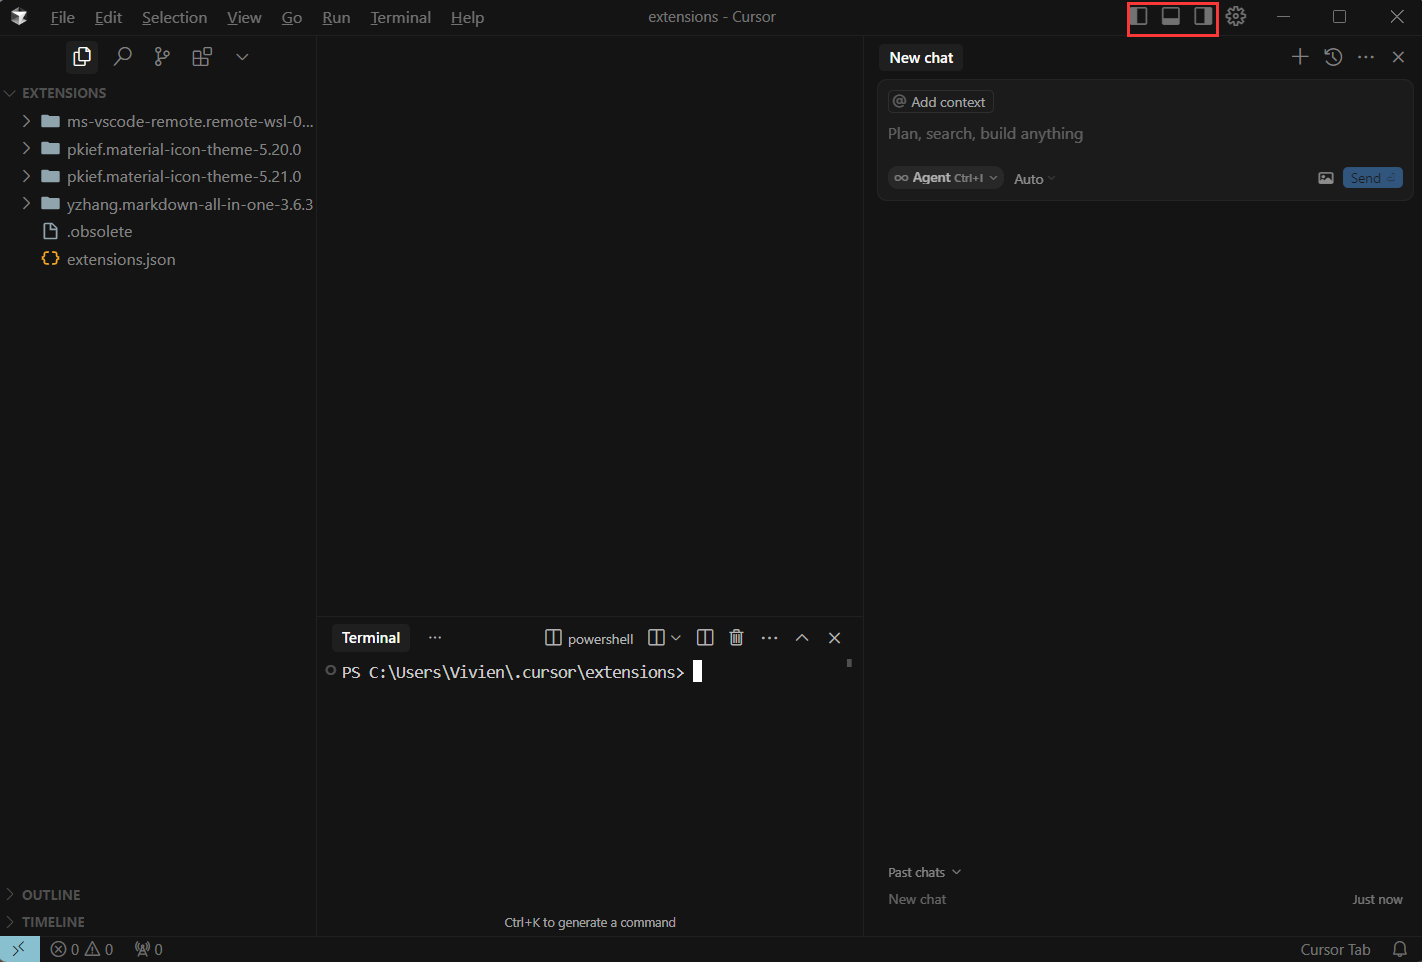
AI Chat Panel: Your Coding Assistant
The AI Chat panel, typically located on the right side of the interface, serves as your direct line of communication with Cursor's AI assistant. If not visible by default, you can toggle it using Ctrl+L (Cmd+L on Mac).
The chat interface resembles a messaging app, with your queries at the bottom and the AI's responses above. This conversational approach makes complex coding tasks more accessible, especially for beginners who might not yet be fluent in programming syntax.
Effective ways to use the AI Chat include:
- Asking for explanations: "What does this code do?" or "Explain how this function works"
- Requesting code generation: "Create a login form with email and password fields"
- Seeking debugging help: "Why am I getting this error?" followed by the error message
- Learning concepts: "Explain what a closure is in JavaScript" or "How do I use async/await?"
The chat maintains context throughout your session, allowing for follow-up questions and iterative development. This contextual awareness means you can refine your requests without repeating information, making the development process more natural and efficient.
Inline Editing and Code Composer
Beyond the chat panel, Cursor offers two powerful ways to interact with AI directly within your code:
Inline Editing (Ctrl+K/Cmd+K): Select a code block, press the shortcut, and describe the changes you want. The AI will modify the selected code according to your instructions. This feature is ideal for:
- Refactoring existing code
- Adding functionality to a method
- Fixing bugs or implementing error handling
- Converting code between different styles or patterns
Composer (Ctrl+I/Cmd+I): This advanced feature helps tackle larger tasks by breaking them into manageable steps. The Composer provides a structured approach to complex development tasks, guiding you through the process while generating the necessary code.
Terminal Integration and Runtime Environment
The integrated terminal, accessible via View > Terminal or Ctrl+` (backtick), allows you to execute commands without leaving Cursor. This terminal functions like any command-line interface, enabling you to:
- Run your code
- Install dependencies
- Execute build processes
- Manage version control
- Deploy applications
For beginners, the terminal might seem intimidating at first, but it becomes an essential tool as you progress. Cursor's AI can help here too—you can ask for terminal commands in the chat, then copy and paste them into the terminal window.
By familiarizing yourself with these interface elements, you create a foundation for efficient coding with Cursor. The combination of traditional editor functionality and AI assistance creates a unique development environment where technical barriers are reduced, allowing you to focus on bringing your ideas to life.
Best Practice: Enhancing Cursor with Apidog MCP Server
Integrating Cursor with Apidog MCP Server represents a significant advancement for developers working with APIs. This powerful combination bridges the gap between API specifications and code implementation, enabling AI-assisted development that's precisely aligned with your API documentation. This section guides you through the setup process and explores the benefits of this integration.
Understanding Apidog MCP Server and Its Benefits
The Apidog Model Context Protocol (MCP) Server functions as a communication channel between your API specifications and AI coding assistants like Cursor. By providing Cursor with direct access to your API documentation, the MCP Server enables more accurate code generation, better context-aware suggestions, and reduced documentation lookup time.
Key benefits of this integration include:
- Contextual awareness: Cursor gains understanding of your API's endpoints, parameters, response structures, and authentication requirements
- Accurate code generation: Generated code precisely matches your API specifications, reducing integration errors
- Documentation consistency: Implementation remains synchronized with documentation as your API evolves
- Productivity boost: Eliminates constant switching between documentation and code editor
- Learning acceleration: Helps new team members quickly understand and work with your APIs
This integration is particularly valuable for teams maintaining complex APIs or developers working with third-party services that provide OpenAPI specifications.
Setting Up Apidog MCP Server Integration
To connect Cursor with your API specifications through Apidog MCP Server, follow these steps:
Prerequisites:
- Ensure Node.js (version 18 or higher) is installed on your system
- Have an Apidog account with access to your API project
- Cursor should be installed and running
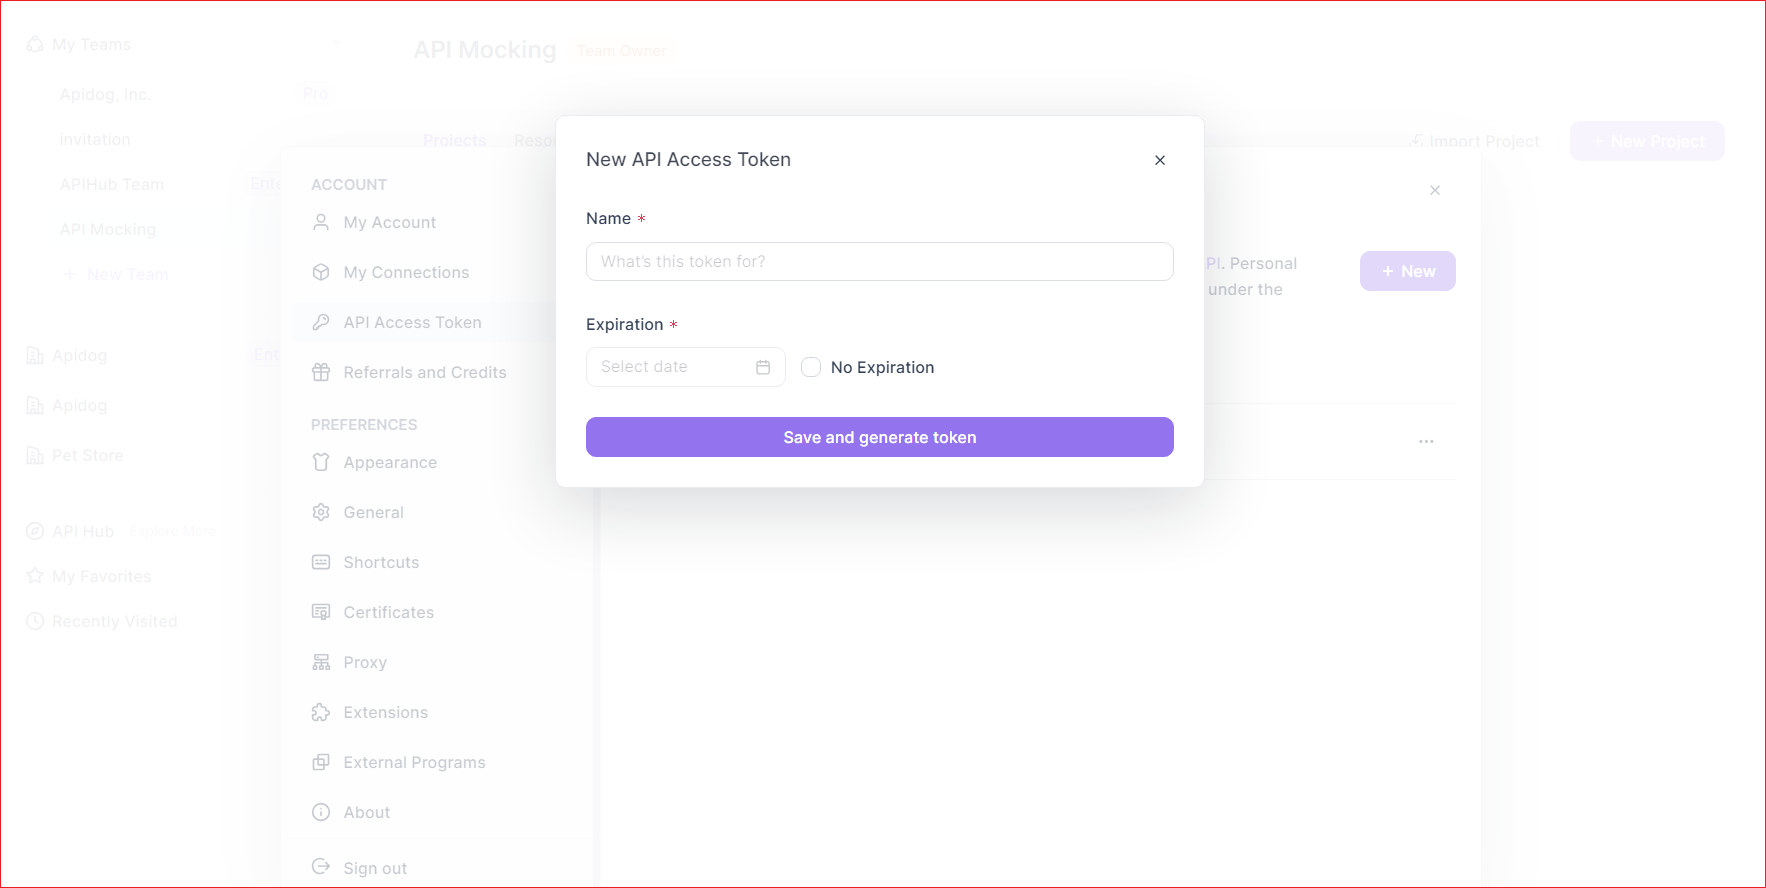
Generate an Apidog Access Token:
- Log into your Apidog account
- Navigate to Account Settings > API Access Token
- Create a new token and copy it to a secure location
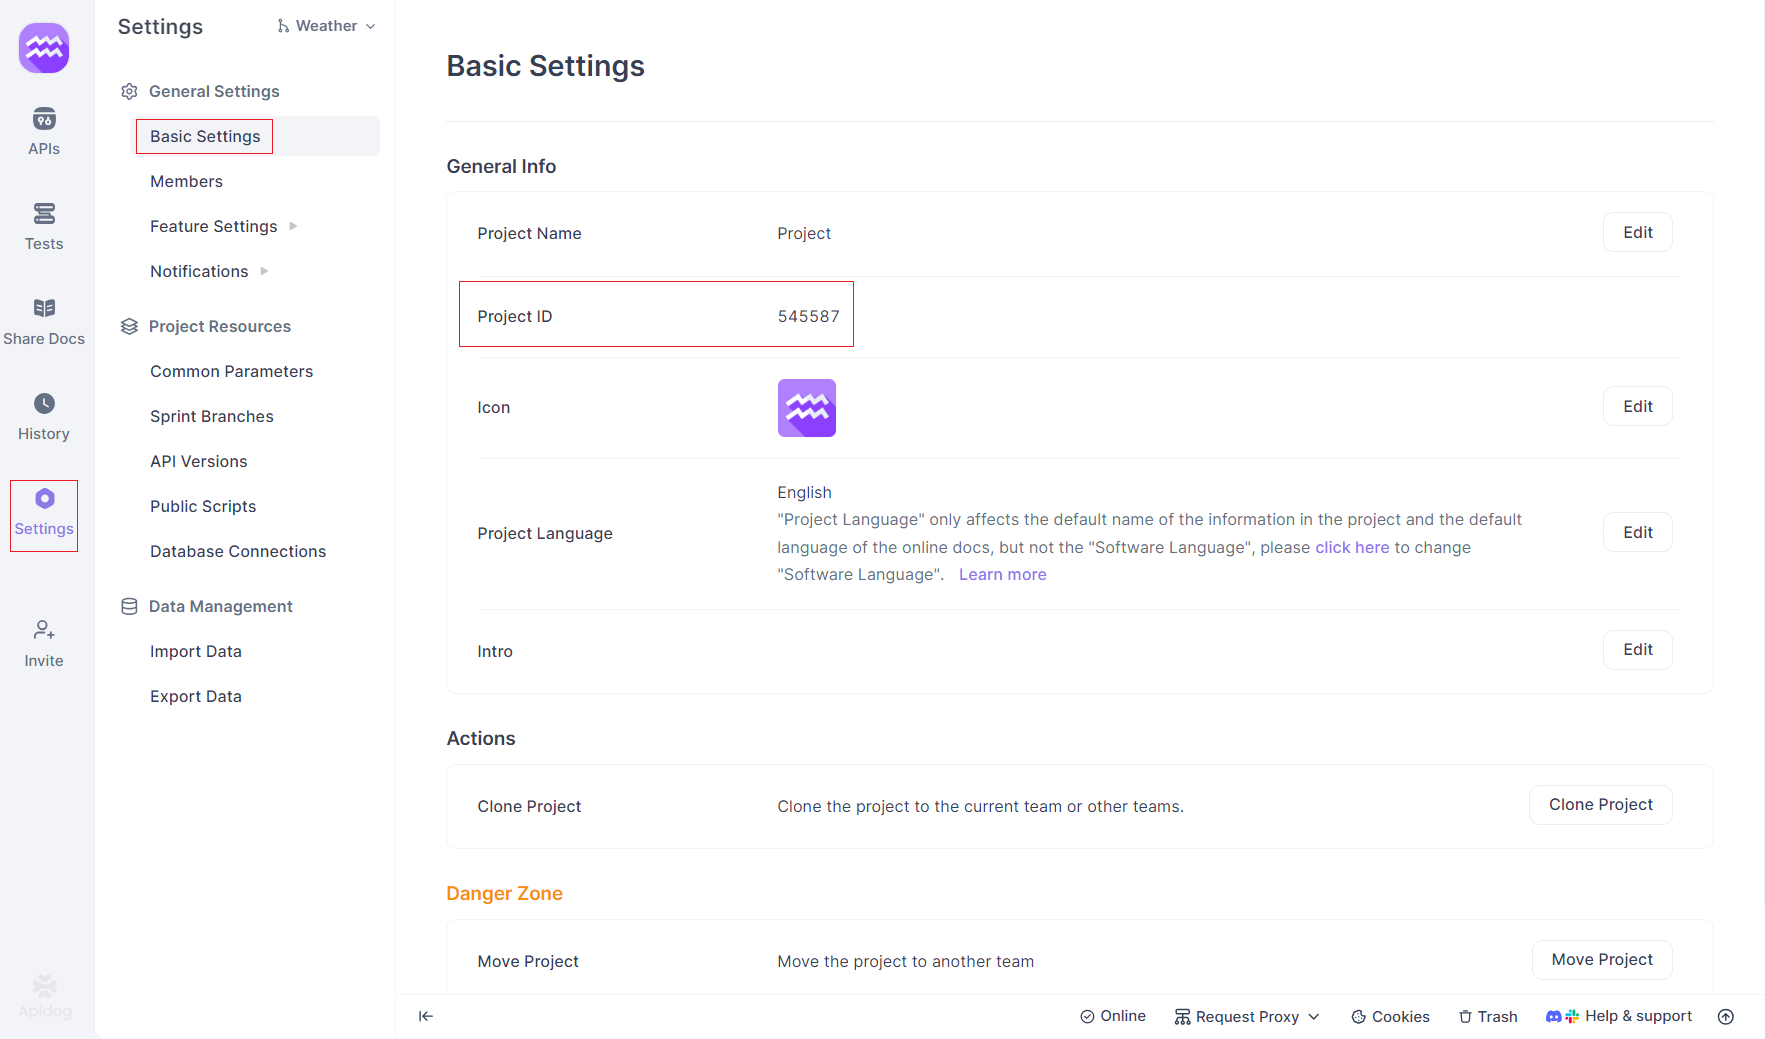
Locate Your Apidog Project ID:
- Open your project in Apidog
- Go to Settings in the left sidebar
- Find and copy the Project ID from Basic Settings
Configure Cursor for MCP Integration:
- Create or edit the MCP configuration file in one of these locations:
- Global configuration:
~/.cursor/mcp.json - Project-specific configuration:
.cursor/mcp.jsonin your project directory - Add the following JSON configuration:
{
  "mcpServers": {
    "API specification": {
      "command": "npx",
      "args": [
        "-y",
        "apidog-mcp-server@latest",
        "--project=<project-id>"
      ],
      "env": {
        "APIDOG_ACCESS_TOKEN": "<access-token>"
      }
    }
  }
}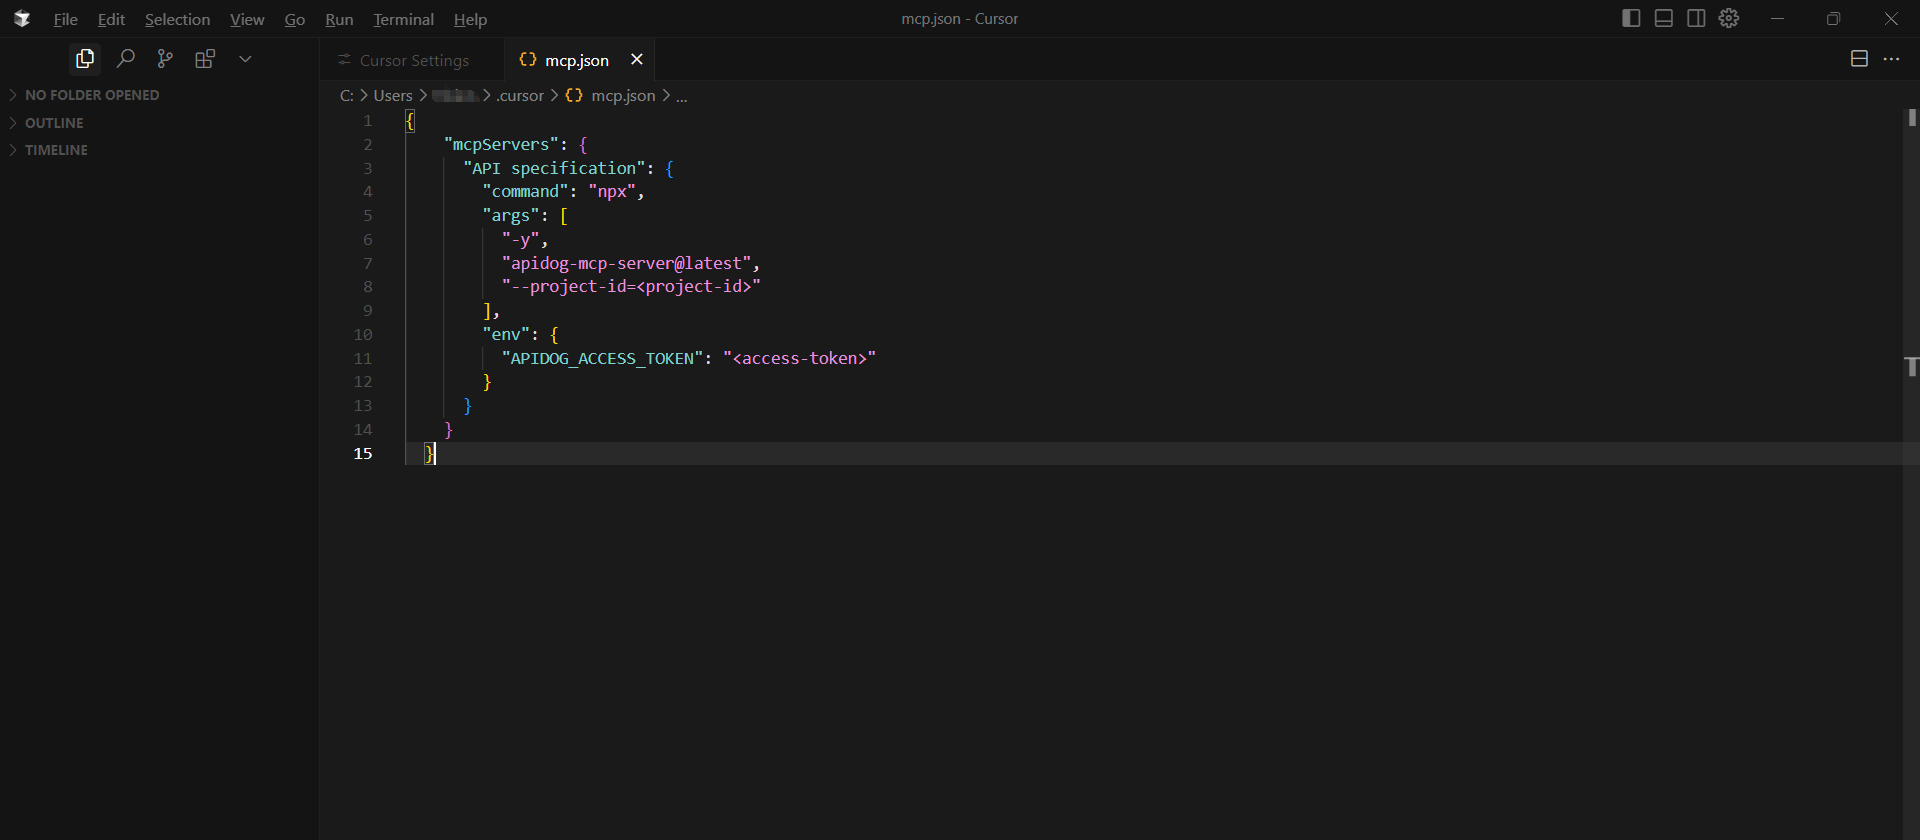
Save the configuration and restart Cursor to apply the changes
For Windows users, if the standard configuration doesn't work, use this alternative path format:
{
  "mcpServers": {
    "API specification": {
      "command": "npx",
      "args": [
        "-y",
        "apidog-mcp-server@latest",
        "--project=<project-id>",
        // Required for on-premise deployment:
        "--apidog-api-base-url=<API address of the on-premise server, starting with http:// or https://>"
      ],
      "env": {
        "APIDOG_ACCESS_TOKEN": "<access-token>"
      }
    }
  }
}
Working with OpenAPI Specifications
If you're using standard OpenAPI/Swagger specifications instead of Apidog projects, you can configure the MCP Server to read these files directly:
{
  "mcpServers": {
    "API specification": {
      "command": "npx",
      "args": [
        "-y",
        "apidog-mcp-server@latest",
        "--oas=<oas-url-or-path>"
      ]
    }
  }
}
This flexibility allows you to work with any API documentation that follows the OpenAPI standard, not just those created in Apidog.
For more details, check out Apidog Help Doc.
Leveraging the Integration in Your Workflow
Once the integration is set up, you can begin using it in your development workflow. Here are some effective ways to leverage this connection:
Generate code based on API documentation:
Use MCP to fetch the API documentation and generate TypeScript interfaces for the User schemaCreate API clients:
Generate a React hook for interacting with the product management API based on our API documentationUpdate code to match API changes:
Update this service class to handle the new parameters in the /users endpoint according to our API documentationAdd documentation details to code:
Add comments for each field in this class based on the constraints defined in our API documentationBy following these setup steps and integration practices, you create a powerful development environment where your code and API specifications remain in perfect harmony. This approach not only accelerates development but also improves code quality and reduces integration issues, making it an essential setup for serious API development with Cursor.
Conclusion: Transforming Your Development Experience with Cursor
Setting up Cursor is more than just installing a code editor—it’s a shift toward AI-assisted software development. By blending the familiarity of traditional coding with powerful AI capabilities, Cursor streamlines both learning and implementation. Its intuitive setup lays the foundation for effortless navigation, making it easier to adopt new programming concepts.
Integrated with Apidog MCP Server, Cursor ensures seamless API alignment, reducing discrepancies between documentation and code. Whether you're a beginner relying on AI for guidance or an experienced developer using it to automate routine tasks, Cursor adapts to your needs. The key to maximizing its potential lies in clear communication—specific prompts lead to better AI responses. As software development evolves, tools like Cursor redefine how code is written, making the process more efficient, intuitive, and creative.

