You’re building a web application and you need to allow users to upload images. But there’s a catch: you need all images to be in JPEG format for consistency and performance reasons. How can you convert user-uploaded images to JPEG on the fly?
In this tutorial, we'll explore how to set up a backend server using Node.js and Express.js to convert images to JPEG format. We'll utilize the powerful Sharp library for image processing and demonstrate how to handle image conversion requests from a front-end client or API management tool such as Apidog.
Prerequisites:
Before getting started, ensure you have Node.js and npm (Node Package Manager) installed on your system. You can download and install them from the official Node.js website.
Setting Up the Backend;
Let's begin by creating a new folder for our project and initializing npm.
mkdir image-conversion-backend
cd image-conversion-backend
npm init -y
Next, install the necessary dependencies: Express, Cors, Multer, and Sharp.
npm install express cors multer sharp
With the dependencies installed, let's create an index.js file where we'll define our Express server.
const cors = require("cors");
const express = require('express');
const multer = require('multer');
const sharp = require('sharp');

const app = express();
const port = process.env.PORT || 8080;

// Configure Multer to handle file uploads
const storage = multer.memoryStorage();
const upload = multer({ storage: storage });

// Enable Cross-Origin Resource Sharing (CORS)
app.use(cors());

// Parse JSON bodies
app.use(express.json());

// Define route for image conversion
app.post('/convert', upload.single('image'), async (req, res) => {
    try {
        // Use Sharp to convert the uploaded image to JPEG format
        const buffer = await sharp(req.file.buffer).toFormat('jpg').toBuffer();

        // Send the converted image as the response
        res.send(buffer);
    } catch (error) {
        console.error('Conversion error:', error);
        res.status(500).send('Conversion failed');
    }
});

// Start the server
app.listen(port, () => {
    console.log(`Server is running on port ${port}`);
});
Understanding the Code;
Let's break down the key components of our backend application:
- Express Initialization: We initialize an Express application and define the port number for our server.
- Multer Configuration: Multer is configured to handle file uploads. In our case, we're using
memoryStorage()to store the uploaded file in memory. - CORS Middleware: Cross-Origin Resource Sharing (CORS) is enabled to allow requests from a front-end client running on
http://localhost:3000. - Image Conversion Route: We define a POST route
/convertwhere the image conversion takes place. Multer middleware handles the file upload, and Sharp library is used to convert the image to JPEG format. - Error Handling: We wrap the conversion logic in a try-catch block to handle any errors that may occur during the conversion process.
- Server Start: Finally, we start the Express server, which listens on the specified port.
Running the Backend Server
To run the backend server, navigate to your project directory in the terminal and execute the following command:
node index.js
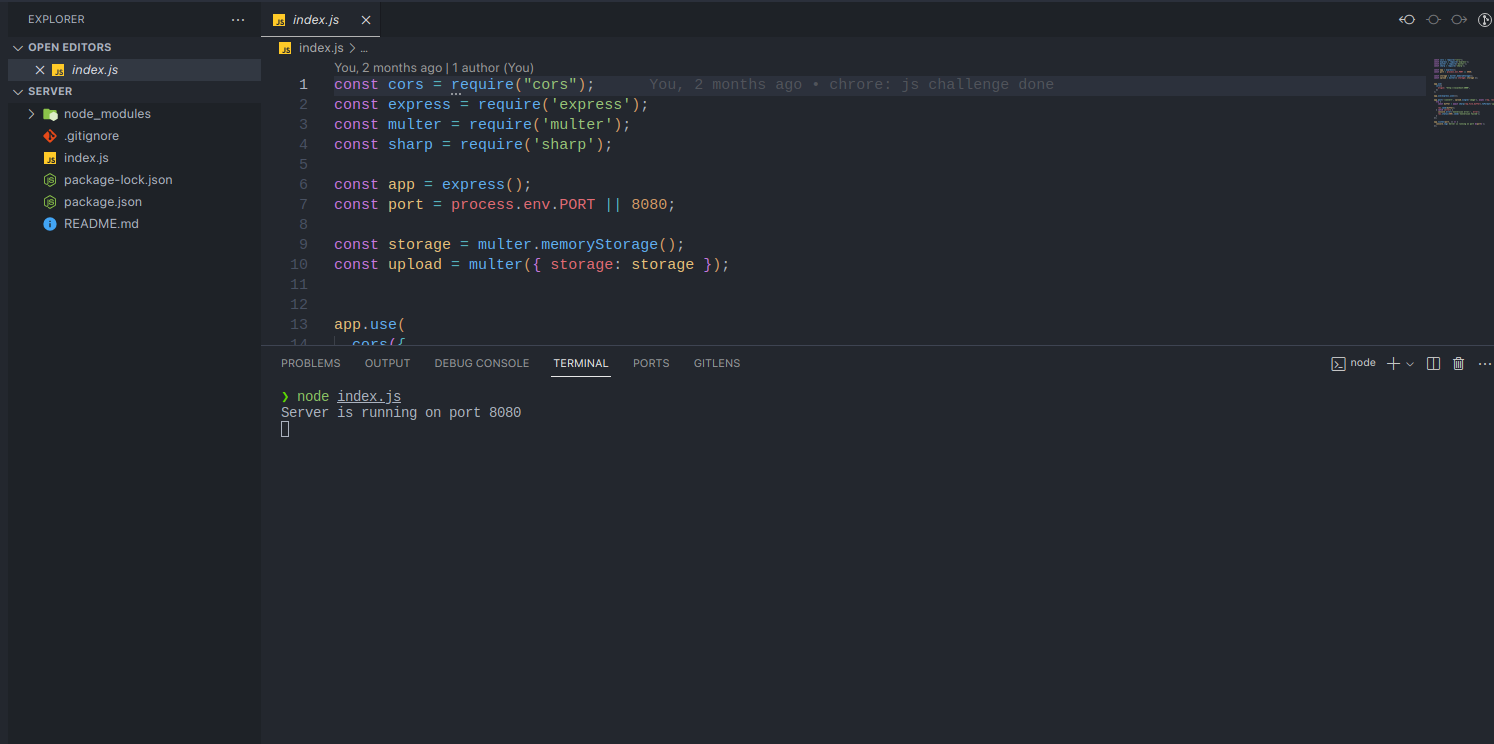
Your backend server is now up and running, ready to handle image conversion requests.
Now, you can use a frontend tool like react, vue.js or even vanilla js Fetch method to send a request from the frontend to the server to test things out. That should work. In this guide, however, as I mentioned before we'll use Apidog.
Getting Started with Apidog
For those of us who don't know what Apidog is, Apidog is an integrated collaboration platform for API documentation, API debugging, API mocking, and API automated testing. For those of us who have heard of or used Postman before, Apidog offers much more than Postman thus making it the ideal API management tool to test your APIs.
You can use the above link to download, or create an account to get started. After your account has been created, the next step is to send a POST request to your already running backend server to convert the images to jpeg.
When you create an account on Apidog, a new team/workspace is automatically created for you. You can create projects, or continue with the default one generated for you. In this example, I'll use the already created project, and create a new request to try out our backend code.
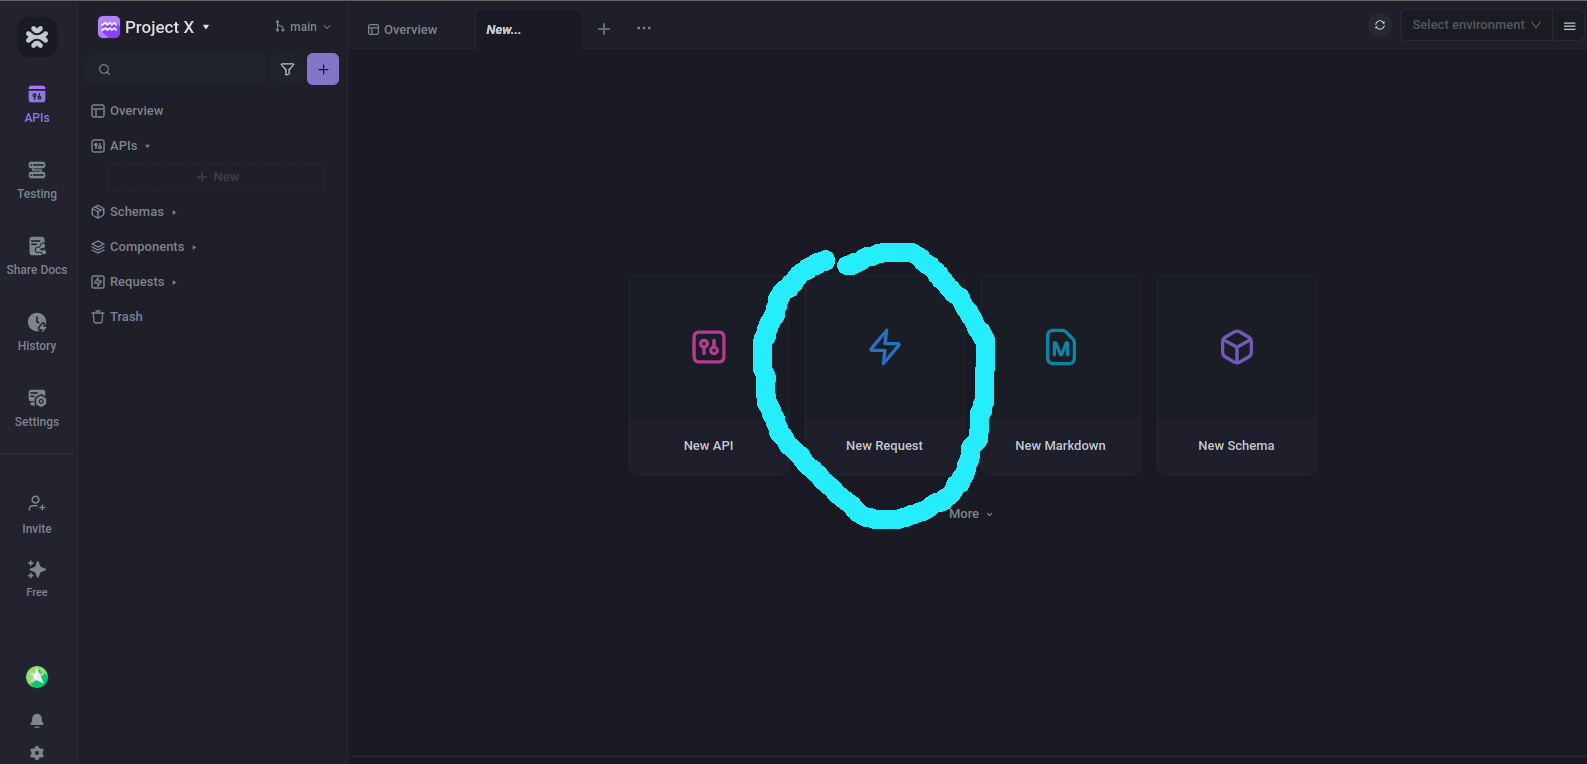
When you click on that request button, you'll be shown an interface to send your first request.
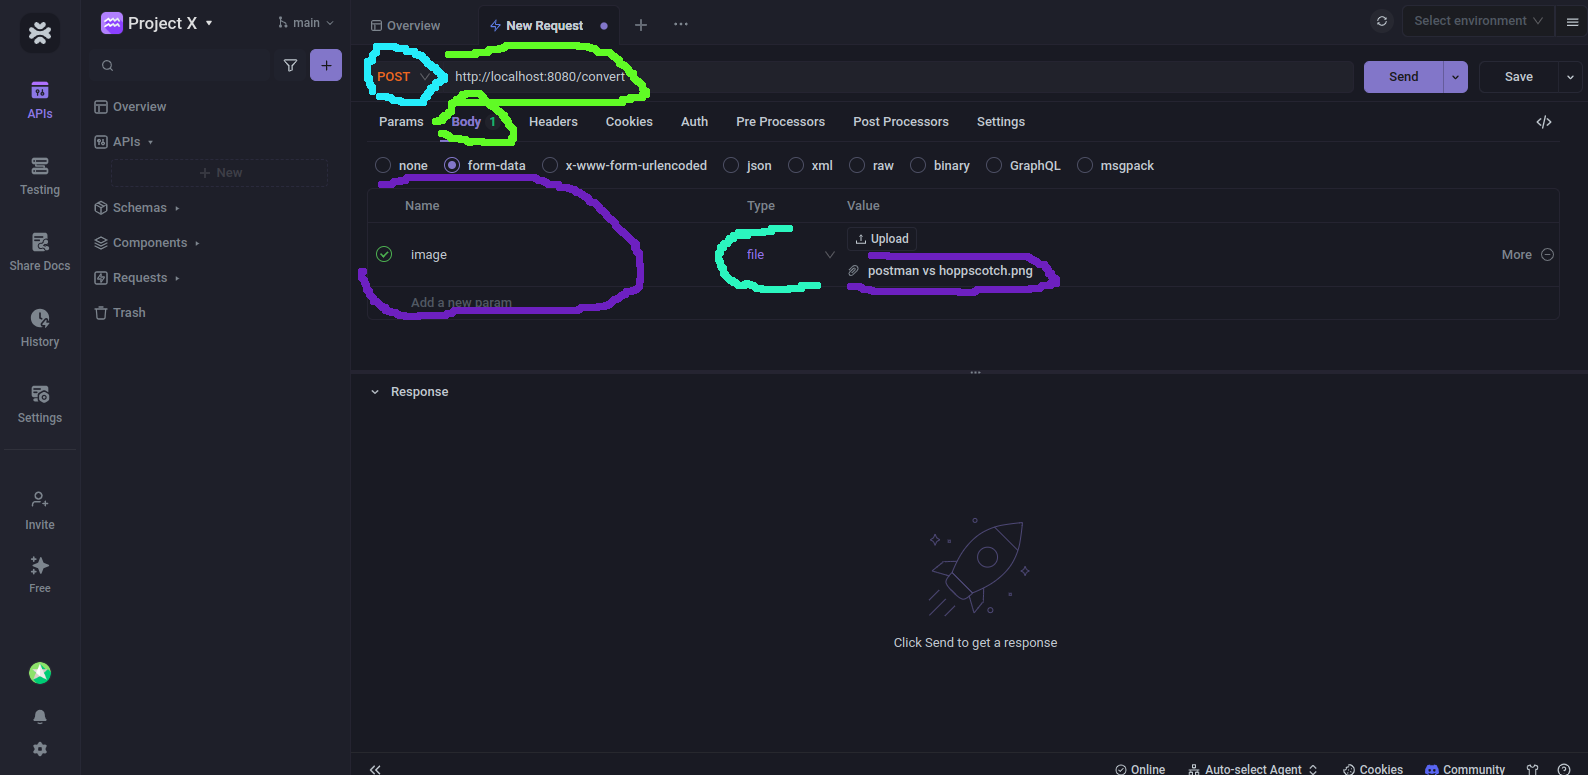
The first thing to do is to change the request type from GET to POST. Update the URL with the local server's URL - localhost:8080 in my case.
Next to that is to click on the "Body" section, and select form data. By selecting form data, you'd be able to select and upload images directly to Apidog to test the conversion. Now give the form data a name "Image", type "file", & upload the image to convert.
Once done, click the Send button on the top right to send the request. If everything goes well, you should be able to see a 200 response and the file to download.
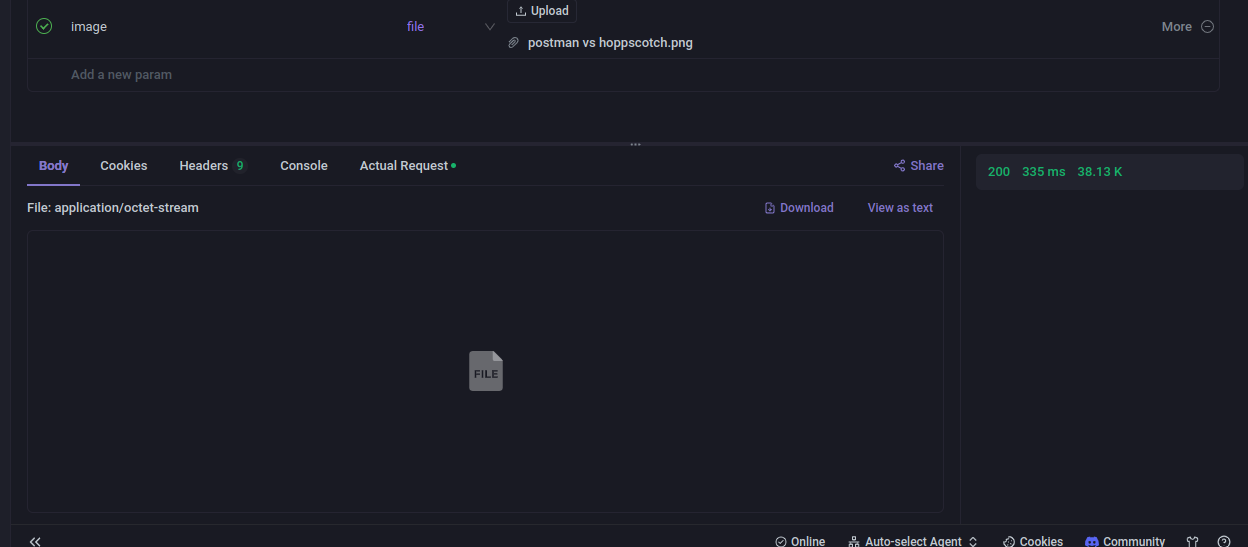
It's important to note that when you download the file, you'll see a response.bin file. When you view the property, you'll find out it's a .jpg file. And that's your converted image.
Conclusion
We've just seen how to convert images from .png or any other format to .jpeg using node.js and then testing things out with Apidog.
Apidog gave us the ability and flexibility to test out the API without relying on any frontend tool or framework.