
Mobile development workflows present unique challenges when working with AI-powered coding assistants. While Claude Code delivers exceptional results on desktop environments, developers frequently encounter situations where mobile access becomes critical—whether debugging production issues during commutes, reviewing code changes from remote locations, or maintaining development momentum across different devices.
This guide details three distinct technical approaches to running Claude Code on mobile. Whether you prefer a direct SSH tunnel, a dedicated relay client, or an asynchronous GitOps workflow, these methods allow you to maintain development velocity from anywhere.
Understanding Claude Code Architecture
Before implementing mobile access, developers must understand Claude Code's underlying architecture. Claude Code operates as a command-line interface tool that establishes secure connections to Anthropic's API servers. The tool maintains persistent sessions, manages conversation context, and executes code operations within your local development environment.
The primary constraint preventing direct mobile usage stems from Claude Code's terminal-based interface and local file system dependencies. Mobile operating systems impose sandboxing restrictions that prevent traditional terminal emulation, necessitating alternative architectural approaches for mobile integration.
Claude Code Pricing Overview
Understanding cost structures proves essential when selecting your mobile access method. Claude Code operates under two distinct pricing models:
Subscription-Based Pricing
Claude offers subscription tiers designed for individual developers and teams:

API-Based Pricing
For programmatic access and automation workflows:
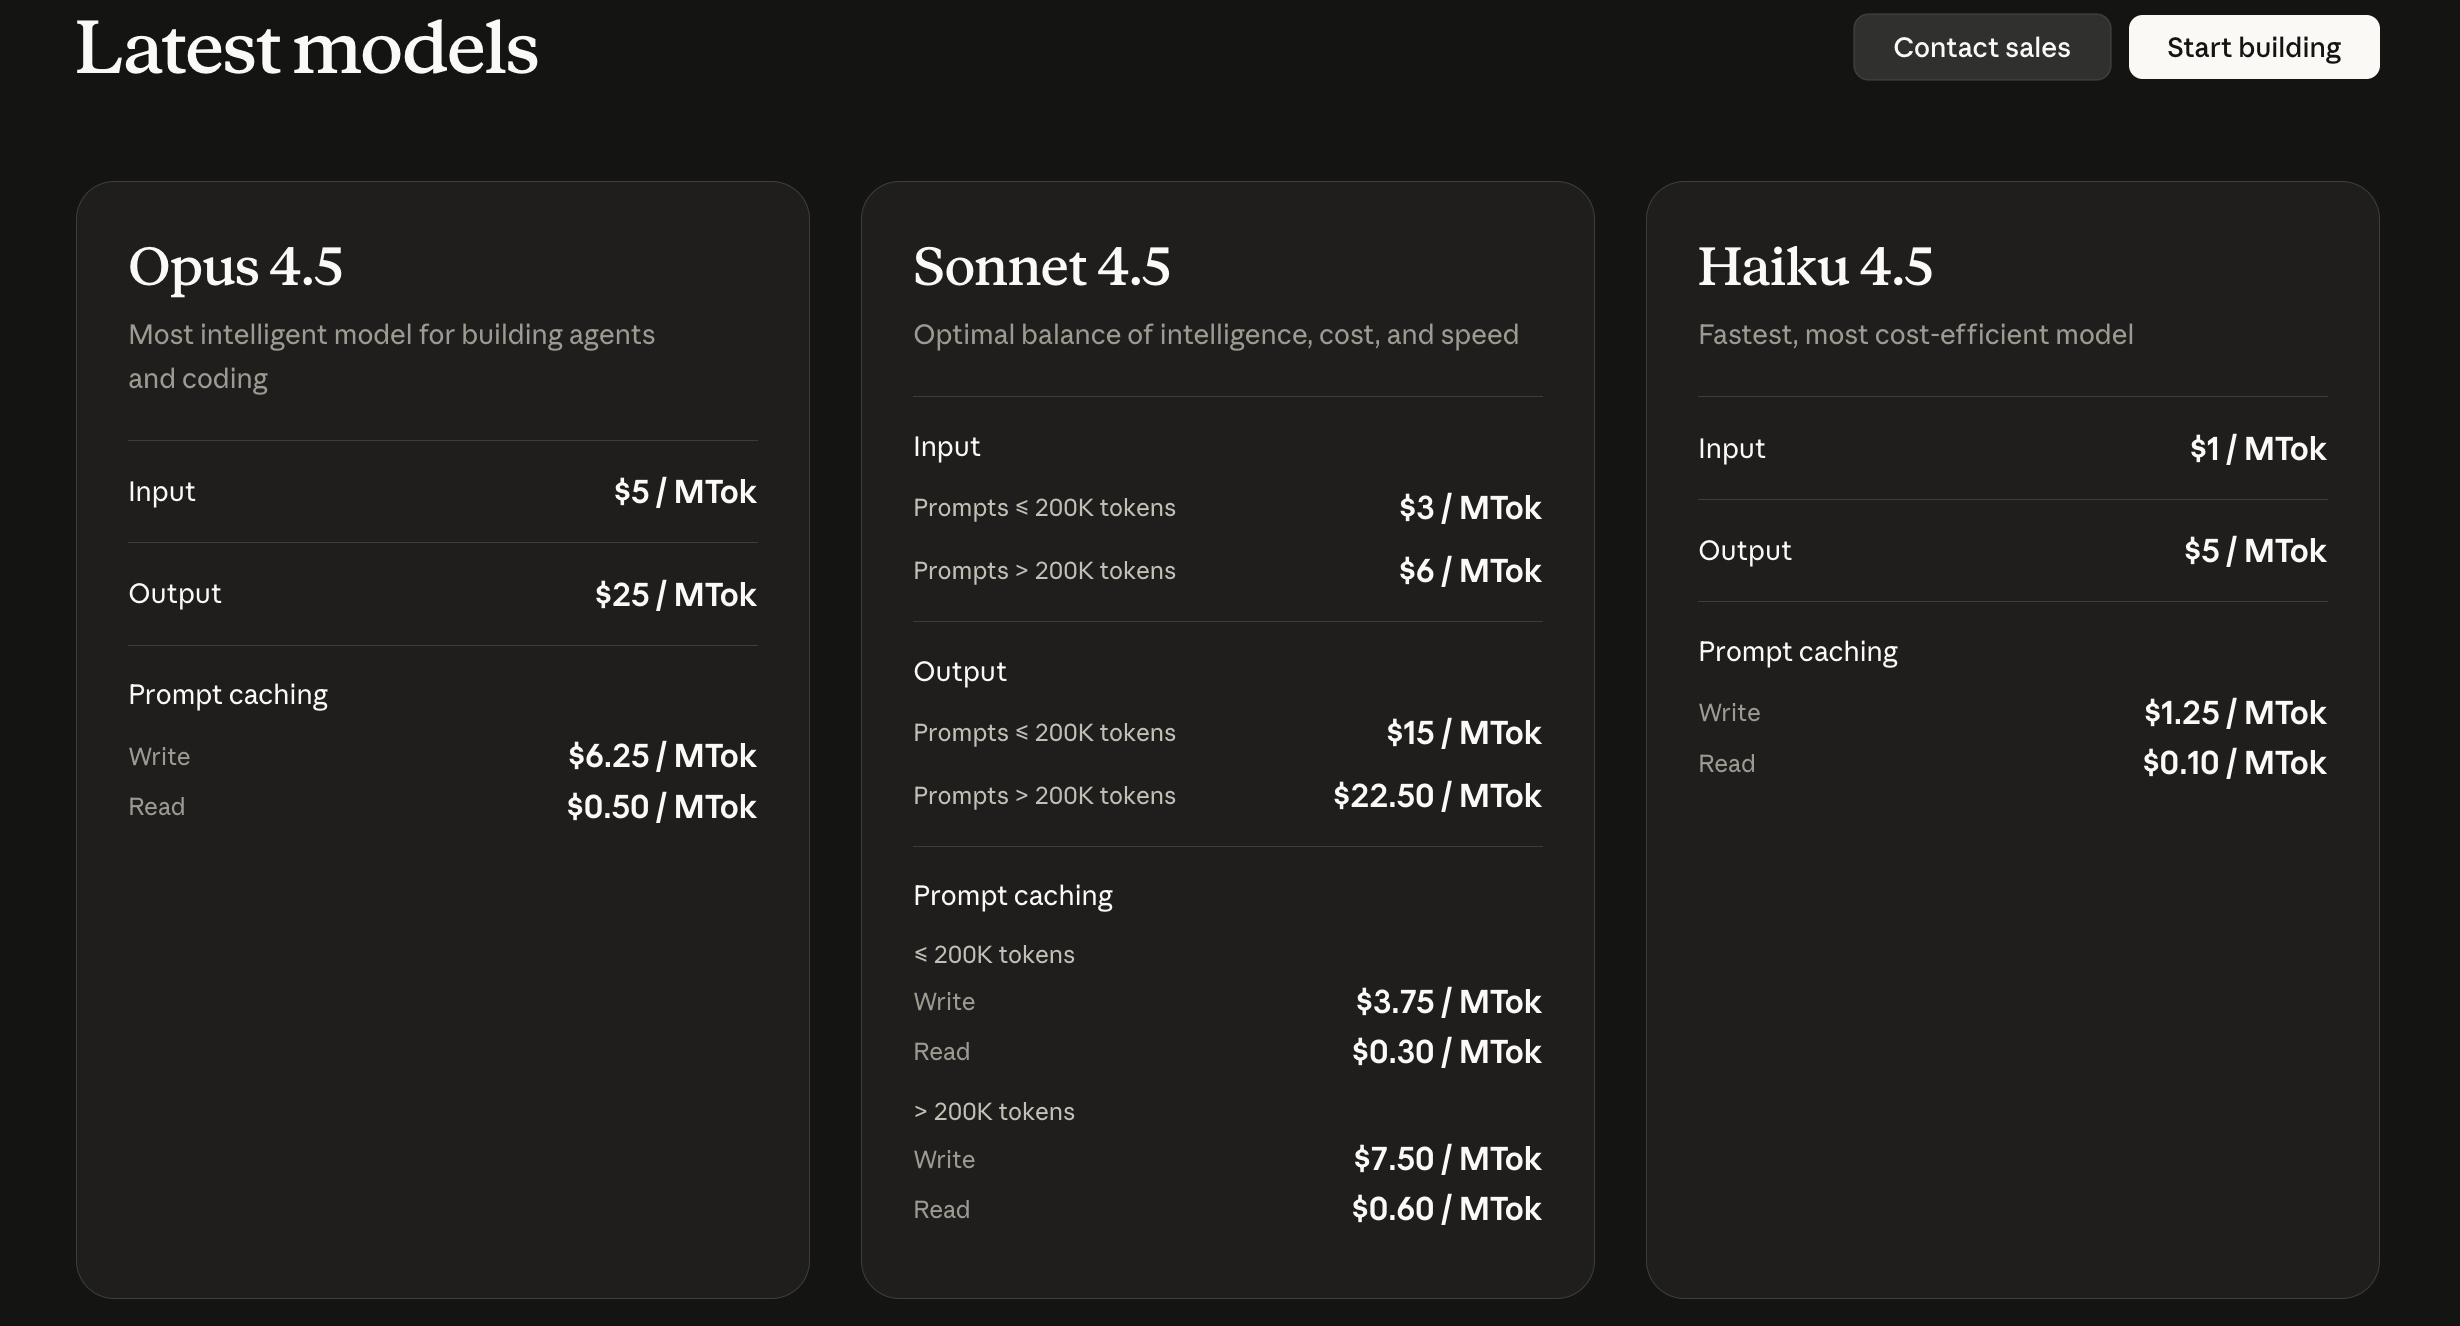
The subscription model provides predictable monthly costs ideal for individual developers, while API pricing offers flexibility for team deployments and automated workflows. Token conversion approximates 1,000 tokens ≈ 750 words, though actual conversion varies by language and content structure.
Method 1: SSH Tunneling with Tailscale and Termius
This method establishes secure remote access to Claude Code running on your primary development machine through VPN tunneling and SSH protocols. The approach maintains Claude Code execution on your desktop while providing terminal access from mobile devices.
Architecture Overview
The implementation creates a three-layer connection architecture:
[Mobile Device] → [Termius SSH Client] → [Tailscale VPN] → [Development Machine] → [Claude Code]
Tailscale provides the VPN layer using WireGuard protocol for encrypted peer-to-peer connections, eliminating complex network configuration. Termius functions as the SSH client, offering cross-platform terminal emulation with advanced features like command snippets and session management.
Prerequisites
Before beginning implementation, ensure the following components:
- Development machine running macOS, Linux, or Windows with SSH server capabilities
- Mobile device (iOS or Android) with internet connectivity
- Active Claude Code installation on development machine
- Claude Max subscription recommended for avoiding API charges
- Administrative access to development machine for SSH configuration
Step 1: Development Machine Preparation
Installing and Configuring Claude Code
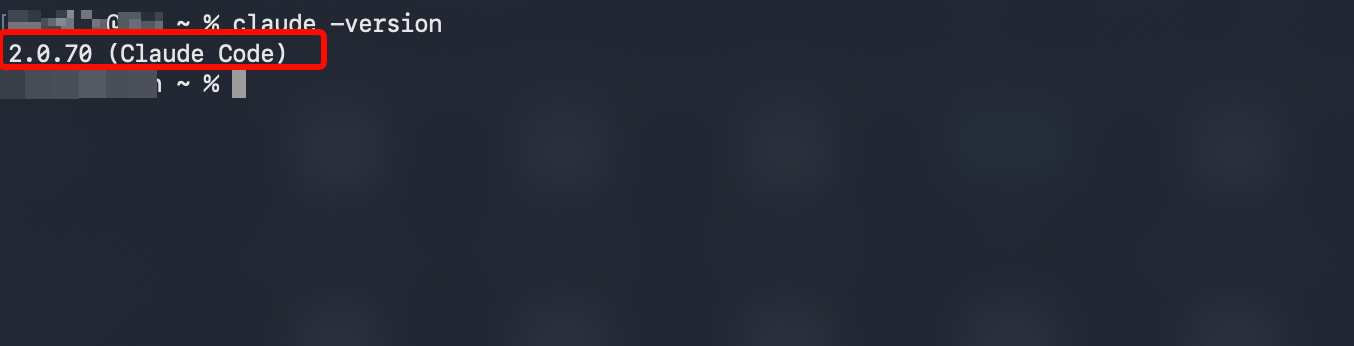
First, verify Claude Code installation on your development machine. Open your terminal and execute:
# Verify Claude Code installation
claude --version

# If not installed, install via npm
npm install -g @anthropic-ai/claude-cli

# Authenticate with Anthropic
claude login
Enabling SSH Server (macOS)
macOS users must enable Remote Login through System Settings:
- Navigate to System Settings → General → Sharing
- Toggle "Remote Login" to enabled state
- Click the information icon (ℹ️) adjacent to Remote Login
- Configure user access permissions
- Note the SSH access format displayed (typically
ssh username@hostname.local)
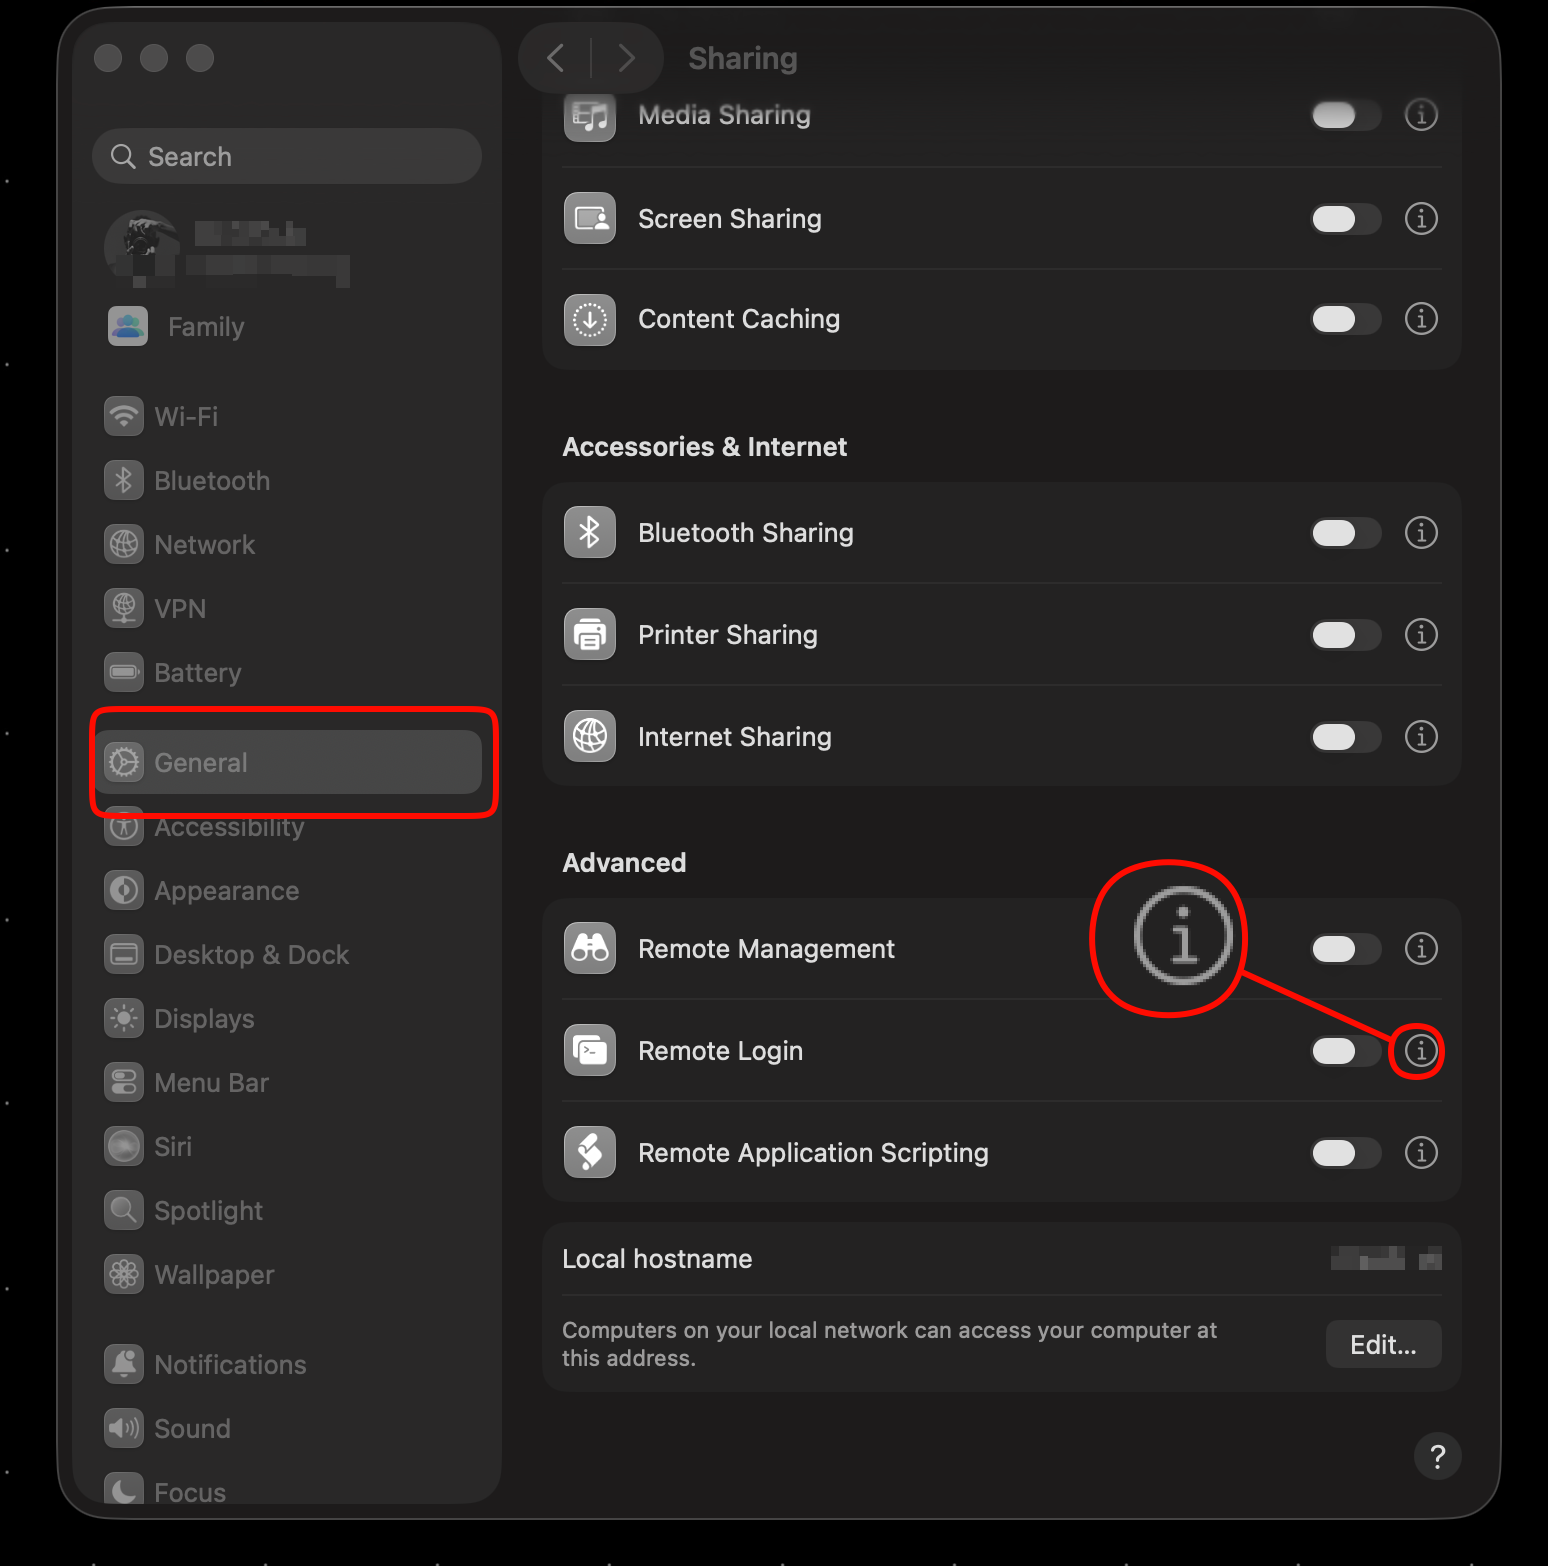
The system displays your username and local hostname for SSH connection strings. Record these credentials for subsequent configuration steps.
Enabling SSH Server (Linux)
Linux distributions typically require OpenSSH server installation:
# Ubuntu/Debian systems
sudo apt update
sudo apt install openssh-server

# Verify SSH service status
sudo systemctl status ssh

# Enable SSH service at boot
sudo systemctl enable ssh

# Start SSH service
sudo systemctl start ssh
Configure firewall rules to permit SSH traffic:
# UFW firewall (Ubuntu/Debian)
sudo ufw allow ssh
sudo ufw enable
Enabling SSH Server (Windows)
Windows 10/11 includes OpenSSH Server as an optional feature:
- Open Settings → Apps → Optional Features
- Select "Add a feature"
- Locate and install "OpenSSH Server"
- Open Services (services.msc)
- Configure OpenSSH SSH Server to start automatically
- Start the OpenSSH SSH Server service
Step 2: Tailscale VPN Configuration
Installing Tailscale on Development Machine
Navigate to tailscale.com and create an account using your preferred authentication provider (Google, Microsoft, GitHub).
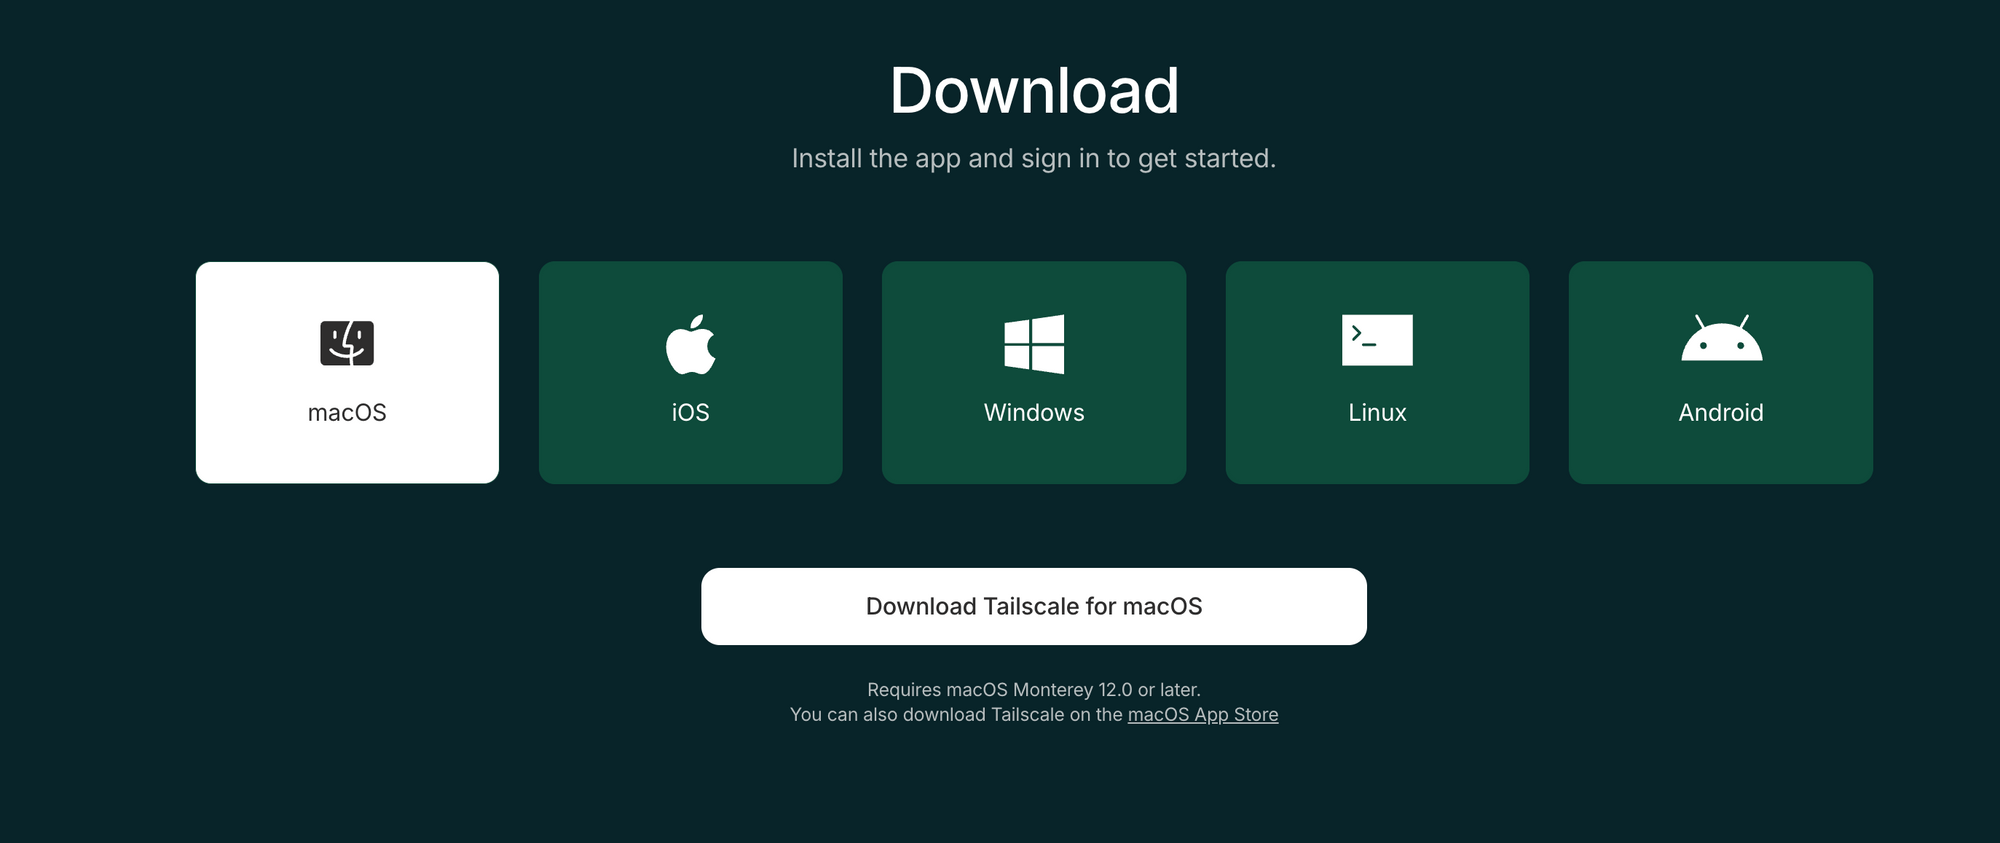
Download and install the Tailscale client for your operating system:
After installation, authenticate Tailscale with your account credentials. The application generates a unique Tailscale IP address (typically in the 100.x.x.x range) for your machine.
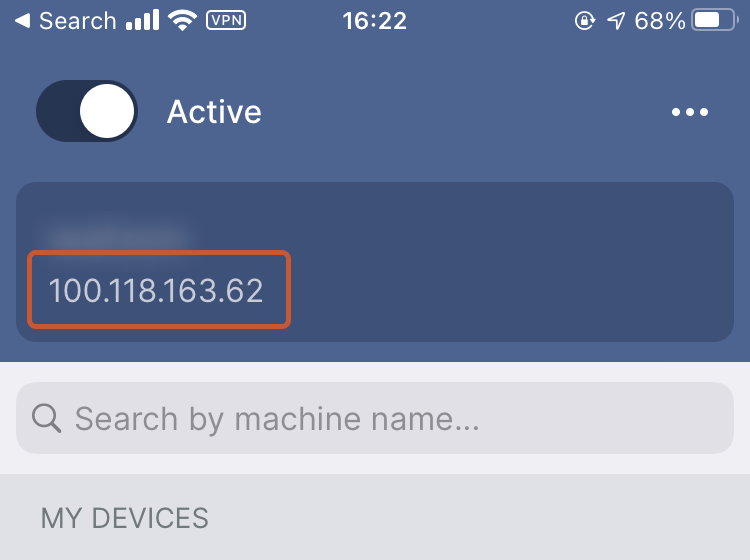
Record your Tailscale IP address or Magic DNS hostname (format: hostname.tailnet-xxx.ts.net). This identifier enables connection from mobile devices.
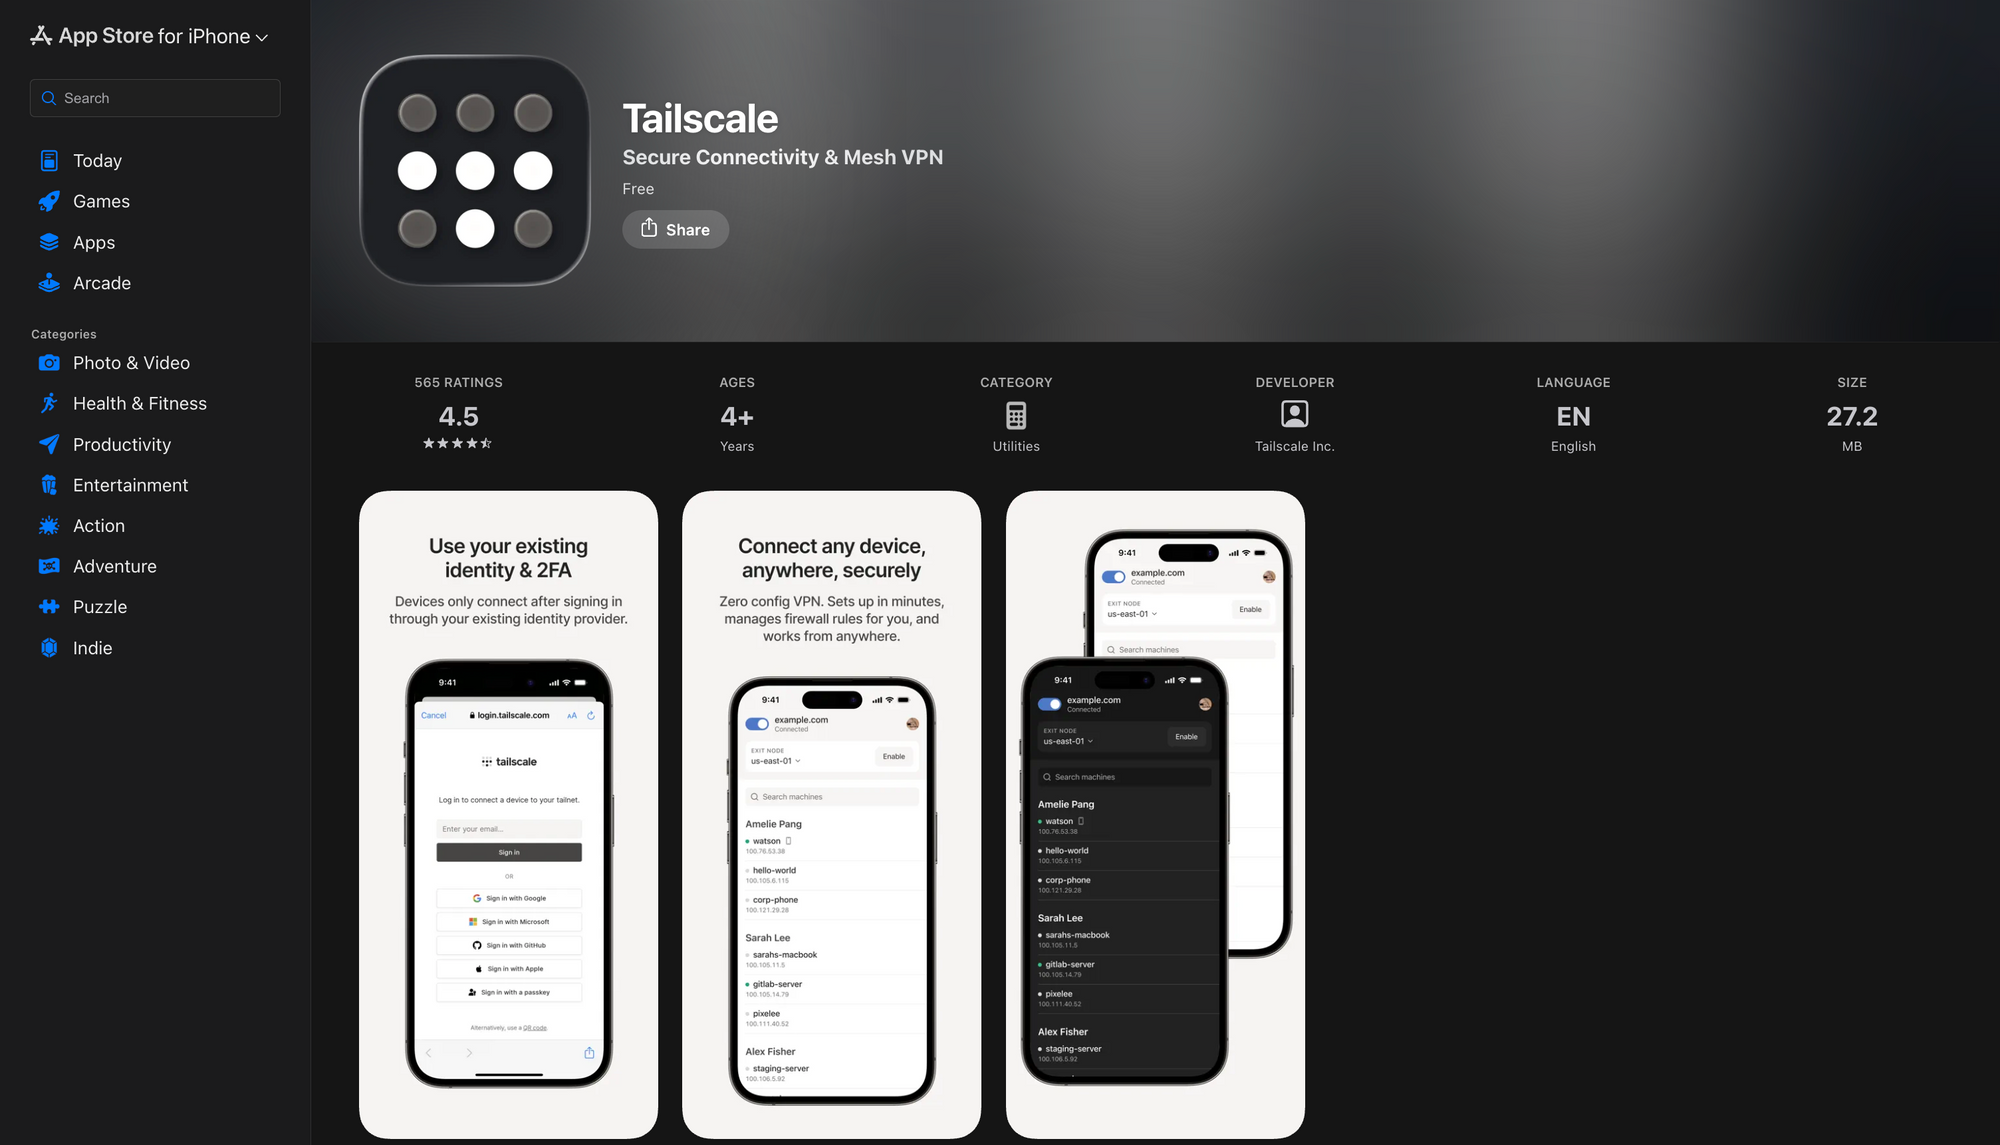
Installing Tailscale on Mobile Device
iOS Installation:
- Open App Store
- Search "Tailscale"
- Install the official Tailscale application
- Launch and authenticate using your Tailscale account
- Enable VPN connection when prompted
Android Installation:
- Open Google Play Store
- Search "Tailscale"
- Install the official Tailscale application
- Launch and authenticate using your Tailscale account
- Grant VPN permissions when requested
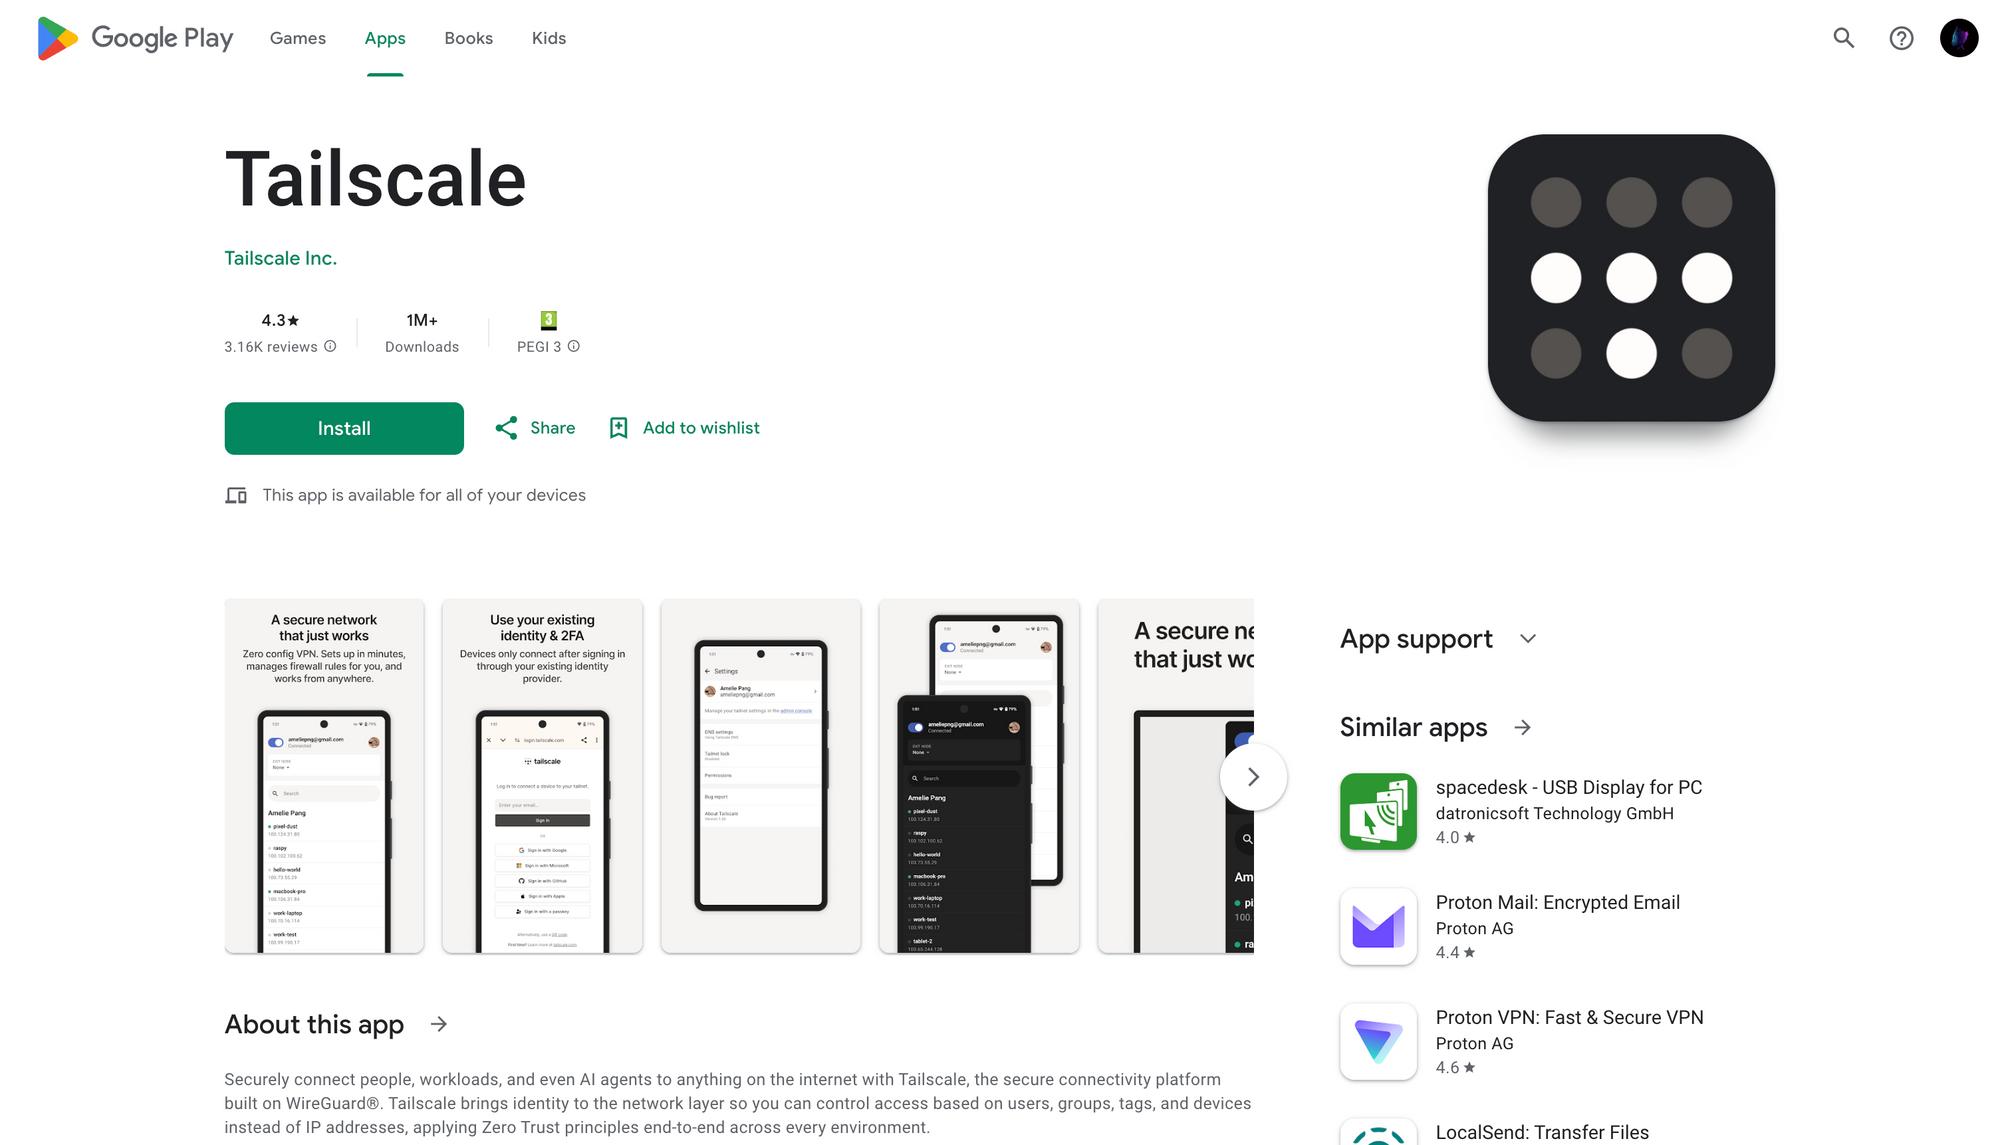
Verify successful VPN establishment by confirming your development machine appears in the peer list on your mobile device.
Step 3: Termius SSH Client Configuration
Installing Termius
iOS:Navigate to App Store, search "Termius", and install the application. Termius offers free tier functionality sufficient for basic SSH operations.
Android:Navigate to Google Play Store, search "Termius", and install the application.

Configuring SSH Connection
Launch Termius and configure a new SSH host:
- Tap the "+" icon to create new host
- Configure connection parameters:
- Label: Descriptive name (e.g., "Development Mac")
- Address: Tailscale IP address (100.x.x.x) or Magic DNS hostname
- Port: 22 (default SSH port)
- Username: Your development machine username
- Authentication: Password or SSH key
- Save the configuration
- Test connection by tapping the host entry
Upon successful connection, Termius displays your development machine's terminal interface. Navigate to your project directory and launch Claude Code:
# Navigate to project
cd ~/projects/your-project

# Launch Claude Code
claude
Step 4: Optimizing Mobile Usage
Preventing System Sleep
Remote SSH connections terminate when the development machine enters sleep mode. Implement sleep prevention strategies:
macOS:
# Prevent sleep indefinitely
caffeinate -d

# Prevent sleep with display off
caffeinate -s
Configure macOS to prevent automatic sleep through System Settings → Battery → Prevent automatic sleeping on power adapter.
Linux:
# Prevent system suspension
systemctl mask sleep.target suspend.target

# Or use caffeine utility
sudo apt install caffeine
Windows:Adjust Power & Sleep settings to "Never" for both plugged-in and battery scenarios.
Creating Command Snippets
Termius supports command snippet storage for frequently executed operations. Create snippets for common Claude Code workflows:
- Open Termius settings
- Navigate to Snippets section
- Create new snippet with label and command
- Example snippets:
claude→ Launch Claude Code in current directorycd ~/projects/app && claude→ Navigate and launch specific projectclaude --resume→ Resume previous Claude Code session
Snippets reduce mobile keyboard input requirements, significantly improving workflow efficiency.
Managing Multiple Sessions
Termius permits multiple simultaneous SSH connections, enabling parallel Claude Code instances across different projects. Create new terminals by:
- Tap the "+" icon in active session
- Select your configured host
- Launch Claude Code in different project directory
This capability supports context switching between multiple development efforts without terminating active sessions.
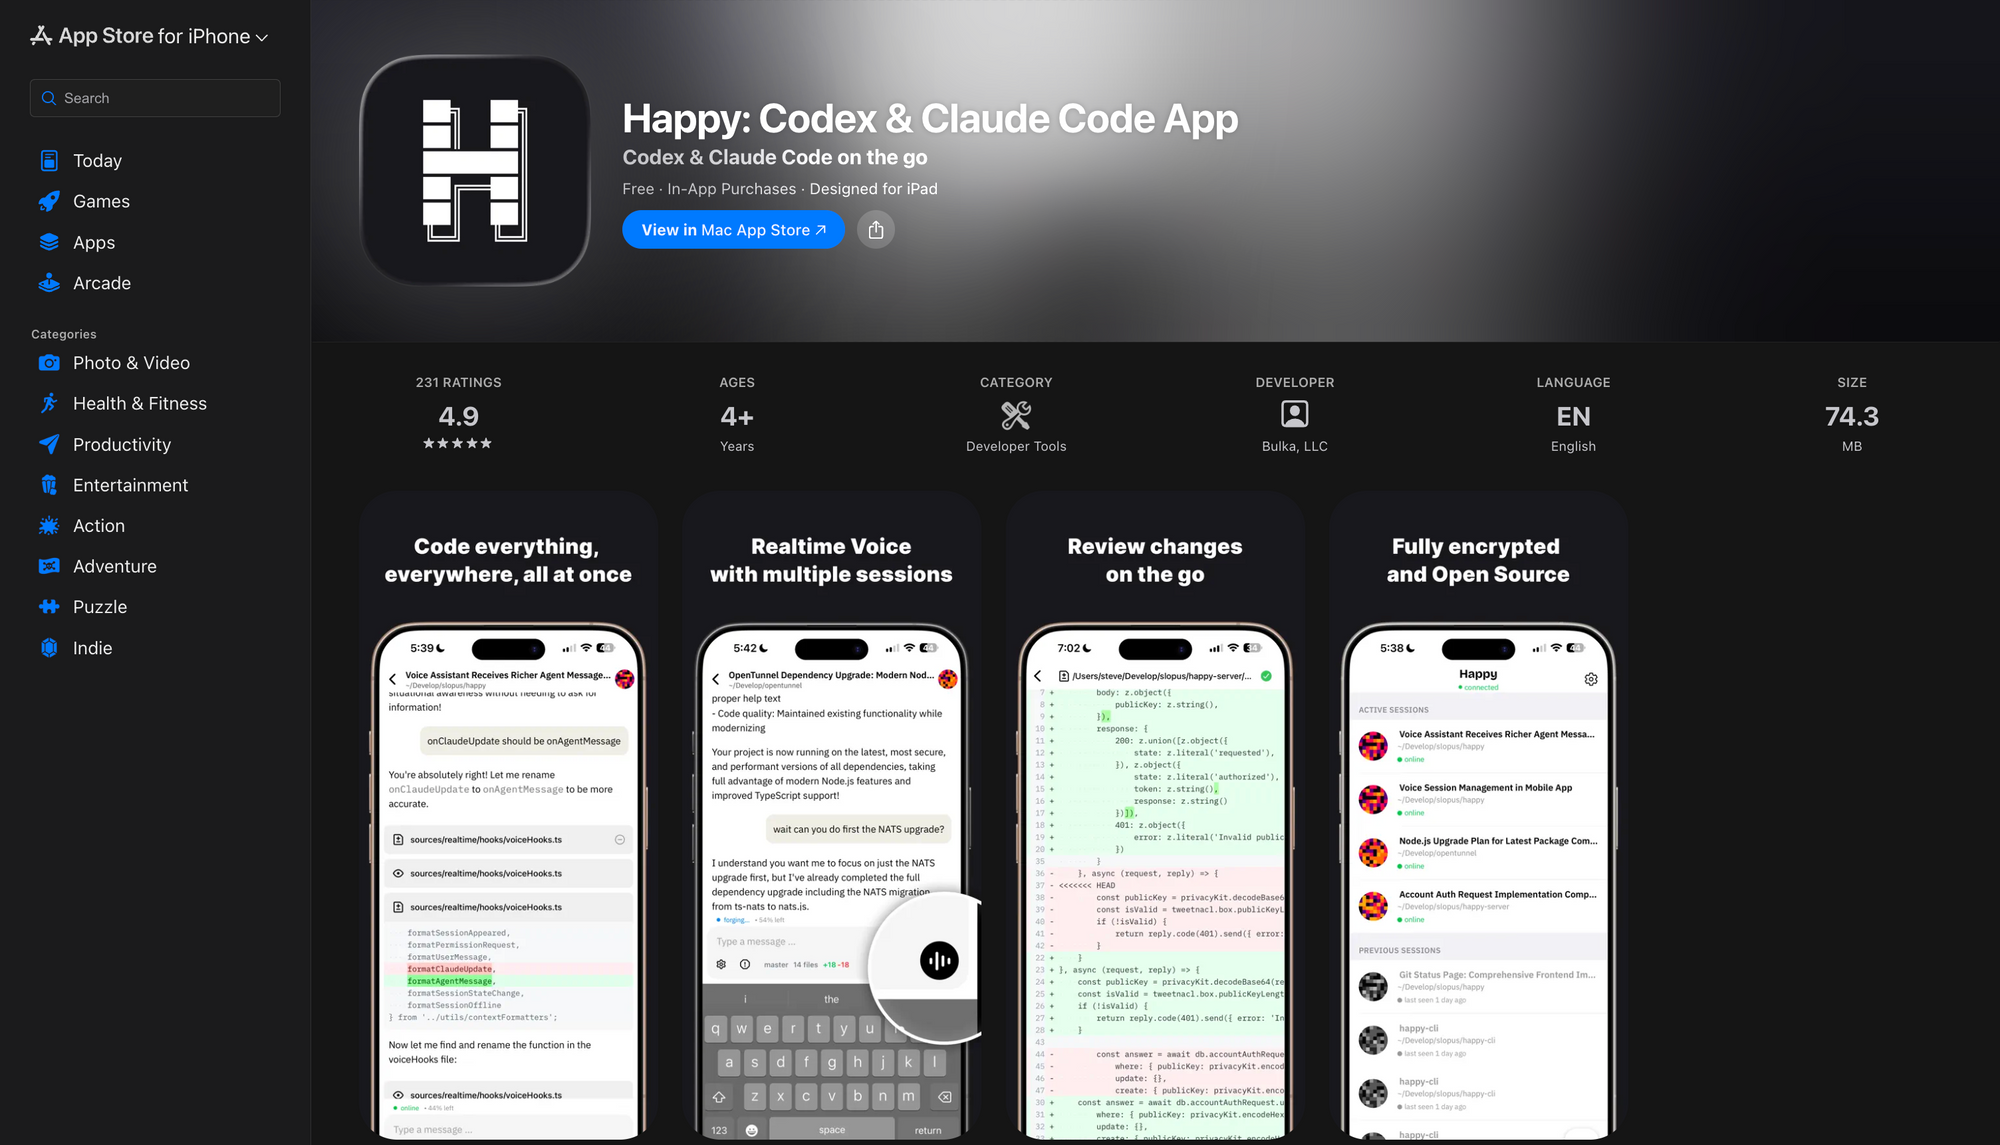
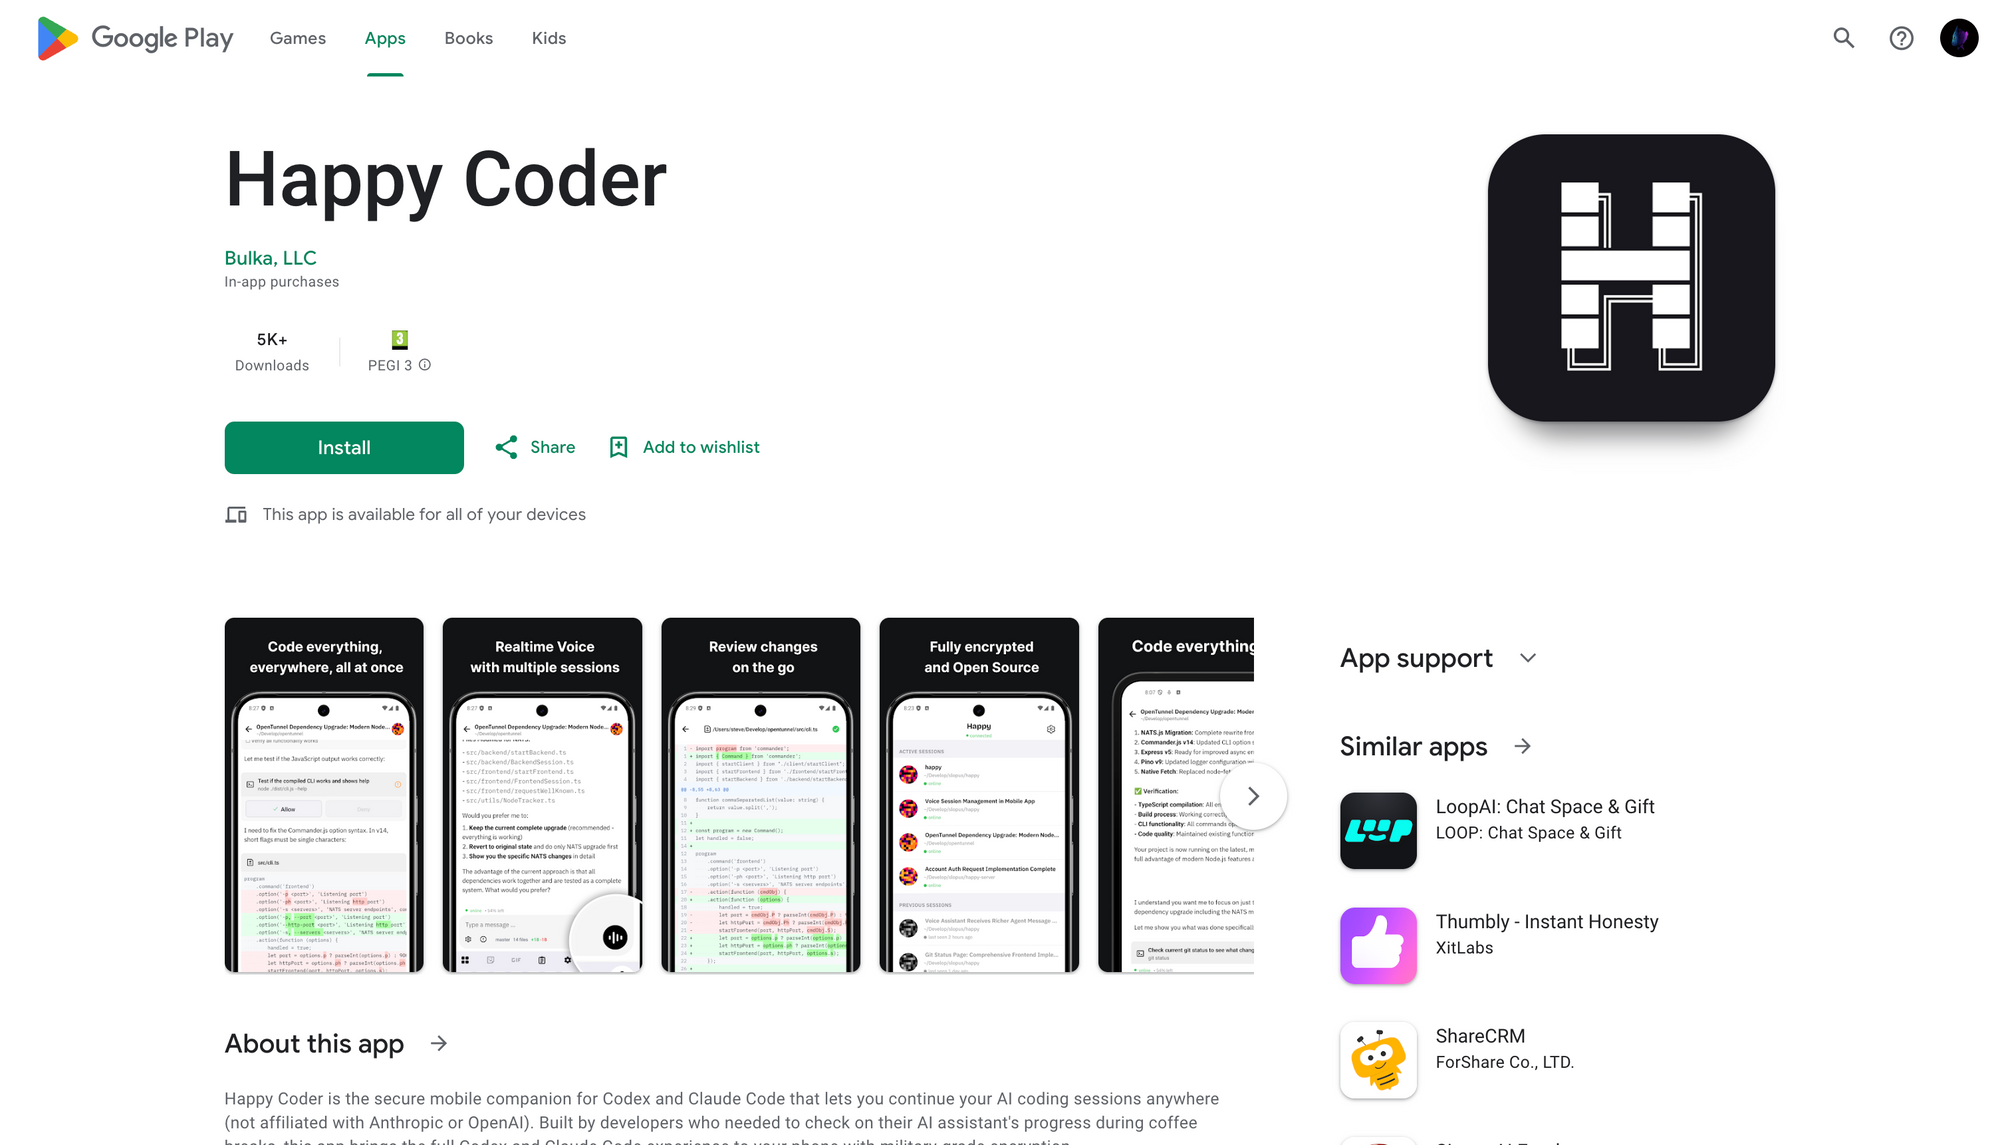
Method 2: Happy Coder - Open Source Mobile Client
Happy Coder implements a dedicated client-server architecture specifically designed for Claude Code mobile access. Unlike SSH tunneling, this approach separates the execution environment from the user interface, providing native mobile experiences.
Architecture Overview
Happy Coder operates through three distinct components:
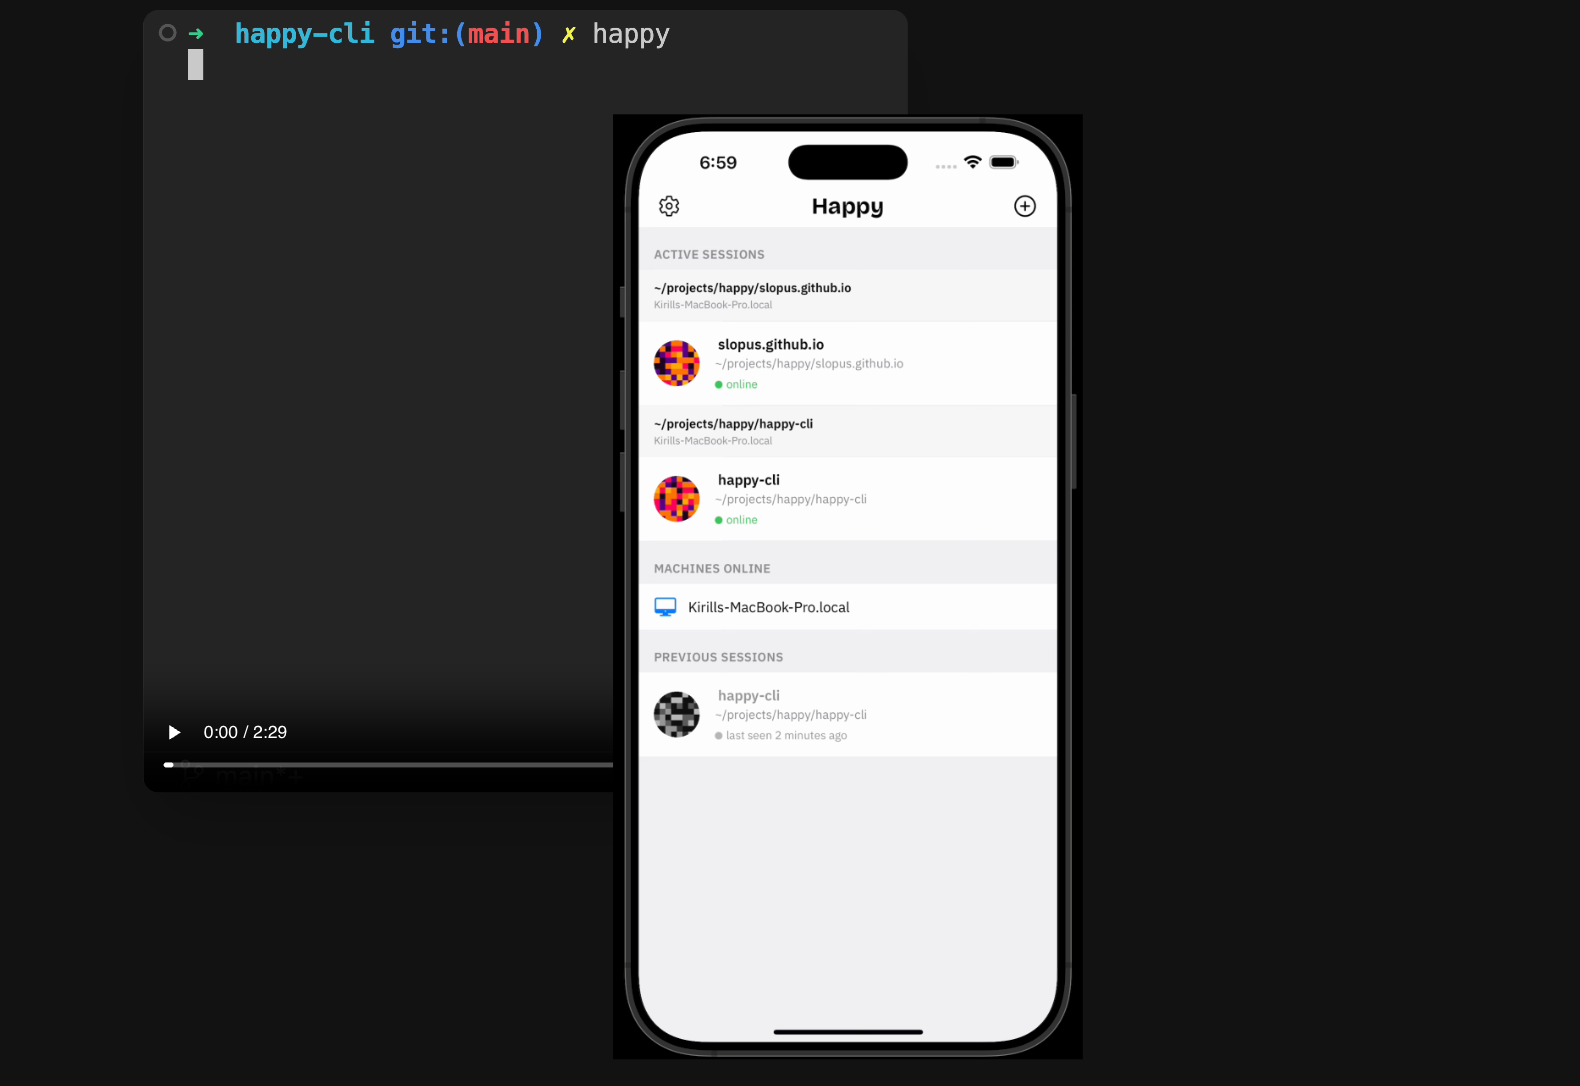
[Mobile App] ← [Encrypted Messages] → [Relay Server] ← [Encrypted Messages] → [CLI Program] → [Claude Code]
CLI Program (happy): Executes on your development machine, manages Claude Code sessions, captures stdout/stderr, and transmits encrypted data to relay server.
Relay Server: Cloud-based message broker that routes encrypted data between CLI program and mobile clients without decryption capabilities.
Mobile App: Native iOS/Android applications that receive encrypted session data, render terminal output, and transmit user input back through relay server.
The architecture implements end-to-end encryption where only the CLI program and mobile app possess decryption keys. The relay server handles opaque encrypted blobs, ensuring data confidentiality.
Prerequisites
- Node.js 18+ installed on development machine
- Active Claude Code installation
- iOS device running iOS 15+ or Android device running Android 8+
- Claude subscription (Pro or Max) or API access
- Internet connection on both development machine and mobile device
Step 1: Installing Happy Coder CLI
Connect to your development machine terminal and install the Happy Coder CLI globally via npm:
# Install Happy Coder CLI
npm install -g happy-coder

# Verify installation
happy --version
The installation places the happy command in your system PATH, enabling execution from any directory.
Step 2: Initializing Happy Coder Session
Navigate to your project directory and launch Happy Coder:
# Change to project directory
cd ~/projects/your-application

# Launch Happy Coder
happy
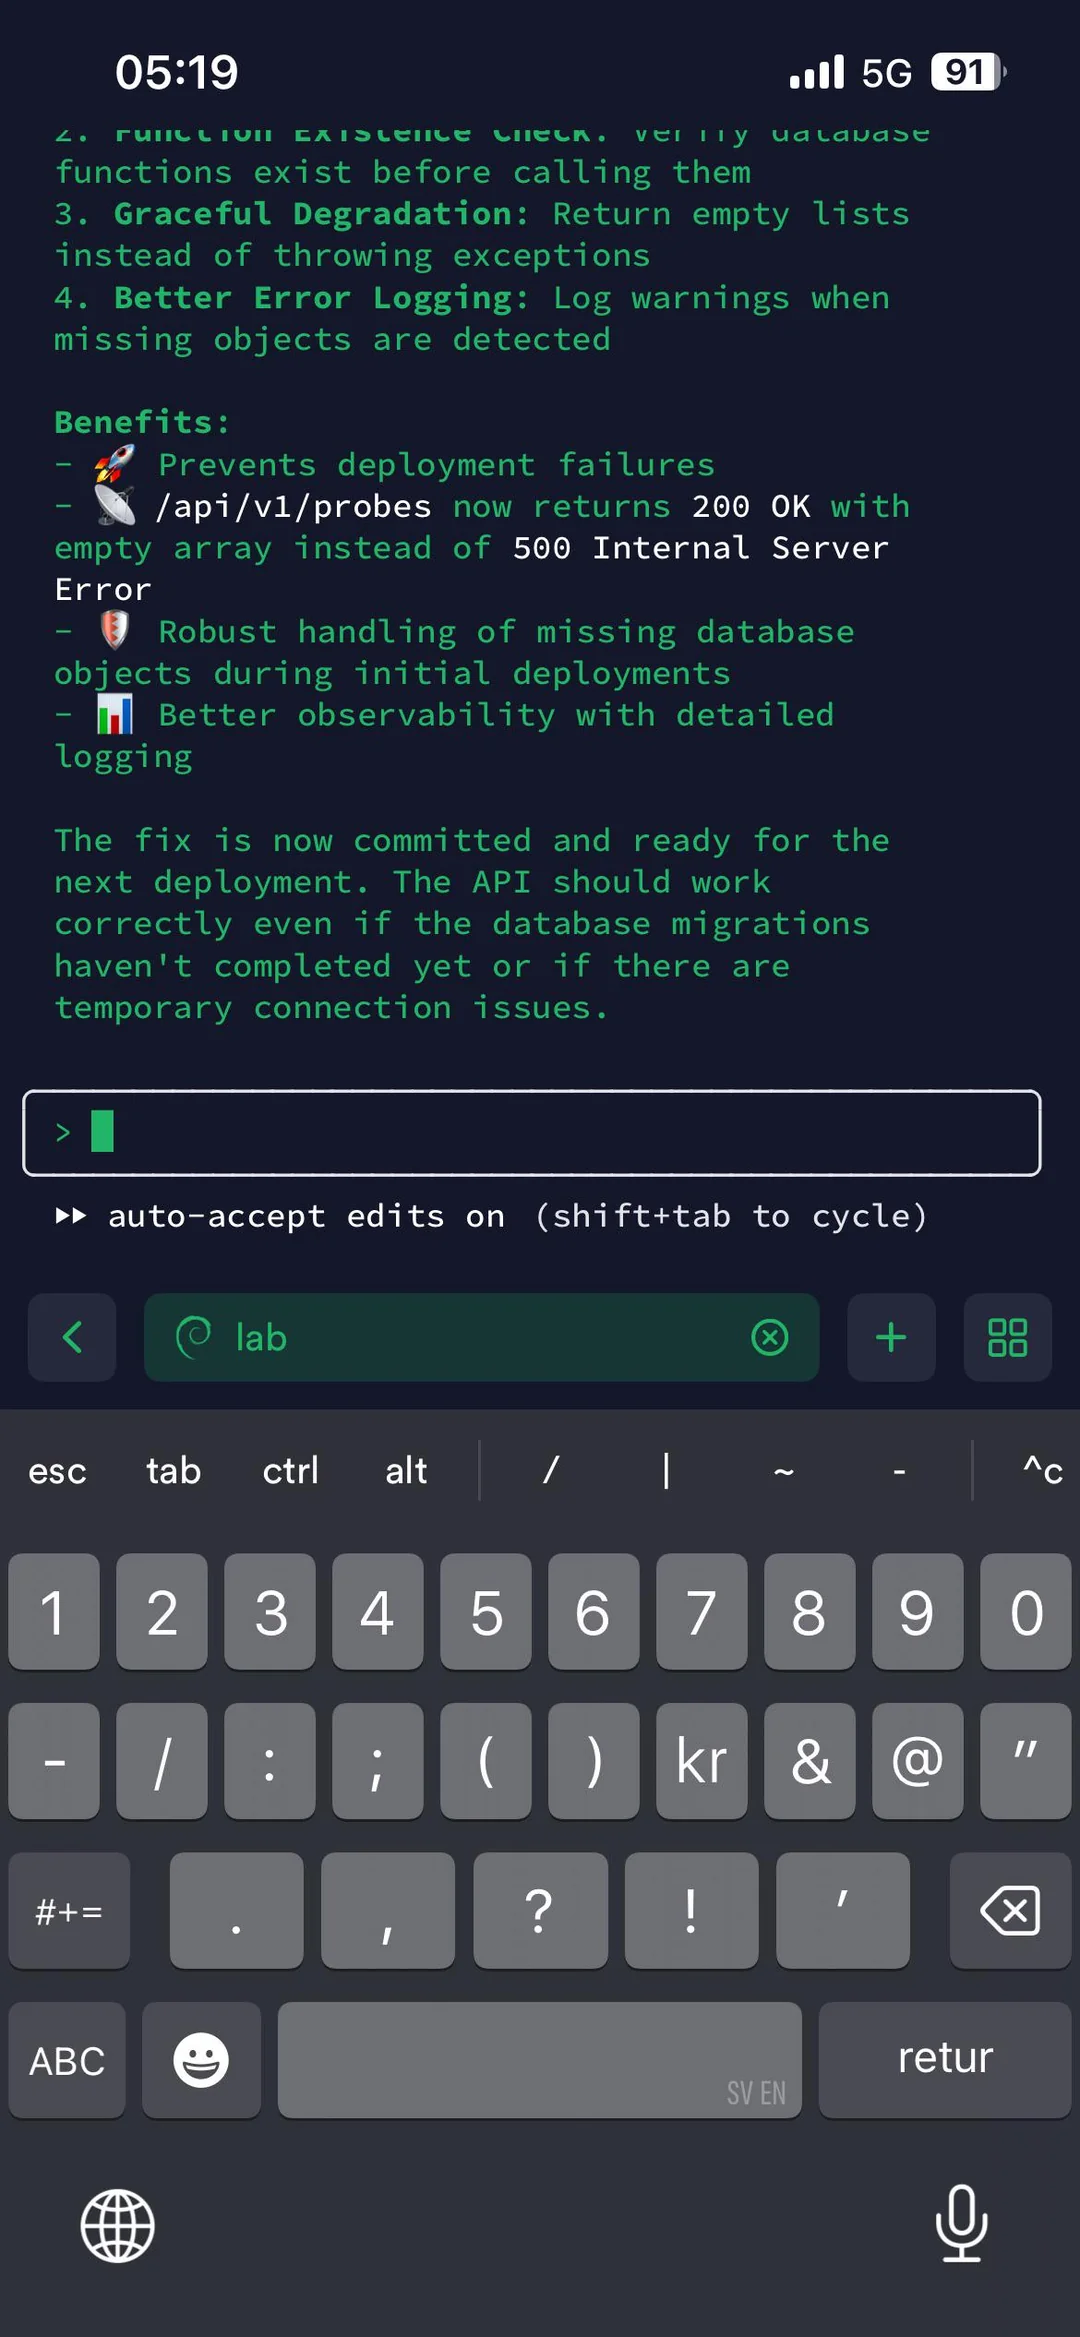
Upon first execution, Happy Coder initiates the following sequence:
- Claude Code authentication: If not previously authenticated, Claude prompts for Anthropic credentials
- Encryption key generation: Happy generates a unique encryption key pair for the session
- QR code display: Terminal displays a QR code containing connection credentials and encryption key
The QR code encapsulates:
- Relay server endpoint URL
- Session identifier
- Client-side encryption key
- Connection timestamp
Step 3: Mobile App Installation and Connection
iOS Installation
- Open App Store on your iOS device
- Search "Happy Coder" or "Happy Claude Code Client"
- Install the official Happy application
- Launch the application after installation
Android Installation
- Open Google Play Store on your Android device
- Search "Happy Coder" or "Happy Claude Code"
- Install the official Happy application
- Launch the application after installation
Establishing Connection
Within the mobile application:
- Tap "New Session" or "Scan QR Code"
- Point device camera at terminal QR code
- Application automatically extracts connection parameters
- Connection establishes within 2-3 seconds
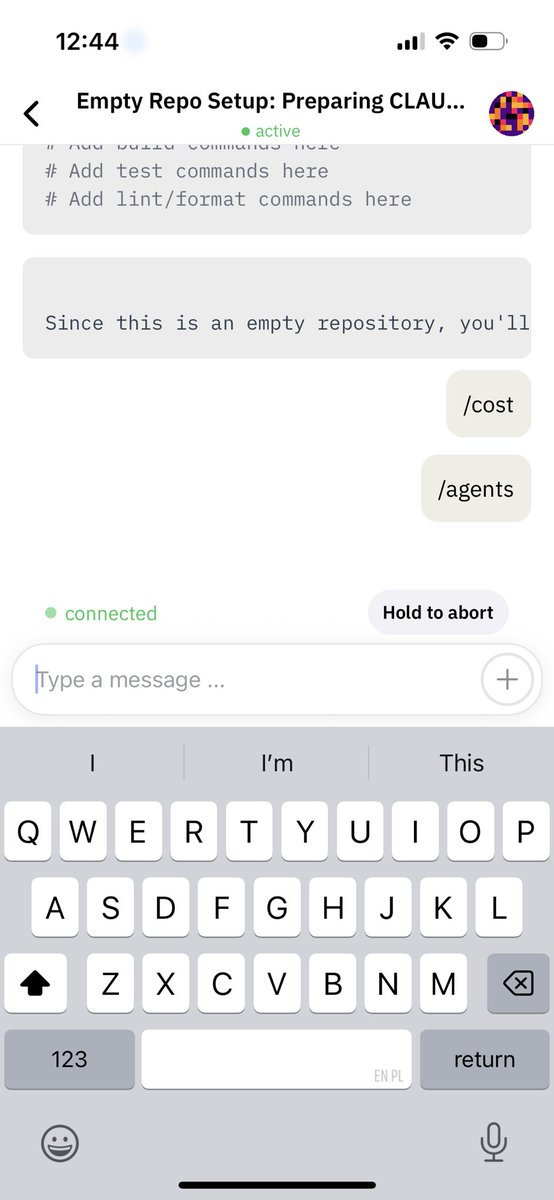
After successful connection, the mobile application displays your Claude Code session with full interaction capabilities.
Step 4: Using Happy Coder Features
Real-Time Synchronization
Happy Coder maintains bidirectional real-time synchronization between CLI and mobile clients. Terminal output appears on mobile devices within milliseconds, and mobile input transmits instantly to CLI program.
Voice Coding Integration
Happy Coder implements voice-to-action capabilities beyond simple transcription:
- Tap the microphone icon in mobile interface
- Speak your coding instruction or command
- Happy processes speech and executes corresponding Claude Code operation
- Results display in real-time on mobile device
Example voice commands:
- "Create a new React component for user authentication"
- "Add error handling to the API endpoint"
- "Run the test suite and fix any failures"
Voice coding proves particularly effective for hands-free scenarios like commuting or physical activities.
Parallel Task Management
Happy Coder supports multiple concurrent Claude Code sessions across different projects:
- Launch additional
happyinstances in separate terminal windows/tabs - Each instance generates unique QR code
- Scan additional QR codes from mobile app
- Switch between sessions using mobile interface tabs
This capability enables context switching between frontend, backend, and DevOps tasks without losing session state.
Step 5: Advanced Configuration
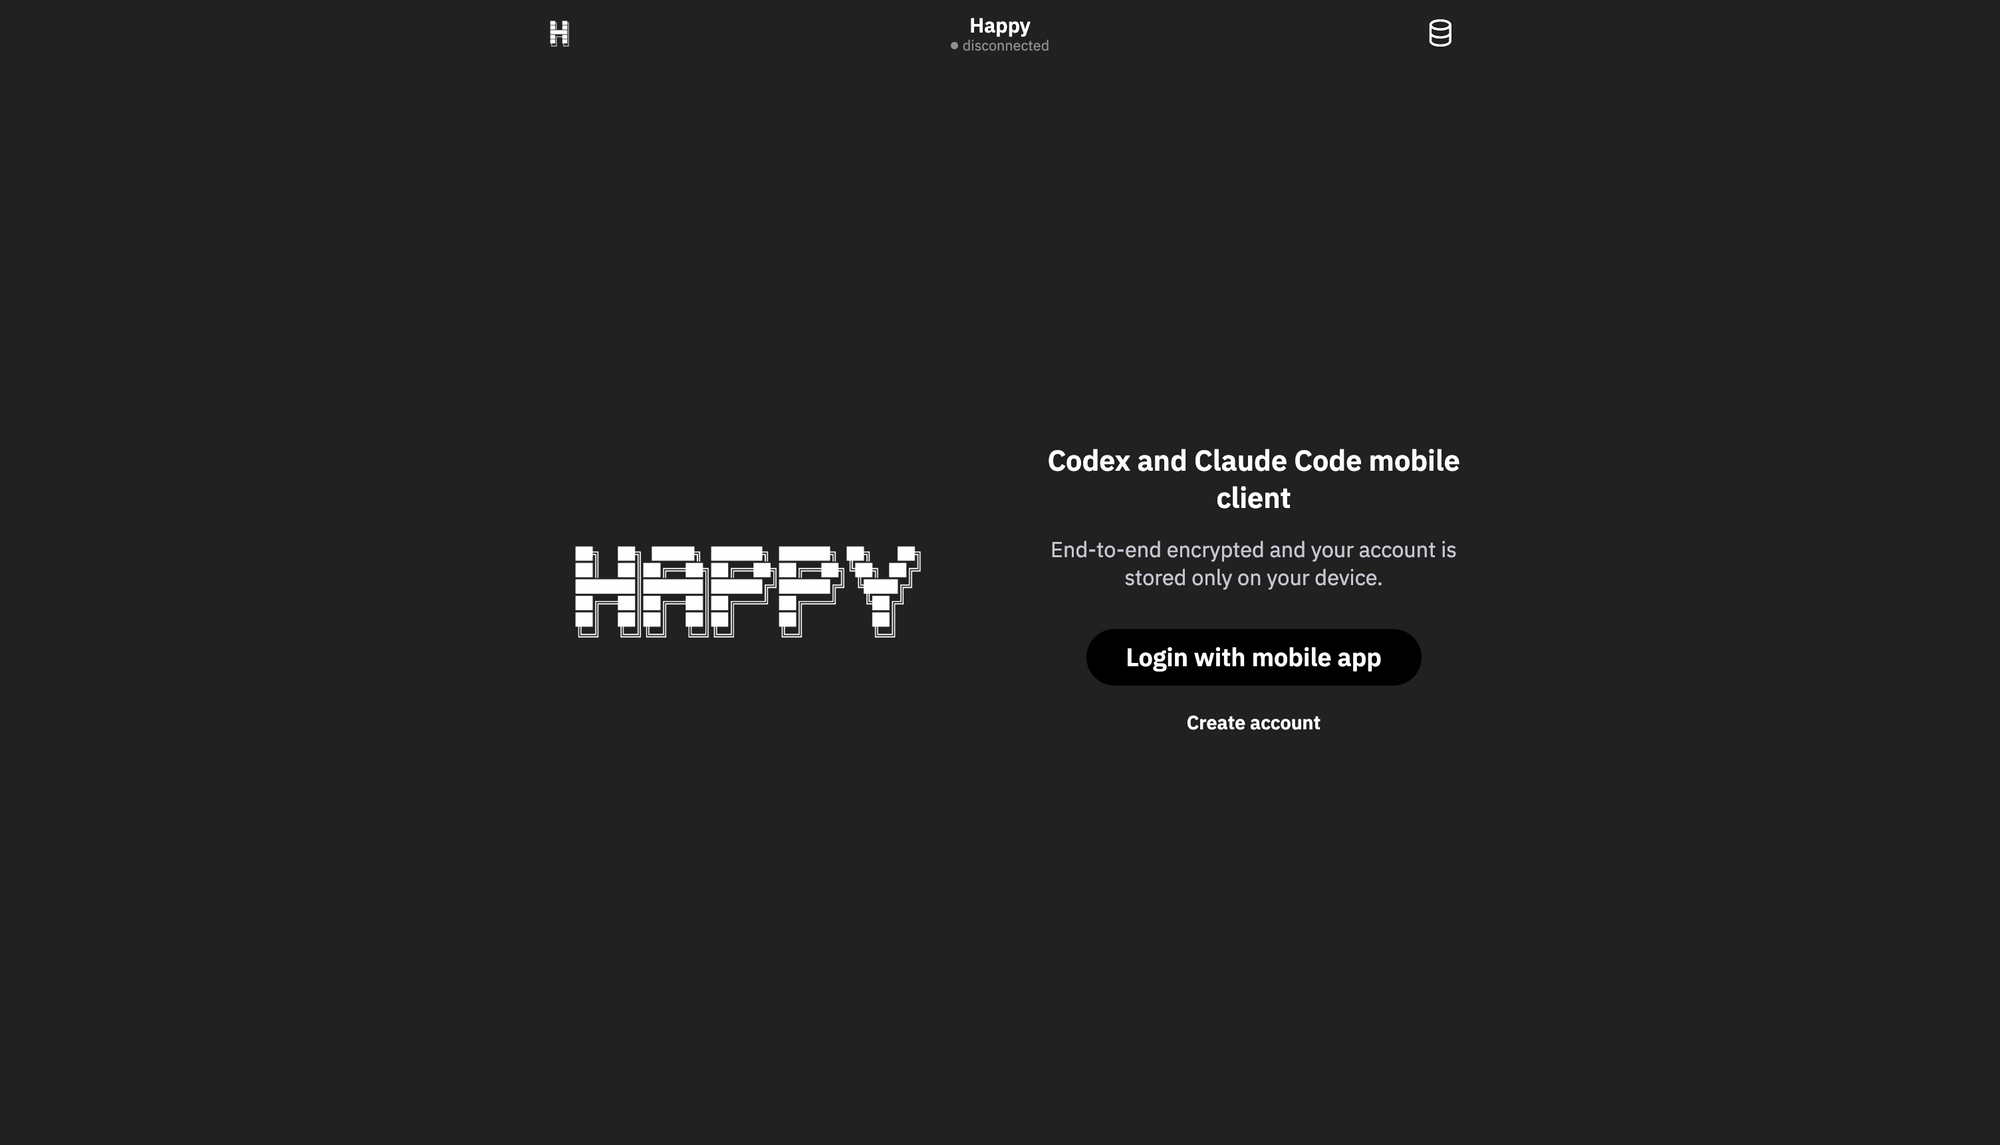
Web Interface Access
Happy Coder provides a web-based interface alternative to mobile apps:
- While CLI program runs, note the displayed local URL (typically
http://localhost:8080) - Open web browser on any device connected to same network
- Navigate to the displayed URL
- Interface mirrors mobile app functionality with larger screen real estate
For remote web access:
- Visit app.happy.engineering
- Enter your session ID from CLI output
- Paste encryption key (found in terminal output)
- Click "Connect"
Method 3: Claude Central - Multi-Project Dashboard
Claude Central provides comprehensive session management and history tracking across multiple Claude Code projects simultaneously. While not exclusively mobile-focused, Claude Central's real-time monitoring capabilities enable mobile oversight of active development sessions.
Architecture Overview
Claude Central implements a local web server that analyzes Claude Code history files and monitors active sessions:
[Claude Code Sessions] → [History Files] → [Analyzer Script] → [Web Dashboard] → [Mobile Browser]
History Analyzer: Python script that parses ~/.claude/history.jsonl and project session files to reconstruct development timeline.
Live Monitor: Real-time session tracker that polls active Claude Code instances across all projects.
Web Dashboard: Responsive web interface accessible from any device with browser support.
AI-Enhanced Summaries: Optional integration with Claude API for generating daily activity summaries and CLAUDE.md suggestions.
Prerequisites
- Python 3.9 or later installed
- Active Claude Code usage with existing history
- Multiple projects for optimal benefit
- Optional: Anthropic API key for enhanced summaries
- Git repositories recommended for commit linking
Step 1: Installing Claude Central
Clone the Claude Central repository and install dependencies:
# Clone repository
git clone https://github.com/eranshir/claude-central.git
cd claude-central

# Install Python dependencies
pip install anthropic

# Verify installation
python3 claude_history_analyzer.py --help
Step 2: Configuring API Access (Optional)
For enhanced AI-powered summaries and CLAUDE.md suggestions:
# Copy environment template
cp .env.example .env

# Edit .env file
nano .env

# Add your Anthropic API key
ANTHROPIC_API_KEY=sk-ant-your-api-key-here
Without API key configuration, Claude Central uses built-in summaries extracted from Claude Code's native session summaries. API access enables daily overview generation and personalized coding pattern analysis.
Step 3: Generating Initial History Analysis
Execute the analyzer to process your Claude Code history:
# Full analysis with AI summaries (requires API key)
python3 claude_history_analyzer.py

# Quick analysis without API calls
python3 claude_history_analyzer.py --no-api

# Force complete refresh
python3 claude_history_analyzer.py --force-refresh
The analyzer performs the following operations:
- History File Discovery: Scans
~/.claude/history.jsonland~/.claude/projects/directories - Session Grouping: Organizes sessions by project and date
- Git Integration: Links sessions to commit history within timeframes
- Beads Discovery: Identifies issue tracker entries in projects
- Summary Generation: Creates daily overviews using Claude API (if configured)
- Output Creation: Generates
history_data.jsonfor web dashboard
Initial analysis duration varies with history volume. Expect 1-3 minutes for typical multi-project histories. Subsequent incremental updates complete within seconds.
Step 4: Starting Web Server
Launch the web server to access the dashboard:
# Start server with API support for saving suggestions
python3 server.py

# Server starts on port 9347
Open your web browser and navigate to http://localhost:9347. The dashboard displays your complete Claude Code activity across all projects.
Step 5: Mobile Dashboard Access
Local Network Access
Access the dashboard from mobile devices on your local network:
Identify your development machine's local IP address:
# macOS/Linux
ifconfig | grep "inet "

# Or use Tailscale IP for VPN access
tailscale ip
On your mobile device browser, navigate to:
http://[your-ip-address]:9347
Remote Access via Tailscale
For secure remote access, combine Claude Central with Tailscale VPN:
- Ensure Tailscale runs on development machine
- Install Tailscale on mobile device
- Connect mobile device to Tailscale network
- Navigate to
http://[tailscale-ip]:9347
This configuration provides secure dashboard access from any location without exposing the web server to public internet.
Step 6: Using Dashboard Features
Project Overview
The main dashboard displays all projects sorted by recent activity:
Each project card reveals:
- Total session count
- Active day count
- Most recent session timestamp
- Git tag indicators
- Quick link to project directory
Session Timeline
Select a project to view detailed session timeline:
Sessions display:
- Start and end timestamps
- Message count
- AI-generated summary bullets
- Expandable full conversation transcript
- Linked git commits within session timeframe
Live Monitor
The Live Monitor tab provides real-time visibility into active Claude Code sessions:
Status indicators classify session states:
- Needs Approval (orange): Claude awaits tool execution approval (Bash, Write, Edit operations)
- Question (orange): Claude requested clarification or decision
- Processing (blue): Claude actively generates response or executes tools
- Ready (green): Task completion, awaiting next instruction
- Idle (gray): No activity for 5+ minutes
Configurable Alerts
Configure alert behavior in Live Monitor settings:
Settings include:
- Waiting Delay: Duration before triggering alerts (default: 20 seconds)
- Sound Notifications: Audio alert on prolonged waiting
- Volume Control: Alert volume adjustment
- Browser Notifications: System-level notifications for background tabs
Alert behavior: System only notifies when sessions remain in "Needs Approval" or "Question" states beyond configured delay. "Ready" state completion does not trigger alerts, preventing notification spam.
Terminal Window Control (macOS)
On macOS development machines, Live Monitor enables direct terminal window focusing:
Click "Jump" button to:
- Instantly focus the Terminal window containing that project's Claude Code session
- Works across macOS Spaces and full-screen windows
- Uses Terminal's Window menu for Space-aware switching
This feature requires macOS Terminal and uses AppleScript for window management. Linux and Windows support remains unavailable due to platform-specific window management differences.
Search Functionality
Global search operates across all projects and sessions:
Search supports:
- Session summaries and descriptions
- User prompts and questions
- Claude responses and code snippets
- Project names and paths
- Date range filtering
CLAUDE.md Suggestions
The Suggestions tab displays AI-generated recommendations for your ~/.claude/CLAUDE.md file:
Each suggestion provides:
- Instruction Text: Ready-to-use CLAUDE.md directive
- Rationale: Explanation of why this helps based on your patterns
- Add Button: One-click integration to CLAUDE.md file
Suggestions derive from analyzing:
- Common coding patterns across projects
- Repeated task types
- Tool usage frequency
- Project technology stacks
Step 7: Automated Updates
Configure automatic history updates using cron:
# Edit crontab
crontab -e

# Add hourly update (runs at top of each hour)
0 * * * * /path/to/claude-central/run_analyzer.sh

# Or update every 30 minutes
*/30 * * * * /path/to/claude-central/run_analyzer.sh
Create run_analyzer.sh script:
#!/bin/bash
cd /path/to/claude-central
python3 claude_history_analyzer.py
Make script executable:
chmod +x run_analyzer.sh
Automated updates ensure dashboard reflects current activity without manual intervention.
Integration with Development Workflows
Git Commit Linking
Claude Central automatically associates sessions with git commits when:
- Project contains valid git repository
- Commits occur within session timeframe
- Git history accessible from analyzer
Click commit links to view full commit details in your git hosting platform.
Beads Issue Tracking
If projects use Beads issue tracker:
Dashboard displays:
- Open issues by type (bug/feature/task)
- Closed issues with resolution reasons
- Issue-to-session correlation
Comparative Analysis: Choosing the Right Method
Selecting the optimal Claude Code mobile access method depends on specific requirements, infrastructure, and workflow patterns.
Method Comparison Matrix
| Criterion | SSH Tunneling | Happy Coder | Claude Central |
|---|---|---|---|
| Setup Complexity | Medium | Low | Medium |
| Mobile Experience | Terminal emulation | Native apps | Web dashboard |
| Real-time Interaction | Full terminal access | Full interaction + voice | Monitoring + occasional input |
| Offline Capability | None | None | View cached history only |
| Additional Costs | None (subscription only) | None (subscription or API) | $0-50/month for AI features |
| Multiple Projects | Manual switching | Manual switching | Unified dashboard |
| Security | VPN + SSH | E2E encryption + relay | Local-only |
| Platform Support | iOS/Android | iOS/Android/Web | Any modern browser |
| Power Requirements | Machine must run | Machine must run | Machine must run |
| Voice Coding | No | Yes | No |
| History Tracking | No | No | Yes |
Use Case Recommendations
Choose SSH Tunneling When:
- You require full terminal control and command flexibility
- Your infrastructure already includes VPN solutions
- Mobile usage focuses on occasional quick fixes
- Team members comfortable with terminal interfaces
- Budget constraints prevent additional tool adoption
Choose Happy Coder When:
- Mobile interaction represents primary development mode
- Voice coding capabilities enhance productivity
- Team requires native mobile app experiences
- Real-time synchronization proves critical
- Open source transparency matters for security compliance
Choose Claude Central When:
- Managing multiple concurrent projects
- Historical activity tracking provides value
- Team collaboration requires visibility into agent activities
- Monitoring long-running sessions from mobile devices
- AI-powered workflow insights enhance productivity
Hybrid Approaches
These methods complement rather than conflict. Consider combining:
SSH + Claude Central: Use SSH for active development, Claude Central for historical tracking and session monitoring.
Happy + Claude Central: Happy for mobile interaction, Claude Central for dashboard oversight and multi-project management.
All Three: SSH for emergency access, Happy for primary mobile work, Claude Central for analytics and history.
Advanced Integration with Apidog
Developers working with Claude Code frequently interact with REST APIs, GraphQL endpoints, and WebSocket connections during development. Apidog complements Claude Code mobile workflows by providing unified API testing environments accessible from any device.
Conclusion
Mobile development is no longer limited to viewing code; it now includes generating it. By leveraging these three technical pathways, you can extend the capabilities of Claude Code beyond the desktop.
- Choose Termius + Tailscale for a raw, unadulterated terminal experience that mirrors your desktop environment.
- Choose Happy Coder for a mobile-first UX that prioritizes voice input and unstable network conditions.
- Choose GitHub Actions for an asynchronous, cloud-native workflow that integrates seamlessly with your team's Git processes.
Regardless of the method you choose, the ability to architect software from anywhere is a powerful multiplier for your productivity. Ensure your new mobile workflow includes robust testing by integrating Apidog to validate every endpoint Claude creates, guaranteeing that your code works as well in production as it does in the terminal.


