If you’ve ever tested a smartphone app without seeing its source code or surfed through a website wondering if the button you just pressed would actually work, then you’ve already performed Black Box Testing! You didn’t need to know how the developers built the feature and you only cared about whether it behaved correctly from the outside. That’s the essence of Black Box Testing, and it’s one of the most powerful approaches for finding real-world bugs.
Many testers treat Black Box Testing as “just clicking around,” but that view undersells its discipline and depth. When done right, it’s a systematic, methodical process that exposes defects hiding in business logic, user workflows, and edge cases that developers often miss. This guide will show you how to move from random clicking to professional-grade Black Box Testing that catches serious issues before your users do.
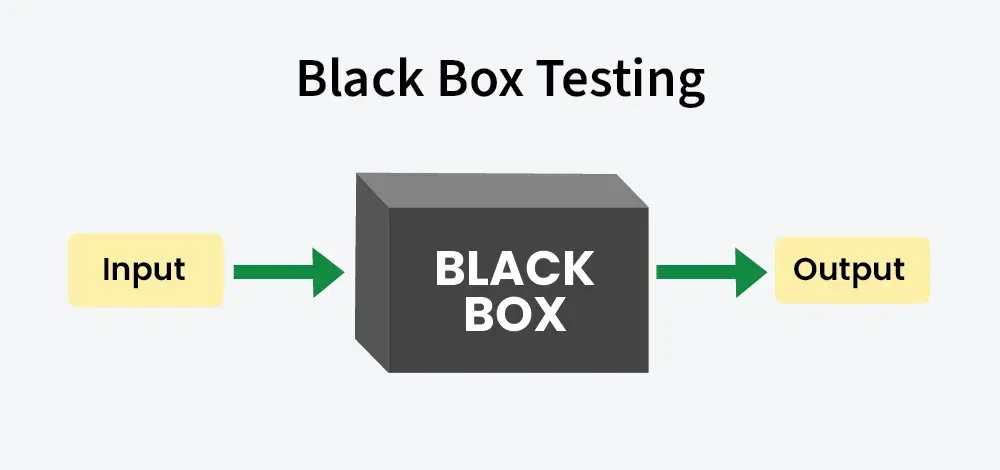
What is Black Box Testing and Why does It Still Matter?
Black Box Testing is a software testing method where you evaluate the functionality of an application without examining its internal code structure, implementation details, or internal pathways. The tester only knows what the software is supposed to do—not how it does it. The system is a “black box” where inputs go in and outputs come out, and your job is to verify those outputs match expectations.
This approach remains critical because it mirrors how users experience your product. Users don’t care if you used a clever algorithm or refactored your database layer. They care that clicking “Pay Now” processes their order correctly. Black Box Testing validates the user’s perspective, not the developer’s intent.
It also scales across skill levels. Manual testers, business analysts, and domain experts can contribute effectively without programming knowledge. Meanwhile, automation engineers build Black Box Testing scripts that simulate user behavior at scale. This dual nature makes it the backbone of most QA strategies.
The Five Core Techniques of Black Box Testing
Effective Black Box Testing isn’t random. It follows proven techniques that systematically expose defects. Here are the five you must master:
1. Equivalence Partitioning
Equivalence Partitioning divides input data into groups where all values should behave identically. Instead of testing every possible input, you test one representative from each group.
For example, if an age field accepts values 18-100, you create three partitions:
- Valid partition: 18 to 100 (test with 25)
- Invalid low partition: < 18 (test with 17)
- Invalid high partition: > 100 (test with 101)
This technique cuts testing effort by 80% while maintaining coverage. A bank testing loan applications uses Equivalence Partitioning to verify that credit scores in different ranges trigger the correct interest rates without testing every possible score.
2. Boundary Value Analysis
Boundaries are where bugs hide. Black Box Testing using Boundary Value Analysis focuses on values at the edges of equivalence partitions—minimum, maximum, just inside, and just outside.
Using the same age field (18-100), you’d test:
- Minimum valid: 18
- Just above minimum: 19
- Just below maximum: 99
- Maximum valid: 100
- Just below minimum: 17
- Just above maximum: 101
E-commerce systems often fail at boundary values—free shipping at orders over $100 breaks when someone orders exactly $100.00. This technique catches those embarrassing edge cases that frustrate users.
3. Decision Table Testing
When business rules involve multiple conditions, Decision Tables map combinations to expected outcomes. This technique prevents logic gaps in complex scenarios.
Consider a loan approval system with three conditions: credit score > 700, income > $50k, and existing debt < 30%. A Decision Table lists all combinations (2³ = 8) and defines whether each should be approved or denied. Black Box Testing using this method ensures no rule combination is overlooked.
| Credit Score >700 | Income >$50k | Debt <30% | Expected Result |
|---|---|---|---|
| Yes | Yes | Yes | Approve |
| Yes | Yes | No | Approve |
| Yes | No | Yes | Approve |
| Yes | No | No | Deny |
| No | Yes | Yes | Deny |
| No | Yes | No | Deny |
| No | No | Yes | Deny |
| No | No | No | Deny |
4. State Transition Testing
Applications with distinct states—like an order status (pending, confirmed, shipped, delivered)—require State Transition Testing. This technique verifies that events trigger correct state changes and that invalid transitions are blocked.
For a shopping cart, you’d test:
- Adding items transitions from Empty to Active
- Removing last item returns from Active to Empty
- Checking out from Active transitions to Pending Payment
- What happens if you try to add items to a Completed cart?
Black Box Testing here reveals workflow bugs where systems get stuck in impossible states, like an order marked both “shipped” and “cancelled.”
5. Use Case Testing
Use Case Testing validates complete user journeys through realistic scenarios. It combines multiple functions to ensure they work together end-to-end.
A typical use case: “Registered user searches for product, adds to cart, applies discount code, checks out, and receives confirmation email.” Each step might work individually, but Black Box Testing the entire flow exposes integration issues between search, cart, payment, and notification systems.
This technique prioritizes what users actually do over what developers built. It’s the ultimate reality check.
Best Practices for Professional Black Box Testing
Mastering techniques is only half the battle. These best practices ensure your Black Box Testing delivers consistent value:
- Start with Requirements: Every test must trace to a requirement, user story, or acceptance criterion. If you can’t map it, question whether it needs testing. This traceability matrix becomes your coverage proof.
- Design Tests Before Code Exists: The most effective Black Box Testing happens during the design phase, not after development. When you write tests early, you catch requirement ambiguities before they become coded bugs. This is the essence of shift-left testing.
- Prioritize Based on Risk: Not all features deserve equal testing depth. Use risk-based testing to focus Black Box Testing effort on business-critical paths, complex logic, and areas with frequent changes. A payment gateway needs more scrutiny than a “Terms of Service” page.
- Combine Techniques: No single technique finds all bugs. Use Equivalence Partitioning for input validation, Boundary Value Analysis for edges, Decision Tables for logic, State Transitions for workflows, and Use Cases for integration. Layered coverage catches different defect types.
- Maintain a Central Repository: Store all Black Box Testing artifacts in a version-controlled repository. Reuse test cases for regression, track changes, and enable collaboration. A scattered collection of Word documents is a recipe for missed tests and duplicated effort.
How Apidog Accelerates Black Box Testing for APIs
APIs are the perfect application for Black Box Testing—you send requests and validate responses without seeing internal implementation. However, manually designing test cases for dozens of endpoints, each with multiple input combinations, is overwhelming.
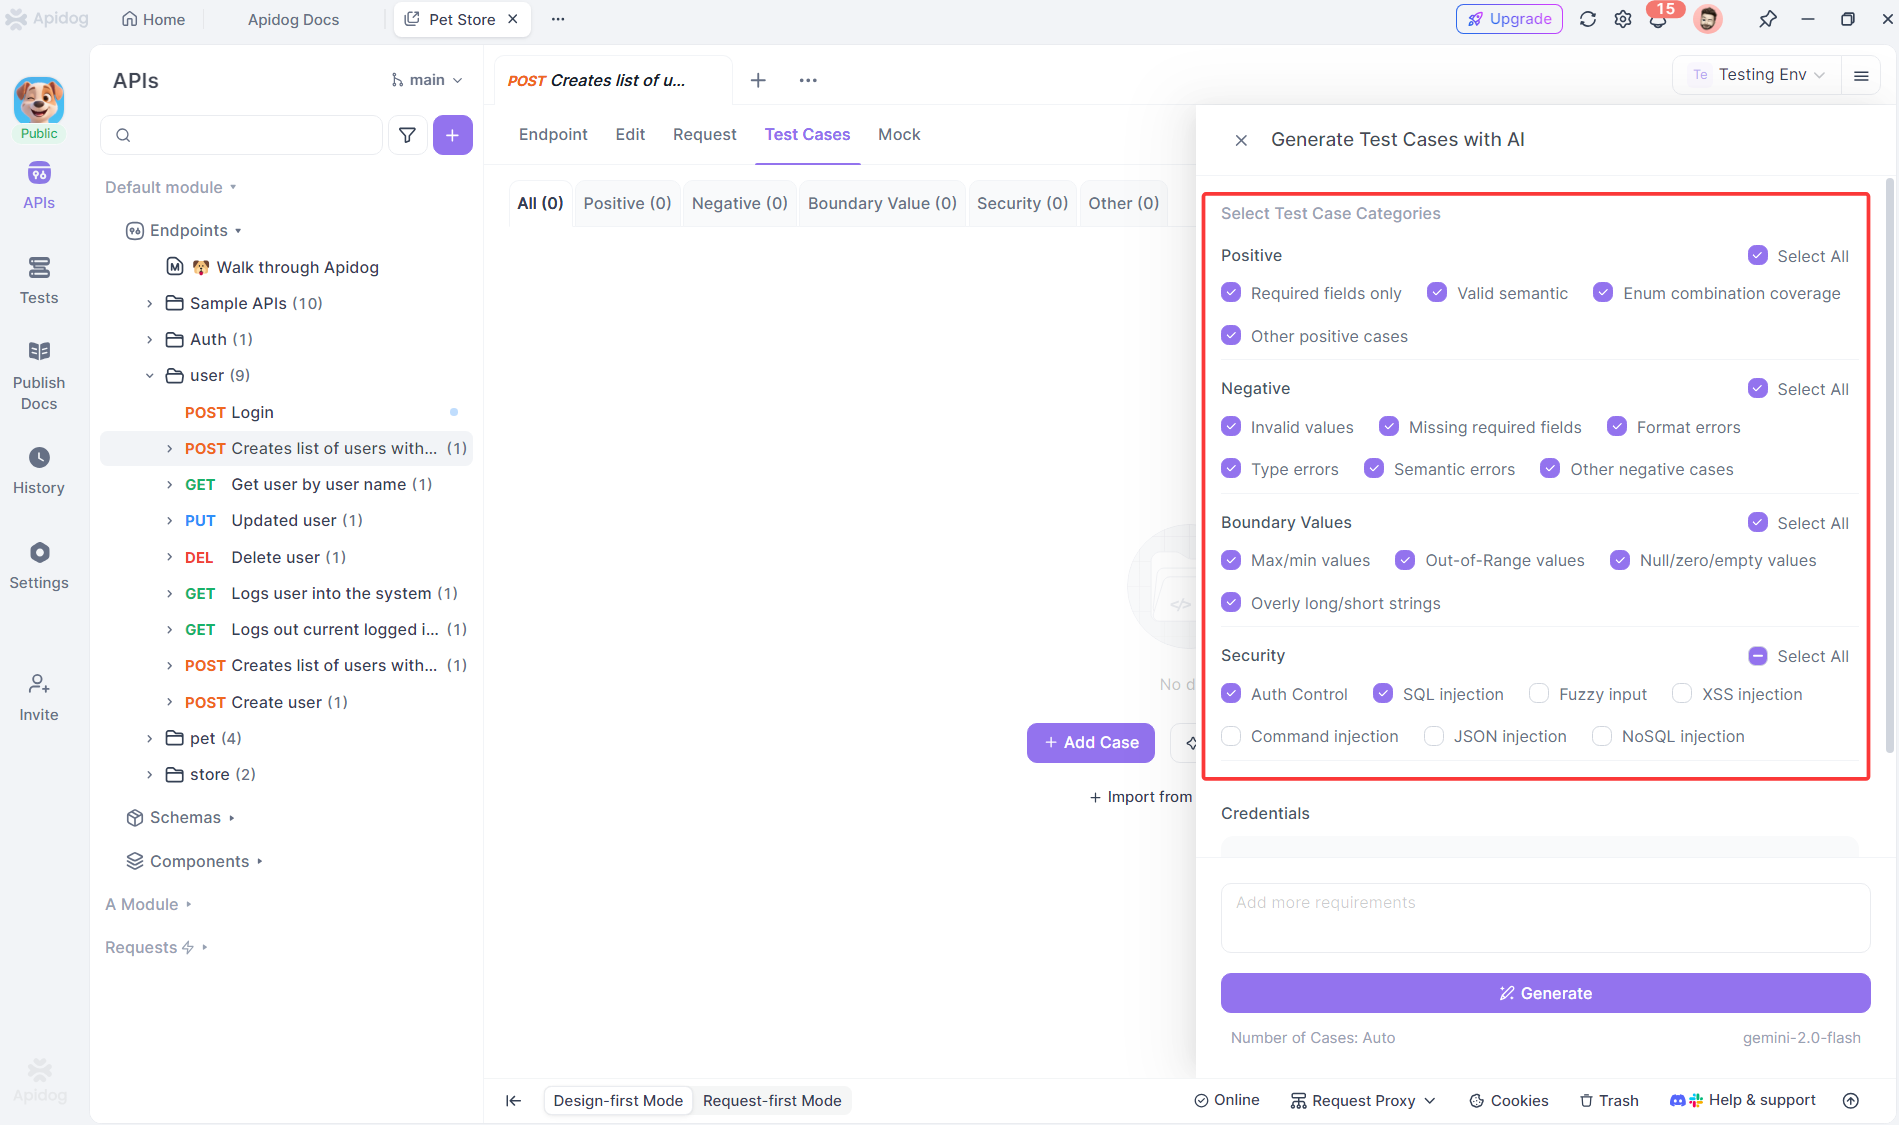
Apidog automates this process using AI. It reads your API specification (OpenAPI, Swagger, or Postman collections) and generates comprehensive Black Box Testing scenarios instantly. For each endpoint, it creates:
- Positive tests with valid data to verify happy paths
- Negative tests with invalid inputs to check error handling
- Boundary tests for numeric and string length limits
- Security tests for authentication and authorization edge cases
If your API accepts a user registration payload, Apidog generates test cases for missing required fields, invalid email formats, password strength violations, and duplicate usernames—all classic Black Box Testing scenarios that would take hours to document manually.
The AI understands data types, constraints, and business rules from your spec. It knows that “age” requires boundary testing and “email” needs format validation. You review and customize the generated tests, focusing your expertise on business logic rather than boilerplate design.
For teams practicing Black Box Testing in Agile sprints, this automation means you keep pace with development. APIs change, you re-import the spec, Apidog flags outdated tests, and you update only what’s relevant. The maintenance burden that traditionally kills API test suites becomes manageable.
Frequently Asked Questions
Q1: Can Black Box Testing find all types of bugs?
A: No single method can. Black Box Testing excels at finding functional, integration, and usability bugs but may miss performance issues, security vulnerabilities, and code-level defects. That’s why you need white-box (unit) testing, static analysis, and performance testing as part of a comprehensive strategy.
Q2: How is Black Box Testing different from User Acceptance Testing (UAT)?
A: Both test from the user perspective, but Black Box Testing is performed by QA professionals who understand testing techniques and edge cases. UAT is performed by actual end-users or business representatives validating that the software meets their needs. UAT focuses on business value; Black Box Testing focuses on functional correctness.
Q3: Should we automate all Black Box Testing?
Ans: No. Automate stable, repetitive tests like regression and smoke tests. Continue manual Black Box Testing for exploratory, usability, and newly developed features that change frequently. The human eye catches visual glitches and workflow awkwardness that automation misses.
Q4: How do we measure the effectiveness of Black Box Testing?
Ans: Track defect detection rate—how many bugs your Black Box Testing finds versus what slips to production. Measure requirement coverage percentage and test execution time. Most importantly, monitor escaped defects: if critical bugs reach users, your black box approach needs refinement.
Q5: Can Black Box Testing be performed without requirements documentation?
Ans: Technically yes, but it’s inefficient. Testing without requirements becomes guesswork. You can use user stories, mockups, or even the application itself as a specification, but you’ll miss edge cases and waste effort on low-value tests. Always push for documented requirements before designing Black Box Testing scenarios.
Conclusion
The difference between amateur and professional Black Box Testing isn’t the tools you use—it’s the discipline you apply. Mastering equivalence partitioning, boundary analysis, decision tables, state transitions, and use case testing gives you a systematic way to expose defects that matter to users. Combining these techniques with smart practices like risk-based prioritization and early test design multiplies your impact.
Modern tools like Apidog remove the drudgery of test case creation, letting you focus on strategy and analysis rather than paperwork. But automation only amplifies good fundamentals. Without solid techniques, you’re just testing faster, not better.
Start small. Pick one technique and apply it to your next feature. Notice how many defects you find that would have slipped through random clicking. Then expand your toolkit. Before long, you’ll trust your Black Box Testing not because you hope it works, but because you know it does.