
Authentication is the cornerstone of any modern web application, yet setting it up remains one of the most time-consuming challenges developers face. Enter Better Auth API—a framework-agnostic authentication solution that promises to transform how we implement user management. In this comprehensive guide, we'll walk through building a complete full-stack application that demonstrates the power and simplicity of Better Auth, using Bun for blazing-fast performance.
Want an integrated, All-in-One platform for your Developer Team to work together with maximum productivity?
Apidog delivers all your demands, and replaces Postman at a much more affordable price!
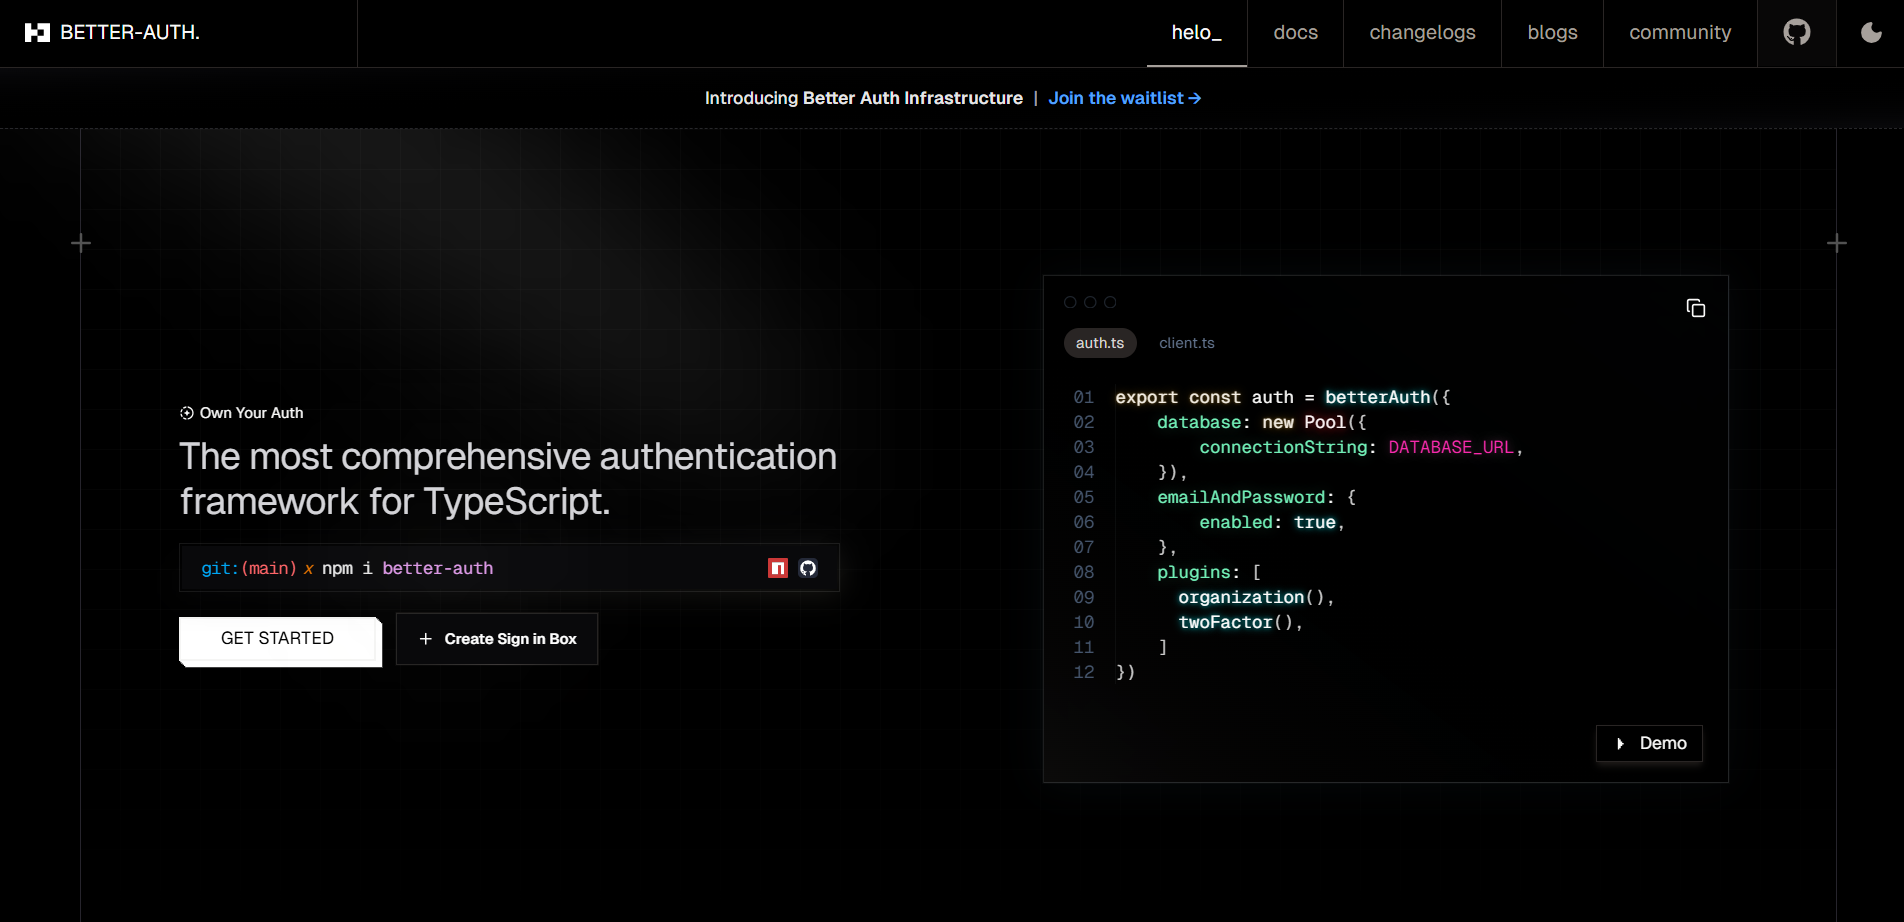
What is Better Auth API?
Better Auth API is a modern, open-source authentication framework designed to work seamlessly across any JavaScript environment. Unlike traditional authentication libraries that lock you into specific ecosystems, Better Auth provides a unified API that adapts to your stack—whether you're using React, Vue, Svelte, or vanilla JavaScript on the frontend, and Node.js, Bun, or Deno on the backend. Its plugin-based architecture supports multiple authentication strategies, from traditional email/password to OAuth providers, passkeys, and magic links, all while maintaining type safety and excellent developer experience.
Getting Started with Better Auth: Prerequisites and Project Setup
Before diving into code, ensure you have the following installed:
- Bun 1.0+: We'll use Bun throughout this tutorial for its exceptional speed and modern tooling.
- Node.js 18+: Required for the backend runtime.
- A code editor: VS Code recommended for TypeScript support.
While this setup works perfectly with npm, we'll demonstrate the Bun workflow, which offers 3-5x faster package installation and a more streamlined development experience.
Building a Sample Project: Step-by-Step Implementation
Let's create a practical authentication system with a React frontend and Express backend, complete with database persistence.
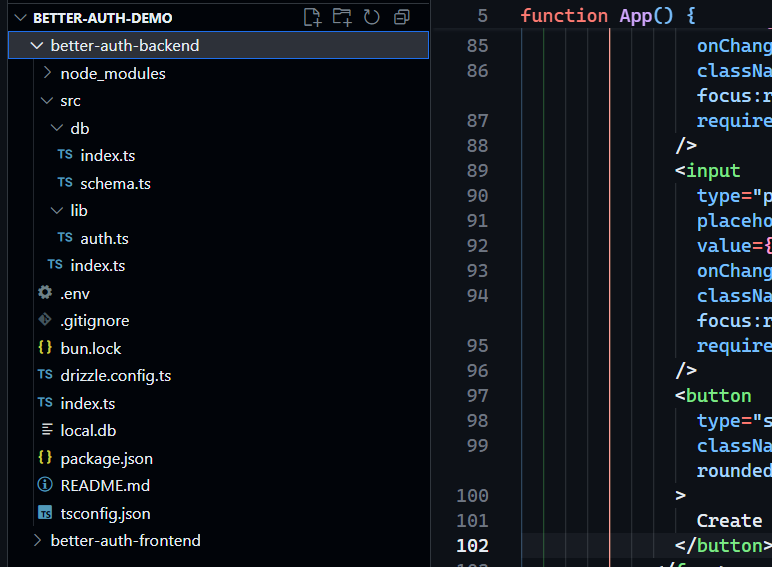
Step 1: Backend Setup with Express and Drizzle ORM
1. Initialize the Backend Project
First, create and enter your backend directory:
mkdir better-auth-backend
cd better-auth-backend
bun init -y
2. Install Dependencies
We'll need Express for the server, Better Auth for authentication, and Drizzle ORM for database management:
bun add express better-auth drizzle-orm
bun add -D @types/bun @types/express drizzle-kit
3. Configure Environment Variables
Create a .env file to store sensitive configuration:
BETTER_AUTH_SECRET=your-secret-key-here # Generate with: openssl rand -base64 32
BETTER_AUTH_URL=http://localhost:3000
DATABASE_URL=local.db
The BETTER_AUTH_SECRET can also be generated at the better-auth website.
4. Create Database Schema with Drizzle ORM
Better Auth works best with Drizzle, which provides excellent TypeScript support and avoids native module issues. Create src/db/schema.ts:
import { sqliteTable, text, integer } from "drizzle-orm/sqlite-core";

export const user = sqliteTable("user", {
  id: text("id").primaryKey(),
  name: text('name').notNull(),
  email: text('email').notNull().unique(),
  emailVerified: integer('email_verified', { mode: 'boolean' }).notNull().default(false),
  image: text('image'),
  createdAt: integer('created_at', { mode: 'timestamp' }).notNull(),
  updatedAt: integer('updated_at', { mode: 'timestamp' }).notNull(),
});

export const session = sqliteTable("session", {
  id: text("id").primaryKey(),
  expiresAt: integer('expires_at', { mode: 'timestamp' }).notNull(),
  token: text('token').notNull().unique(),
  createdAt: integer('created_at', { mode: 'timestamp' }).notNull(),
  userId: text('user_id').notNull(),
});

export const account = sqliteTable("account", {
  id: text("id").primaryKey(),
  accountId: text('account_id').notNull(),
  providerId: text('provider_id').notNull(),
  userId: text('user_id').notNull(),
  accessToken: text('access_token'),
  refreshToken: text('refresh_token'),
  createdAt: integer('created_at', { mode: 'timestamp' }).notNull(),
});

export const verification = sqliteTable("verification", {
  id: text("id").primaryKey(),
  identifier: text('identifier').notNull(),
  value: text('value').notNull(),
  expiresAt: integer('expires_at', { mode: 'timestamp' }).notNull(),
});
5. Configure Database Connection
Create src/db/index.ts using Bun's native SQLite binding:
import { Database } from "bun:sqlite";
import { drizzle } from "drizzle-orm/bun-sqlite";

const sqlite = new Database("local.db");
export const db = drizzle(sqlite);
6. Set Up Better Auth Configuration
Create src/lib/auth.ts to configure the Better Auth API:
import { betterAuth } from "better-auth";
import { drizzleAdapter } from "better-auth/adapters/drizzle";
import { db } from "../db";
import { user, session, account, verification } from "../db/schema";

export const auth = betterAuth({
  database: drizzleAdapter(db, {
    provider: "sqlite",
    schema: {
      user: user,
      session: session,
      account: account,
      verification: verification,
    },
  }),
  emailAndPassword: {
    enabled: true,
  },
  trustedOrigins: ["http://localhost:5173"],
});
7. Create Express Server
In src/index.ts, mount the Better Auth API handler:
import express from "express";
import cors from "cors";
import { toNodeHandler } from "better-auth/node";
import { auth } from "./lib/auth";

const app = express();
const PORT = process.env.PORT || 3000;

app.use(
  cors({
    origin: "http://localhost:5173",
    credentials: true,
  })
);

// Mount Better Auth API at /api/auth
app.use("/api/auth", toNodeHandler(auth));
app.use(express.json());

app.get("/api/me", async (req, res) => {
  const session = await auth.api.getSession({
    headers: req.headers,
  });

  if (!session) {
    return res.status(401).json({ error: "Unauthorized" });
  }

  res.json({ user: session.user });
});

app.listen(PORT, () => {
  console.log(`Server running on http://localhost:${PORT}`);
});
8. Run Database Migration
Create drizzle.config.ts in the backend root:
import { defineConfig } from "drizzle-kit";

export default defineConfig({
  dialect: "sqlite",
  schema: "./src/db/schema.ts",
  out: "./drizzle",
  dbCredentials: {
    url: "local.db",
  },
});
Execute the migration to create tables:
bunx drizzle-kit push
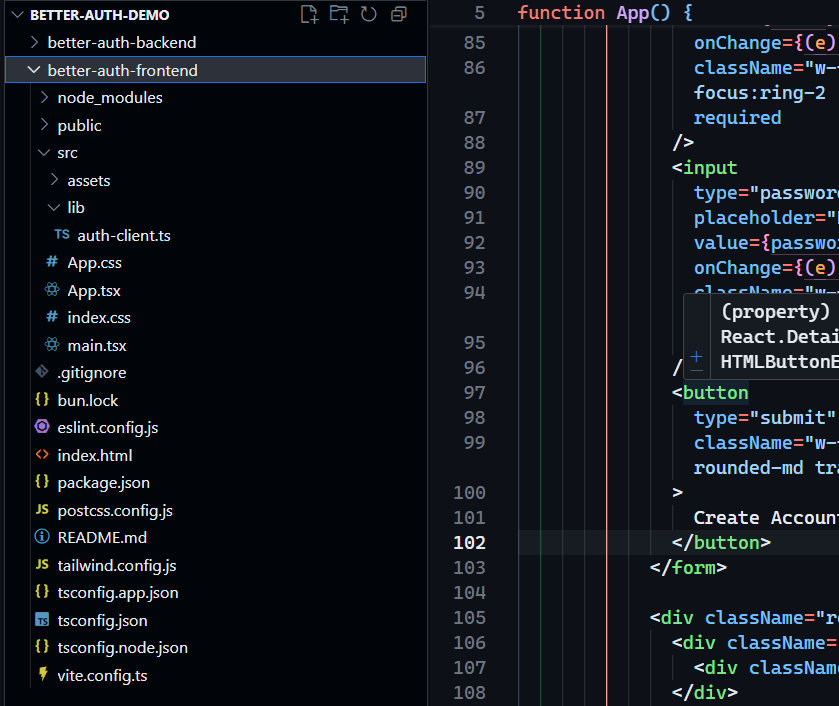
Step 2: Frontend Setup with React and Vite
1. Create React Application
In a new terminal, initialize the frontend:
bun create vite better-auth-frontend --template react-ts
cd better-auth-frontend
2. Install Dependencies
bun add better-auth
3. Configure Tailwind CSS (V4 Update)
Post-Tailwind CSS v4 requires a different setup. Install the new packages:
bun add -D tailwindcss postcss @tailwindcss/postcss
Create tailwind.config.js in the project root:
/** @type {import('tailwindcss').Config} */
export default {
  content: [
    "./index.html",
    "./src/**/*.{js,ts,jsx,tsx}",
  ],
  theme: {
    extend: {},
  },
  plugins: [],
}
Create postcss.config.js:
export default {
  plugins: {
    "@tailwindcss/postcss": {},
  },
}
Create src/index.css:
@import "tailwindcss";

body {
  margin: 0;
  font-family: system-ui, -apple-system, sans-serif;
}
4. Set Up Better Auth Client
Create src/lib/auth-client.ts:
import { createAuthClient } from "better-auth/react";

export const authClient = createAuthClient({
  baseURL: "http://localhost:3000",
});

export const { signIn, signUp, useSession } = authClient;
5. Build the Authentication UI
Replace src/App.tsx with a complete authentication interface:
import { useState } from 'react';
import { useSession, signIn, signUp } from './lib/auth-client';
function App() {
const { data: session, isPending } = useSession();
const [email, setEmail] = useState('');
const [password, setPassword] = useState('');
const [name, setName] = useState('');
const handleSignUp = async (e: React.FormEvent) => {
e.preventDefault();
await signUp.email({
name,
email,
password,
callbackURL: '/',
});
};
const handleSignIn = async (e: React.FormEvent) => {
e.preventDefault();
await signIn.email({
email,
password,
});
};
const handleSignOut = async () => {
await authClient.signOut();
};
if (isPending) return <div className="flex items-center justify-center min-h-screen">Loading...</div>;
return (
<div className="min-h-screen bg-gray-100 flex items-center justify-center p-4">
<div className="max-w-md w-full bg-white rounded-lg shadow-md p-6">
<h1 className="text-2xl font-bold text-center mb-6 text-gray-800">
Better Auth API Test
</h1>
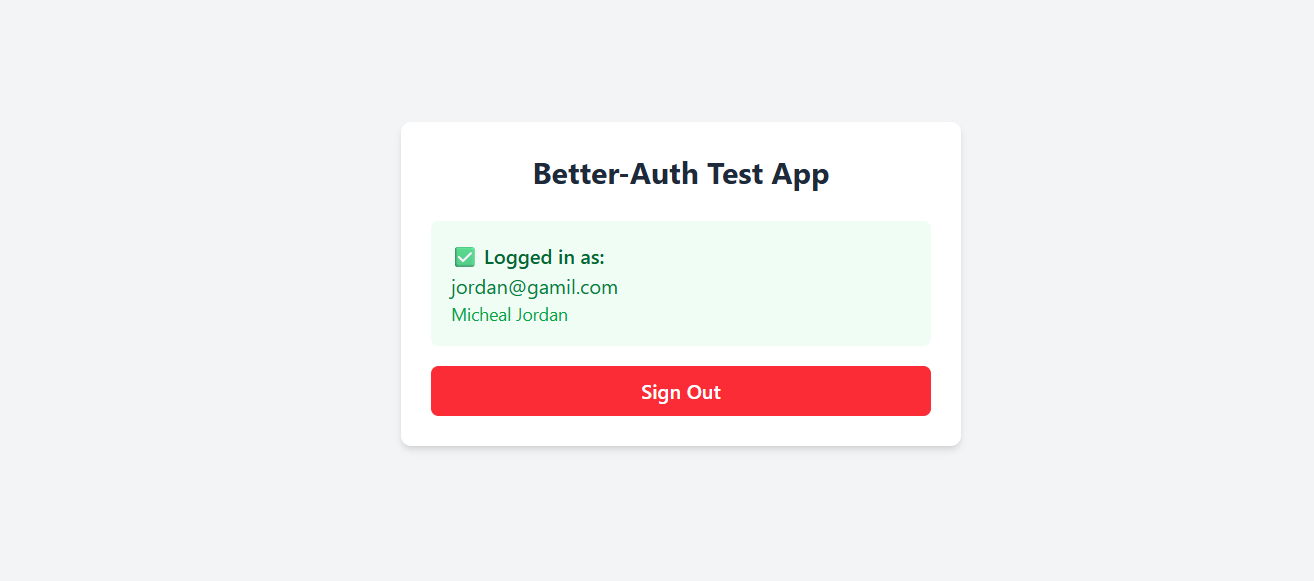
{session?.user ? (
<div className="space-y-4">
<div className="bg-green-50 p-4 rounded-md">
<p className="text-green-800 font-semibold">Logged in as:</p>
<p className="text-green-700">{session.user.email}</p>
<p className="text-green-600 text-sm">{session.user.name}</p>
</div>
<button
onClick={handleSignOut}
className="w-full bg-red-500 hover:bg-red-600 text-white font-medium py-2 px-4 rounded-md transition"
>
Sign Out
</button>
</div>
) : (
<div className="space-y-4">
<form onSubmit={handleSignUp} className="space-y-3">
<h2 className="text-lg font-semibold text-gray-700">Sign Up</h2>
<input
type="text"
placeholder="Name"
value={name}
onChange={(e) => setName(e.target.value)}
className="w-full px-3 py-2 border border-gray-300 rounded-md focus:outline-none focus:ring-2 focus:ring-blue-500"
required
/>
<input
type="email"
placeholder="Email"
value={email}
onChange={(e) => setEmail(e.target.value)}
className="w-full px-3 py-2 border border-gray-300 rounded-md focus:outline-none focus:ring-2 focus:ring-blue-500"
required
/>
<input
type="password"
placeholder="Password"
value={password}
onChange={(e) => setPassword(e.target.value)}
className="w-full px-3 py-2 border border-gray-300 rounded-md focus:outline-none focus:ring-2 focus:ring-blue-500"
required
/>
<button
type="submit"
className="w-full bg-green-500 hover:bg-green-600 text-white font-medium py-2 px-4 rounded-md transition"
>
Create Account
</button>
</form>
<form onSubmit={handleSignIn} className="space-y-3">
<h2 className="text-lg font-semibold text-gray-700">Sign In</h2>
<input
type="email"
placeholder="Email"
value={email}
onChange={(e) => setEmail(e.target.value)}
className="w-full px-3 py-2 border border-gray-300 rounded-md focus:outline-none focus:ring-2 focus:ring-blue-500"
required
/>
<input
type="password"
placeholder="Password"
value={password}
onChange={(e) => setPassword(e.target.value)}
className="w-full px-3 py-2 border border-gray-300 rounded-md focus:outline-none focus:ring-2 focus:ring-blue-500"
required
/>
<button
type="submit"
className="w-full bg-blue-500 hover:bg-blue-600 text-white font-medium py-2 px-4 rounded-md transition"
>
Sign In
</button>
</form>
</div>
)}
</div>
</div>
);
}
export default App;
Step 3: Testing the Integration
1. Start Backend Server
cd better-auth-backend
bun dev

2. Start Frontend Development
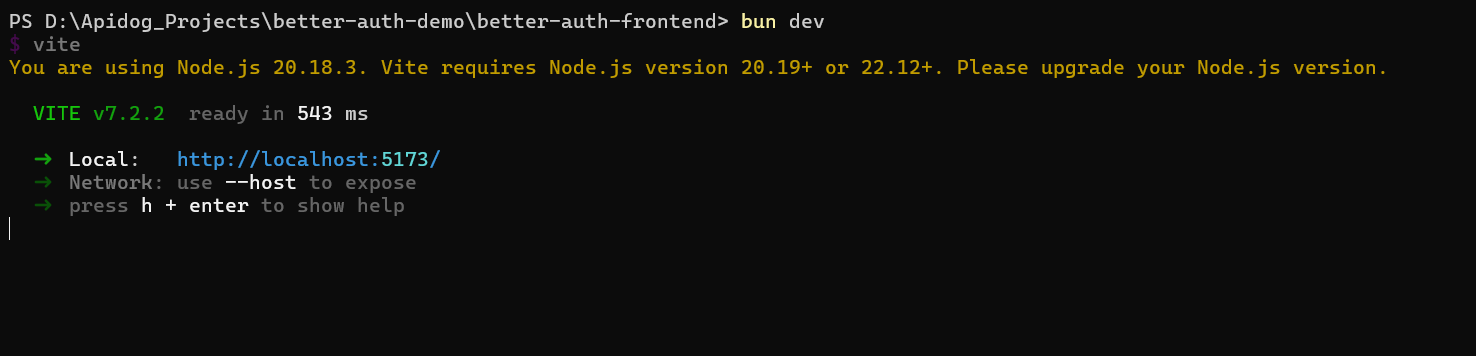
cd better-auth-frontend
bun dev
3. Test Authentication Flow
- Open
http://localhost:5173in your browser - Register a new user using the Sign-Up form
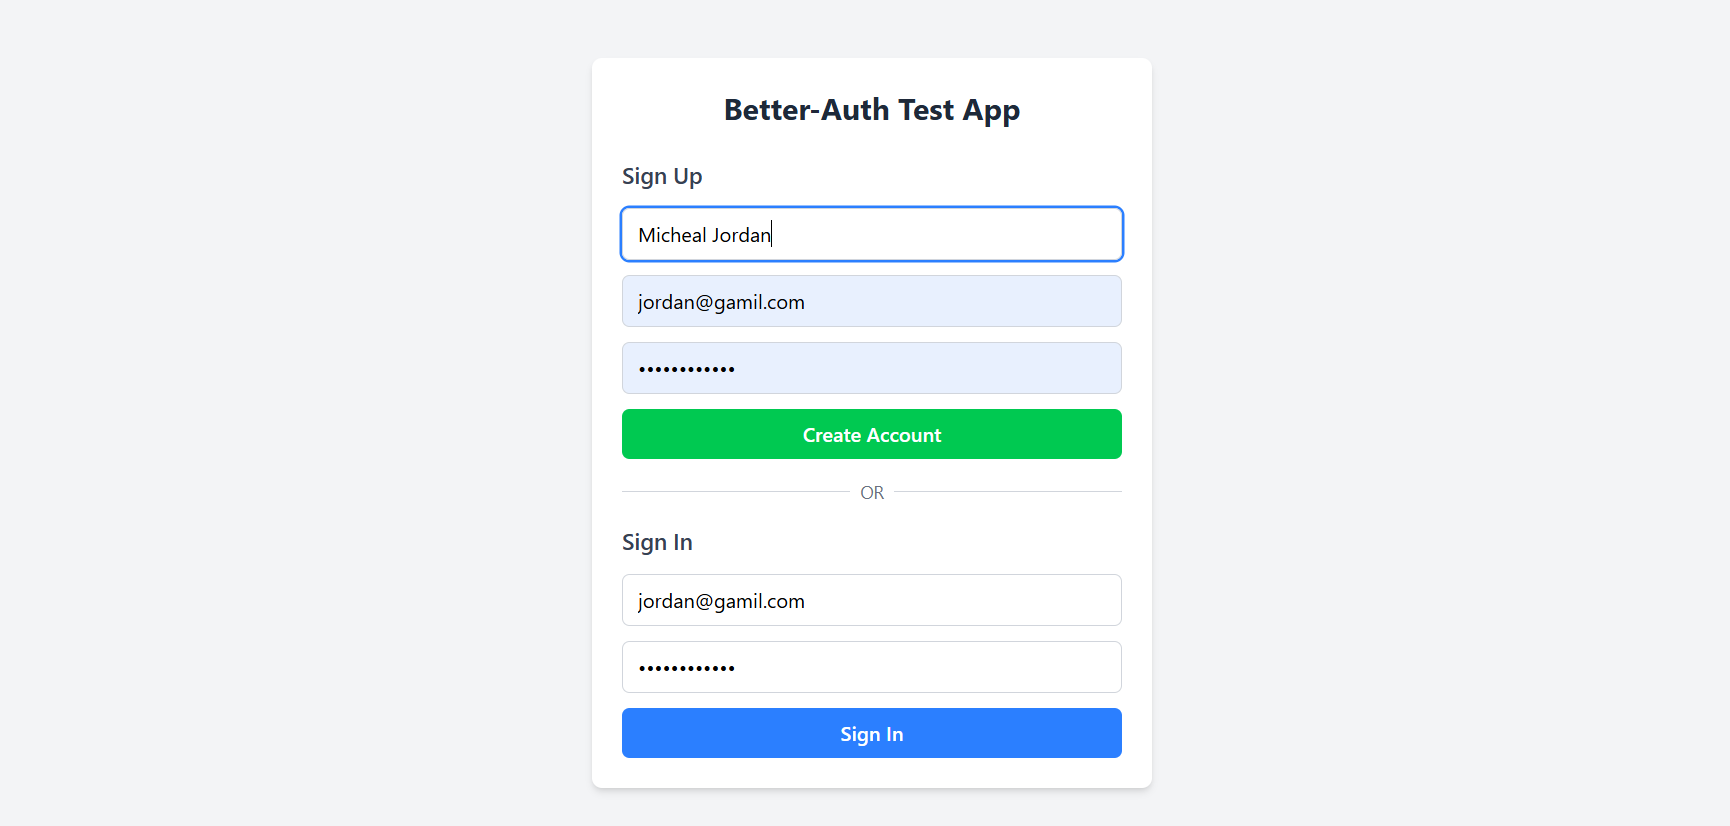
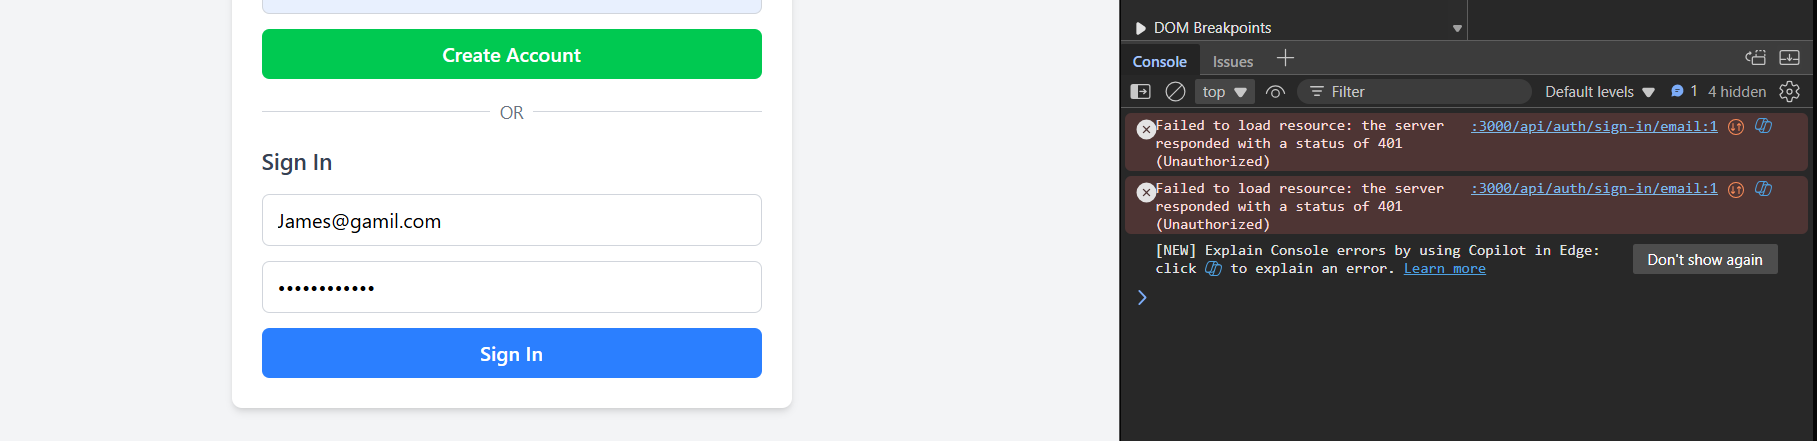
- Observe the database file growing as tables populate
- Sign out and sign back in to verify session management
- Check the session endpoint:
http://localhost:3000/api/auth/session
Key Benefits of Better Auth API
The Better Auth API distinguishes itself through several compelling advantages:
- Framework Agnosticism: Unlike NextAuth.js or Firebase Auth, Better Auth works anywhere JavaScript runs. The same authentication logic serves web, mobile, and API clients without modification.
- Multiple Authentication Strategies: Out-of-the-box support for credentials, OAuth 2.0, passkeys, two-factor authentication, and magic links. Each strategy is a plugin that can be enabled with a single configuration line.
- Type Safety: Full TypeScript support with inferred types from your database schema eliminates the "any" type hell common in authentication codebases.
- Database Flexibility: The Drizzle ORM adapter means you can switch between SQLite, PostgreSQL, and MySQL without changing your authentication logic. This tutorial uses SQLite for simplicity, but the same code scales to production databases.
- Plugin Ecosystem: Need organization support? Multi-tenancy? Admin roles? Better Auth's plugin system lets you extend functionality without bloating the core.
- Performance: With Bun as the runtime, cold starts are sub-100ms, and the entire authentication flow completes in under 50ms on modest hardware.
Frequently Asked Questions
Q1: Can I use Better Auth API with npm instead of Bun?
Ans: Absolutely. While this guide uses Bun for its performance benefits, every command has an npm equivalent. Replace bun add with npm install, bun dev with npm run dev, and bunx with npx. The only Bun-specific code is the bun:sqlite import, which can be replaced with better-sqlite3 for Node.js environments.
Q2: Why did we need Drizzle ORM? Can't Better Auth create tables automatically?
Ans: Better Auth follows the principle of explicit database management. Drizzle provides type-safe migrations, schema versioning, and prevents accidental data loss. The drizzle-kit push command is a one-time setup that gives you full control over your database evolution.
Q3: What if I encounter the "Missing parameter name" error?
Ans: This occurs when using app.all() with wildcards in Express. The solution is to use app.use("/api/auth", toNodeHandler(auth)) instead. Better Auth's handler manages all sub-routes internally, so Express doesn't need wildcard matching.
Q4: How do I add social authentication providers?
Ans: Enable OAuth plugins in your Better Auth configuration. For example, to add GitHub:
import { betterAuth } from "better-auth";
import { github } from "better-auth/plugins";

export const auth = betterAuth({
  plugins: [
    github({
      clientId: process.env.GITHUB_CLIENT_ID,
      clientSecret: process.env.GITHUB_CLIENT_SECRET,
    })
  ]
});
Q5: Is Better Auth API production-ready?
Ans: Yes. Better Auth powers authentication for several SaaS products with thousands of users. The framework implements secure session management, CSRF protection, and follows OWASP guidelines. However, always audit your specific implementation and keep dependencies updated.
Conclusion
Building authentication from scratch is no longer necessary with modern solutions like the Better Auth API. In this guide, we've created a complete authentication system—from database schema to UI components—in a few minutes! The combination of Better Auth's flexibility, Drizzle ORM's type safety, and Bun's performance creates a developer experience that scales from prototype to production.
The step-by-step process demonstrates that authentication, while critical, doesn't need to be complex. By leveraging Better Auth's plugin architecture and framework-agnostic design, you can focus on building features that matter to your users rather than wrestling with security implementations.
Whether you're building a side project or enterprise application, Better Auth API provides the foundation for secure, scalable authentication that adapts to your needs—not the other way around.
Want an integrated, All-in-One platform for your Developer Team to work together with maximum productivity?
Apidog delivers all your demands, and replaces Postman at a much more affordable price!


