
In the fast-paced world of web development, managing API requests efficiently is crucial. Sometimes, you need to cancel these requests to save resources or prevent unwanted outcomes. Axios, a popular JavaScript library, provides a seamless way to handle such scenarios. In this blog post, we’ll explore the intricacies of canceling API requests with Axios and introduce you to Apidog, a tool that simplifies API testing and management. And the best part? You can download Apidog for free!
Why You Might Need to Cancel Requests
Let's start with a relatable scenario. Imagine you're building a search feature for your web app. As the user types in the search box, you want to fetch suggestions from an API. However, if the user keeps typing quickly, you don't want to bombard the server with unnecessary requests for each keystroke. Instead, you'd like to cancel any pending requests and only send the latest one. That's where axios cancel requests come into play!

How Axios Cancel Requests Work
So, how does this canceling thing work? Well, the key lies in the CancelToken provided by Axios. This token allows you to create a "cancelable operation" and associate it with a particular request. If you decide to cancel the operation, Axios will automatically stop the corresponding request.
Creating a CancelToken
To get started, you'll need to import the CancelToken from Axios:
import axios from 'axios';

const source = axios.CancelToken.source();
The source object has two properties: token and cancel. The token property is what you'll pass along with your Axios request, while the cancel function is used to, well, cancel the request.
Making a Request That Can Be Canceled
Now that you have a CancelToken, you can attach it to your Axios request like so:
axios.get('/api/suggestions', {
  cancelToken: source.token
})
  .then(response => {
    // Handle the successful response
  })
  .catch(thrown => {
    if (axios.isCancel(thrown)) {
      // Handle the cancellation
    } else {
      // Handle other errors
    }
  });
By passing source.token as the cancelToken option, you're telling Axios that this request can be canceled. If the request is successfully canceled, the Promise will be rejected with a Cancel object, which you can handle in the catch block.
Canceling the Request
To actually cancel the request, you simply call the cancel function provided by the source object:
source.cancel('Operation canceled by the user.');
You can pass an optional reason for canceling the request, which will be available in the Cancel object thrown by the rejected Promise.
Real-world Example: Search Suggestions with Axios Cancel Requests
Now that you understand the basics, let's see how you can implement axios cancel requests in a real-world scenario. We'll build a simple search suggestions feature using React and the apidog API (a dummy API for testing purposes).
First, let's set up our React component:
import React, { useState, useEffect } from 'react';
import axios from 'axios';

const SearchSuggestions = () => {
  const [query, setQuery] = useState('');
  const [suggestions, setSuggestions] = useState([]);
  const [cancelToken, setCancelToken] = useState(null);

  // ... (Component logic goes here)

  return (
    <div>
      <input
        type="text"
        value={query}
        onChange={handleInputChange}
        placeholder="Search..."
      />
      <ul>
        {suggestions.map(suggestion => (
          <li key={suggestion}>{suggestion}</li>
        ))}
      </ul>
    </div>
  );
};
Next, let's implement the handleInputChange function, which will fetch suggestions from the apidog API:
const handleInputChange = (event) => {
  const newQuery = event.target.value;
  setQuery(newQuery);

  // Cancel the previous request if it exists
  if (cancelToken) {
    cancelToken.cancel('Canceling previous request');
  }

  // Create a new CancelToken for the current request
  const source = axios.CancelToken.source();
  setCancelToken(source);

  // Make the API request with the new CancelToken
  axios.get(`https://api.apidog.com/suggestions?query=${newQuery}`, {
    cancelToken: source.token
  })
    .then(response => {
      setSuggestions(response.data.suggestions);
    })
    .catch(thrown => {
      if (axios.isCancel(thrown)) {
        console.log('Request canceled:', thrown.message);
      } else {
        console.error('Error fetching suggestions:', thrown);
      }
    });
};
In this example, we're canceling any previous request before making a new one. We create a new CancelToken for each request and store it in the component state using the setCancelToken function. When the user types in the search box, we cancel the previous request (if it exists) and make a new request with the updated query and the new CancelToken.
If the request is successfully canceled, the catch block will handle the cancellation and log the reason. If there's any other error, it will be caught and logged as well.

Advanced Techniques
Now that you've mastered the basics of axios cancel requests, let's take a look at some advanced techniques that can further enhance your skills.
Reusable Axios Instance with Automatic Cancel Requests
Instead of creating a new CancelToken for every request, you can create a reusable Axios instance that automatically cancels previous requests when a new one is made. This approach can be particularly useful when working with complex applications that have multiple components making API requests.
Here's an example of how you can create such an instance:
import axios from 'axios';

const axiosInstance = axios.create();
let cancelToken;

axiosInstance.interceptors.request.use(
  config => {
    if (cancelToken) {
      cancelToken.cancel('Canceling previous request');
    }

    config.cancelToken = new axios.CancelToken(c => {
      cancelToken = c;
    });

    return config;
  },
  error => Promise.reject(error)
);

export default axiosInstance;
In this example, we create a new Axios instance using axios.create(). We then set up an interceptor for requests, which automatically cancels any previous request before making a new one. The cancelToken is stored globally and assigned to each new request's cancelToken option.
You can then use this axiosInstance throughout your application for making API requests, and it will automatically handle cancel requests for you.
Dealing with Multiple Cancellable Requests
In some cases, you might have multiple cancellable requests in a single component or function. To handle this situation, you can use an array or object to store multiple CancelToken instances.
Here's an example of how you can manage multiple cancel requests:
import React, { useState, useEffect } from 'react';
import axios from 'axios';

const MultipleRequests = () => {
  const [cancelTokens, setCancelTokens] = useState({});

  const fetchData = (endpoint) => {
    // Cancel any existing request for the same endpoint
    if (cancelTokens[endpoint]) {
      cancelTokens[endpoint].cancel('Canceling previous request');
    }

    // Create a new CancelToken for the current request
    const source = axios.CancelToken.source();
    setCancelTokens(prevTokens => ({ ...prevTokens, [endpoint]: source }));

    // Make the API request with the new CancelToken
    axios.get(`https://api.apidog.com/${endpoint}`, {
      cancelToken: source.token
    })
      .then(response => {
        // Handle the successful response
      })
      .catch(thrown => {
        if (axios.isCancel(thrown)) {
          console.log('Request canceled:', thrown.message);
        } else {
          console.error('Error fetching data:', thrown);
        }
      });
  };

  return (
    <div>
      <button onClick={() => fetchData('endpoint1')}>Fetch Data 1</button>
      <button onClick={() => fetchData('endpoint2')}>Fetch Data 2</button>
    </div>
  );
};
In this example, we use an object cancelTokens to store multiple CancelToken instances, with the endpoint as the key. When making a new request, we first check if there's an existing CancelToken for that endpoint and cancel it if necessary. Then, we create a new CancelToken and store it in the cancelTokens object, overwriting any previous value for that endpoint.
This approach allows you to manage multiple cancellable requests within the same component or function, ensuring that only the latest request for each endpoint is executed.
How to cancel API requests with Apidog?
To cancel an API request using Apidog, you would typically follow these steps:
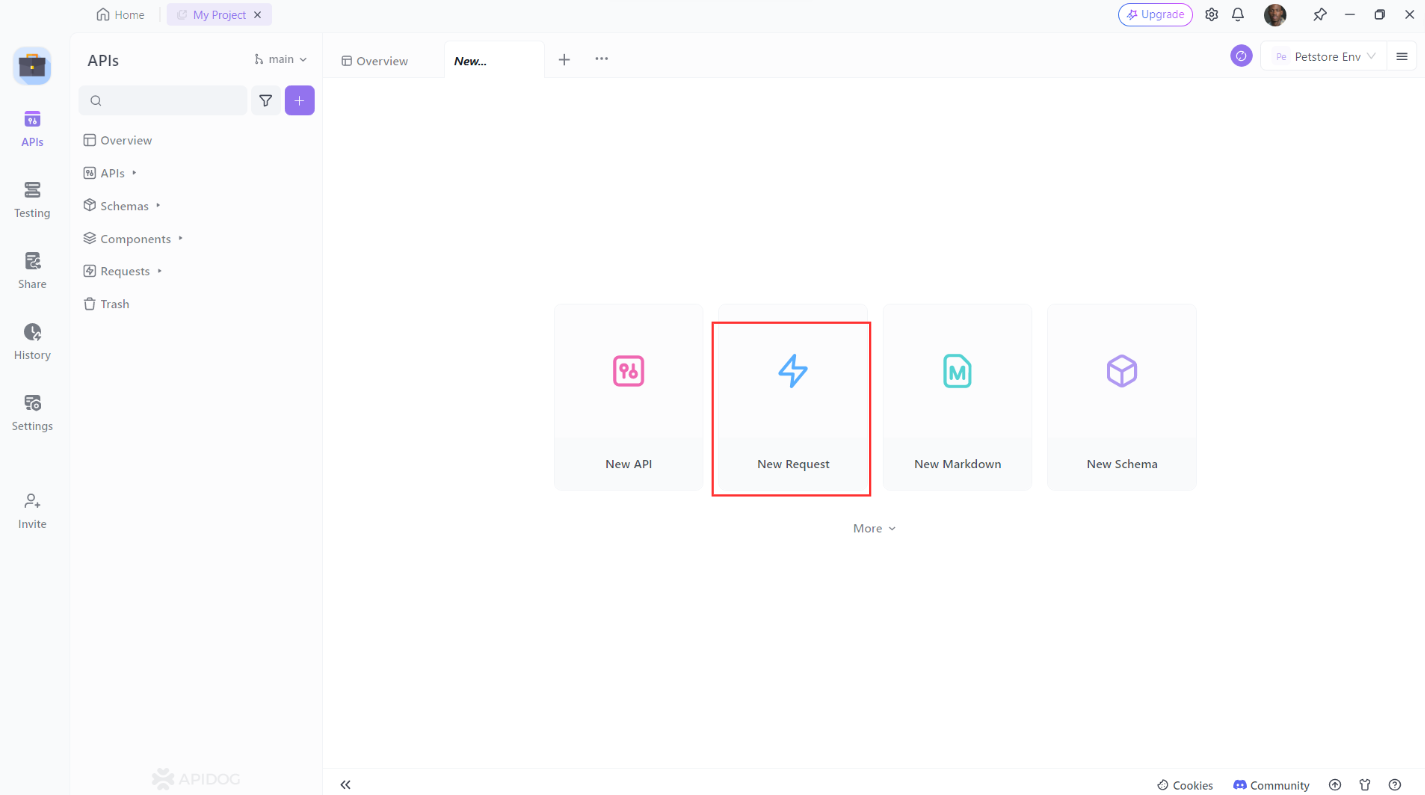
- Open Apidog and create a new request.
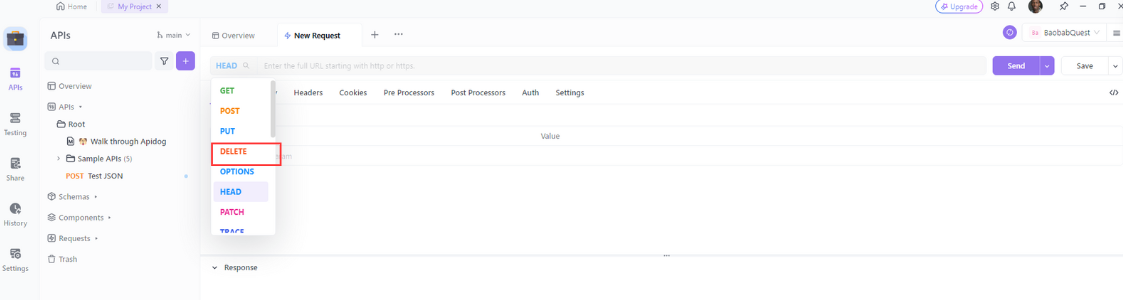
2. Set the request method to DELETE.
3. Enter the URL of the resource you want to delete and Add any additional headers or parameters you need.

4. Click the “Send” button to send the request and analyze the response
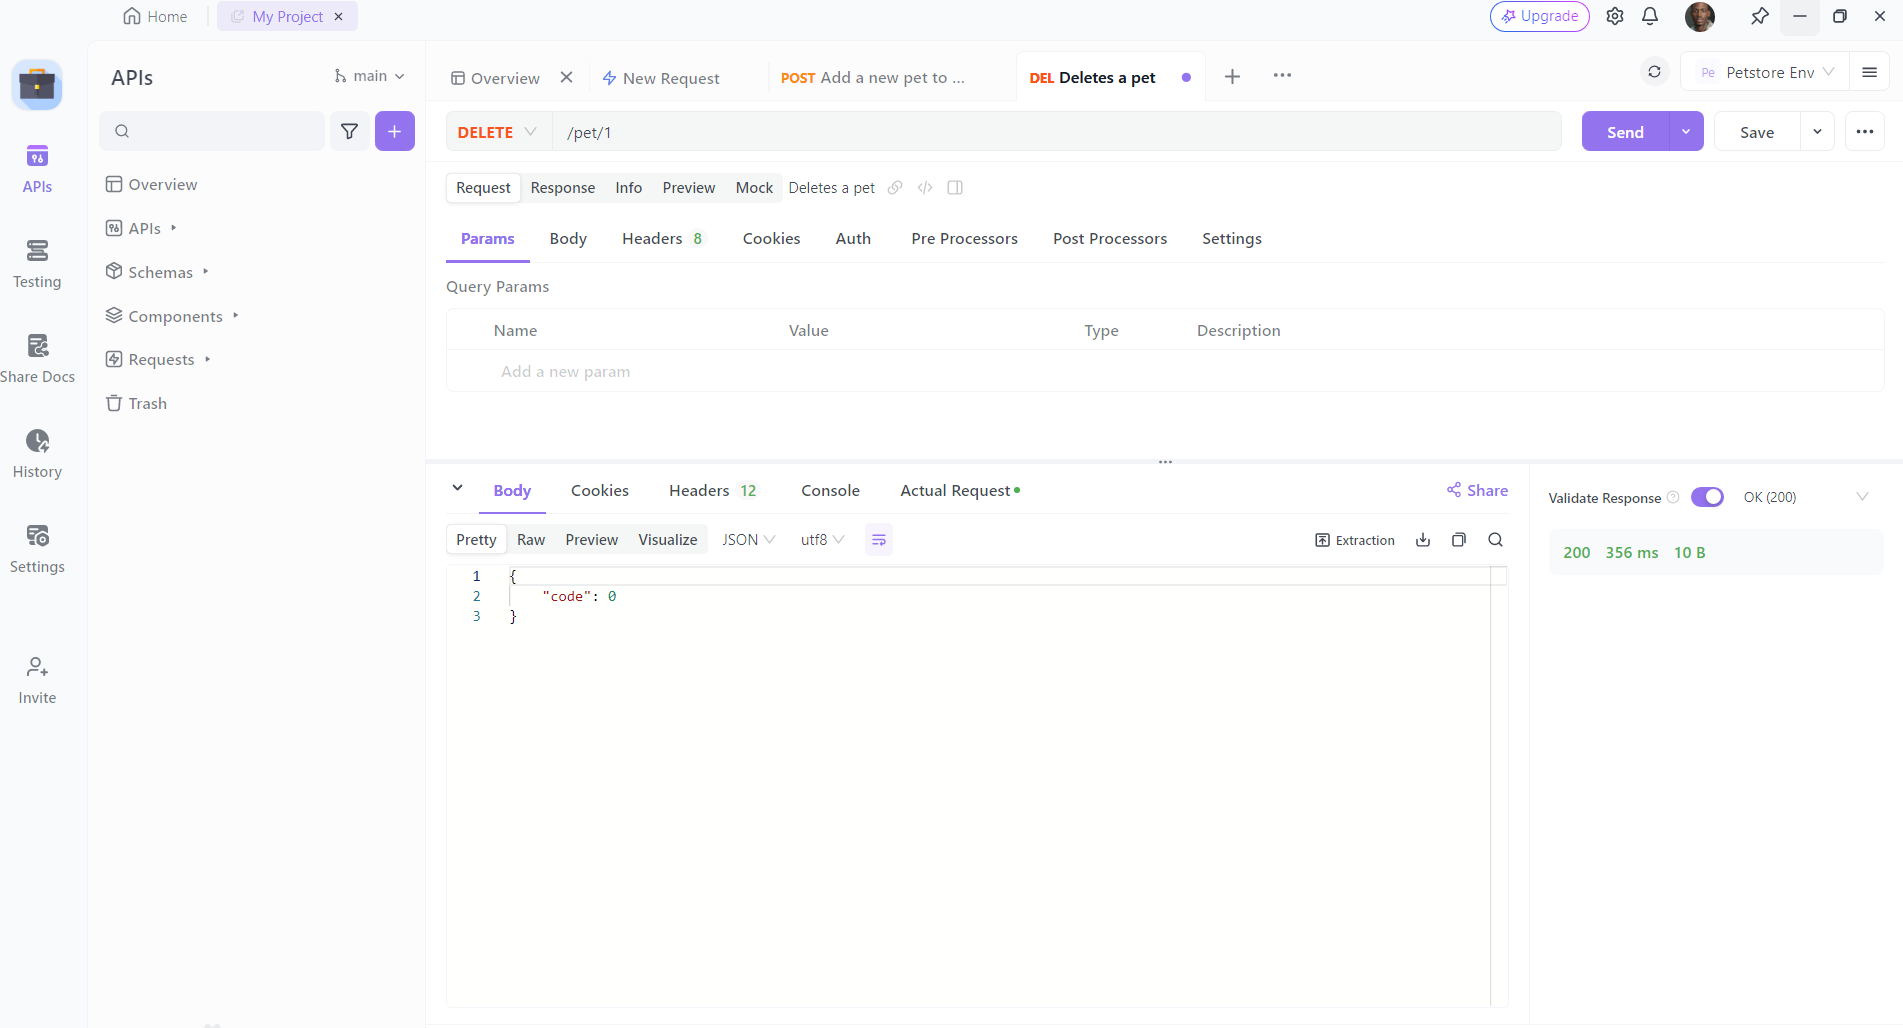
This will send a DELETE request to the specified URL, which is the standard way to remove resources via APIs. However, if you’re looking to cancel a request that is in progress, this might not be directly supported by Apidog as it would depend on the API’s functionality and whether it supports cancellation of in-progress requests.
For APIs that do not support cancellation, you would need to implement this functionality on the server side, where the server can check for a cancellation signal and terminate the processing of the request accordingly.
Conclusion
Mastering the art of canceling API requests with Axios can significantly improve the performance and reliability of your applications. As we’ve seen, Axios offers a straightforward and effective method to abort requests whenever necessary. To put this knowledge into practice and streamline your API testing process, don’t forget to download Apidog. It’s a powerful ally in your development toolkit, and it’s available at no cost. Embrace the power of Axios and Apidog, and take your API management to the next level!


