
Hey there, fellow developers! Today, we're diving into the world of Axios API interceptors. If you're working with APIs, especially in the realm of web development, you know how vital it is to manage your HTTP requests efficiently. That's where Axios API interceptors come in handy. In this post, we'll explore what Axios API interceptors are, why you need them, and how to use them effectively. Plus, we'll introduce you to Apidog, a fantastic tool for API testing and management that you can download for free. So, let's get started!
What are Axios API Interceptors?
Before we dive into the nitty-gritty details, let's clarify what Axios API interceptors are. In simple terms, Axios interceptors are a feature of the Axios library that allows you to intercept and modify HTTP requests and responses globally before they are handled by then or catch.
Imagine having a security guard at the entrance of your application, checking and tweaking every request and response that comes through. That's precisely what interceptors do. They provide a centralized way to add custom logic to your HTTP requests and responses.
Why Use Axios API Interceptors?
You might be wondering, why bother with interceptors when you can directly handle requests and responses in your code? Well, here are a few compelling reasons:
Global Error Handling: Interceptors allow you to implement global error handling. Instead of writing error-handling code for every single request, you can define it once in an interceptor and reuse it across your application.
Token Management: Managing authentication tokens can be a hassle. With interceptors, you can automatically attach tokens to your requests and handle token expiration seamlessly.
Logging and Debugging: Interceptors provide an excellent way to log requests and responses for debugging purposes. You can log important information about every request and response, helping you diagnose issues faster.
Request Modification: Sometimes, you need to modify requests before they are sent. Interceptors allow you to add headers, transform request data, and more, all in one place.
Response Transformation: Similarly, you can transform responses before they reach your application logic. This can be useful for normalizing data, handling different response formats, etc.
Now that we understand the importance of Axios API interceptors let's move on to how to set them up.
Setting Up Axios API Interceptors
To get started, you need to have Axios installed in your project. If you haven't done that yet, you can install it using npm or yarn:
npm install axios
or
yarn add axios
Once you have Axios installed, you can create an instance of Axios and set up your interceptors. Let's walk through the process step by step.
Creating an Axios Instance
First, let's create an Axios instance. This instance will allow us to set up interceptors and make HTTP requests.
import axios from 'axios';

// Create an Axios instance
const api = axios.create({
  baseURL: 'https://api.example.com',
  timeout: 1000,
  headers: {'X-Custom-Header': 'foobar'}
});
Adding Request Interceptors
Request interceptors are used to modify requests before they are sent. For example, you can add authentication tokens or custom headers to every request.
// Add a request interceptor
api.interceptors.request.use(
  (config) => {
    // Do something before the request is sent
    config.headers.Authorization = `Bearer ${localStorage.getItem('token')}`;
    return config;
  },
  (error) => {
    // Do something with request error
    return Promise.reject(error);
  }
);
Adding Response Interceptors
Response interceptors are used to modify responses before they reach your application logic. For instance, you can handle global error responses or transform data.
// Add a response interceptor
api.interceptors.response.use(
  (response) => {
    // Do something with response data
    return response;
  },
  (error) => {
    // Do something with response error
    if (error.response.status === 401) {
      // Handle unauthorized access (e.g., redirect to login)
      window.location.href = '/login';
    }
    return Promise.reject(error);
  }
);
Combining Request and Response Interceptors
You can combine both request and response interceptors to create a robust API handling mechanism.
api.interceptors.request.use(
  (config) => {
    config.headers.Authorization = `Bearer ${localStorage.getItem('token')}`;
    return config;
  },
  (error) => {
    return Promise.reject(error);
  }
);

api.interceptors.response.use(
  (response) => {
    return response;
  },
  (error) => {
    if (error.response.status === 401) {
      window.location.href = '/login';
    }
    return Promise.reject(error);
  }
);
Practical Use Cases of Axios API Interceptors
Let's explore some practical use cases where Axios API interceptors can make your life easier.
Use Case 1: Token Refresh Mechanism
In many applications, you need to handle token expiration and refresh tokens seamlessly. Interceptors can help you achieve this.
api.interceptors.response.use(
  (response) => {
    return response;
  },
  async (error) => {
    const originalRequest = error.config;
    if (error.response.status === 401 && !originalRequest._retry) {
      originalRequest._retry = true;
      const refreshToken = localStorage.getItem('refreshToken');
      const res = await api.post('/auth/refresh-token', { token: refreshToken });
      if (res.status === 200) {
        localStorage.setItem('token', res.data.token);
        api.defaults.headers.common['Authorization'] = `Bearer ${res.data.token}`;
        return api(originalRequest);
      }
    }
    return Promise.reject(error);
  }
);
Use Case 2: Centralized Error Handling
Instead of handling errors in every API call, you can centralize error handling in an interceptor.
api.interceptors.response.use(
  (response) => {
    return response;
  },
  (error) => {
    if (error.response) {
      switch (error.response.status) {
        case 400:
          alert('Bad Request');
          break;
        case 401:
          alert('Unauthorized');
          break;
        case 404:
          alert('Not Found');
          break;
        default:
          alert('An error occurred');
      }
    }
    return Promise.reject(error);
  }
);
Use Case 3: Logging Requests and Responses
For debugging purposes, you might want to log every request and response.
api.interceptors.request.use(
  (config) => {
    console.log('Request:', config);
    return config;
  },
  (error) => {
    return Promise.reject(error);
  }
);

api.interceptors.response.use(
  (response) => {
    console.log('Response:', response);
    return response;
  },
  (error) => {
    console.log('Error Response:', error.response);
    return Promise.reject(error);
  }
);
Introduction to Apidog: Your API Companion
While Axios API interceptors are powerful, testing and managing APIs can still be challenging. That's where Apidog comes into play. Apidog is a fantastic tool that helps you design, test, and document your APIs with ease.
Why Choose Apidog?
- User-Friendly Interface: Apidog offers a clean and intuitive interface that makes API testing a breeze.
- Comprehensive Testing: With Apidog, you can create and run complex test scenarios, ensuring your APIs are robust and reliable.
- Collaboration: Apidog supports team collaboration, allowing multiple developers to work on API projects simultaneously.
- Free to Use: Best of all, Apidog is free to download and use. Whether you're a solo developer or part of a large team, Apidog has you covered.
Apidog and Axios Interceptors
By utilizing axios interceptors, Apidog can automatically capture and analyze API requests and responses, providing valuable insights and helping you identify and resolve issues more efficiently.
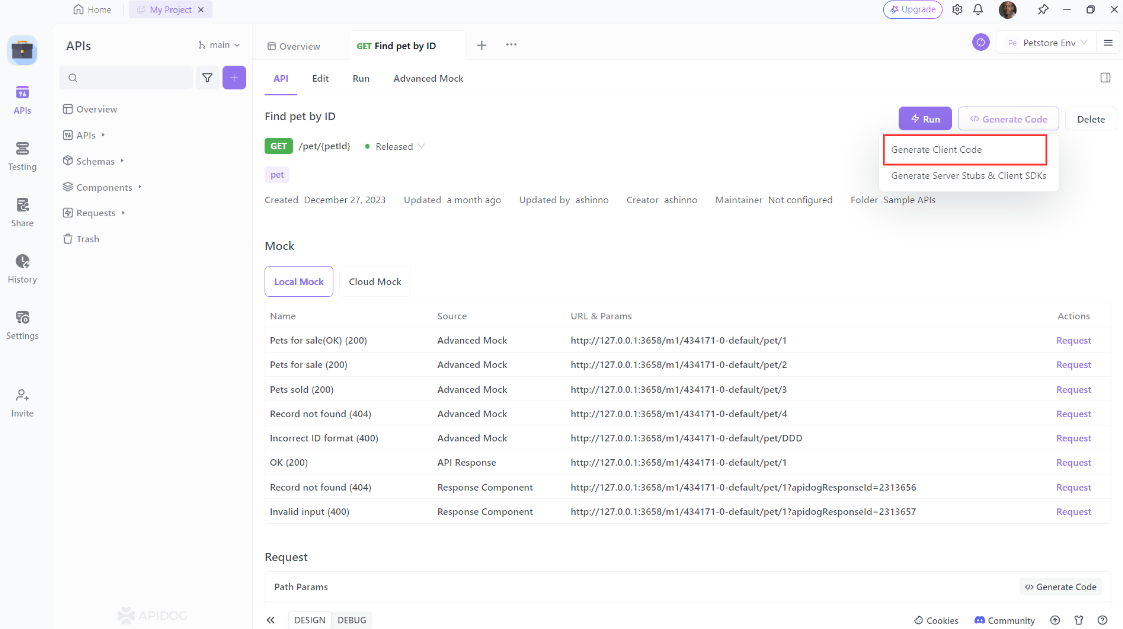
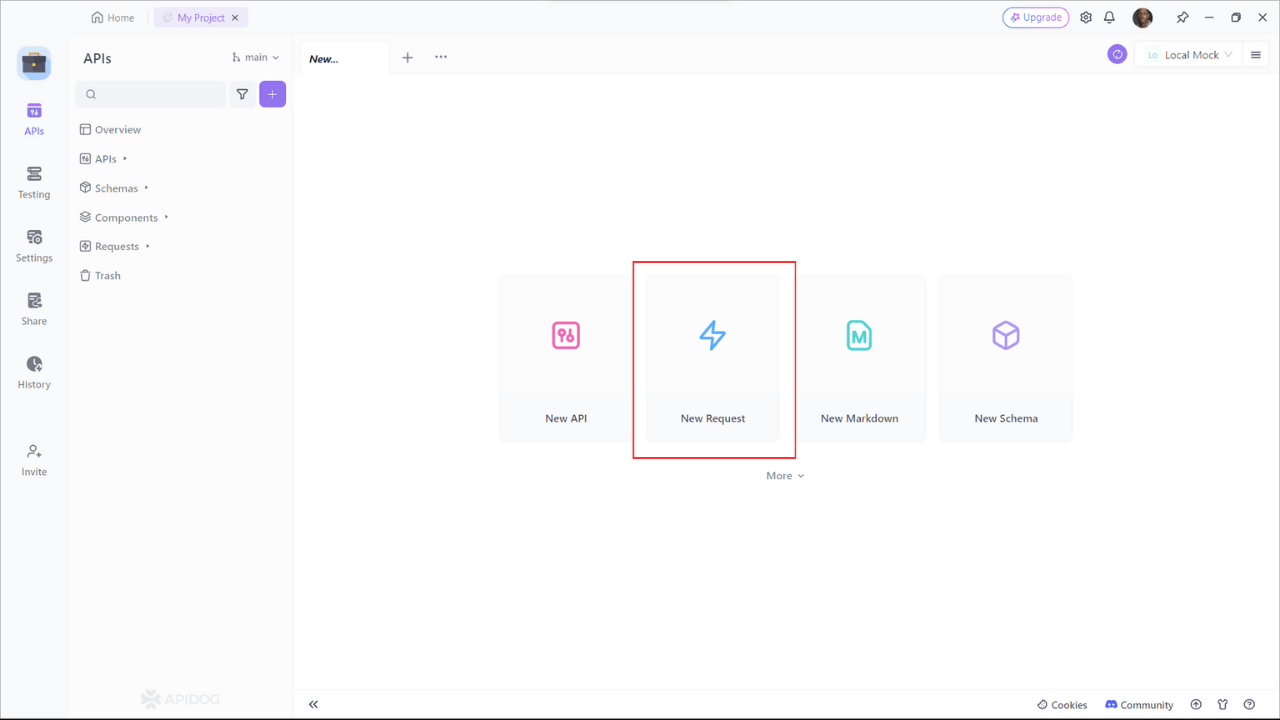
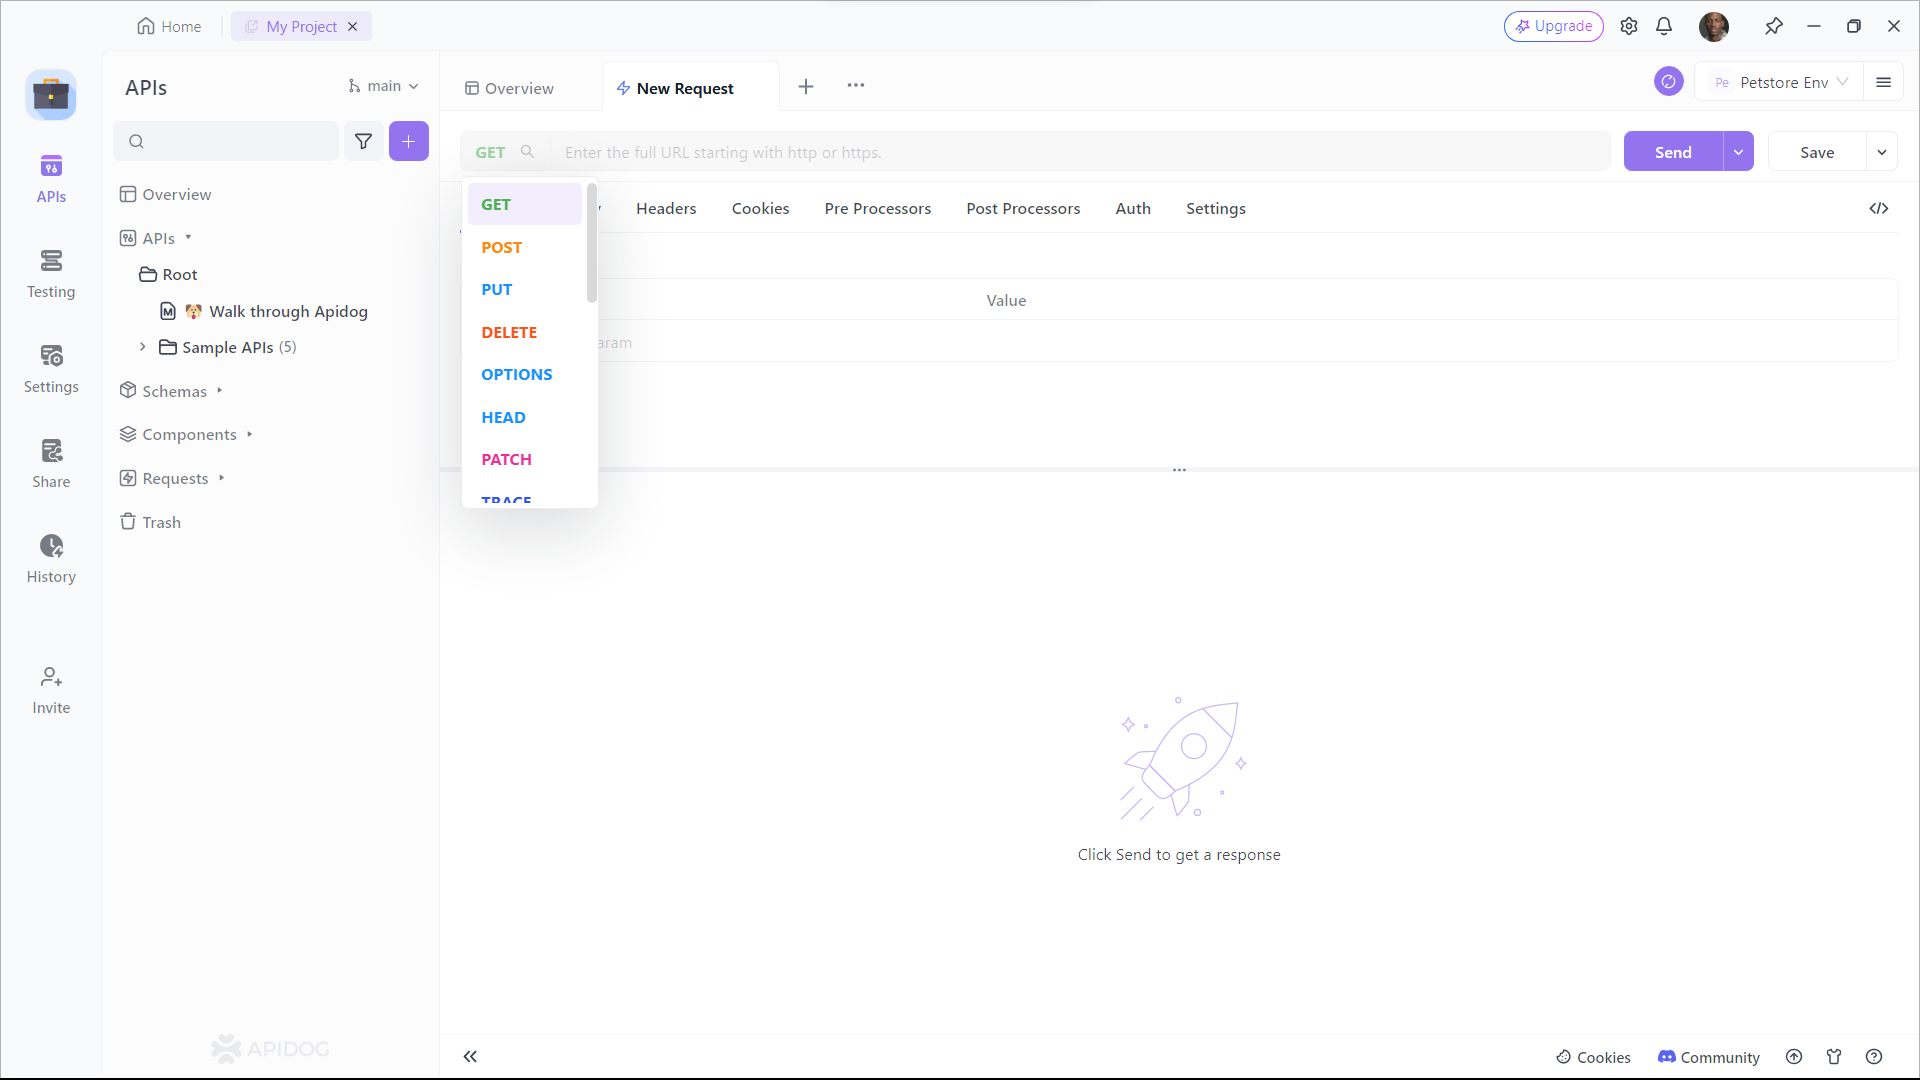
Step 1: Open Apidog and select new request

Step 2: Enter the URL of the API endpoint you want to send a request to,input any headers or query string parameters you wish to include with the request, then click on the "Design" to switch to the design interface of Apidog.

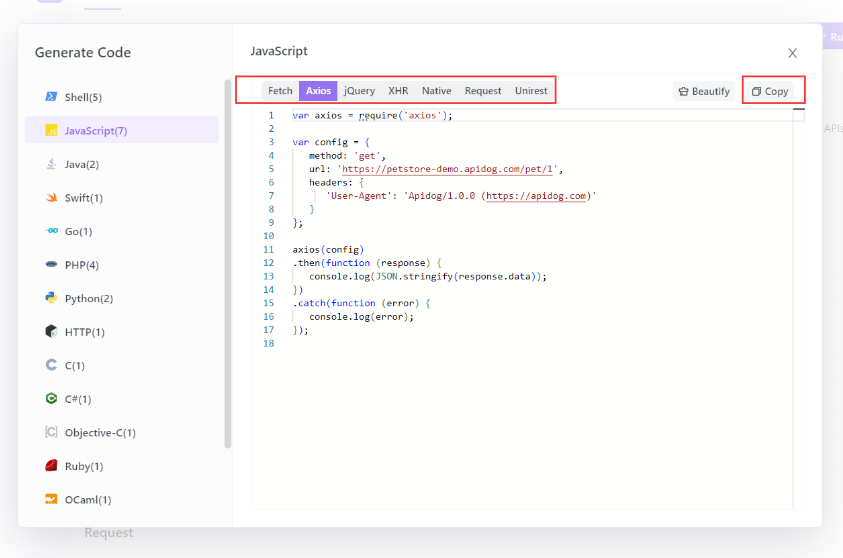
Step 3: Select "Generate client code " to generate your code.
Step 4: Copy the generated Axios code and paste it into your project.
Using Apidog to Send HTTP Requests
Apidog offers several advanced features that further enhance its ability to test HTTP requests. These features allow you to customize your requests and handle more complex scenarios effortlessly.
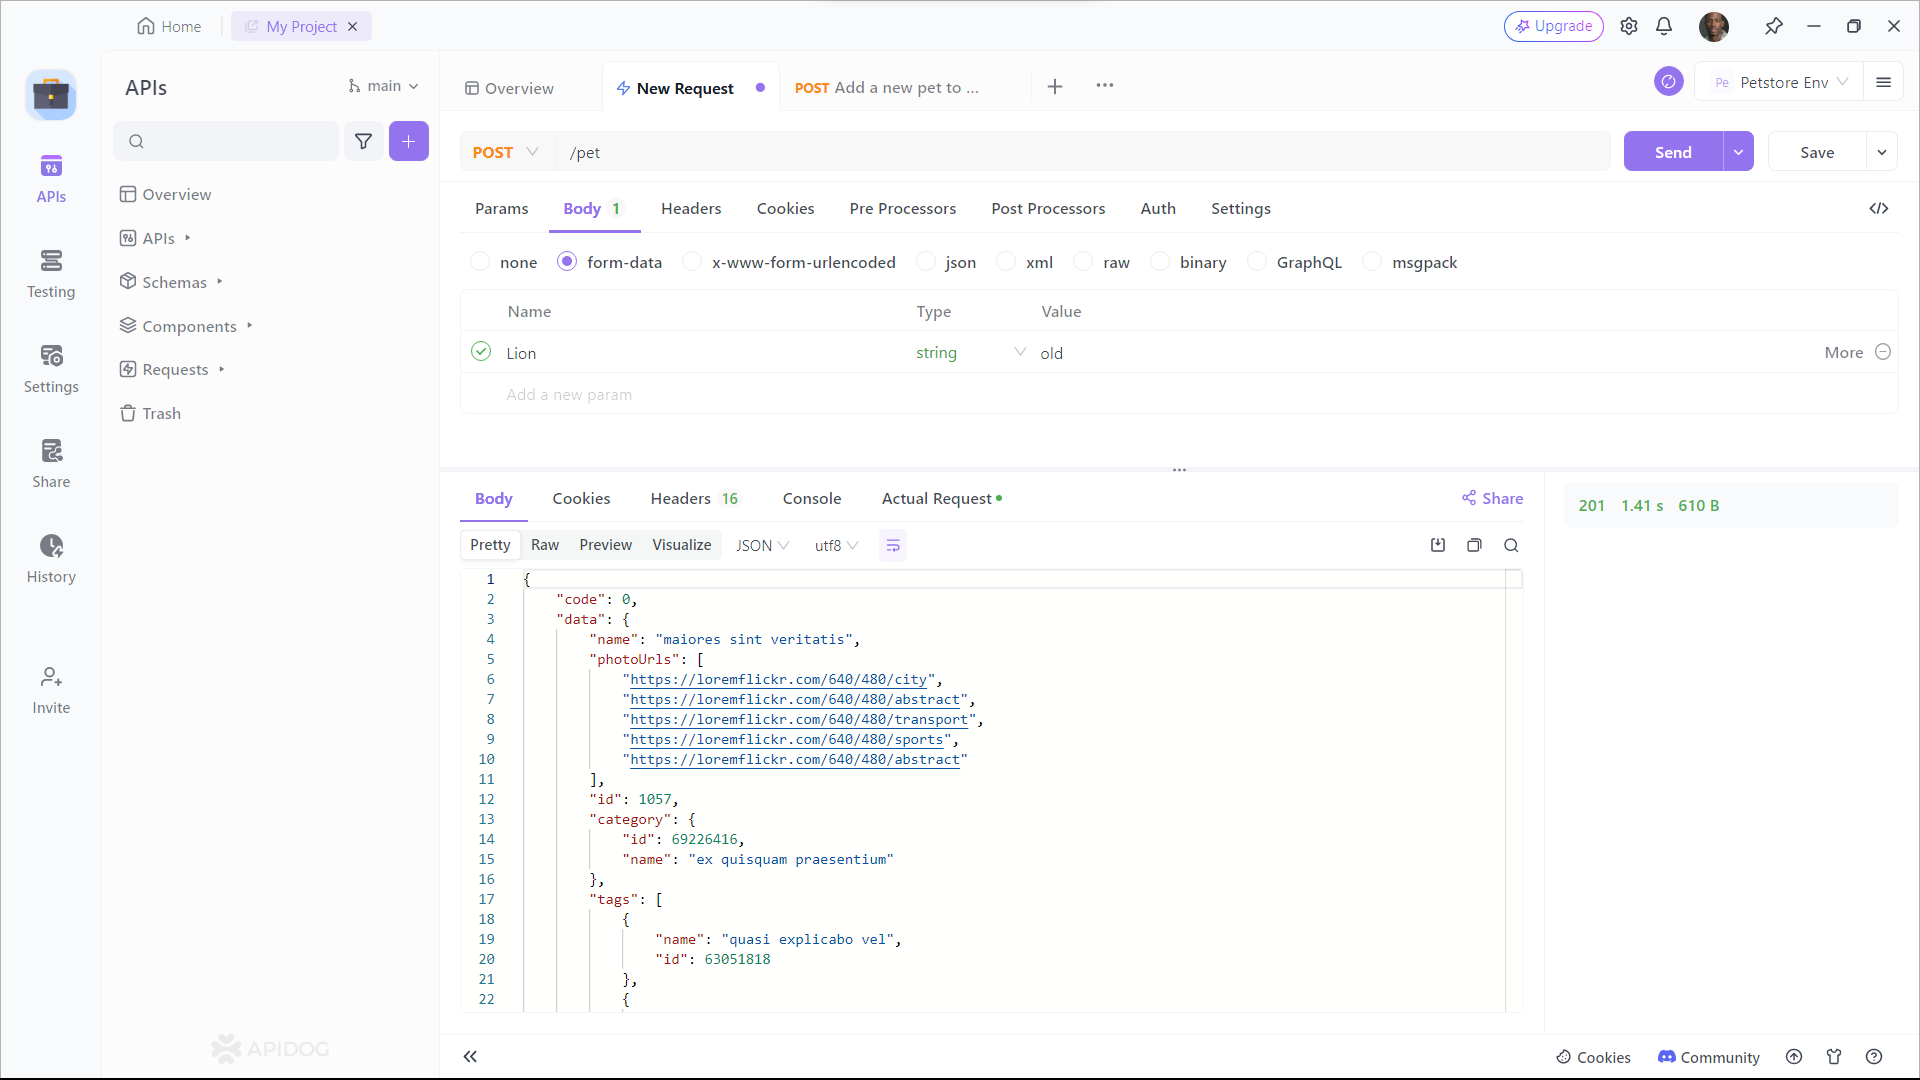
Step 1: Open Apidog and create a new request.
Step 2: Find or manually input the API details for the POST request you want to make.
Step 3: Fill in the required parameters and any data you want to include in the request body.
Best Practices for Using Axios Interceptors
While axios interceptors are powerful tools, it's important to follow best practices to ensure clean, maintainable code and avoid common pitfalls.
Tips for clean and maintainable interceptor code
- Separate concerns: Divide your interceptor logic into separate functions or modules based on their responsibilities. This promotes code reusability and makes it easier to maintain and update specific functionalities.
- Use middleware patterns: Embrace middleware patterns when structuring your interceptors. This approach allows you to chain multiple interceptors together, promoting modular and composable code.
- Leverage functional programming: Axios interceptors lend themselves well to functional programming principles. Utilize pure functions, higher-order functions, and immutable data structures to create more predictable and testable code.
Avoiding common pitfalls
- Avoid modifying the original request/response objects: Always return a new object or a cloned version of the original request or response object. Modifying the original objects can lead to unexpected behavior and hard-to-debug issues.
- Handle errors appropriately: Ensure that errors are properly propagated or handled within your interceptors. Failure to do so can result in unhandled promise rejections and obscure error messages.
- Be mindful of performance: While interceptors are powerful, overusing them or introducing complex logic can negatively impact performance. Strive for simplicity and efficiency in your interceptor implementations.
Conclusion
Axios API interceptors are an invaluable tool for managing HTTP requests and responses in your applications. They provide a centralized way to handle errors, manage tokens, log data, and more. By setting up Axios API interceptors, you can streamline your API interactions and create a more robust and maintainable codebase.
Additionally, Apidog complements Axios by offering a powerful platform for API testing and management. Whether you're working on a small project or a large-scale application, Apidog can help you ensure your APIs are reliable and well-documented.
So, what are you waiting for? Start implementing Axios API interceptors in your projects and download Apidog for free to take your API game to the next level. Happy coding!


