
In the fast-paced world of web development, Angular has carved out a significant niche for itself. If you're working with Angular and APIs, you’ve probably encountered the need to update resources on a server. That's where Angular PUT requests come into play. Whether you’re a seasoned developer or just starting out, understanding how to make PUT requests in Angular is crucial for ensuring your applications can effectively communicate with APIs.
Understanding Angular PUT Requests
At its core, a PUT request is used to update an existing resource on the server. Unlike a POST request, which is typically used to create new resources, a PUT request replaces the entire resource with the data you send. This means if you only want to update a few fields of a resource, you need to send the entire resource with the updated fields.
Why Use PUT Requests?
Using PUT requests in Angular has several advantages:
- Consistency: PUT requests are idempotent. This means that no matter how many times you send the request, the state of the resource remains the same.
- Clarity: PUT clearly signals that you are updating an existing resource, making your code more readable and maintainable.

Setting Up Your Angular Project
Before you can make a PUT request, you need an Angular project. If you don’t have one set up yet, here’s a quick rundown on how to get started:
ng new angular-put-request-demo
cd angular-put-request-demo
ng serve
Now, you have a basic Angular application up and running.
Making Your First PUT Request in Angular
Let’s break down the steps to make a PUT request in Angular.
Step 1: Import HttpClientModule
First, you need to import the HttpClientModule in your Angular app. This module provides a simplified API for HTTP functionality.
Open app.module.ts and add the following import:
import { HttpClientModule } from '@angular/common/http';

@NgModule({
  declarations: [
    // your components here
  ],
  imports: [
    // other modules here
    HttpClientModule
  ],
  providers: [],
  bootstrap: [AppComponent]
})
export class AppModule { }
Step 2: Create a Service for API Calls
Creating a service for your API calls helps in keeping your code modular and reusable. Let’s create a service called ApiService.
ng generate service api
In the newly created api.service.ts, inject the HttpClient and create a method for the PUT request.
import { Injectable } from '@angular/core';
import { HttpClient } from '@angular/common/http';
import { Observable } from 'rxjs';

@Injectable({
  providedIn: 'root'
})
export class ApiService {

  private apiUrl = 'https://your-api-url.com/resources';

  constructor(private http: HttpClient) { }

  updateResource(id: number, resourceData: any): Observable<any> {
    const url = `${this.apiUrl}/${id}`;
    return this.http.put(url, resourceData);
  }
}
In this service, we defined a method updateResource that takes an id and resourceData, constructs the appropriate URL, and makes a PUT request to update the resource.
Integrating PUT Requests in Your Component
Now that your service is set up, it’s time to use it in a component. For this example, we’ll use the AppComponent.
Step 3: Inject the ApiService
In your app.component.ts, inject the ApiService and create a method to call the updateResource function.
import { Component } from '@angular/core';
import { ApiService } from './api.service';

@Component({
  selector: 'app-root',
  templateUrl: './app.component.html',
  styleUrls: ['./app.component.css']
})
export class AppComponent {
  title = 'angular-put-request-demo';

  constructor(private apiService: ApiService) {}

  updateResource() {
    const id = 1; // example resource ID
    const updatedData = {
      name: 'Updated Resource Name',
      description: 'Updated Resource Description'
    };

    this.apiService.updateResource(id, updatedData).subscribe(
      response => {
        console.log('Resource updated successfully', response);
      },
      error => {
        console.error('Error updating resource', error);
      }
    );
  }
}
In this component, we’ve created a method updateResource which calls the updateResource method from the ApiService.
Step 4: Add a Trigger in the Template
To trigger the update, add a button in your app.component.html.
<div style="text-align:center">
  <h1>
    Welcome to {{ title }}!
  </h1>
  <button (click)="updateResource()">Update Resource</button>
</div>
Handling Responses and Errors
Handling responses and errors is an important part of working with APIs. In the example above, we used subscribe to handle the response and errors.
However, for more complex applications, you might want to use catchError from rxjs/operators to handle errors in a more streamlined way.
Using catchError for Error Handling
First, import the necessary operators:
import { catchError } from 'rxjs/operators';
import { throwError } from 'rxjs';
Then, update the updateResource method in api.service.ts:
updateResource(id: number, resourceData: any): Observable<any> {
  const url = `${this.apiUrl}/${id}`;
  return this.http.put(url, resourceData).pipe(
    catchError(this.handleError)
  );
}

private handleError(error: any) {
  console.error('An error occurred:', error);
  return throwError(error);
}
With this setup, any errors during the PUT request will be caught and handled by handleError, which you can customize further to fit your needs.
Using Apidog for API Management
When working with APIs, having a reliable tool to manage and test your requests can save you a lot of time and effort. Apidog is an excellent choice for this purpose. It provides a user-friendly interface to create, test, and document your APIs. Plus, it's free to use!
Benefits of Using Apidog
- Easy Testing: Quickly test your APIs with an intuitive interface.
- Comprehensive Documentation: Automatically generate documentation for your APIs.
- Collaboration: Share your API specifications with your team effortlessly.
To get started with Apidog, simply download it for free and integrate it into your workflow.
How to send Angular PUt request using Apidog
To create and test a PUT request in Apidog, you can follow these steps:
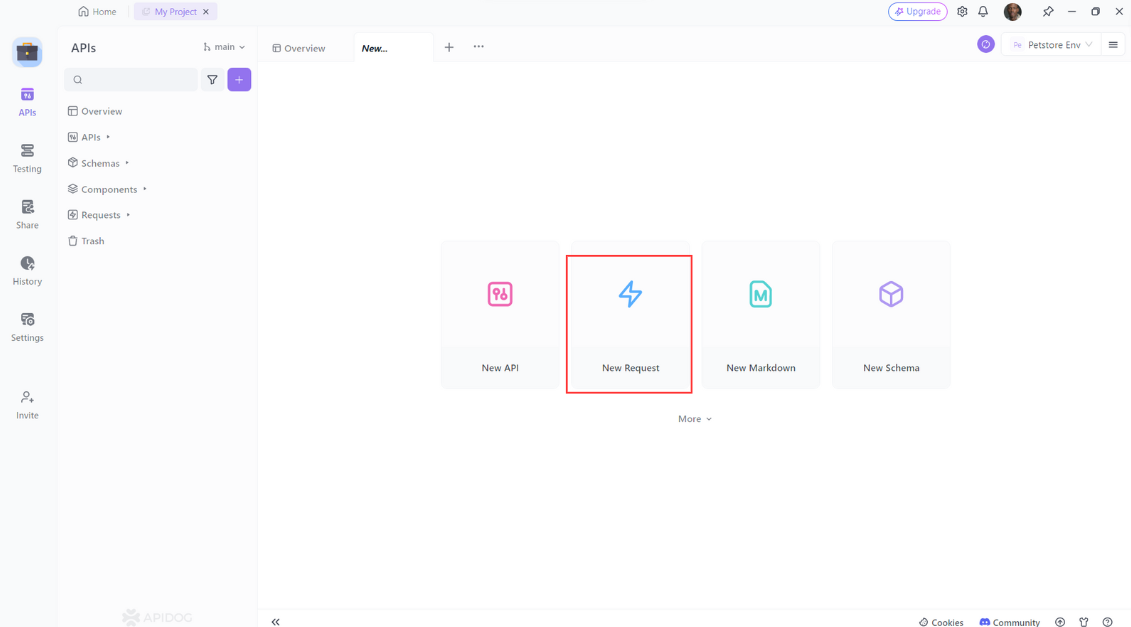
- Open Apidog: Open Apidog and create a new request.
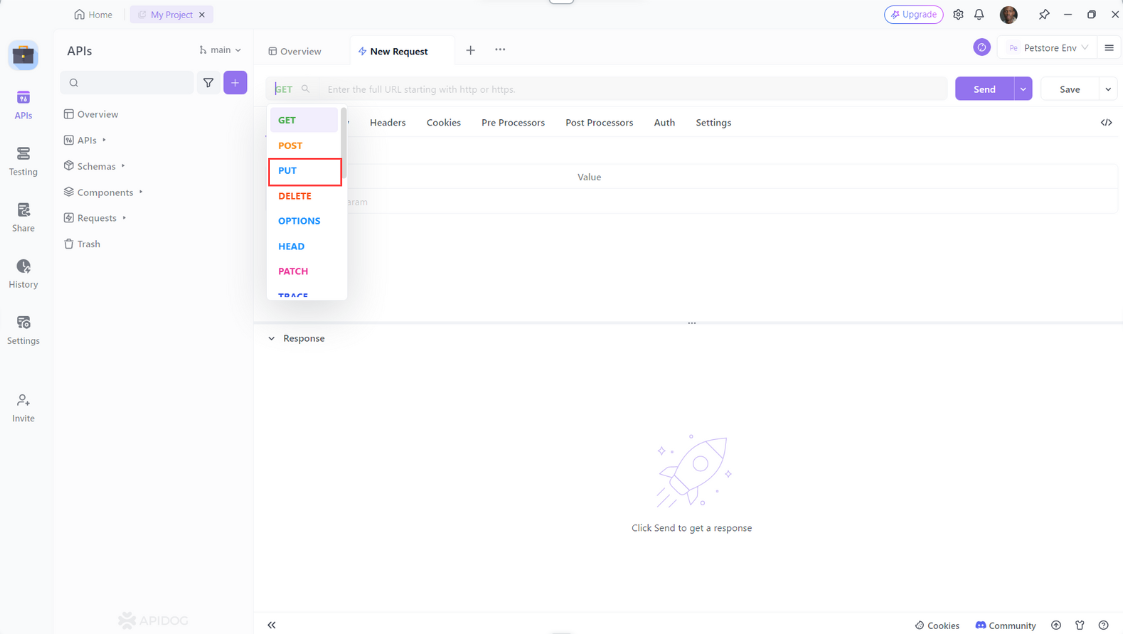
2. Specify the HTTP method: Select PUT as the HTTP method.
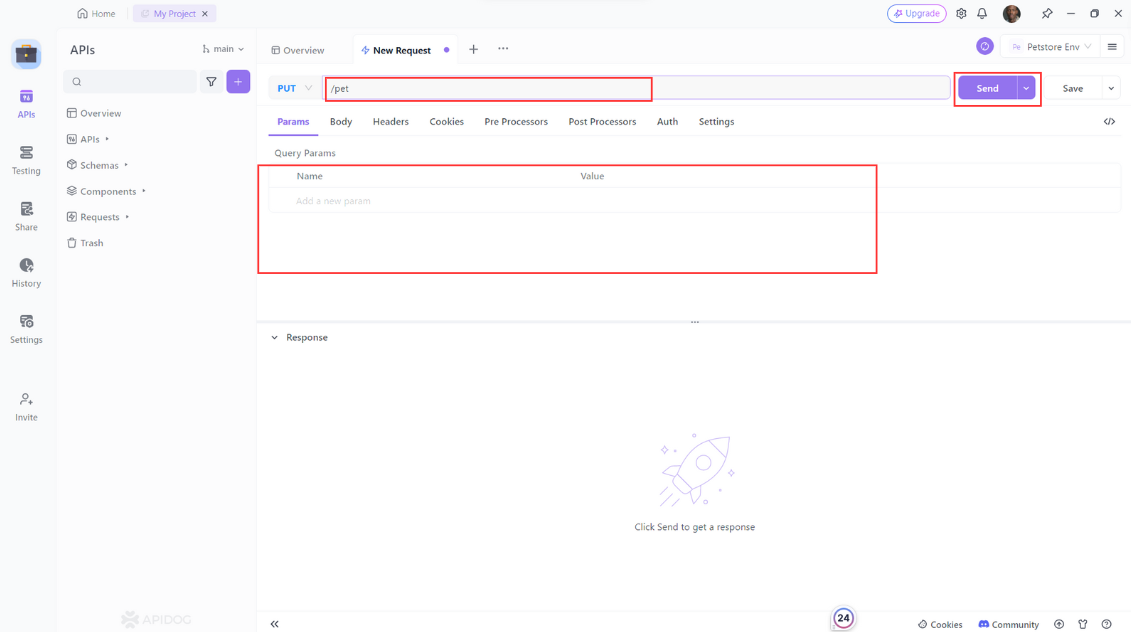
3. Define the request URL: Enter the URL of the resource you want to update, add request headers, and/or the request body.Then click the “Send” button to send the PUT request
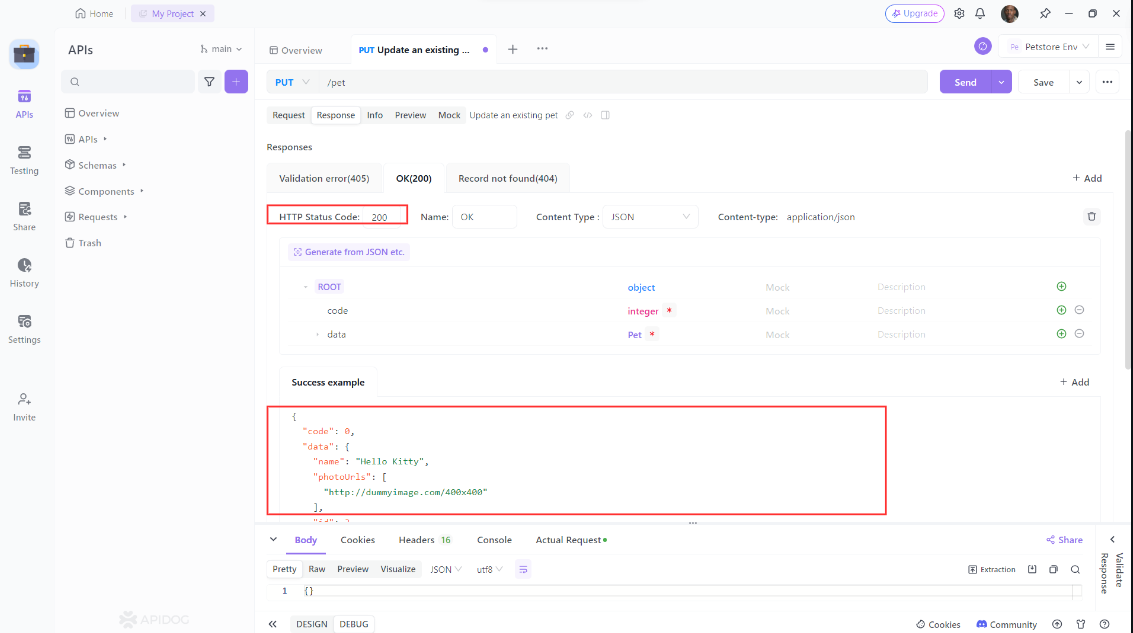
4. Check the response: Check the response from the server to ensure that the PUT request was successful.
Advanced PUT Request Handling
So far, we’ve covered the basics of making a PUT request in Angular. Let’s explore some advanced topics that can help you become even more proficient.
Optimizing Data Handling with Models
Using TypeScript models can help ensure that your data handling is type-safe and more maintainable. Create a model for your resource:
export interface Resource {
  id: number;
  name: string;
  description: string;
}
Then, update your service to use this model:
import { Resource } from './resource.model';

updateResource(id: number, resourceData: Resource): Observable<Resource> {
  const url = `${this.apiUrl}/${id}`;
  return this.http.put<Resource>(url, resourceData).pipe(
    catchError(this.handleError)
  );
}
Partial Updates with PATCH Requests
If you need to update only a few fields of a resource without sending the entire resource, consider using a PATCH request instead of PUT. Here’s how you can modify the service:
updateResourcePartially(id: number, partialData: Partial<Resource>): Observable<Resource> {
  const url = `${this.apiUrl}/${id}`;
  return this.http.patch<Resource>(url, partialData).pipe(
    catchError(this.handleError)
  );
}
Interceptors for Request Customization
Angular provides HTTP interceptors to modify requests globally. You can use interceptors to add authentication tokens, handle errors, or log requests.
First, create an interceptor:
ng generate interceptor http
In the generated http.interceptor.ts, implement the interceptor logic:
import { Injectable } from '@angular/core';
import { HttpInterceptor, HttpRequest, HttpHandler, HttpEvent } from '@angular/common/http';
import { Observable } from 'rxjs';

@Injectable()
export class HttpInterceptorService implements HttpInterceptor {

  intercept(req: HttpRequest<any>, next: HttpHandler): Observable<HttpEvent<any>> {
    const clonedRequest = req.clone({
      headers: req.headers.set('Authorization', 'Bearer your-token-here')
    });

    return next.handle(clonedRequest);
  }
}
Then, register the interceptor in app.module.ts:
import { HTTP_INTERCEPTORS } from '@angular/common/http';
import { HttpInterceptorService } from './http.interceptor';

@NgModule({
  // other configurations
  providers: [
    { provide: HTTP_INTERCEPTORS, useClass: HttpInterceptorService, multi: true }
  ],
})
export class AppModule { }
Conclusion
Mastering Angular PUT requests is essential for any developer working with APIs. By understanding the fundamentals and exploring advanced techniques, you can ensure your applications are robust, efficient, and maintainable. Remember to leverage tools like Apidog to streamline your API development and testing processes.
If you haven’t already, download Apidog for free and start optimizing your API workflows today. Happy coding!


