The rise of AI-driven development tools has transformed software engineering, and OpenAI Codex stands at the forefront of this evolution. As a versatile coding agent powered by advanced models like Codex-1, it enables developers to generate code, debug issues, and automate tasks directly from their terminal or within the ChatGPT interface. Whether you're a seasoned developer or a newcomer, accessing OpenAI Codex can streamline your workflow, enhance productivity, and integrate seamlessly with tools like Apidog for API testing.
This article provides a detailed, technical guide on accessing OpenAI Codex, covering its command-line interface (CLI), cloud-based integration, and setup on various platforms, including Windows via WSL. By the end, you'll understand how to harness Codex's capabilities and integrate it with Apidog for a complete development experience.
What Is OpenAI Codex?
Before exploring how to access OpenAI Codex, let's clarify what it is. OpenAI Codex is a family of AI-powered coding agents built on the Codex-1 model, an evolution of earlier models that powered tools like GitHub Copilot. Unlike traditional autocomplete tools, Codex combines advanced reasoning with execution capabilities, allowing it to read codebases, generate code, run commands, and iterate on solutions. It supports both local (via Codex CLI) and cloud-based workflows, making it adaptable to diverse development environments.
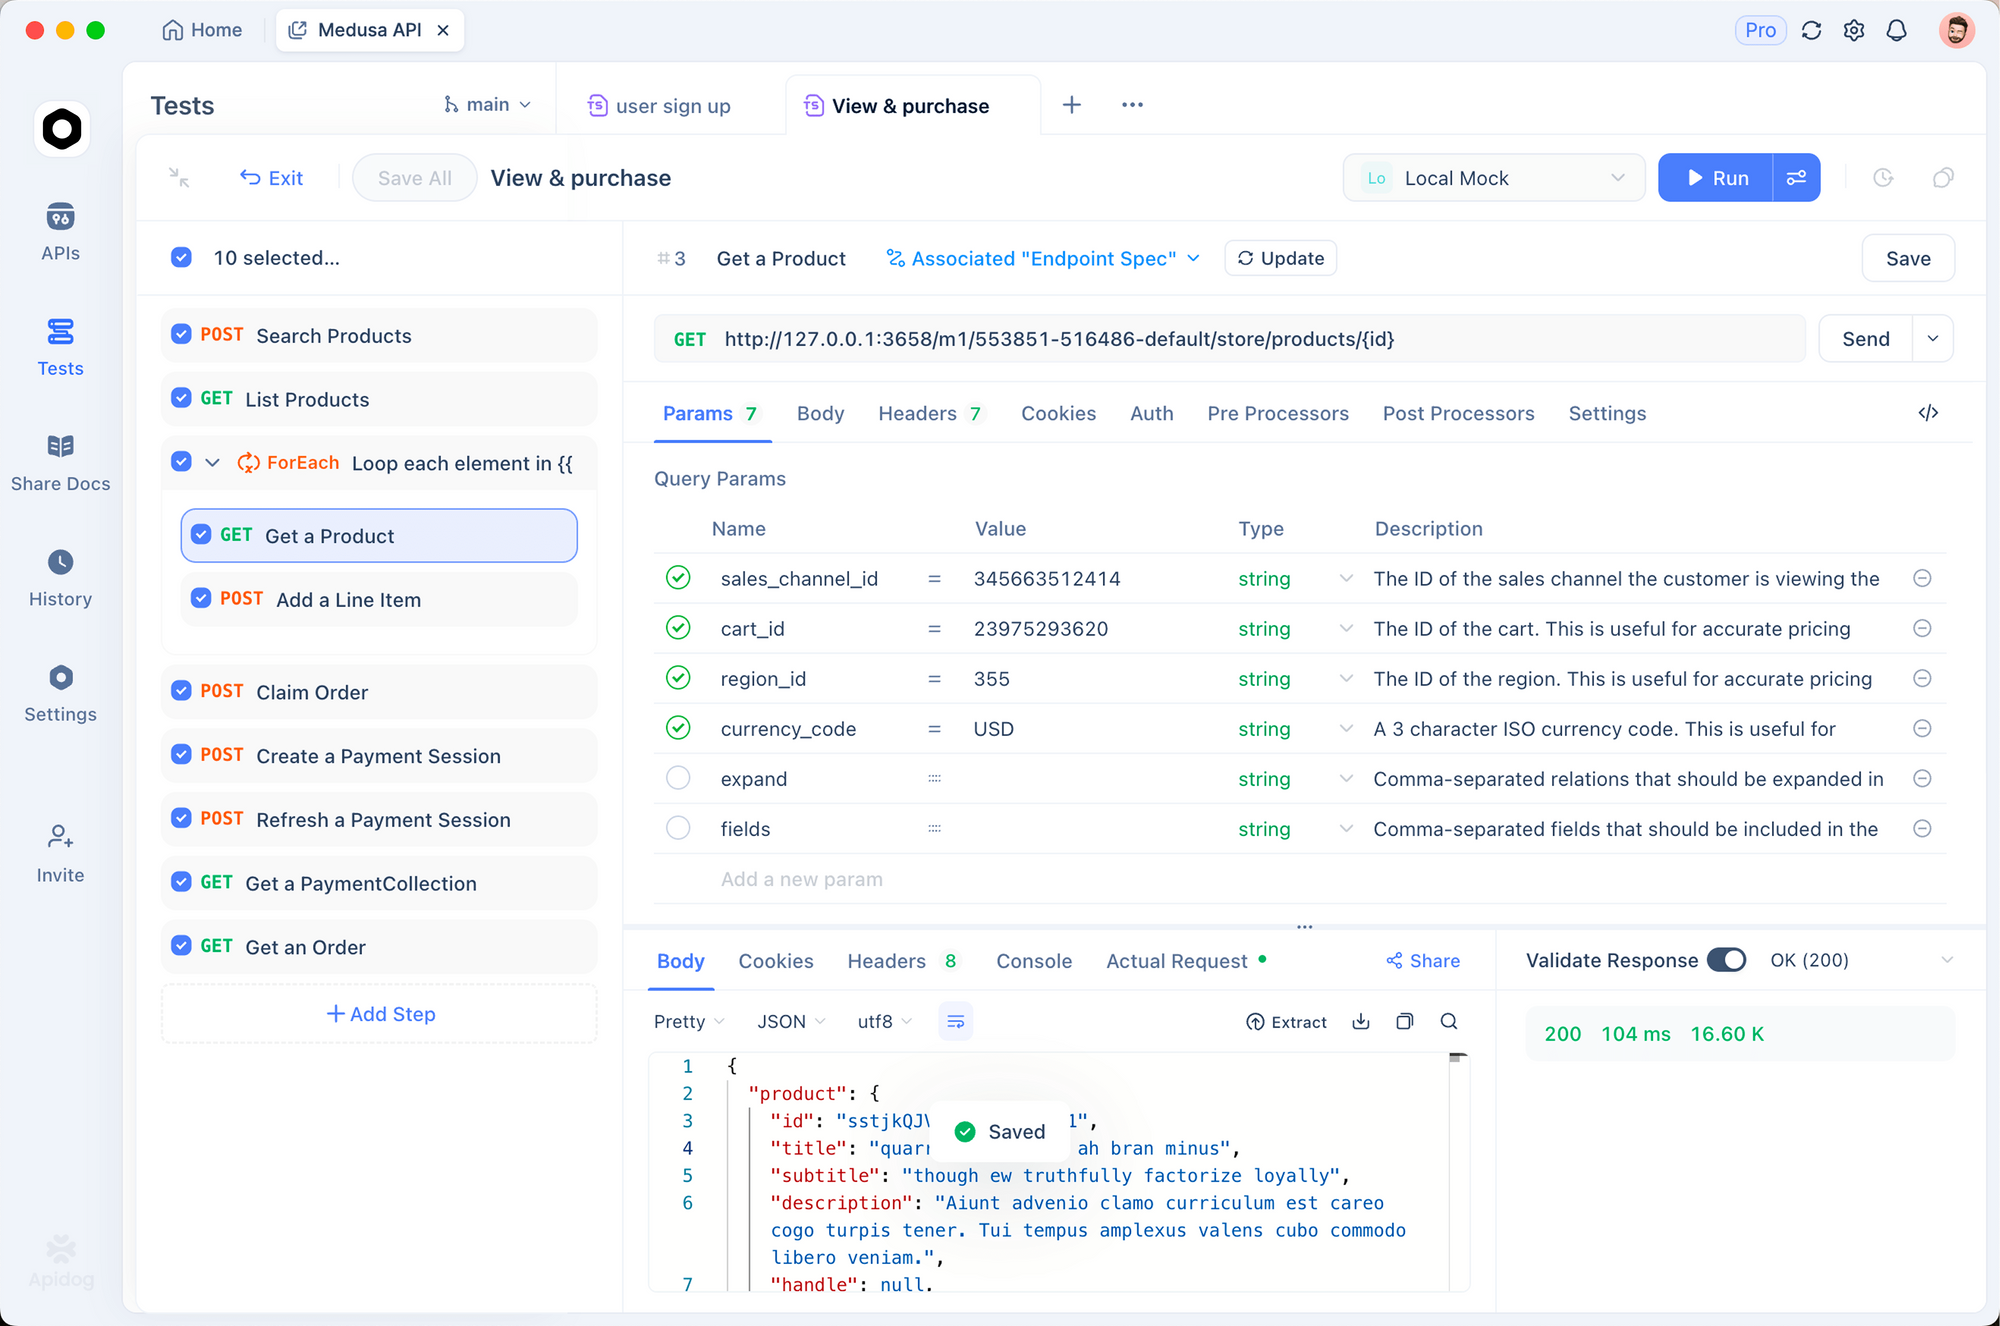
Codex excels in tasks like code generation, refactoring, debugging, and even high-level repository analysis. Its ability to process multimodal inputs, such as screenshots or diagrams, and integrate with version control systems like Git, sets it apart. Additionally, tools like Apidog enhance Codex's utility by providing robust API testing and documentation power, ensuring your Codex-generated APIs are production-ready.
Why Access OpenAI Codex?
Accessing OpenAI Codex offers several advantages for developers:
- Terminal-Native Workflow: The Codex CLI integrates directly into your terminal, eliminating the need for context-switching to web-based interfaces.
- Context-Aware Coding: Codex understands your repository's structure, enabling it to provide relevant suggestions and execute tasks within your project's context.
- Safe Automation: With sandboxed execution and configurable approval modes, Codex ensures secure operations.
- Multimodal Capabilities: Codex processes images and diagrams, making it ideal for tasks like implementing UI designs or API flows.
- Open-Source Transparency: The Codex CLI, available on GitHub, fosters community contributions and trust.
- API Testing Integration: Pairing Codex with Apidog allows developers to test and document APIs generated by Codex, streamlining the development pipeline.

Now, let's explore the primary methods to access OpenAI Codex: the CLI and the ChatGPT interface.
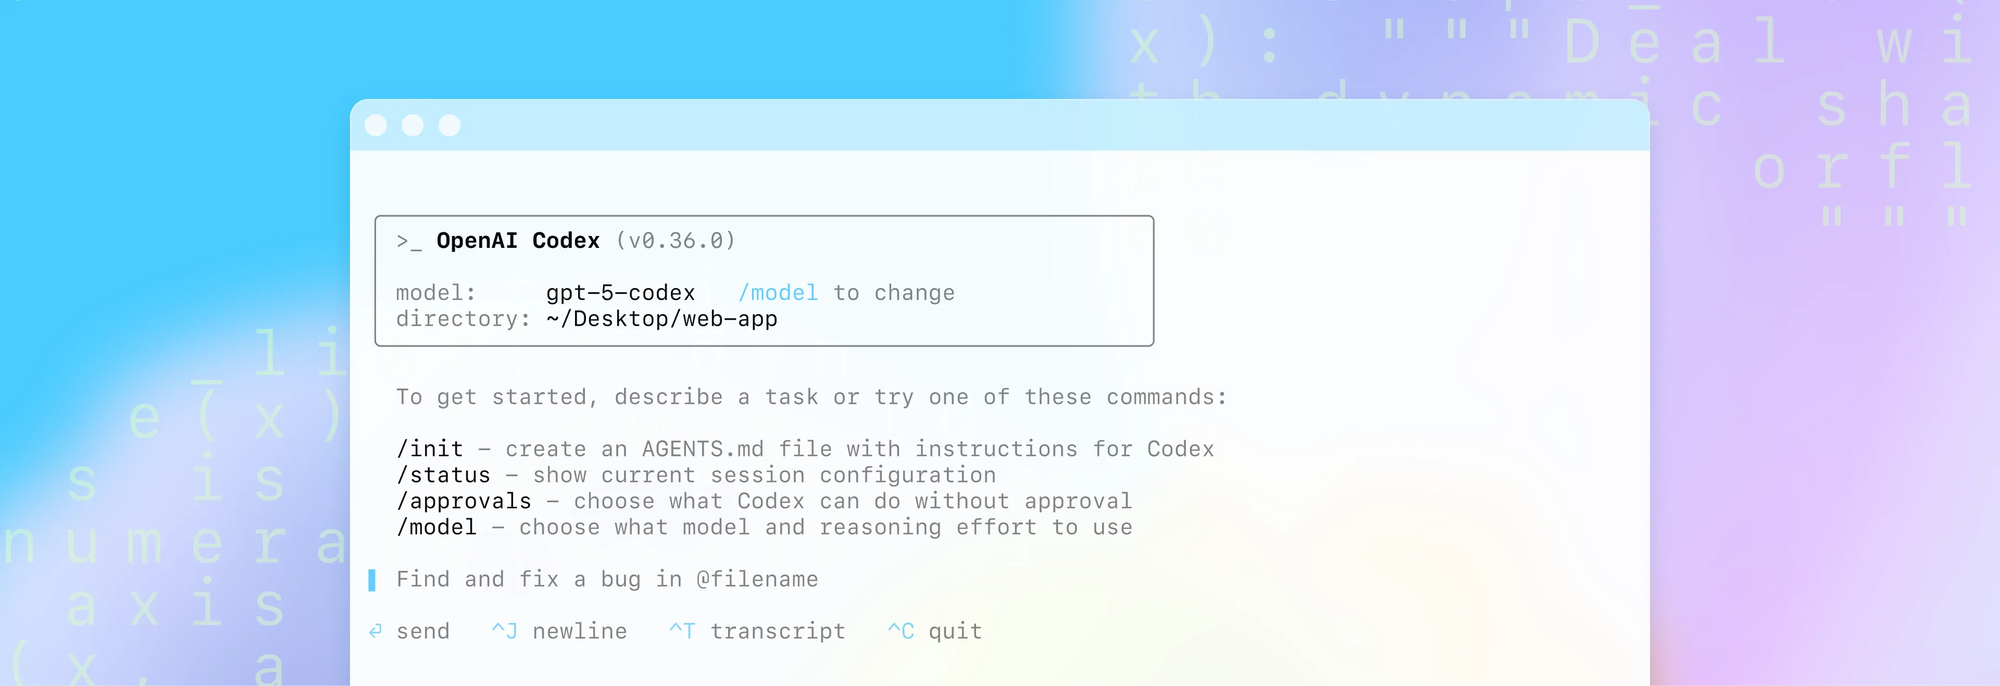
Accessing OpenAI Codex via the Command-Line Interface (CLI)
The Codex CLI, available as an npm package (@openai/codex), is designed for developers who prefer terminal-based workflows. It’s lightweight, open-source, and integrates seamlessly with your local repository. Below, we outline the steps to set it up and use it effectively.
System Requirements
To access OpenAI Codex CLI, ensure your system meets these prerequisites:
- Operating Systems: macOS 12+, Ubuntu 20.04+/Debian 10+, or Windows 11 via WSL2.
- Node.js: Version 22 or newer (LTS recommended).
- Git: Version 2.23+ for version control integration (optional but recommended).
- RAM: Minimum 4 GB, 8 GB recommended.
- OpenAI API Key: Required for authentication.
Installation Steps
Install Node.js:
- On macOS/Linux, use Node Version Manager (NVM):
curl -o- https://raw.githubusercontent.com/nvm-sh/nvm/v0.39.7/install.sh | bash
nvm install --lts- On Windows, use WSL2 and follow the same NVM installation process.
- Verify with
node --versionandnpm --version.
Install Codex CLI:
- Run the following command to install globally:
npm install -g @openai/codex
- Avoid using
sudoto prevent permission issues; configure npm permissions if needed.
Set Up OpenAI API Key:
- Obtain your API key from openai.com.
- Set it as an environment variable:
export OPENAI_API_KEY="your-api-key-here"
- For persistence, add the above line to your shell configuration file (
~/.zshrc,~/.bashrc, or~/.bash_profile).
Verify Installation:
- Run
codex --versionto confirm the CLI is installed correctly.
Using Codex CLI
Once installed, you can access OpenAI Codex CLI in three modes:
- Interactive Mode: Launch with
codexto enter a REPL (Read-Eval-Print Loop) where you issue natural language commands, e.g., "Generate a Python script for a REST API." - Direct Prompt: Run a single command, e.g.:
codex "Refactor my React component to use Hooks"
- Automated Execution: Use approval modes for automation:
codex --approval-mode full-auto "Create a Node.js Express server"
Codex reads your repository, generates code, executes commands in a sandbox, and presents diffs for approval. For API-related tasks, you can use Apidog to test and document the generated APIs, ensuring they meet your specifications.
Approval Modes
Codex CLI offers three approval modes to balance automation and control:
- Suggest Mode: Reads files without approval but requires manual confirmation for writes and commands. Ideal for sensitive operations.
- Auto-Edit Mode: Allows file reads and writes without approval but requires confirmation for shell commands. Suitable for refactoring tasks.
- Full-Auto Mode: Permits all operations within a sandbox, ideal for trusted, repetitive tasks.
Each mode includes safeguards like network-disabled sandboxes and Git integration to ensure safety and reversibility.
Accessing OpenAI Codex via ChatGPT
For developers preferring a cloud-based interface, OpenAI Codex is accessible through ChatGPT’s "Codex (beta)" sidebar. This method leverages micro-VMs for task execution, offering parallelism and isolation. Here's how to access it.
Prerequisites
- ChatGPT Subscription: Available to Pro, Enterprise, and Team users as of September 2025, with Plus and EDU access planned.
- GitHub Account: Required for repository integration.
- Multi-Factor Authentication (MFA): Mandatory for security.
Setup Steps
- Go to the ChatGPT Website: Open your web browser and navigate to chatgpt.com or chatgpt.com/codex.
- Connect Your GitHub Account: In your workspace or account settings, locate and enable the GitHub connector and follow the instructions to connect your GitHub account to Codex.
- Access from the Sidebar: After connecting your account and enabling the feature in your workspace settings, the Codex link will appear in the left-hand navigation panel of the ChatGPT interface.
- Start Coding:
- Assign Tasks: Click the "Code" button to give Codex a new coding task by typing your prompt.
- Ask Questions: Click the "Ask" button to ask questions or get information about your codebase.
- Isolated Environment: Codex will work in a separate, isolated environment preloaded with your connected repository.
5. Create Pull Requests: Once Codex completes a task, you can generate a pull request directly from the platform to merge the changes into your repository.
Accessing OpenAI Codex on Windows via WSL
Windows users can access OpenAI Codex CLI using Windows Subsystem for Linux (WSL2), which provides a Linux environment for stable operation. Here’s how to set it up.
Enabling WSL2
Enable Windows Features:
- Open “Turn Windows features on or off” from the Start menu.
- Check “Virtual Machine Platform” and “Windows Subsystem for Linux.”
- Restart your PC.
Update WSL:
- In PowerShell, run:
wsl --update
- Verify with
wsl --status(should show Default Version: 2).
Install a Linux Distro:
- Open Microsoft Store and install Ubuntu 22.04 LTS.
- Launch Ubuntu, set up a username and password, and initialize the filesystem.
Installing Node.js and Codex CLI
Update Ubuntu Packages:
sudo apt update && sudo apt upgrade -y
Install curl:
sudo apt install curl -y
Install NVM:
curl -o- https://raw.githubusercontent.com/nvm-sh/nvm/v0.39.7/install.sh | bash
source ~/.bashrc
Install Node.js:
nvm install --lts
Install Codex CLI:
npm install -g @openai/codex
Set API Key:
- Add
export OPENAI_API_KEY=yourkeyto~/.bashrcand runsource ~/.bashrc.
Running Codex on WSL
- Launch Codex with
codexfor interactive mode or use direct prompts, e.g.:
codex "Generate a Python script for data analysis"
- For API development, test outputs with Apidog to ensure functionality.
WSL2 ensures Codex runs smoothly on Windows, with Apidog providing a robust testing environment for APIs.
Practical Use Cases for OpenAI Codex
OpenAI Codex supports a wide range of development tasks. Here are some examples:
Code Refactoring:
- Prompt: "Refactor
dashboard.jsto use React Hooks." - Codex rewrites the code, runs tests, and presents diffs.
Database Migrations:
- Prompt: "Generate SQL migrations for a users table."
- Codex creates migration files and tests them in a sandbox.
Unit Test Generation:
- Prompt: "Write unit tests for
utils.py." - Codex generates tests and validates them with tools like
pytest.
Security Audits:
- Prompt: "Scan my repo for vulnerabilities."
- Codex identifies issues and suggests fixes, which can be tested with Apidog.
API Development:
- Prompt: "Build a REST API with Express."
- Use Apidog to test and document the resulting endpoints.
These use cases demonstrate Codex's versatility, with Apidog ensuring robust API validation.
Best Practices for Using OpenAI Codex
To maximize the benefits of OpenAI Codex, follow these best practices:
- Use Git Integration: Always work in a Git-tracked directory to enable version control and easy reversibility.
- Start with Suggest Mode: For new projects, use suggest mode to maintain control over changes.
- Leverage Project Context: Create
codex.mdfiles to provide project-specific instructions. - Test with Apidog: Validate Codex-generated APIs with Apidog to ensure functionality and compliance.
- Monitor Usage Limits: For ChatGPT-based Codex, track usage to avoid hitting limits during the beta phase.
- Update Regularly: Keep the Codex CLI updated (
npm update -g @openai/codex) for the latest features and security patches.
Troubleshooting Common Issues
Encountering issues while accessing OpenAI Codex? Here are solutions:
- NPM Installation Fails: Install
build-essentialon Linux (sudo apt install build-essential -y) or check npm permissions. - API Key Errors: Ensure the
OPENAI_API_KEYis correctly set and valid. - WSL Issues: Verify WSL2 is enabled and update with
wsl --update. - ChatGPT Access Denied: Confirm your subscription tier (Pro, Enterprise, or Team) and set up MFA.
- API Testing Failures: Use Apidog to debug endpoints and verify specifications.
Conclusion
Accessing OpenAI Codex opens a world of possibilities for developers, from automating code generation to streamlining API testing with Apidog. Whether you choose the terminal-native Codex CLI or the cloud-based ChatGPT interface, Codex empowers you to focus on high-level tasks while handling the details. By following this guide, you can set up Codex on your preferred platform, integrate it with Apidog, and transform your development workflow. Start exploring Codex today and leverage Apidog’s free download to enhance your API development!