
What Is Warp Terminal? Key Features for Developers
Warp Terminal is a modern, Rust-based, GPU-accelerated terminal emulator built to make command-line workflows faster, smarter, and more collaborative. Unlike traditional terminals, Warp rethinks core interactions for today’s API developers, backend engineers, and technical teams.
Why are developers switching to Warp?
Warp offers:
- Real-time, predictive autocompletion powered by AI
- GPU-accelerated rendering for seamless performance
- Block-based output for easier navigation and copy-pasting
- Built-in collaboration tools (like session sharing and chat)
- Cross-platform support (macOS, Windows, Linux)
These features deliver a productivity boost for API and backend projects, especially when working with complex toolchains or collaborating across teams.
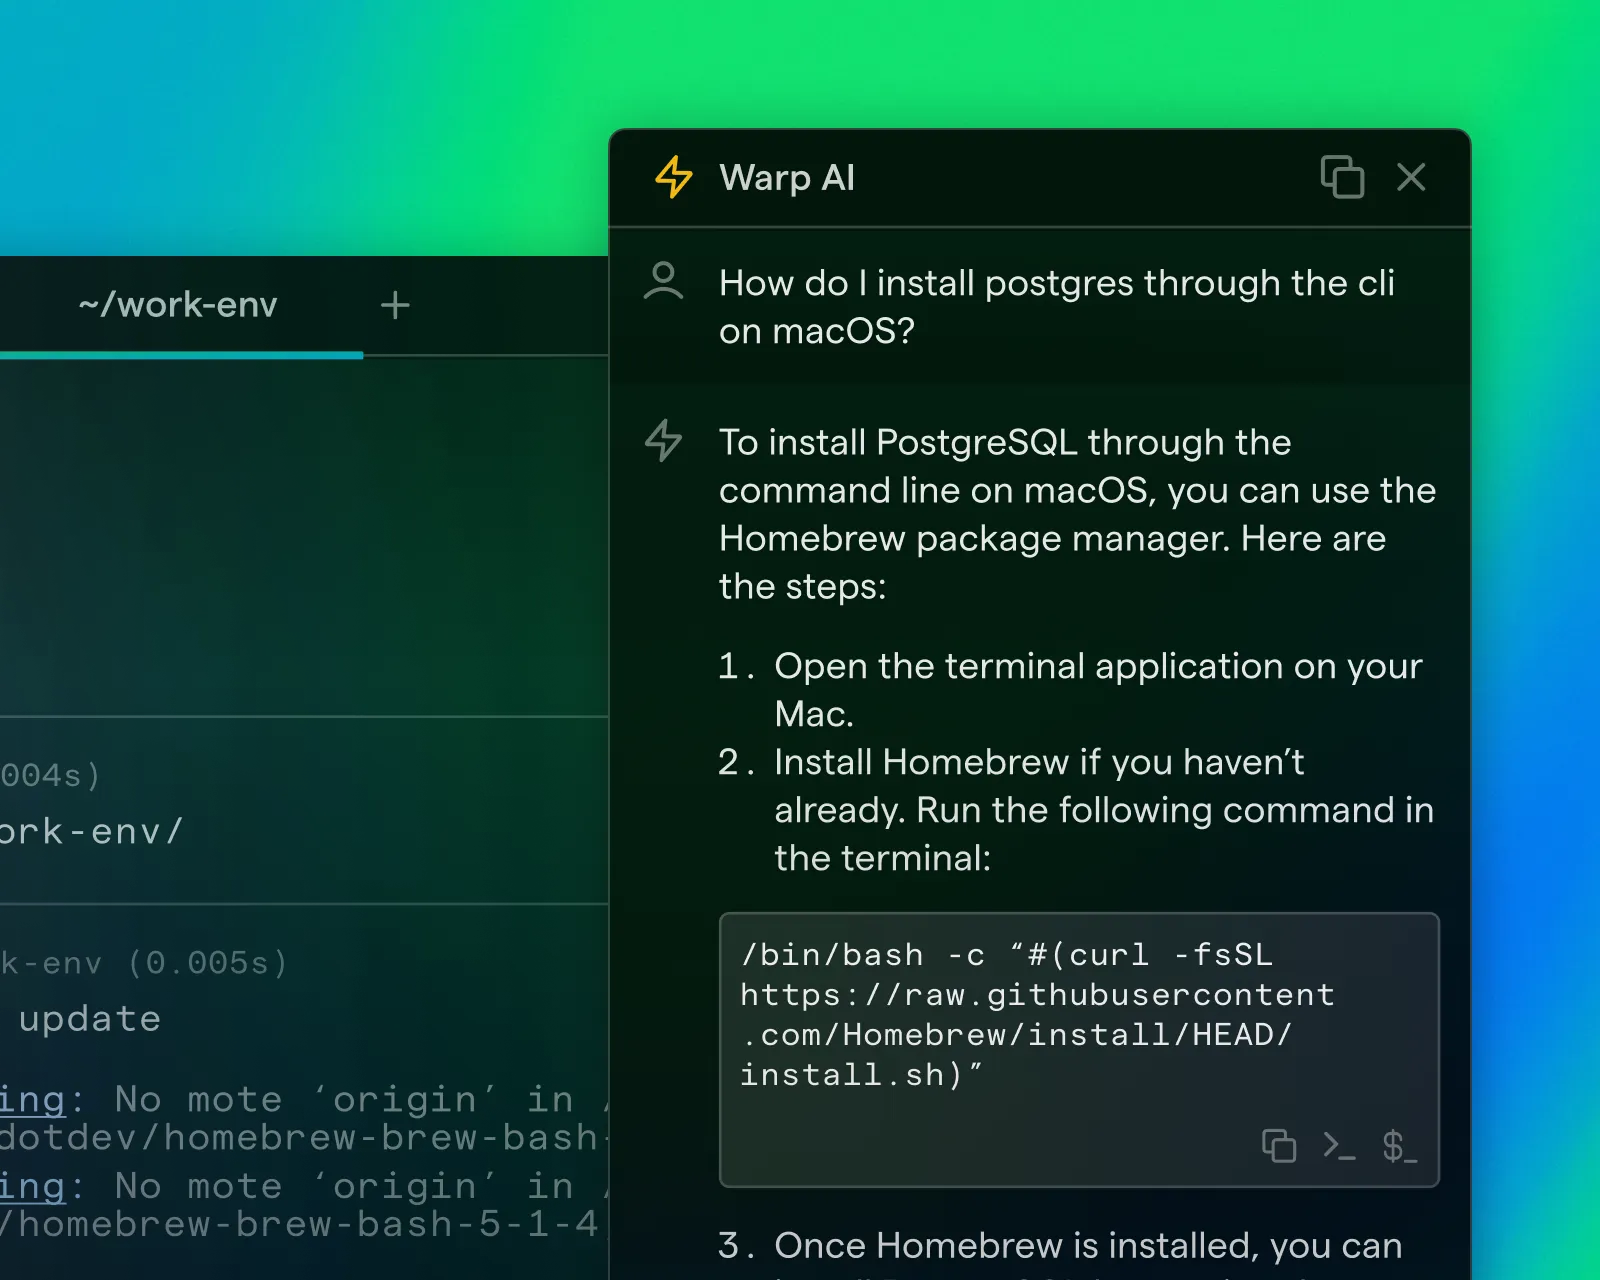
AI Inside Warp:
Warp Terminal’s AI-driven features help you find commands, understand errors, and autocomplete code—right in your terminal. Compared to alternatives like Ghostty, Warp’s interface is polished and intuitive, with frequent updates and a strong open-source community.
💡 Tip for API Developers:
If you’re building or testing APIs in Warp, consider using Apidog alongside it. Apidog’s built-in documentation generator creates always-updated API docs directly from your requests—eliminating manual write-ups and keeping teams on the same page. It’s ideal for Rust and backend workflows, making the switch from Postman seamless.

How to Install Warp Terminal on macOS
Warp Terminal is easy to install on macOS. Here’s how:
1. Download Warp Terminal
- Visit warp.dev and click “Download for macOS.”
- Prefer Homebrew? Run:
brew install --cask warp - If you use the website, a
.dmgfile will be downloaded.
2. Install with DMG
- Open the downloaded
.dmg - Drag the Warp Terminal icon into your “Applications” folder
- Eject the DMG when done
3. Grant Permissions & Launch
- If prompted, approve permissions in “Security & Privacy”
- Launch Warp Terminal from Applications or Spotlight
4. Initial Setup
- Configure shell integrations (zsh, bash, fish), fonts, and color themes as prompted on first run
5. Verify Installation
- In Warp Terminal, check your version:
warp --version
How to Install Warp Terminal on Windows
Warp Terminal now supports Windows, though some features are still maturing. Always check official docs for the latest.
Installation Steps:
- Download the Windows installer from warp.dev
- Save and run the
.exefile - Follow the on-screen setup (license, install location, etc.)
- Select your default shell (PowerShell, Git Bash, or WSL)
- Choose your theme and font options
Post-Installation:
- Launch Warp Terminal from the Start Menu
- Verify installation with:
warp --version - Use the built-in update feature or check for new releases often, as Windows support is evolving
How to Install Warp Terminal on Linux
Support varies by Linux distribution, but AppImage and native packages are available.
1. Download Warp for Linux
- Go to warp.dev
- Under “Linux” choose your preferred format: AppImage, .deb, or .rpm
2. Install Package
- For Ubuntu/Debian:
sudo dpkg -i warp-terminal.deb - For Fedora/RedHat:
sudo rpm -i warp-terminal.rpm - For AppImage:
chmod +x Warp-Terminal.AppImage
./Warp-Terminal.AppImage
3. Initial Configuration
- On first launch, follow the setup wizard to select shell, theme, and integrations
4. Create a Shortcut (if AppImage)
- Copy the
.desktopfile to~/.local/share/applications/ - Adjust the
Execline to the AppImage location
5. Verify Installation
- Run:
warp --version
Getting Started with Warp Terminal: Essential Setup
After installation, take these steps to optimize Warp Terminal for your workflow:
1. Choose Your Default Shell
Warp supports bash, zsh, fish, PowerShell, and WSL.
- On macOS/Linux: zsh is often default
- On Windows: choose PowerShell or WSL
- Change shell anytime in Warp settings
2. Set Themes & Layout
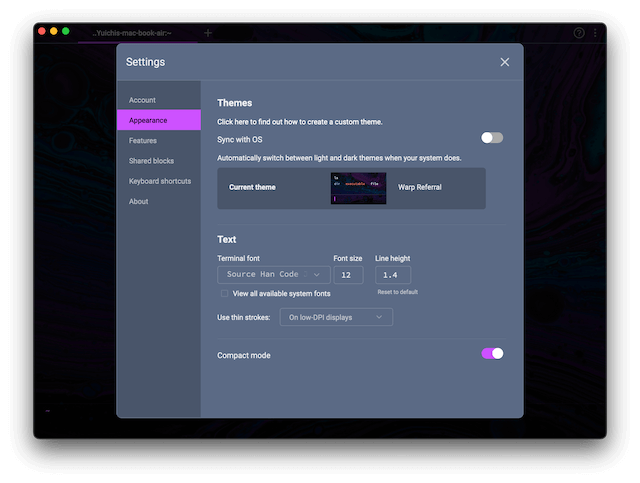
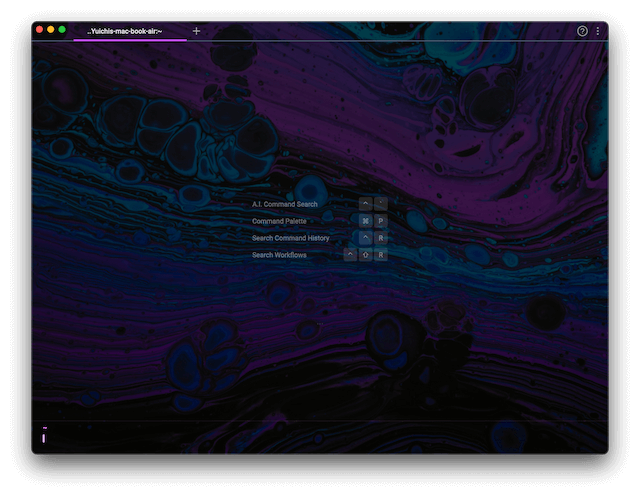
- Access the command palette or settings to try built-in color schemes
- Customize or create your own (edit settings file for advanced tweaks)
- If supported, enable GPU-accelerated fonts and backgrounds
3. Use Autocompletion & AI Assistance
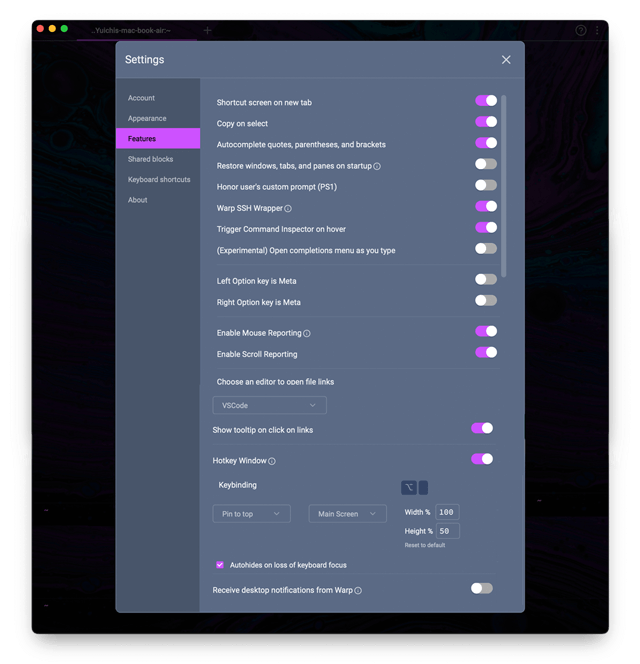
- Warp offers syntax highlighting, real-time completions, and intelligent suggestions
- Use
TABor shortcuts to accept - Some AI features may require internet access for GPT-based completions
4. Work with Command Output Blocks
- Warp treats each command output as an interactive block
- Easily copy, resize, search, or reference past output
- This block-based approach simplifies debugging and code review
5. Try Collaboration Features
- Warp supports session sharing and integrated chat for pair programming or troubleshooting
- Useful for distributed teams or remote debugging
Customizing Warp Terminal: Visual Prompt Builder & Personalization
Warp stands out for its no-config, visual customization—perfect for teams who want clarity without manual setup.
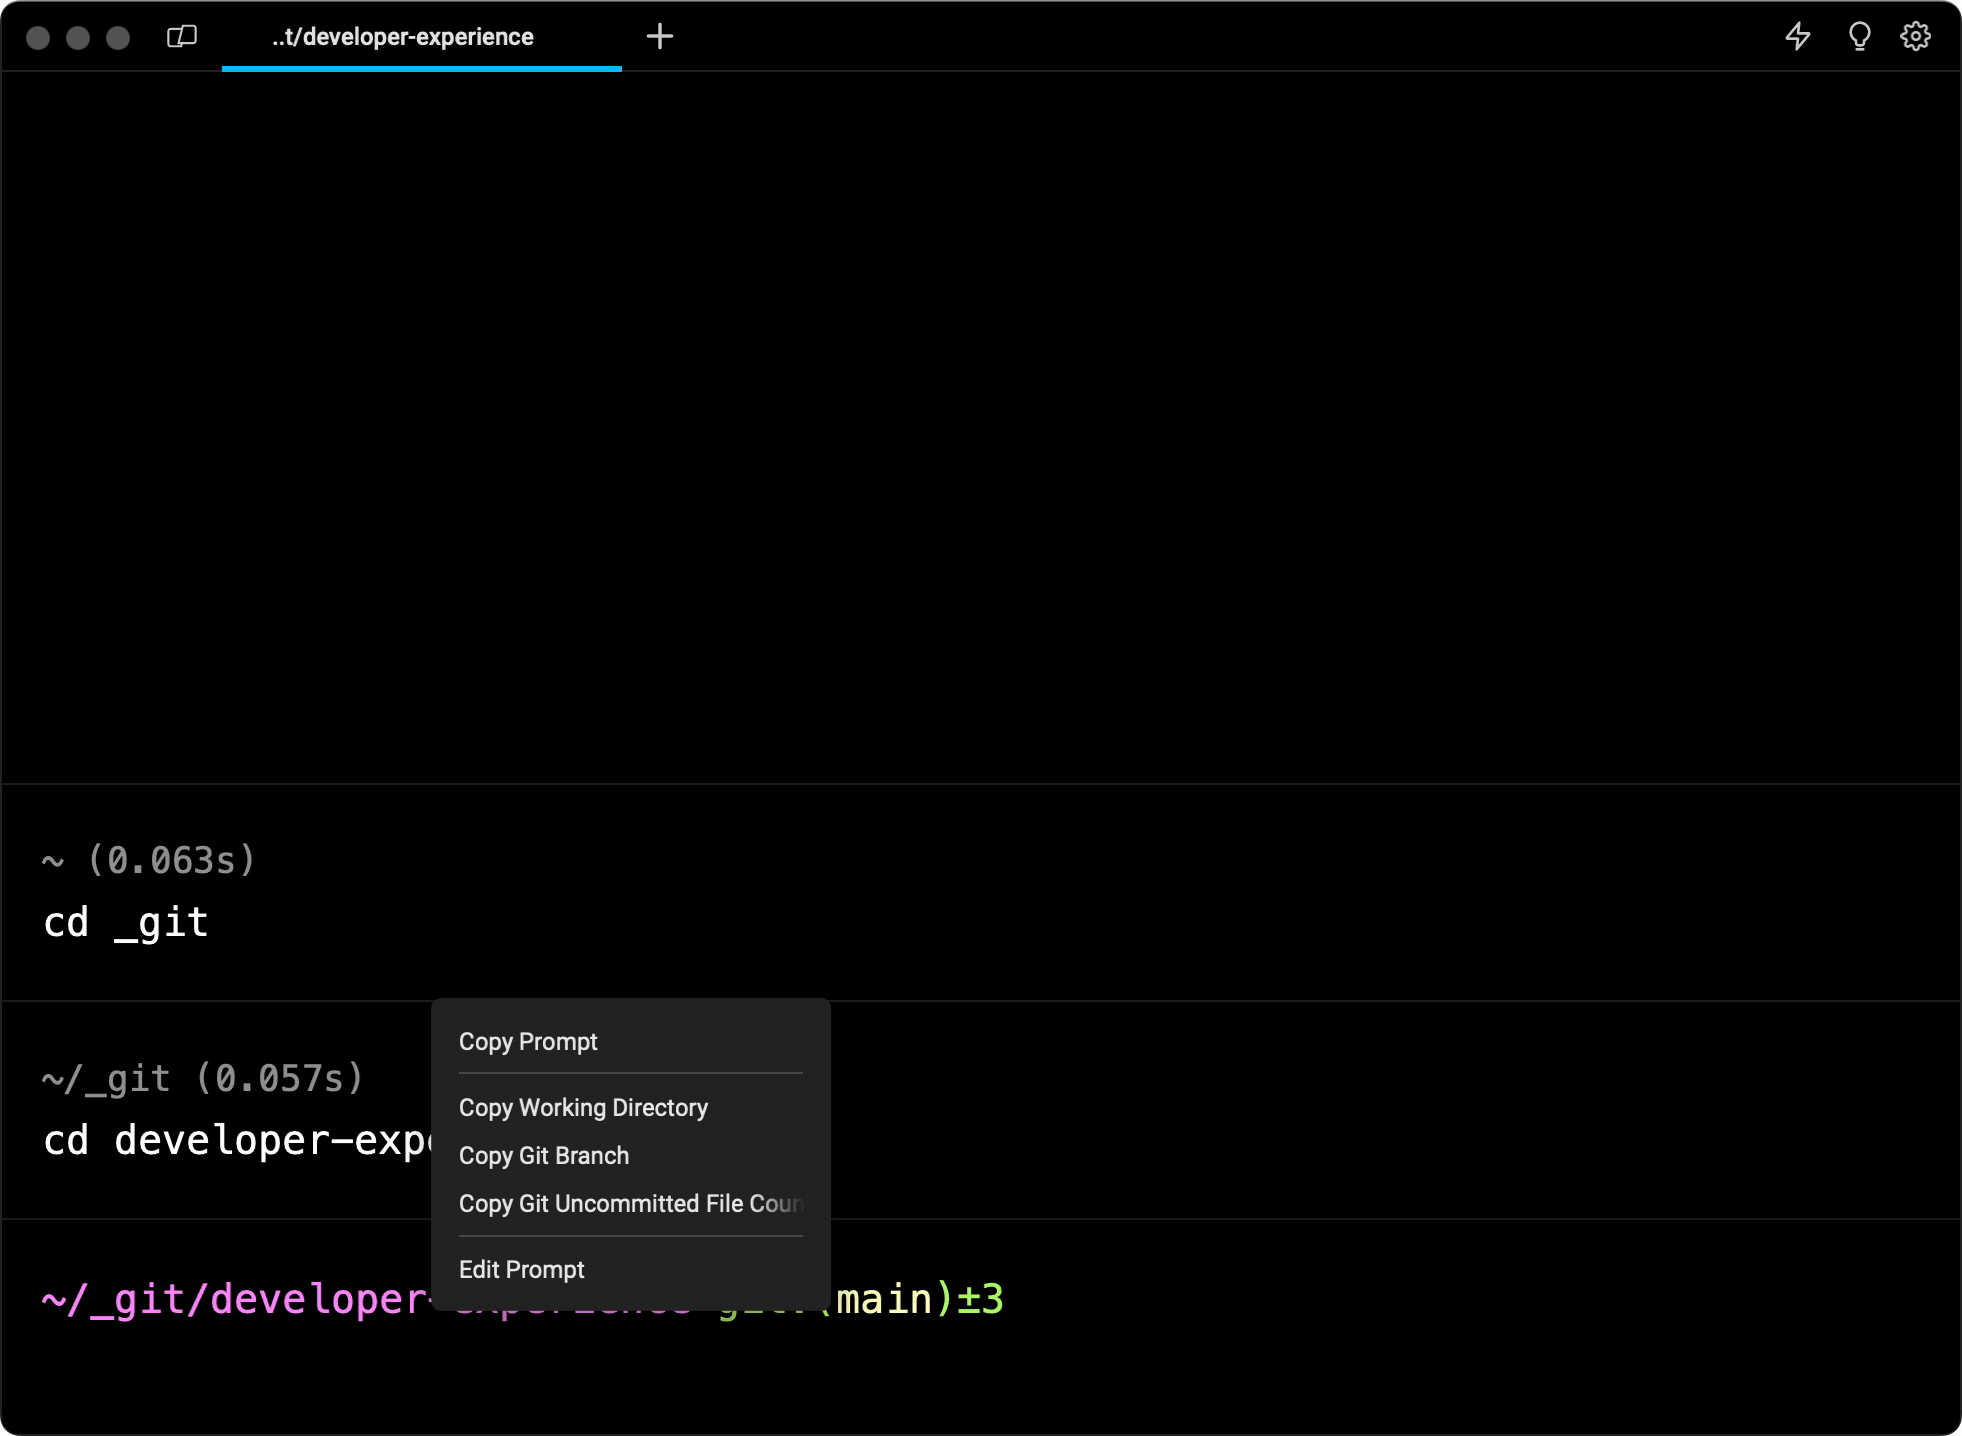
Prompt Customization:
- Right-click the prompt and select “Edit prompt” to open the visual editor
- Or, go to Settings > Appearance > Prompt
- Drag and drop “context chips” (timestamp, working directory, Git branch, etc.)
- Rearrange or remove chips as needed
- Save to apply changes across all sessions
Dynamic Context Sync:
- Changes update instantly in all terminal sessions
- Switch Git branches and see prompts update everywhere
- Great for context switching between projects
Other Customization Options:
- Switch between dark/light mode and various color schemes
- Choose monospaced fonts (including Powerline support)
- Integrate with zsh, fish, oh-my-zsh, and WSL
- Explore further tweaks in official docs or the Warp Discord community
The visual prompt builder means no manual config files—just fast, visible results tailored to your workflow.
Warp Terminal vs. Ghostty, iTerm2, Windows Terminal, Hyper, Alacritty
How does Warp stack up against other top developer terminals? Here’s a focused comparison for technical users:
Warp Terminal vs. Ghostty
- UI & Design: Warp features a polished, block-based interface with out-of-the-box enhancements. Ghostty is minimal but offers fewer integrated features.
- Performance: Both are fast; Warp leverages GPU acceleration for rendering, while Ghostty relies more on CPU.
- Ecosystem: Warp offers frequent updates and a growing community; Ghostty’s updates are less frequent.
Warp Terminal vs. iTerm2 (macOS)
- Features: iTerm2 excels at split panes and scripting. Warp emphasizes AI-driven suggestions, collaboration, and block UI.
- Ease of Use: Warp favors plug-and-play defaults; iTerm2 may require more manual setup.
Warp Terminal vs. Windows Terminal
- Platform: Windows Terminal is Microsoft-native and integrates PowerShell, CMD, WSL.
- Design: Warp is cross-platform, focusing on GPU acceleration and AI suggestions.
Warp Terminal vs. Hyper
- Technology: Hyper is Electron-based and plugin-rich. Warp is native, GPU-accelerated, and curates features rather than relying on plugins.
Warp Terminal vs. Alacritty
- Performance: Alacritty is GPU-driven and minimal. Warp matches speed but adds interactive blocks and collaboration.
Bottom line: Warp Terminal is ideal for developers who want a feature-rich, collaborative, and high-performance terminal across OSes—without relying on heavy manual configuration.
Conclusion: Why Warp Terminal Is Transforming Modern CLI Workflows
Warp Terminal delivers a next-generation command-line experience for developers, backend engineers, and API teams. Its GPU acceleration, AI-powered completions, block-based UI, and seamless collaboration features offer a tangible productivity boost over legacy and even other modern terminals.
In this guide, you’ve learned:
- The core benefits and features of Warp Terminal
- How to install and set up Warp on macOS, Windows, and Linux
- Essential customization and collaboration tips
- Detailed comparisons with Ghostty, iTerm2, and more
For API development teams, pairing Warp Terminal with Apidog unlocks even more potential—streamlining your command-line and API documentation workflows in one integrated environment.
As Warp Terminal continues to evolve, it’s set to become an essential tool for technical professionals seeking speed, clarity, and collaboration in their daily work.


