In the rapidly evolving landscape of software development, Model Context Protocol (MCP) servers have emerged as game-changers for API development. These specialized servers bridge AI assistants with structured data sources, enabling natural language interaction with complex API specifications.
MCP servers function as knowledge providers for AI tools, allowing them to access, understand, and utilize API specifications directly. This capability transforms how developers work with APIs by:
- Eliminating context switching between documentation and code
- Reducing implementation errors through direct access to specifications
- Accelerating development with AI-assisted code generation
- Ensuring consistency across API implementations
When deployed on Vercel, MCP servers gain additional advantages of global availability, automatic scaling, and simplified deployment processes. This cloud-based approach makes your API specifications accessible to AI tools from anywhere, creating a truly modern development environment.
Setting Up Your Vercel-Based MCP Server for Enhanced API Development
Deploying an MCP server on Vercel requires careful configuration to ensure optimal performance and integration with your API development workflow. This section provides a comprehensive guide to setting up your server.
Prerequisites for Vercel MCP Deployment
Before beginning the deployment process, ensure you have:
- A Vercel account (Pro or Enterprise recommended for production use)
- Node.js environment (version 18 or higher)
- Basic familiarity with TypeScript and API concepts
- Redis database for state management (required for Vercel deployment)
- API specifications you want to make available to AI tools
Step-by-Step Vercel MCP Server Configuration
Initialize Your Project Structure
Start by creating a new project directory and initializing it:
mkdir vercel-mcp-server
cd vercel-mcp-server
npm init -y
npm install @modelcontextprotocol/sdk @vercel/redis express
Create Server Implementation
Create an api/server.ts file with your MCP server implementation:
import { McpServer } from "@modelcontextprotocol/sdk/server/mcp";
import { z } from "zod";

// Create MCP server instance
const server = new McpServer({
 name: "API-Development-Server",
 version: "1.0.0"
});

// Add API specification resource
server.resource(
 "api-spec",
 "api-spec://main",
 async (uri) => ({
   contents: [{
     uri: uri.href,
     text: "Your API specification content here"
   }]
 })
);

// Add endpoint generation tool
server.tool(
 "generate-endpoint",
 {
   path: z.string(),
   method: z.enum(["GET", "POST", "PUT", "DELETE"]),
   description: z.string()
 },
 async ({ path, method, description }) => ({
   content: [{
     type: "text",
     text: `Generated ${method} endpoint for ${path} with description: ${description}`
   }]
 })
);

export default server;
Configure Vercel Settings
Create a vercel.json file in your project root:
{
 "version": 2,
 "builds": [
   {
     "src": "api/server.ts",
     "use": "@vercel/node",
     "config": {
       "maxDuration": 800,
       "memory": 3008
     }
   }
 ],
 "routes": [
   { "src": "/api/(.*)", "dest": "/api/server.ts" }
 ]
}
Set Up Redis Integration
Add Redis integration through the Vercel dashboard:
- Navigate to your project settings
- Select "Integrations" tab
- Add Vercel Redis integration
- Note the
REDIS_URLenvironment variable
Deploy to Vercel
Deploy your MCP server to Vercel:
vercel --prodAfter deployment, note your server URL (e.g., https://your-mcp-server.vercel.app).
Integrating Apidog MCP Server with Vercel for Comprehensive API Development
To create a truly powerful API development environment, integrating your Vercel-deployed MCP server with Apidog MCP Server provides the best of both worlds. This combination allows AI tools to access both your cloud-based MCP tools and your detailed API specifications managed in Apidog.
Setting Up Apidog MCP Server
Install Apidog MCP Server
npm install -g apidog-mcp-serverObtain Apidog Project Information
- Log into your Apidog account
- Navigate to your project settings
- Copy your Project ID
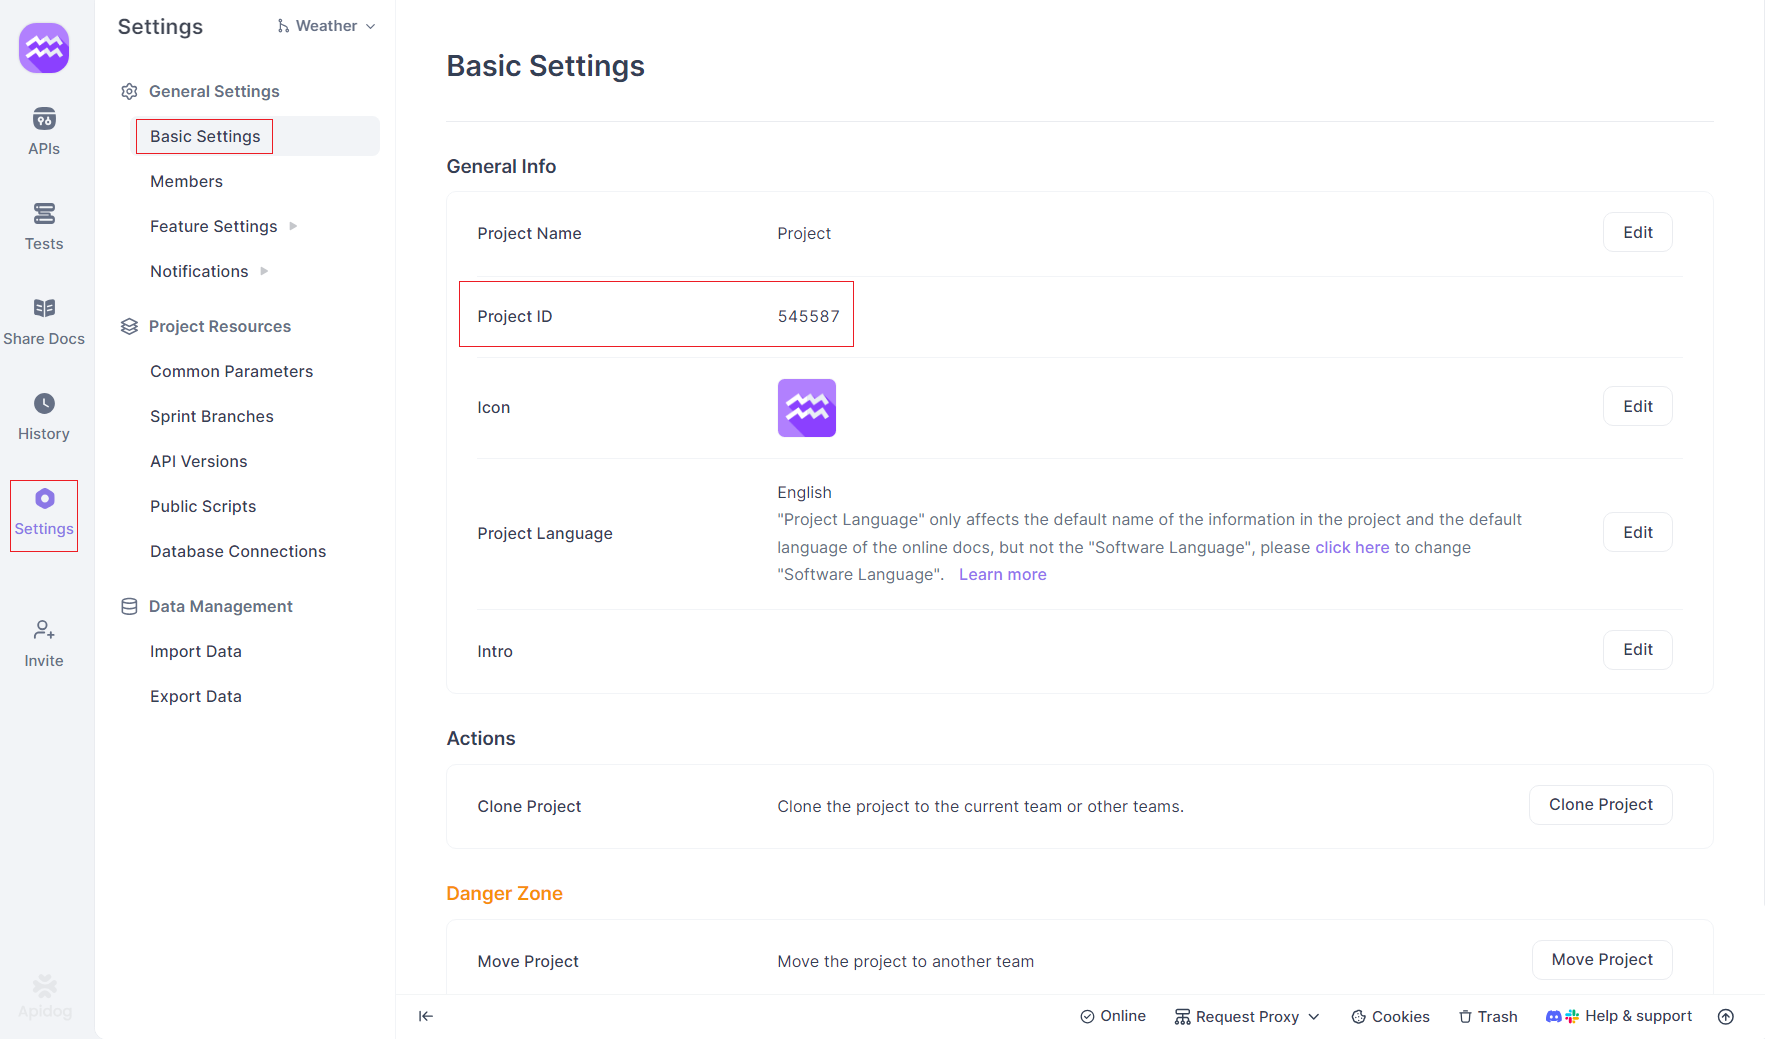
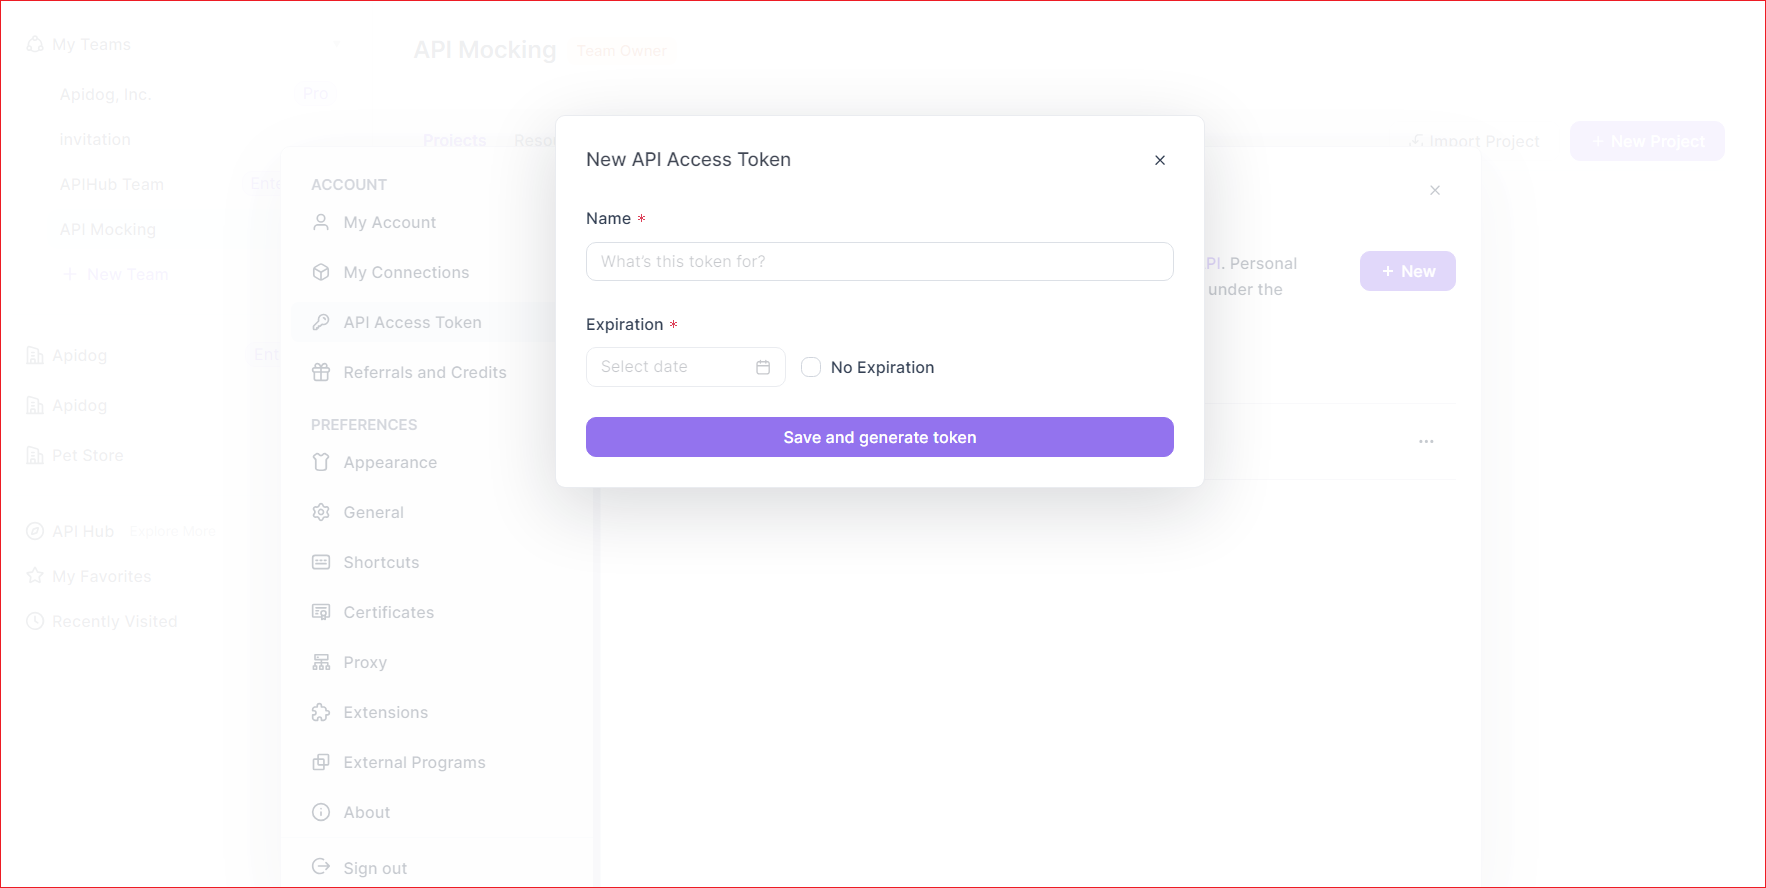
- Generate an API access token from Account Settings → API Access Token
Configure Combined MCP Setup
Update your IDE's MCP configuration to include both servers:
{
 "mcpServers": {
   "vercel-mcp": {
     "command": "curl",
     "args": [
       "https://your-mcp-server.vercel.app/api/server"
     ]
   },
   "apidog-mcp": {
     "command": "cmd",
     "args": [
       "/c",
       "npx",
       "-y",
       "apidog-mcp-server@latest",
       "--project=<your-project-id>"
     ],
     "env": {
       "APIDOG_ACCESS_TOKEN": "<your-access-token>"
     }
   }
 }
}
This configuration enables your AI assistant to access both your Vercel-deployed MCP server and your Apidog API specifications.
Leveraging AI-Assisted API Development with Vercel and Apidog Integration
The combination of Vercel-deployed MCP server and Apidog MCP Server creates powerful workflows that transform API development. With both MCP servers configured, developers can:
Building API-Driven Applications with AI Assistance
Design Phase
"Using Apidog MCP, show me the schema for our User model"The AI will retrieve and display your API schema directly from Apidog.
Implementation Phase
"Using Vercel MCP, generate a controller for the User endpoints based on the Apidog specification"The AI can generate implementation code that perfectly matches your API design.
Testing Phase
"Create test cases for the User API endpoints based on the Apidog specification"The AI can generate comprehensive tests that verify your implementation against the specification.
Troubleshooting Common Issues in Vercel MCP Deployment
When deploying MCP servers on Vercel, you might encounter these common issues:
Redis Connection Errors
- Verify
REDIS_URLis correctly set in environment variables - Check Redis instance status in Vercel dashboard
- Ensure proper Redis connection configuration in your code
Function Timeout Issues
- Increase
maxDurationinvercel.json(requires Pro/Enterprise plan) - Optimize tool implementations for faster execution
- Consider breaking complex operations into smaller, chainable tools
Integration Problems with Apidog
- Verify Apidog access token is valid and has appropriate permissions
- Check project ID is correct and accessible
- Test Apidog MCP Server independently before integration
Conclusion: Transforming API Development with Vercel and Apidog MCP Integration
The integration of Vercel-deployed MCP servers with Apidog MCP Server represents a significant advancement in API development methodology. By creating a unified environment where AI assistants can access both cloud-based tools and detailed API specifications, this combination addresses the persistent challenges of modern API development.
This integrated approach delivers tangible benefits across the entire development lifecycle. Developers spend less time switching between documentation and implementation, and more time creating value. Code generation maintains perfect alignment with API specifications, eliminating the drift that often occurs between design and implementation.
For organizations building API-driven applications, this combination transforms how APIs are built and maintained. The cloud-based nature of Vercel ensures your MCP tools are always available, while Apidog maintains the crucial connection to your API specifications. Together, they create a development environment that's greater than the sum of its parts.
By embracing the integration of Vercel-deployed MCP servers and Apidog MCP Server, development teams position themselves at the forefront of modern API development practices—ready to deliver better, more consistent APIs in less time.