
Kling AI has quickly become a leading tool for generating high-quality videos and images, particularly following its 2.0 update announced on April 15, 2025, by Kling AI on X. For developers, the Kling AI API offers a powerful way to integrate advanced video generation capabilities into applications, and using it through Replicate makes the process even more streamlined. This technical guide provides a detailed walkthrough of how to use the Kling AI API via Replicate, focusing on practical steps to ensure seamless implementation.
Want to build production-ready AI Apps with Kling AI, at lightening fast speed? Hypereal AI is your ultimate solution!

Hypereal AI replaces fragmented model and infra stacks with a unified application layer for modern AI products.

What Is the Kling AI API?
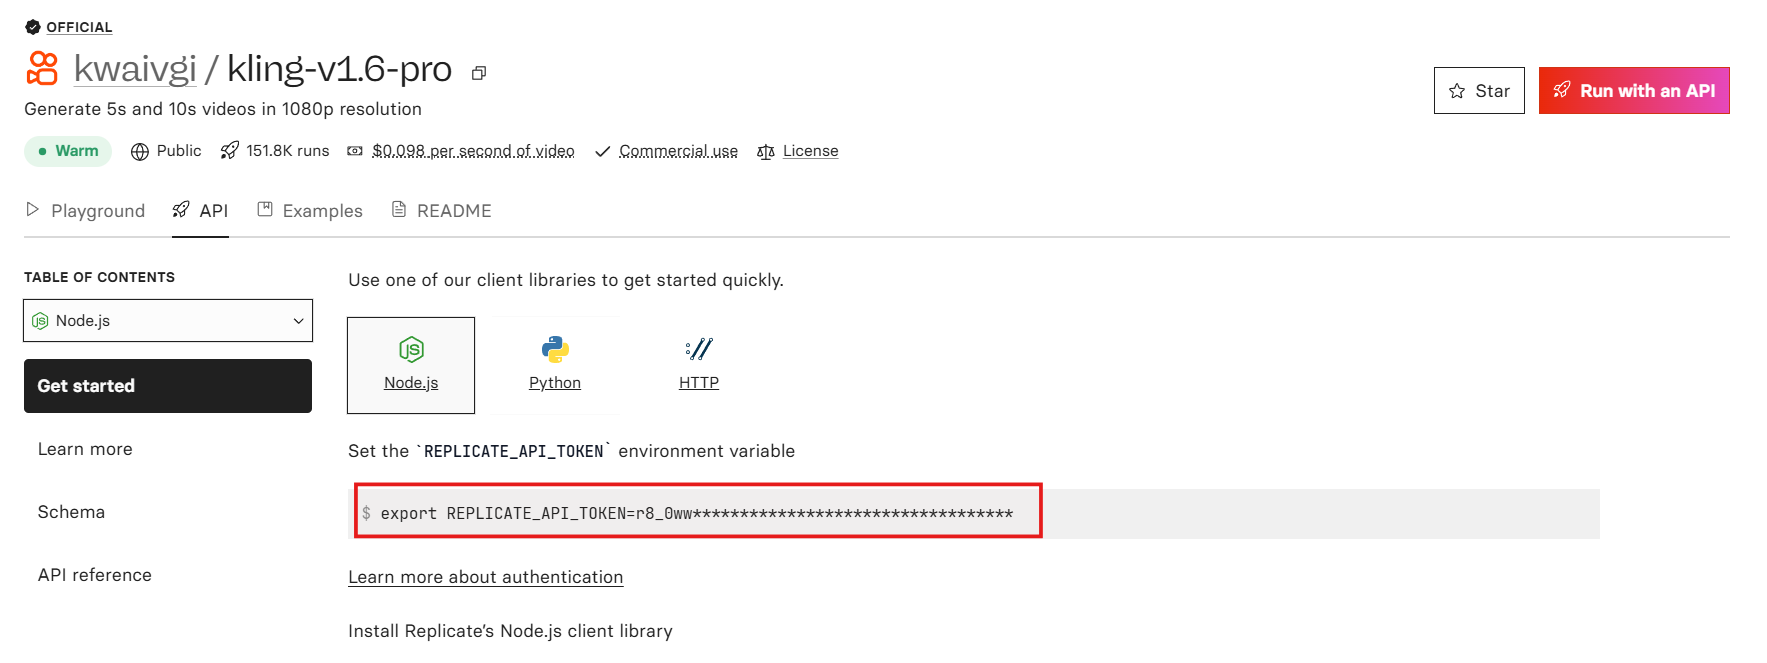
The Kling AI API, developed by the Kuaishou AI Team, is a robust solution for text-to-video and image-to-video generation, delivering high-fidelity outputs. According to Replicate’s official model page, it supports video outputs in 1080p resolution, with options to generate clips that are either 5 seconds or 10 seconds long.
Replicate hosts the Kling 1.6 Pro model, enabling developers to access its features programmatically through API calls. The API leverages a Diffusion Transformer model to ensure semantic understanding, producing videos that align with realistic physics and user-defined prompts. This makes it an ideal tool for creating dynamic, visually compelling content programmatically.

Why Use Replicate for Kling AI API?
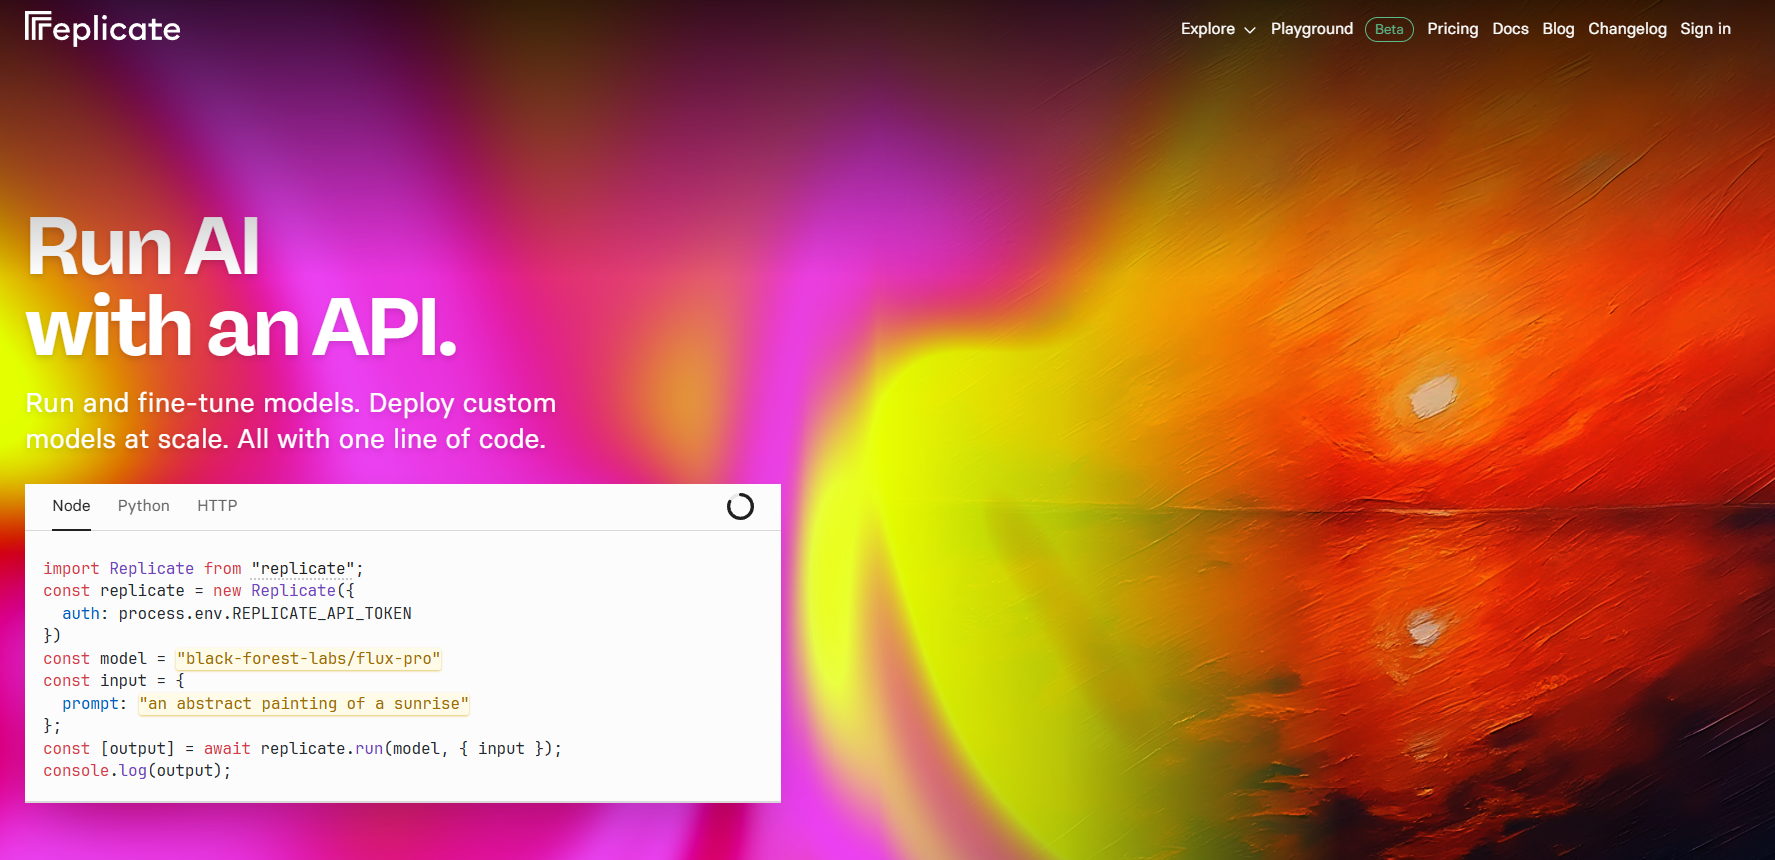
Replicate offers a simplified and scalable infrastructure for accessing the Kling AI API, making it a preferred platform for developers. Unlike traditional models that bill based on time, Replicate charges based on input and output, providing predictable costs as outlined in their documentation.
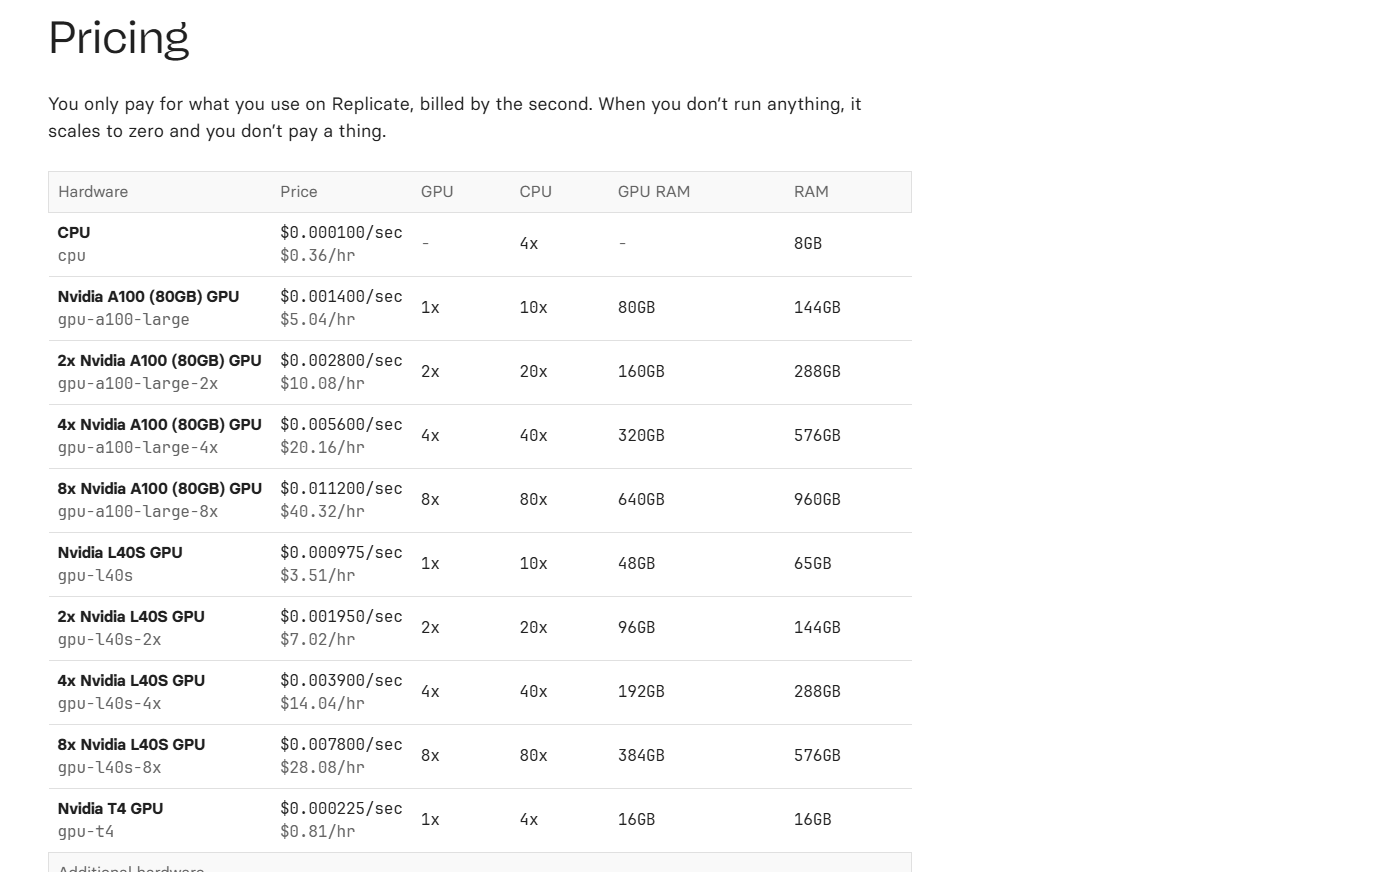
Pricing is determined by the seconds of video generated, with clear guidelines available on Replicate’s pricing page. Additionally, Replicate ensures that data is securely transmitted to Kuaishou, maintaining compliance and reliability for API users. This combination of cost transparency, security, and ease of use makes Replicate an excellent choice for integrating the Kling AI API into your projects.
Prerequisites for Using Kling AI API via Replicate
Before you begin, ensure you have a Replicate account by signing up on their official website, replicate.com. Once registered, obtain an API token from your Replicate dashboard under the “API Tokens” section.
You’ll also need to install either Node.js or Python on your system, as these are commonly used for API integration. A basic understanding of REST APIs and JSON is necessary since the Kling AI API adheres to these standards. Finally, set up a code editor like Visual Studio Code to write and test your API requests. With these prerequisites in place, you’re ready to start integrating the Kling AI API.
Step 1: Set Up Your Replicate Environment
Start by logging into your Replicate account and navigating to the Kling 1.6 Pro model page at replicate.com/kwaivgi.
On this page, you’ll find the API endpoint, which typically looks like https://api.replicate.com/v1/predictions.
Copy this endpoint for later use. To keep your API token secure, store it in an environment variable, such as in a .env file, by adding REPLICATE_API_TOKEN=your-token-here.
Next, install the Replicate client library for your preferred programming language. For Node.js, run the command npm install replicate in your terminal.
If you’re using Python, install the library by executing pip install replicate. This sets up your environment for making API calls to the Kling AI API.
Step 2: Authenticate Your API Requests
Authentication is a critical step for every request to the Kling AI API. Include your API token in the Authorization header of your requests by setting it as Authorization: Token your-replicate-api-token.
To verify that your authentication works, test it by making a simple GET request to the Replicate API endpoint using a tool like cURL or Postman.
For example, you can run the command curl -H "Authorization: Token your-token-here" https://api.replicate.com/v1/models in your terminal. If successful, you’ll receive a JSON response listing available models, confirming that your authentication is correctly set up.
This ensures you’re ready to proceed with generating videos using the Kling AI API.
Step 3: Prepare Your Input Prompt for Video Generation
The quality of your video output depends heavily on the prompt you provide to the Kling AI API. Replicate’s documentation emphasizes that the API performs best with specific, detailed prompts.
For text-to-video generation, craft a prompt like “A futuristic cityscape at dusk with flying cars, cinematic lighting, and a slow pan shot.” If you’re using image-to-video generation, upload an image to a publicly accessible URL and include it in your request with a prompt such as “Animate this image of a lion running across a savanna.”
Specify the video length in your request, choosing either 5 seconds or 10 seconds, as these are the durations supported by the Kling 1.6 Pro model. Additionally, include style keywords like “ultra-realistic” or “cartoon-style” to guide the AI’s output, ensuring the generated video meets your expectations.
Step 4: Make Your First API Call to Kling AI API
Now it’s time to send your first API request to the Kling AI API using the Replicate client library.
For Node.js, write a script to initiate a video generation task. Start by importing the Replicate library and setting up your client with your API token, then call the run method with your prompt and duration.
For example, you might write:
const Replicate = require('replicate');
const replicate = new Replicate({ auth: process.env.REPLICATE_API_TOKEN });
const output = await replicate.run("kwaivgi/kling-v1.6-pro", { input: { prompt: "A futuristic cityscape at dusk with flying cars, cinematic lighting, slow pan shot", duration: 5 } });
If you’re using Python, the equivalent script would be
import replicate
replicate.Client(api_token=os.getenv("REPLICATE_API_TOKEN")).run("kwaivgi/kling-v1.6-pro", input={"prompt": "A futuristic cityscape at dusk with flying cars, cinematic lighting, slow pan shot", "duration": 5})
Replace the prompt and duration with your desired values, ensuring they align with the model’s capabilities. The API will return a prediction ID, which you’ll use to track the status of your video generation task.
Step 5: Monitor the Status of Your Video Generation
Using the prediction ID from the previous step, poll the Kling AI API to check the status of your video generation task.
Send a GET request to https://api.replicate.com/v1/predictions/{prediction-id}, including your API token in the header.
In Node.js, you can fetch the status with a script like
const status = await fetch("https://api.replicate.com/v1/predictions/" + predictionId, { headers: { "Authorization": "Token " + process.env.REPLICATE_API_TOKEN } }).then(res => res.json());For Python, use
status = replicate.Client(api_token=os.getenv("REPLICATE_API_TOKEN")).predictions.get(prediction_id)The response will include a status field indicating whether the task is “processing,” “succeeded,” or “failed.” Continue polling until the status changes to “succeeded,” which means your video is ready for retrieval.
Step 6: Retrieve and Download Your Generated Video
Once the status of your task is “succeeded,” the API response will include a URL to the generated video in the output field. This URL points to the video hosted on Replicate’s servers. Download the file using a library like axios in Node.js or requests in Python.
For Node.js, you can write a script like const axios = require('axios'); const video = await axios.get(videoUrl, { responseType: 'stream' }); video.data.pipe(fs.createWriteStream('output-video.mp4')); to save the video locally.
In Python, the equivalent would be import requests; video = requests.get(video_url); with open('output-video.mp4', 'wb') as f: f.write(video.content).
After downloading, verify that the video matches your prompt by checking its quality, motion, and adherence to your instructions.
Step 7: Handle Errors and Optimize API Usage
Error handling is essential when working with the Kling AI API. Check the API response for status codes to identify issues; a 401 status code indicates an authentication failure, while a 429 signals rate limiting.
If the video generation fails, examine the error message in the error field of the response to diagnose the problem.
Optimize your prompts by being as specific as possible since vague prompts like “a car” can lead to unpredictable results. Monitor your credit usage, as Replicate charges based on the seconds of video generated, with 5-second clips being more cost-effective than 10-second ones. Start with shorter clips to save credits, scaling up only after you’re satisfied with the output quality. This approach helps you manage costs while refining your results.
Advanced Features of Kling AI API on Replicate
The Kling AI API offers several advanced features that you can explore on Replicate.
or instance, experiment with image-to-video generation by providing an image URL in the input field of your API request. You can also use the camera_movement parameter to add effects like zoom-in or pan shots, enhancing the cinematic quality of your video.
The API supports complex prompts, so try something detailed like “A medieval knight fighting a dragon, with a slow zoom-in on the knight’s face, dramatic lighting” to see its full potential. Additionally, combine text and image inputs for hybrid generation, allowing the API to animate static images with dynamic motion. To maintain consistency in image-to-video outputs, specify “preserve style” in your prompt, ensuring the API retains the visual style of your input image.
Best Practices for Using Kling AI API via Replicate
Adhering to best practices ensures a smooth experience with the Kling AI API. Always secure your API token by avoiding hardcoding it in your source code, as this can lead to accidental leaks. Use asynchronous requests to prevent blocking your application, since video generation can take several seconds to complete. Test your prompts iteratively, refining them based on the output to achieve the desired result. Keep an eye on Replicate’s API rate limits, which are detailed in their documentation, to avoid throttling. Finally, save your generated videos locally and back them up, as Replicate may not store outputs indefinitely. These practices help you maximize the API’s potential while minimizing potential issues.
Troubleshooting Common Issues with Kling AI API
When issues arise, troubleshooting is key to maintaining a smooth workflow with the Kling AI API. If you encounter a 400 error, check your input prompt for unsupported characters or invalid parameters. For low-quality outputs, increase the specificity of your prompt or adjust the creativity setting in your API request to fine-tune the results. If the video length is incorrect, verify that the duration parameter in your request matches the supported values of 5 or 10 seconds. Authentication problems can often be resolved by regenerating your API token in the Replicate dashboard if you suspect the current one is compromised. For persistent issues not covered in the documentation, reach out to Replicate support via their website for assistance.
Scaling Your Application with Kling AI API
To scale your application with the Kling AI API, consider building a queue system to handle multiple video generation tasks efficiently. Use a message broker like RabbitMQ to manage API requests asynchronously, improving performance for high-volume usage. Cache frequently used prompts and their outputs in a database to reduce redundant API calls and save credits over time. Implement robust error handling at scale by logging failed requests with timestamps and error messages, which aids in debugging. Additionally, monitor your application’s API usage through Replicate’s dashboard to optimize costs and performance as your application grows. These strategies ensure your application can handle increased demand while maintaining reliability.
Conclusion
The recent Kling 2.0 update, suggests a bright future for the Kling AI API on Replicate. Future iterations may support longer videos and higher resolutions, expanding the API’s capabilities for developers. Replicate could also integrate new Kling features, such as the Finegrain Eraser for advanced editing.
Based on Kling 2.0’s enhancements, developers might see improvements in motion quality and prompt accuracy in upcoming API versions. The ongoing partnership between Replicate and Kuaishou ensures continuous support and updates, making the Kling AI API a reliable choice for long-term projects. To stay informed, follow Kling AI on X and check Replicate’s blog for announcements about new API features and capabilities.


