In collaborative software development, manually running API tests after every code commit can quickly become tedious. Wouldn’t it be better if these tests could run automatically whenever new code is pushed?
The good news is that this is entirely possible. Most teams already use CI/CD platforms to handle code builds and deployments, and these platforms are designed to listen for Git commit events. When you push code, they automatically execute predefined tasks such as compiling, packaging, or deploying.
Running automated API tests is no different. Apidog provides a CLI tool that allows you to trigger automated tests with a single command. By adding this command to your CI/CD pipeline, you can ensure that tests run automatically after every code submission.
The setup process is straightforward. The main thing to understand is how the trigger mechanism works, then choose the right integration approach based on the platform your team is using.
How Automatic Test Triggers Work? (The Principles)
The core of the whole process is "Event Listening + Command Execution".
When you push code to a Git repository, the CI/CD platform listens for this Git event and, according to your preset configuration (such as pipeline scripts or config files), automatically executes the Apidog test command.
This principle can be illustrated as follows:

There are mainly two ways for CI/CD platforms to listen for Git events:
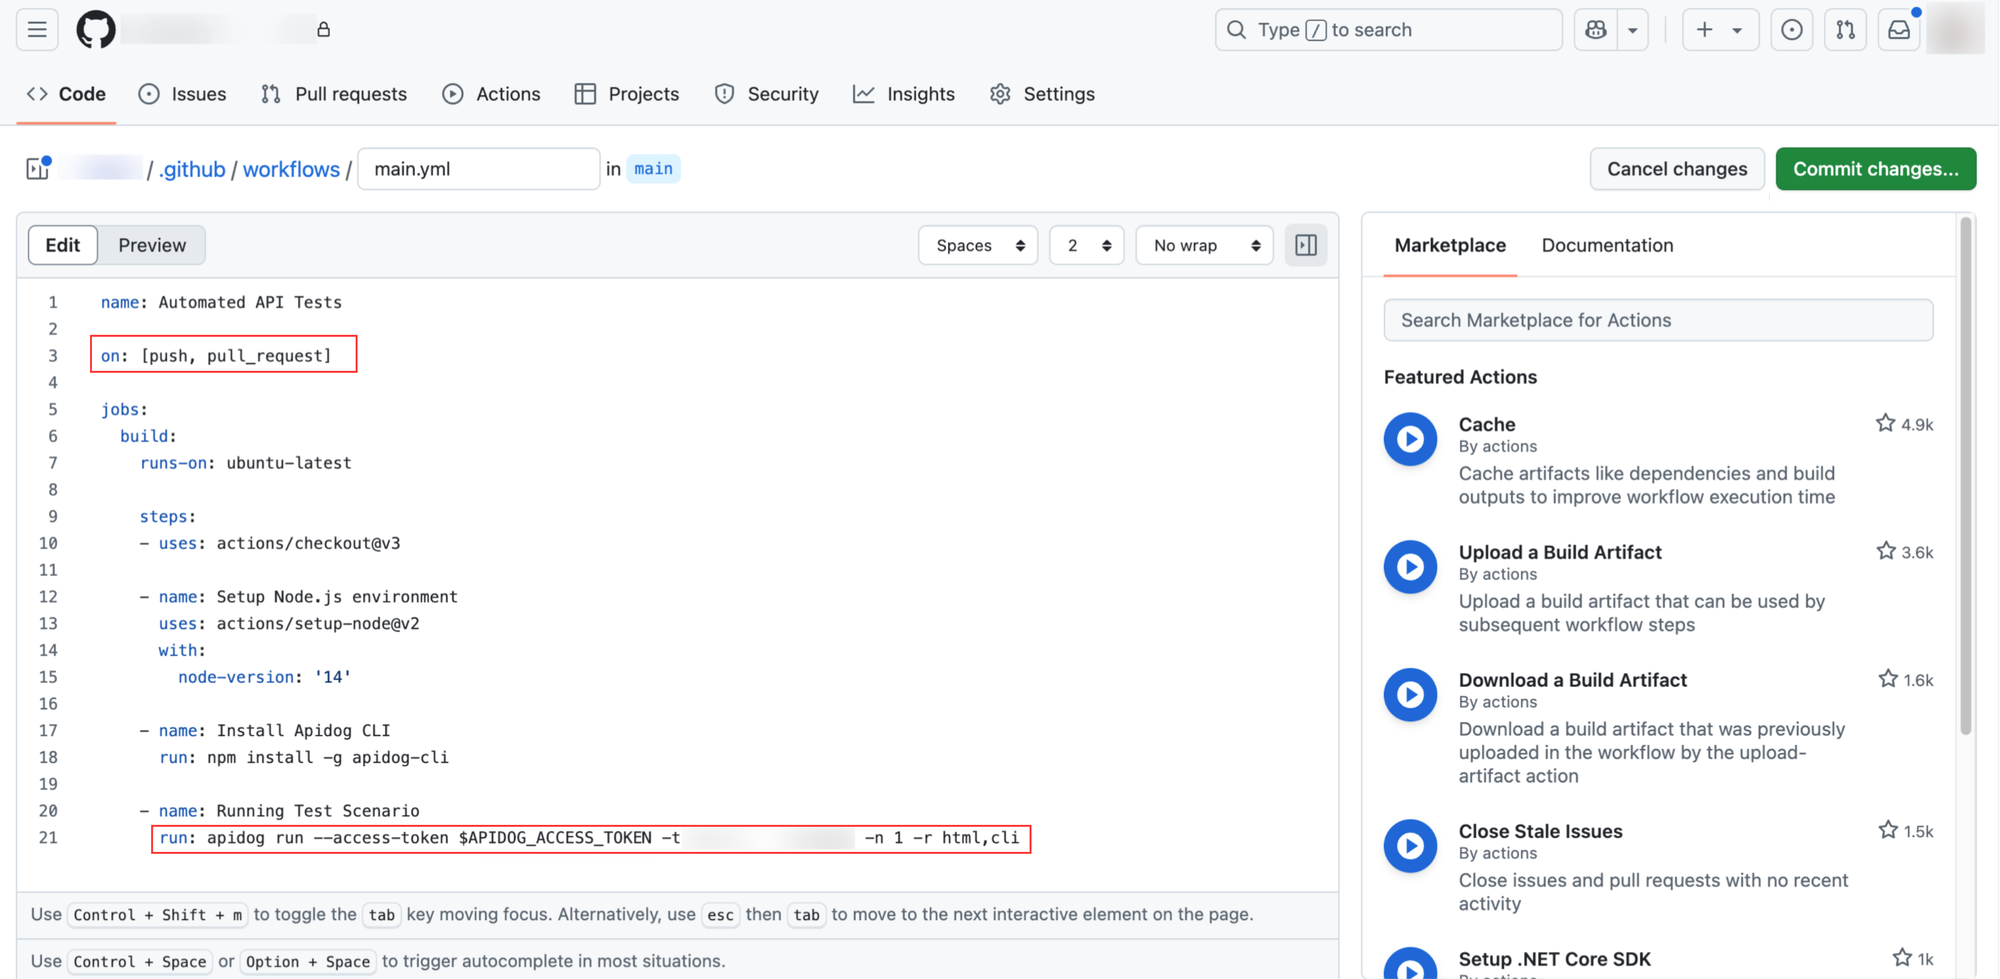
The first is the platform’s built-in event mechanism. For example, GitHub Actions can be directly specified in the config file: on: [push, pull_request]. When you push code or create a PR, the platform automatically listens for these Git events and starts testing.
The second is via Webhook, suitable for scenarios like Jenkins where cross-platform communication is needed. You'll have to manually configure a trigger URL.
Regardless of the method, the final step is always the same: execute the apidog run command to start the automated test.
Integration Solutions for Popular Platforms
If you use code hosting platforms like GitHub or GitLab, triggering tests is especially simple. These platforms have built-in CI/CD services (like GitHub Actions, GitLab CI) that can directly listen for Git events and execute tasks. You can refer to these docs to get started quickly:
However, many teams have more complex setups. For example, code is hosted on GitHub or GitLab, but the CI/CD pipeline runs on Jenkins. In this case, GitHub/GitLab and Jenkins are two independent systems — the former cannot directly trigger the latter.
For cross-platform scenarios, Webhooks are a simple and effective solution. A Webhook works like a callback mechanism—when a specific event (such as a Git push) happens on GitHub, it actively sends a request to a predefined Webhook URL to alert an external system. By offering a Webhook endpoint, Jenkins can receive these notifications and automatically trigger test tasks.
Let’s look at a specific configuration: code is hosted on GitHub, but the test pipeline runs on Jenkins.
GitHub + Jenkins Integration for Running Apidog Automated Tests
If your team stores code on GitHub but uses Jenkins to run build tasks, here’s how you can set it up:
Step 1: Configure Jenkins and Obtain the Webhook URL
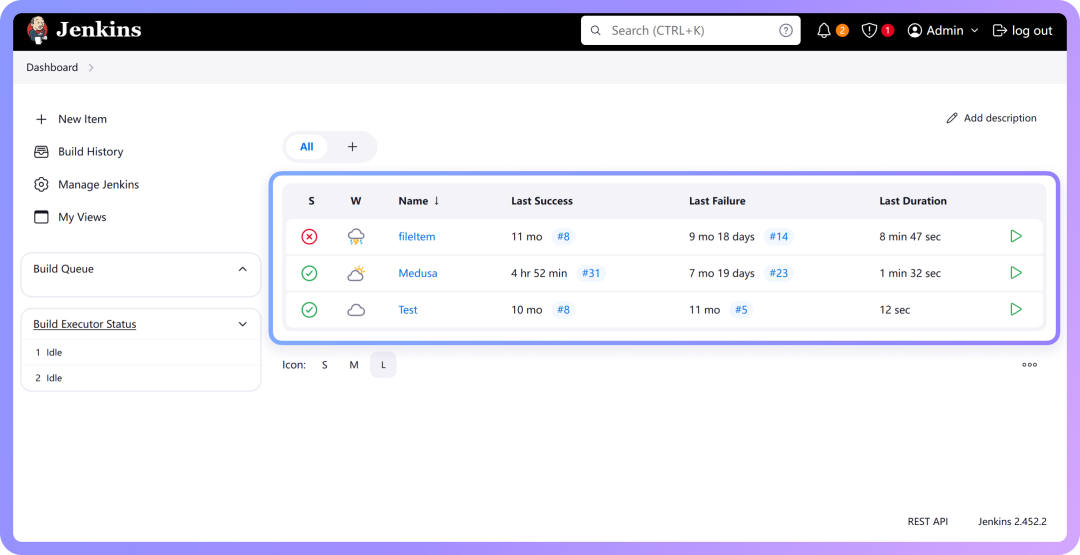
First, prepare the test task in Jenkins. Follow the Integrate with Jenkins documentation to create a project, configure the build command, and ensure the CLI command can run properly.
Next, get the Webhook URL from Jenkins. This URL acts as an entry point for external systems to call Jenkins, and GitHub will use it to trigger the test tasks.
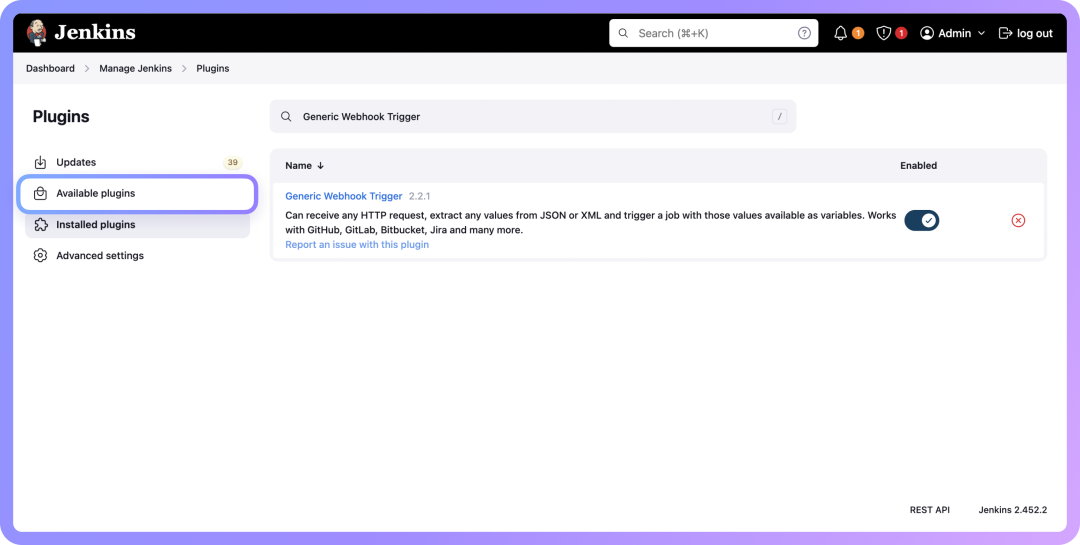
The simplest way is to install the "Generic Webhook Trigger" plugin. Search for and install it in Jenkins’ plugin management page, then restart Jenkins.
Then go to your project's configuration page and enable this plugin. The Webhook address will be:
http://<your Jenkins server address>/generic-webhook-trigger/invoke`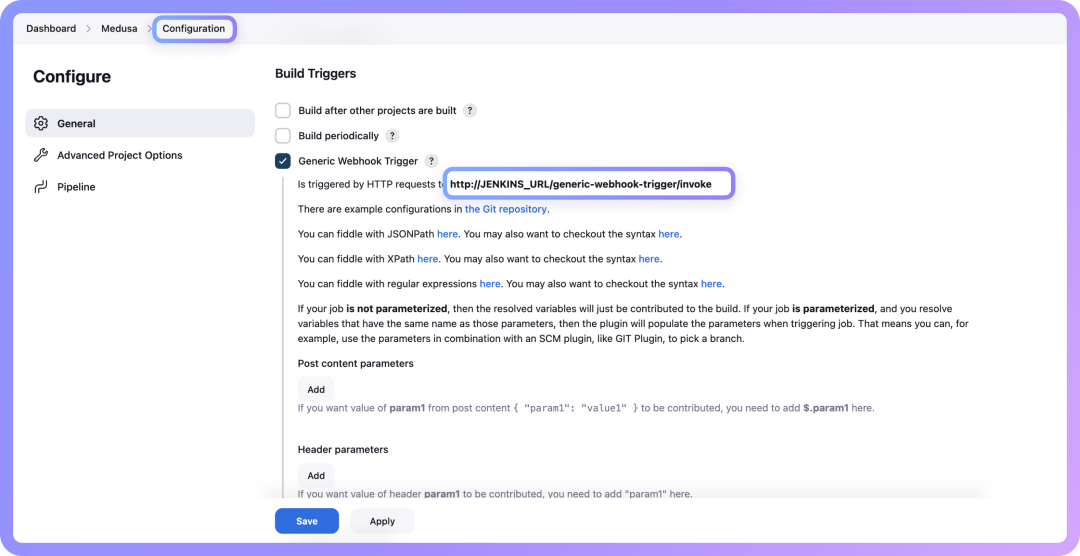
For security, it’s recommended to set a custom Token, so the address becomes:
http://<your Jenkins server address>/generic-webhook-trigger/invoke?token=<xxxxxx>Once you have this URL, you can configure the Webhook in GitHub.
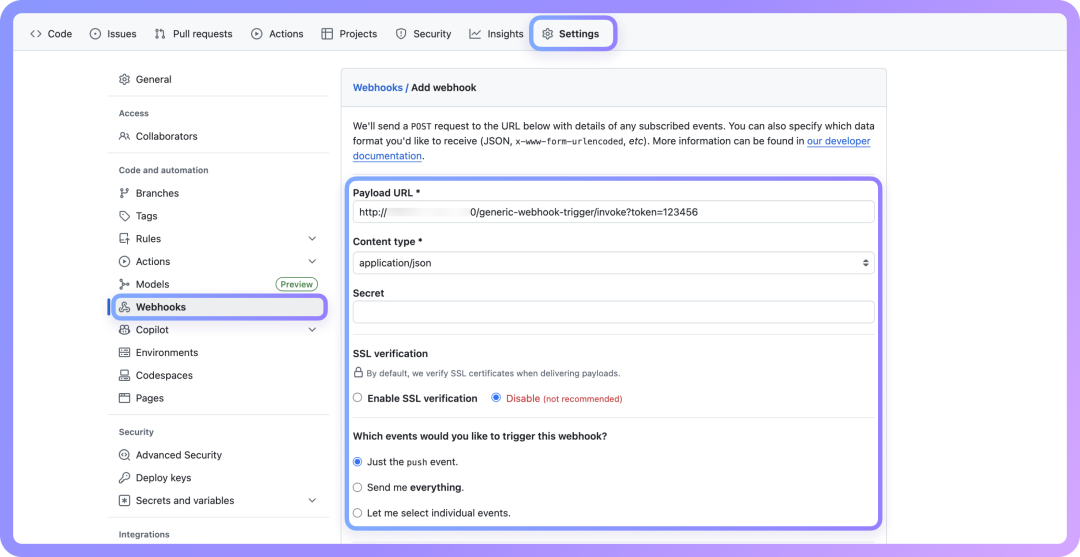
Step 2: Configure GitHub Webhook
Go to your "GitHub repository → Settings → Webhooks", add a new Webhook, enter the address from the previous step, set Content type to application/json, select push or other events you want to trigger the test, and save the configuration.
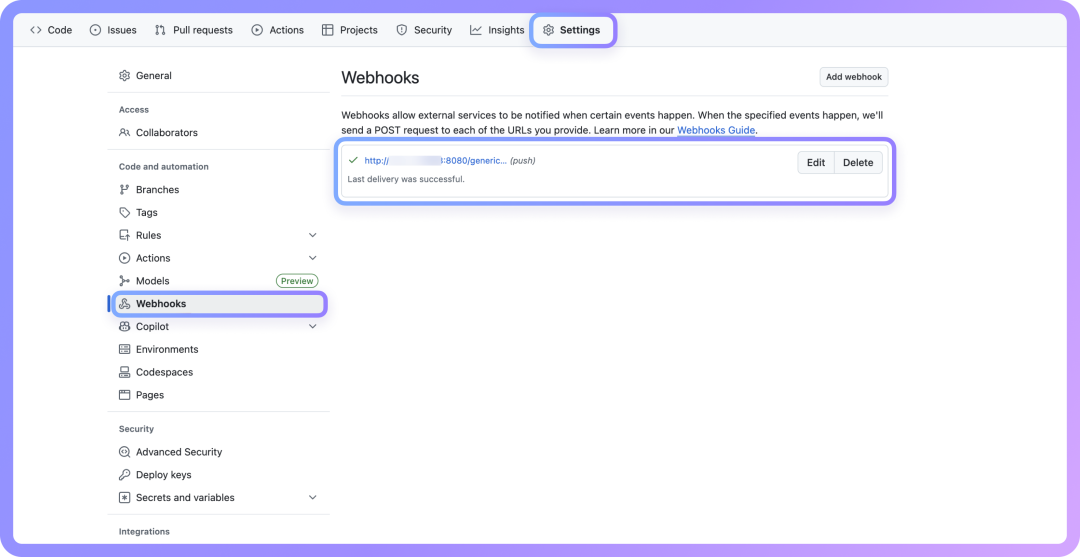
After configuration, every code push will automatically trigger Jenkins to execute the test task. You can push some code to test it and check the Jenkins build logs and test results.
Step 3: Verify the Entire Process
When you push code to GitHub, the configured Webhook will send a notification to Jenkins. Jenkins will receive the request and start the build task automatically. You can see the test execution logs in the Jenkins project’s "Console" and see the final test report.
Webhook Configuration for Other Platforms
Besides GitHub, other code hosting platforms also support Webhooks, such as:
The configuration methods are similar. The key is to understand the trigger mechanism: a Git commit generates an event, which is then used to notify the CI/CD platform via event listening or Webhook, ultimately triggering the automatic execution of the test command.
For more CI/CD platform integration methods, refer to the CI/CD Integration section of the Apidog official documentation.