
Running an LLM on your local machine has several advantages. First, it gives you complete control over your data, ensuring that privacy is maintained. Secondly, you can experiment without worrying about expensive API calls or monthly subscriptions. Plus, local deployments provide a hands-on way to learn about how these models work under the hood.
Furthermore, when you run LLMs locally, you avoid potential network latency issues and dependency on cloud services. This means you can build, test, and iterate faster, especially if you’re working on projects that require tight integration with your codebase.
Understanding LLMs: A Quick Overview
Before we dive into our top picks, let’s briefly touch on what an LLM is. In simple terms, a large language model (LLM) is an AI model that has been trained on vast amounts of text data. These models learn the statistical patterns in language, which allows them to generate human-like text based on the prompts you provide.
LLMs are at the core of many modern AI applications. They power chatbots, writing assistants, code generators, and even sophisticated conversational agents. However, running these models—especially the larger ones—can be resource-intensive. That’s why having a reliable tool to run them locally is so important.
Using local LLM tools, you can experiment with these models without sending your data off to remote servers. This can enhance both security and performance. Throughout this tutorial, you’ll notice the keyword “LLM” is emphasized as we explore how each tool helps you leverage these powerful models on your own hardware.
Tool #1: Llama.cpp
Llama.cpp is arguably one of the most popular tools when it comes to running LLMs locally. Created by Georgi Gerganov and maintained by a vibrant community, this C/C++ library is designed to perform inference on models like LLaMA and others with minimal dependencies.
Why You’ll Love Llama.cpp
- Lightweight and Fast: Llama.cpp is engineered for speed and efficiency. With minimal setup, you can run complex models even on modest hardware. It leverages advanced CPU instructions like AVX and Neon, meaning you get the most out of your system’s performance.
- Versatile Hardware Support: Whether you’re using an x86 machine, an ARM-based device, or even an Apple Silicon Mac, Llama.cpp has you covered.
- Command-Line Flexibility: If you prefer the terminal over graphical interfaces, Llama.cpp’s command-line tools make it simple to load models and generate responses right from your shell.
- Community and Open Source: As an open-source project, it benefits from continuous contributions and improvements by developers around the world.
How to Get Started
- Installation: Clone the repository from GitHub and compile the code on your machine.
- Model Setup: Download your preferred model (for example, a quantized LLaMA variant) and use the provided command-line utilities to start inference.
- Customization: Tweak parameters such as context length, temperature, and beam size to see how the model’s output varies.
For example, a simple command might look like this:
./main -m ./models/llama-7b.gguf -p "Tell me a joke about programming" --temp 0.7 --top_k 100
This command loads the model and generates text based on your prompt. The simplicity of this setup is a huge plus for anyone getting started with local LLM inference.
Transitioning smoothly from Llama.cpp, let’s explore another fantastic tool that takes a slightly different approach.
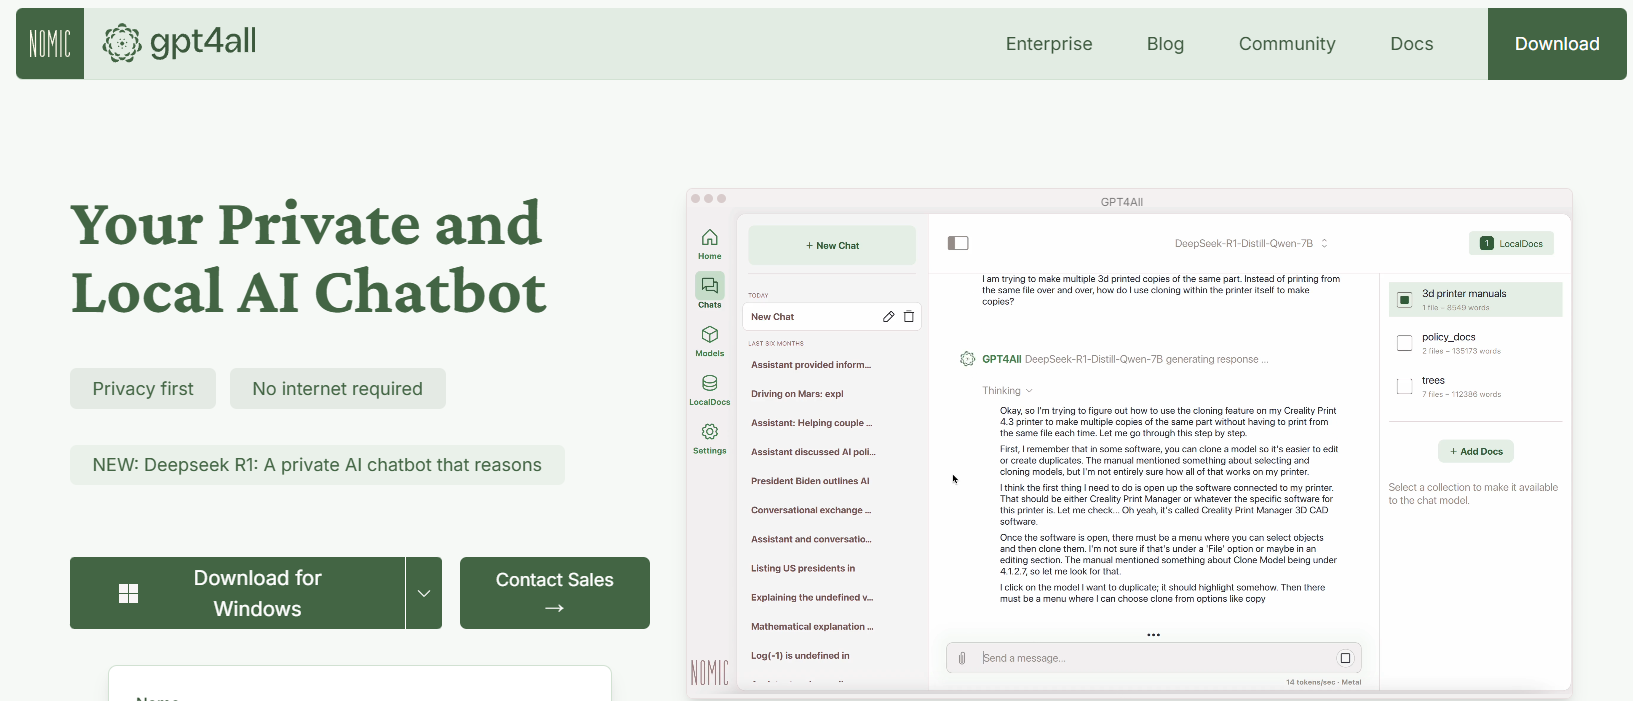
Tool #2: GPT4All
GPT4All is an open-source ecosystem designed by Nomic AI that democratizes the access to LLMs. One of the most exciting aspects of GPT4All is that it’s built to run on consumer-grade hardware, whether you’re on a CPU or a GPU. This makes it perfect for developers who want to experiment without needing expensive machines.
Key Features of GPT4All
- Local-First Approach: GPT4All is built to run entirely on your local device. This means no data ever leaves your machine, ensuring privacy and fast response times.
- User-Friendly: Even if you’re new to LLMs, GPT4All comes with a simple, intuitive interface that lets you interact with the model without deep technical know-how.
- Lightweight and Efficient: The models in the GPT4All ecosystem are optimized for performance. You can run them on your laptop, making them accessible to a broader audience.
- Open-Source and Community-Driven: With its open-source nature, GPT4All invites community contributions, ensuring that it stays up-to-date with the latest innovations.
Getting Started with GPT4All
- Installation: You can download GPT4All from its website. The installation process is straightforward, and precompiled binaries are available for Windows, macOS, and Linux.
- Running the Model: Once installed, simply launch the application and choose from a variety of pre-tuned models. The tool even offers a chat interface, which is perfect for casual experimentation.
- Customization: Adjust parameters such as the model’s response length and creativity settings to see how the output changes. This helps you understand how LLMs work under different conditions.
For example, you might type a prompt like:
What are some fun facts about artificial intelligence?
And GPT4All will generate a friendly, insightful response—all without needing an internet connection.
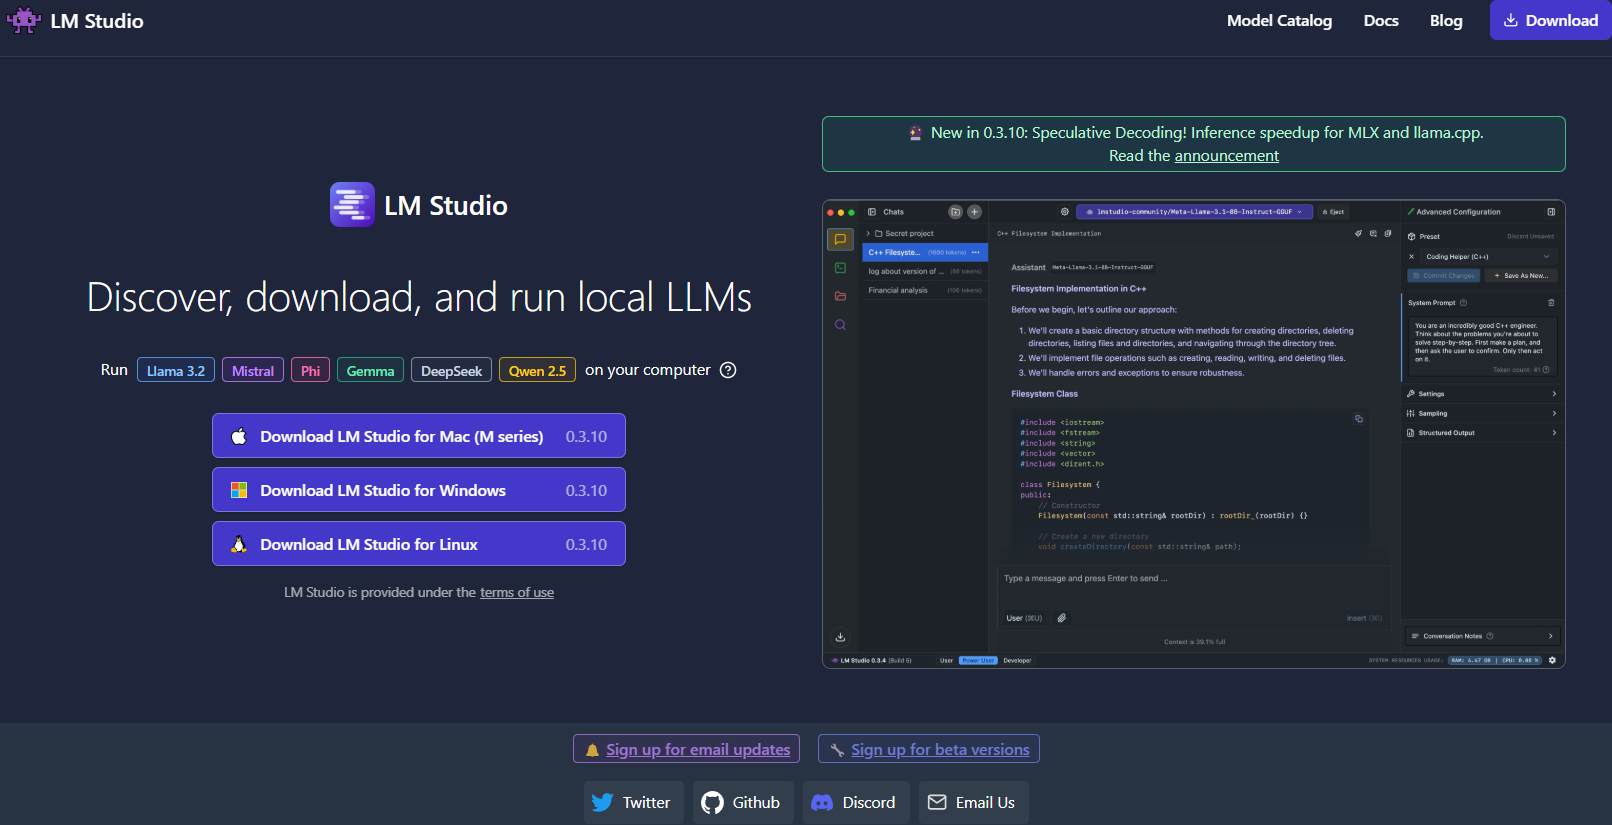
Tool #3: LM Studio
Moving on, LM Studio is another excellent tool for running LLMs locally, particularly if you’re looking for a graphical interface that makes model management a breeze.
What Sets LM Studio Apart?
- Intuitive User Interface: LM Studio provides a sleek, user-friendly desktop application. This is ideal for those who prefer not to work solely on the command line.
- Model Management: With LM Studio, you can easily browse, download, and switch between different LLMs. The app features built-in filters and search functionalities, so you can find the perfect model for your project.
- Customizable Settings: Adjust parameters like temperature, maximum tokens, and context window directly from the UI. This immediate feedback loop is perfect for learning how different configurations affect model behavior.
- Cross-Platform Compatibility: LM Studio runs on Windows, macOS, and Linux, making it accessible to a wide range of users.
- Local Inference Server: Developers can also leverage its local HTTP server, which mimics the OpenAI API. This makes integrating LLM capabilities into your applications much simpler.
How to Set Up LM Studio
- Download and Installation: Visit the LM Studio website, download the installer for your operating system, and follow the setup instructions.
- Launch and Explore: Open the application, explore the library of available models, and select one that fits your needs.
- Experiment: Use the built-in chat interface to interact with the model. You can also experiment with multiple models simultaneously to compare performance and quality.
Imagine you’re working on a creative writing project; LM Studio’s interface makes it easy to switch between models and fine-tune the output in real time. Its visual feedback and ease of use make it a strong choice for those who are just starting out or for professionals who need a robust local solution.
Tool #4: Ollama
Next up is Ollama, a powerful yet straightforward command-line tool with a focus on both simplicity and functionality. Ollama is designed to help you run, create, and share LLMs without the hassle of complex setups.

Why Choose Ollama?
- Easy Model Deployment: Ollama packages everything you need—model weights, configuration, and even data—into a single, portable unit known as a “Modelfile.” This means you can quickly download and run a model with minimal configuration.
- Multimodal Capabilities: Unlike some tools that focus only on text, Ollama supports multimodal inputs. You can provide both text and images as prompts, and the tool will generate responses that take both into account.
- Cross-Platform Availability: Ollama is available on macOS, Linux, and Windows. It’s a great option for developers who work across different systems.
- Command-Line Efficiency: For those who prefer working in the terminal, Ollama offers a clean, efficient command-line interface that allows for quick deployment and interaction.
- Rapid Updates: The tool is frequently updated by its community, ensuring that you’re always working with the latest improvements and features.
Setting Up Ollama
1. Installation: Visit the Ollama website and download the installer for your operating system. Installation is as simple as running a few commands in your terminal.
2. Run a Model: Once installed, use a command such as:
ollama run llama3
This command will automatically download the Llama 3 model (or any other supported model) and start the inference process.
3. Experiment with Multimodality: Try running a model that supports images. For example, if you have an image file ready, you could drag and drop it into your prompt (or use the API parameter for images) to see how the model responds.
Ollama is particularly appealing if you’re looking to quickly prototype or deploy LLMs locally. Its simplicity doesn’t come at the cost of power, making it ideal for both beginners and seasoned developers.
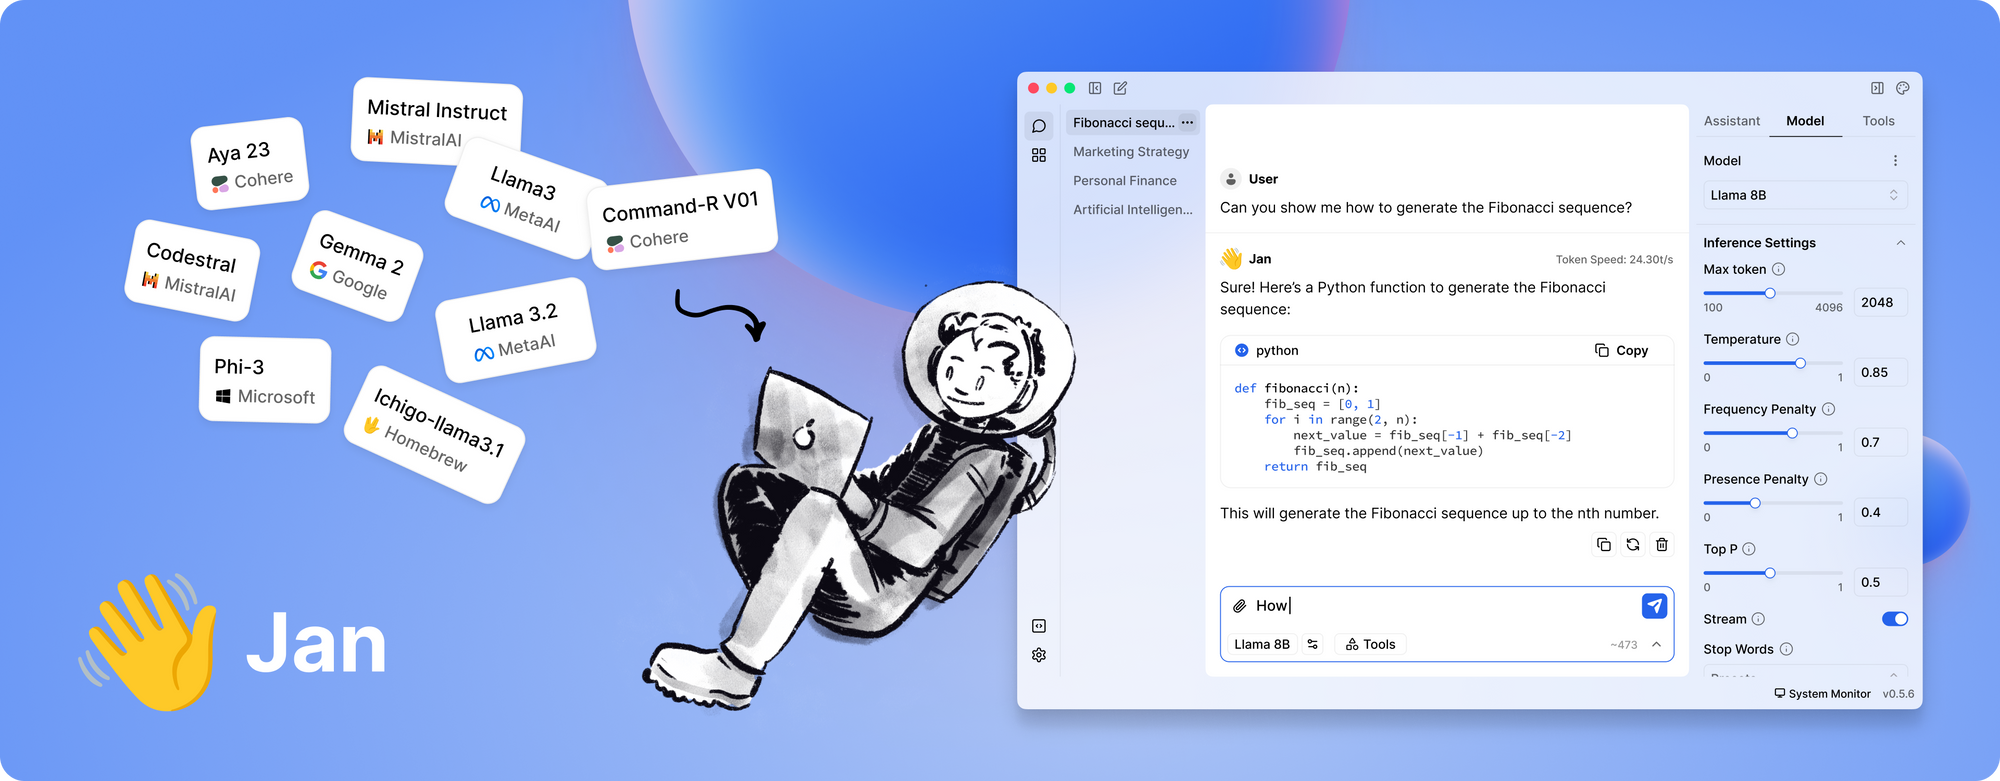
Tool #5: Jan
Last but not least, we have Jan. Jan is an open-source, local-first platform that is steadily gaining popularity among those who prioritize data privacy and offline operation. Its philosophy is simple: let users run powerful LLMs entirely on their own hardware, with no hidden data transfers.
What Makes Jan Stand Out?
- Completely Offline: Jan is designed to operate without an internet connection. This ensures that all your interactions and data remain local, enhancing privacy and security.
- User-Centric and Extensible: The tool offers a clean interface and supports an app/plugin framework. This means you can easily extend its capabilities or integrate it with your existing tools.
- Efficient Model Execution: Jan is built to handle a variety of models, including those fine-tuned for specific tasks. It is optimized to run even on modest hardware, without compromising performance.
- Community-Driven Development: Like many of the tools on our list, Jan is open-source and benefits from contributions by a dedicated community of developers.
- No Subscription Fees: Unlike many cloud-based solutions, Jan is free to use. This makes it an excellent choice for startups, hobbyists, and anyone who wants to experiment with LLMs without financial barriers.
How to Get Started with Jan
- Download and Install: Head over to Jan’s official website or GitHub repository. Follow the installation instructions, which are straightforward and designed to get you up and running quickly.
- Launch and Customize: Open Jan and choose from a variety of pre-installed models. If needed, you can import models from external sources such as Hugging Face.
- Experiment and Expand: Use the chat interface to interact with your LLM. Adjust parameters, install plugins, and see how Jan adapts to your workflow. Its flexibility allows you to tailor your local LLM experience to your precise needs.
Jan truly embodies the spirit of local, privacy-focused LLM execution. It’s perfect for anyone who wants a hassle-free, customizable tool that keeps all data on their own machine.
Pro Tip: Streaming LLM Responses Using SSE Debugging
If you are working with LLMs (Large Language Models), real-time interaction can greatly enhance the user experience. Whether it's a chatbot delivering live responses or a content tool dynamically updating as data is generated, streaming is key. Server-Sent Events (SSE) offer an efficient solution for this, enabling servers to push updates to clients via a single HTTP connection. Unlike bidirectional protocols like WebSockets, SSE is simpler and more straightforward, making it a great choice for real-time features.
Debugging SSE can be challenging. That’s where Apidog comes in. Apidog’s SSE debugging feature allows you to test, monitor, and troubleshoot SSE streams with ease. In this section, we’ll explore why SSE matters for debugging LLM APIs and walk you through a step-by-step tutorial on using Apidog to set up and test SSE connections.
Why SSE Matters for Debugging LLM APIs
Before we dive into the tutorial, here’s why SSE is a great fit for debugging LLM APIs:
- Real-Time Feedback: SSE streams data as it’s generated, letting users see responses unfold naturally.
- Low Overhead: Unlike polling, SSE uses a single persistent connection, minimizing resource use.
- Ease of Use: SSE integrates seamlessly into web applications, requiring minimal setup on the client side.
Ready to test it out? Let’s set up SSE debugging in Apidog.
Step-by-Step Tutorial: Using SSE Debugging in Apidog
Follow these steps to configure and test an SSE connection with Apidog.
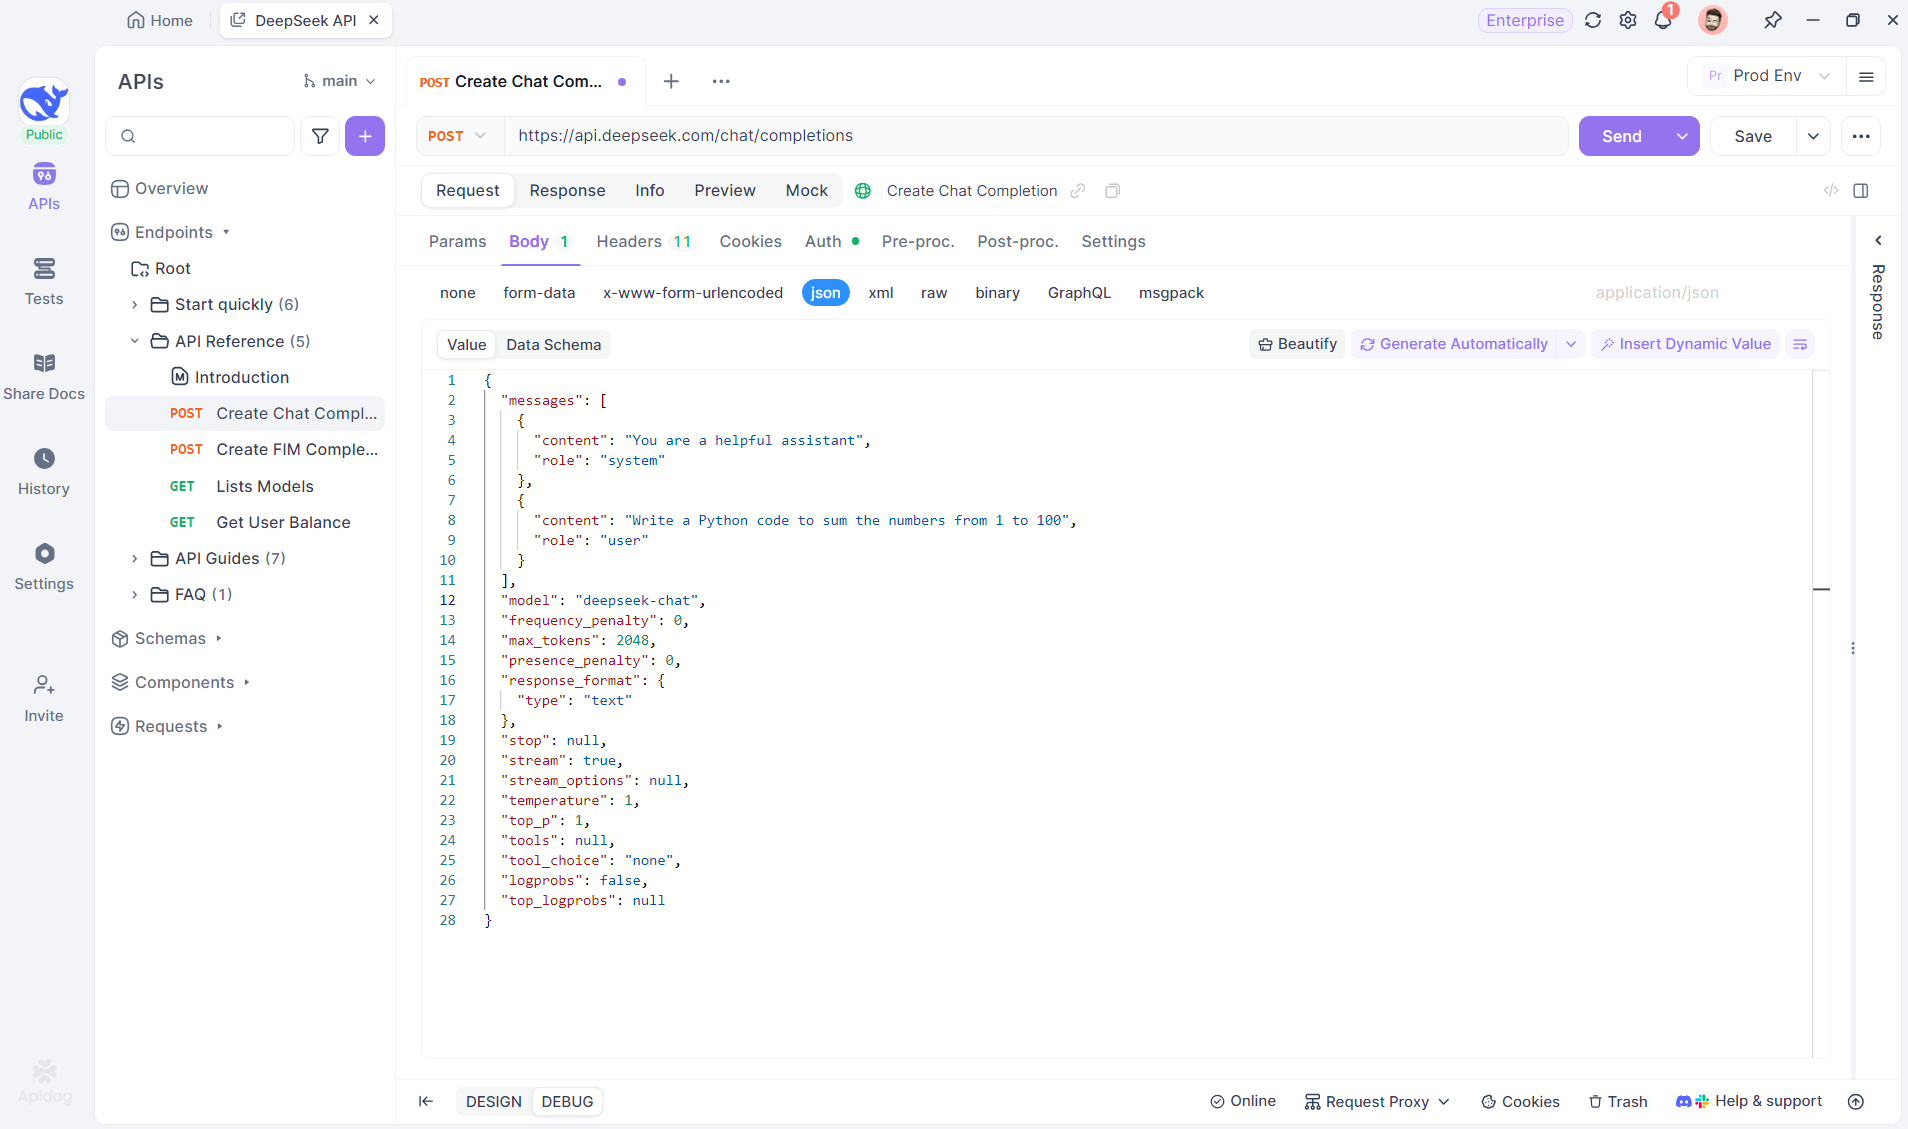
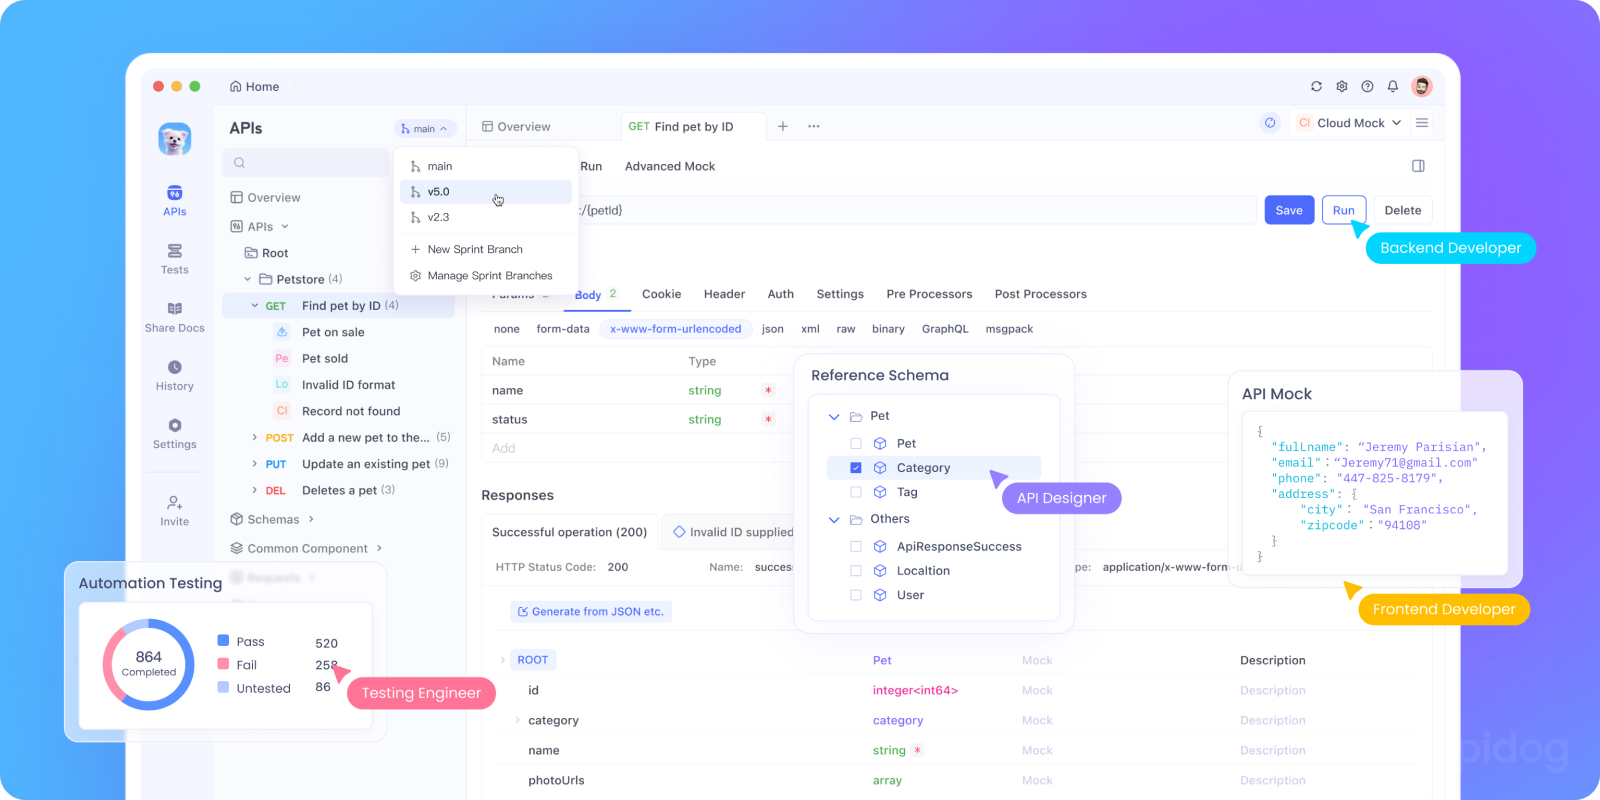
Step 1: Create a New Endpoint in Apidog
Create a new HTTP project in Apidog to test and debug API requests. Add an endpoint with the AI model’s URL for the SSE stream—using DeepSeek in this example. (PRO TIP: Clone the ready-made DeepSeek API project from Apidog's API Hub).
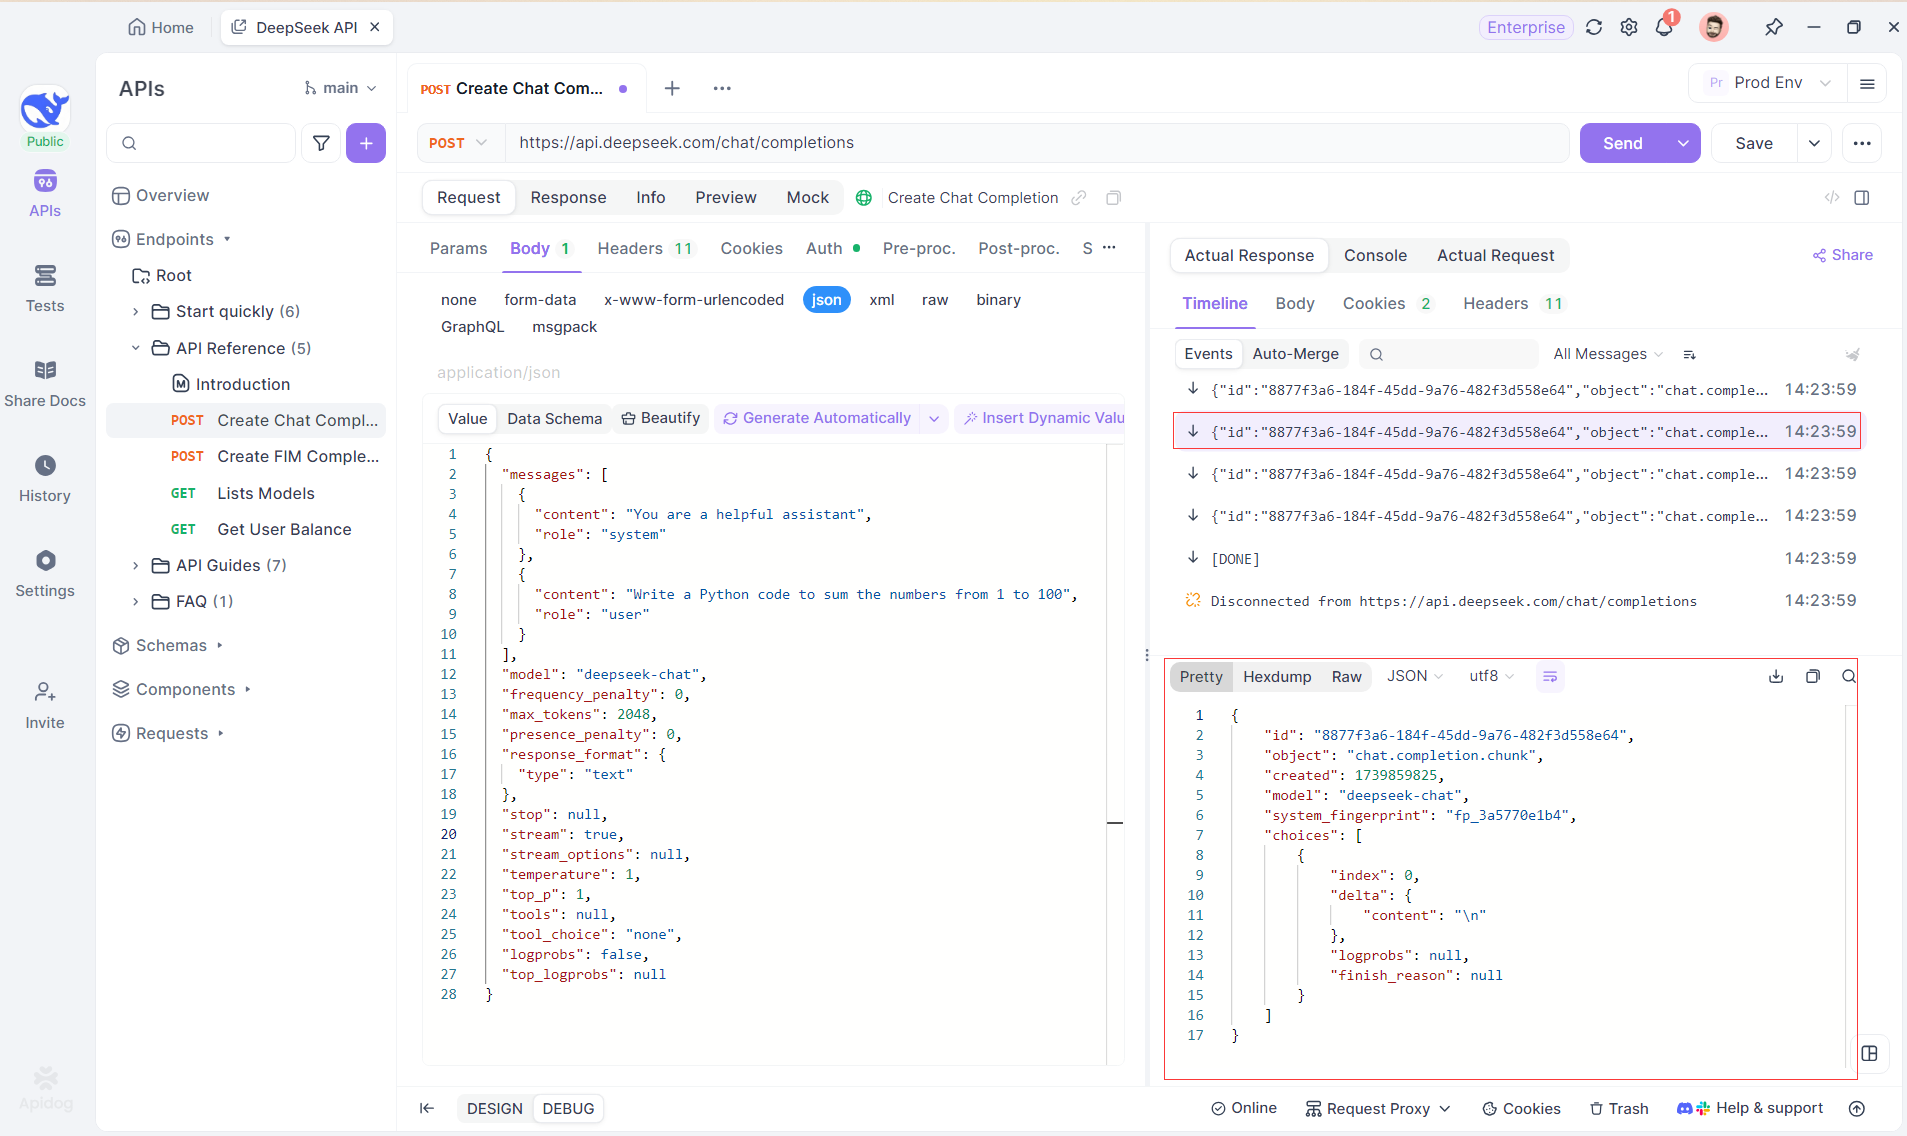
Step 2: Send the Request
After adding the endpoint, click Send to send the request. If the response header includes Content-Type: text/event-stream, Apidog will detect the SSE stream, parse the data, and display it in real time.
Step 3: View Real-Time Responses
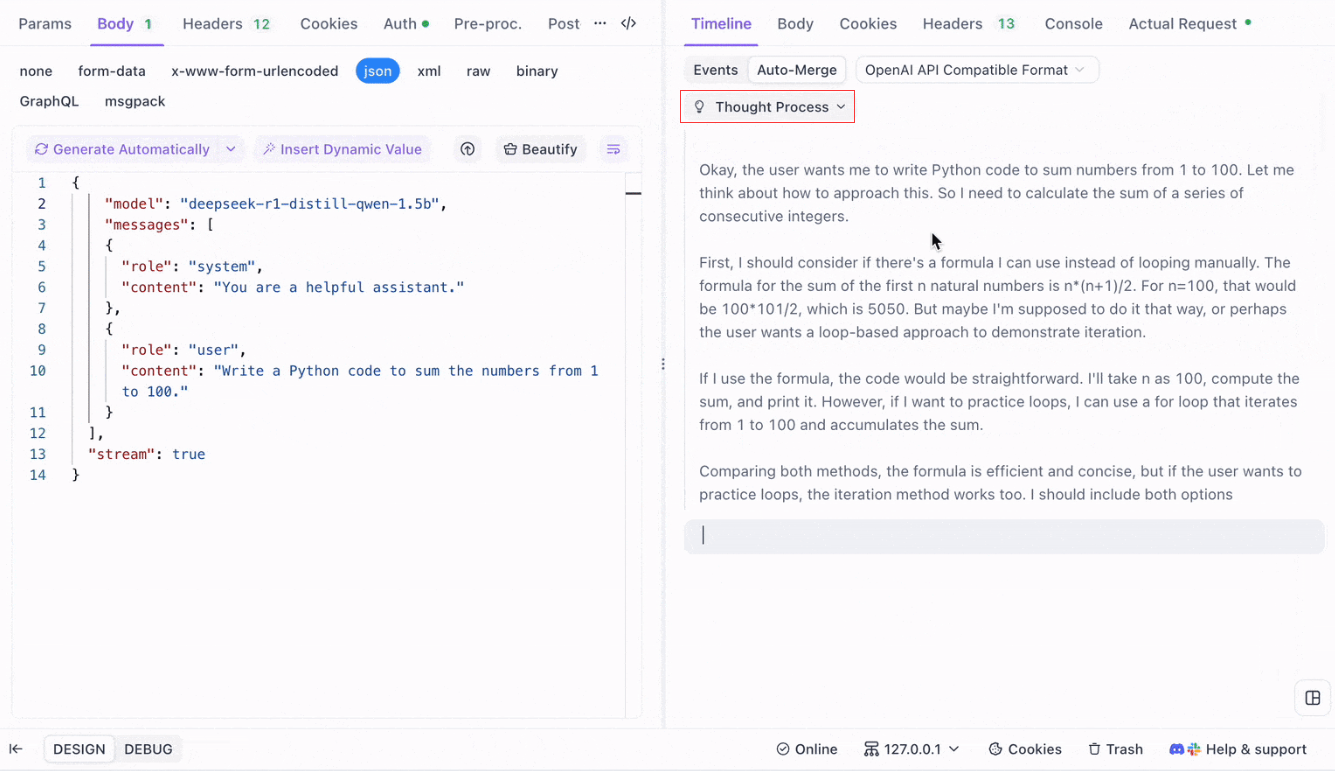
Apidog’s Timeline View updates in real time as the AI model streams responses, showing each fragment dynamically. This lets you track the AI’s thought process and gain insights into its output generation.
Step 4: Viewing SSE Response in a Complete Reply
SSE streams data in fragments, requiring extra handling. Apidog’s Auto-Merge feature solves this by automatically combining fragmented AI responses from models like OpenAI, Gemini, or Claude into a complete output.
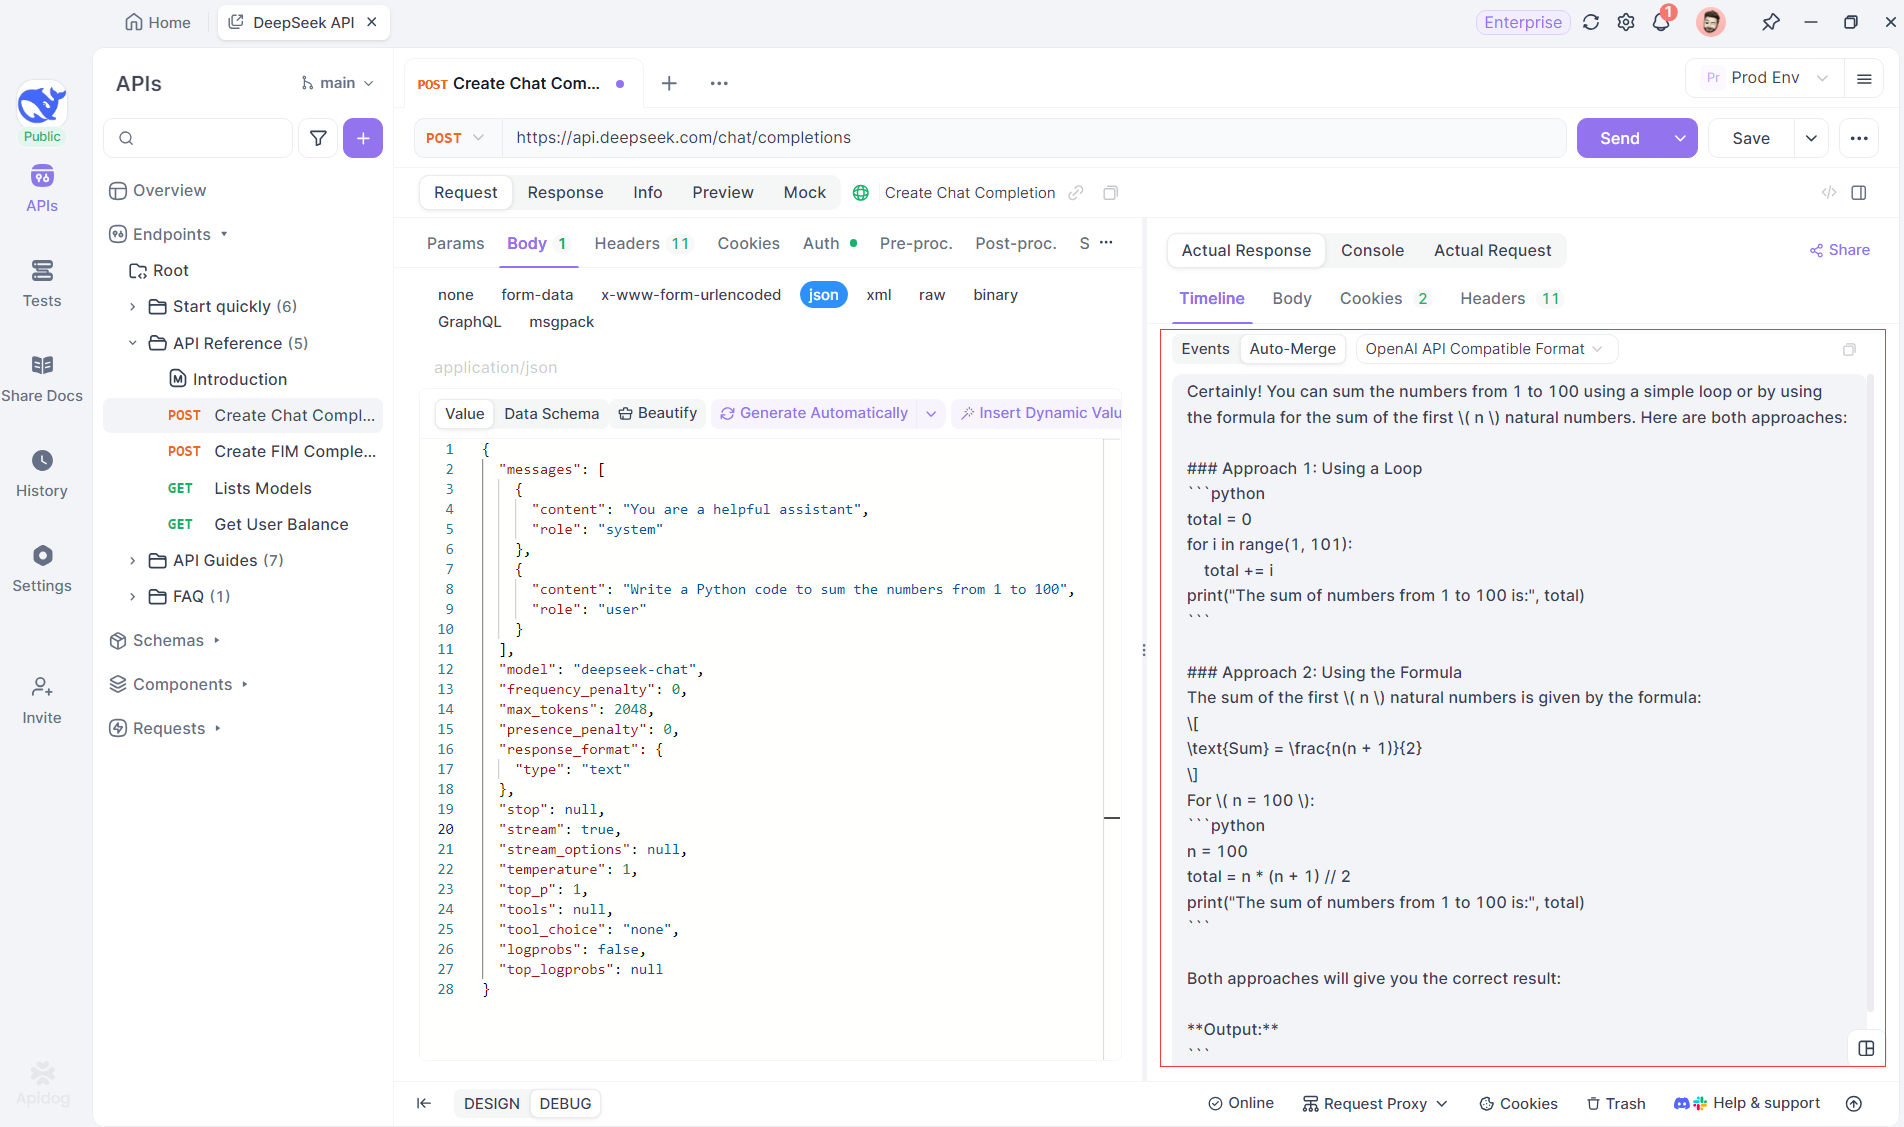
Apidog’s Auto-Merge feature eliminates manual data handling by automatically combining fragmented AI responses from models like OpenAI, Gemini, or Claude.
For reasoning models like DeepSeek R1, Apidog’s Timeline View visually maps the AI’s thought process, making it easier to debug and understand how conclusions are formed.
Apidog seamlessly recognizes and merges AI responses from:
- OpenAI API Format
- Gemini API Format
- Claude API Format
When a response matches these formats, Apidog automatically combines the fragments, eliminating manual stitching and streamlining SSE debugging.
Conclusion and Next Steps
We’ve covered a lot of ground today! To summarize, here are the five standout tools for running LLMs locally:
- Llama.cpp: Ideal for developers who want a lightweight, fast, and highly efficient command-line tool with broad hardware support.
- GPT4All: A local-first ecosystem that runs on consumer-grade hardware, offering an intuitive interface and powerful performance.
- LM Studio: Perfect for those who prefer a graphical interface, with easy model management and extensive customization options.
- Ollama: A robust command-line tool with multimodal capabilities and seamless model packaging through its “Modelfile” system.
- Jan: A privacy-first, open-source platform that runs completely offline, offering an extensible framework for integrating various LLMs.
Each of these tools offers unique advantages, whether it’s performance, ease of use, or privacy. Depending on your project’s requirements, one of these solutions may be the perfect fit for your needs. The beauty of local LLM tools is that they empower you to explore and experiment without worrying about data leakage, subscription costs, or network latency.
Remember that experimenting with local LLMs is a learning process. Feel free to mix and match these tools, test various configurations, and see which one aligns best with your workflow. Additionally, if you’re integrating these models into your own applications, tools like Apidog can help you manage and test your LLM API endpoints using Server-sent Events(SSE) seamlessly. Don’t forget to download Apidog for free and elevate your local development experience.
Next Steps
- Experiment: Choose one tool from our list and set it up on your machine. Play around with different models and settings to understand how changes affect the output.
- Integrate: If you’re developing an application, use the local LLM tool as part of your backend. Many of these tools offer API compatibility (for example, LM Studio’s local inference server) which can make integration smoother.
- Contribute: Most of these projects are open source. If you find a bug, a missing feature, or simply have ideas for improvement, consider contributing to the community. Your input can help make these tools even better.
- Learn More: Continue exploring the world of LLMs by reading up on topics such as model quantization, optimization techniques, and prompt engineering. The more you understand, the more you can leverage these models to their full potential.
By now, you should have a solid foundation for choosing the right local LLM tool for your projects. The landscape of LLM technology is evolving rapidly, and running models locally is a key step towards building private, scalable, and high-performance AI solutions.
As you experiment with these tools, you’ll discover that the possibilities are endless. Whether you’re working on a chatbot, a code assistant, or a custom creative writing tool, local LLMs can offer the flexibility and power you need. Enjoy the journey, and happy coding!


