When endpoint test cases and test scenarios in a project keep growing, the cost of managing and running them individually rises sharply. What was meant to safeguard quality—automated testing—can itself become a maintenance burden.
Traditionally, teams select test cases manually. When a project has accumulated many cases and test scenarios, manually deciding which to include and which to run for regression becomes heavy manual work.
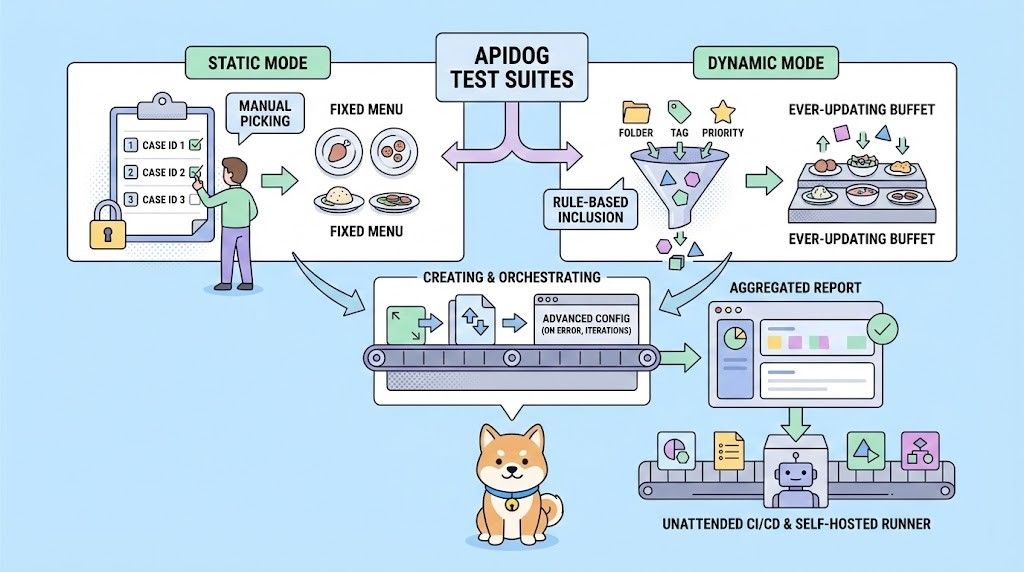
Apidog Test Suites address this with a dynamic approach. Instead of rigidly storing IDs, a suite stores a set of filter rules—for example, by folder, tag, priority, or a combination of conditions.
Before each run, the test suite automatically assembles all test cases and test scenarios that match those rules. You can focus on writing tests and applying tags; new test assets are picked up automatically and flow into your CI/CD pipeline for truly unattended continuous integration.
All execution results are then summarized in a single aggregated report for easier analysis and troubleshooting.
Create and Orchestrate Your First Test Suite
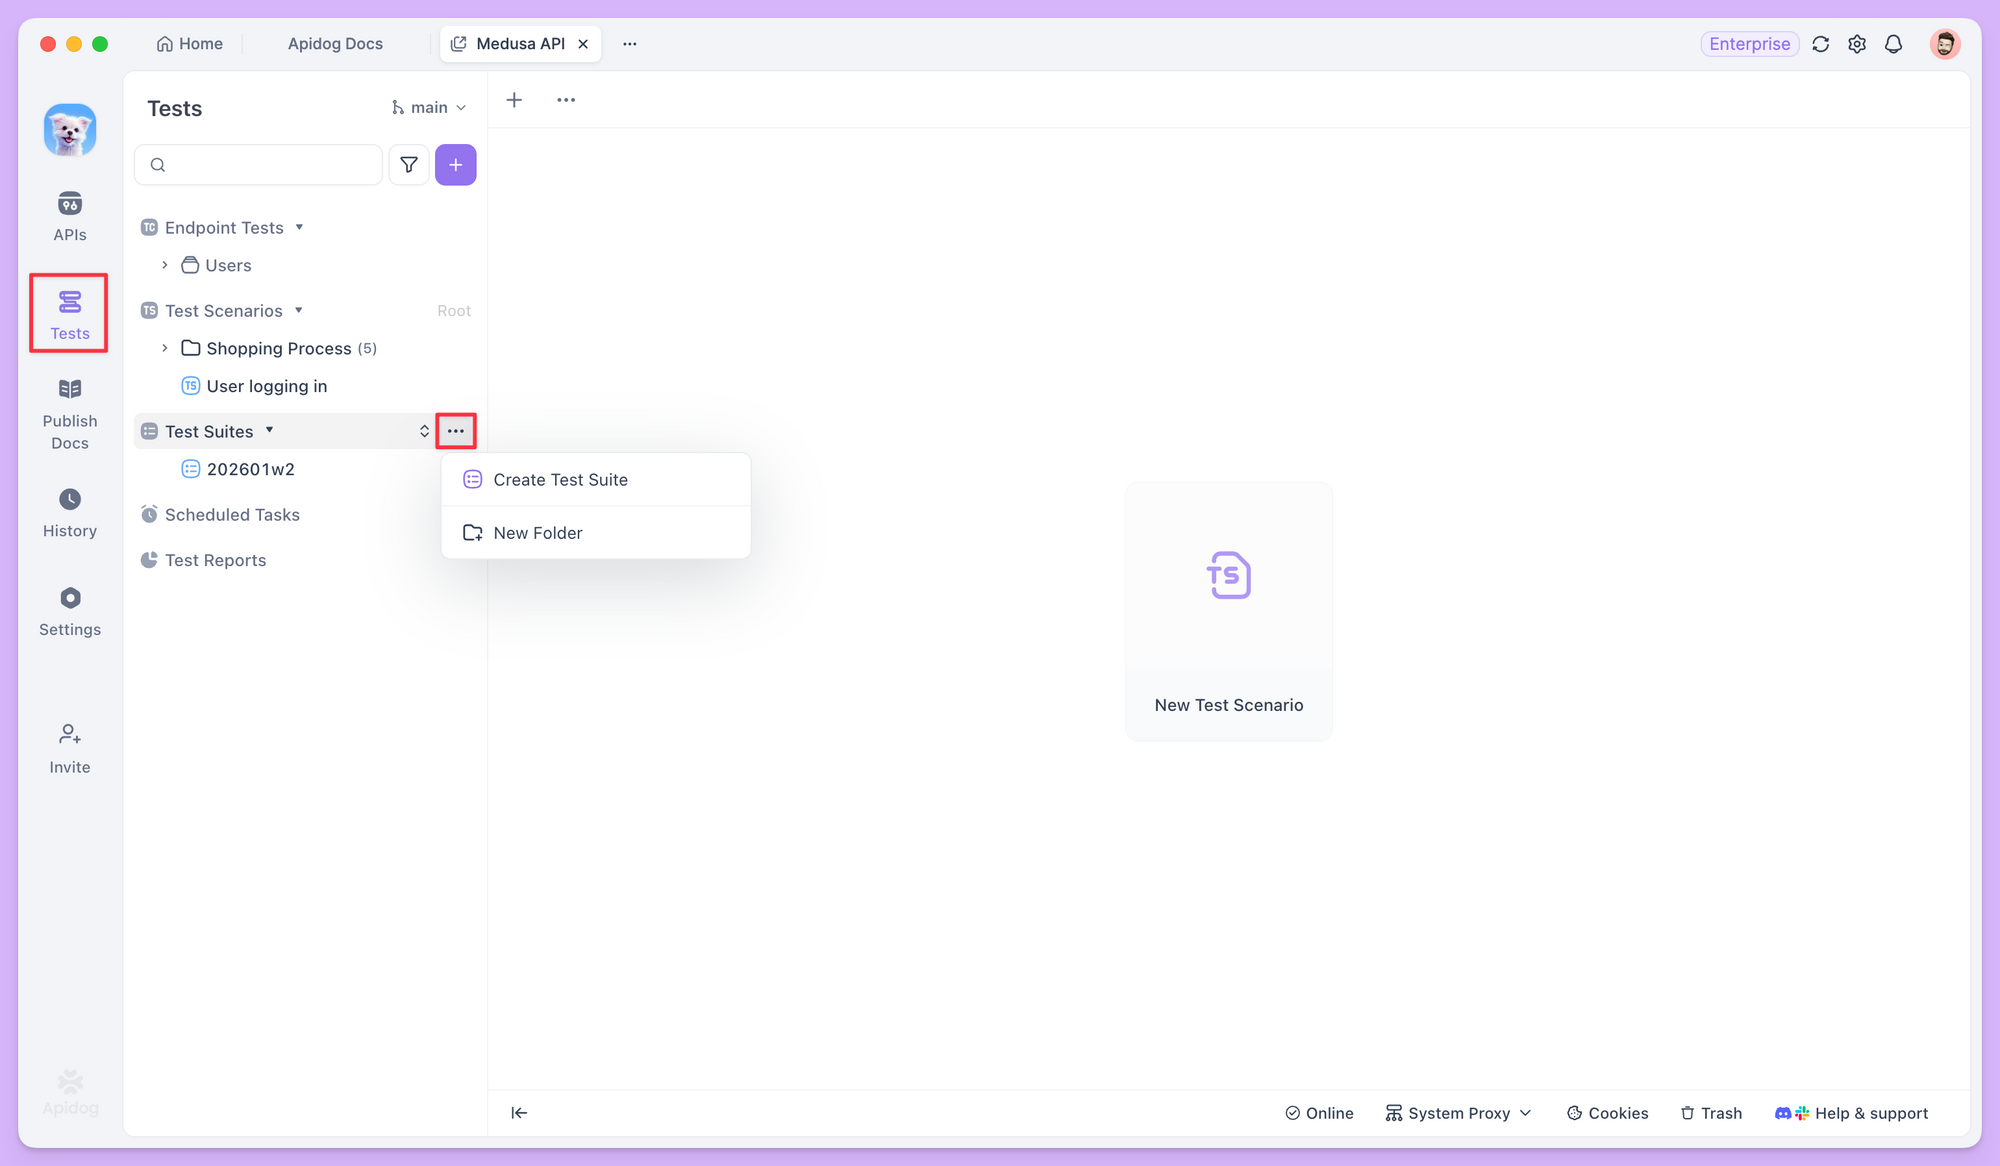
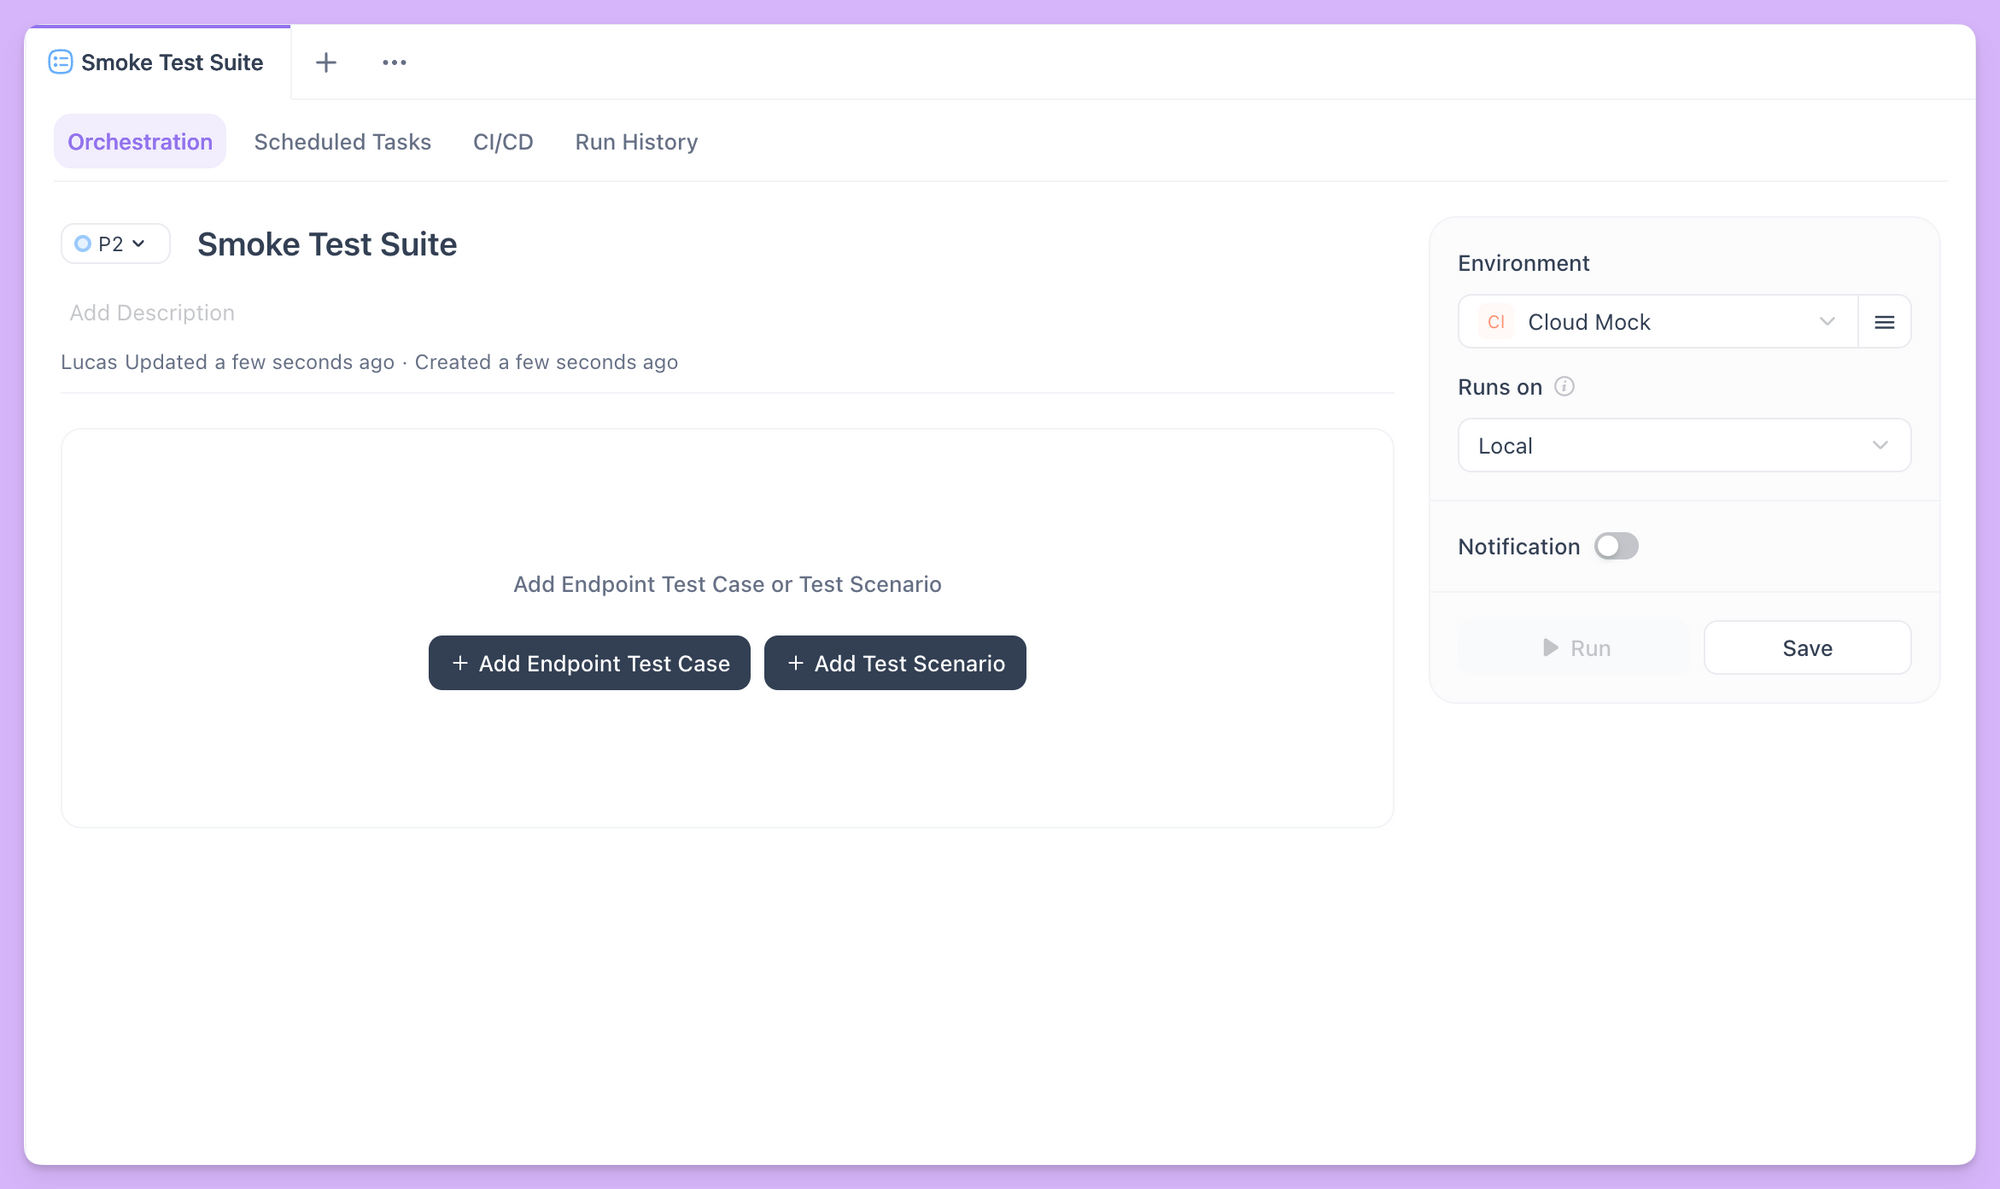
After updating Apidog to the latest version, open the Tests module and find the Test Suite section. Click the ... menu next to it and choose Create Test Suite.
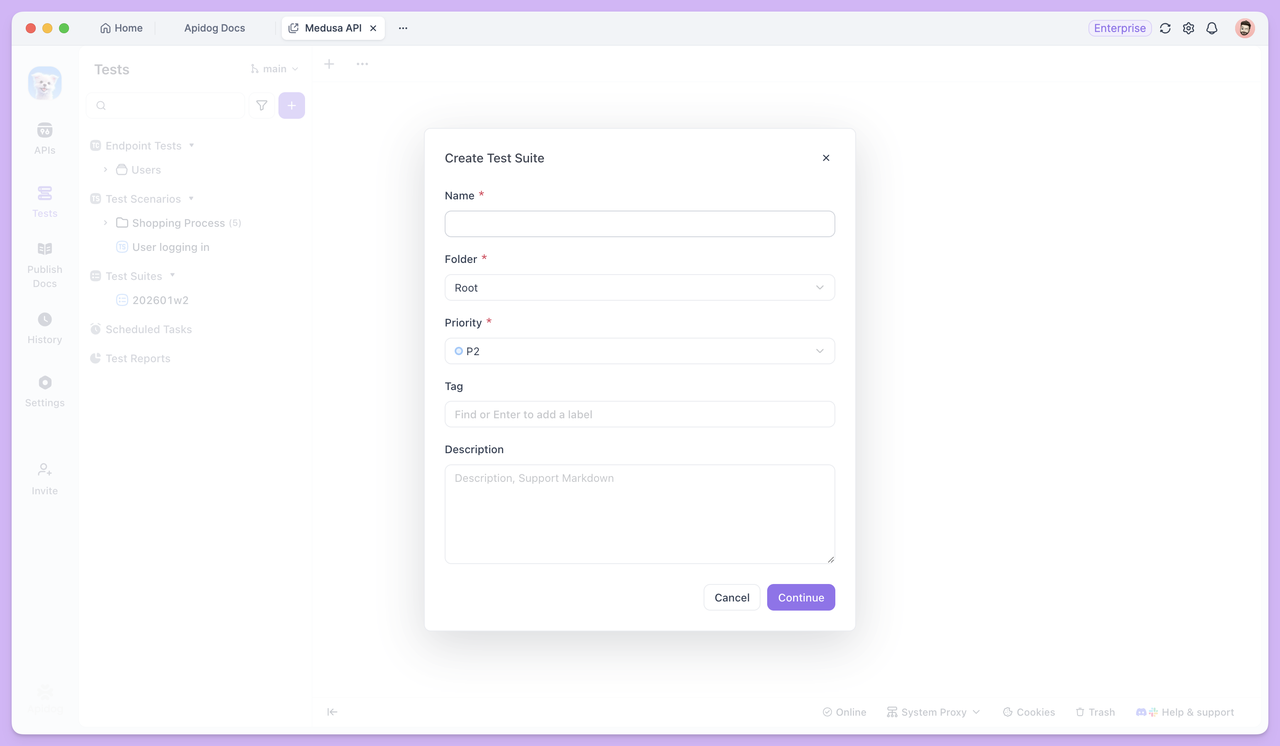
In the pop-up, enter a descriptive name and set options such as priority or tags. An empty test suite is created.
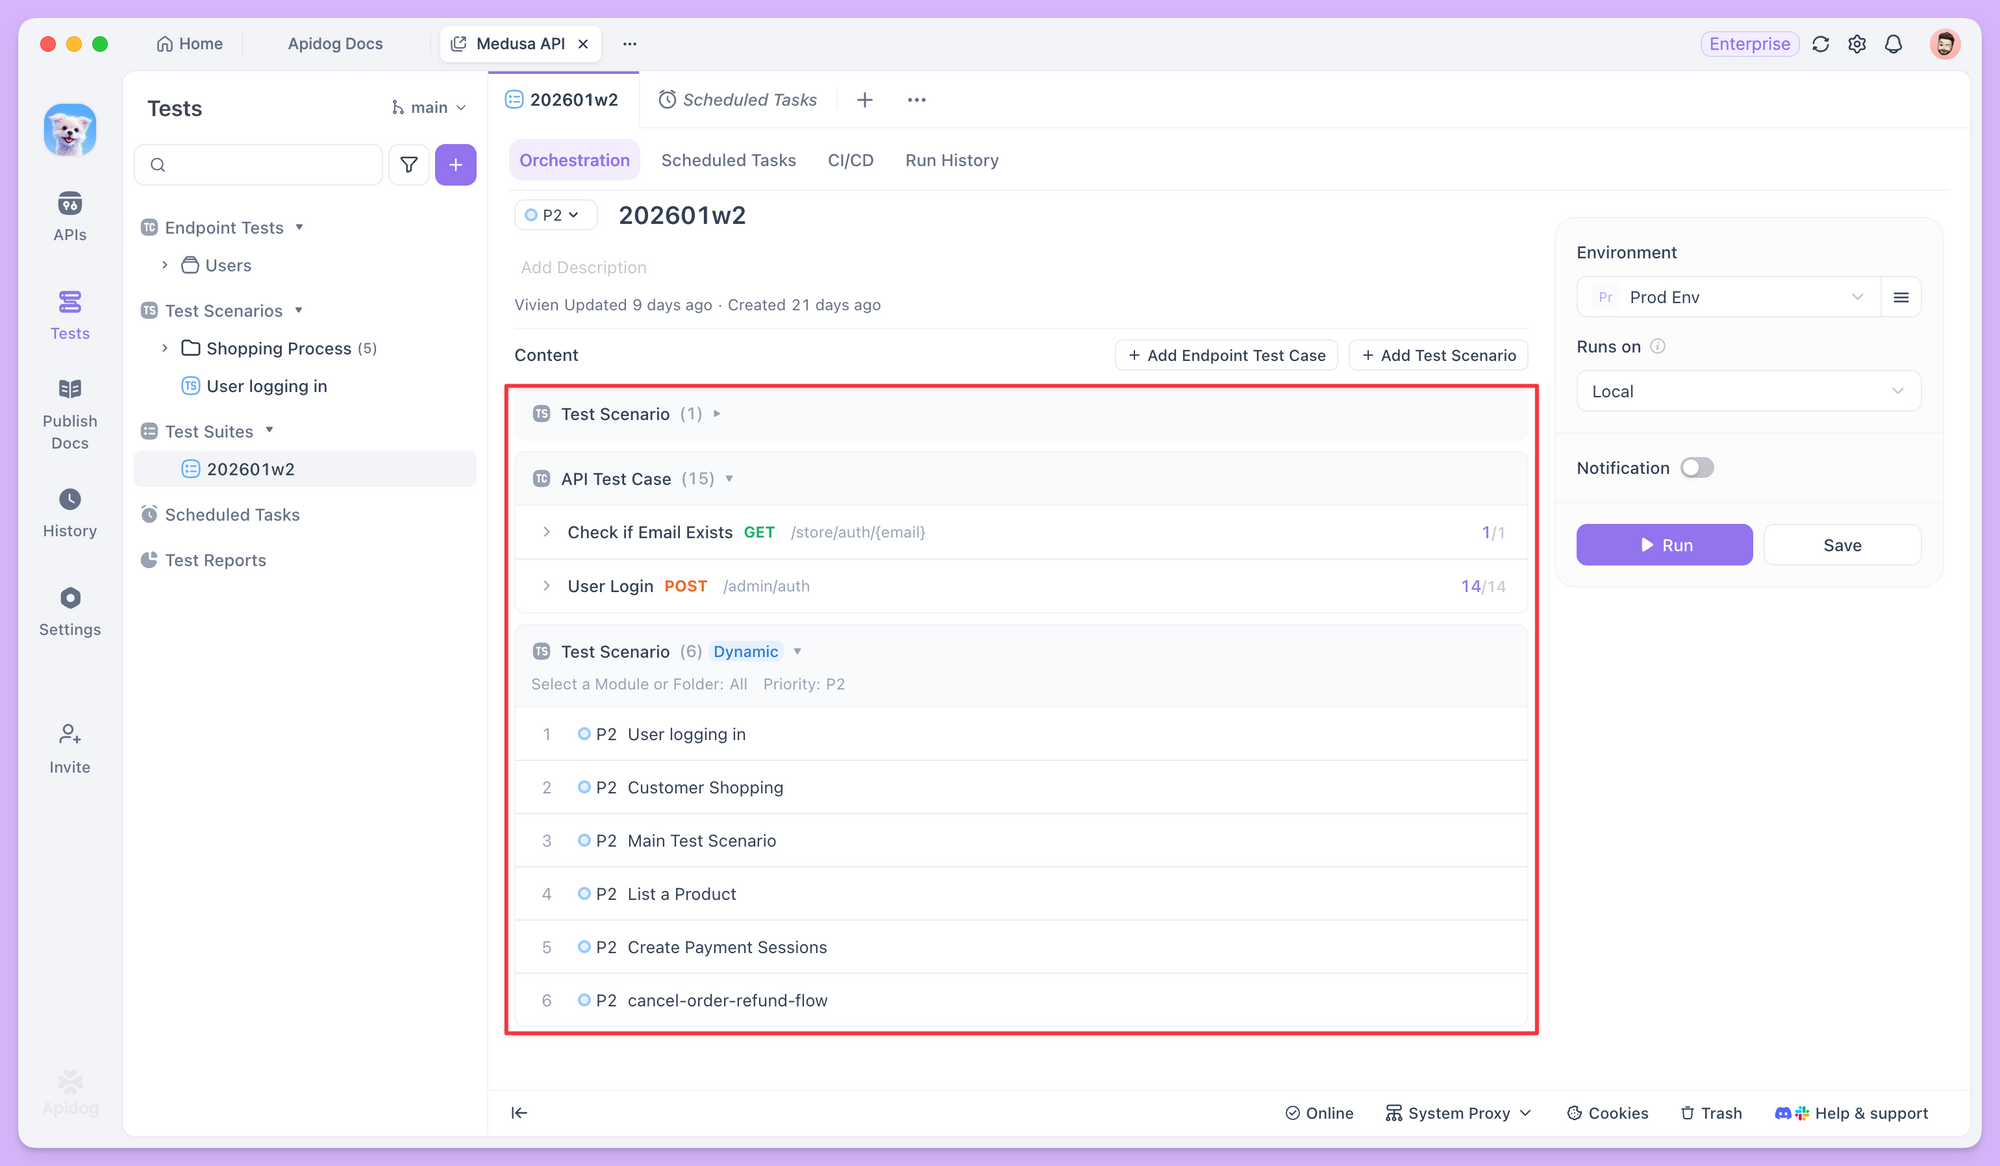
Next, add content to the suite. A test suite can contain individual endpoint test cases or test scenarios made up of multiple test steps.
Adding Test Content: Static and Dynamic
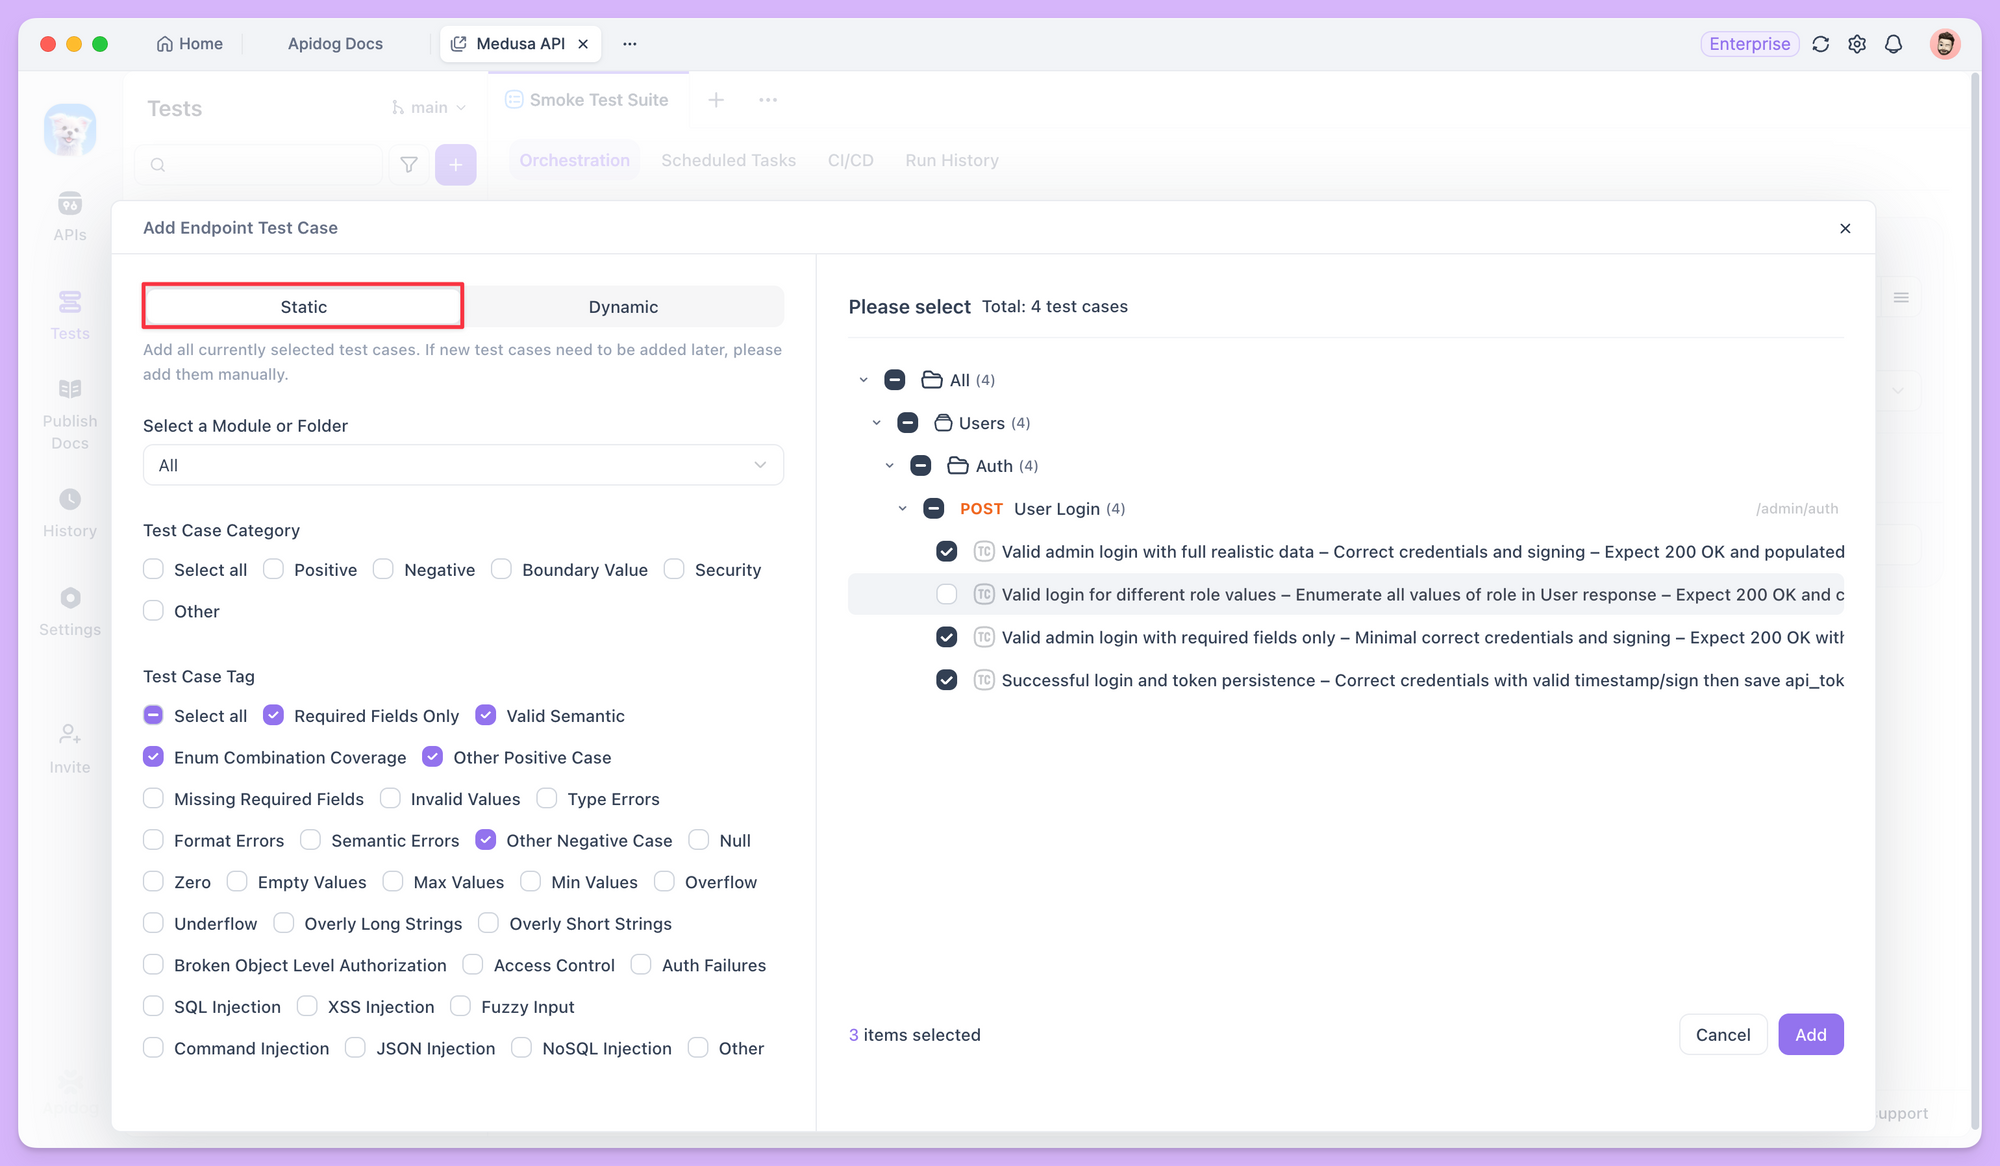
When you click Add Endpoint Test Case or Add Test Scenario, you can choose Static or Dynamic mode. These modes determine how the suite decides what to run and suit different maintenance and testing goals.
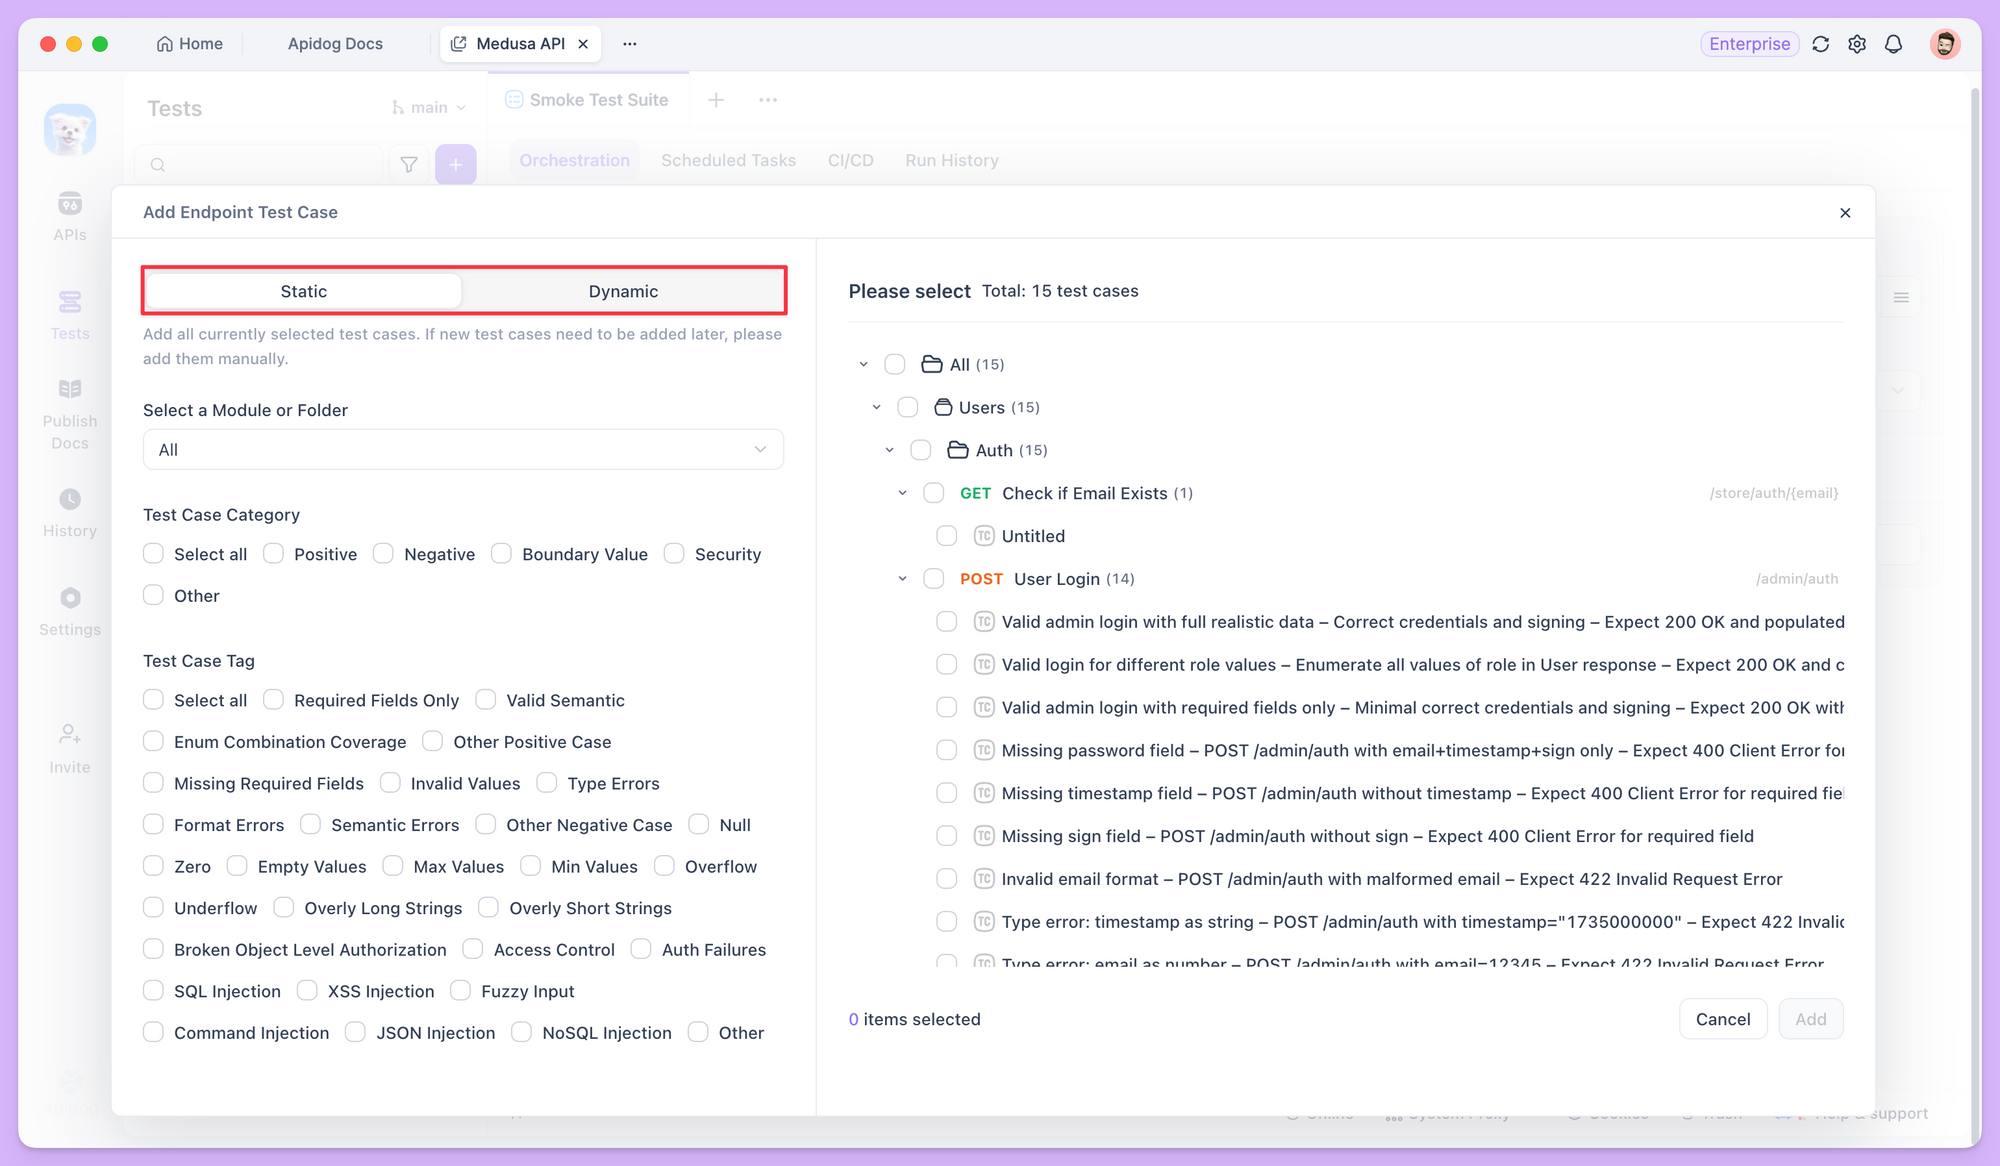
Static mode pins the exact set of items to run. When you select specific cases in static mode, the system stores those cases' unique IDs. If new cases are later added to the same folder or cases are moved, the suite's execution scope does not change. Behavior is deterministic and the same every run.
Dynamic mode works differently. It does not store specific case IDs; it stores filter rules, such as "all cases under a certain folder" or "all cases with the tag 'semantic-valid'," or "all test scenarios with P0 priority".

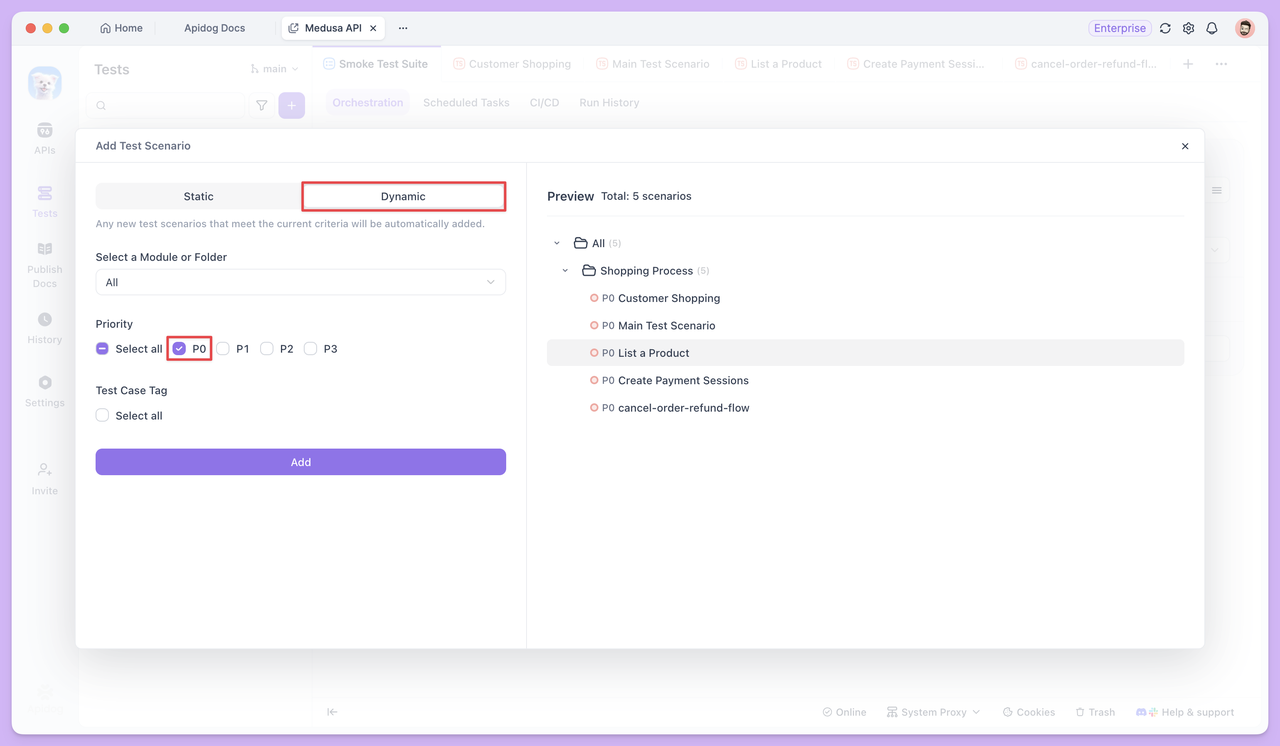
In dynamic mode, each time the test suite runs, the system rescans the project using these rules and includes all cases that currently match. Any test case or scenario whose attributes (folder, tags, priority) match the rules is included automatically.
Static vs Dynamic Mode: How to Choose?
Neither mode is universally better; they serve different needs. The choice depends on how you want the suite to behave over time.
For tightly scoped, dedicated tests (e.g., a fixed regression set), static mode is more predictable. For ongoing iteration and "auto-onboard" regression or smoke testing, dynamic mode greatly reduces maintenance.
For a quick comparison of the two modes, see the table below:
| Aspect | Static Mode | Dynamic Mode |
|---|---|---|
| Core logic | Stores specific case IDs | Stores filter rules (folder, tags, priority, etc.) |
| Content over time | Fixed unless you change it manually | Updates automatically as matching cases are added or removed |
| Maintenance cost | Higher; new cases must be added manually | Lower; set rules once, then runs stay in sync |
| Typical use | Bug fix verification, core-path stability, compatibility testing | Full regression, smoke tests, release acceptance |
Execution Order and Advanced Config
After adding content, you can reorder items in the orchestration list by dragging them.
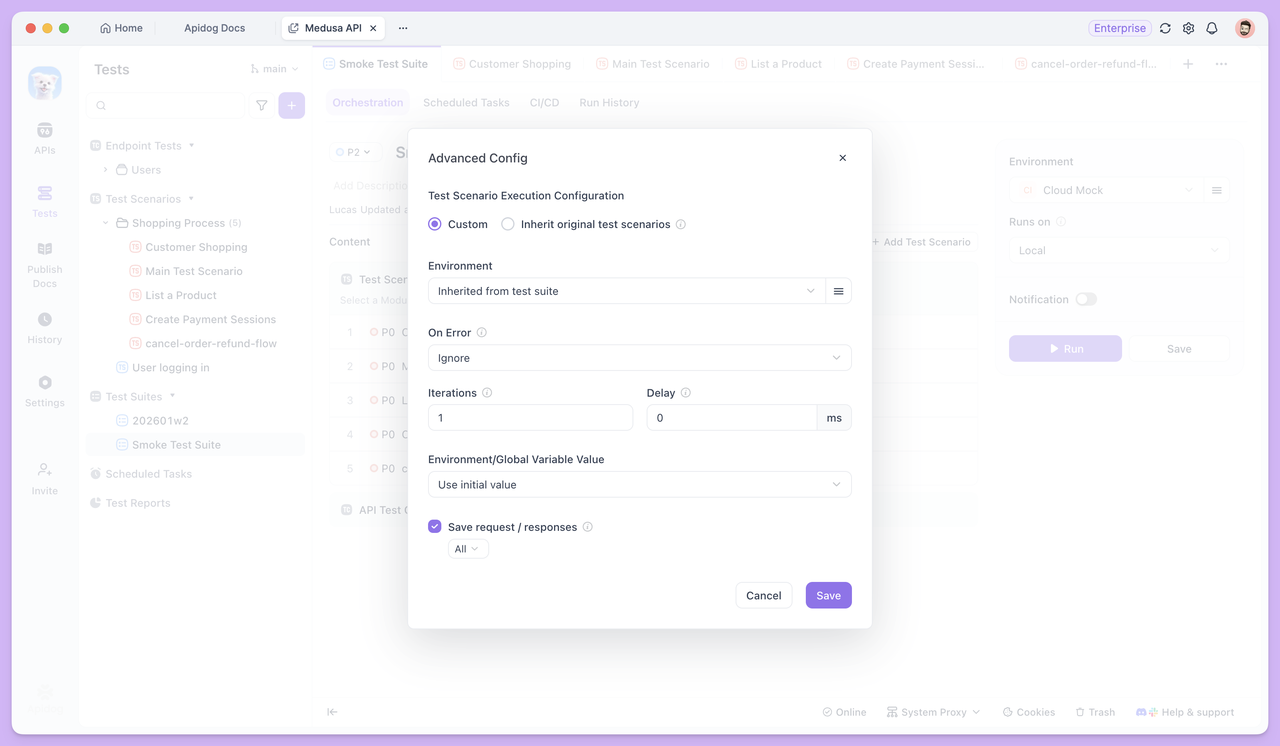
For each execution item (e.g., test scenario), you can control run behavior in more detail via the options on the right.
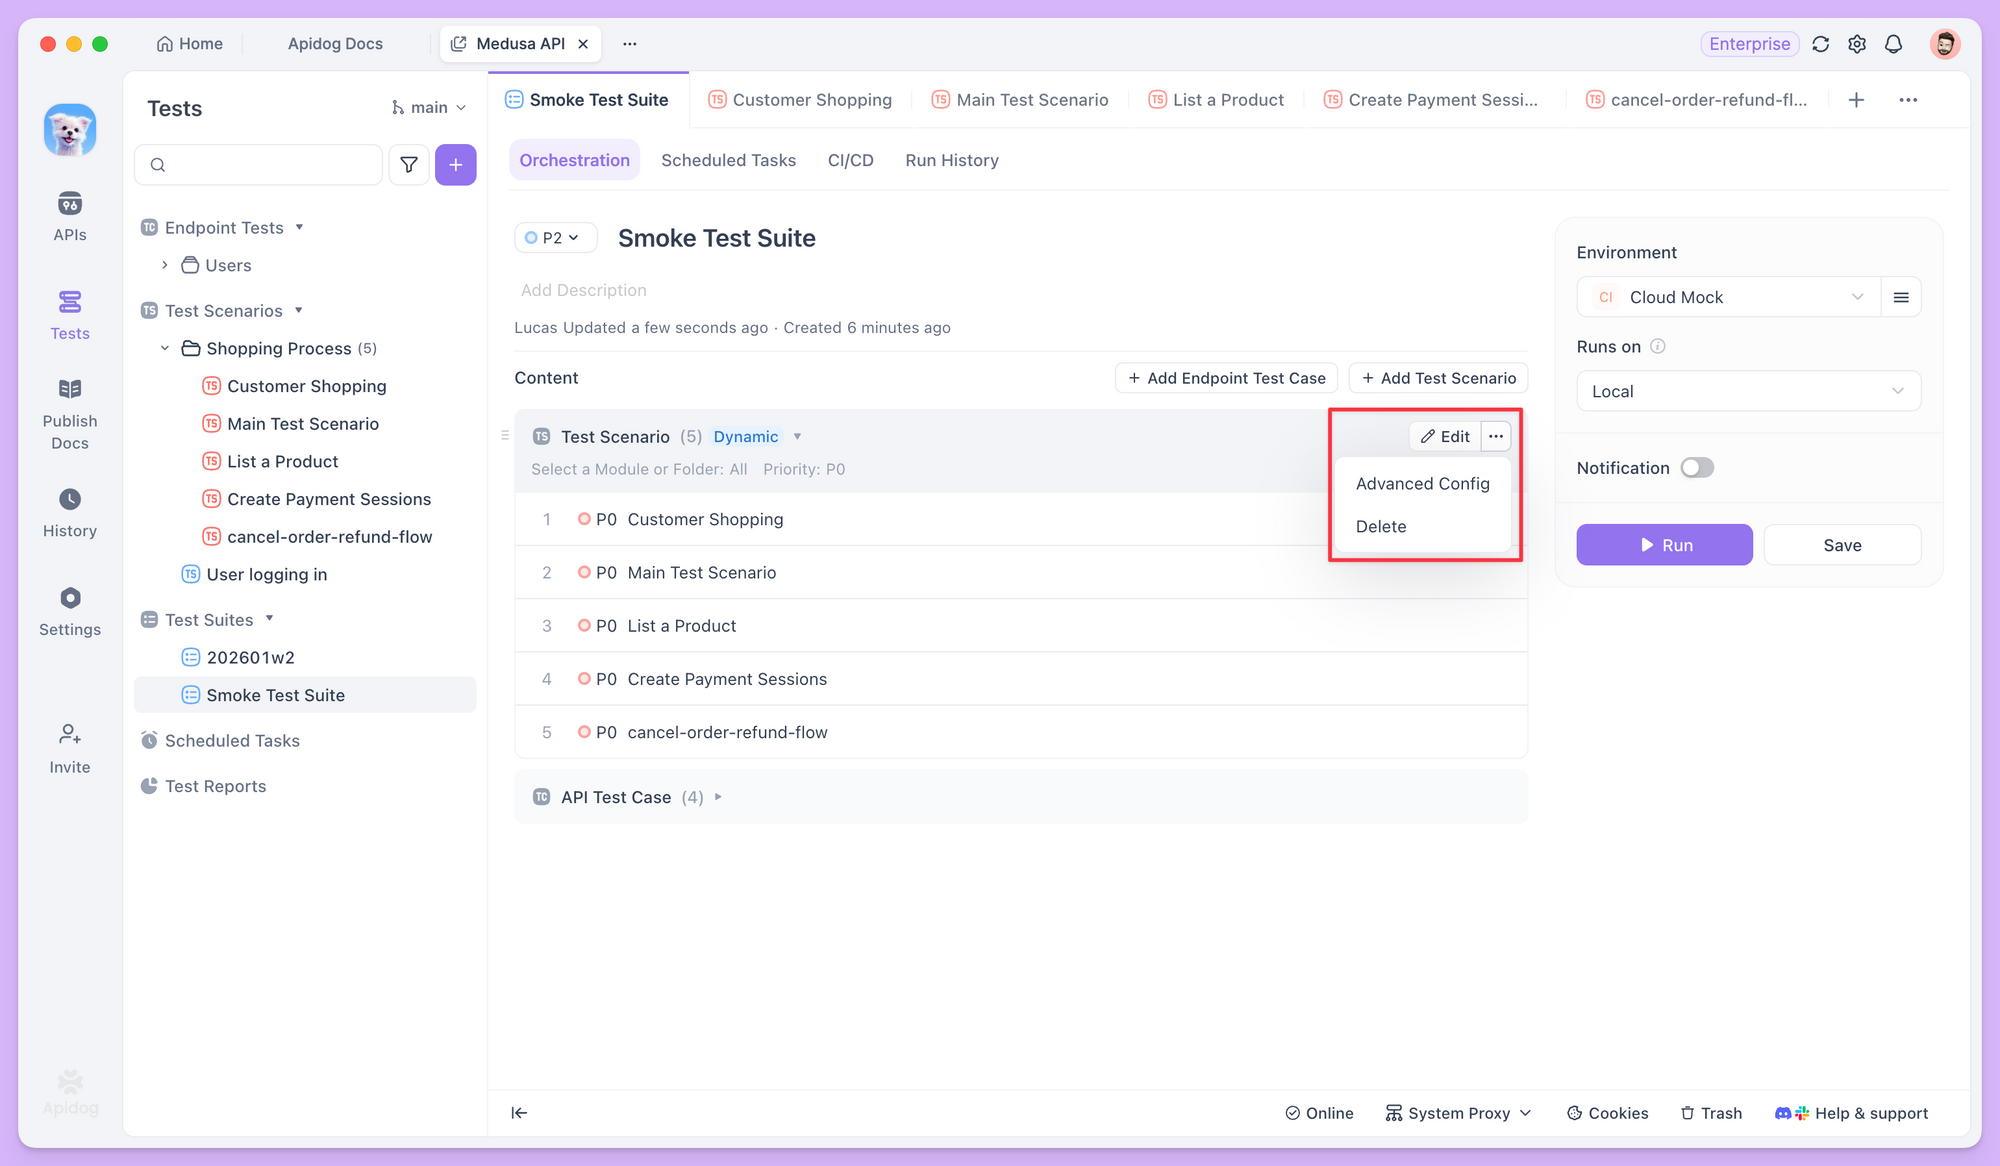
For example, On Error lets you choose whether to continue, skip the current round, or stop the whole run when a step fails. Iterations lets you run the whole suite multiple times for simple stability checks. Together, these options make a test suite not just a collection of cases but a controllable execution flow.
Running Test Suites
Once the test suite is set up, you can run it in several ways: from local manual runs to cloud-based automation, depending on your stage and environment.
Running Test Suites Locally
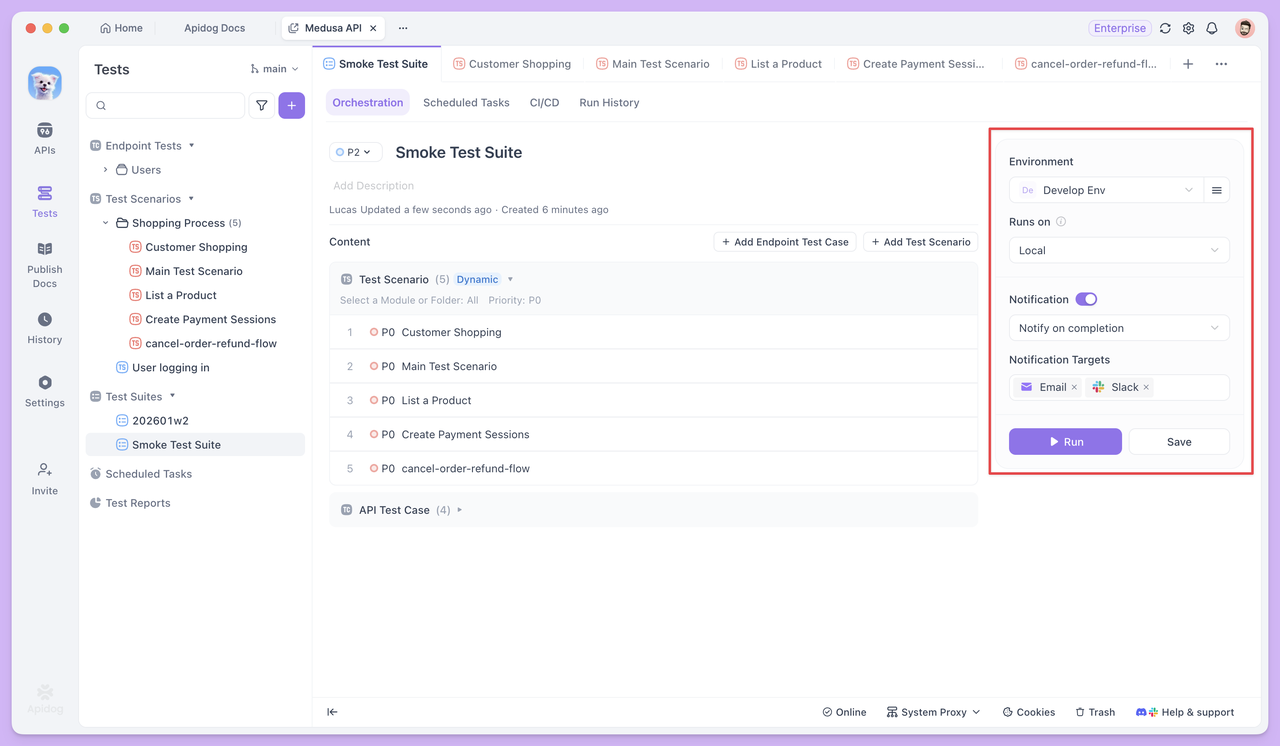
The most direct way is to click Run in the Apidog client. Execution runs from your local machine and is suited to small, quick checks during development and debugging. In the run configuration, you can switch the run environment and set a notification when the run finishes.
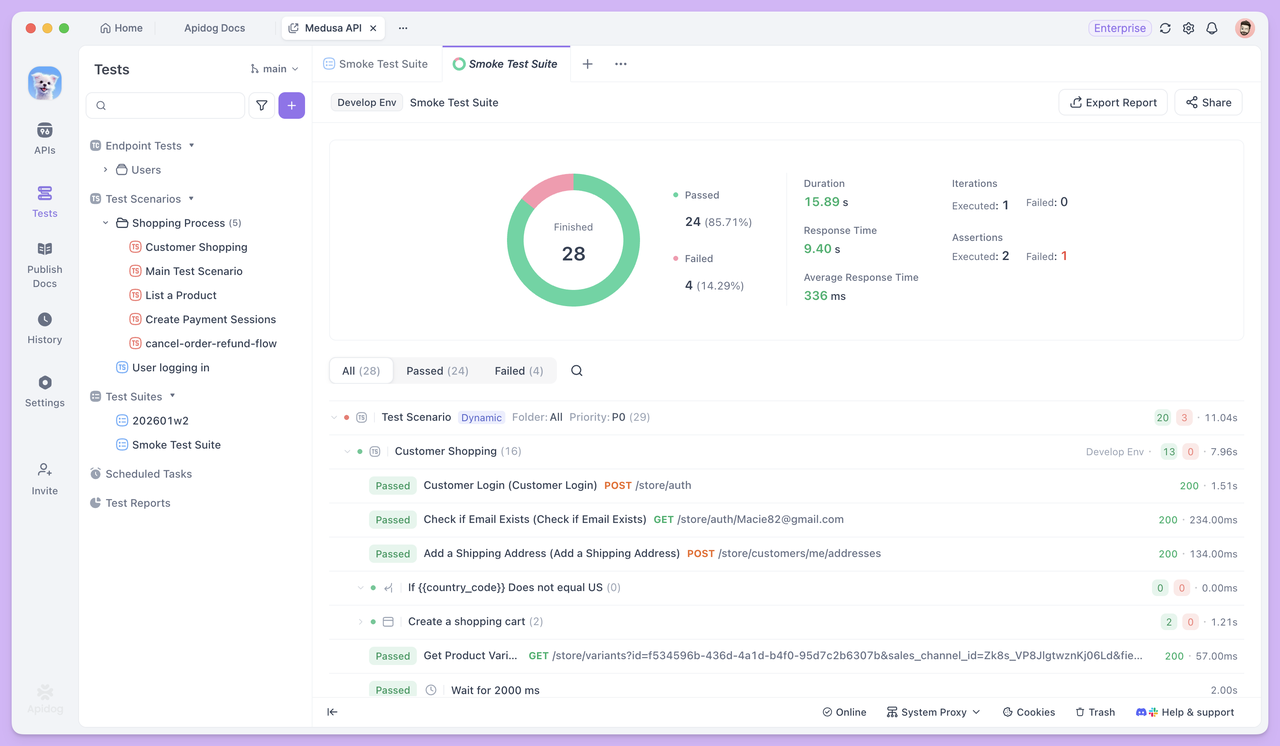
When the run completes, Apidog generates a test report and shows it in the UI. The report lists each endpoint test case and test scenario in execution order, with clear pass/fail status. You can open individual items for more detail.
Running Test Suites via CLI
For larger test sets or headless environments (e.g., servers without a GUI), Apidog CLI is the better option. It brings Apidog's test execution to any terminal.
To run via CLI, install Apidog CLI and ensure it is up to date. Then, in the test suite's CI/CD tab, use the generated command:
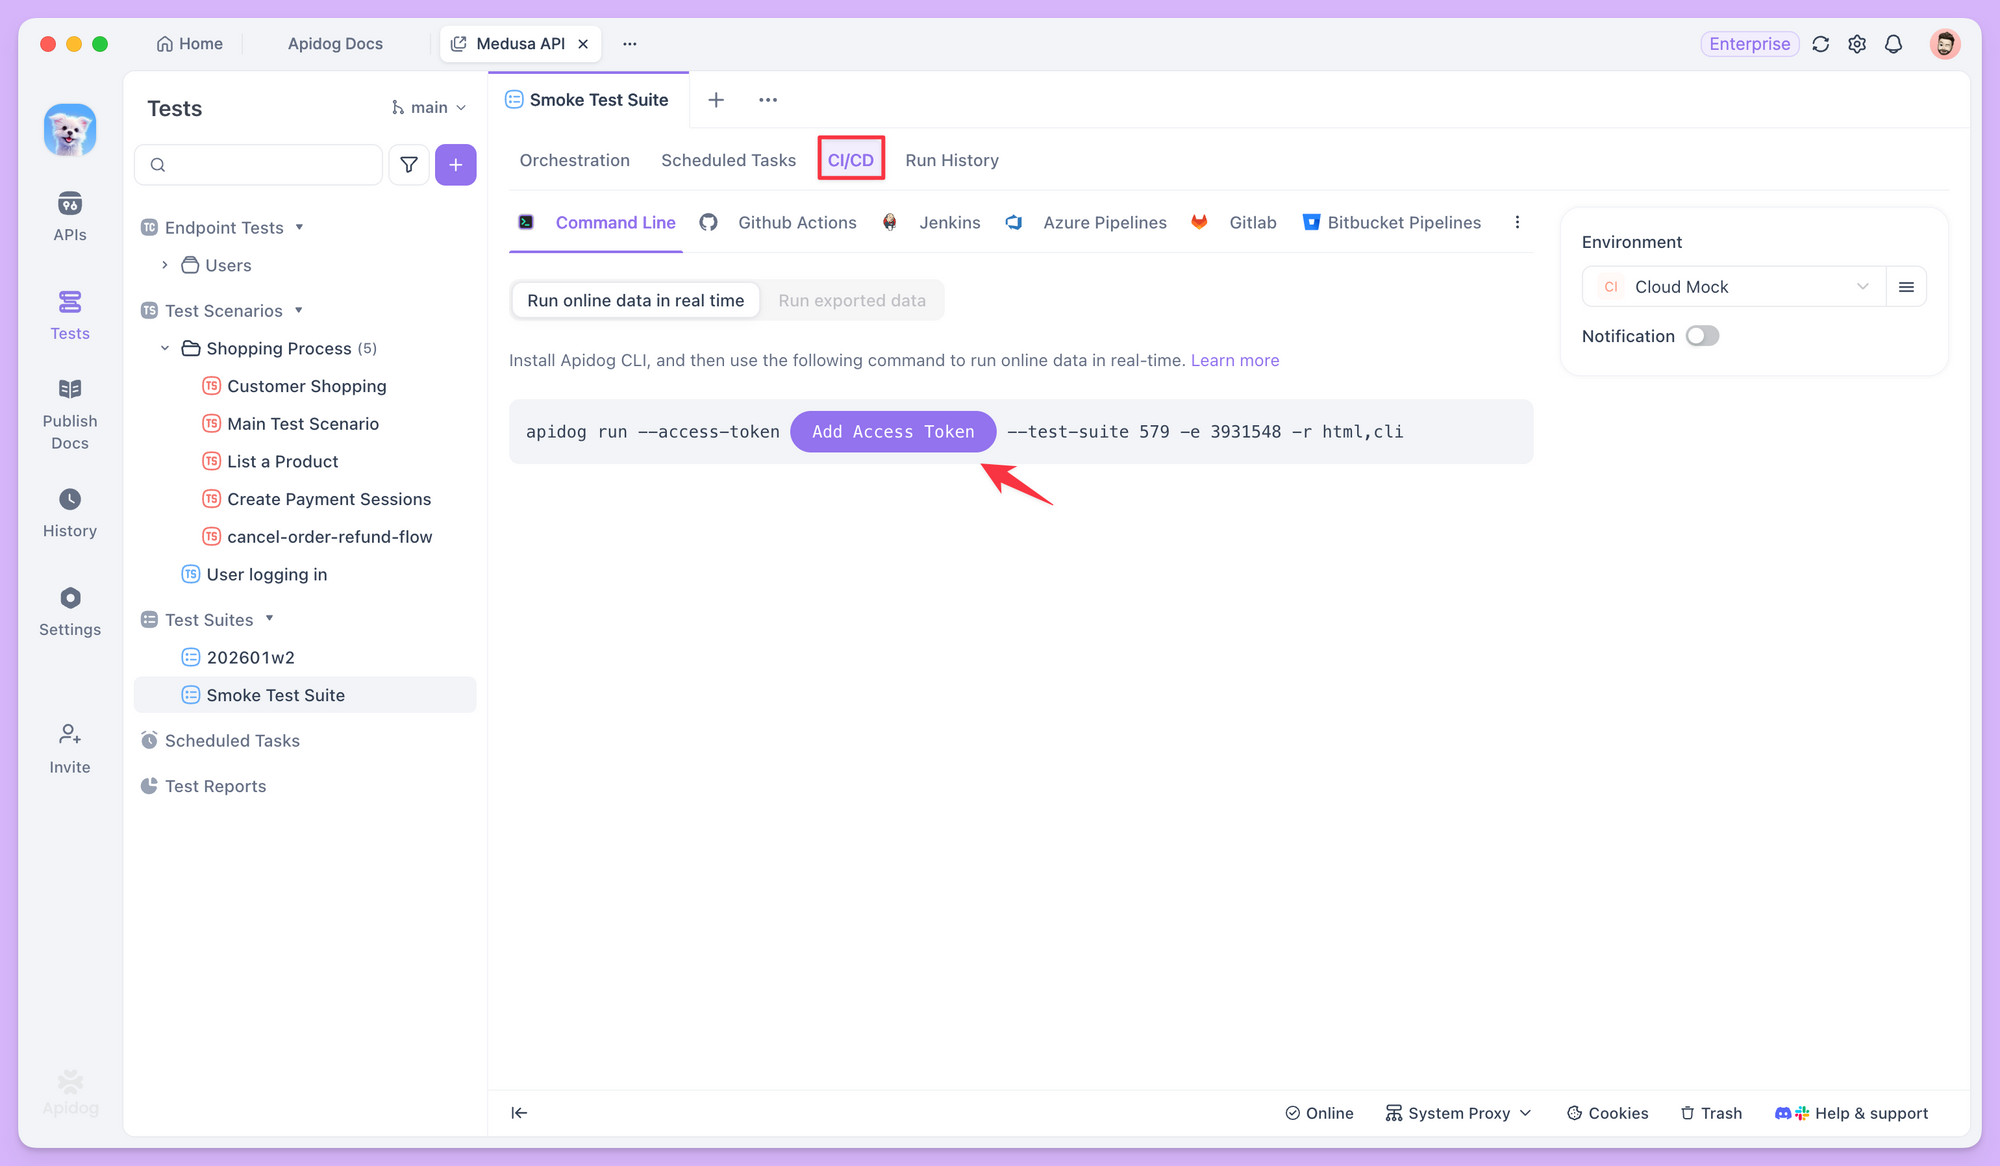
Copy that command into your terminal to run the suite and see the same flow and results as in the UI.
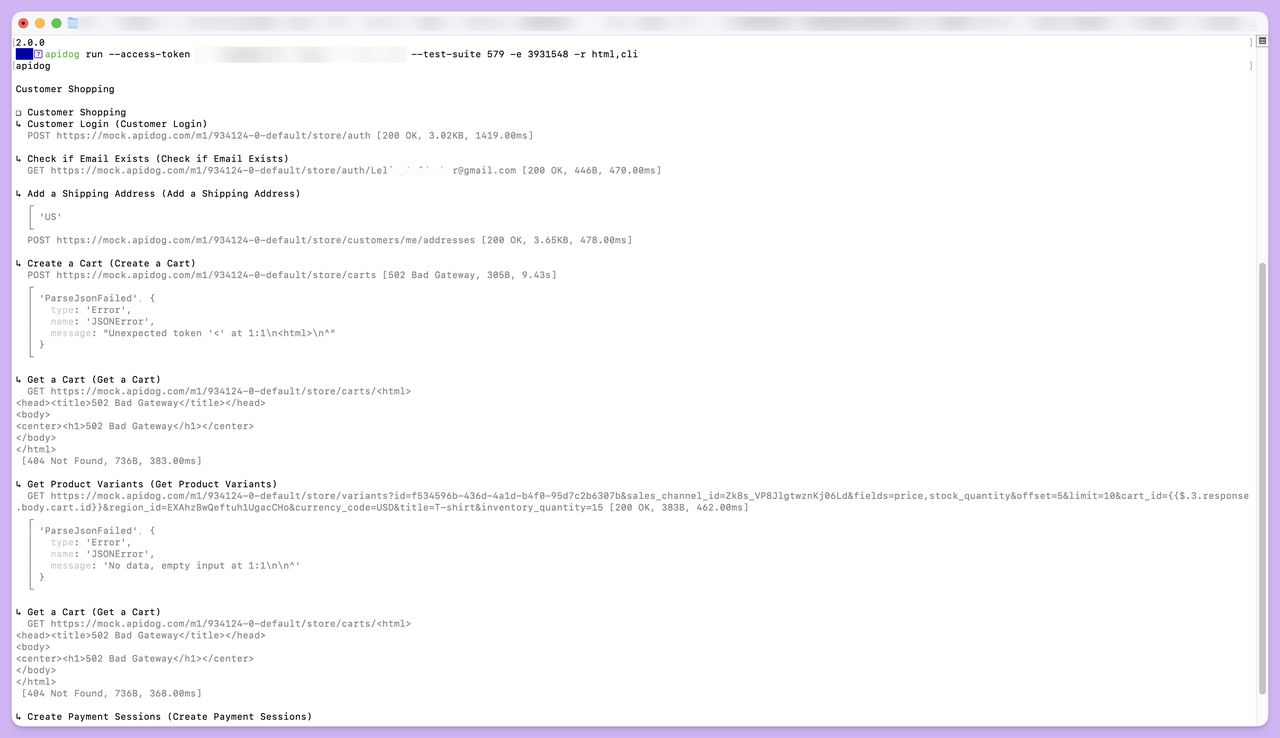
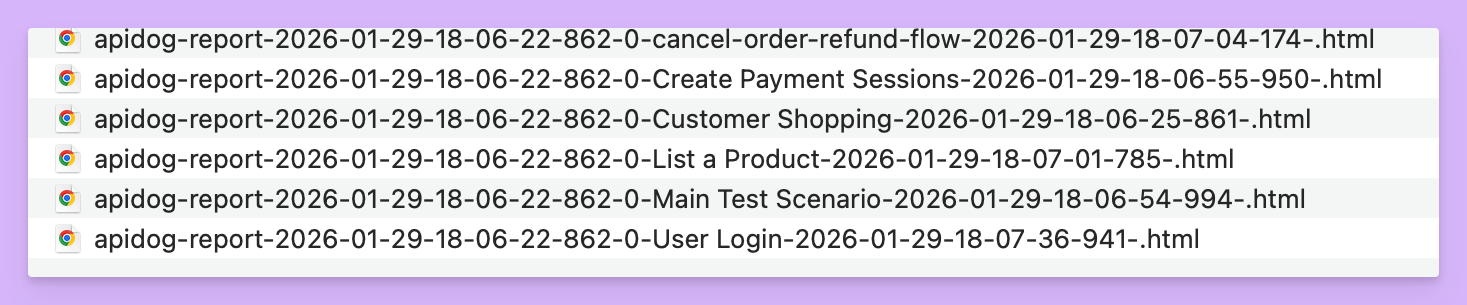
When the run finishes, a folder named apidog-reports/ is created in the current directory and contains the HTML test report.
Running via CLI is the basis for CI/CD integration. You can plug this command into Jenkins, GitLab CI, or GitHub Actions and trigger regression tests at key points such as code merge.
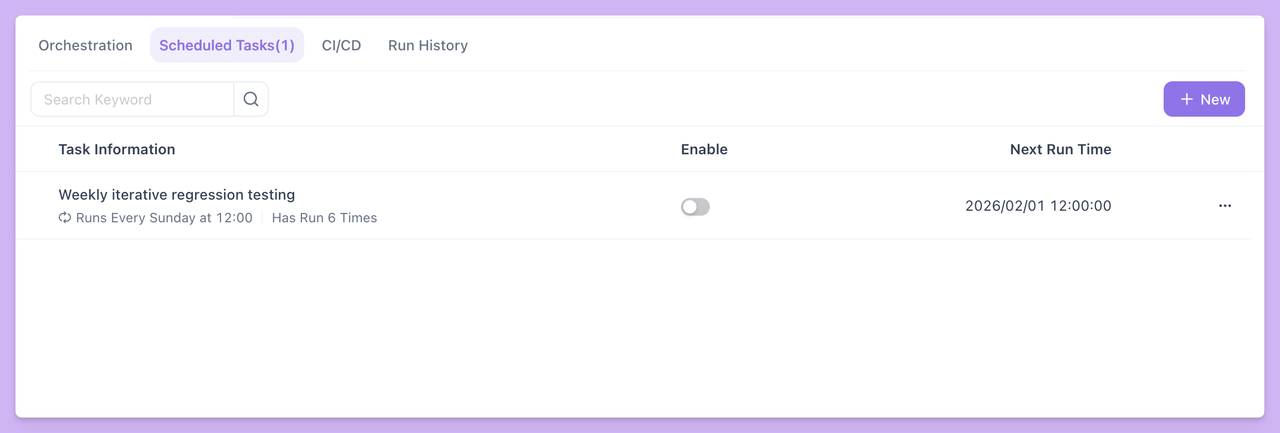
Running Test Suites via Scheduled Tasks
Apidog supports Scheduled Tasks. In the test suite's Scheduled Tasks tab, create a task and set its run schedule and run environment.
Unlike local runs, scheduled tasks must run on a self-hosted Runner.
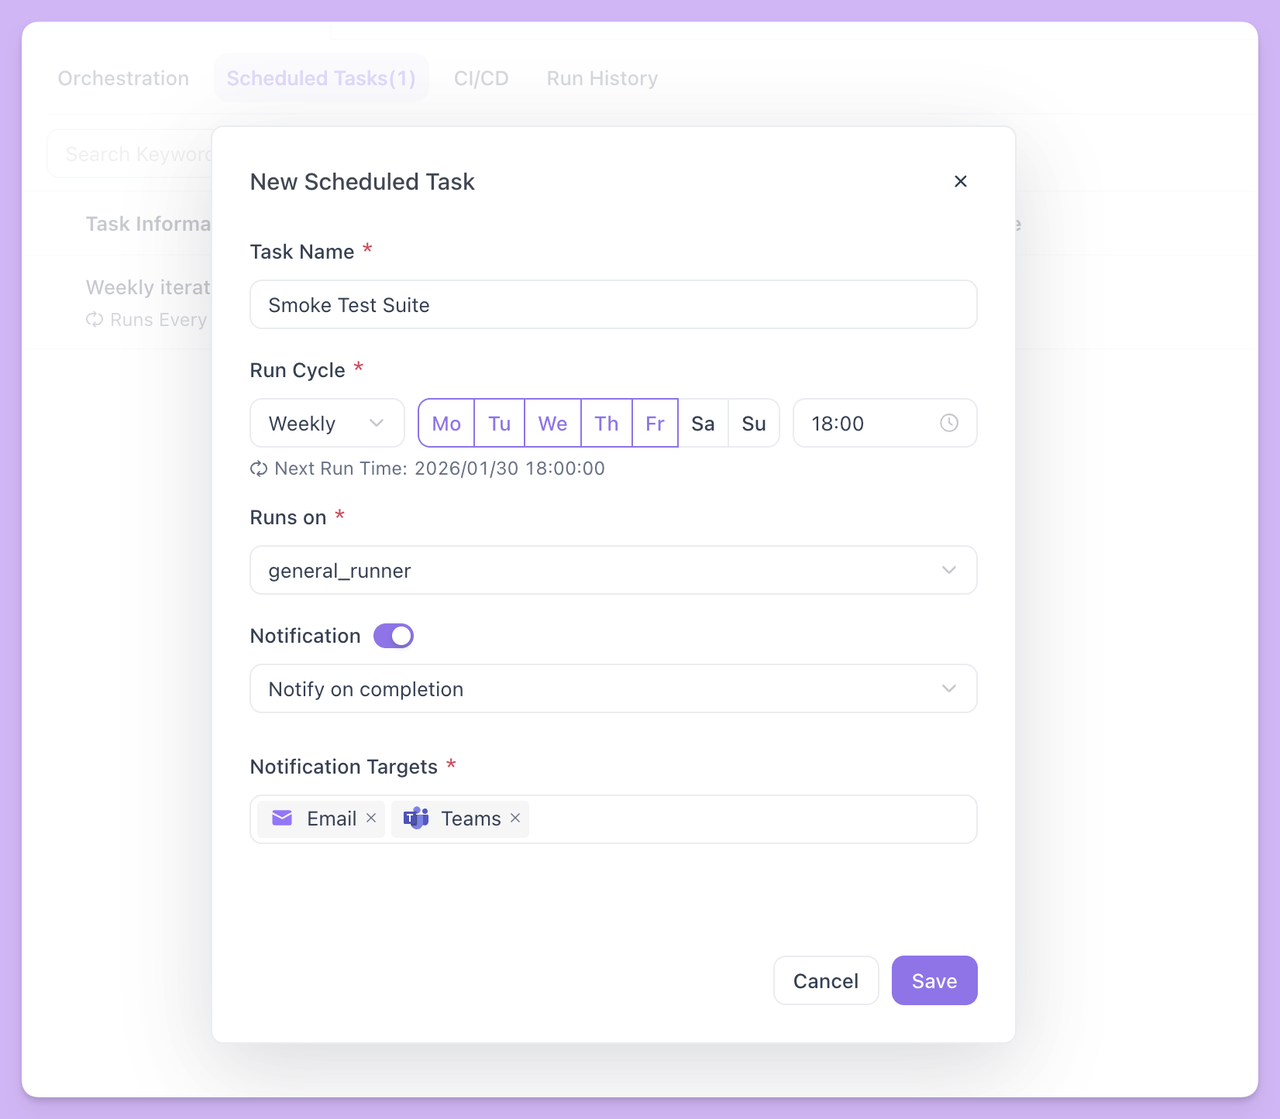
The Runner is a lightweight program your team can deploy on an internal server. Using a Runner avoids failures when local machines are off or unreachable and lets you use the server's resources for larger test runs.
After a scheduled task is configured, Apidog runs the test suite on the Runner at the specified times and uploads the run history and reports. You can also configure failure notifications so that when an issue occurs, the right people are alerted quickly.
Summary
With static and dynamic orchestration, you can keep dedicated tests tightly scoped and let regression suites grow automatically with your project, without constant manual updates. Combined with local runs, CLI integration, and scheduled tasks, test suites can fit into every stage of your workflow—from quick checks during development to automated regression in CI/CD and scheduled checks in production.
For more on test suites, see the Apidog documentation. Try creating your first test suite, orchestrate your existing tests, and build a sustainable automated regression setup step by step.


