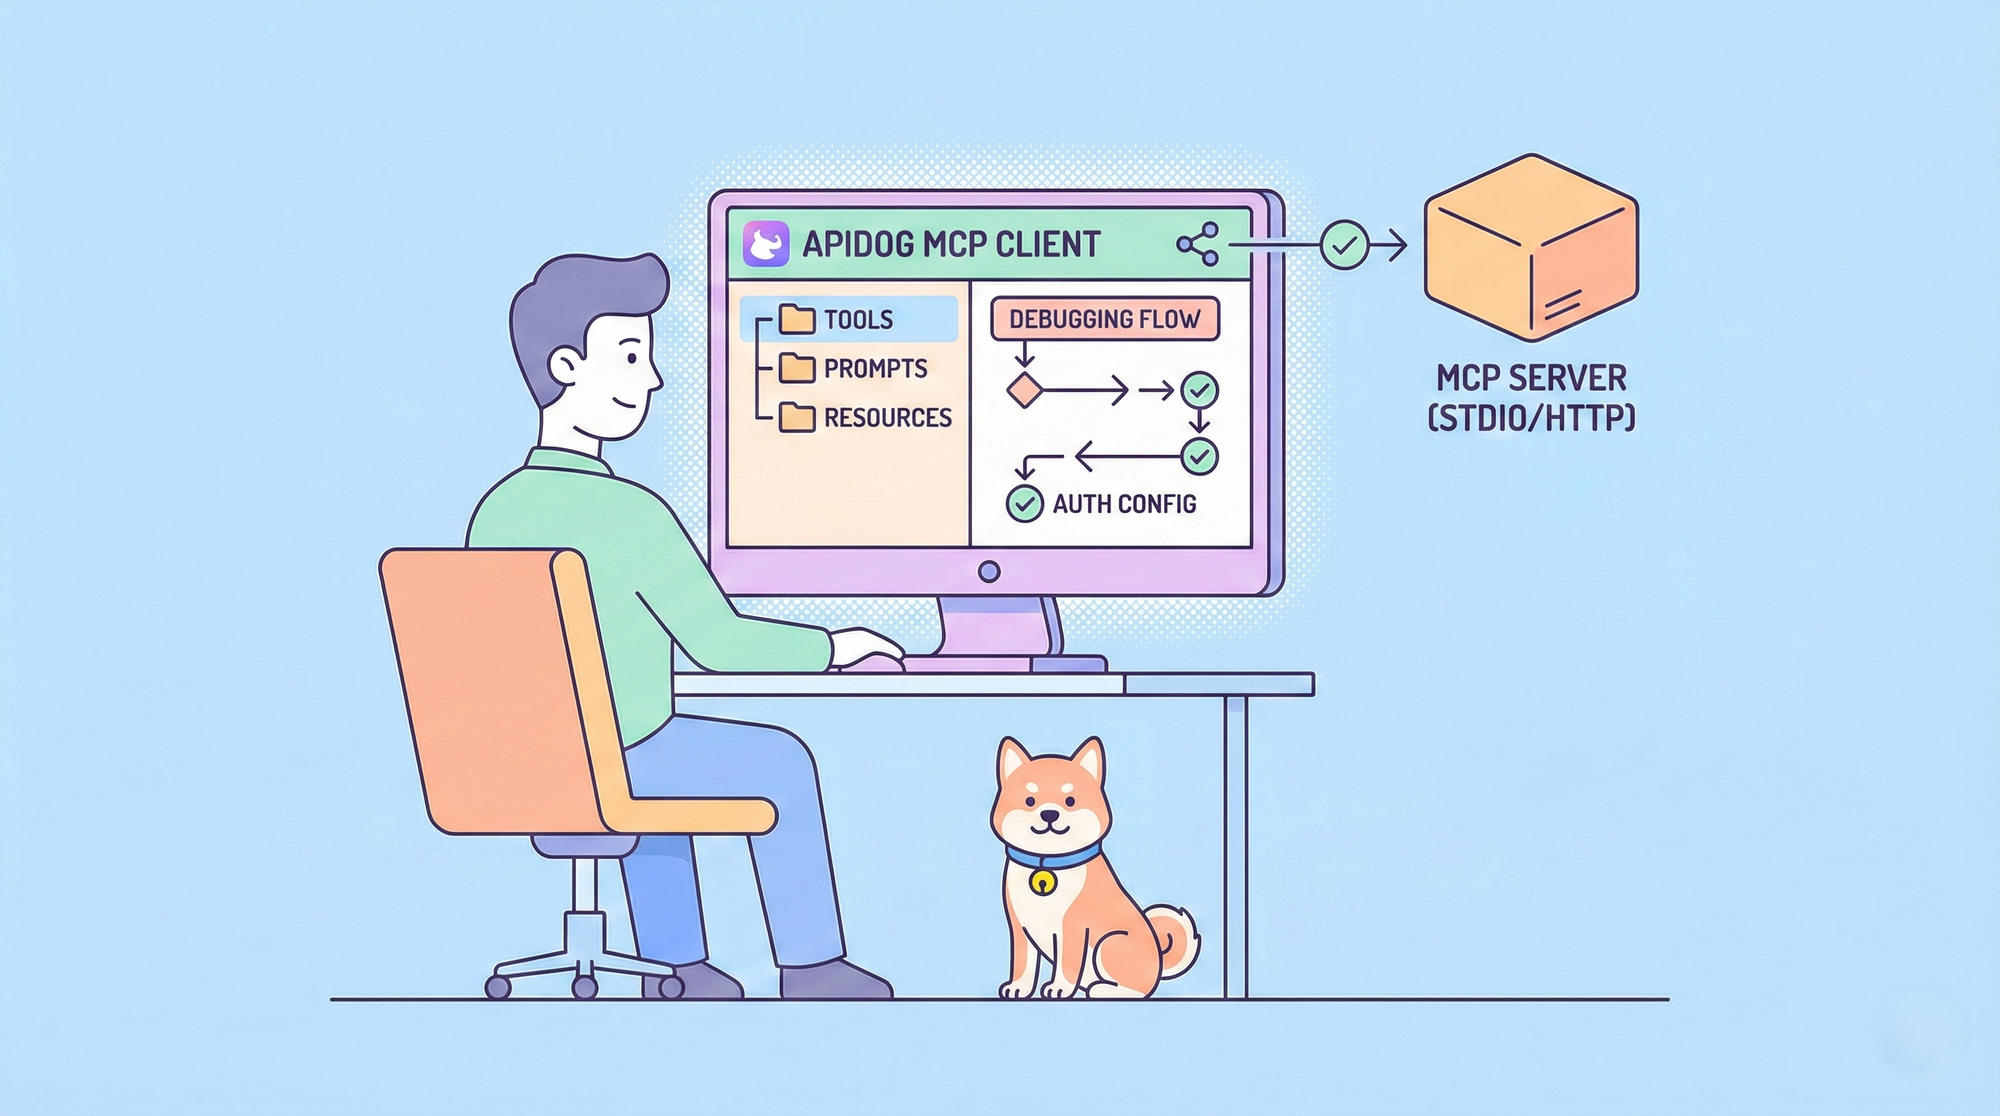
Model Context Protocol (MCP) has emerged as an open standard for connecting LLM applications to external data and tools. Whether you are building or integrating an MCP server, you need a reliable way to test MCP servers and verify that tools, prompts, and resources behave as expected. Apidog MCP clients provide a built-in, professional environment to do exactly that—making Apidog one of the most effective MCP server testing tools available today.
This guide explains how to test MCP servers step by step using Apidog. You will learn how to create an MCP client, connect via STDIO or HTTP, debug tools and prompts, and apply best practices so your MCP integrations stay robust and maintainable.
Why Use Apidog MCP Client to Test MCP Servers
Choosing the right MCP server testing environment affects how quickly you can iterate and how confident you are in your integration. Apidog’s built-in MCP client is designed to fit into a single, unified workflow instead of forcing you to juggle separate tools.
| Benefit | What it means for you |
|---|---|
| Single workspace | Create an MCP client inside an HTTP project and switch between API and MCP debugging without changing apps. |
| Full protocol support | Debug Tools, Prompts, and Resources—the three core MCP features—from one interface. |
| Dual transport | Test local servers via STDIO and remote servers via HTTP (Streamable HTTP), including auth. |
| Reuse and collaboration | Save configured MCP clients in the project and share them with your team. |
Apidog also supports variables in server addresses, environment values, headers, and parameters, so you can switch between environments (e.g. dev vs prod) without re-entering configuration. For teams that already use Apidog for API design and testing, adding MCP server testing here reduces context switching and keeps documentation and behaviour in one place.
What You Need Before Testing MCP Servers
Before you start testing MCP servers with Apidog, ensure the following are in place:
- An Apidog account and project — Create or open an HTTP project where you will add the MCP client.
- MCP server details — Either: a command for STDIO (e.g.
npx -y @modelcontextprotocol/server-everything), or a URL for HTTP (e.g.https://example-server.modelcontextprotocol.io/mcp). - Runtime for STDIO — If you use a local command, the required runtime (e.g. Node.js) must be installed and on your PATH.
- Auth (for HTTP) — If the server uses OAuth 2.0, API Key, Bearer Token, or other auth, have credentials or config ready; Apidog can fetch OAuth 2.0 configuration automatically for supported servers.
No extra plugins or separate MCP testing tools are required—Apidog’s MCP client is built in and ready to use.
How to Test MCP Servers Step-by-Step with Apidog
Step 1: Create an MCP Client in Apidog
- Open your HTTP project in Apidog.
- Create a new endpoint and choose MCP as the type.
- You will see the MCP client configuration screen, where you can enter the server address or paste a configuration file.
This creates a dedicated MCP client endpoint in your project so you can test MCP servers alongside your other API assets.
Step 2: Connect to Your MCP Server
- Enter server address
Apidog accepts several input styles; it infers the transport from what you paste:
- Paste a terminal command → protocol switches to STDIO.
Example:npx -y @modelcontextprotocol/server-everything - Paste a URL → protocol switches to HTTP.
Example:https://example-server.modelcontextprotocol.io/mcp
You can also paste an MCP configuration file. Apidog parses it and fills in server name, command or URL, environment variables, and related fields. If the file lists multiple servers, the first one is used.
Example MCP servers file (STDIO):
{

  "mcpServers": {

    "Everything Server": {

      "command": "npx",

      "args": ["-y", "@modelcontextprotocol/server-everything"],

      "env": {}

    }

  }

}
Example MCP server entry (HTTP):
{

  "type": "streamable-http",

  "url": "https://example-server.modelcontextprotocol.io/mcp"

}
Establish connection
- Click Connect.
- STDIO: Apidog may show a security confirmation before running the local process; after you confirm, it starts the process and connects.
- HTTP: Apidog sends a connection request to the URL. For OAuth 2.0, it can retrieve auth configuration and show the authentication window; for API Key, Bearer Token, Basic Auth, etc., configure them in the Auth tab.
After a successful connection, the directory tree shows the server's Tools, Prompts, and Resources. You can now use Apidog as your main MCP server testing tool for this server.
Step 3: Debug Tools, Prompts, and Resources
Tools — Executable server-side functions. Select a tool, set parameters via the form or JSON editor, then click Run. Results appear in the response area.
Prompts — Predefined prompt templates. Select a prompt, fill in any parameters, and click Run to get the generated prompt text.
Resources — Data resources exposed by the server. Select a resource and click Run to fetch its content.
Exercising all three (tools, prompts, resources) gives you full coverage when you test MCP servers and ensures nothing is misconfigured or broken.
Step 4: Configure Environment, Auth, and Headers
- Environment (STDIO only): Set environment variables for the MCP server process (e.g.
ACCESS_TOKEN,NODE_ENV) in the Environment section. - Auth (HTTP only): Use the Auth tab to set API Key, Bearer Token, JWT Bearer, Basic Auth, Digest Auth, or OAuth 2.0. For OAuth 2.0–capable servers, Apidog can auto-retrieve and populate auth configuration.
- Headers (HTTP only): Add any custom HTTP headers required by your MCP server.
Variables {{variable_name}} are supported in server address/command, environment values, headers, auth, and parameter values, so you can keep config reusable across environments.
Step 5: View Responses and Save Your Setup
The response area has two tabs:
- Messages — User-driven events: connect/disconnect, requests/responses.
- Notifications — Server-driven messages (e.g. notifications, tool list updates).
Click a message to see details (type, content, timestamp). You can switch to "With Envelope" to view the full JSON-RPC payload.
Save the MCP client to the project for reuse and team collaboration. The directory tree (list of tools, prompts, resources) is refreshed on each connection and is stored locally.
MCP Server Testing Best Practices
- Start with one transport — Use STDIO for local development and HTTP for remote or production-like testing so you know both paths work.
- Test all three surfaces — Run at least one Tool, one Prompt, and one Resource to validate the server end-to-end.
- Use variables — Put server URLs, tokens, and env values in variables so you can switch environments without editing the client each time.
- Check the Notifications tab — If the directory tree is empty after connect, open Notifications to see whether the server sent tool/list updates or errors.
- Validate parameter types — In form mode Apidog validates types; in JSON editor mode avoid quoting numbers and use
true/falsefor booleans to prevent parameter type mismatches.
Troubleshooting Common MCP Server Testing Issues
| Issue | What to do |
|---|---|
| STDIO: "command not found" | Install the required runtime (e.g. Node.js) and ensure the command path is correct. |
| HTTP: 401 | Let Apidog try OAuth 2.0 auto-config; if it fails, set authentication manually in the Auth tab. |
| Connected but empty tree | Verify server configuration and check the Notifications tab for tool/list responses from the server. |
| Parameter type mismatch | Use form mode for validation, or in JSON ensure numbers are unquoted and booleans are true/false. |
Conclusion
Testing MCP servers is straightforward when you use a single, capable MCP server testing tool. Apidog’s built-in MCP client lets you create an MCP endpoint in your HTTP project, connect via STDIO or HTTP, and debug Tools, Prompts, and Resources without leaving Apidog. Support for config paste, environment variables, auth (including OAuth 2.0 auto-config), and variables keeps setup fast and repeatable. Saving clients in the project supports reuse and team collaboration, while the Messages and Notifications tabs give you clear visibility into protocol behavior.
Delve into MCP server testing with a tool that already fits your API workflow: no separate installs, no context switching. You get one workspace for both REST or HTTP APIs and Model Context Protocol servers, so your team can adopt MCP without adding yet another MCP server testing app to the stack. The ability to paste existing MCP config files and have Apidog fill in connection details reduces setup time, and variable support makes it easy to keep dev, staging, and production server addresses and credentials in check. When something goes wrong, the split between Messages (your actions) and Notifications (server-driven updates) makes it easier to see whether the issue is on the client side or the server side.
Whether you are integrating a third-party MCP server or validating your own, following this guide will help you test MCP servers with confidence and keep your LLM–tool integrations reliable. Try Apidog MCP clients for your next MCP project, and streamline how you test MCP servers end to end. Sign up for Apidog to bring MCP server testing into the same platform where you design, test, and document your APIs.