If you’re looking to streamline your database interactions using AI-powered tools, this guide dives deep into connecting your Supabase database to Cursor via Model Context Protocol (MCP) servers. We’ll walk through the technical process step-by-step, ensuring you can leverage Supabase’s Postgres database, its API, and Cursor’s advanced LLM capabilities for efficient querying and development. Before we dive in, grab Apidog for free to enhance your API testing and integration workflows—perfect for complementing this Supabase and Cursor setup!
Why Connect Supabase to Cursor via MCP Servers?
Supabase, an open-source Firebase alternative, provides a scalable Postgres database, real-time subscriptions, authentication, and a robust API. Its Model Context Protocol (MCP) servers enable AI tools like Cursor—an AI-driven code editor—to interact with your database using natural language queries. This integration, powered by the Supabase API, allows developers to execute SQL operations (e.g., SELECT, INSERT, UPDATE, DELETE) without manually writing every query, significantly boosting productivity for complex projects.
MCP servers act as a middleware layer, translating Cursor’s LLM-generated natural language prompts into SQL commands that the Supabase database understands. This setup is particularly valuable for rapid prototyping, data exploration, and automating repetitive database tasks.
Prerequisites for the Integration
Before proceeding, ensure you have the following:
- Supabase Account and Project: Sign up at supabase.com and create a new project. Supabase offers a free tier, but you’ll need to enable the Postgres database and note your project URL, API keys, and connection string (e.g.,
postgresql://user:password@host:port/dbname). - Cursor Installed: Download and install Cursor . Ensure it’s configured with an active LLM model (e.g., Grok, Claude, or Cursor’s default model) to handle natural language processing.
- Node.js and npm: Install Node.js (v16 or higher) and npm for running the MCP server locally or on a server.
- Basic Understanding of Postgres and APIs: Familiarity with SQL, Supabase’s RESTful API (powered by PostgREST), and API authentication is recommended.
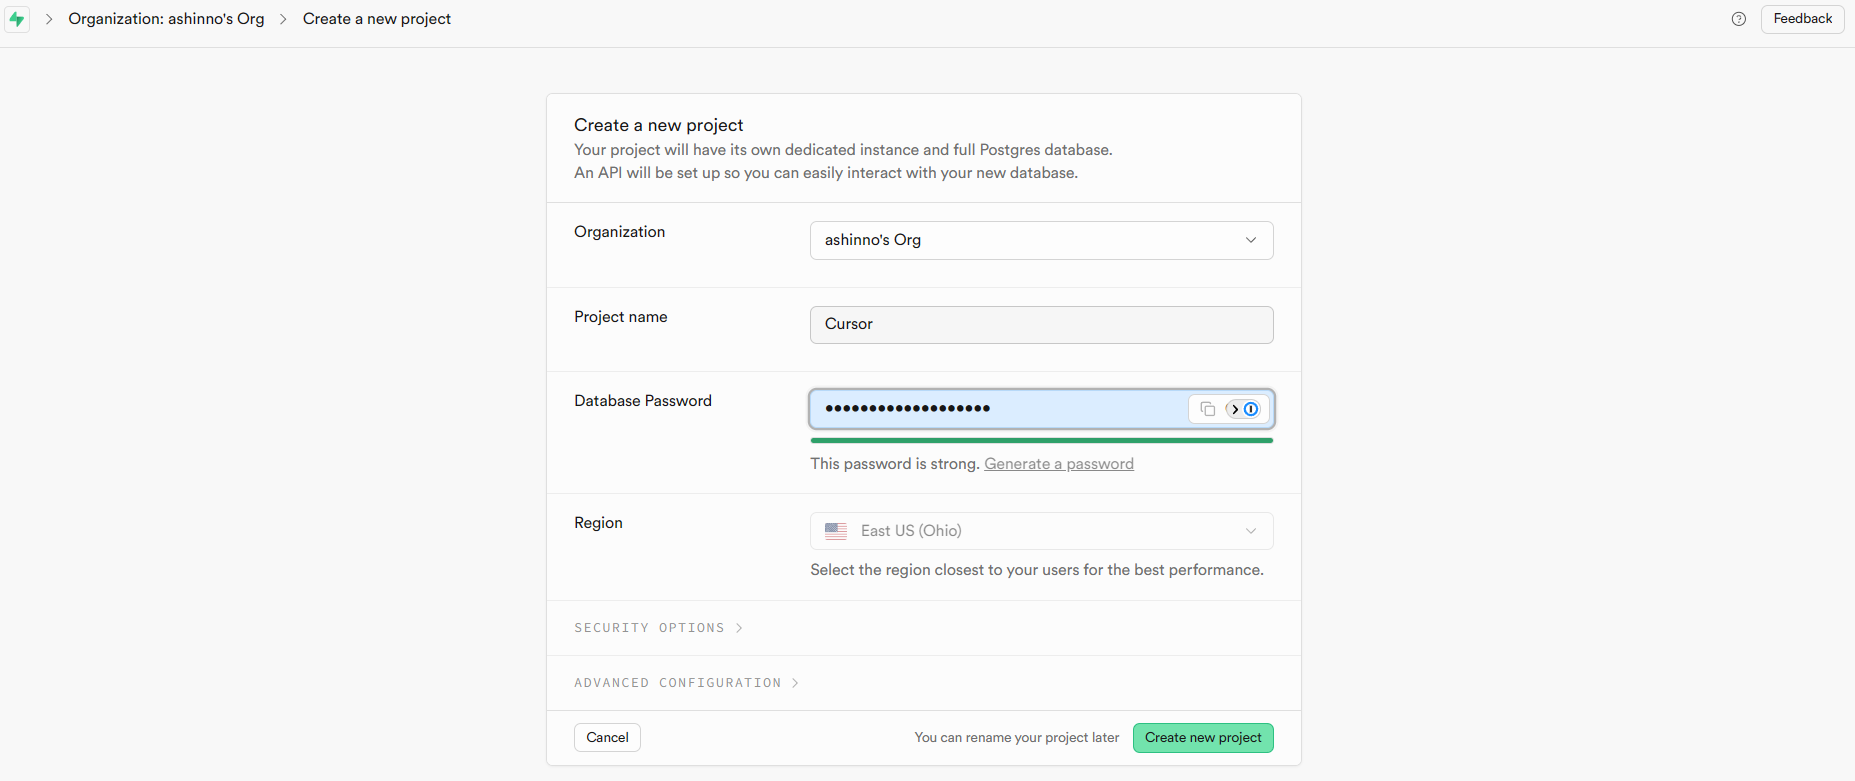
Step 1: Set Up Your Supabase Project
Create a Supabase Project: Log in to supabase.com, create a new project, and wait for it to initialize. Once ready, navigate to the “Database” section to access your Postgres database.
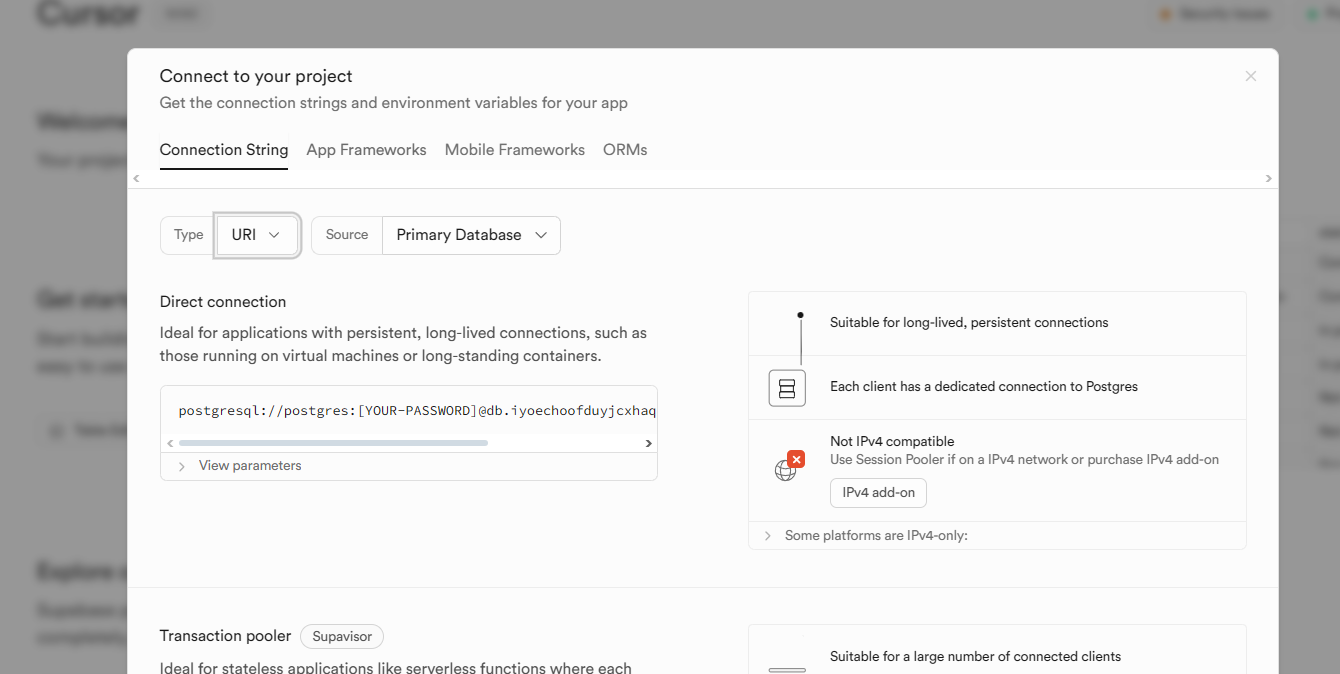
Retrieve Your Connection String: In the Supabase dashboard, click connect

And copy your connection string. It typically follows the format postgresql://<user>:<password>@<host>:<port>/<dbname>. Secure this string, as it grants full access to your database.
Enable API Access: Ensure the Supabase API is enabled. You’ll need your API key (anon key or service role key) for authentication. These keys are available under “Settings” > “API”.
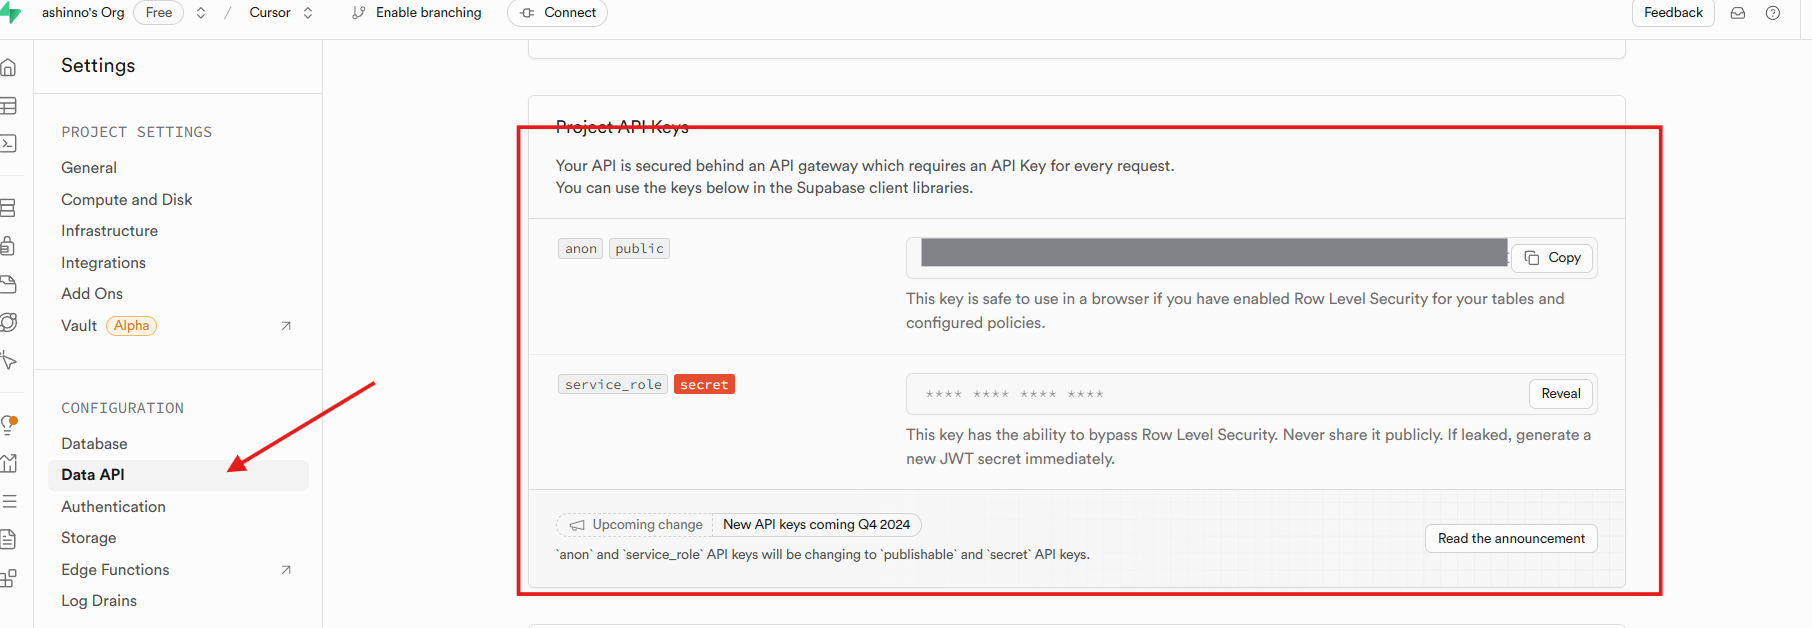
This connection string and API key are critical for configuring the MCP server to communicate with your Supabase database via the Supabase API.
Step 2: Install and Configure the MCP Server
The MCP server bridges Cursor and your Supabase database. Follow these steps to set it up:
- Clone or Install the MCP Server: Supabase provides an open-source MCP server implementation. Clone the repository from GitHub (e.g.,
git clone https://github.com/supabase/mcp-server) or install it via npm:
npm install @supabase/mcp-server
- Configure the Connection String: Create a configuration file (e.g.,
config.json) with your Supabase connection string:
{
  "connectionString": "postgresql://user:password@host:port/dbname",
  "port": 5433
}
Save this file in your MCP server directory.
- Start the MCP Server: Run the server using Node.js:
npx @supabase/mcp-server --config config.json
Ensure the server runs on a port (default is 5433) accessible to Cursor. Verify the server logs for a successful startup message, indicating it’s listening for connections.
This MCP server uses the Supabase API to translate LLM queries into Postgres-compatible SQL, leveraging PostgREST for RESTful database access.
Step 3: Configure Cursor for MCP Integration
Cursor’s AI capabilities rely on MCP servers to interact with external databases like Supabase. Here’s how to set it up:
Open Cursor Settings: Launch Cursor and navigate to Settings.
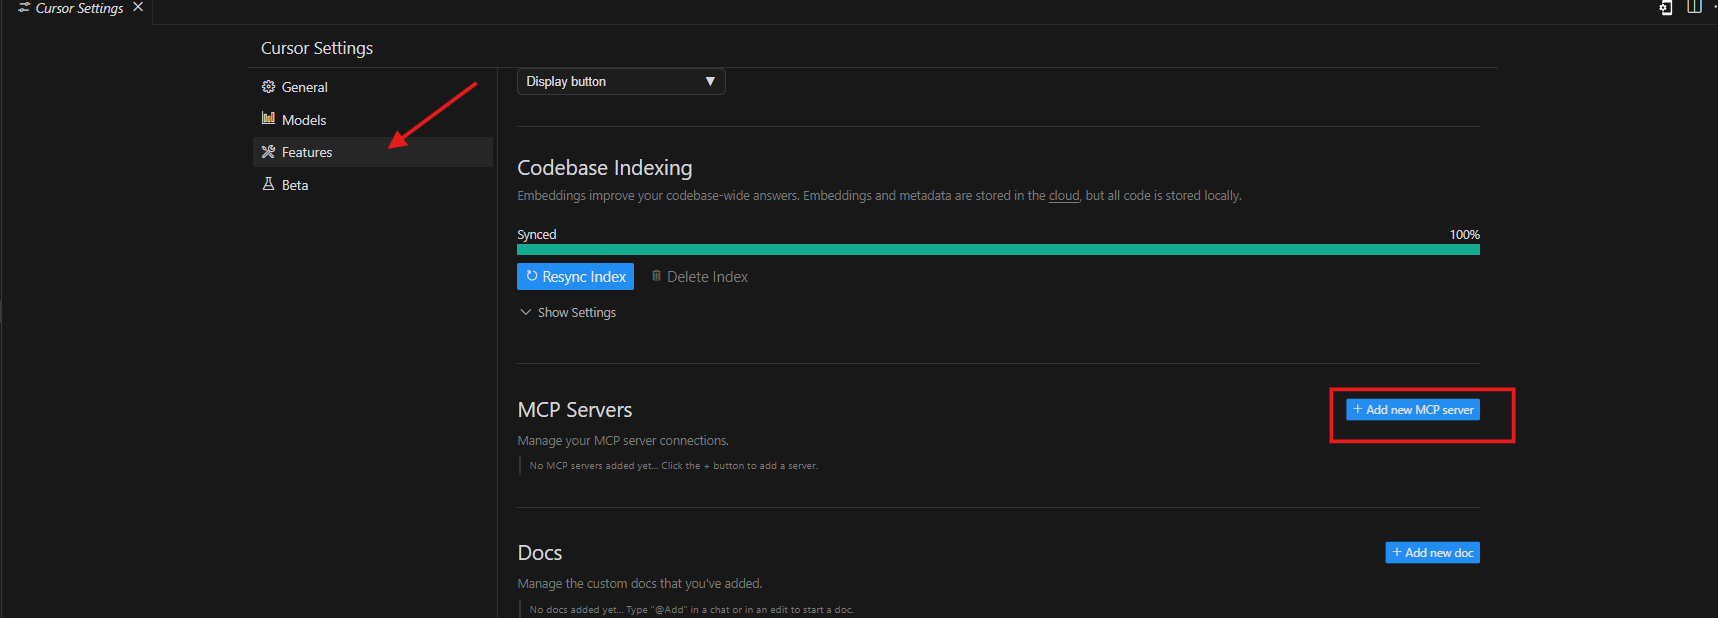
Add the MCP Server: In the MCP configuration, specify the MCP server’s
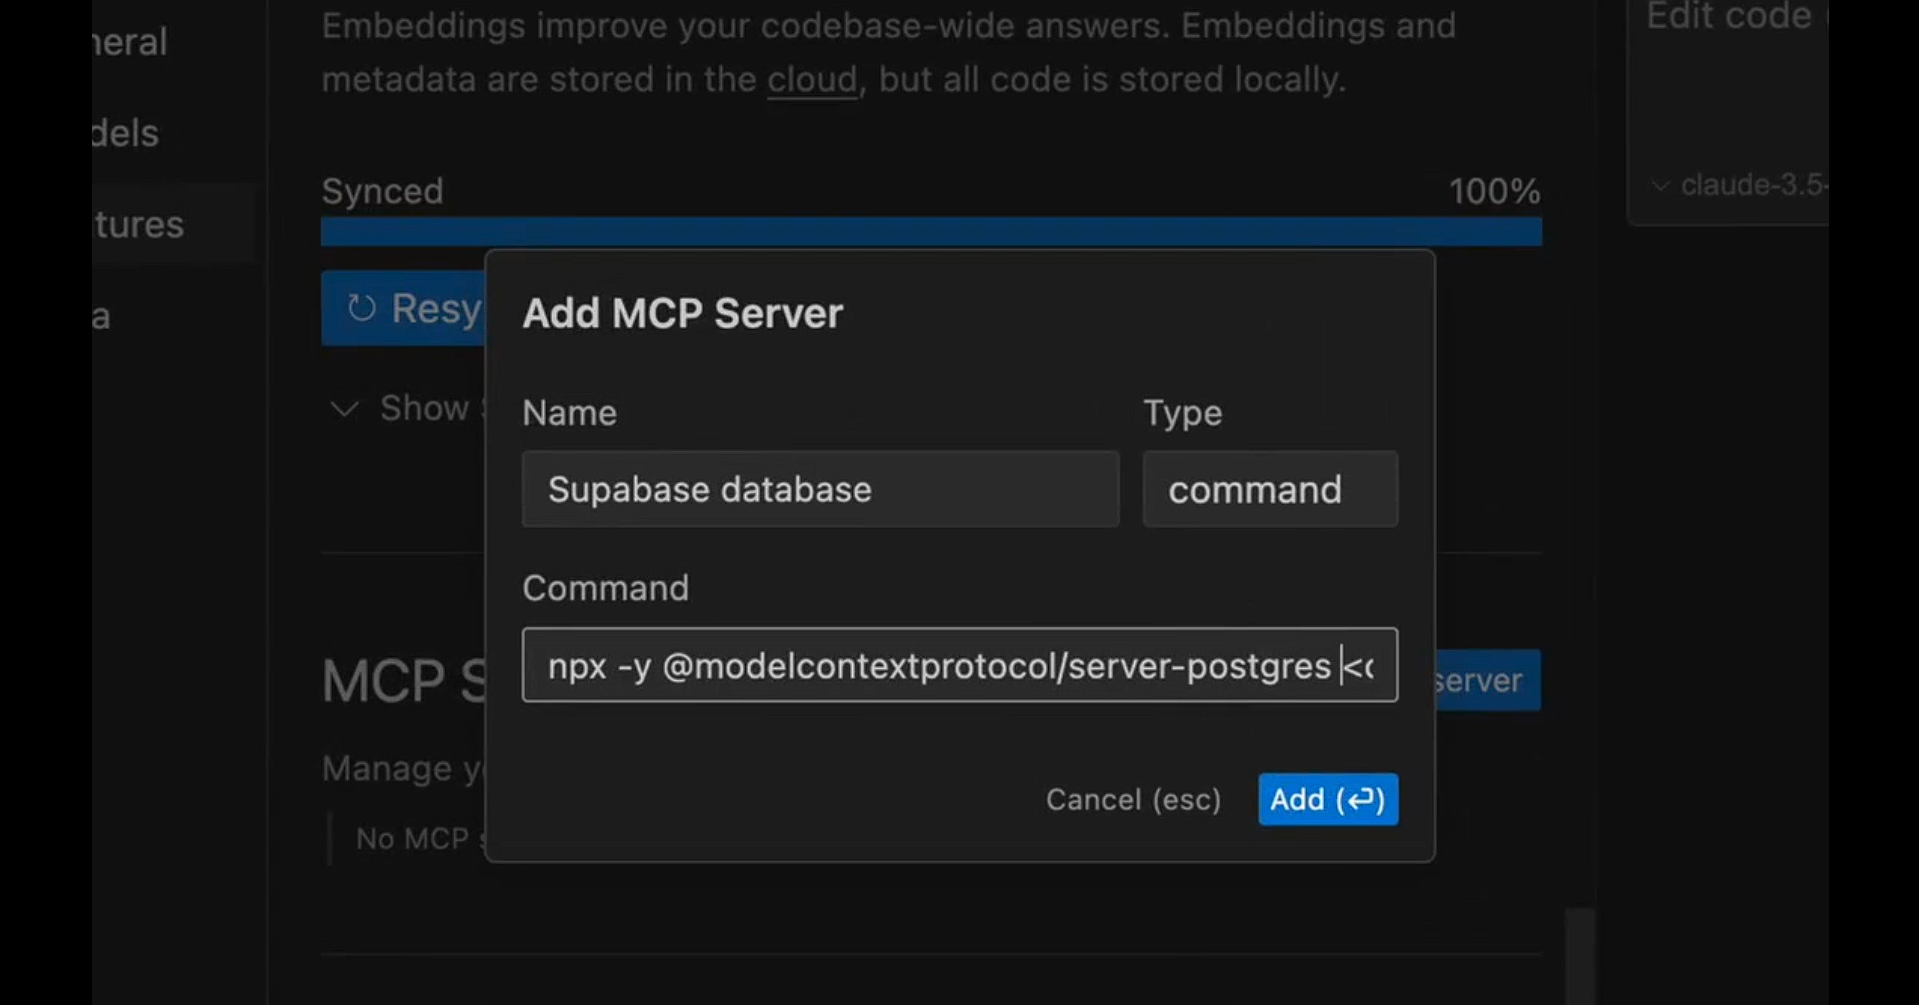
You may need to create or edit a .cursor/mcp.json file in your project directory:
{
  "servers": [
    {
      "name": "Supabase MCP",
      "url": "http://localhost:5433"
    }
  ]
}
Verify Connection: Save the configuration and restart Cursor. In the MCP settings, you should see a green “active” status, confirming the connection to your Supabase MCP server via the Supabase API.
If you encounter issues (e.g., connection timeouts), ensure the MCP server is running and your firewall allows traffic on the specified port. Windows users may need to prefix commands with cmd /k or cmd /c when running Cursor or MCP server scripts.
Step 4: Query Your Supabase Database via Cursor
With the integration complete, you can now use Cursor to query your Supabase database using natural language.
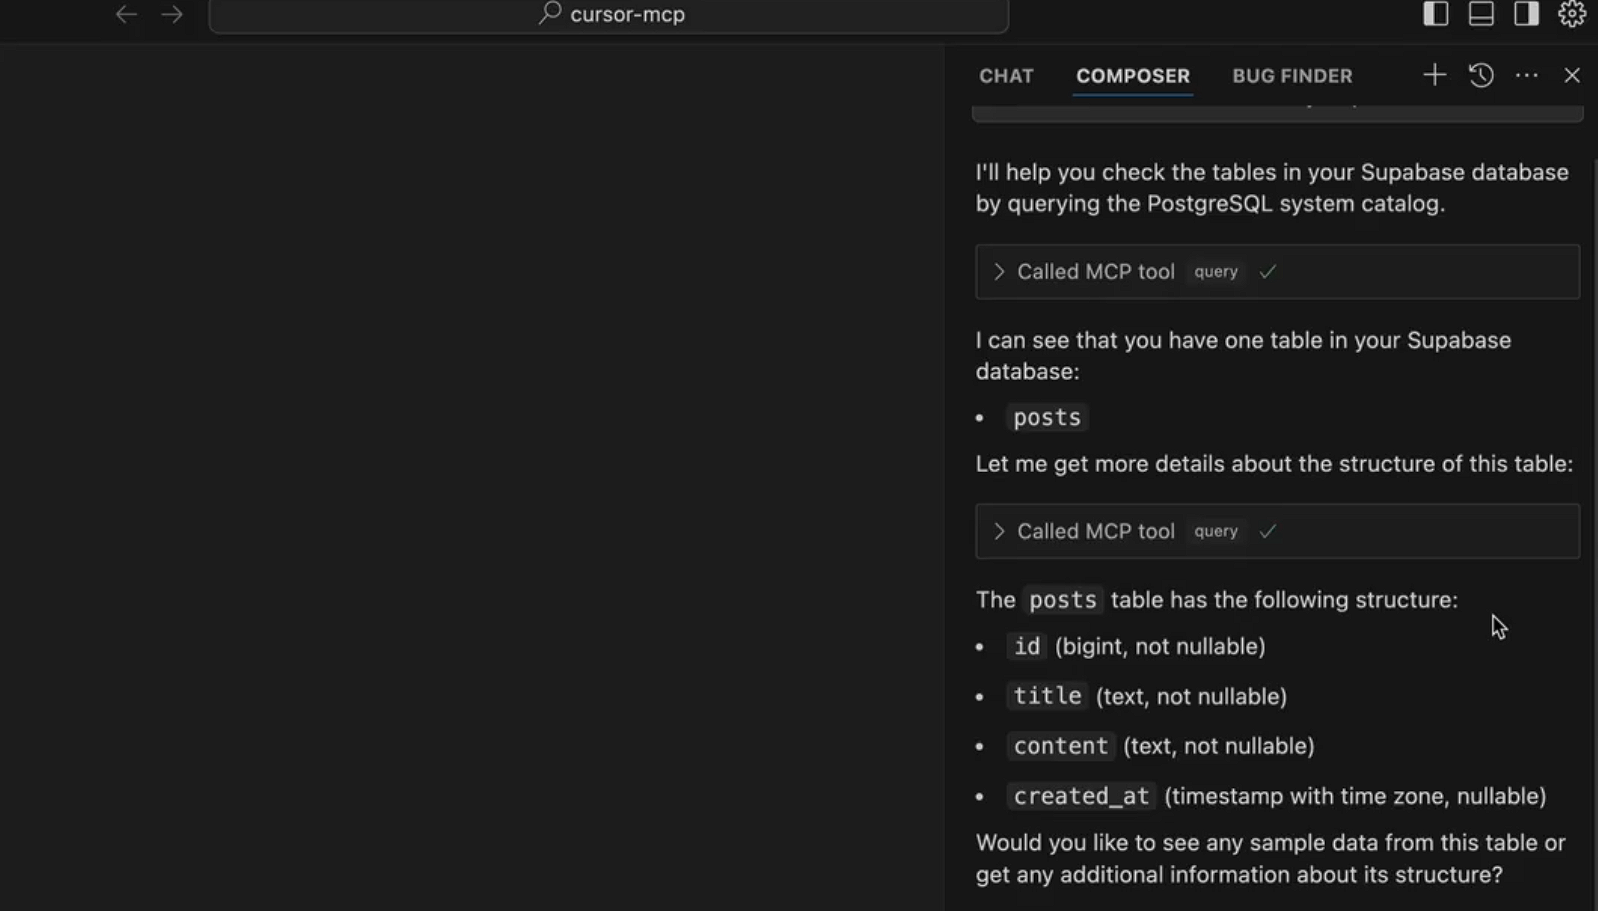
Cursor’s context-aware LLM ensures queries align with your Supabase database schema. For complex operations (e.g., JOINs across multiple tables), provide clear schema details or use Cursor’s schema exploration features to enhance accuracy.
Troubleshooting Common Issues
Some developers reported challenges on X, such as:
- Connection Failures: If Cursor can’t connect to the MCP server, verify the server is running, the port is open, and your connection string is correct. Use
curlor a tool like Apidog to test the MCP server endpoint (e.g.,curl http://localhost:5433). - Query Generation Errors: If Cursor generates incorrect SQL, ensure your Supabase schema is well-documented, and test with simpler queries first. Update Cursor’s LLM model or provide additional context in your prompts.
- Windows Compatibility: Add
cmd /korcmd /cbefore runningnpxcommands in Windows.
Optimizing Your Supabase-Cursor Integration
To maximize this setup’s efficiency, consider these best practices:
Secure Your API Keys: Use Supabase’s Row Level Security (RLS) and API key rotation to protect your database. Store keys in environment variables (e.g., .env files) rather than hardcoding them.
Organize Your Schema: Use clear, descriptive table and column names in Supabase (e.g., users, products). Document your schema in Supabase’s SQL editor to improve Cursor’s query generation accuracy.
Leverage Apidog for API Testing: Use Apidog to test and debug your Supabase API endpoints, ensuring seamless communication between Cursor, MCP servers, and your database.
For example to execute automated tests in Apidog, you can :
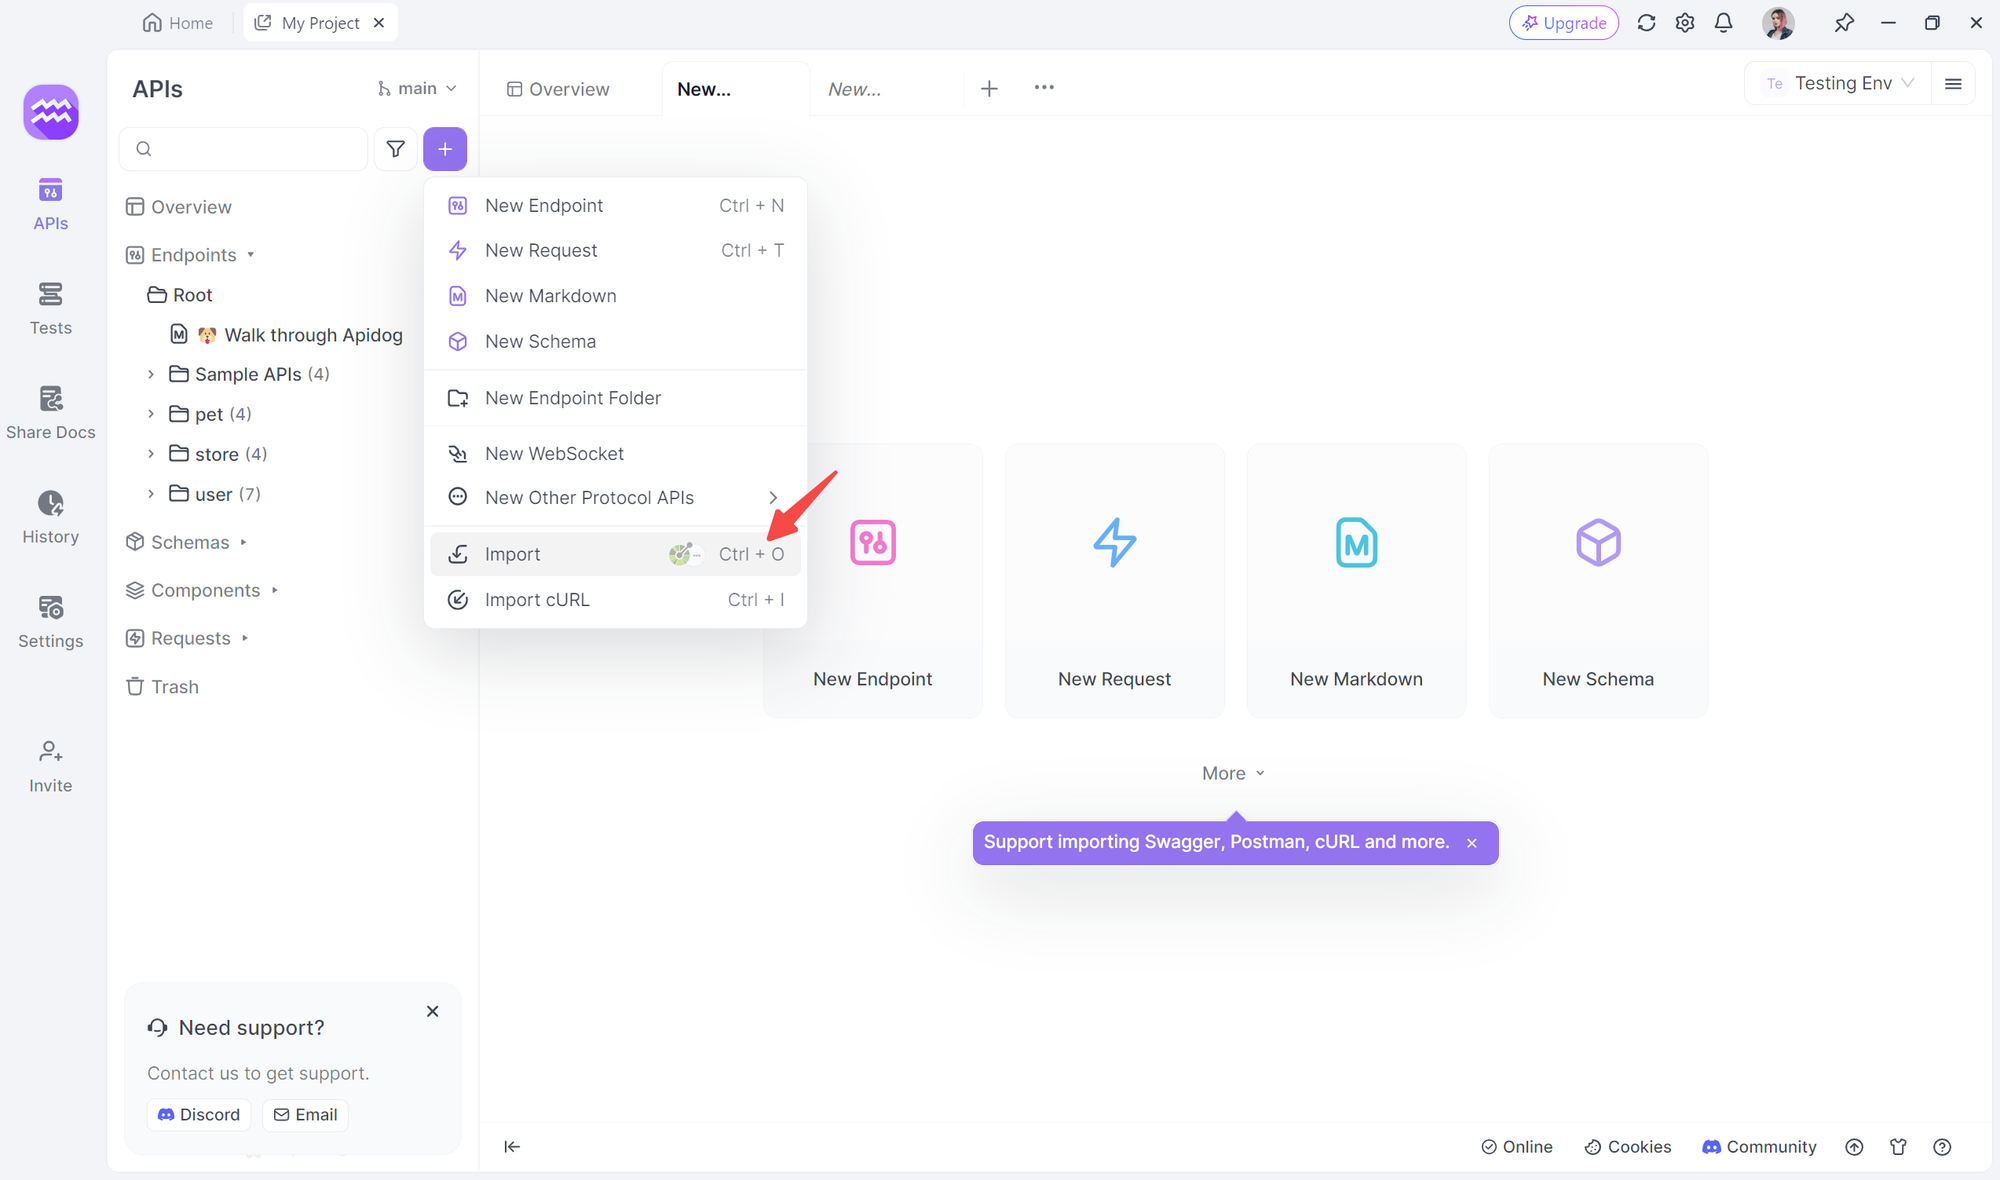
Step 1: Import or Create Your API Documentation
If you have existing Swagger or OpenAPI documentation, import it into Apidog. Alternatively, create new API endpoints directly in Apidog's interface. Organize your APIs into logical groups or projects for easier management.
Step 2: Design Your Test Cases/Create a new test scenario in Apidog.
Add individual API requests to your test scenario. Set up request parameters, headers, and authentication as needed. Define expected responses and add assertions to validate API behavior.

Step 3: Implement Data-Driven Testing
Create a data set with multiple test cases (e.g., CSV or JSON file). Link your data set to your test scenario in Apidog. Use variables to dynamically inject test data into your requests.
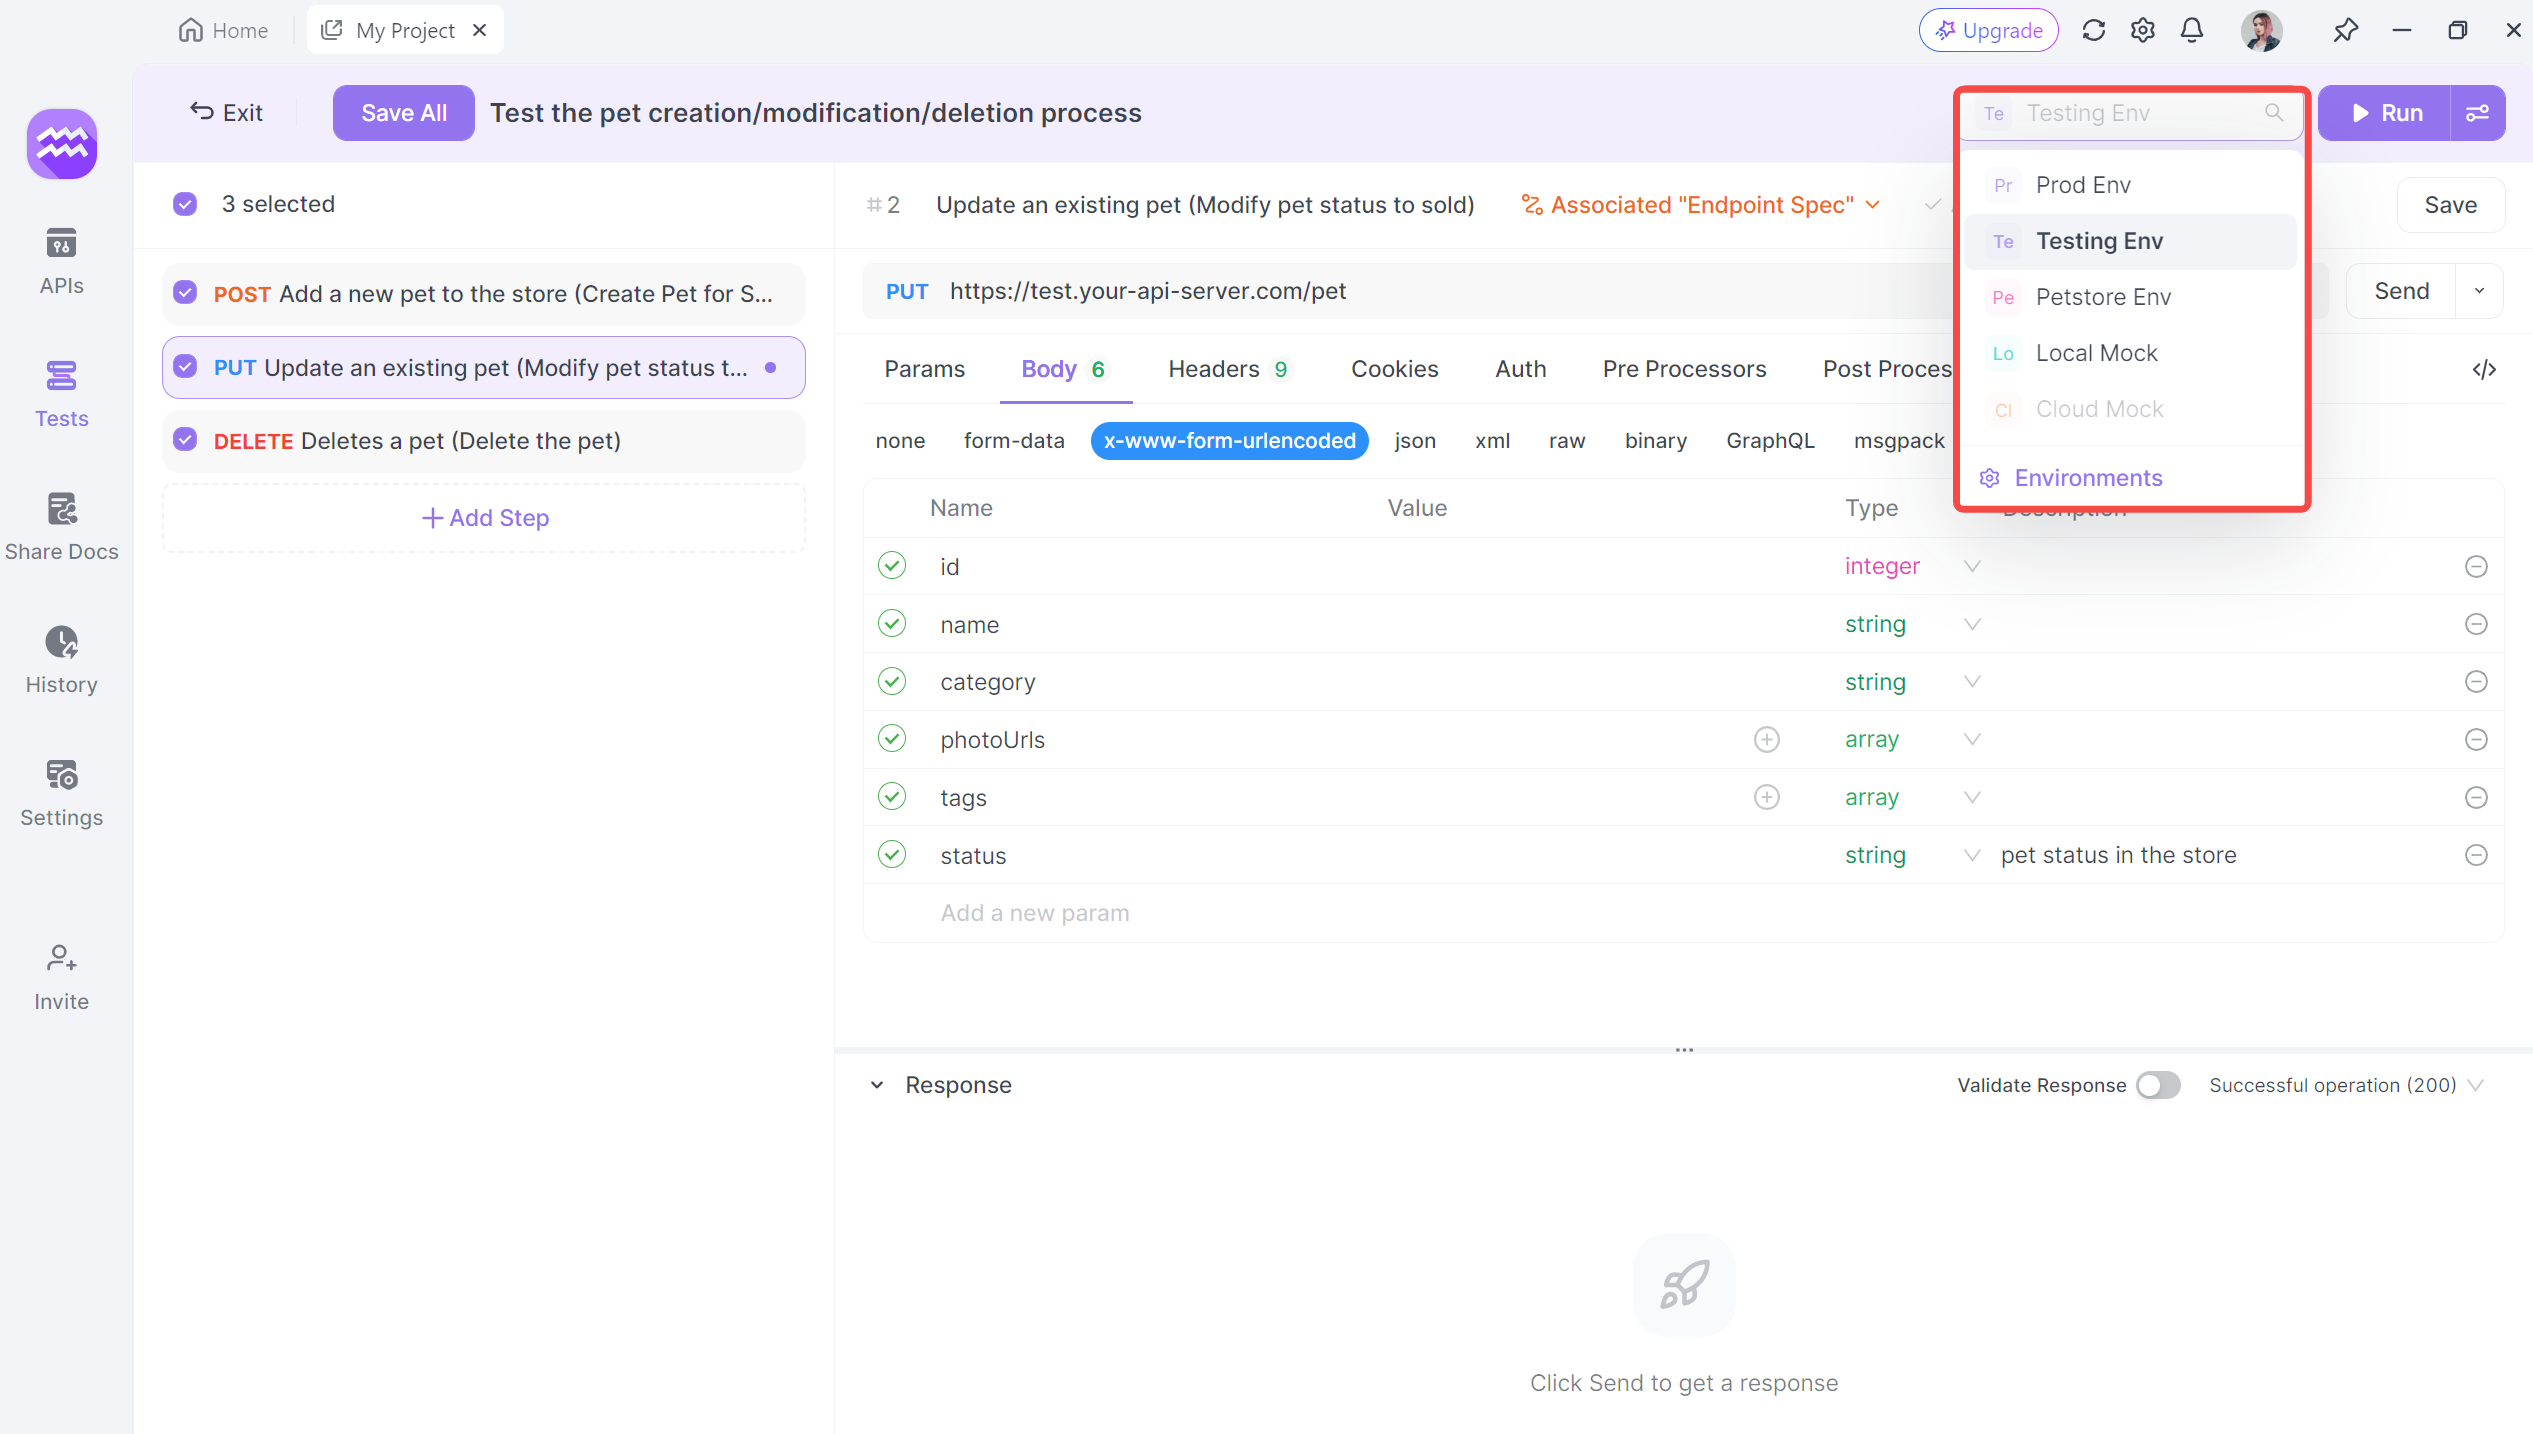
Step 4: Set Up Environment Variables
Create different environments (e.g., development, testing, and production). Define environment-specific variables (e.g., base URLs, API keys). Easily switch between environments for testing.
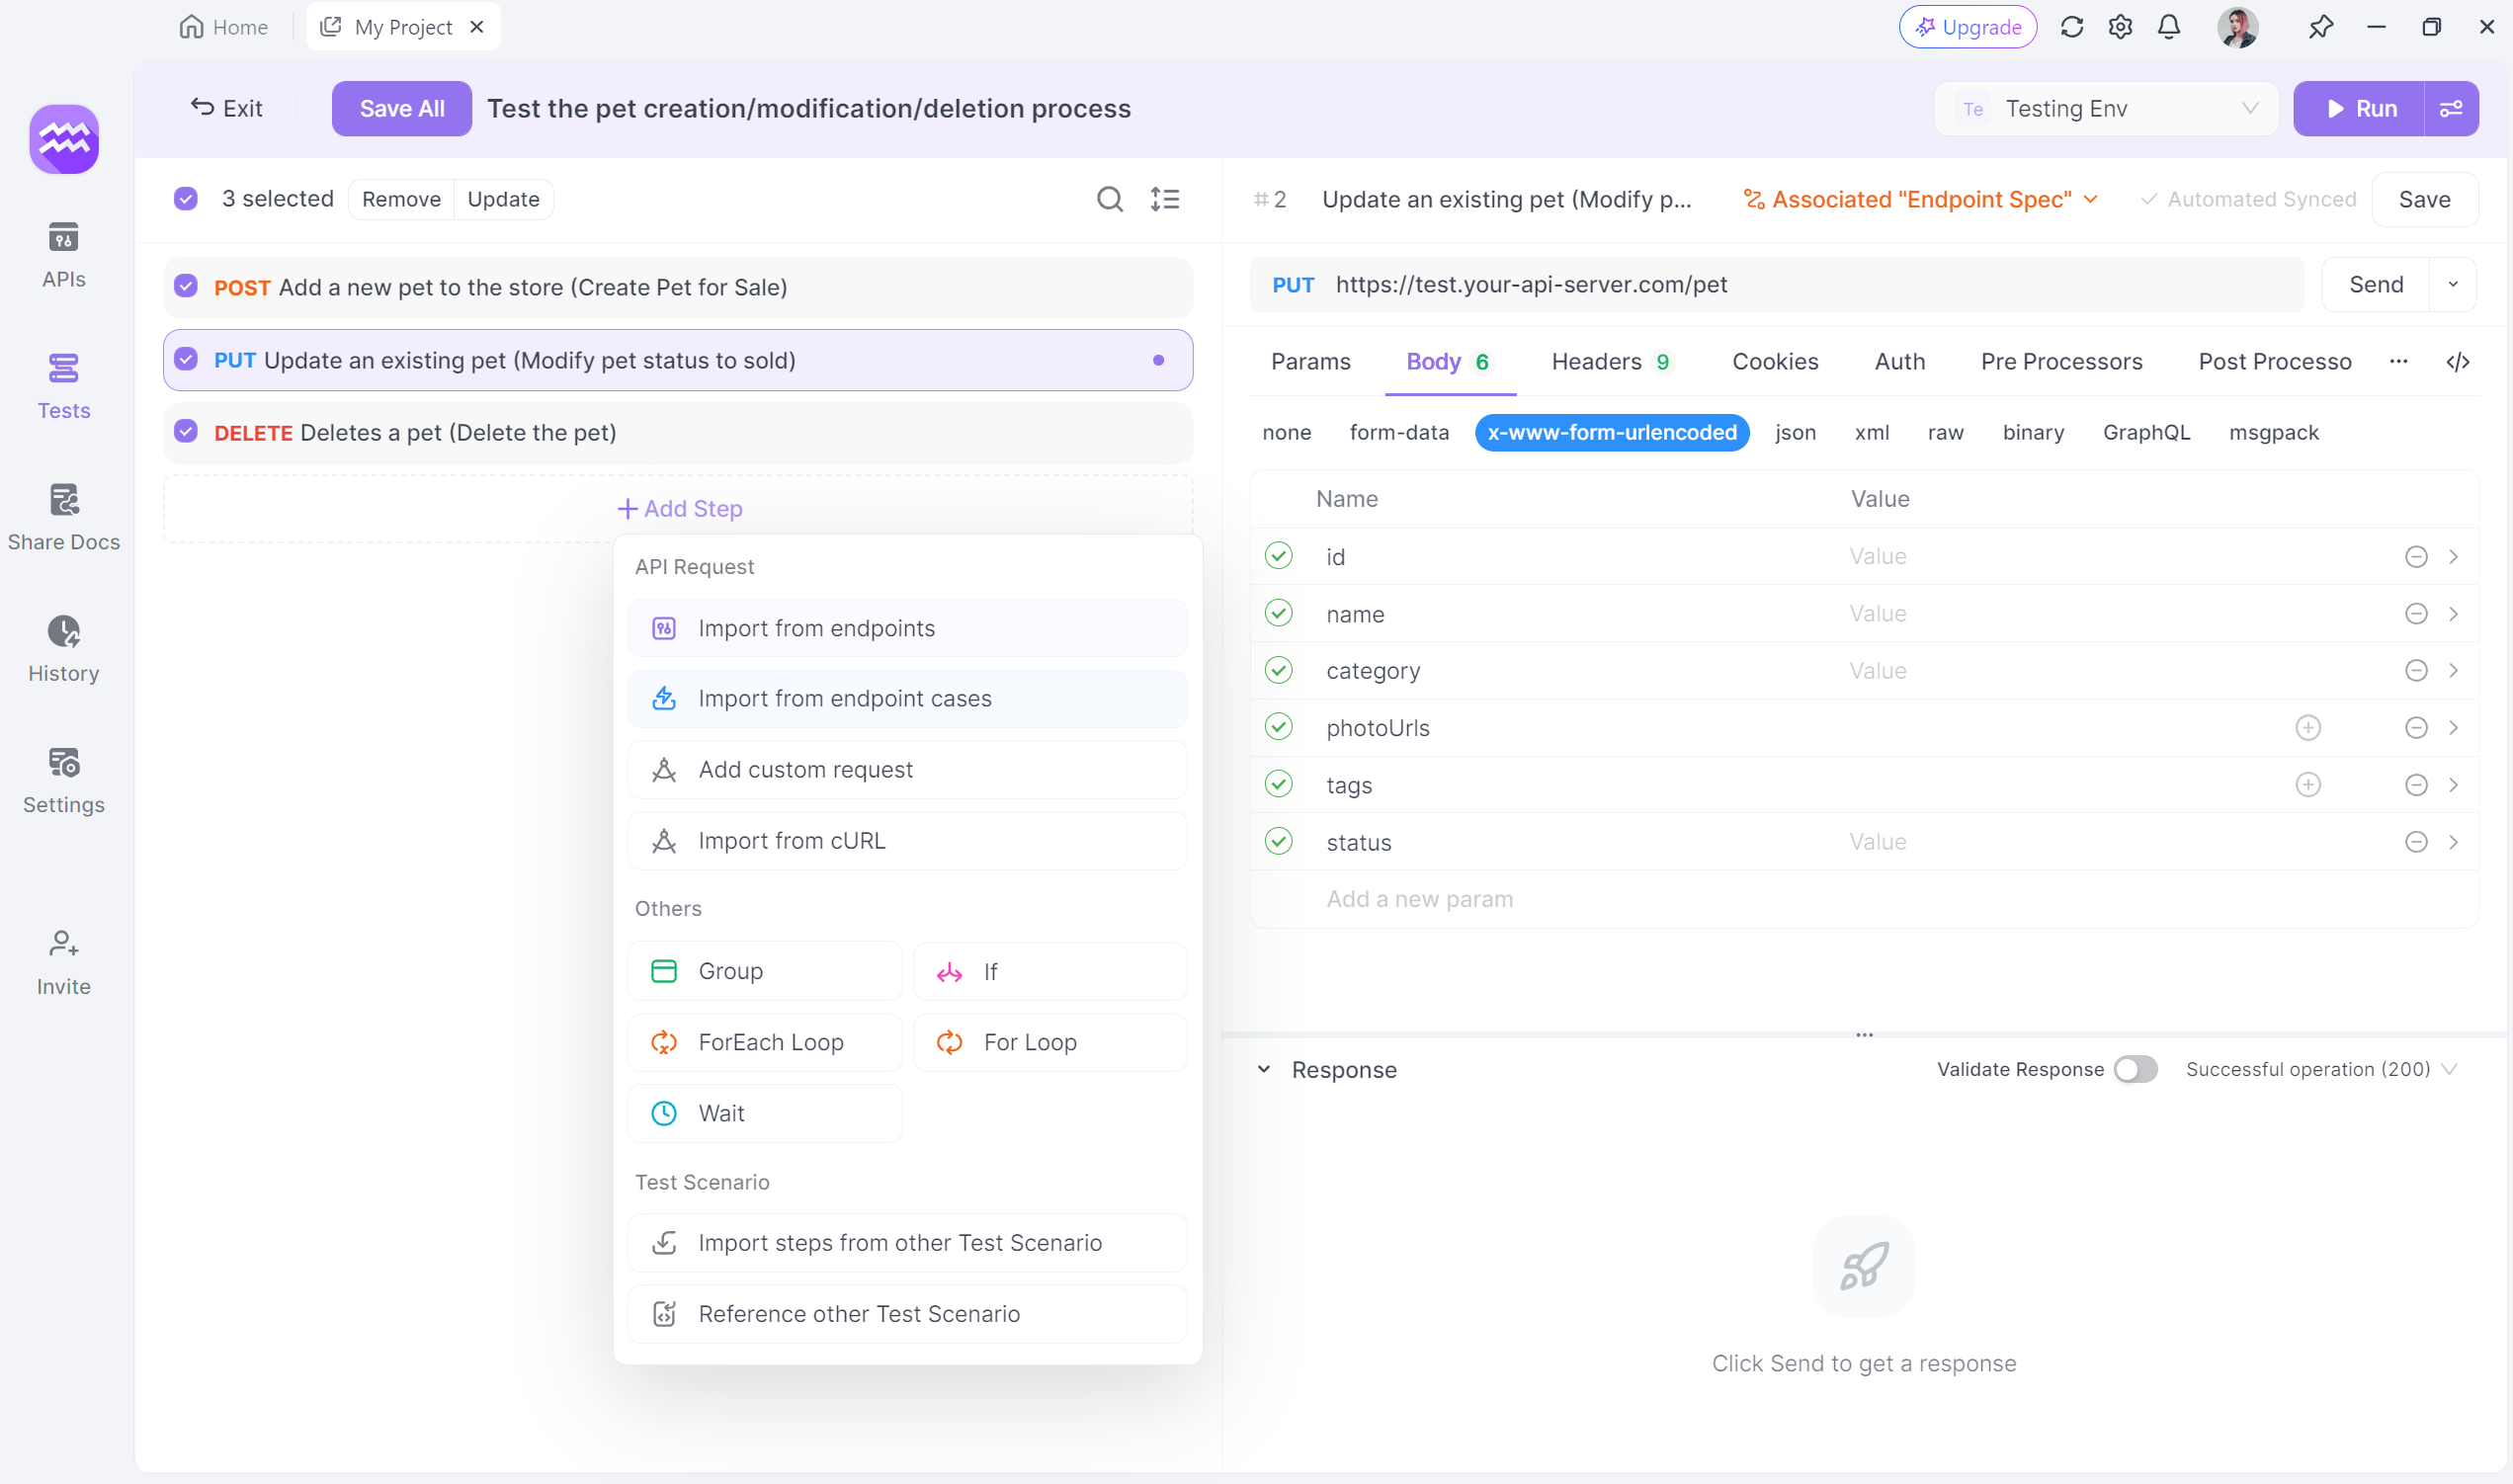
Step 5: Implement Test Flow Control
Use Apidog's flow control features to create realistic user scenarios. Add conditions, loops, and wait times to simulate complex workflows. Group related API calls for better organization and reusability.
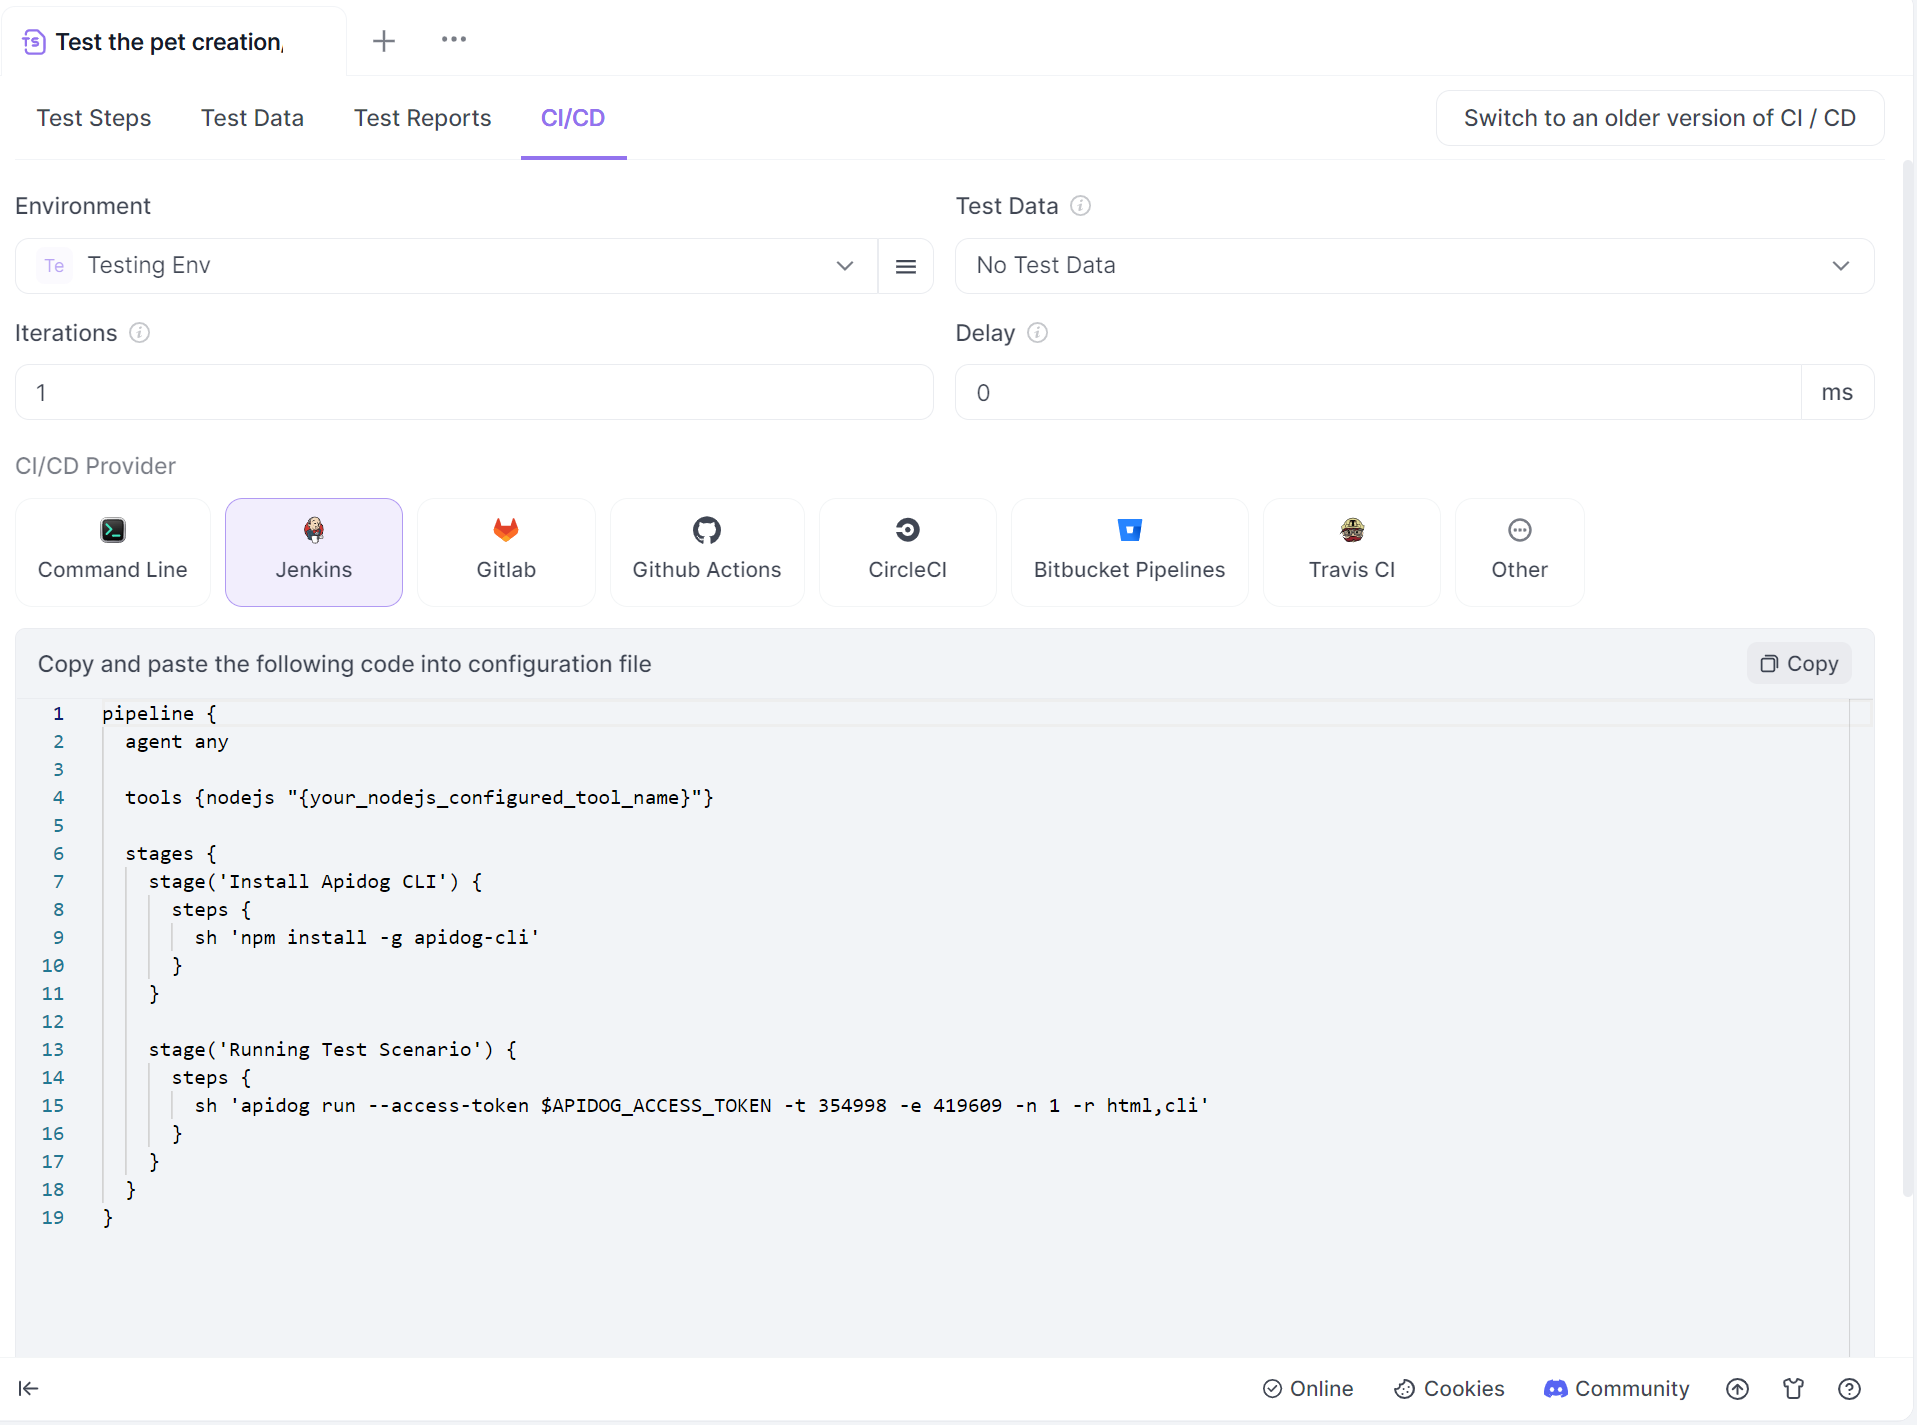
Step 6: Run Your API Tests
Execute your test scenarios manually through the Apidog interface. Schedule automated test runs at regular intervals. Integrate Apidog with your CI/CD pipeline for continuous testing
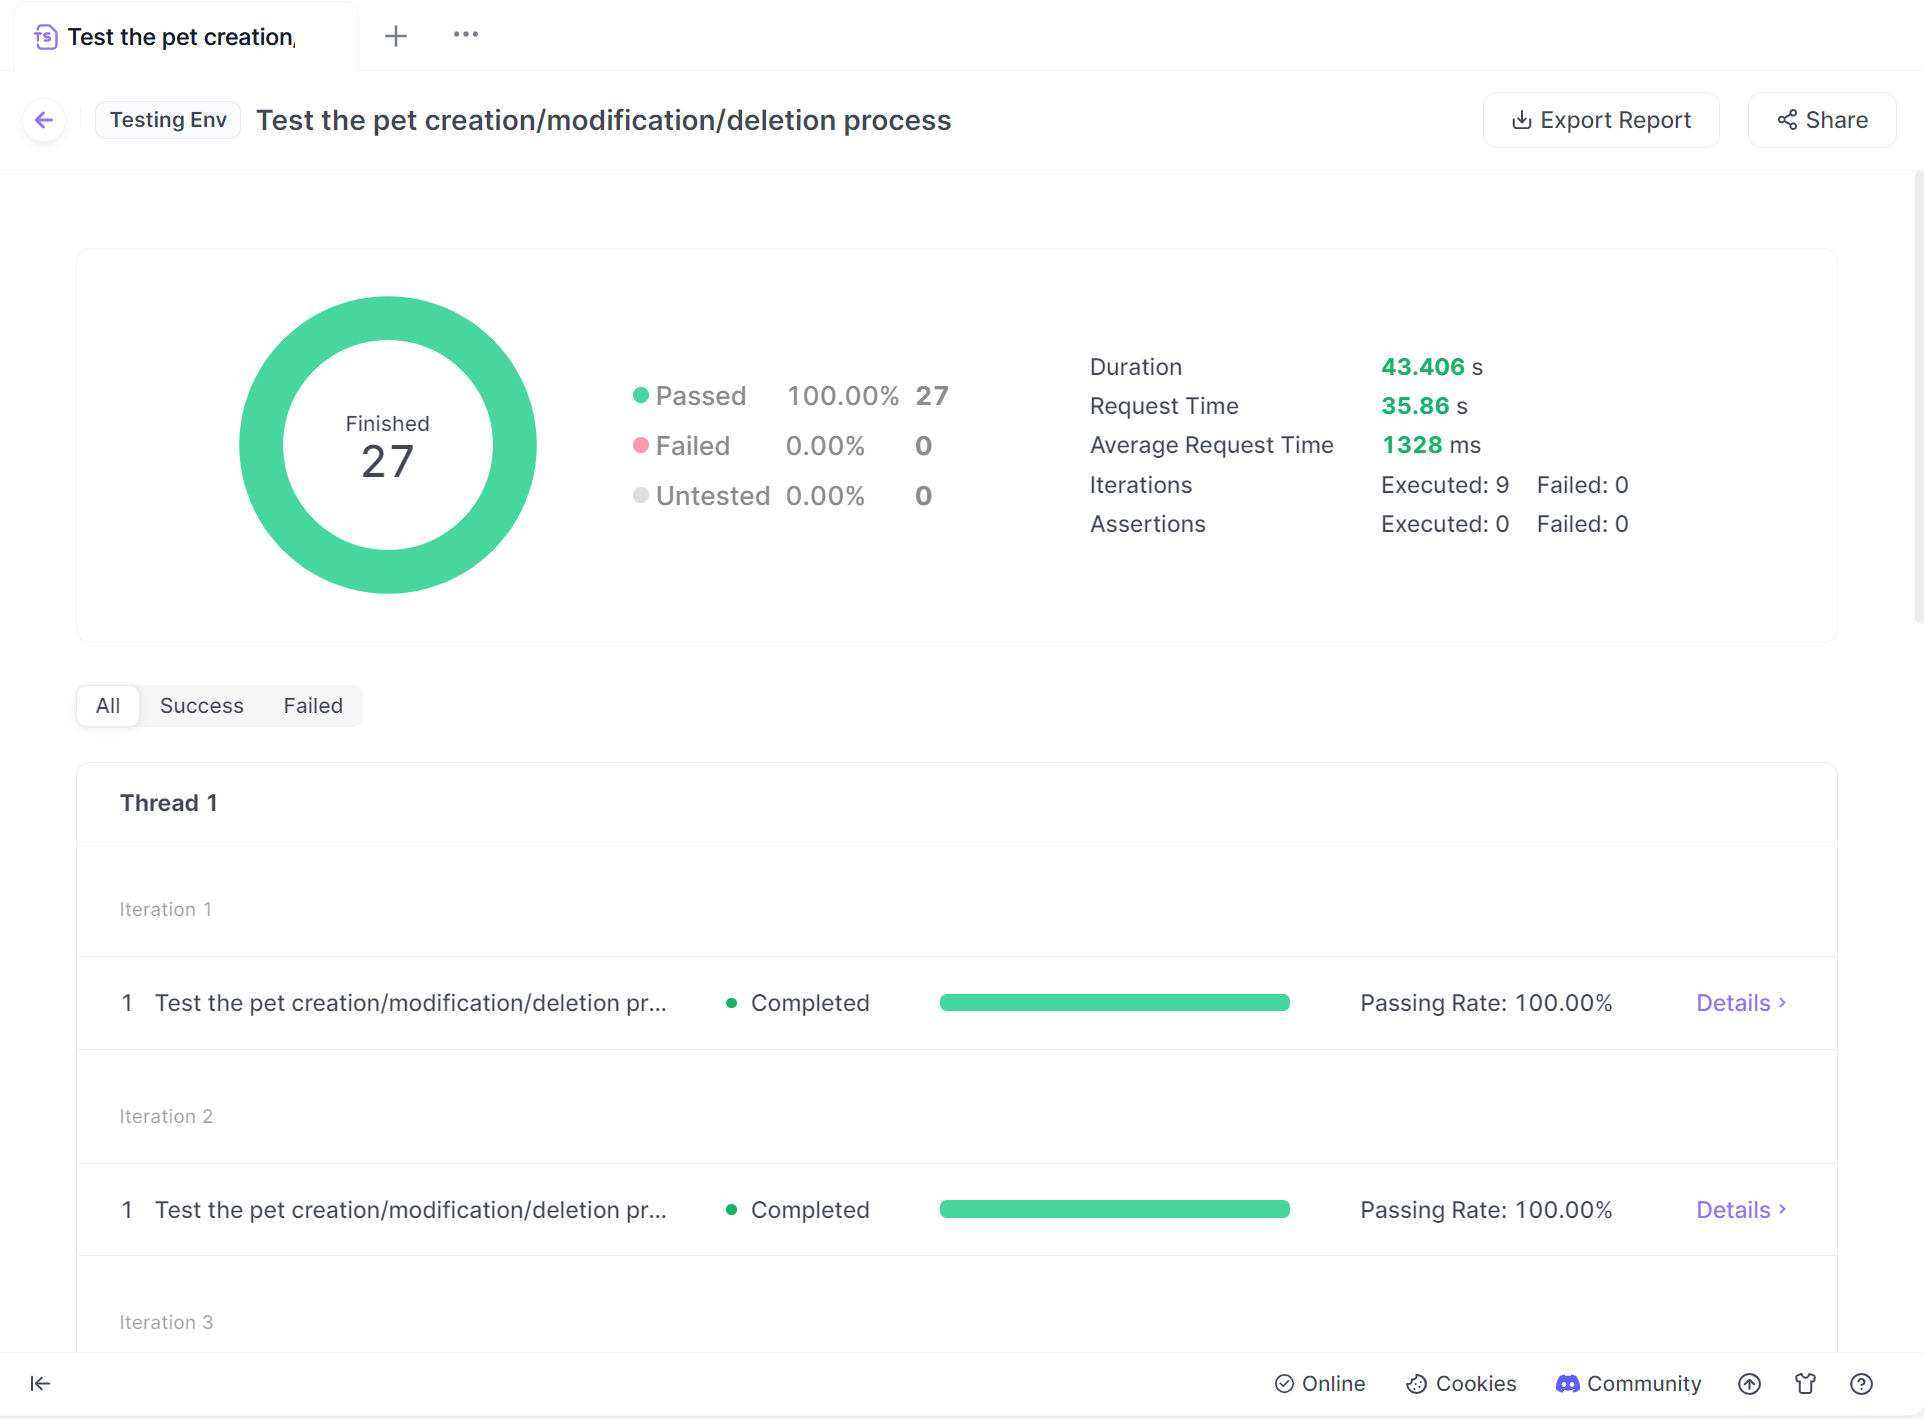
Step 7: Analyze Test Results
Review the detailed test reports generated by Apidog. Identify failed tests and investigate the root causes. Use Apidog's visualization tools to spot trends and patterns in your API performance
Monitor Performance: Track MCP server logs and Supabase API usage to identify bottlenecks or errors. Use Supabase’s dashboard metrics to optimize database performance.
This integration reduces manual SQL coding, enabling rapid development cycles for projects requiring real-time data access and AI-driven workflows.
Technical Underpinnings of the Integration
The Supabase-Cursor connection via MCP servers relies on several key technologies:
- Supabase API and PostgREST: Supabase’s RESTful API, powered by PostgREST, exposes your Postgres database as HTTP endpoints. The MCP server uses these endpoints to execute SQL queries, leveraging Supabase’s authentication and authorization mechanisms.
- MCP Servers: These servers implement a protocol for AI tools to interact with databases. Supabase’s MCP server parses Cursor’s natural language queries, translates them into SQL, and sends requests to the Supabase API.
- Cursor’s LLMs: Cursor’s large language models process natural language inputs, generate SQL queries, and refine them based on feedback or schema context, ensuring accurate database interactions.
This architecture enables developers to query Supabase databases programmatically, reducing the cognitive load of writing and debugging SQL manually.
Conclusion
Connecting your Supabase database to Cursor via MCP servers is a powerful way to leverage AI for database management. By following the steps outlined—setting up Supabase, configuring the MCP server, and integrating with Cursor—you can query your Postgres database using natural language, saving time and reducing errors. Use tools like Apidog to test and refine your API workflows, ensuring a robust development environment.