Running advanced coding models locally empowers developers to harness cutting-edge AI without relying on cloud services. DeepCoder, a fully open-source 14B parameter coding model, offers exceptional performance comparable to O3-mini. When paired with Ollama, a lightweight framework for running large language models (LLMs), you can deploy DeepCoder on your machine efficiently. This technical guide walks you through the process, from setup to execution, while integrating tools like Apidog for API testing.
What is DeepCoder?
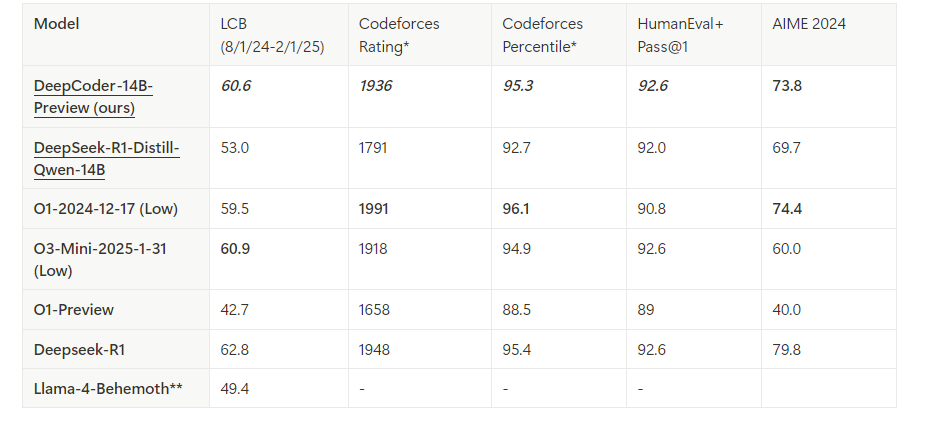
DeepCoder is a 14B parameter open-source coding model developed through a collaboration between Agentica and Together AI. Built by fine-tuning Deepseek-R1-Distilled-Qwen-14B with distributed reinforcement learning (RL), it excels in code reasoning and generation tasks. Additionally, a smaller 1.5B version exists for resource-constrained environments. Unlike proprietary models, DeepCoder’s open-source nature allows full transparency and customization, making it a favorite among developers.
Ollama, on the other hand, simplifies the deployment of LLMs like DeepCoder. It provides a lightweight runtime and an API for seamless integration into development workflows. By combining these tools, you unlock a powerful, local coding assistant.

Prerequisites for Running DeepCoder Locally
Before proceeding, ensure your system meets the requirements. Here’s what you need:
Hardware:
- A machine with at least 32GB of RAM (64GB recommended for the 14B model).
- A modern GPU (e.g., NVIDIA RTX 3090 or better) with 24GB+ VRAM for optimal performance.
- Alternatively, a CPU with sufficient cores (e.g., Intel i9 or AMD Ryzen 9) works for the 1.5B model.
Software:
- Operating System: Linux (Ubuntu 20.04+), macOS, or Windows (via WSL2).
- Git: For cloning repositories.
- Docker (optional): For containerized deployment.
- Python 3.9+: For scripting and API interactions.
Dependencies:
- Ollama: Installed and configured.
- DeepCoder model files: Downloaded from the official Ollama library.
With these in place, you’re ready to install and configure the environment.
Step 1: Install Ollama on Your Machine
Ollama serves as the backbone for running DeepCoder locally. Follow these steps to install it:
Download Ollama:
Visit the official Ollama website or use a package manager. For Linux, execute:
curl -fsSL https://ollama.com/install.sh | sh
On macOS, use Homebrew:
brew install ollama
Verify Installation:
Check the version to confirm Ollama installed correctly:
ollama --version

Start the Ollama Service:
Launch Ollama in the background:
ollama serve &
This runs the server on localhost:11434, exposing an API for model interactions.
Ollama is now operational. Next, you’ll fetch the DeepCoder model.
Step 2: Download DeepCoder from the Ollama Library
DeepCoder is available in the Ollama model library. Here’s how to pull it:
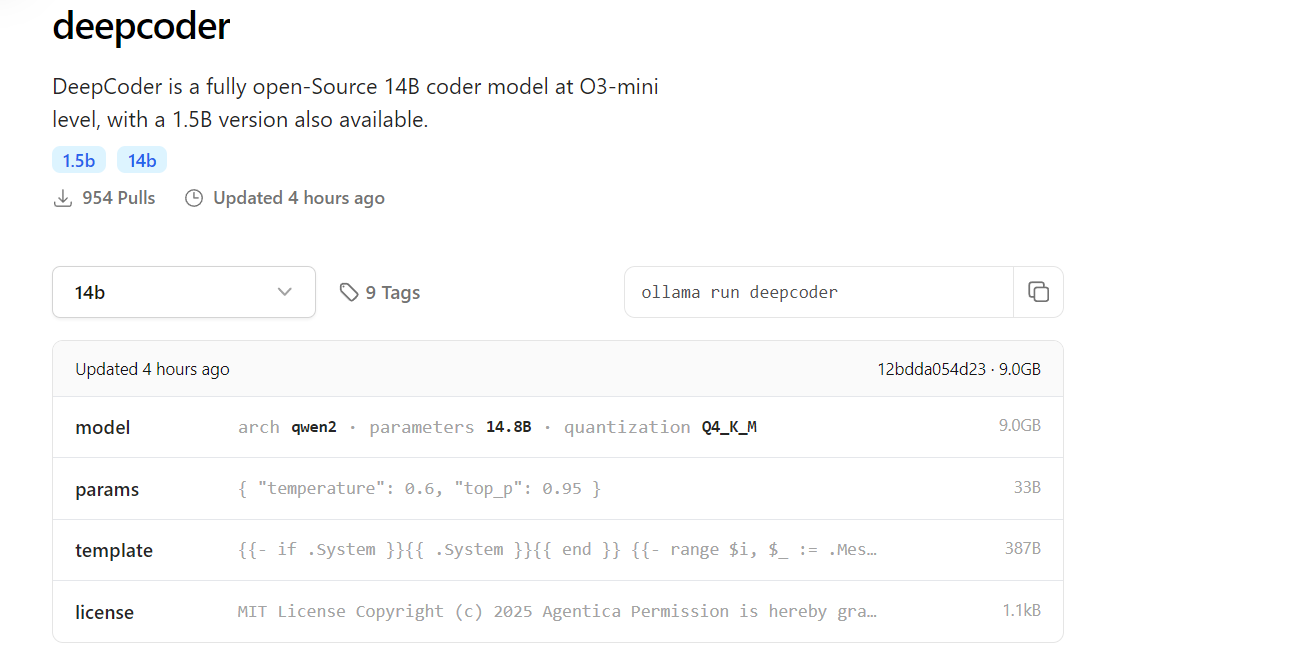
Pull DeepCoder:
Download the 14B model (or 1.5B for lighter setups):
ollama pull deepcoder
This command fetches the latest tagged version. For a specific tag, use:
ollama pull deepcoder:14b-preview
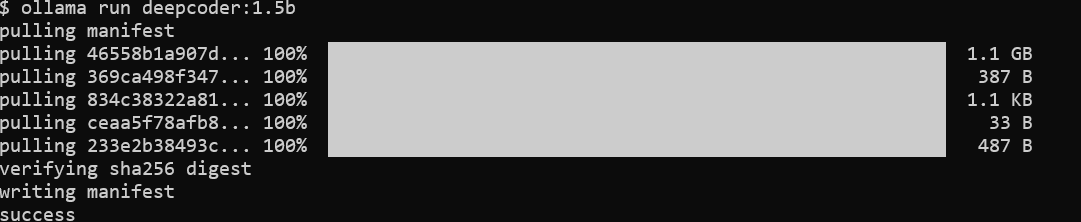
Monitor Download Progress:
The process streams updates, showing file digests and completion status. Expect a multi-gigabyte download for the 14B model, so ensure a stable internet connection.
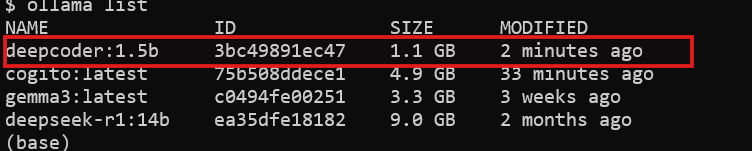
Verify Installation:
Check if DeepCoder is available:
ollama list
You’ll see deepcoder listed among installed models.
With DeepCoder downloaded, you’re ready to run it.
Step 3: Run DeepCoder Locally with Ollama
Now, execute DeepCoder and test its capabilities:
Start DeepCoder:
Launch the model in an interactive session:
ollama run deepcoder
This opens a prompt where you can input coding queries.
Adjust Parameters (Optional):
For advanced usage, tweak settings like temperature via a configuration file or API call (covered later).
DeepCoder is now running locally. However, to integrate it into workflows, you’ll use its API.
Step 4: Interact with DeepCoder via the Ollama API
Ollama exposes a RESTful API for programmatic access. Here’s how to leverage it:
Check API Availability:
Ensure the Ollama server runs:
curl http://localhost:11434
A response confirms the server is active.
Send a Request:
Use curl to query DeepCoder:
curl http://localhost:11434/api/generate -d '{
  "model": "deepcoder",
  "prompt": "Generate a REST API endpoint in Flask",
  "stream": false
}'
The response includes generated code, such as:
from flask import Flask, jsonify

app = Flask(__name__)

@app.route('/api/data', methods=['GET'])
def get_data():
    return jsonify({"message": "Hello, World!"})

if __name__ == "__main__":
    app.run(debug=True)
Integrate with Python:
Use Python’s requests library for cleaner interaction:
import requests

url = "http://localhost:11434/api/generate"
payload = {
    "model": "deepcoder",
    "prompt": "Write a Node.js Express API",
    "stream": False
}
response = requests.post(url, json=payload)
print(response.json()["response"])
The API unlocks DeepCoder’s potential for automation and integration.
Step 5: Enhance API Testing with Apidog
DeepCoder excels at generating API code, but testing those APIs is crucial. Apidog simplifies this process:
Install Apidog:
Download and install Apidog from its official site.
Test the Generated API:
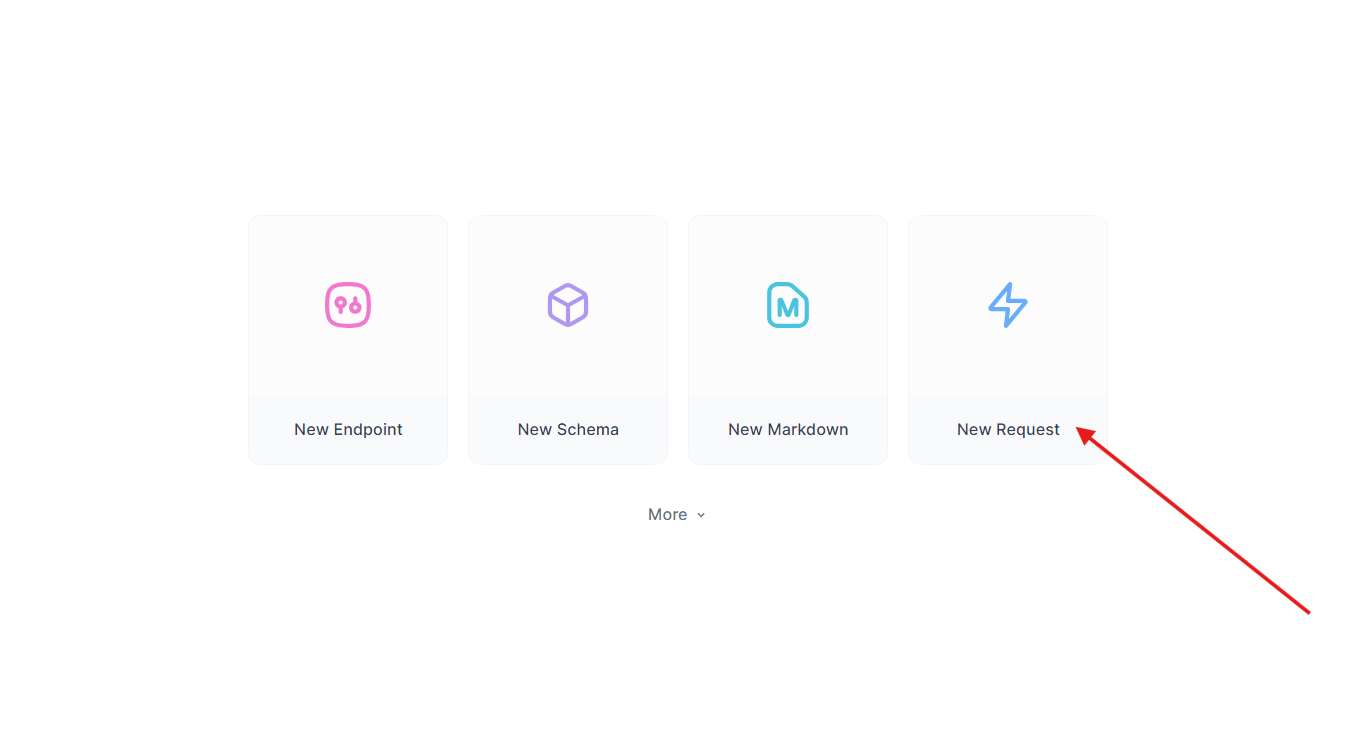
Take the Flask endpoint from earlier. In Apidog:
- Create a new request.
- Set the URL to
http://localhost:5000/api/dataand Send a GET request.
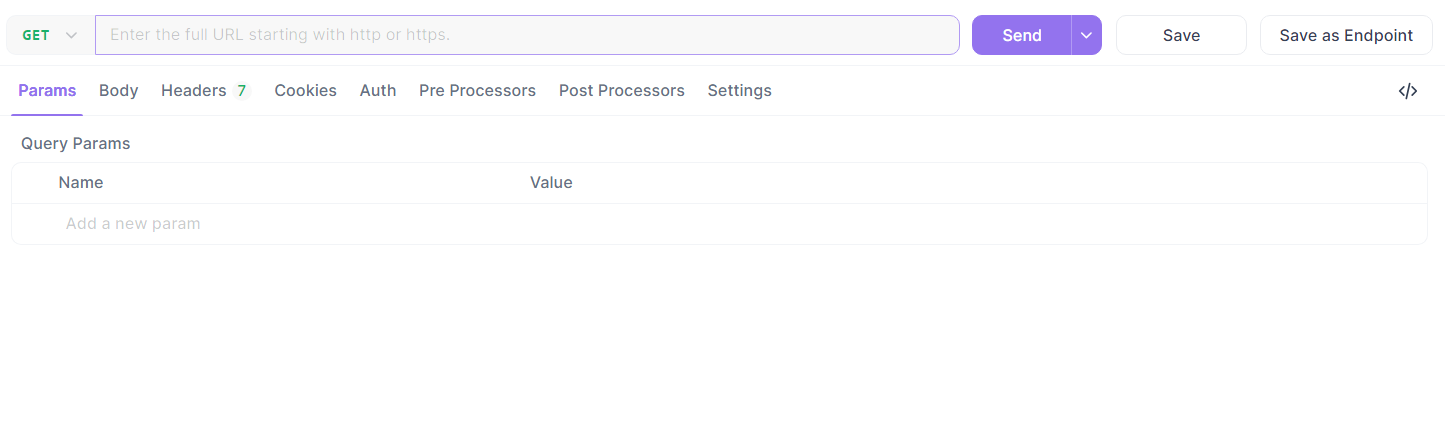
- Verify the response:
{"message": "Hello, World!"}.
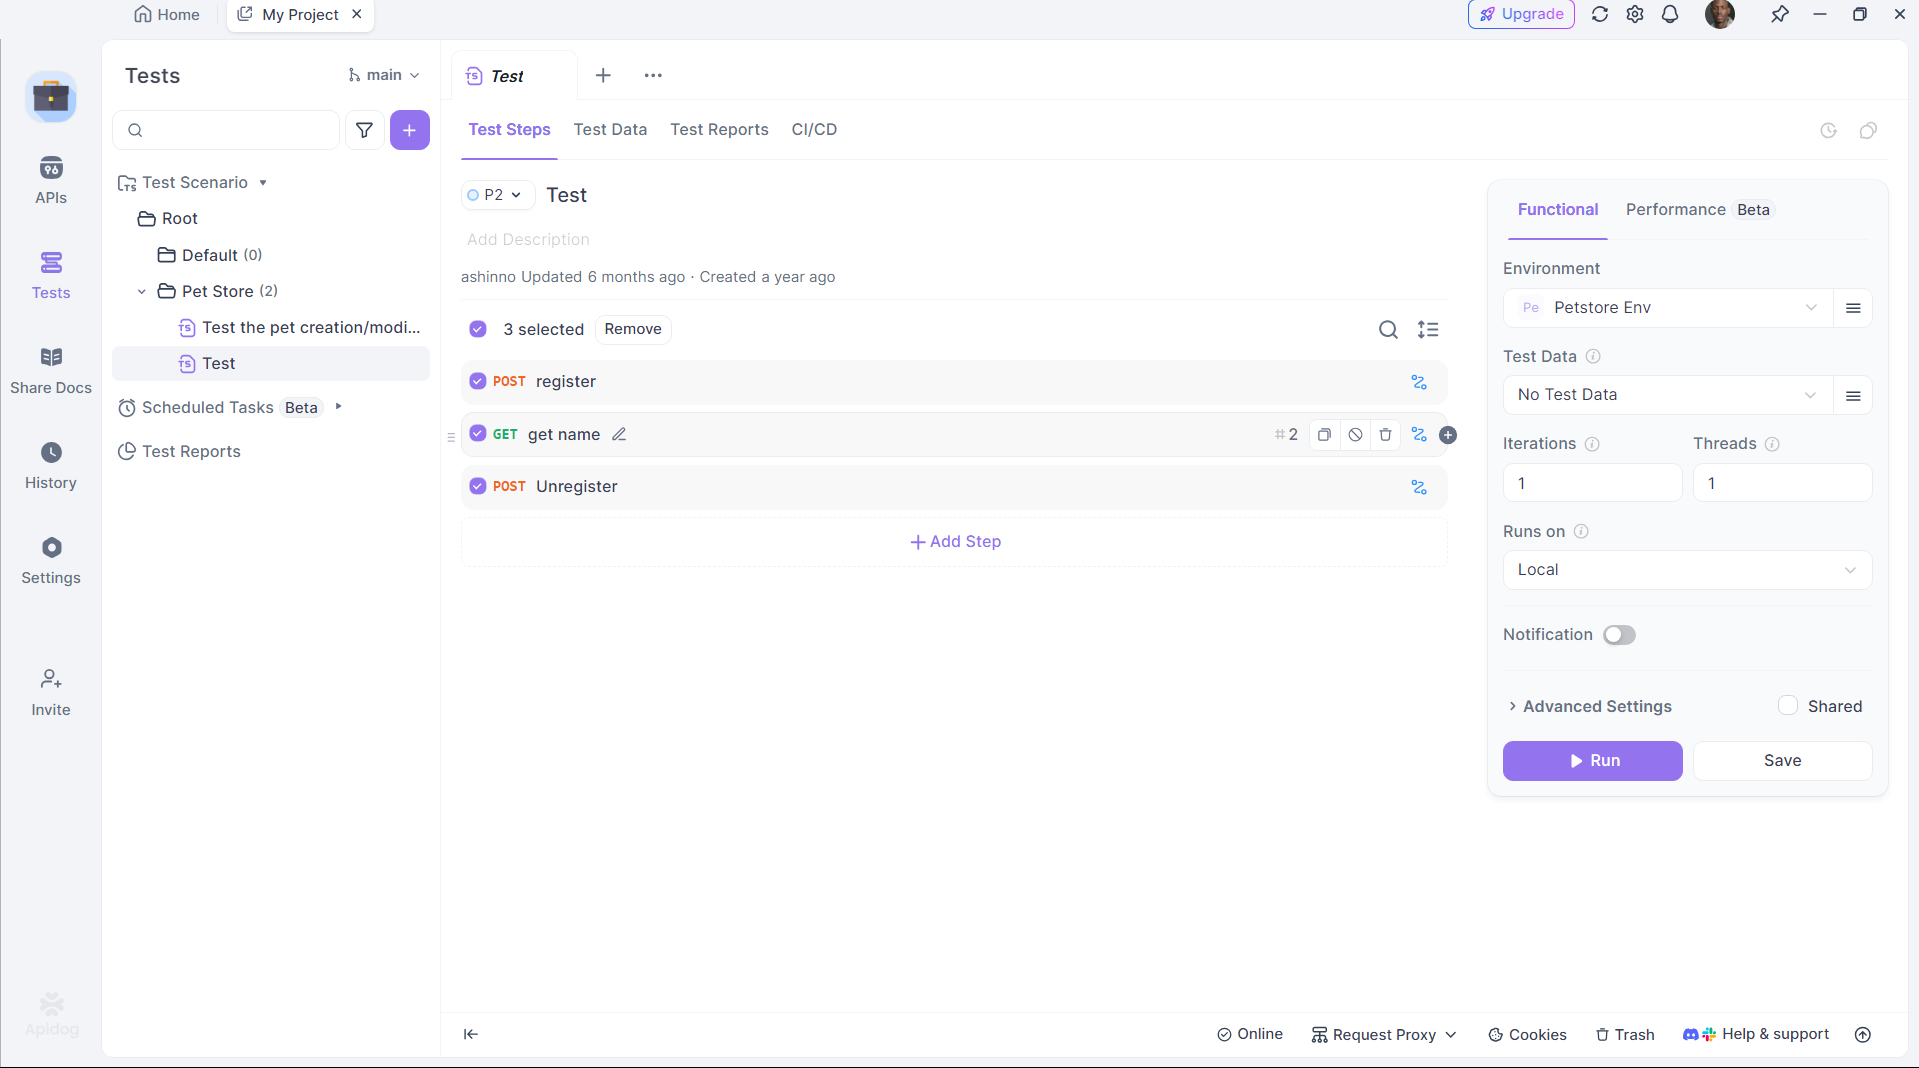
Automate Testing:
Use Apidog’s scripting to automate validation, ensuring DeepCoder’s output meets expectations.
Apidog bridges the gap between code generation and deployment, enhancing productivity.
Step 6: Optimize DeepCoder’s Performance
To maximize efficiency, fine-tune DeepCoder’s setup:
GPU Acceleration:
Ensure Ollama offloads computation to your GPU. Check with:
nvidia-smi
GPU usage indicates successful acceleration.
Memory Management:
For the 14B model, allocate sufficient VRAM. Adjust swap space on Linux if needed:
sudo fallocate -l 32G /swapfile
sudo chmod 600 /swapfile
sudo mkswap /swapfile
sudo swapon /swapfile
Model Quantization:
Use a smaller quantization (e.g., 4-bit) for the 1.5B model:
ollama pull deepcoder:1.5b-q4
These tweaks ensure DeepCoder runs smoothly on your hardware.
Why Choose DeepCoder with Ollama?
Running DeepCoder locally offers distinct advantages:
- Privacy: Keep sensitive code off cloud servers.
- Cost: Avoid subscription fees.
- Customization: Tailor the model to your needs.
Pairing it with Ollama’s lightweight framework and Apidog’s testing capabilities creates a powerful, self-contained development ecosystem.
Conclusion
Setting up DeepCoder locally with Ollama is straightforward yet transformative. You install Ollama, pull DeepCoder, run it, and integrate it via the API—all within a few steps. Tools like Apidog further enhance the experience by ensuring generated APIs work flawlessly. Whether you’re a solo developer or part of a team, this setup delivers a robust, open-source coding assistant.


