
Stoplight Studio is a modern web development tool that provides services such as API design, documentation, and publication. To understand what Stoplight Studio offers its users, continue reading below!
However, if you're looking for an API tool that is the full package, you can consider trying out Apidog's comprehensive API testing features.
If you're interested, you can always start for free by clicking the button below! 👇👇👇
What is Stoplight Studio?
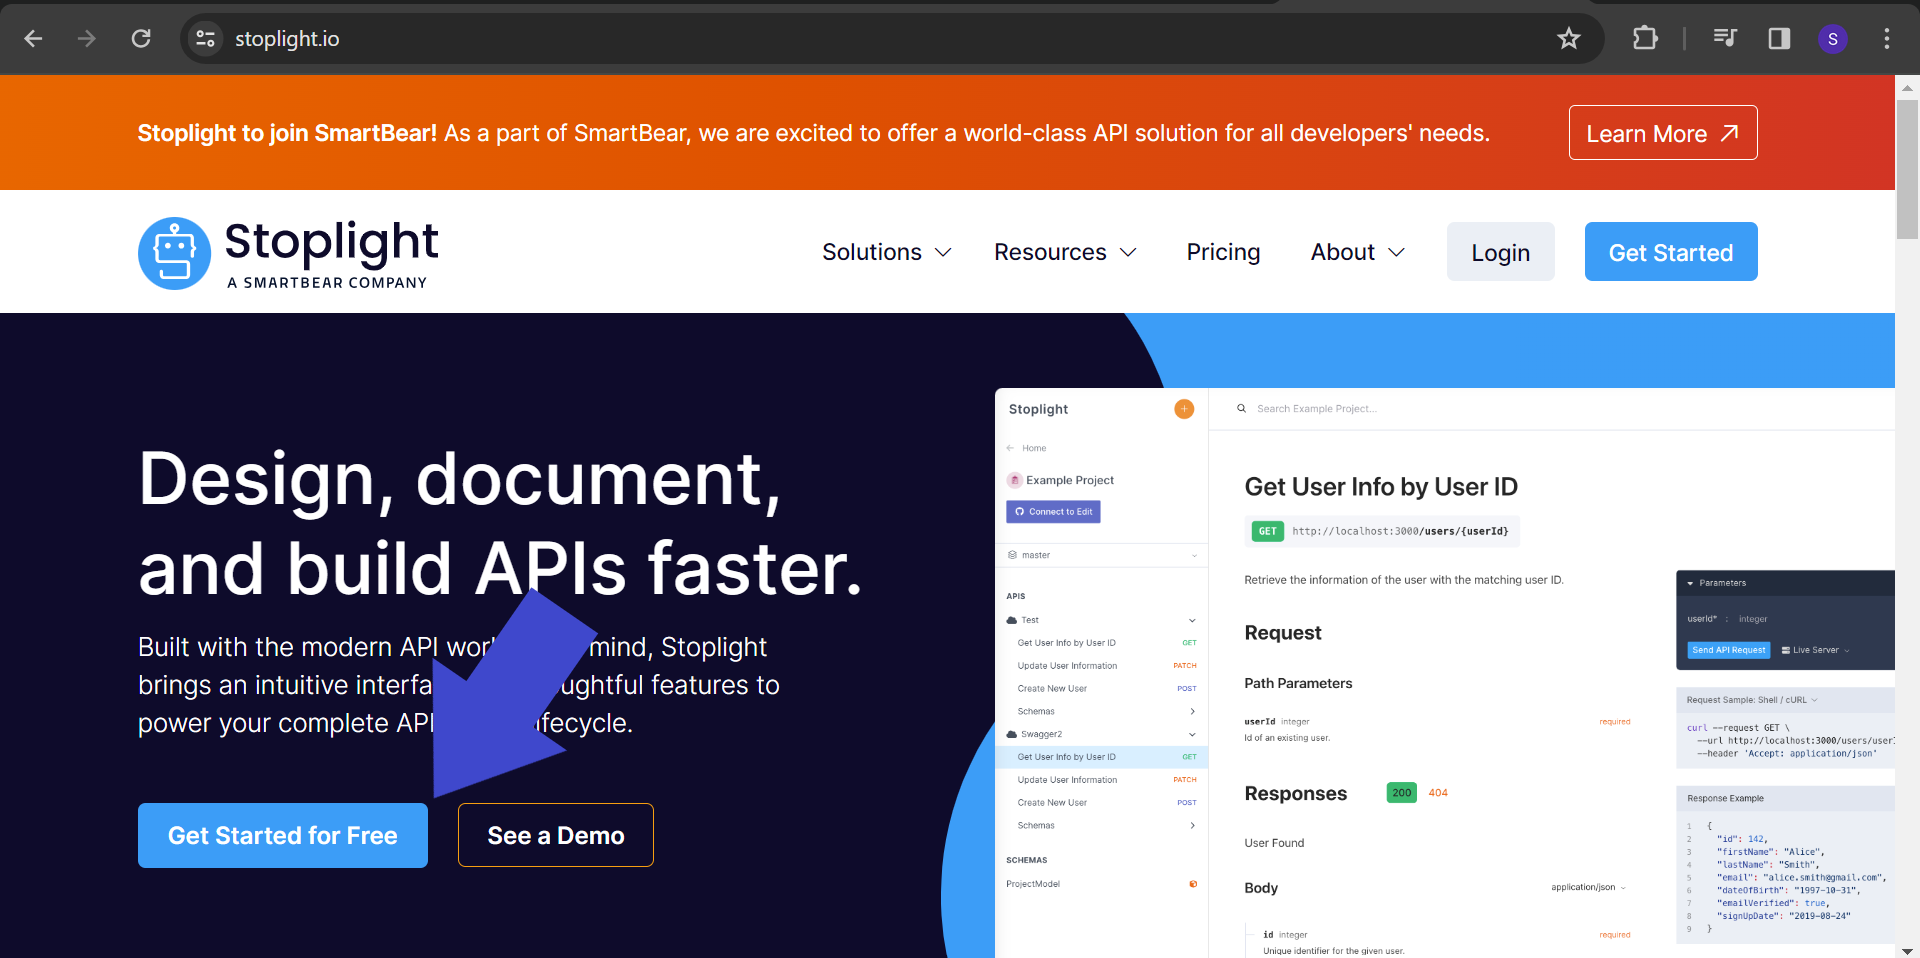
Stoplight Studio is an API tool that specializes in API design, documentation creation, and publication. It is known to be one of the most popular API design and documentation tools in the web service industry.
Stoplight Studio Key Features
Testing Tools: Stolight Studio has testing features that allow developers to test API endpoints within the editor.
Documentation Generator: Stoplight Studio has a built-in API documentation generator. This allows documentation to stay in sync with the actual API implementation.
Industry Standards: Stoplight Studio supports industry standards and best practices. You just need to ensure that the quality of the API you are designing is top-notch!
Team Collaboration: Stoplight Studio allows multiple team members to work on the API design concurrently, enabling live coordination whenever needed.
Easy-to-Learn: Stoplight Studio can be more accessible to new developers who may not be familiar with writing raw code but still need to contribute to the API design process.
Stoplight Studio users can confidently rely on the application to create amazing API designs and documentation!
Step-by-Step Guide To Design API and Create REST API Documentation with Stoplight Studio
Let's cut straight to the core of this article: how exactly do you create REST API documentation with Stoplight Studio?
Step 1 - Sign Up and Login to Stoplight Studio
To begin using Stoplight Studio's website, you need to sign up. Visit their website and press the Get Started for Free button. However, you can also download Stoplight Studio's desktop version if you'd prefer it to be an exclusive window just for the application.
Expect that you will need to log in and create your workspace.
Step 2 - Create a New Project
After you have successfully set up Stoplight Studio, you will be redirected to your Stoplight Studio dashboard webpage.
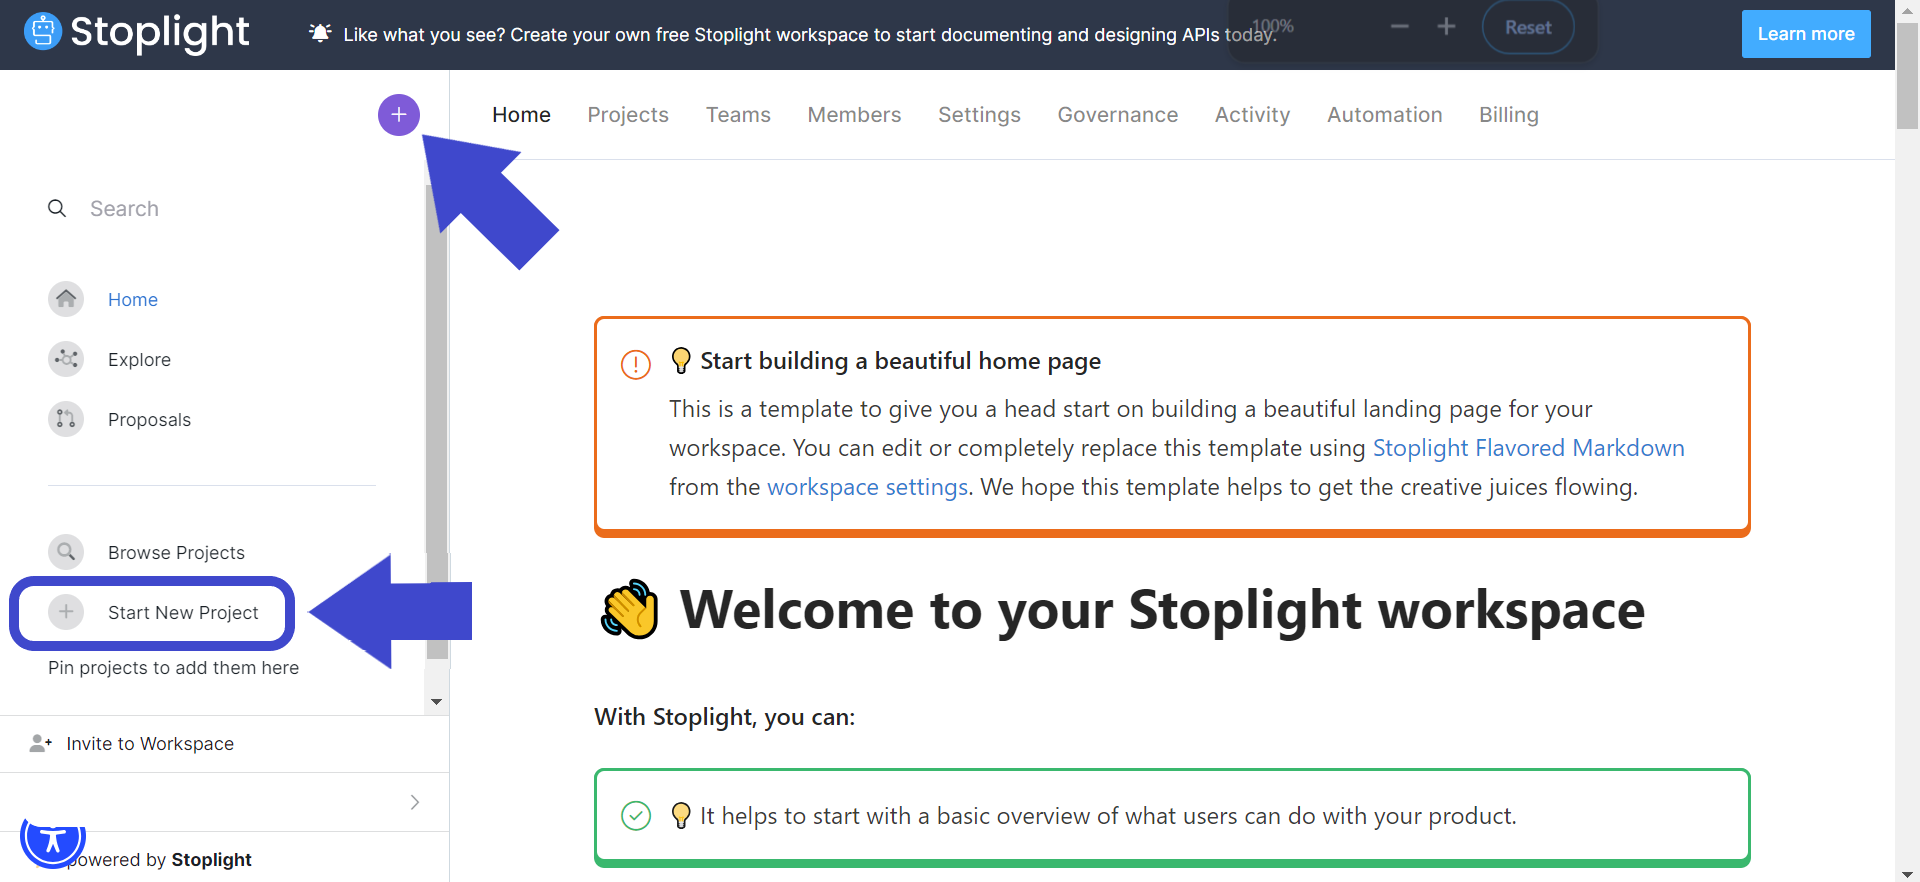
To create a new project, press the + button in the upper left corner of the dashboard. You can also press the Start New Project tab to create a new project. You can refer to the image above if you have difficulties locating both.
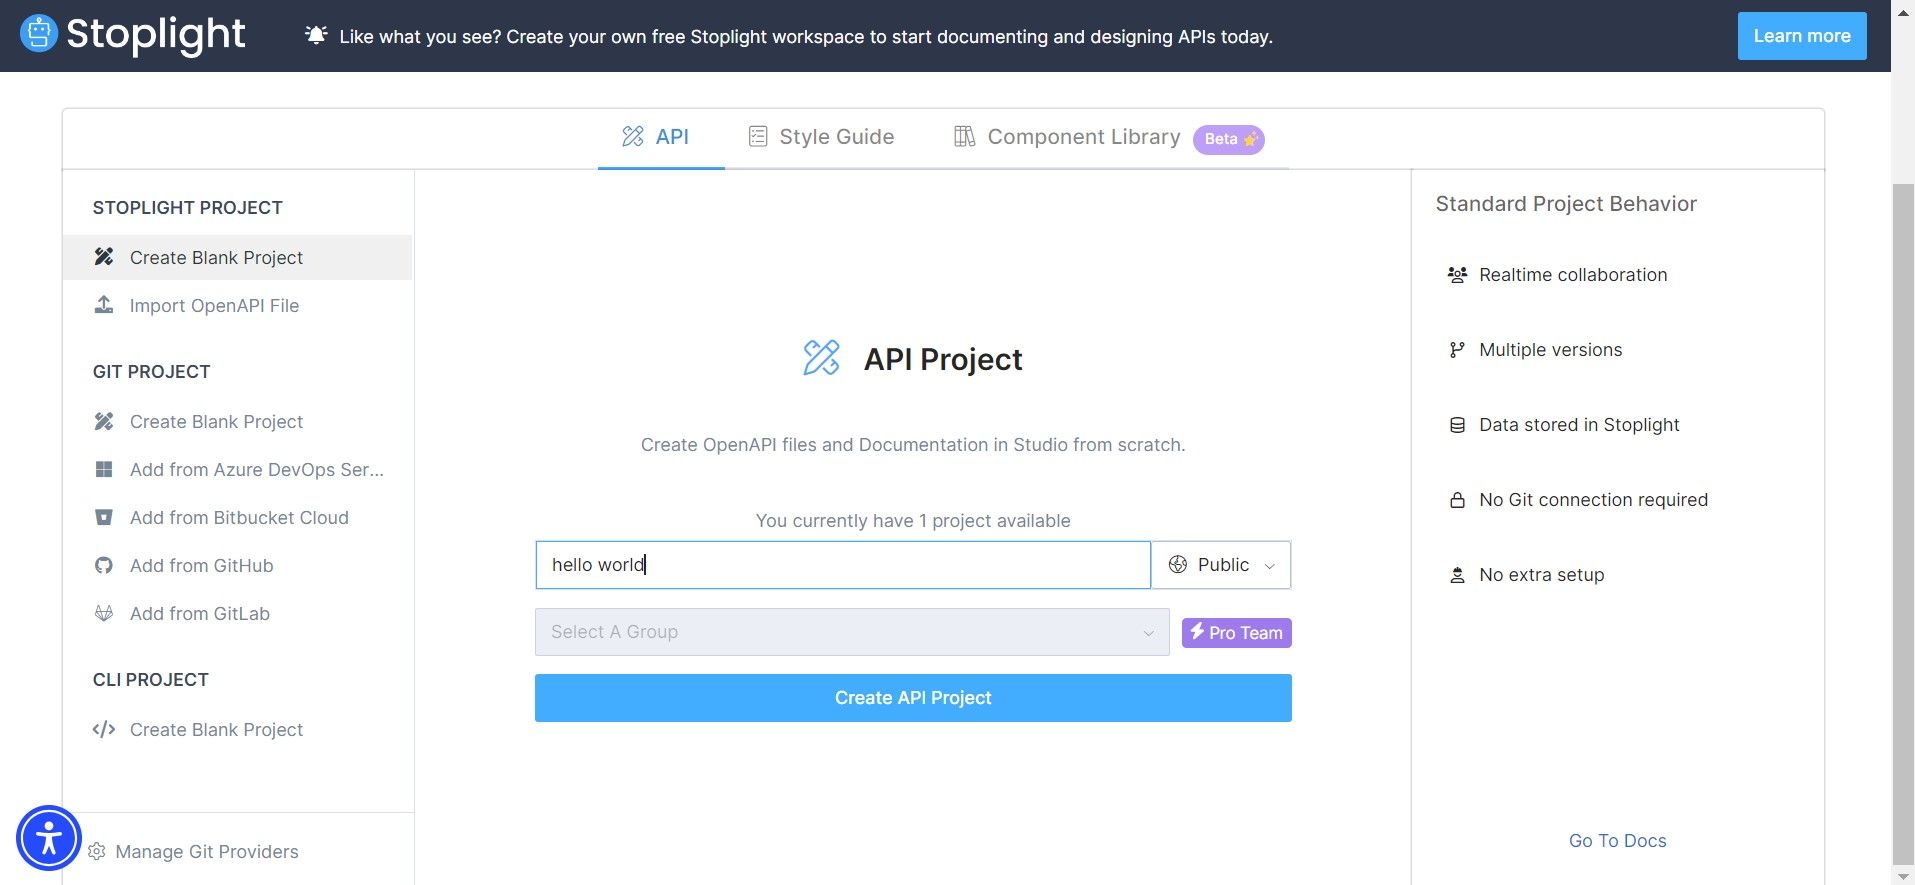
Step 3 - Setup New Project Details
Stoplight Studio will prompt you to set up the API project name. You may notice that there is a label saying "You currently have 1 project available". For now, ignore this first.
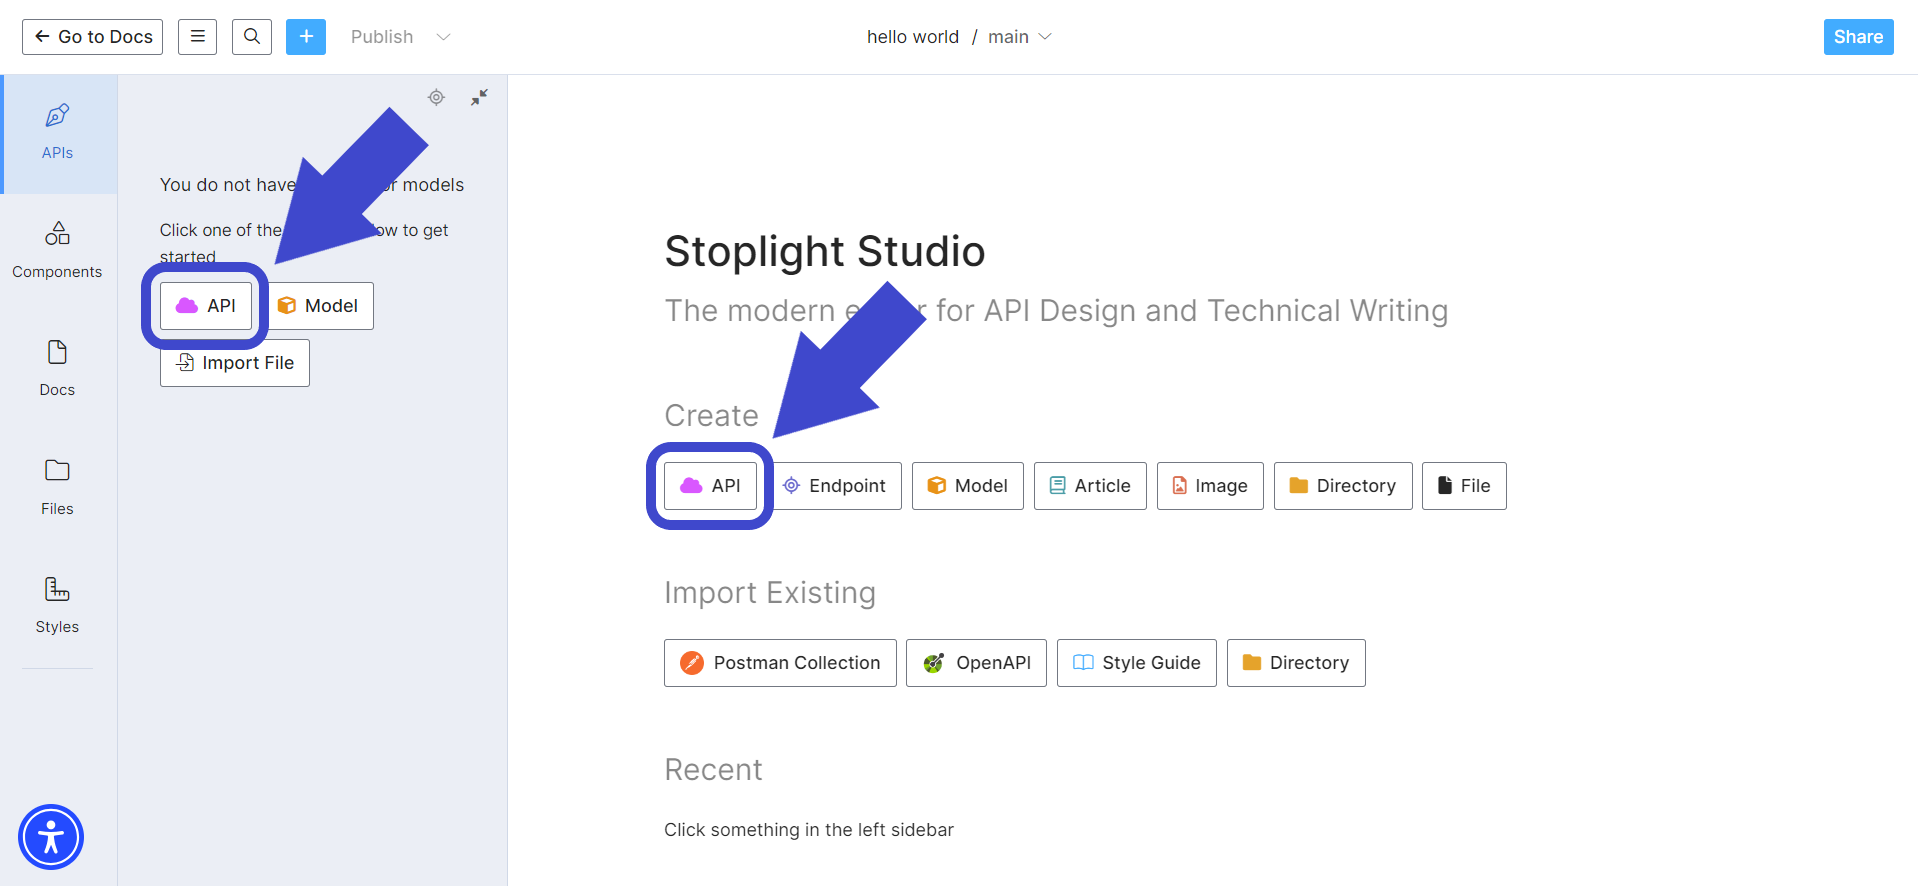
Step 4 - Create API Documentation Inside the API Project
On your screen, select the button API that is under the "Create" section. There should be a pink/purple cloud icon on the said button.
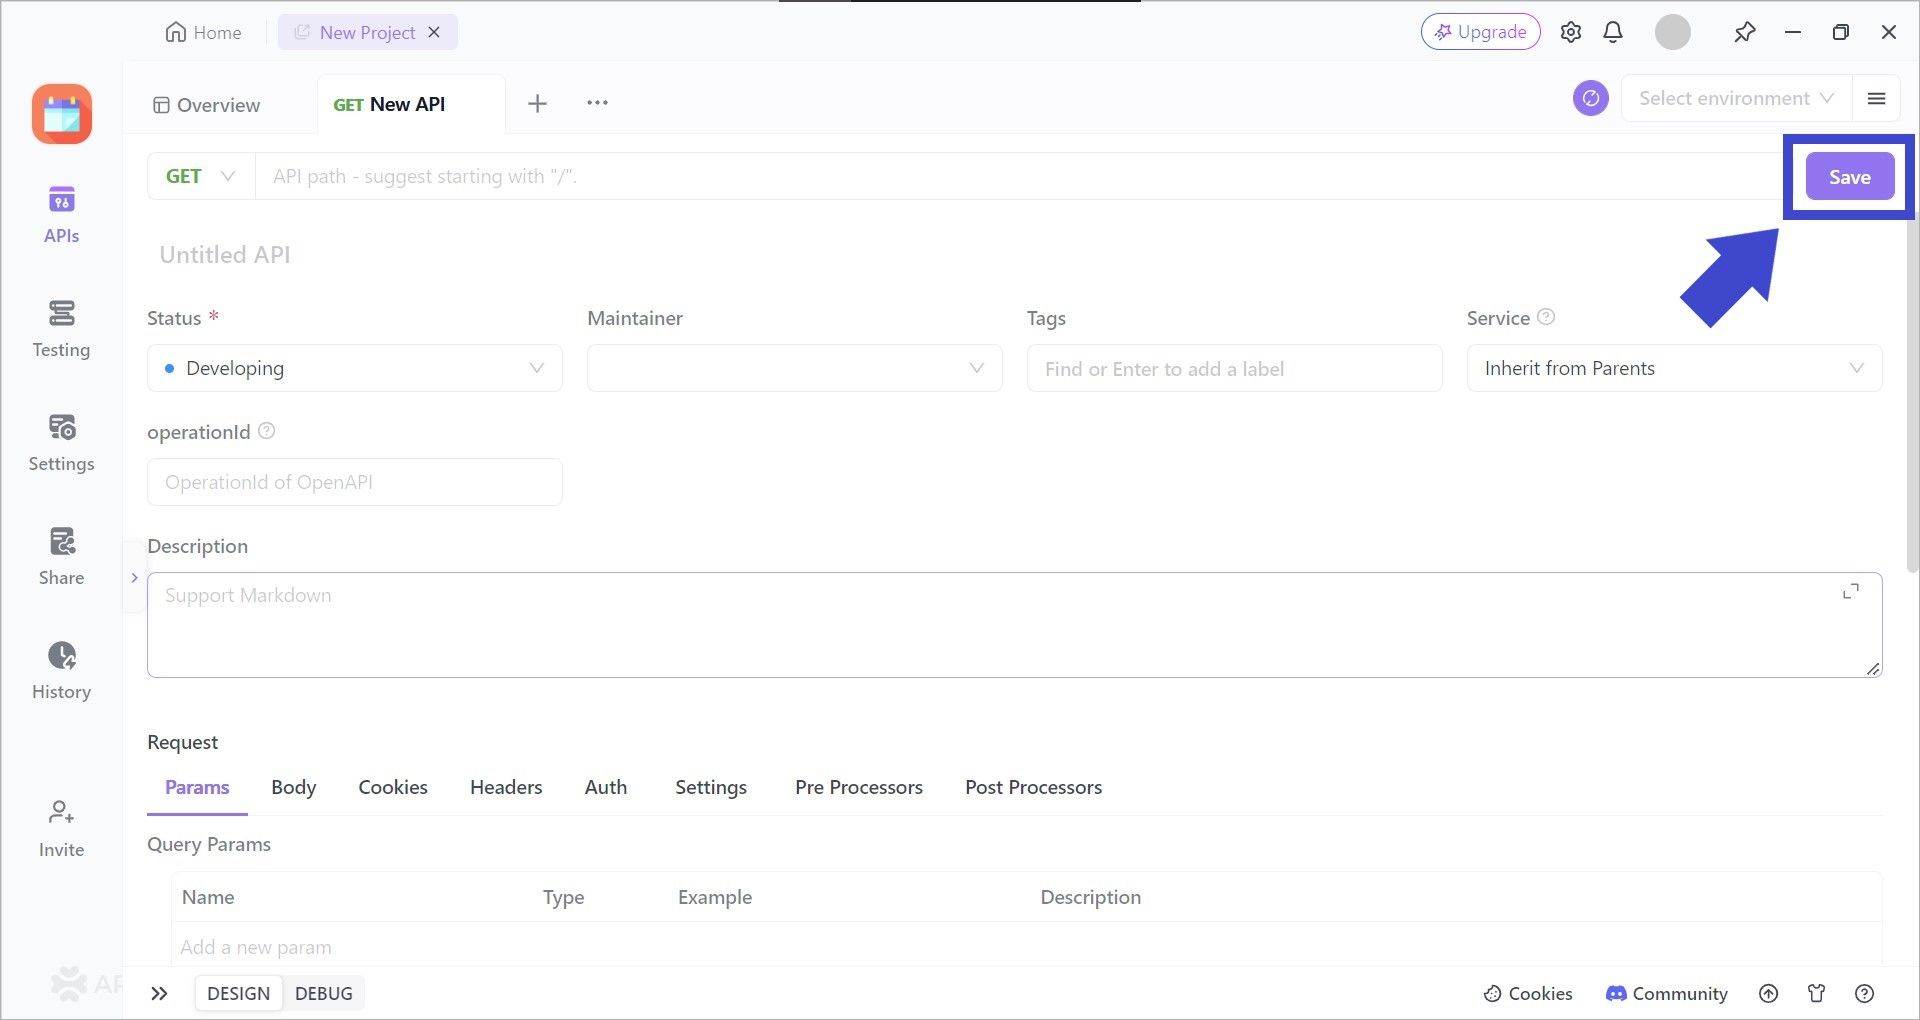
Step 5 - Setup New API Details
You will need to enter your new API details, as shown in the image below.
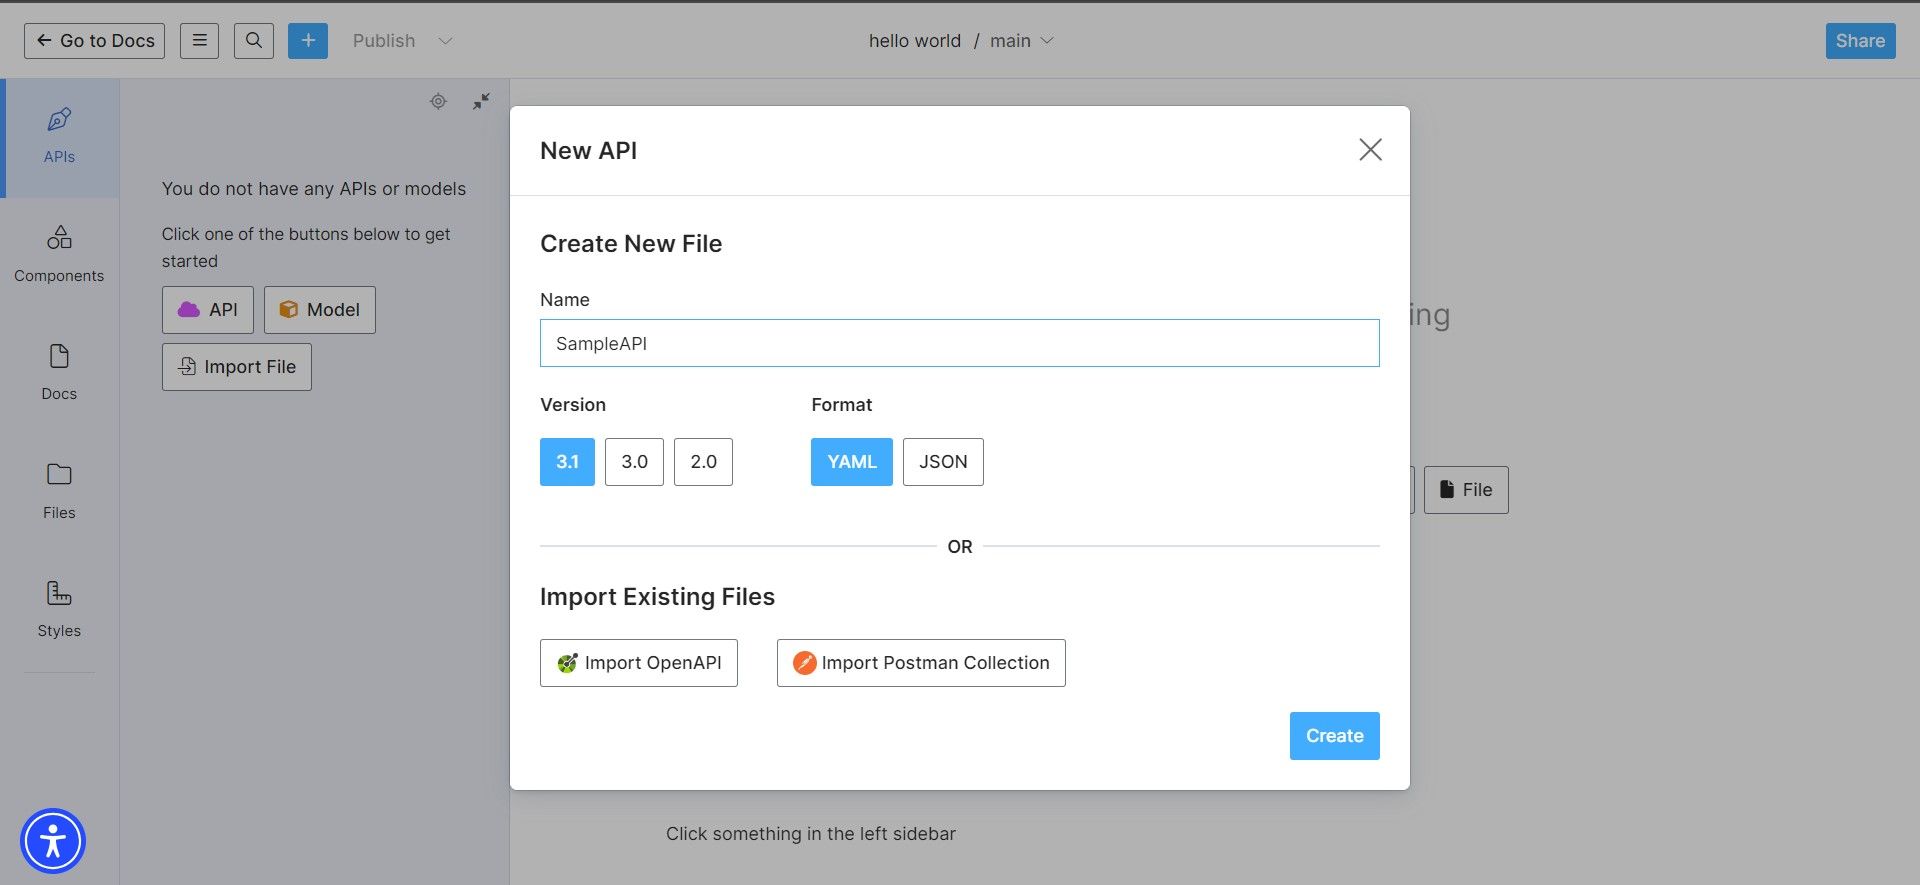
Here, you can decide if you would like to import existing OpenAPI or Postman APIs.
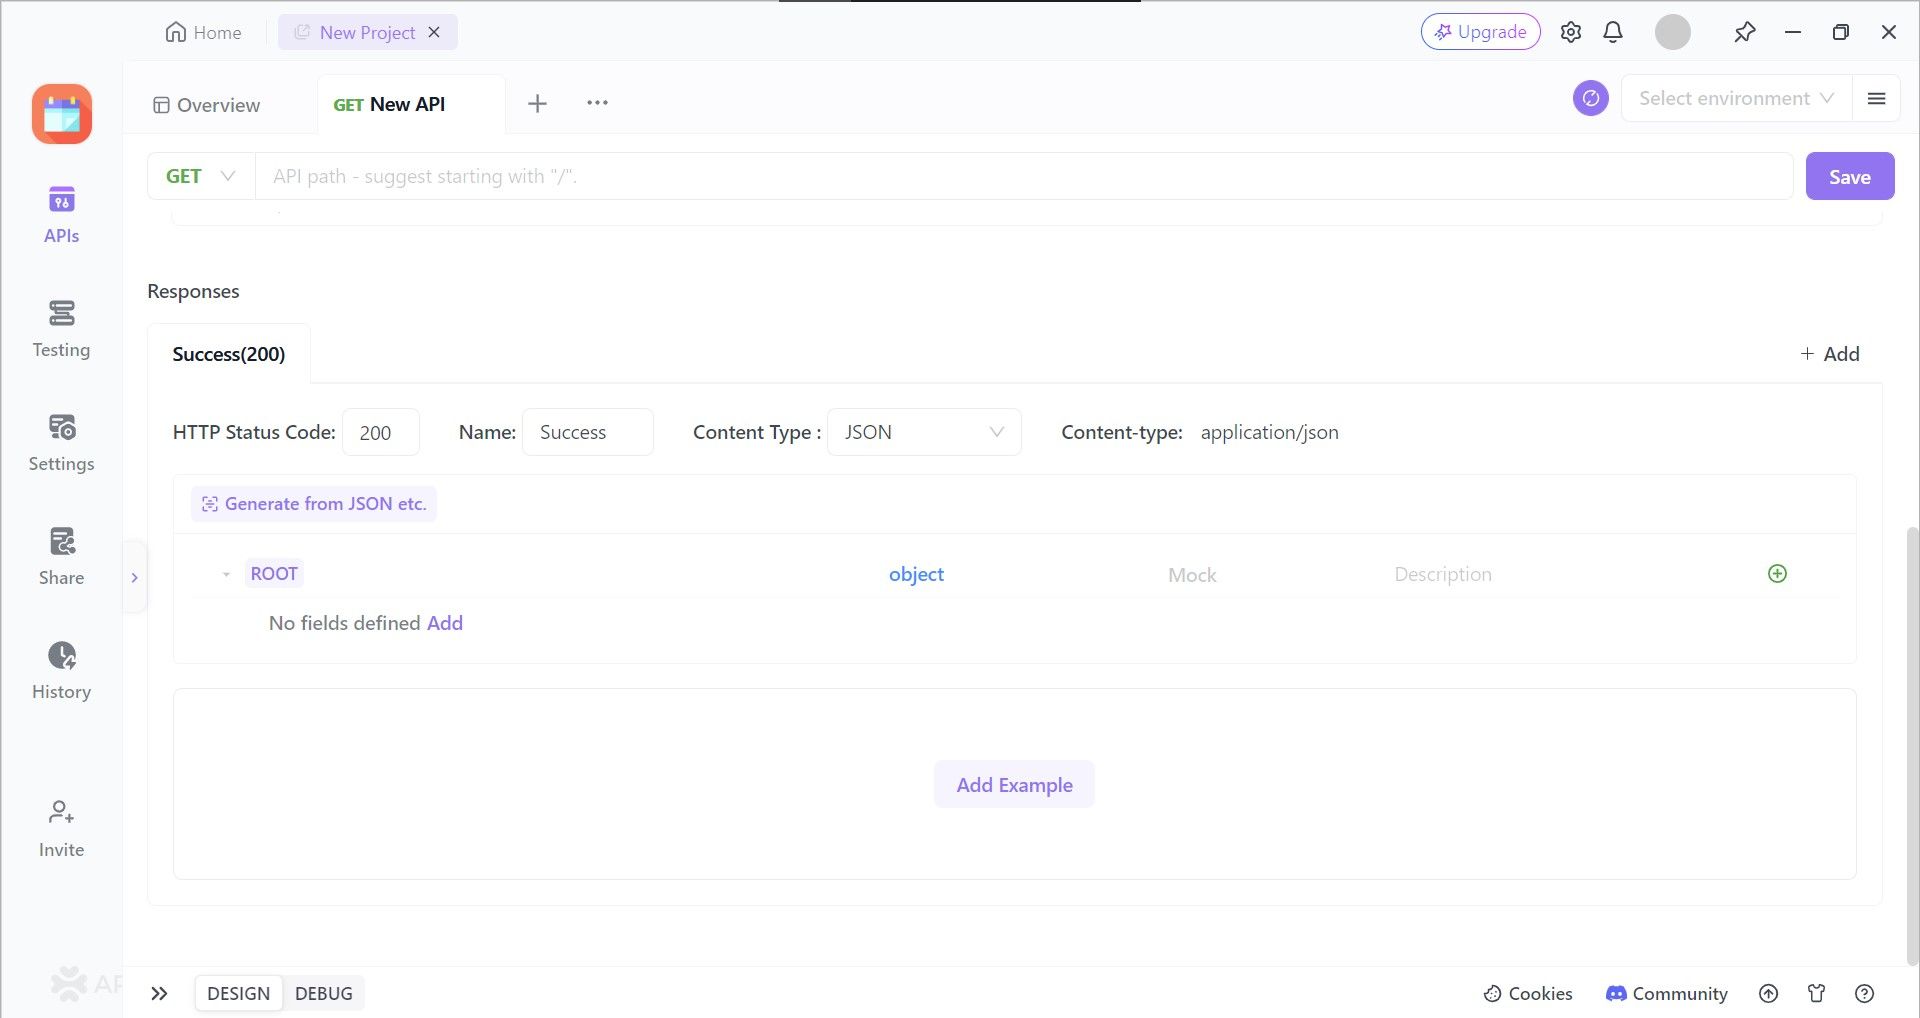
Step 6 - Define API's Endpoint and Details
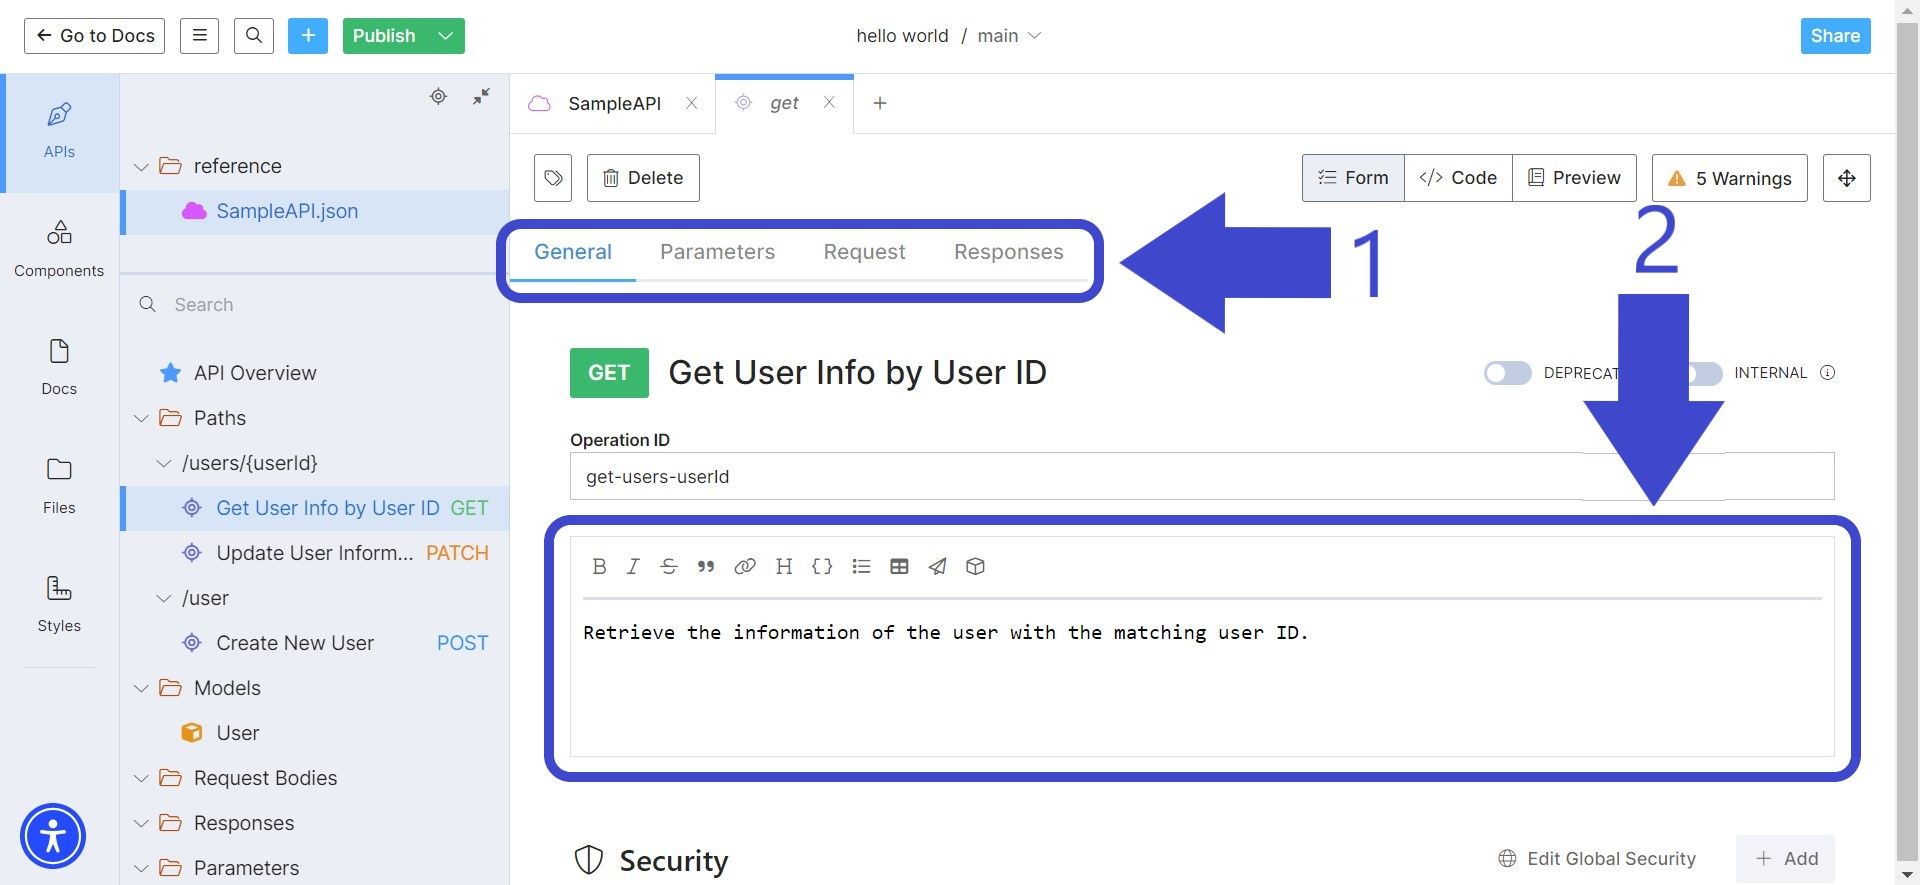
Include as many details regarding the API as you can. This includes the parameters, request, and response details. You can append the details by changing the tabs as pointed out by Arrow 1.
To inform other people reading your documentation what the request is above, make sure to give a clear and concise description of the endpoint, as pointed out by Arrow 2.
Step 7 - Publish Your Stoplight Studio API Documentation
Once you have completed designing your API on Stoplight Studio, hit the + Publish button as pointed out by arrow 1 in the picture below:

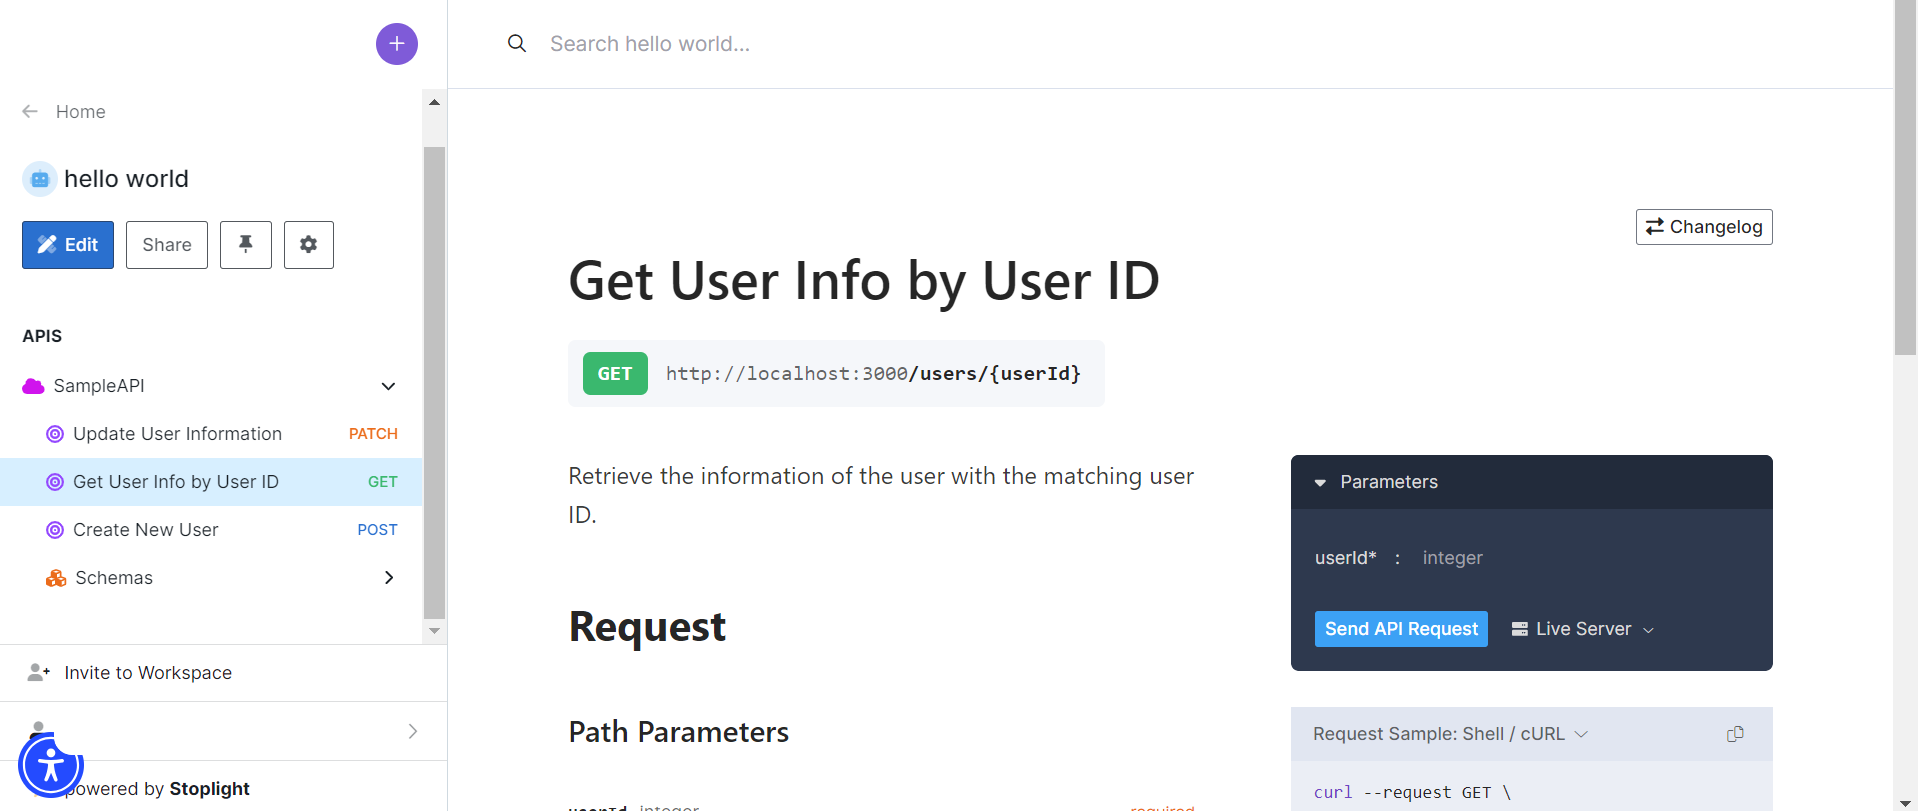
Then, press the <- Go to Docs button as pointed out by arrow 2 to view your generated API documentation. It should lead you to a page that looks something like this:
If this is your first time making API REST API documentation, make sure to read more about it so you can create web service industry-level documentation in no time.
Stoplight Studio Disadvantages
From the step-by-step guide on designing and creating API documentation above, it can be observed that Stoplight Studio has a few drawbacks.
- Lack of Client Language Variety: You may have noticed that Stoplight Studio lacks a variety of client languages. This may be disadvantageous to developers who are using less popular but still relevant programming languages.
- Lack of Testing Functions: Stoplight Studio is an excellent designing and documenting tool for web services, but it does not possess the basic testing functions to debug APIs.
- Cloud / Internet Dependent: The API design and documentation are all stored in the cloud, making it hard to work offline. This also means that a malfunctioning internet connection could result in workflow disturbance.
- Steep Learning Curve: It may look simple to use at first, however, other developers have mentioned that the advanced functions provided by Stoplight Studio may require more time to understand.
As an API tool for a developer to use, Stoplight Studio is an excellent choice if you are more focused on designing and generating good API documentation. However, it must be noted that another tool should be used aside from Stoplight Studio due to the lack of testing functionalities.
Apidog: One-Stop Solution for Complete API Lifecycle Processes
Apidog is an API tool that establishes a simplistic yet elegant UI like Stoplight Studio. Using a GUI, users can easily visualize every process in an API lifecycle - design, document, and test APIs without requiring YAML or JSON coding.
Nonetheless, you can also generate corresponding API documentation that is distributable to anyone using a custom URL made by Apidog (with a higher limit compared to Stoplight Studio).
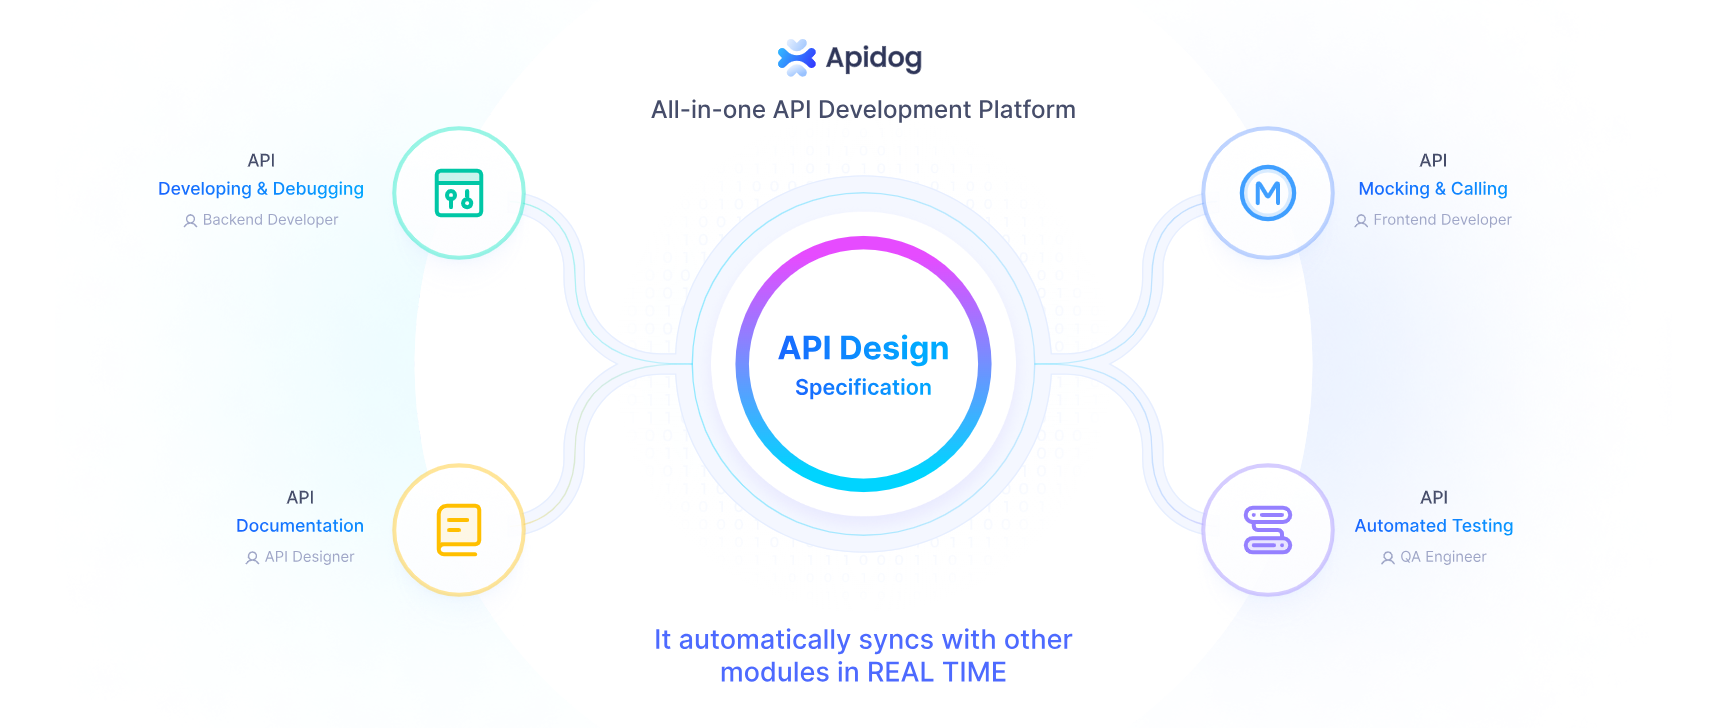
What separates Apidog from Stoplight Studio it's that Apidog has many testing features to offer, ranging from unit testing to scenario testing.
Designing APIs with Apidog
Before every product testing stage, there is a design process. With Apidog. you can design APIs with the OpenAPI specification, and generate corresponding API documentation within just a few clicks.
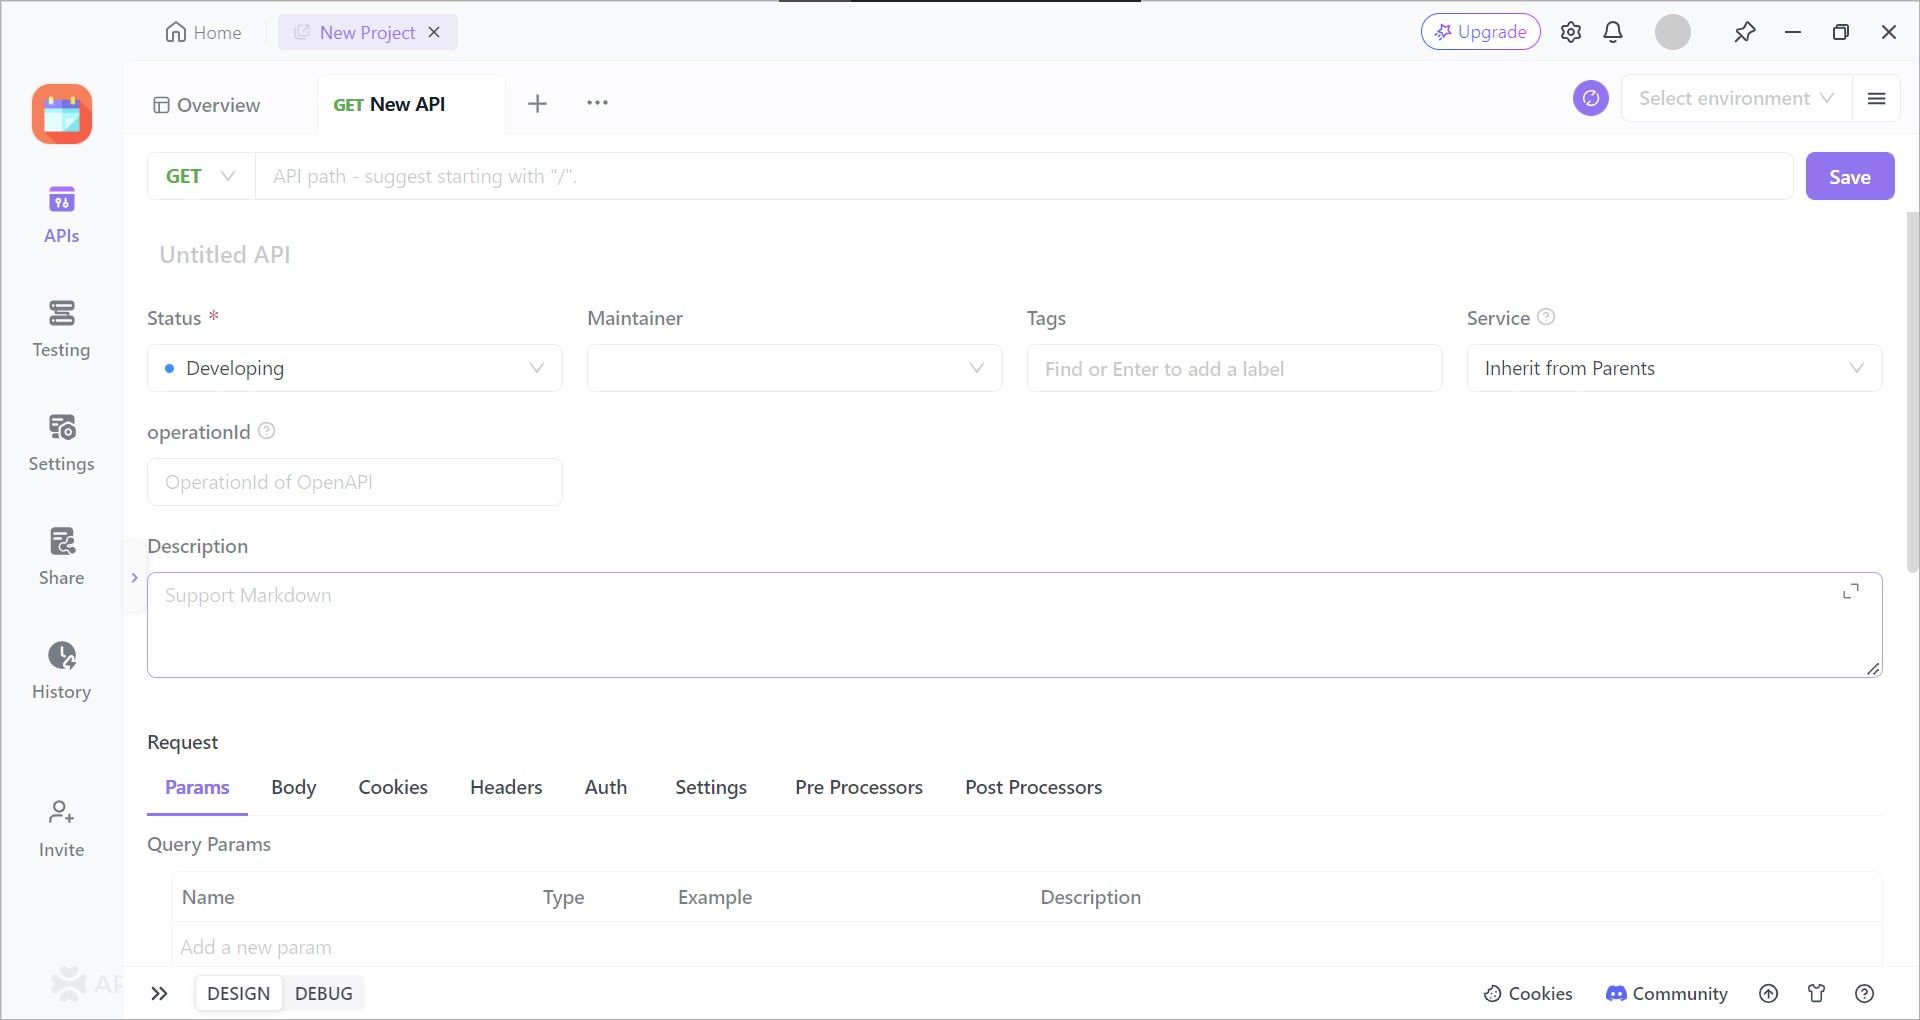
Configuring API Methods and Endpoints
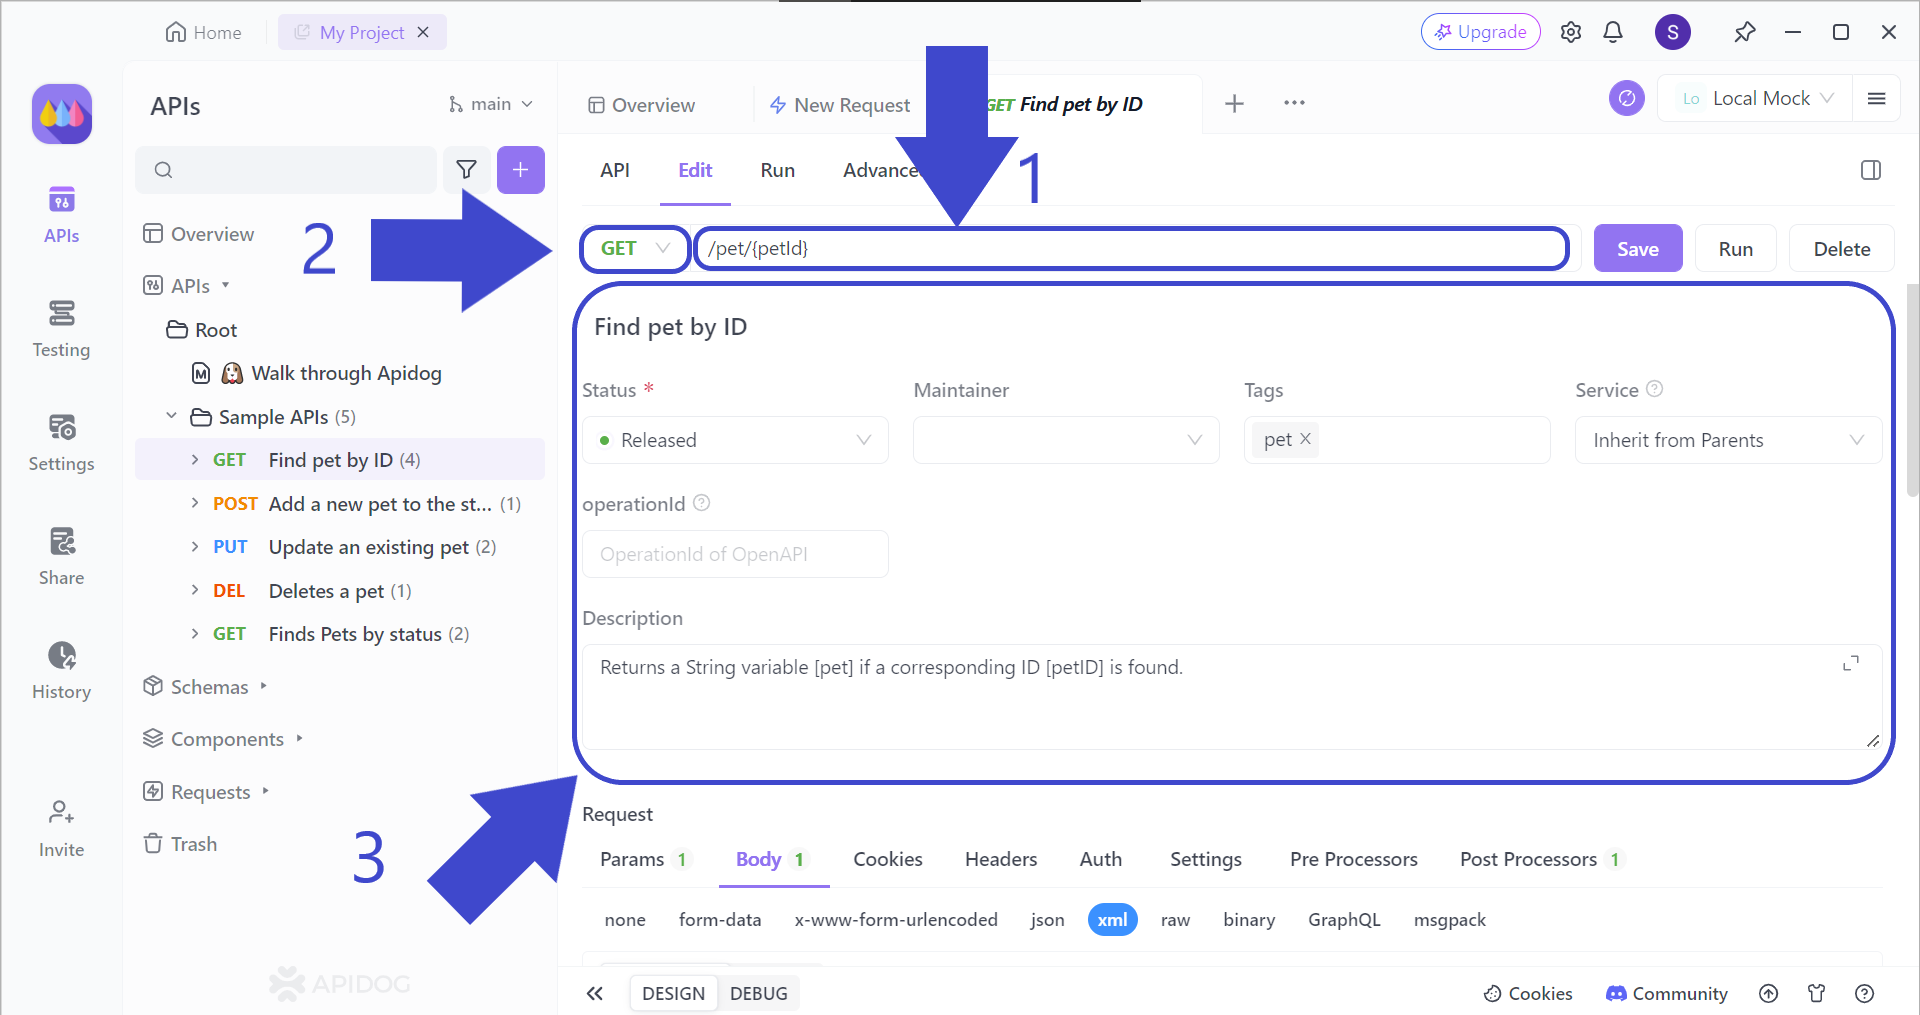
Arrow 1 - Clairfy the correct HTTP URL for your request. Make sure that there are no typos so that you can receive a response!
Arrow 2 - Decide what API method you would like. The most common methods are specifically GET, POST, PUT, and DELETE. Nonetheless, Apidog provides the options to choose OPTIONS, HEAD, and PATCH.
Arrow 3 - Explain the API details thoroughly by including the request parameters, response parameters, and example responses below. It is strongly recommended to have everything filled as every variable will be included in the API documentation.
Designing API Request Testing with Apidog
Before distributing your API for the public to utilize, you have to ensure that the API is bug-free. It is vital for testing each request you have involved in your web services, so follow these steps to start!
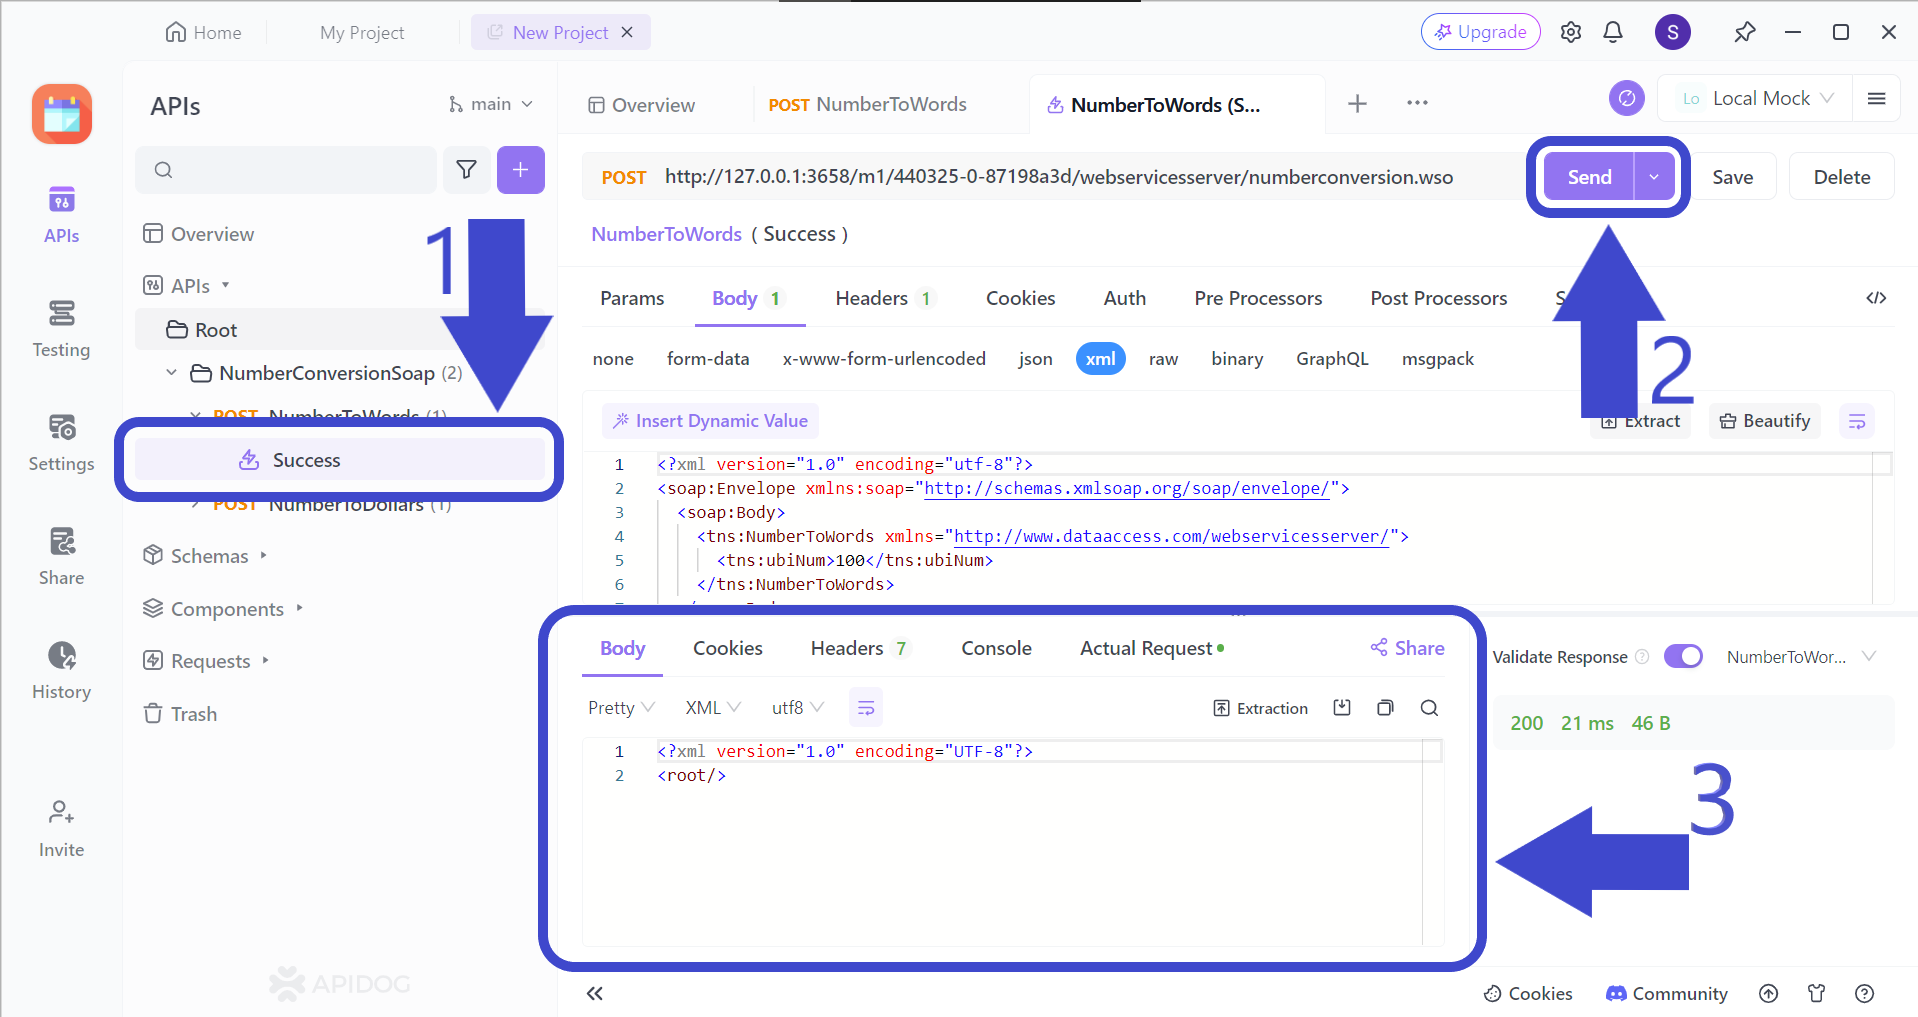
Arrow 1 - Select the request you would like to test.
Arrow 2- Send the request to receive a response. Before pressing the Send button, make sure that the method type and URL are correct.
Arrow 3 - Analyze the response to see if it satisfies your requirements or expectations for the web service.
Creating Test Scenarios for APIs with Apidog
Test scenarios are a series of steps that you can design for your web service to simulate in a practical situation. Here is a step-by-step guide on how to start one.
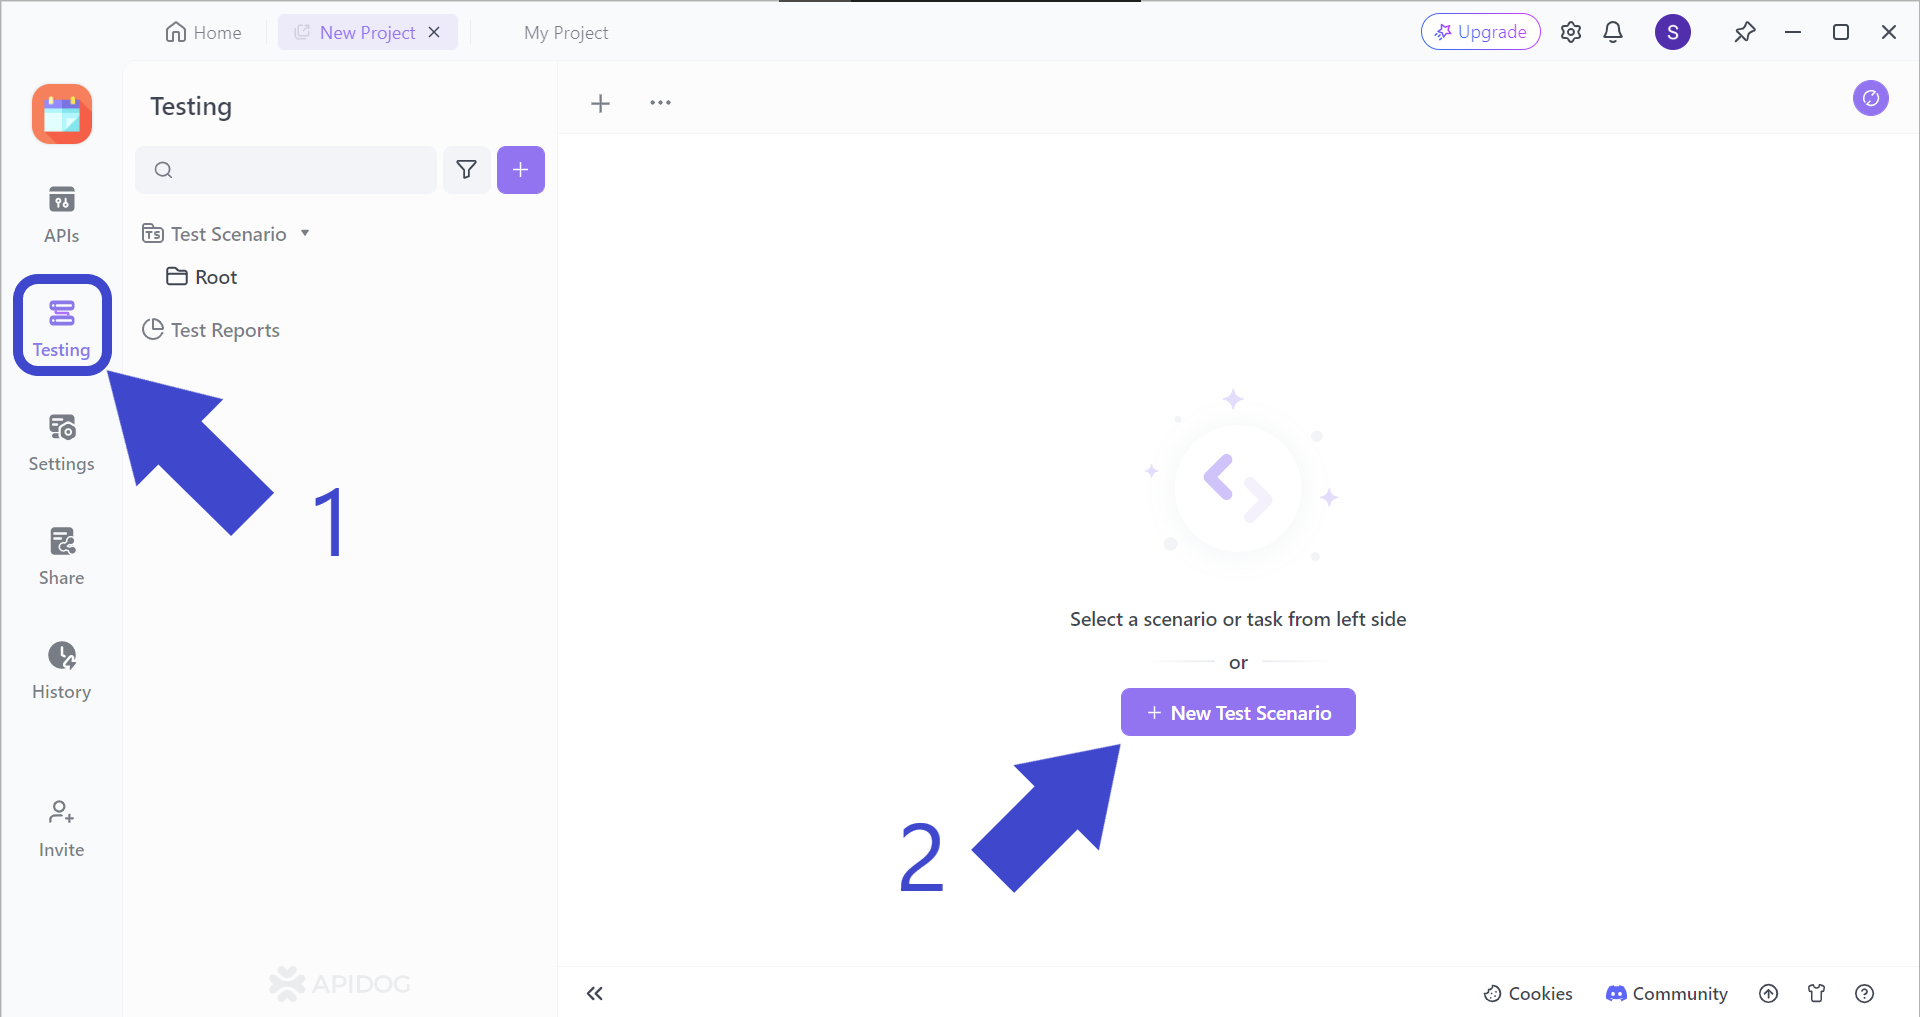
Arrow 1 - Locate the "Testing" button.
Arrow 2 - Press the + New Test Scenario button.
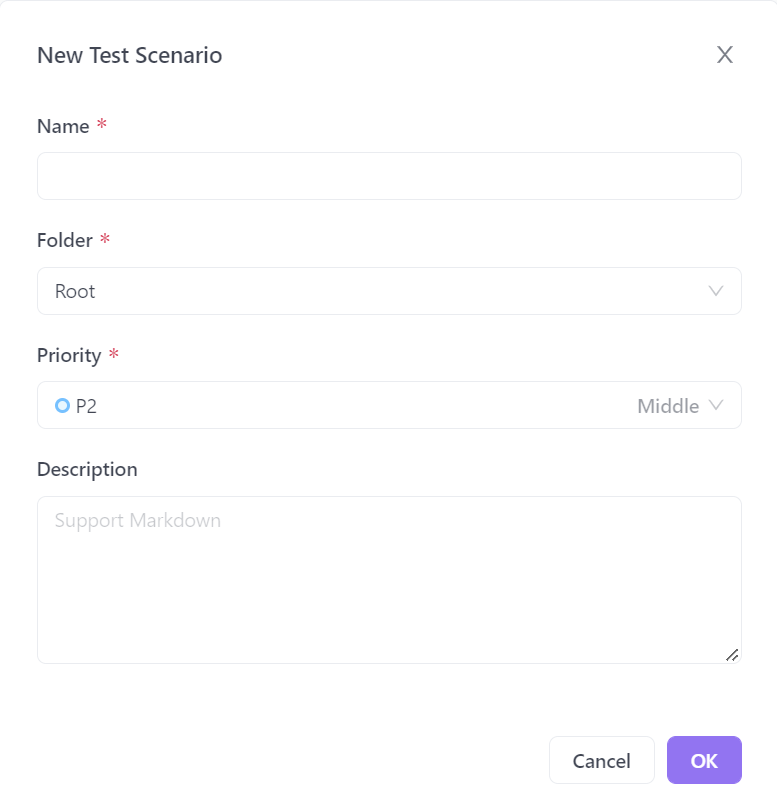
You should then be prompted with this pop-up window, asking you to input a few details about your new test scenario. Once you have filled it out, you can hit the "OK" button on the bottom right corner, or just "Enter" on your keyboard.
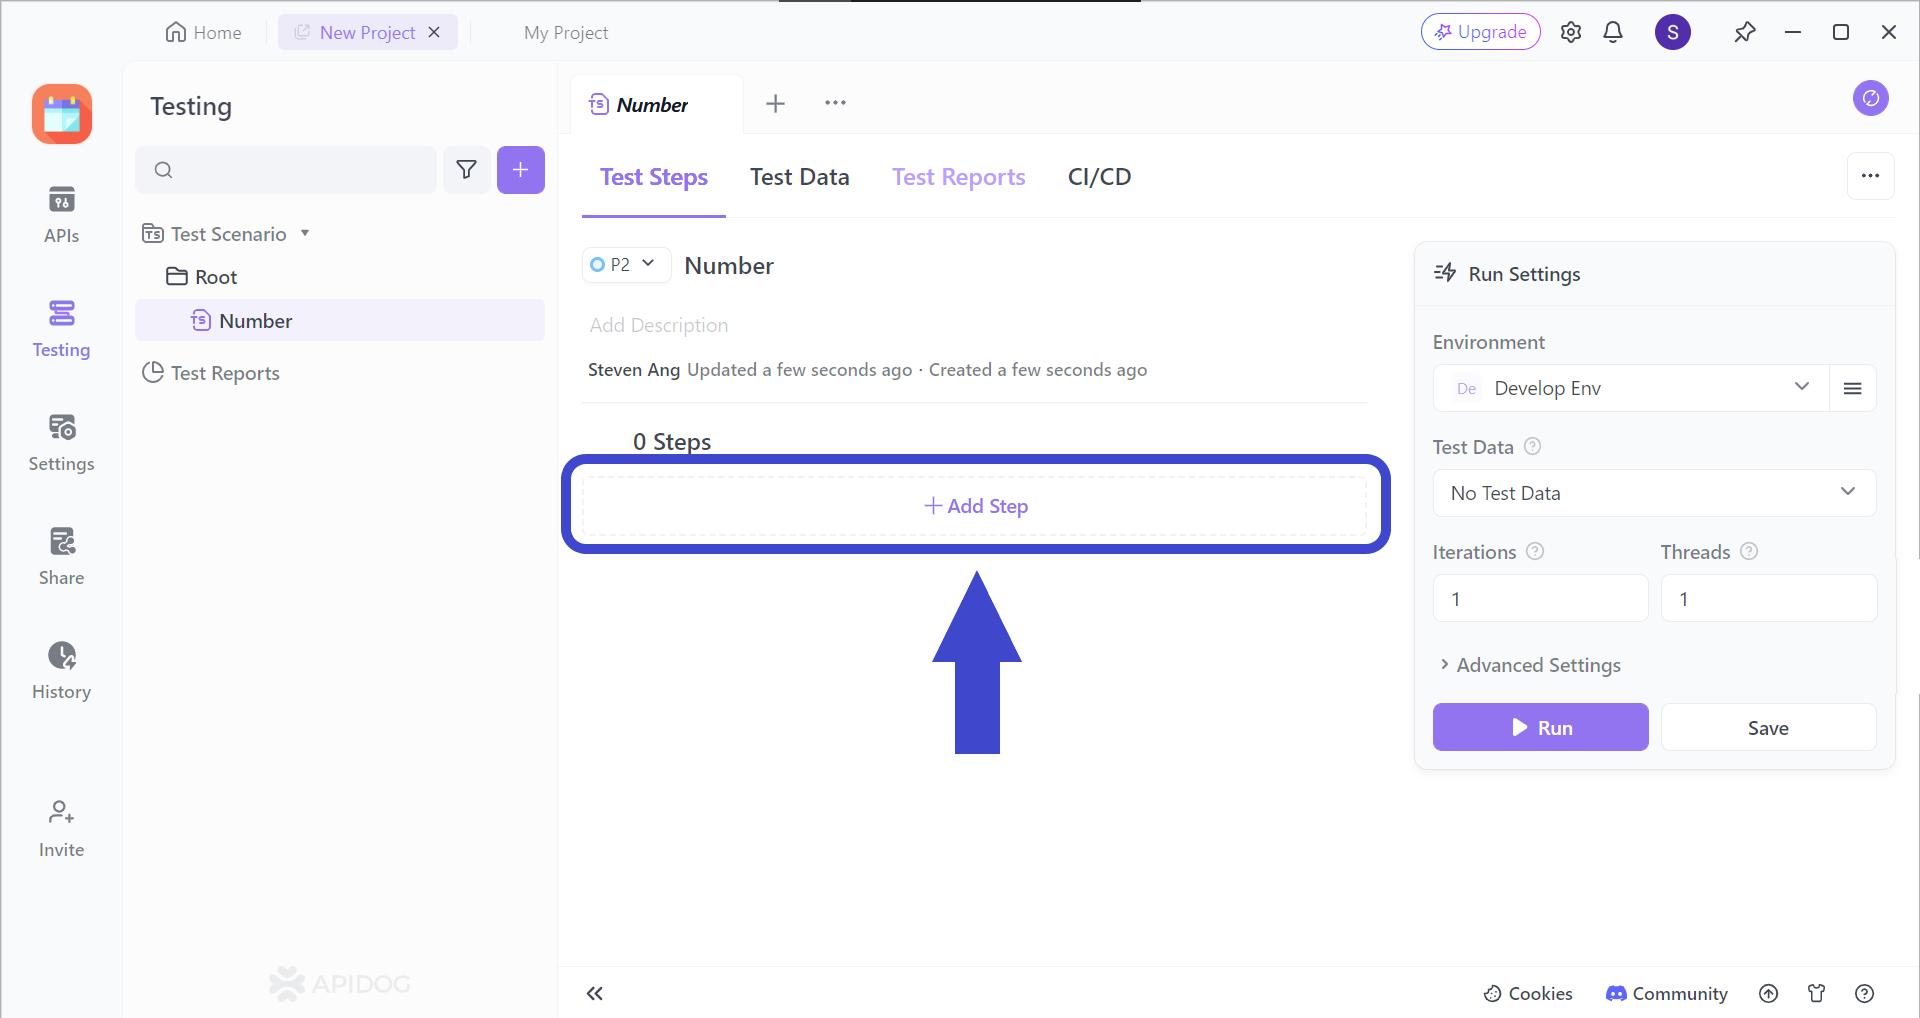
Add a step (or many more steps) to your test scenarios by clicking on the "Add Step" section. You should be able to see the image below.
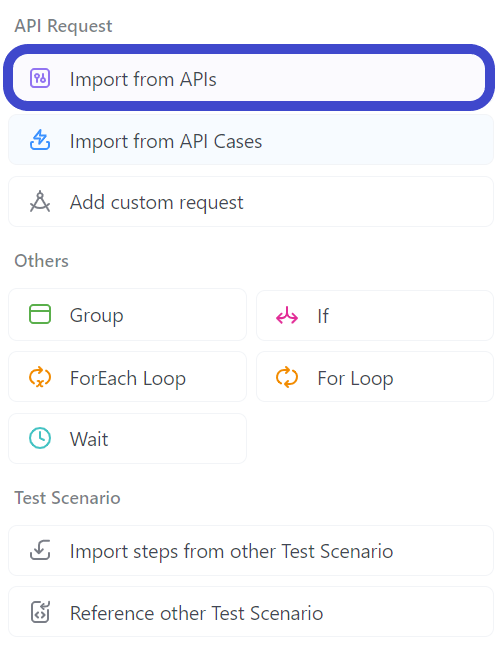
Select "Import from API" from the drop-down menu.

Select all the APIs you would like to include in your test scenario. In the example above, the API called NumberConversionSOAP has been included.
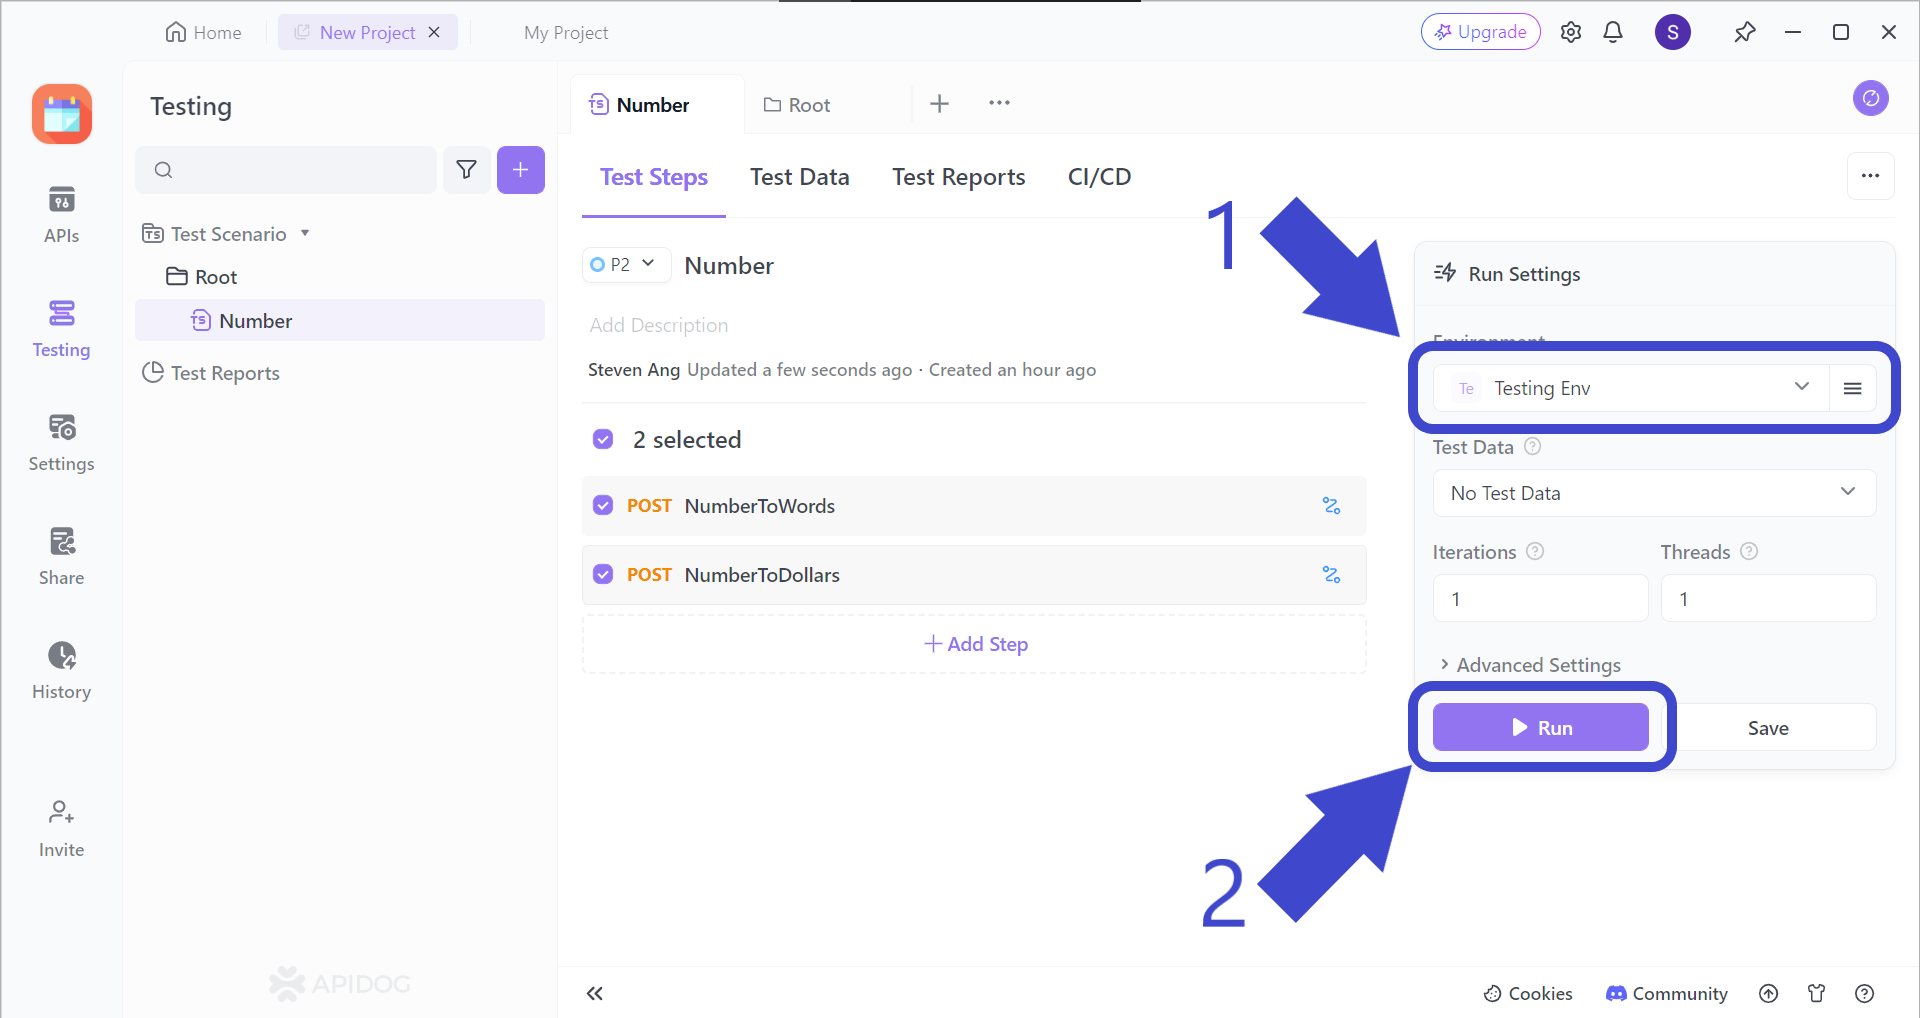
Arrow 1 - Change the test scenario to "Testing Env".
Arrow 2 - Press Run when every detail has been finalized.
Making API Documentation with Apidog
If you are interested in learning how to make API documentation using Apidog, ensure that you download our software first, just hit the button and it will redirect you!
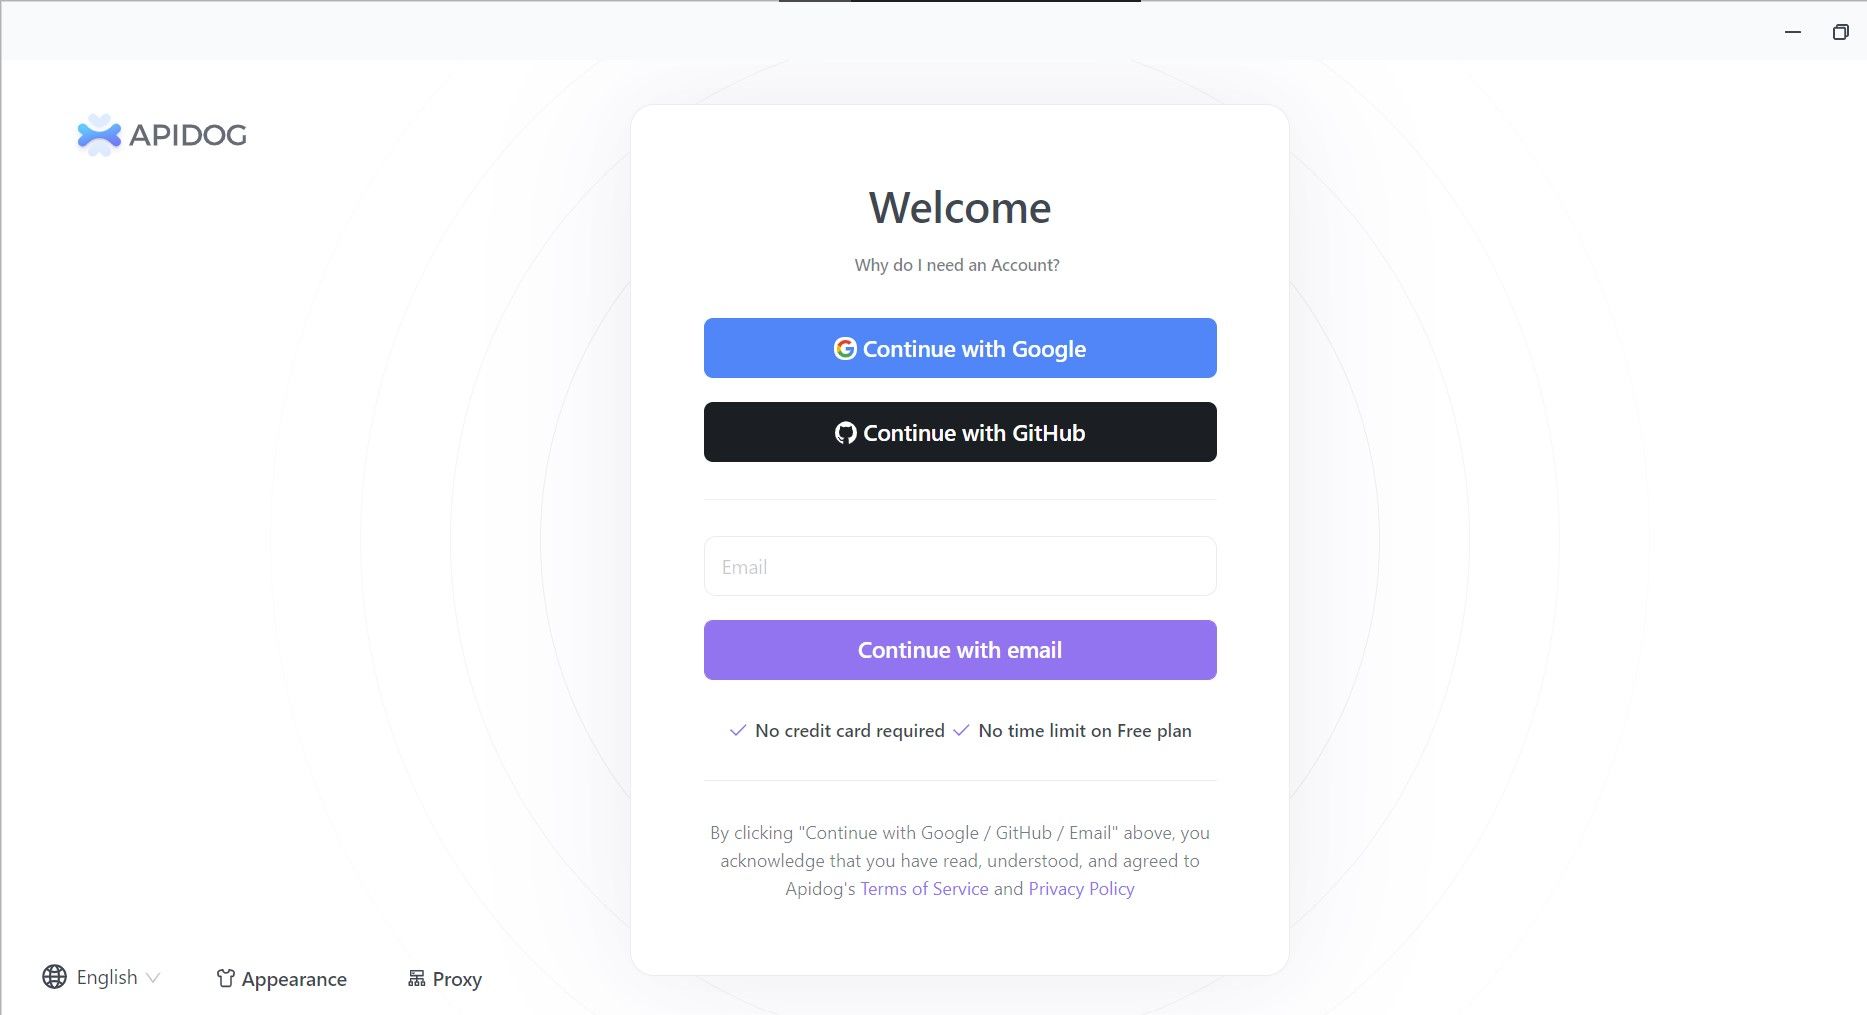
Sign up using an account you prefer to start using Apidog. You can use a Gmail or any other email account to sign up, or if you'd prefer to use your GitHub account, by all means, please do.
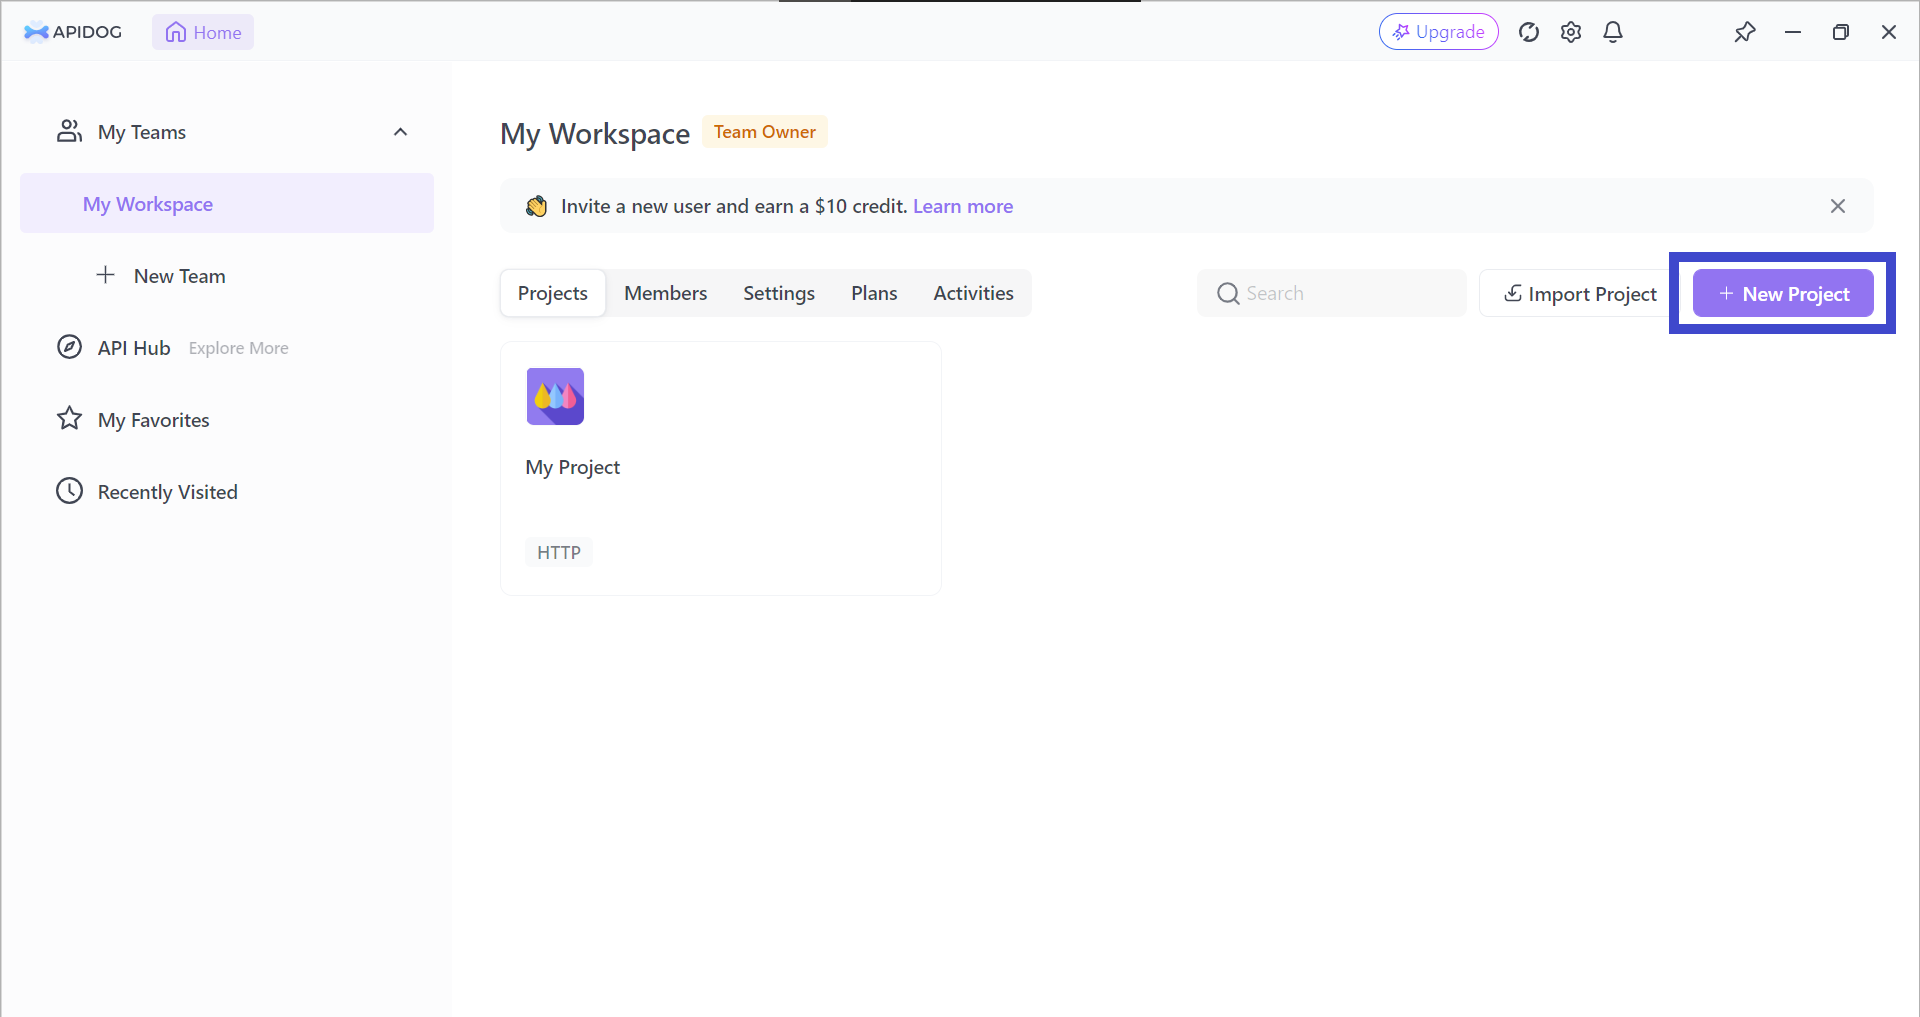
Once you enter, you should be greeted with the default "My Workspace" screen, where you can see a sample project made. In order to start making your own API and corresponding API documentation, click on "New Project", found in the upper left corner of the Apidog window.
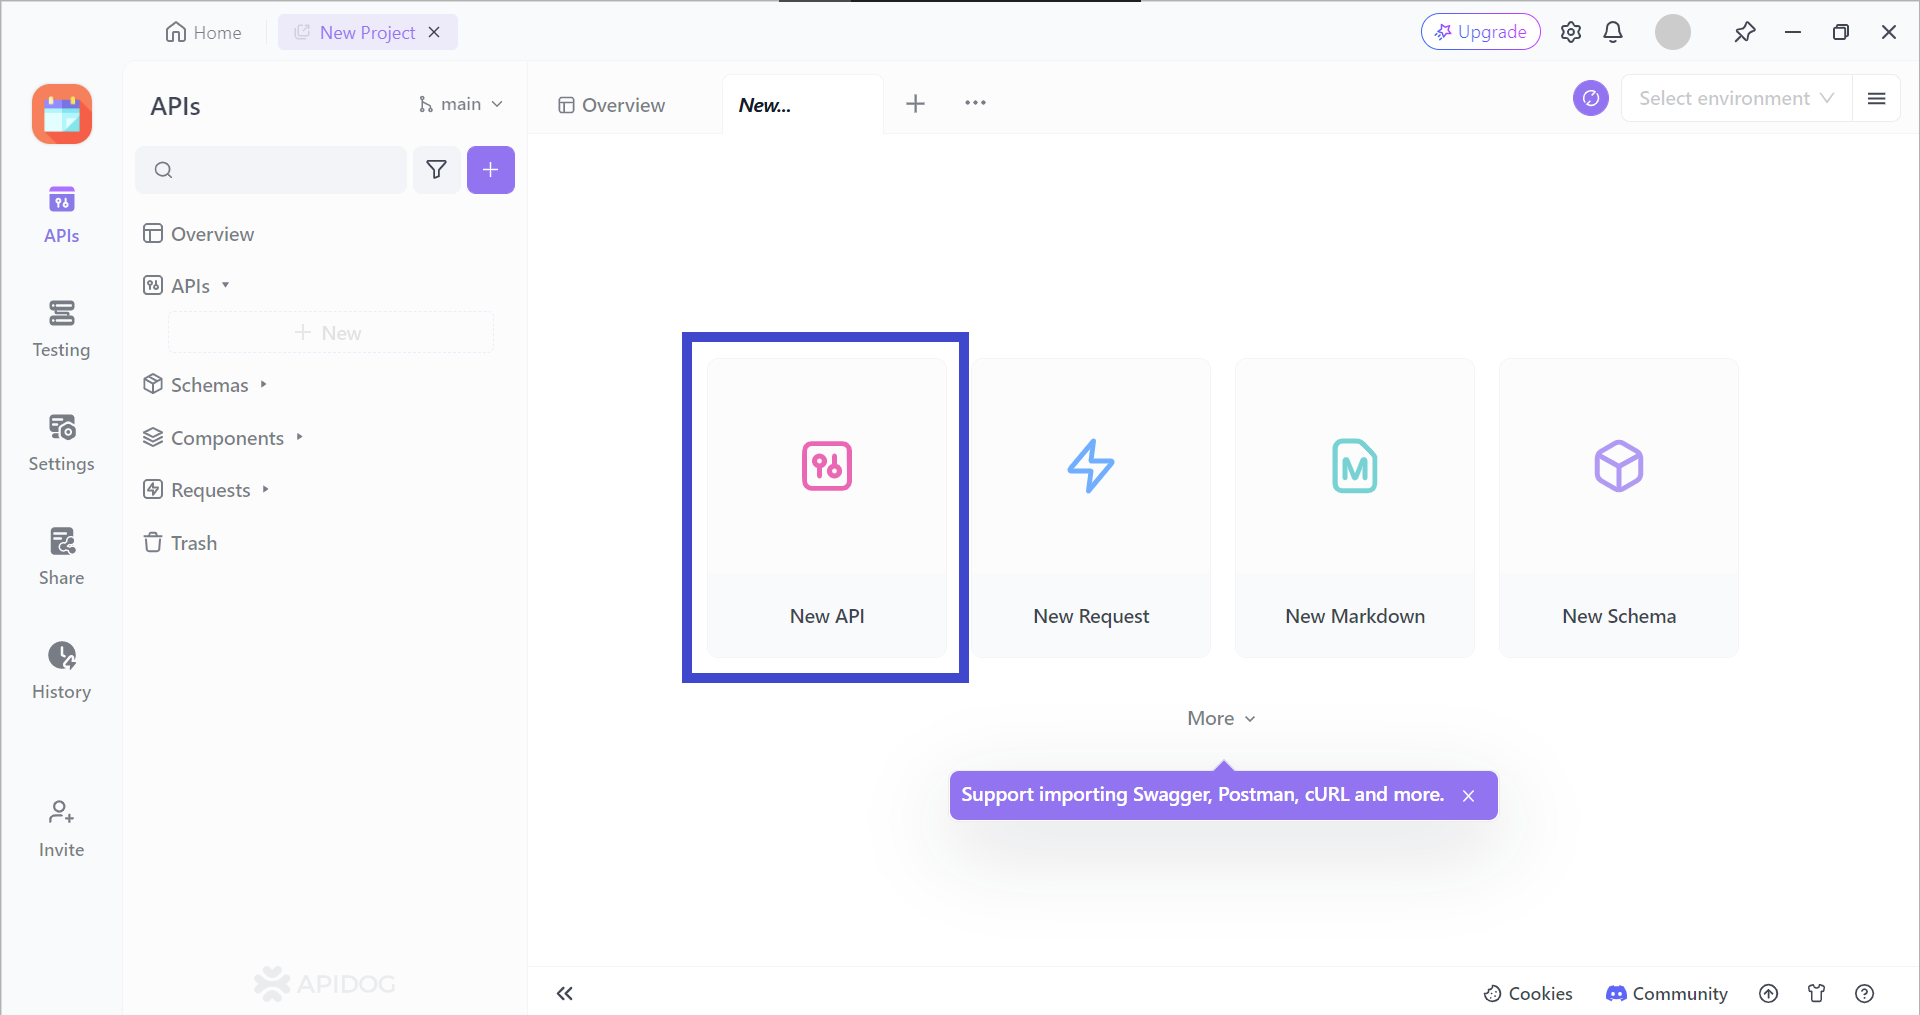
As it is a brand new project, start by choosing "New API". Fields are waiting for your input, so get started with creating your very first API with Apidog! (Of course, it is encouraged to provide information on all the fields that Apidog has. It will look cohesive and elegant at the end.)
Ensure that you have saved all your progress in developing the API.
Now that your progress has been saved, we shall move on to publishing your API documentation.
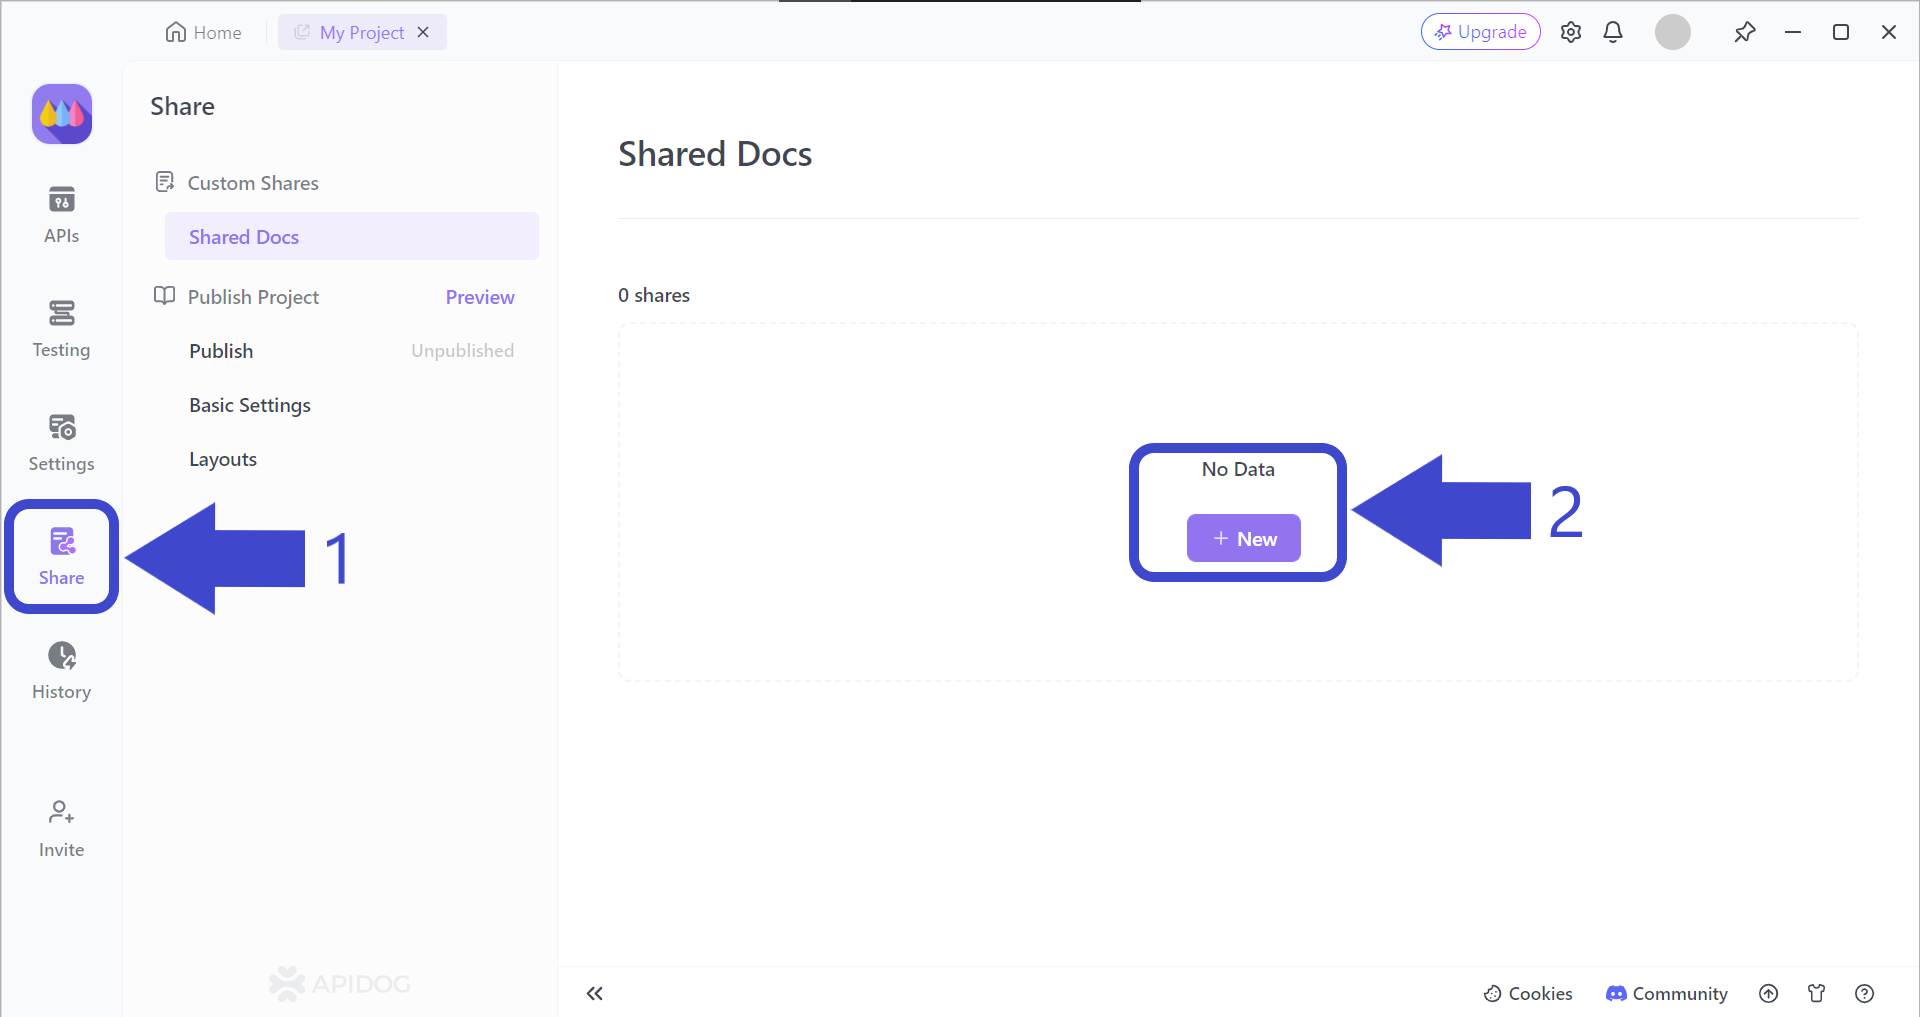
Arrow 1 - Begin by locating and pressing the "Share" button, found on the vertical bar on the left side of the Apidog app window. You should then be able to see the "Shared Docs" page, which should be empty.
Arrow 2 - Press the "+ New" button under "No Data" to begin creating your very first Apidog REST API documentation.
Select and Include Important API Documentation Properties
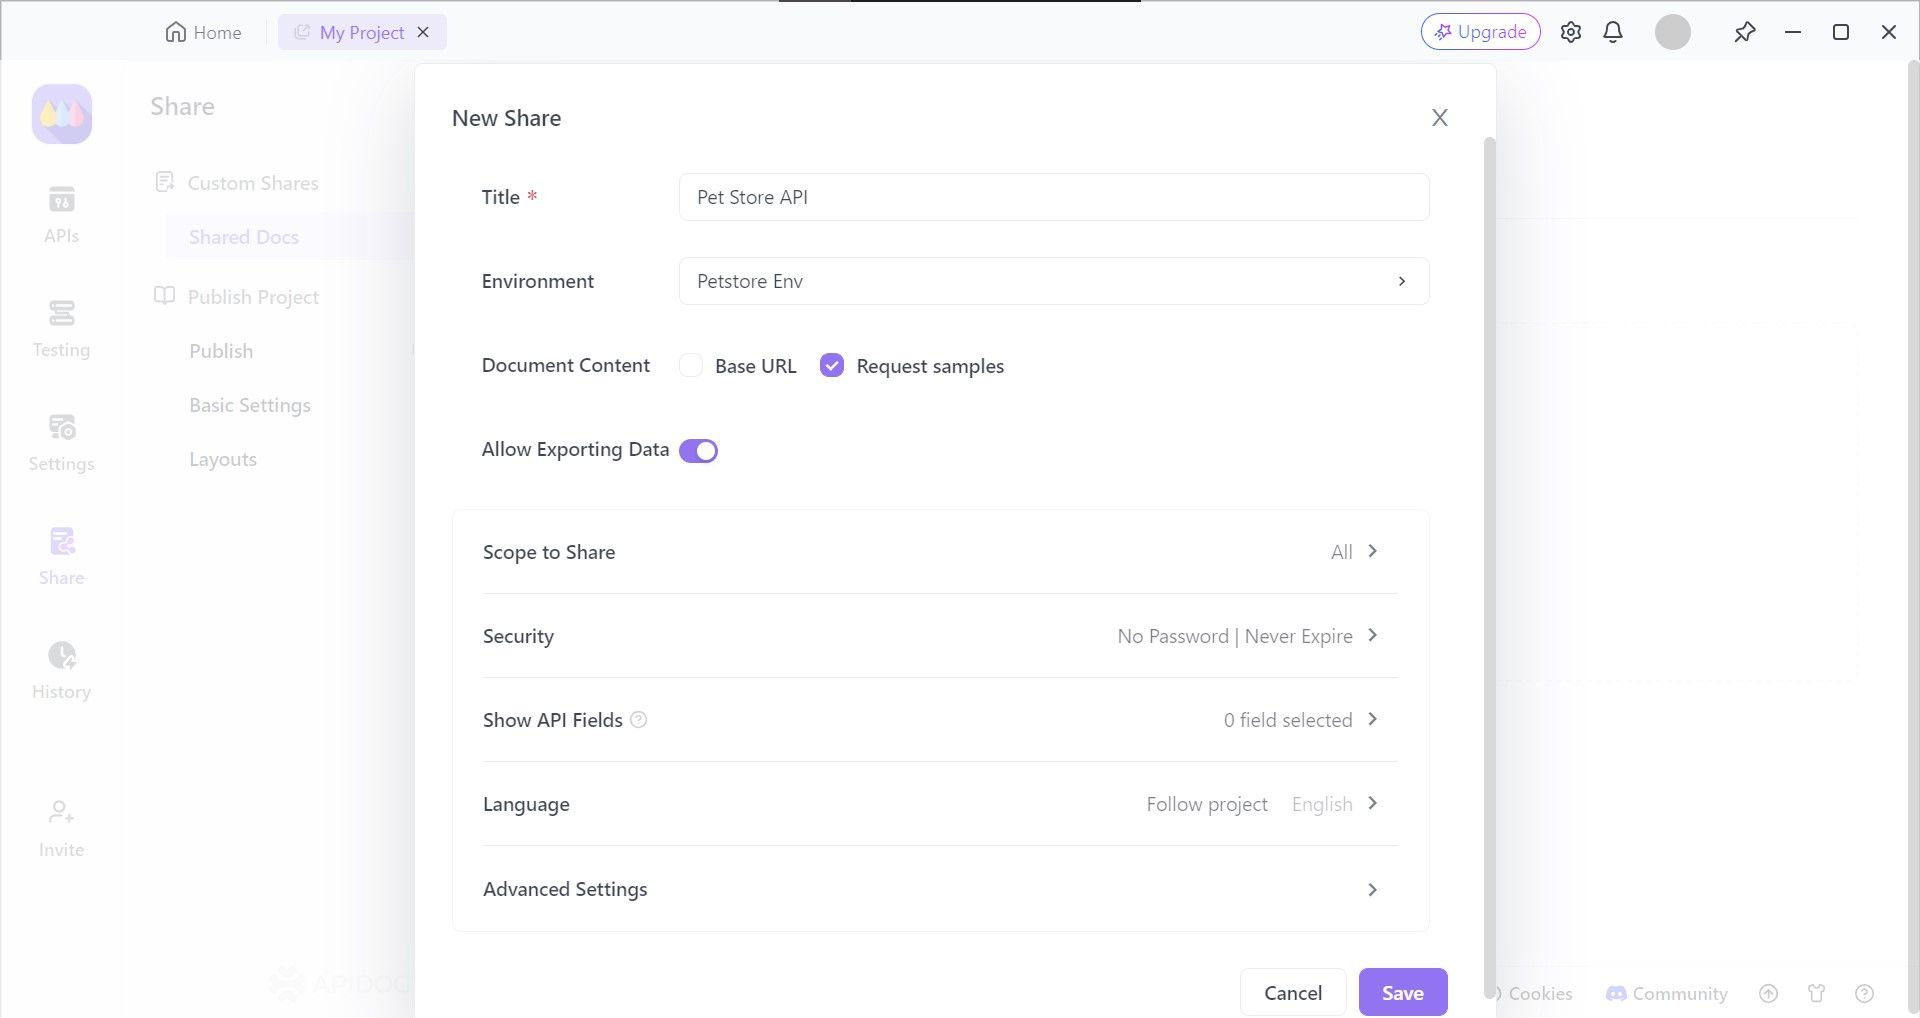
Ensure that you have selected or filled in all the fields according to your requirements. Once you have checked, you can press the "Enter" button on your Keyboard, or the "Save" button found at the bottom of the current screen.
View or Share Your REST API Documentation
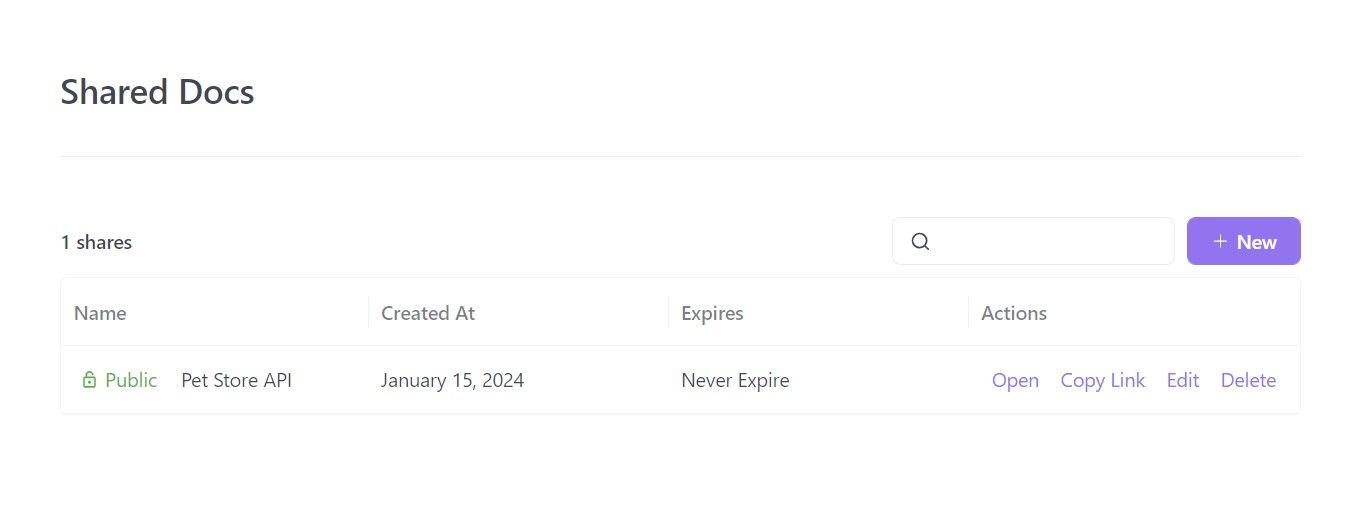
Your API documentation is ready for sharing. You can now decide what to do with the API documentation, as seen with the operations you can do under the "Actions" section.
To explore more, you can check out the comprehensive guide on how to generate API documentation using Apidog.
Conclusion
Stoplight Studio is recognized to be one of the best API tools in the web service industry. If you are planning to create REST API Documentation with Stoplight Studio, then you are in good hands.
However, if you wish to take a step further and ensure your REST API runs smoothly, it is strongly recommended that you to find an API tool that provides testing functions as well
Apidog is an all-in-one API documentation tool that covers Stoplight Studio's lack of testing features. Having an intuitive GUI and complete API lifecycle support which includes API testing and mock servers, Apidog can allow developers to interactively design APIs and automatically generate beautiful API documentation. If you wish to create and share with certain people, all you have to do is share the URL associated with the API documentation.


