
Struggling with repetitive browser tasks or inefficient web scraping workflows?
Discover how Puppeteer MCP blends advanced browser automation with AI-driven intelligence—empowering developers, QA teams, and API engineers to automate complex web interactions with ease.
By integrating Puppeteer’s headless browser capabilities with the Model Context Protocol (MCP), you unlock:
- AI-powered navigation: Direct LLMs to interact with websites, fill forms, and extract data
- Smart screenshot capture: Automate visual documentation with contextual understanding
- Dynamic JavaScript execution: Run and analyze scripts via natural language prompts
This comprehensive guide covers:
- Step-by-step Puppeteer MCP setup
- Real-world automation scenarios
- Optimization tips for maximum efficiency
Ready to automate smarter? Start leveraging AI for browser automation, web testing, and data extraction—without the manual overhead.
💡 Accelerate your MCP and API development workflows—download Apidog for free and see the benefits for yourself!
What is Puppeteer MCP? A Modern Browser Automation Platform
Puppeteer MCP is a Model Context Protocol (MCP) server that utilizes Puppeteer (or Playwright for Python environments) to deliver best-in-class browser automation. Its unique value lies in providing a bridge between large language models (LLMs) and real browser environments, enabling seamless:
- Automated navigation and data extraction
- Form filling and submission
- Screenshot capture and visual diffing
- JavaScript execution and DOM manipulation
Whether you’re automating web testing, scraping dynamic content, or documenting UI changes, Puppeteer MCP offers a robust and extensible foundation.

Core Features of Puppeteer MCP for Developers
Advanced Browser Automation with AI Integration
Puppeteer MCP elevates browser automation by enabling LLMs to understand and control web pages:
- Natural language commands: E.g., “Go to GitHub, search for AI repos, and open the top 3 results”
- Dynamic form automation: Detect and fill complex forms with shifting fields
- Chained workflows: Automate multi-step processes like login → extract data → generate reports
Tip: Use reasoning capabilities in LLMs (like Claude) to intelligently handle pop-ups, CAPTCHAs, and consent dialogs.
Intelligent Screenshot Capture & Visual Insights
Go beyond basic screenshots with context-aware visual automation:
- Targeted captures: “Take screenshot of pricing table, even if loaded via scroll”
- Visual diffing: Compare UI states between deployments
- OCR support: Extract text from screenshots for validation or further use
Example: Automate accessibility compliance checks by capturing and comparing UI states.
Dynamic JavaScript Execution & Monitoring
Take control with real-time scripting and analysis:
- LLM-generated scripts: “Extract all product SKUs from this page”
- DOM manipulation: Modify elements on the fly without manual code
- Performance metrics: Track Lighthouse scores or resource usage during automation
Security Note: Always use sandboxing options in production (
--disable-setuid-sandbox).
Console Log Monitoring & Automated Debugging
Streamline troubleshooting and reporting:
- AI-driven log analysis: Instantly find errors like 404s across sessions
- Pattern detection: Spot memory leaks or unusual behaviors over time
- Automated reports: Summarize issues directly from console output
Flexible Browser Configuration for Your Workflow
Customize Puppeteer MCP’s behavior through environment variables:
export PUPPETEER_HEADLESS=false  # Run browser in visible mode
export PUPPETEER_SLOWMO=250      # Enable slow-motion (great for demos)
export PUPPETEER_TIMEOUT=60000   # Set extended timeouts
💡 Want to add more MCP servers to tools like Claude, Cursor, or Windsurf? Explore HiMCP for 1682+ compatible servers and clients—supercharge your AI coding workflow with [HiMCP.ai](HiMCP.ai - Discover 1682+ MCP Servers).
Quickstart: Setting Up Puppeteer MCP
1. Install Puppeteer MCP Server
Choose the method that best fits your environment:
- Global npm install (for persistent use):
npm install -g puppeteer-mcp-server - Run directly with npx (for quick testing):
npx puppeteer-mcp-server - Install from source (for custom development):
- Clone the repo:
git clone https://github.com/merajmehrabi/puppeteer-mcp-server.git - Navigate to the folder:
cd puppeteer-mcp-server - Install dependencies:
npm install - Build the project:
npm run build - Start the server:
npm start
- Clone the repo:
[ ]
]
Comparing Installation Methods
| Method | Pros | Best for |
|---|---|---|
| Global npm | Persistent, easy access | Production & CI/CD |
| npx | No install, always latest | Quick demos/testing |
| Source | Full customization | Advanced development |
2. Integrate Puppeteer MCP with Claude Desktop
Locate the configuration file:
- macOS:
~/Library/Application Support/Claude/claude_desktop_config.json - Windows:
%APPDATA%\Claude\claude_desktop_config.json
Add Puppeteer MCP server:
{
  "mcpServers": {
    "puppeteer": {
      "command": "puppeteer-mcp-server",
      "args": [],
      "env": {}
    }
  }
}
If using npx:
{
  "mcpServers": {
    "puppeteer": {
      "command": "npx",
      "args": ["-y", "puppeteer-mcp-server"],
      "env": {}
    }
  }
}
3. Test Your Puppeteer MCP Setup
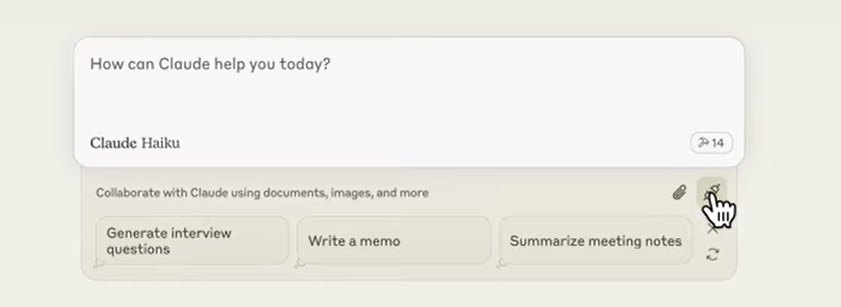
- Launch Claude Desktop.
- Verify MCP integration: See if Puppeteer MCP appears in the tools section.
- [
 ]
] - Click the MCP icon to review available servers: [
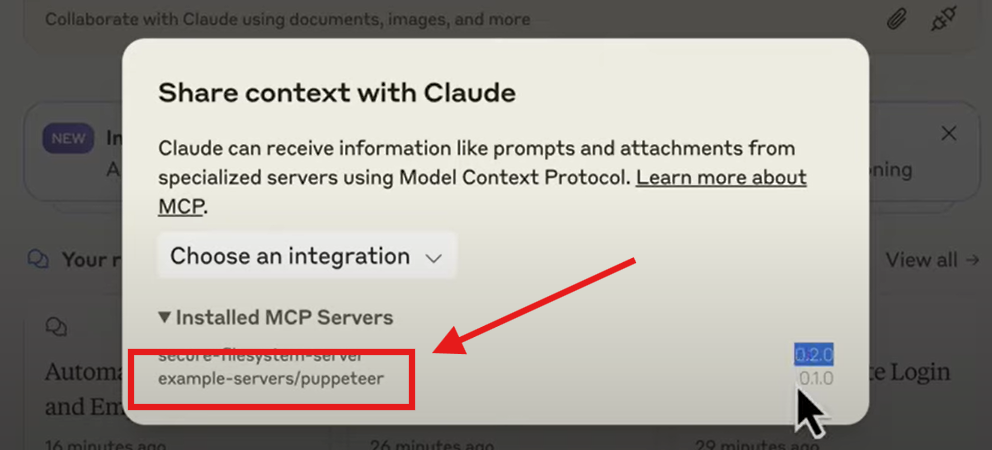 ]
] - To access console log monitoring, select “Choose integration” and pick Puppeteer MCP: [
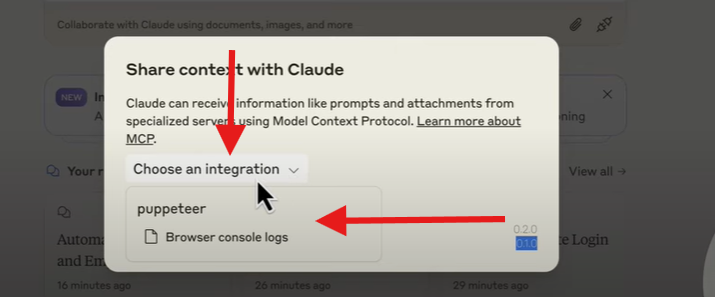 ]
] - Confirm it’s available in your chat interface: [
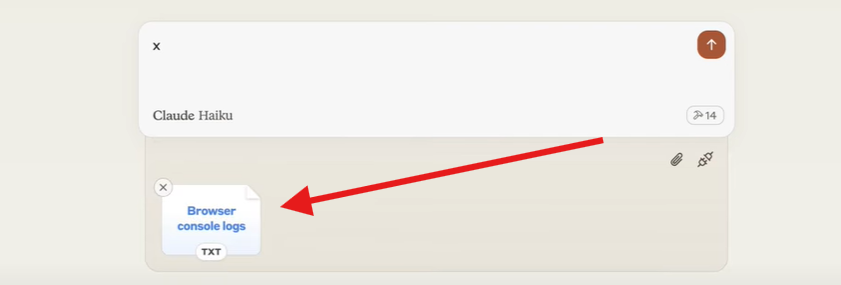 ]
]
- [
- Try sample automation commands:
- Navigate and screenshot:
>> Navigate to https://example.com using Puppeteer. Capture a screenshot of the page. - Multi-step automation:
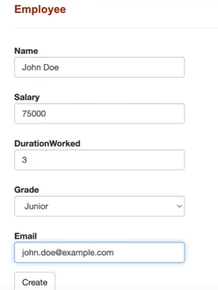
>> Go to http://Any_Test_Website_You_Want.com, click login, enter 'admin'/'incorrect', submit, go to Employee List, create new employee with details, then logout. - The server will open the browser, execute each step in sequence, and return results.
- Navigate and screenshot:
[ ]
]
Common Use Cases for Puppeteer MCP
- Web Testing Automation: Simulate real user journeys and validate UI/UX across updates.
- Web Scraping: Extract structured data from dynamic or JavaScript-heavy sites.
- Documentation: Automatically capture and archive screenshots for change tracking.
- JavaScript Execution: Automate repetitive or complex browser-side logic.
Troubleshooting & Best Practices
- Check config: Ensure your Claude MCP settings are correct and properly formatted.
- Verify installation: Confirm the MCP server starts cleanly with no errors.
- Monitor logs: Use console log resources for real-time debugging and diagnostics.
Security Recommendations
- Protect configuration files: Store sensitive settings (like API keys) securely.
- Restrict access: Limit server use to authorized team members only.
- Stay updated: Regularly update Puppeteer MCP and dependencies to patch vulnerabilities.
Conclusion: Automate Smarter with Puppeteer MCP & Apidog
Puppeteer MCP empowers developers and QA engineers to automate browser workflows—from intelligent navigation to data extraction and visual testing—using the latest in AI-driven automation. With the right setup, you’ll streamline everything from web testing to documentation, freeing time for higher-value engineering work.
For teams focused on API and MCP development, Apidog can further accelerate your workflow—connecting API design, testing, and automation in a unified platform.


