
In the era of cloud computing and microservices, efficient API management is crucial for organizations striving for streamlined workflows and enhanced productivity. Postman, a widely-used API development and collaboration platform, offers a plethora of features to support these goals. One standout feature that enhances security and ease of use is Single Sign-On (SSO). In this blog, we’ll explore what Postman SSO is, its benefits, and how to implement it within your organization.
What is Postman SSO?
Single Sign-On (SSO) is an authentication process that allows users to access multiple applications with a single set of login credentials. For API developers and teams, SSO reduces the burden of remembering multiple passwords and simplifies the login process. Postman SSO integrates with centralized identity providers like Okta, Microsoft Azure AD, Google Workspace, and others, allowing seamless and secure access to the Postman platform.
Benefits of Postman SSO
1. Enhanced Security
With SSO, every developer's access to Postman is controlled and monitored through your organization’s central identity management system. This ensures consistent application of security policies, like multi-factor authentication (MFA), across all platforms. As a result, the chances of unauthorized access are minimized, bolstering overall security.
2. Streamlined User Experience
Users no longer need to memorize multiple sets of credentials for different platforms. With SSO, one username and password provide access to all associated applications. This leads to quicker, more straightforward logins, significantly enhancing the user experience.
3. Simplified User Management
For administrators, SSO simplifies the task of user management. Adding or removing user access becomes effortless as everything is controlled from a single interface. This is particularly beneficial for large teams or organizations with high turnover rates.
4. Faster Onboarding
New team members can gain access to Postman in moments, as administrators can quickly grant permissions through the central identity provider. This ensures that new developers can start contributing to projects right away without any delays.
Implementing Postman SSO
Implementing SSO in Postman involves a few straightforward steps:
1. Configure Your Identity Provider
First, ensure that your identity provider (e.g., Okta, Azure AD, Google Workspace) is configured correctly to support SSO. This usually involves setting up a new application or service within the provider’s dashboard, specifying metadata for Postman, and generating the necessary credentials.
2. Setup Postman
Next, within your Postman dashboard, navigate to the Team Settings. Under the Authentication tab, look for the SSO section and begin the setup process by entering the details acquired from your identity provider. This might include:
- SAML endpoint URLs
- Certificate information
- Entity ID
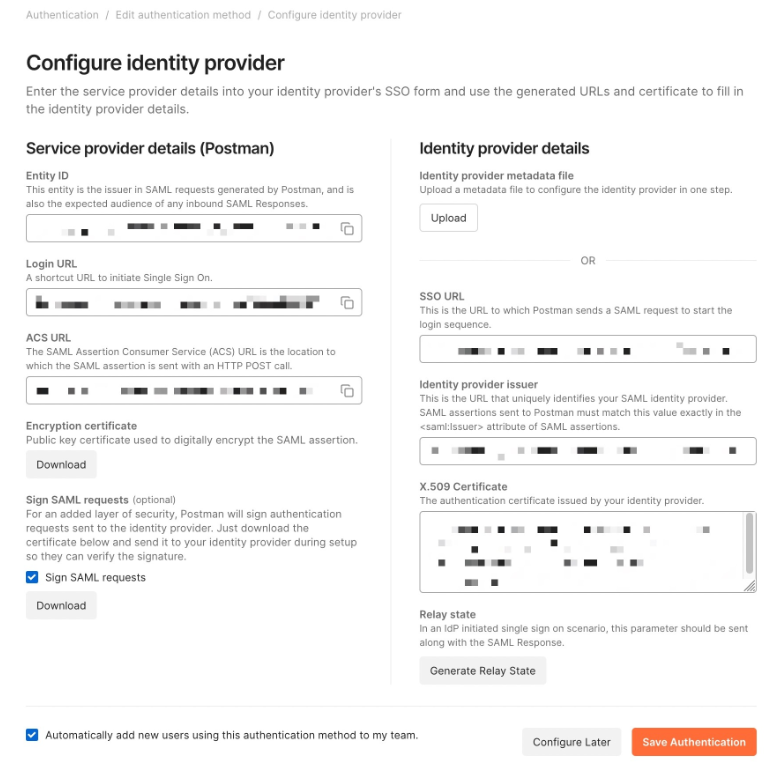
Make sure to follow the guidance provided by Postman to ensure all fields are correctly populated.
3. Test the Integration
Before rolling it out to your entire team, perform a comprehensive test of the SSO integration. This involves attempting to sign in using users within your identity provider to ensure everything functions as expected without any issues.
4. Roll Out to the Team
Once tested, communicate the change to your team, providing any necessary instructions on using SSO. Ensure to include details about accessing Postman using their centralized credentials.
Step-by-step Guide to Set up Apidog SSO
Apidog is the best alternative for Postman, which offers a comprehensive set of tools to streamline the whole API development journey. Apidog's SSO feature allows users to authenticate through their existing identity provider, simplifying the login process and enhancing security. Before you begin, ensure you have administrator access to both Apidog and your identity provider.
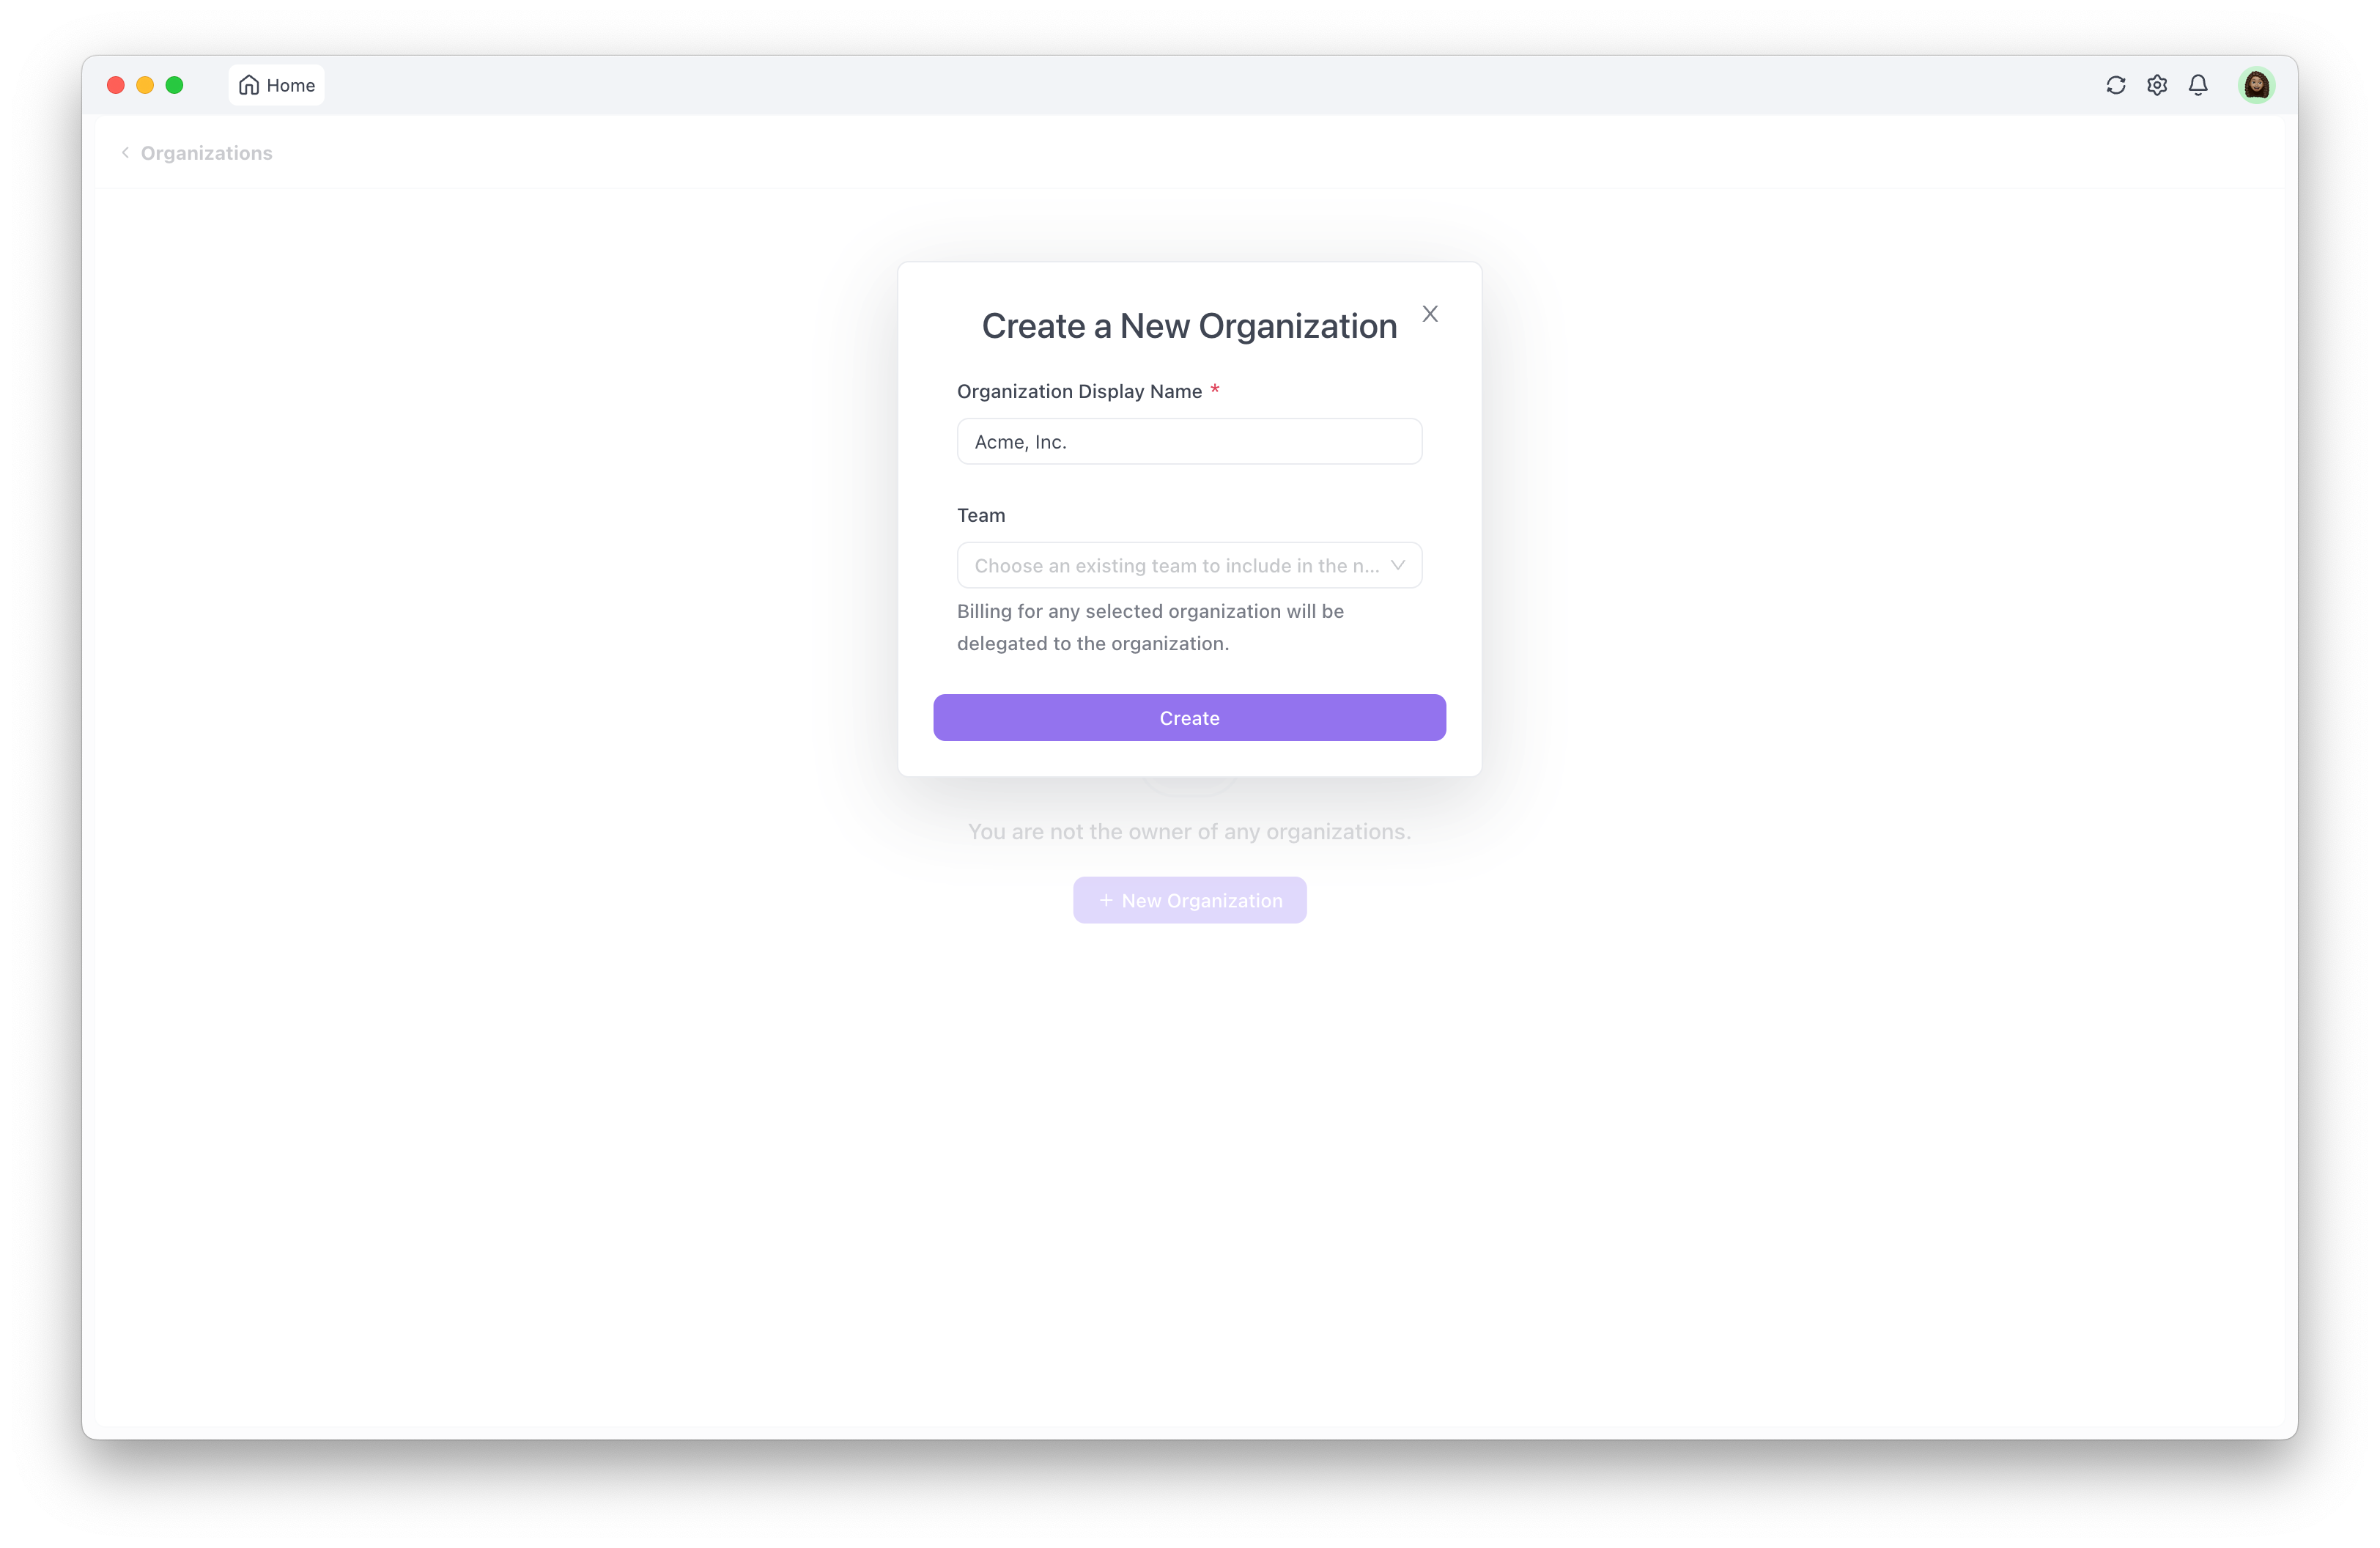
Step1: Create an Organization
1. Navigate to Organization Creation:
- From the homepage sidebar, click on "Organization," then select "New Organization."
- Enter the desired display name for your organization.
2. Transitioning Existing Teams:
- If you have previously created a team on Apidog that you want to manage under this new organization, ensure to select it during the organization creation process.
- Billing for any selected team will be consolidated under the organization.
3. Customize Your Organization Name:
- Upon creation, a default numeric identifier is assigned to your organization. This identifier is used in URLs related to SSO but can be manually changed to a more recognizable name for your organization's members.
Step2: Configuring SAML SSO
Once your organization is set up, proceed with configuring SAML SSO for seamless authentication:
1. Access SAML SSO Configuration:
- Navigate to the SAML SSO section after organization creation.
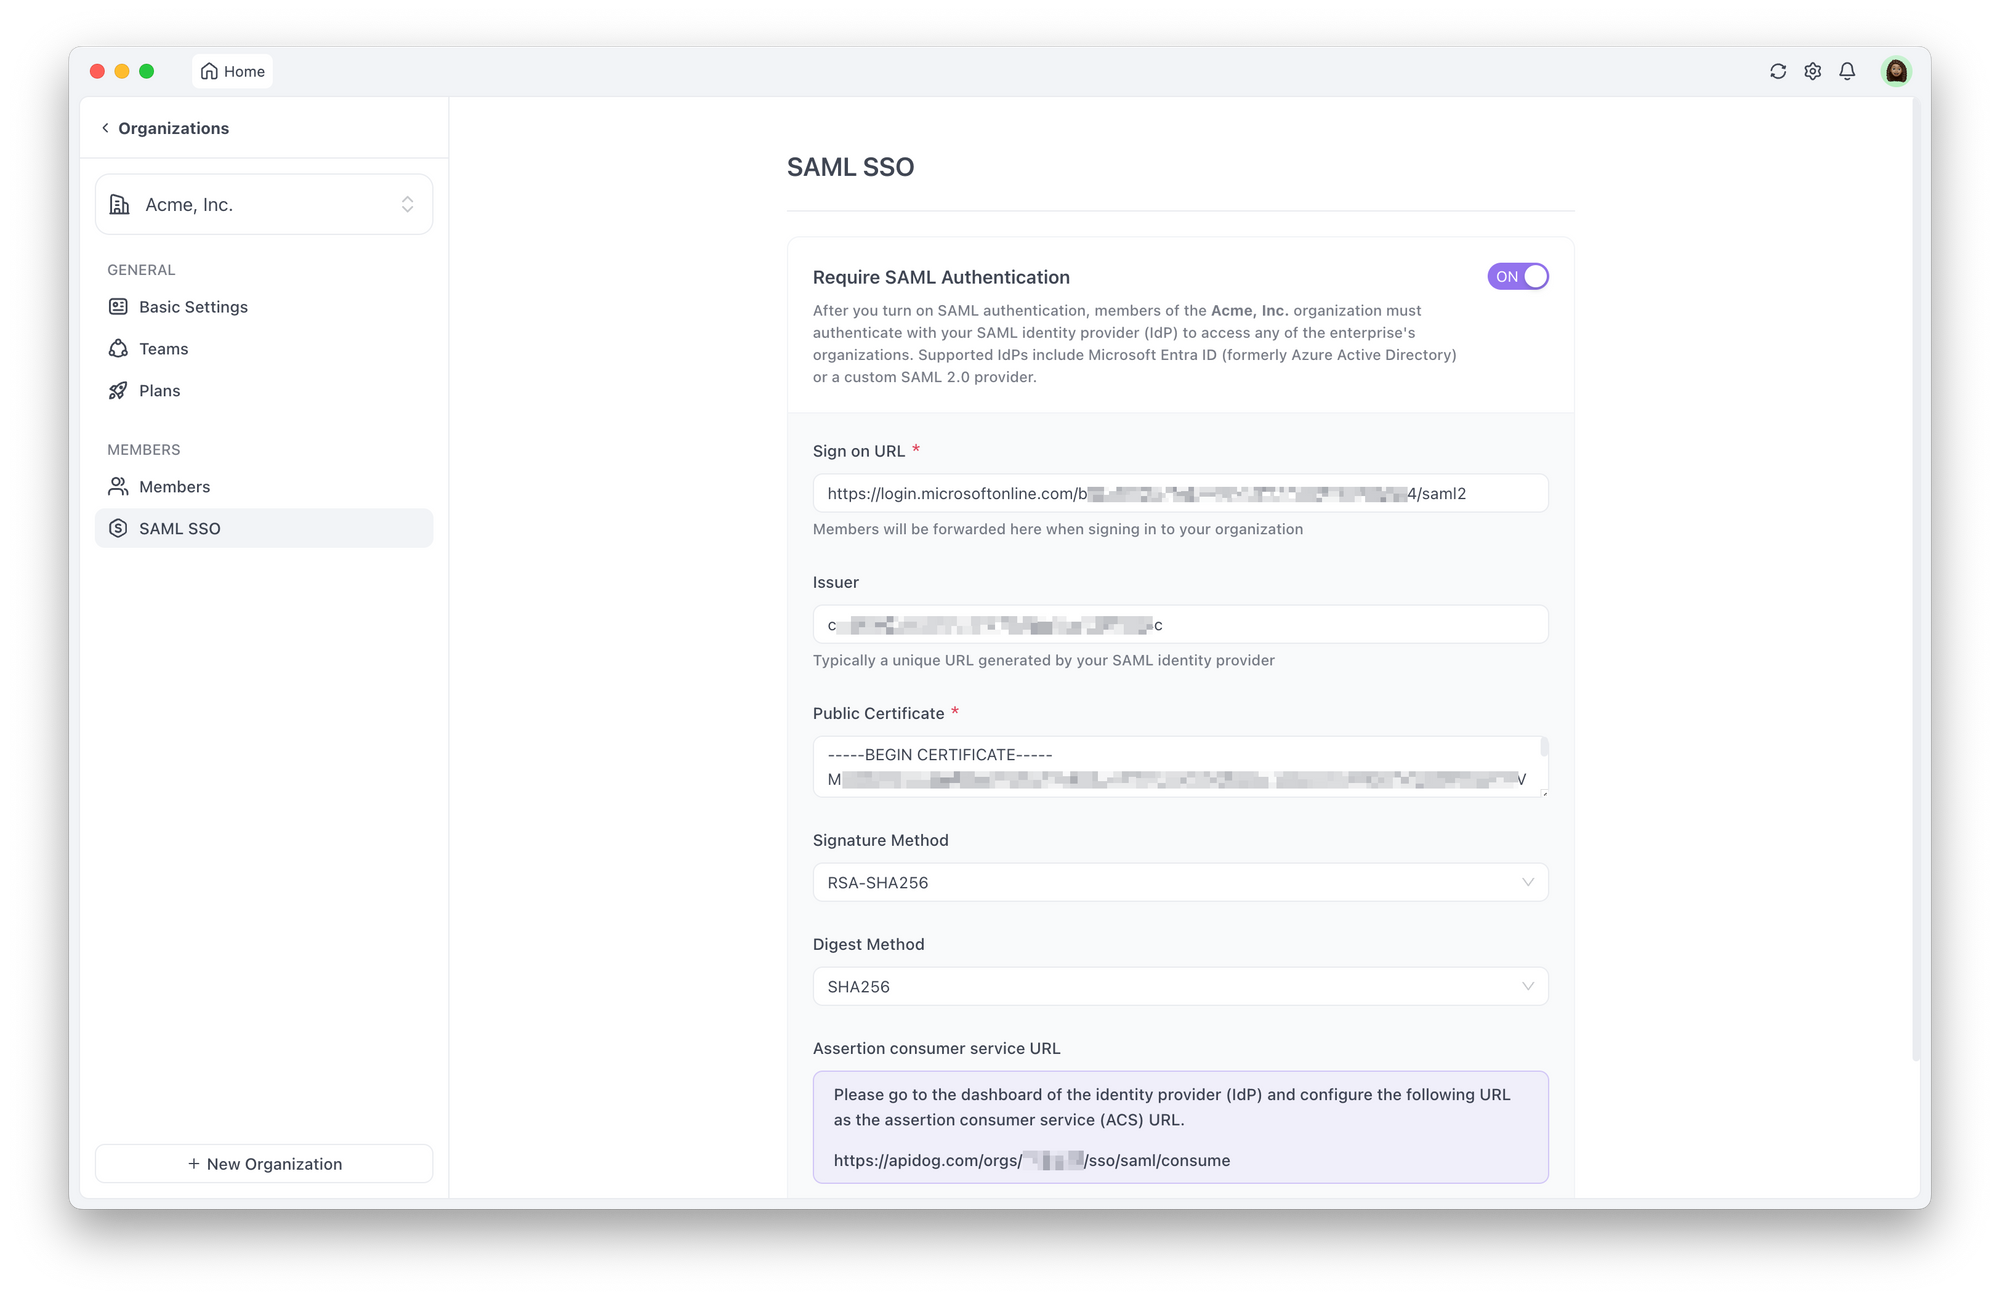
2. Enable SAML Authentication:
- Toggle the "Require SAML Authentication" switch to ON.
3. Configure SAML Settings:
Copy and paste the following details from your Identity Provider (IdP):
- Sign-on URL: This URL directs users to authenticate via your IdP.
- Issuer: Enter the Issuer provided by your IdP.
- Certificate: Paste the certificate obtained from your IdP for secure authentication.
4. Save Your Settings:
- Click on the save button to finalize and activate SSO for your organization.
5. Authentication Requirements:
- After enabling SAML authentication, all organization members must authenticate through their chosen IdP to access organizational resources.
Step3: Testing and Verification
- Conduct thorough testing to ensure that SSO integration works as expected for all users and roles within your organization.
Step4: Invite Teammates to Join the Organization
- After completing testing, inform your team about the update, providing clear instructions on how to use SSO, including guidance on accessing the API project within Apidog with their centralized credentials.
Congratulations, you've successfully configured SSO for API management within Apidog!
Conclusion
Postman SSO is a powerful feature that enhances security, simplifies user management, and improves the user experience. For organizations aiming to optimize their API workflows and ensure robust security protocols, implementing SSO in Postman is an excellent step forward. It not only simplifies access management but also aligns with best practices for identity and access management in modern software environments.
By leveraging Postman SSO, you can provide your development team with a seamless, secure, and efficient way to collaborate and innovate, all while maintaining stringent security standards. If you haven’t already, it’s time to consider integrating SSO into your Postman setup and unlocking the full potential of your API development processes.


