For developers building APIs, the ability to test and refine their creations efficiently is crucial. Postman, a popular API development tool, offers a powerful suite of features for crafting requests, analyzing responses, and streamlining the development workflow.
Apidog is a new modern yet sophisticated API development platform that equips developers with the necessary tools for the entire API lifecycle.
To learn more about Apidog, give the button below a click!
However, developers sometimes encounter connection issues with Postman when it comes to testing locally hosted APIs. This guide will walk you through the steps of establishing a successful connection between Postman and your localhost server, ensuring a smooth and productive development experience.
Benefits of Connecting Postman to Localhost
Connecting Postman to your local server unlocks a range of advantages that streamline and accelerate the API development process. Here's a deeper dive into these benefits:
Faster Development Workflow
Traditional development involves making changes to the API, deploying it to a server, testing it, and repeating the cycle if issues arise. Connecting Postman to localhost bypasses the deployment step. You can write and test requests directly against your local server, instantly seeing the impact of code changes. This significantly reduces development time and allows for rapid iteration.
Efficient API Testing
Postman provides a user-friendly interface for crafting various types of HTTP requests (GET, POST, PUT, etc.) and defining request parameters. Connecting it to localhost allows you to send these requests directly to your local API, simulating real-world user interactions. This enables you to:
- Test different functionalities of the API.
- Verify API responses match expectations with various data inputs.
- Identify and fix bugs in the API logic before deployment.
Controlled Environment for Debugging
Localhost provides a controlled environment where you can isolate the API from external factors like network issues or server configurations. This simplifies debugging by allowing you to focus solely on the API code and logic. Postman's debugging tools, like code snippets and environment variables, further enhance this process.
Mocking External APIs
During development, your API might rely on data or functionality from external APIs. However, these external APIs might not always be readily available for testing. Postman allows you to create mock servers on your localhost that mimic the behavior of the external API. This enables you to test your API independently without relying on the external system, saving time and potential frustration.
Improved Collaboration
Postman allows sharing collections (groups of requests) and environments (configurations) with your team members. Connecting everyone to the local server through Postman ensures everyone's testing environment is identical. This facilitates collaboration, reduces confusion, and promotes consistent API development practices.
How to Establish a Connection Between Postman and Localhost?
Successfully connecting Postman to your local server lays the foundation for efficient API development. Here's a detailed breakdown of the steps involved:
Prerequisites
- Local Server: Ensure you have a local server set up on your machine. This could be a simple Node.js server, a Python web framework like Flask or Django, or any server technology that suits your project.
- Postman Installation: Download and install the latest version of Postman from https://www.postman.com/.
Verification
Before connecting to Postman, it's crucial to verify that your local server is functioning correctly. This can be done in two ways:
- Command Line: Many server setups involve starting the server through a command prompt or terminal. Running the appropriate command (specific to your server technology) should start the server process.
- Browser Access: Once the server is running, open a web browser window and navigate to
http://localhost:<port number>. The port number can vary depending on your server configuration, typically being something like8080or3000. You should see a response from your local server confirming it's running successfully.
Configuration in Postman
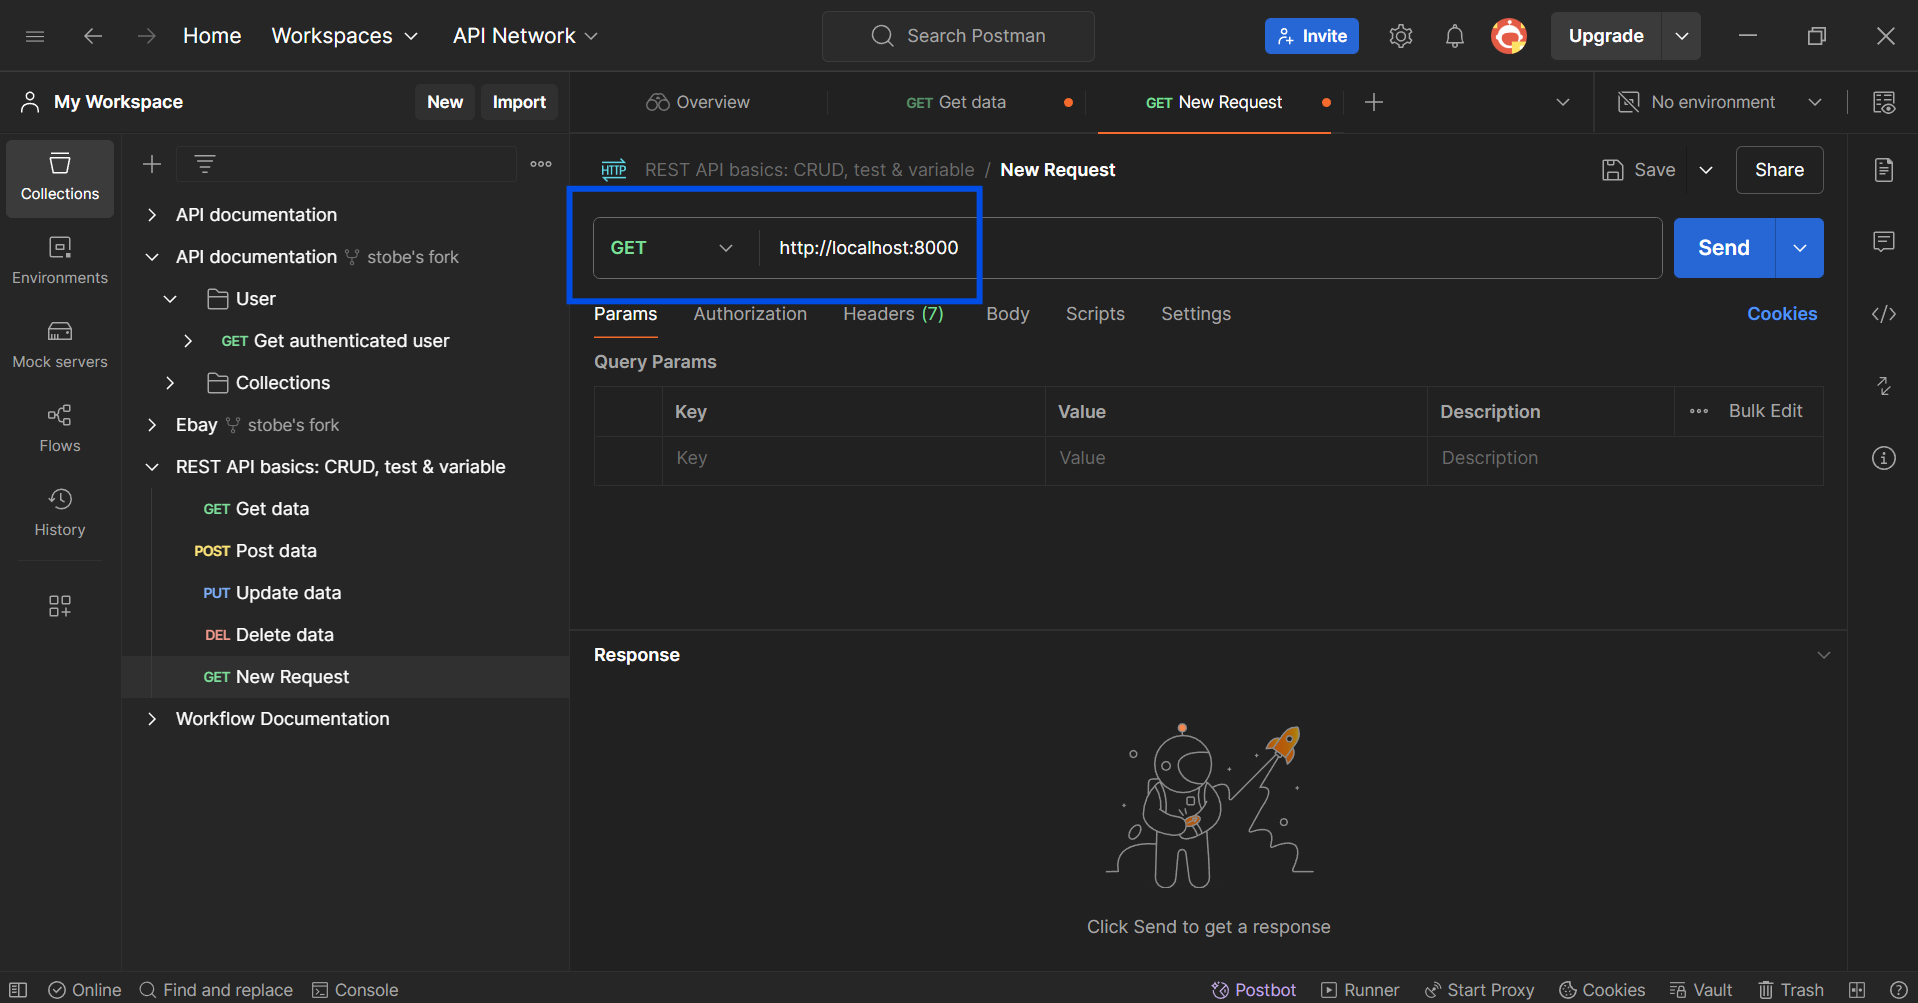
- Create a Request: Launch Postman and click the "+" button to create a new request.
- Set Request Type: Choose the appropriate HTTP method for your initial test (e.g., GET for retrieving data).
- Construct the URL: In the URL field, enter
http://localhost:<port number>. Replace<port number>with the actual port your local server is listening on (obtained from verification step 2).
Troubleshooting Common Issues
If you encounter connection errors after following these steps, troubleshoot these potential causes:
- Firewall Restrictions: Some firewalls might block connections to localhost by default. Check your firewall settings to ensure communication between Postman and your local server is allowed.
- Process Conflicts: Another application might be using the same port as your local server. Identify the conflicting process and either stop it or configure your server to use a different port.
Apidog - A Powerul Postman Alternative
If you are a developer interested in finding a different API tool for your development processes, you should consider trying Apidog.

Apidog provides users with complete functionalities for the entire API lifecycle, where developers can build, test, mock, and document APIs within a single application.
What makes Apidog much more appealing is its simplistic and intuitive user interface, allowing any developer to get accustomed to Apidog's development environment quickly.
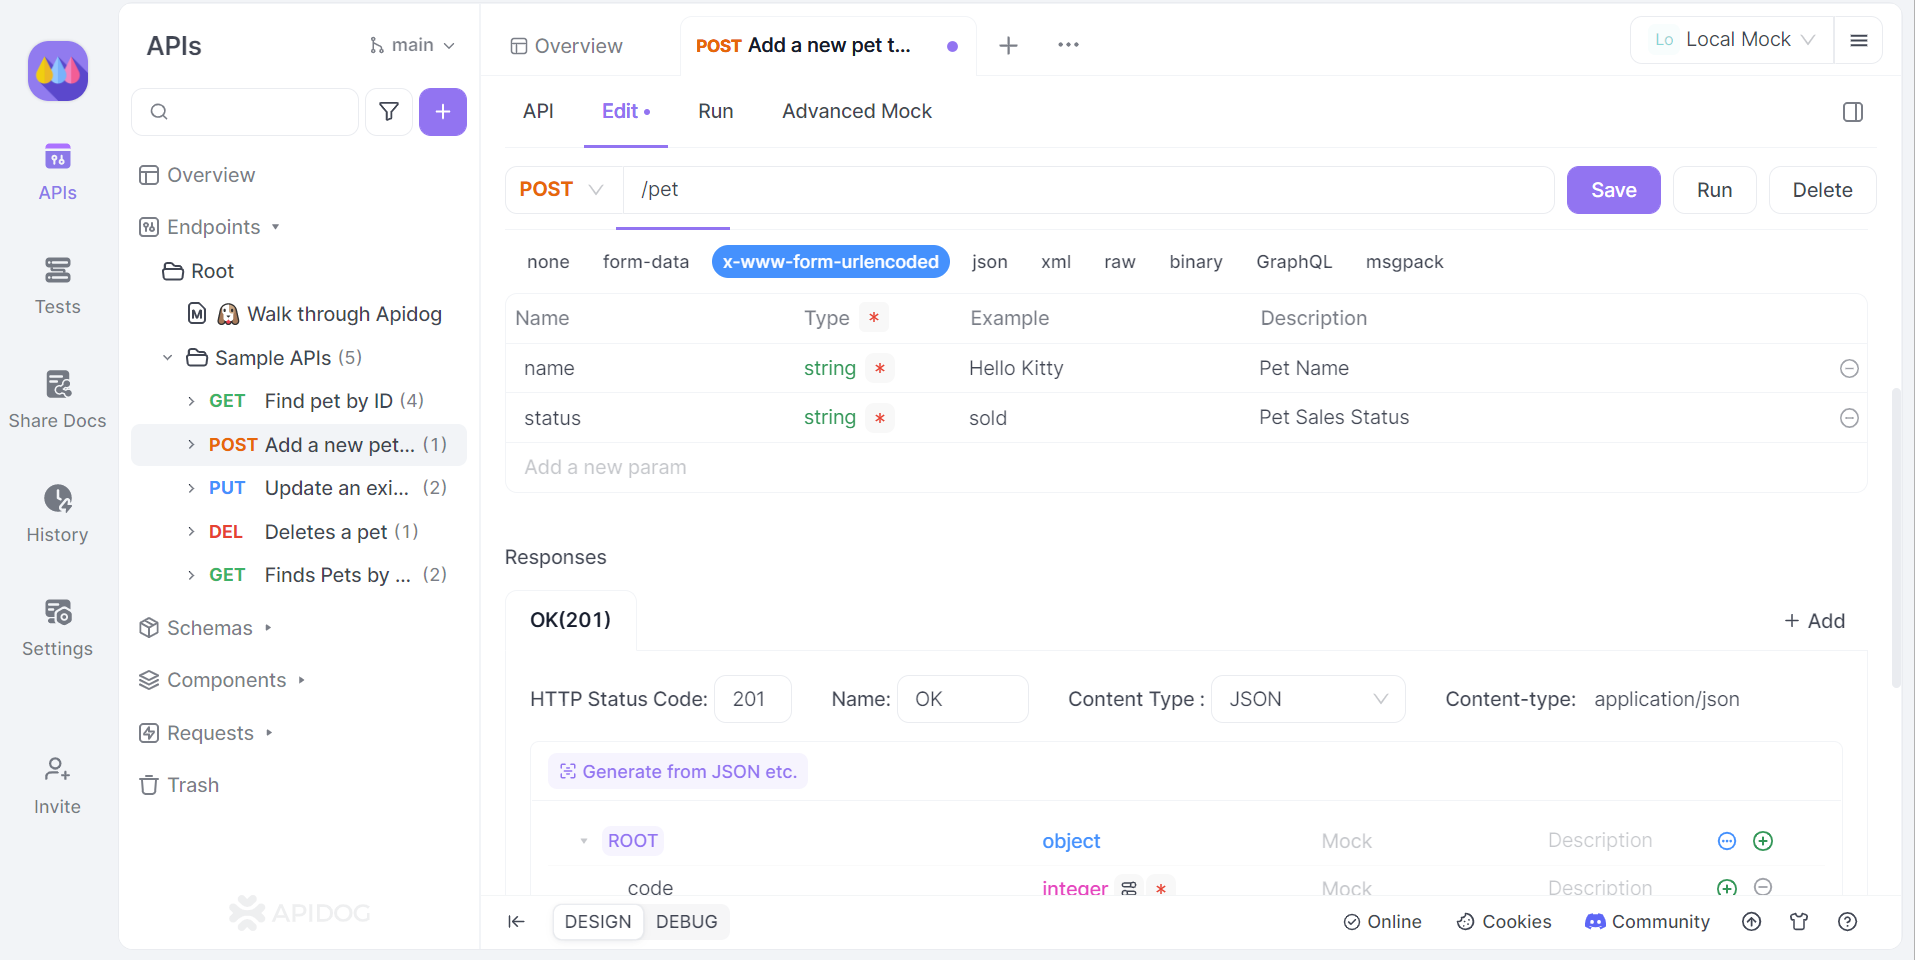
Creating New APIs with Apidog
With Apidog, you can design and create APIs exactly how you want them. This lets you build APIs that perfectly match the features needed by your application or the people who will use them.
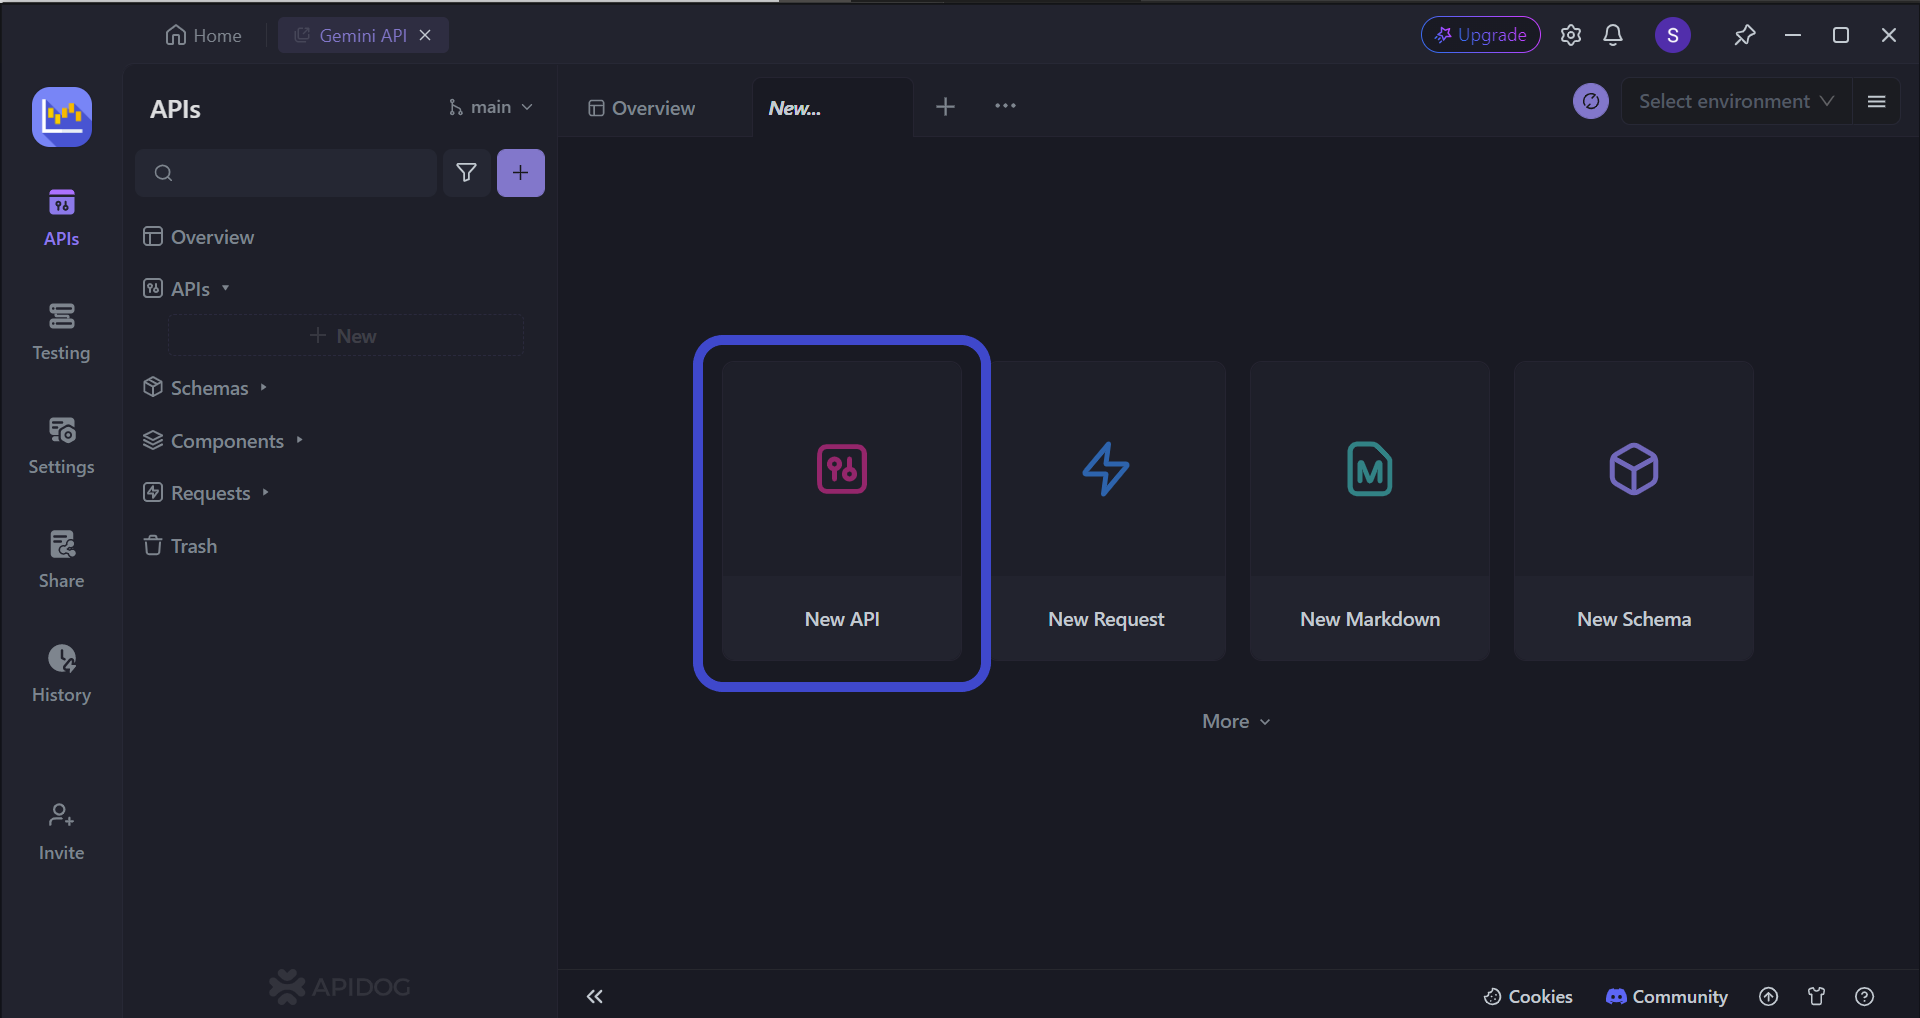
Begin by pressing the New API button, as shown in the image above.
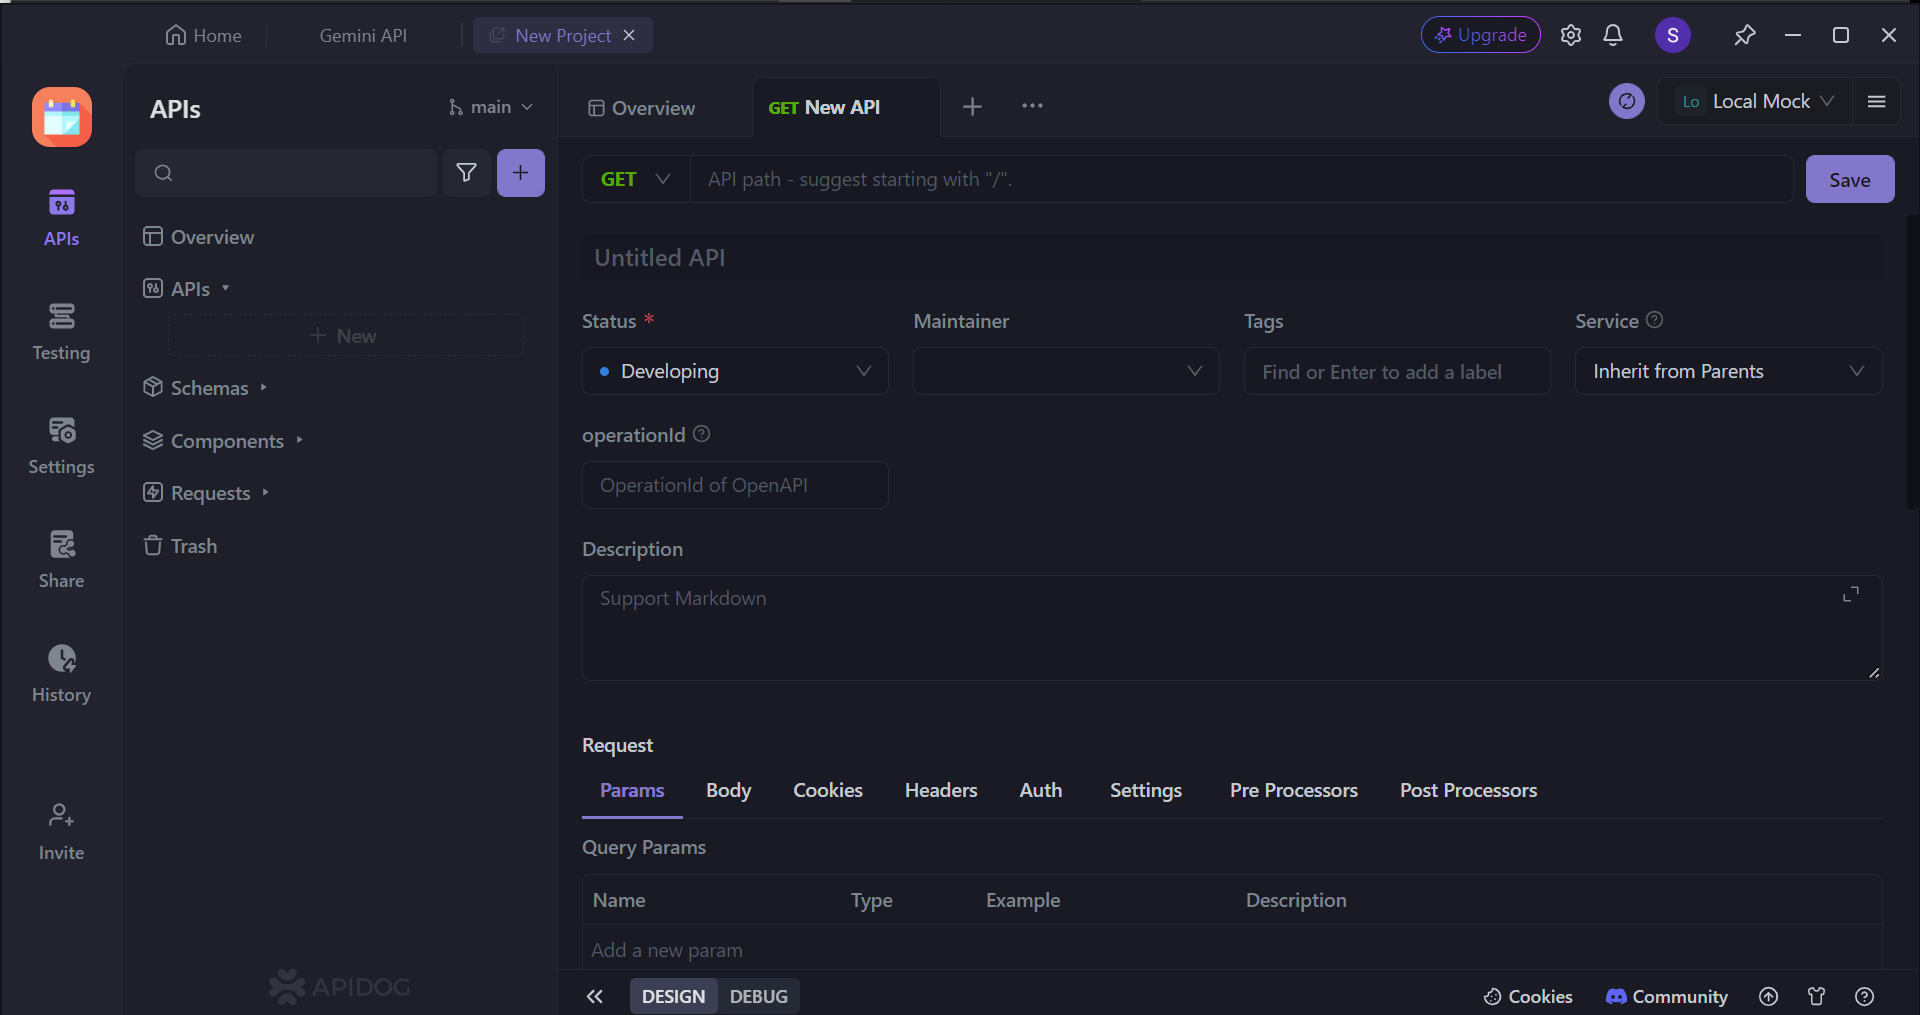
Once you've nailed down what your API does (its core functionality), it's time to fine-tune how it works. Here's what you'll need to decide:
- HTTP Method (GET, POST, PUT, DELETE): Pick the right button (these are called HTTP methods) to control how users access or change information.
- API Address: Set a unique web address (endpoint) where users will find your API and interact with it.
- Input Fields (Parameters): Specify any data users can provide in the address to get a specific response from your API.
- Functionality: Clearly explain what your API does in plain English.
To ensure you're building effective APIs, consider reviewing these helpful articles on REST API best practices.

Testing APIs Thoroughly With Apidog
Apidog provides developers with a portal to clearly observer and modify APIs whenever needed. You can change path and query parameters, and implement pre-processor and post-processor scripts.
Once you have included all the necessary components for an API, you can obtain an API response.
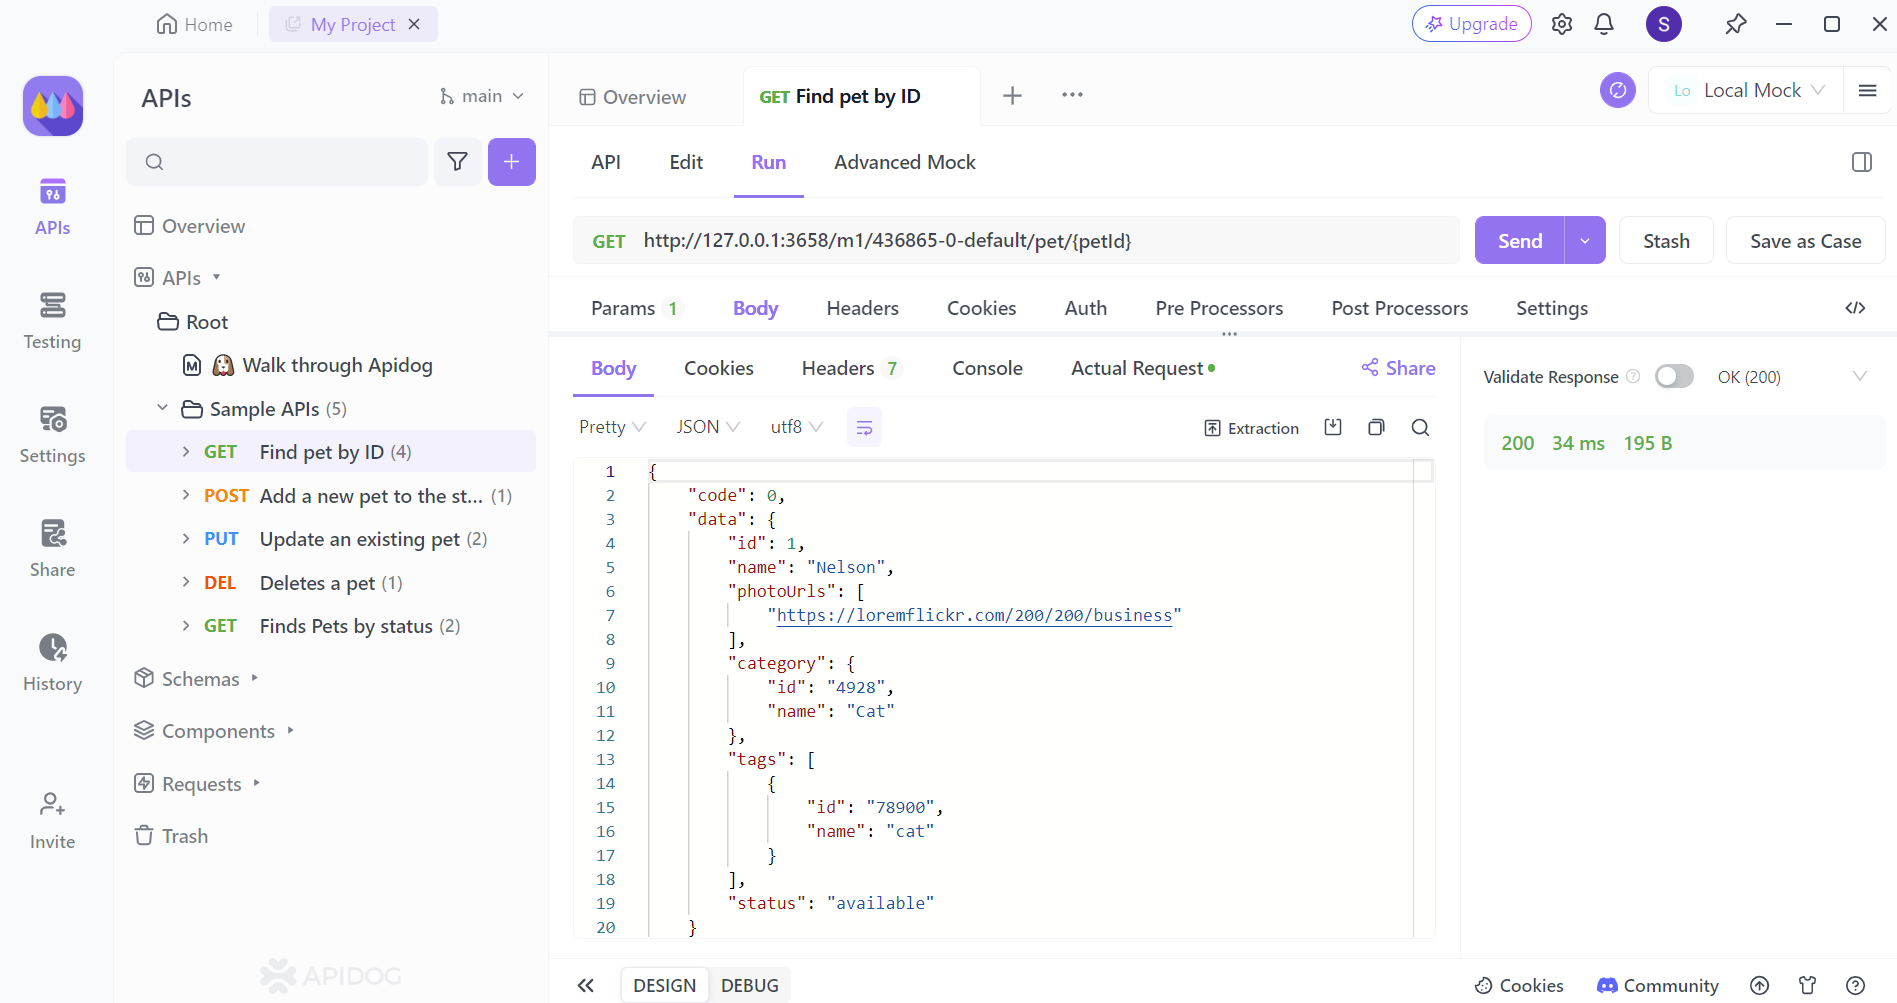
Find out whether your API request is successful through the returned status response. With an orderly-arranged JSON Response, you can copy and paste it to your client code for further development.
Conclusion
In conclusion, establishing a connection between Postman and your local server empowers you to streamline and accelerate the API development process. By leveraging Postman's intuitive interface and bypassing deployment steps, you can rapidly test and iterate on your API code. The ability to simulate user interactions, control the testing environment, and mock external APIs ensures the robustness and functionality of your API before deployment.
With a well-tested and refined API, you can confidently integrate it into your application or share it with consumers, knowing it will function as intended. So, take advantage of Postman's capabilities and unlock a more efficient and productive API development workflow.