When it comes to writing Playwright tests, developers often find themselves choosing between two popular Microsoft integrated development environments (IDEs): Visual Studio and Visual Studio Code. Both offer robust features for test development, but they cater to different needs and preferences. This article will explore the pros and cons of each option, helping you make an informed decision based on your specific requirements.And as a bonus, we'll introduce Apidog as an alternative tool that can enhance your testing workflow.
What is Playwright?

Before diving into the comparison, let's briefly recap what Playwright is. Playwright is a powerful automation framework for end-to-end testing of web applications. It supports multiple browsers (Chromium, Firefox, and WebKit) and provides a high-level API to automate user interactions, making it an excellent choice for modern web application testing.
Visual Studio: The Full-Featured IDE
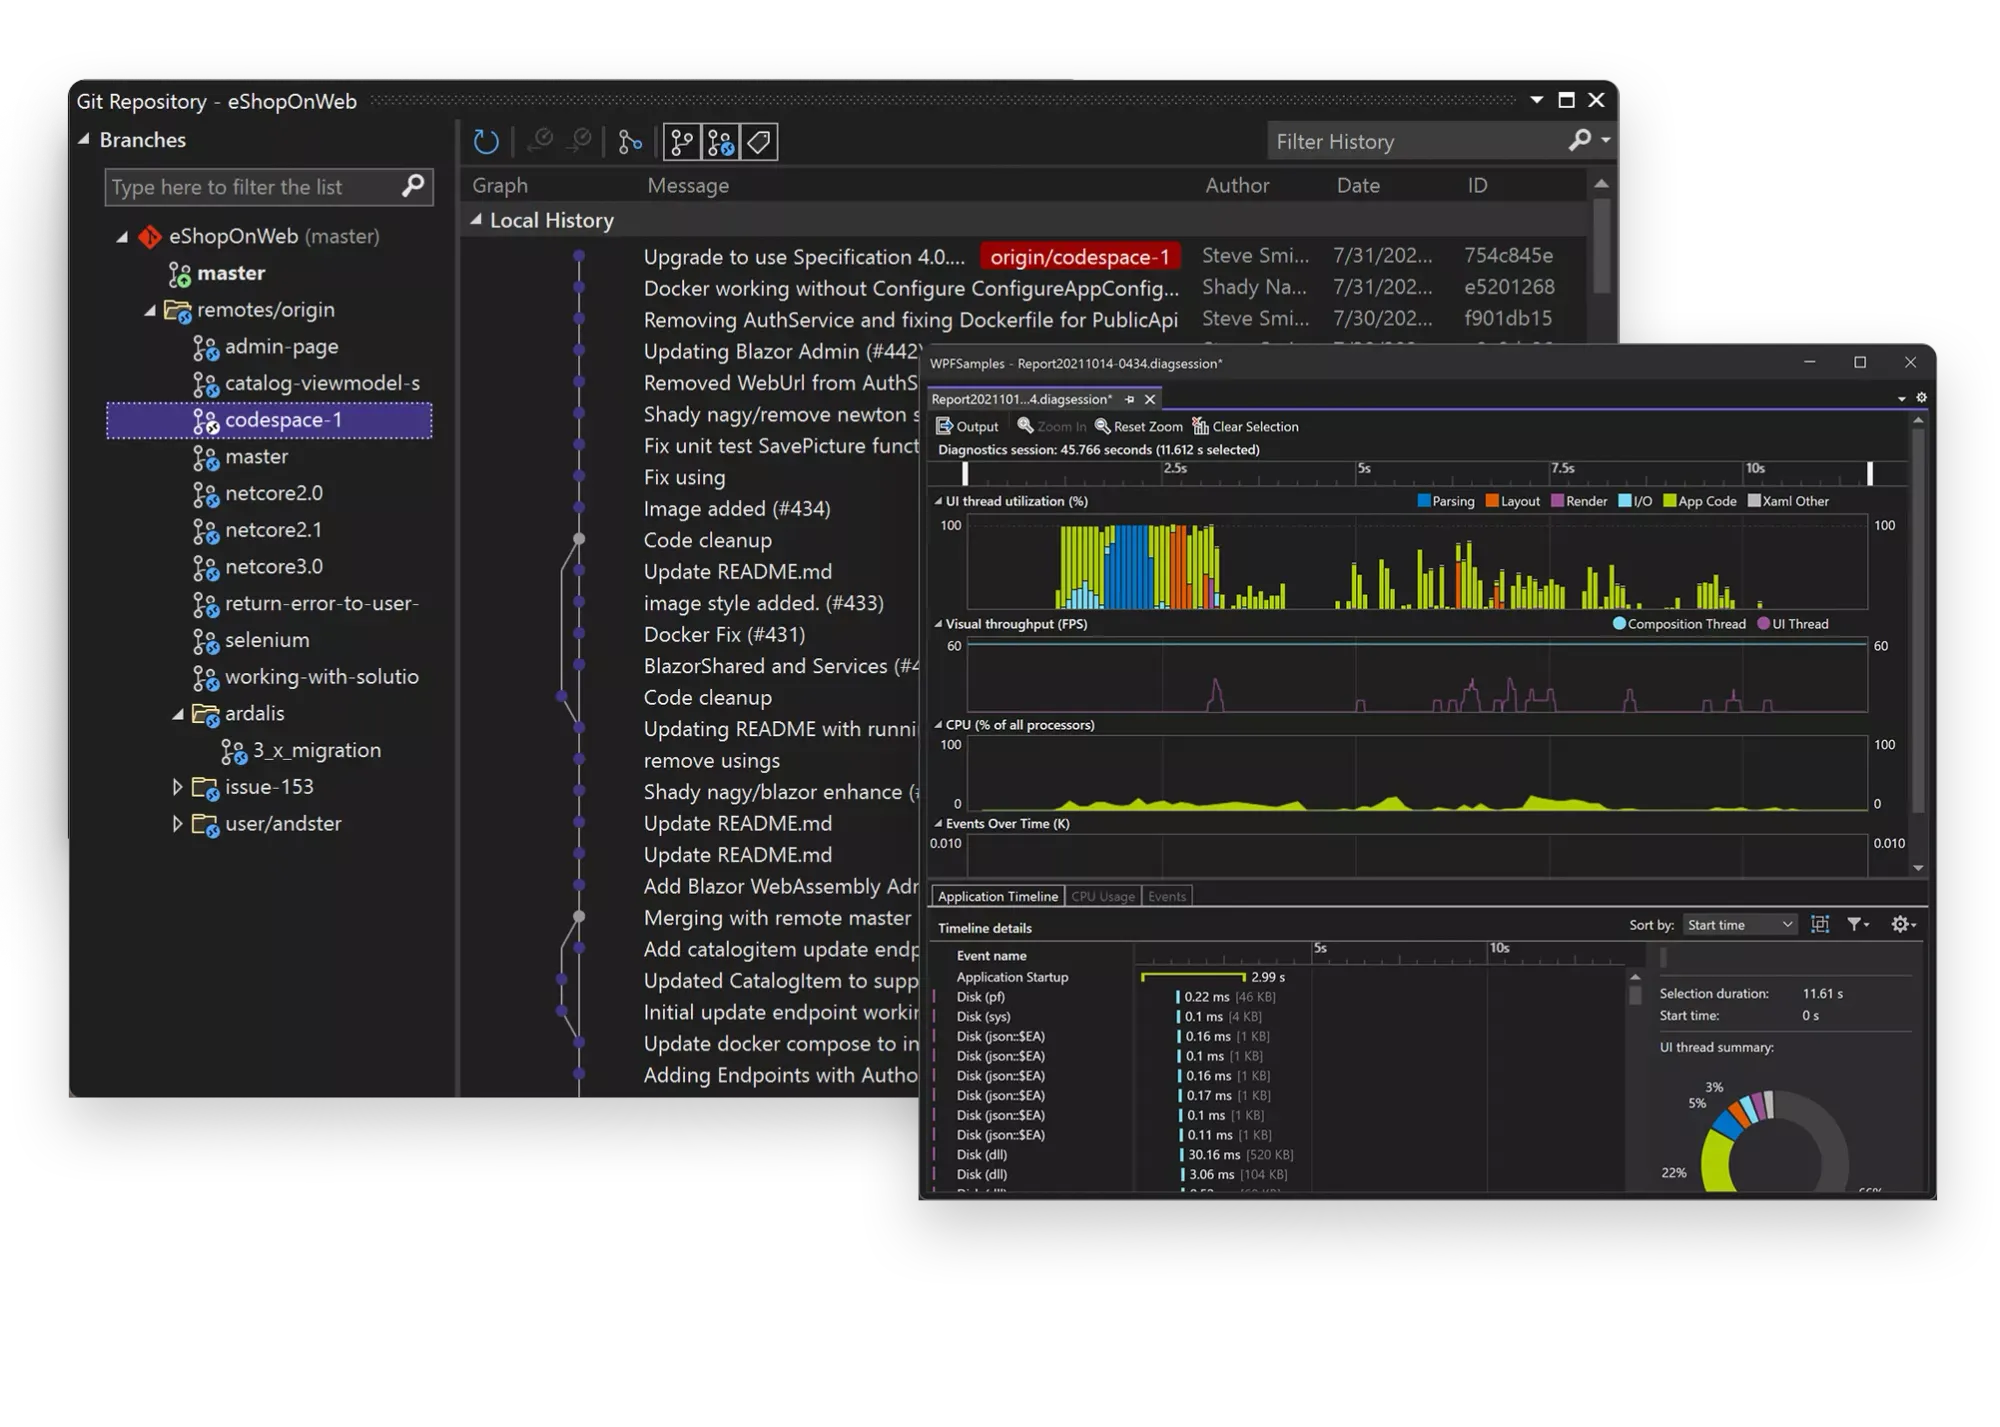
Visual Studio is Microsoft's flagship IDE, known for its comprehensive set of tools and features for .NET development.
Pros of Using Visual Studio for Playwright Tests
Integrated .NET Development: If your project is primarily .NET-based, Visual Studio offers seamless integration with the .NET ecosystem.
Robust Debugging: Visual Studio provides powerful debugging tools that can be particularly useful for complex test scenarios.
Test Explorer: The built-in Test Explorer in Visual Studio makes it easy to manage and run tests.
IntelliSense: Visual Studio's IntelliSense offers excellent code completion and suggestion features for C# development.
Performance Profiling: If you need to analyze the performance of your tests, Visual Studio includes profiling tools.
Cons of Using Visual Studio for Playwright Tests
Resource Intensive: Visual Studio can be heavy on system resources, which might slow down test execution on less powerful machines.
Learning Curve: For developers new to the Microsoft ecosystem, Visual Studio can have a steeper learning curve.
Less Flexibility for Non-.NET Languages: While Visual Studio supports multiple languages, it's primarily optimized for .NET development.
Cost: The full version of Visual Studio can be expensive, although there is a free Community Edition for individual developers and small teams.
Visual Studio Code: The Lightweight, Versatile Editor
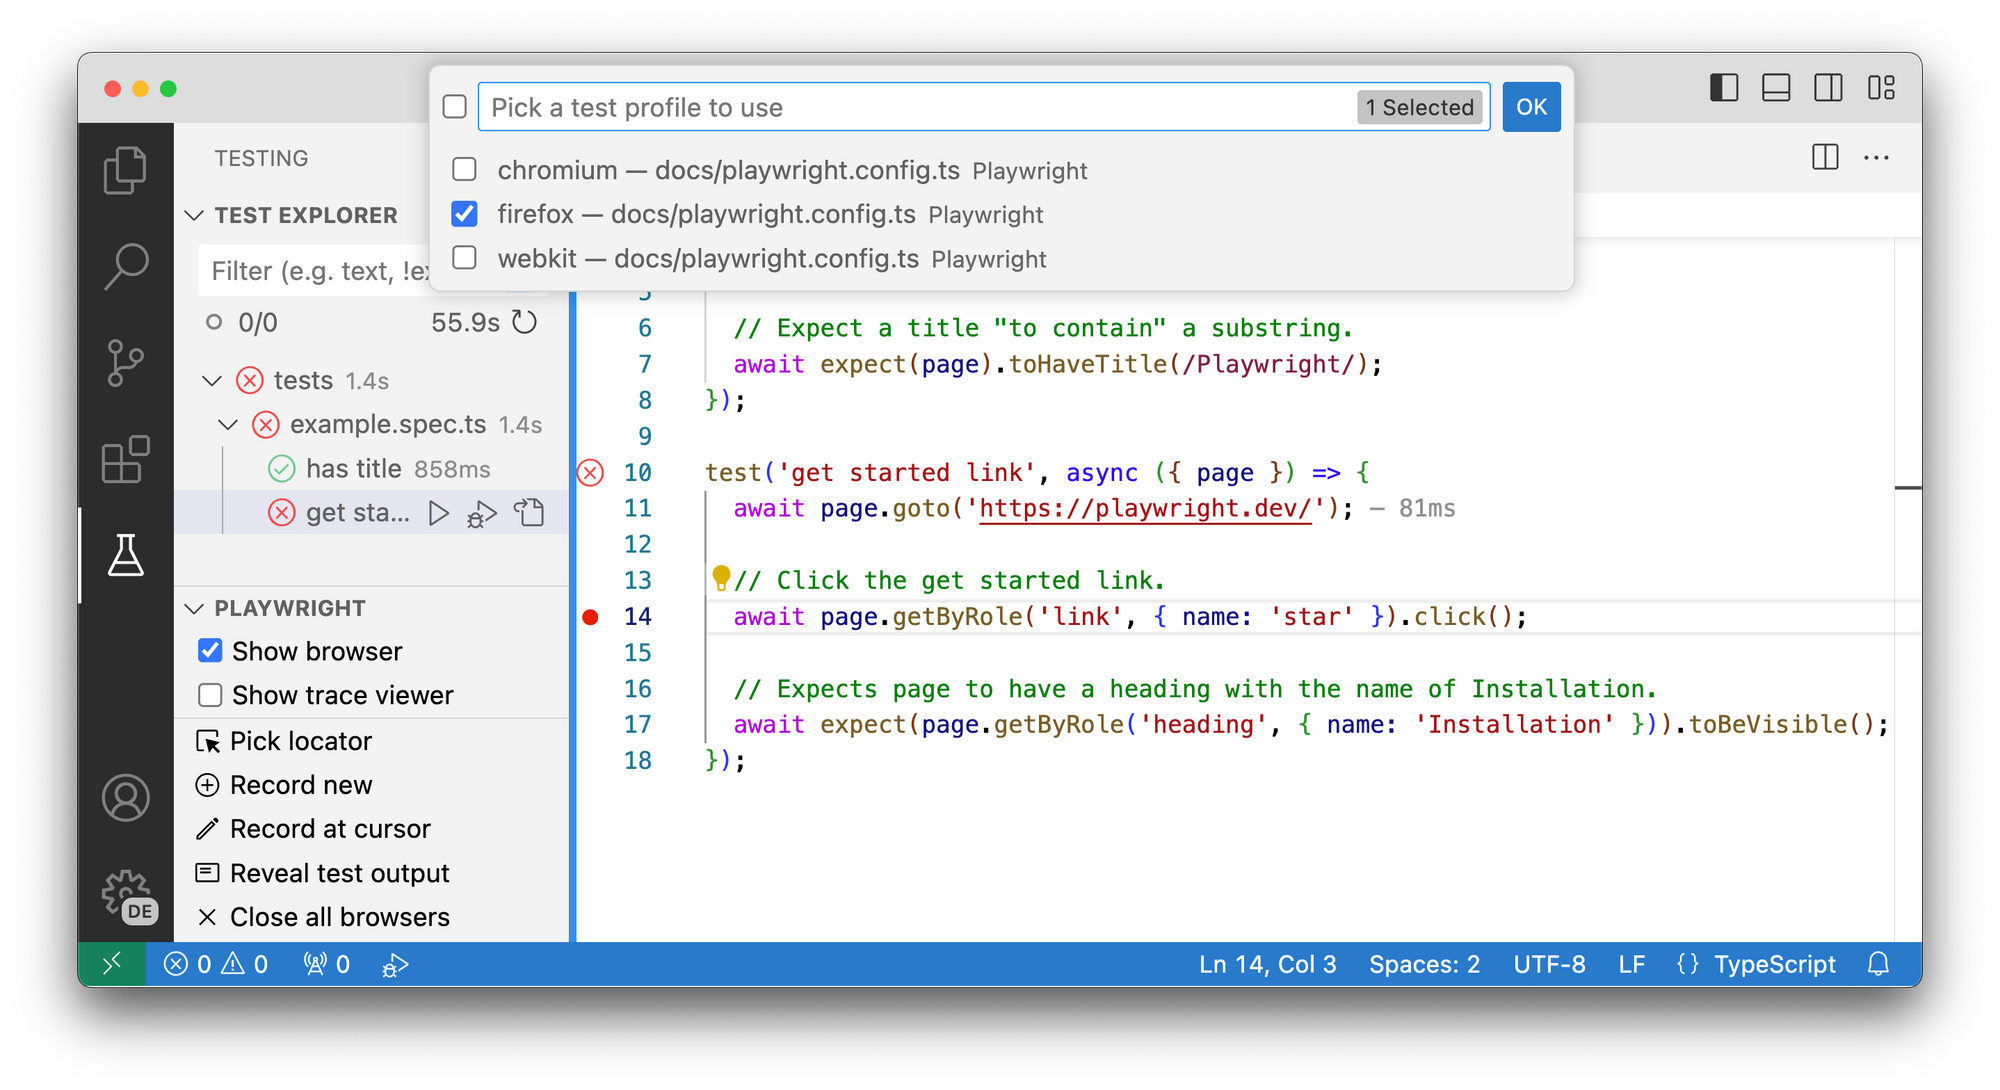
Visual Studio Code (VSCode) is a free, open-source code editor that has gained immense popularity due to its flexibility and extensive ecosystem of extensions.
Pros of Using Visual Studio Code for Playwright Tests
Lightweight and Fast: VSCode is much lighter than Visual Studio, making it quicker to start up and less resource-intensive.
Cross-Platform: VSCode runs seamlessly on Windows, macOS, and Linux, making it ideal for cross-platform development teams.
Rich Extension Ecosystem: The VSCode marketplace offers a wide range of extensions, including specific ones for Playwright testing.
Integrated Terminal: The built-in terminal in VSCode makes it easy to run Playwright commands and tests directly from the editor.
Git Integration: VSCode has excellent built-in Git support, which is useful for version control of your test scripts.
Language Agnostic: VSCode supports multiple programming languages out of the box, making it versatile for various testing frameworks.
Cons of Using Visual Studio Code for Playwright Tests
Less Integrated .NET Support: While VSCode can handle .NET development, it's not as tightly integrated as Visual Studio.
Manual Setup Required: You may need to install additional extensions and configure your environment manually for optimal Playwright testing.
Limited Built-in Profiling Tools: VSCode doesn't come with built-in performance profiling tools like Visual Studio does.
Introducing Apidog: Your perfect Tool for API Testing
While Visual Studio and VSCode are excellent choices for Playwright testing, Apidog offers another robust option, especially for those focused on API documentation and testing. Apidog simplifies the process of creating and managing API documentation and testing with a user-friendly interface and powerful features.
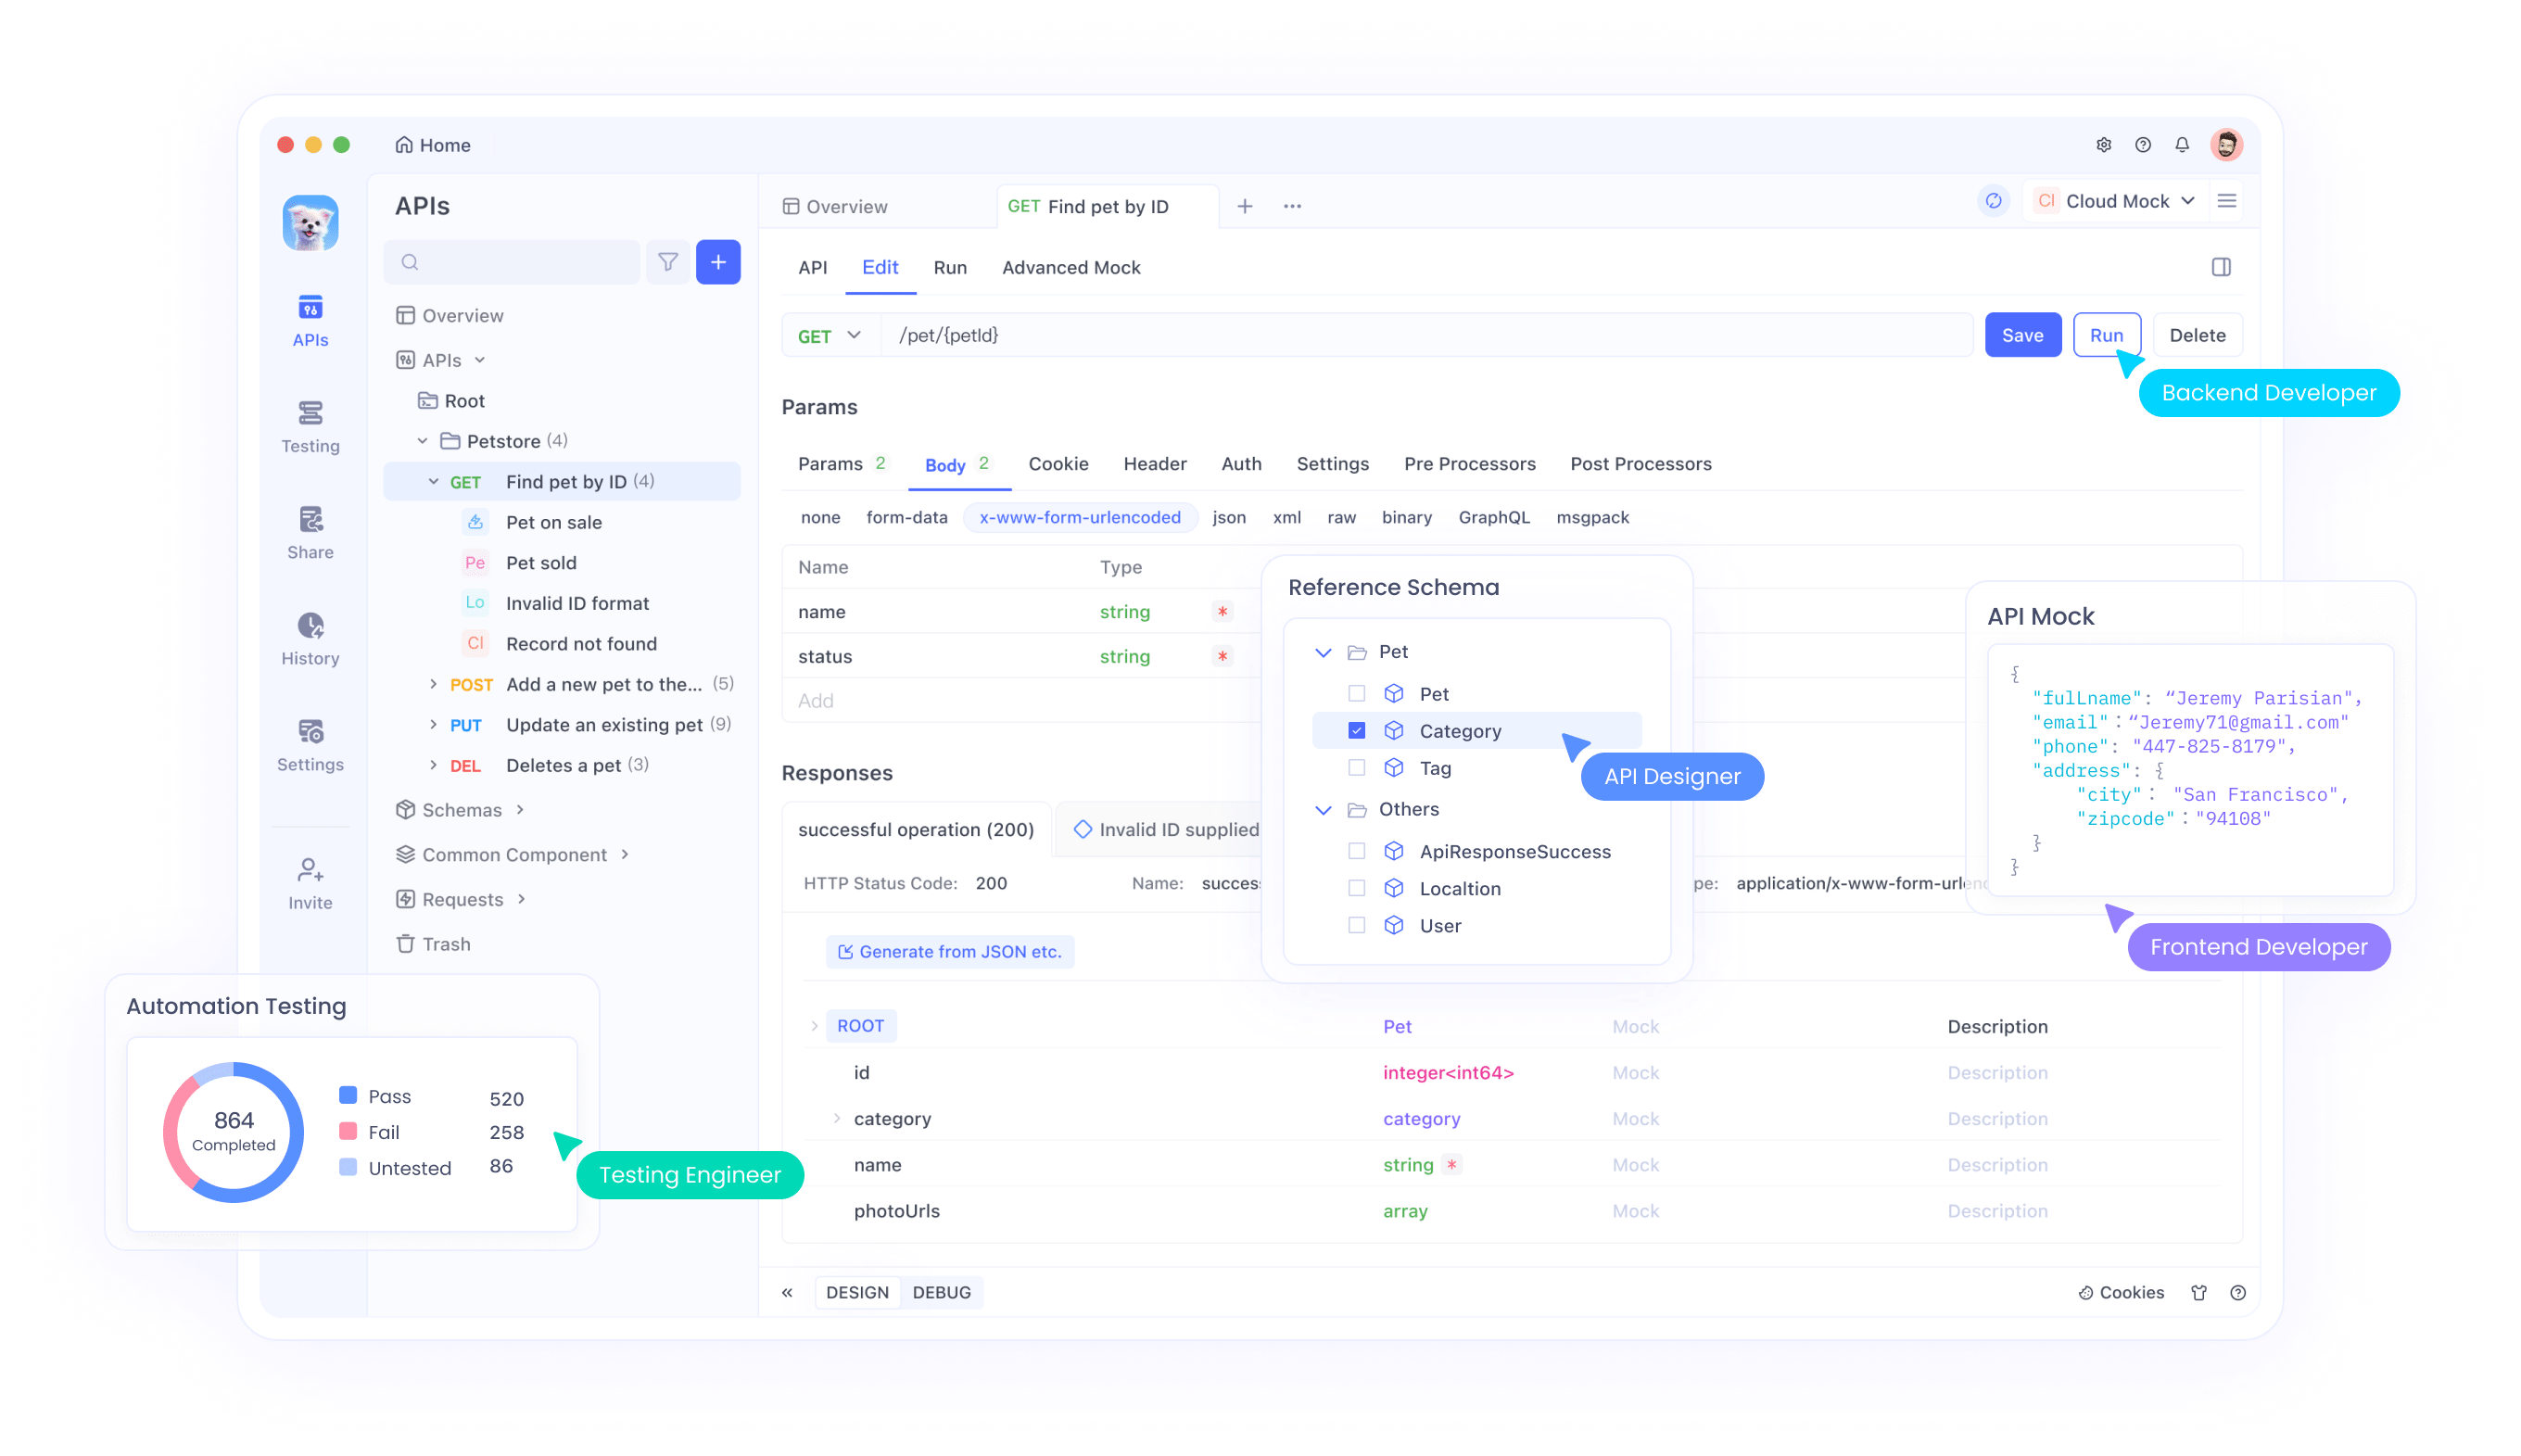
Key Features of Apidog
- Interactive Documentation: Users can test API endpoints directly within the documentation.
- Auto-Generated Docs: Automatically generate documentation from your API specifications.
- Collaboration Tools: Work with your team in real-time to create and update documentation.
- API Testing: Built-in tools for testing API endpoints.
- Customizable Templates: Create documentation that matches your brand and style.
Why Choose Apidog?
Apidog combines ease of use with powerful features, making it an excellent choice for developers who need comprehensive API documentation and testing capabilities. Whether you're a solo developer or part of a large team, Apidog provides the tools you need to create top-notch API documentation. Plus, the ability to test APIs directly from the documentation is a huge time-saver.
Making the Choice: Factors to Consider
When deciding between Visual Studio and Visual Studio Code for Playwright testing, consider the following factors:
Project Type: If you're working on a primarily .NET project, Visual Studio might be the better choice. For other languages or mixed environments, VSCode could be more suitable.
Team Preferences: Consider what your team is already familiar with and what would require the least adaptation.
System Resources: If you're working on a less powerful machine, VSCode's lightweight nature might be beneficial.
Testing Needs: For complex debugging scenarios, Visual Studio's robust tools might be necessary. For simpler tests, VSCode could suffice.
Budget: If cost is a concern, VSCode's free nature makes it an attractive option.
Cross-Platform Requirements: If you need to work across different operating systems, VSCode's cross-platform support is advantageous.
Setting Up Playwright in Visual Studio Code
If you decide to go with Visual Studio Code, here's a step-by-step guide to set up Playwright for testing:
Install Visual Studio Code: Download and install VSCode from the official website.
Install Node.js: Playwright requires Node.js, so make sure it's installed on your system.
Create a New Project: Open VSCode and create a new folder for your Playwright project.
Initialize a Node.js Project: Open the terminal in VSCode and run npm init -y to create a package.json file.
Install Playwright: Run npm init playwright@latest in the terminal. This will set up Playwright in your project.
Install the Playwright Extension: Go to the Extensions view in VSCode and search for "Playwright Test for VSCode". Install this extension.
Write Your First Test: Create a new file with a .spec.js extension and start writing your Playwright test.
Run Tests: Use the Test Explorer in the sidebar to run and debug your tests, or use the terminal to run npx playwright test.
Setting Up Playwright in Visual Studio
If Visual Studio is your choice, follow these steps:
Install Visual Studio: Download and install Visual Studio, ensuring you include the ".NET desktop development" workload.
Create a New Project: Create a new C# project using the "NUnit Test Project" template.
Install Playwright NuGet Packages: Use the NuGet Package Manager to install the following packages:
- Microsoft.Playwright
- Microsoft.Playwright.NUnit
- Microsoft.Playwright.TestAdapter
Write Your First Test: Modify the default test class to use Playwright. You'll need to inherit from PageTest and use the [Page] attribute for the page object.
Run Tests: Use the Test Explorer in Visual Studio to run and debug your Playwright tests.
Best Practices for Playwright Testing
Regardless of which IDE you choose, here are some best practices for Playwright testing:
Use Page Object Model: Organize your tests using the Page Object Model pattern for better maintainability.
Leverage Playwright's Auto-Waiting: Take advantage of Playwright's built-in auto-waiting functionality to avoid explicit waits.
Use Trace Viewer: Utilize Playwright's Trace Viewer for debugging and analyzing test executions.
Implement Parallel Testing: Configure your tests to run in parallel to reduce overall execution time.
Regular Updates: Keep Playwright and its dependencies up to date to benefit from the latest features and bug fixes.
Continuous Integration: Integrate your Playwright tests into your CI/CD pipeline for automated testing.
How to automate your API Testing Journey with Apidog: A Comprehensive Guide
Embarking on your Apidog journey is a breeze. This comprehensive guide will walk you through the steps to set up your account and easily create, execute, and manage API tests.
Create a New Project
Create a new project or import one within your workspace to group your API tests based on a specific application or service. It helps keep your tests organized and makes managing and maintaining them more accessible.

Add Your APIs
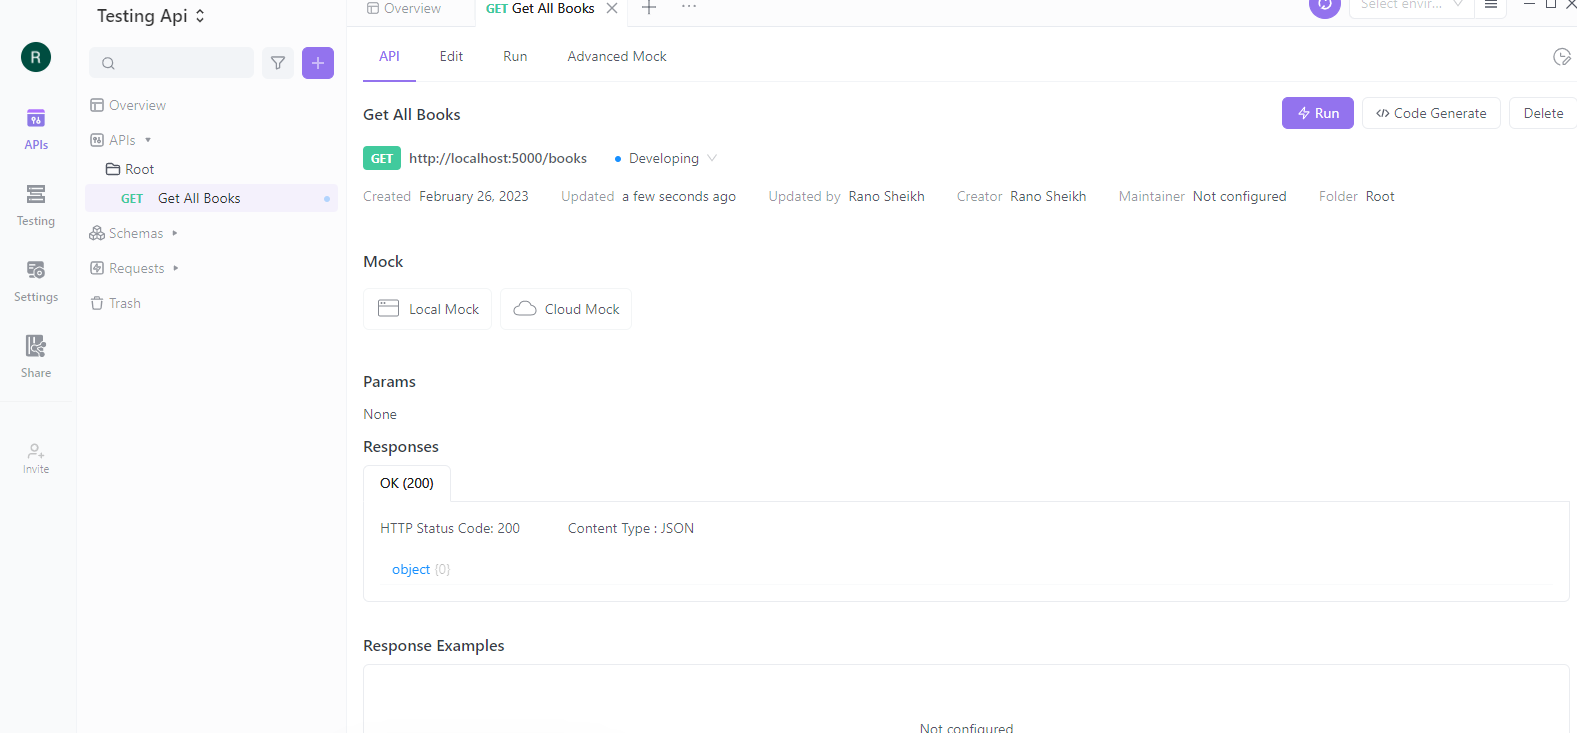
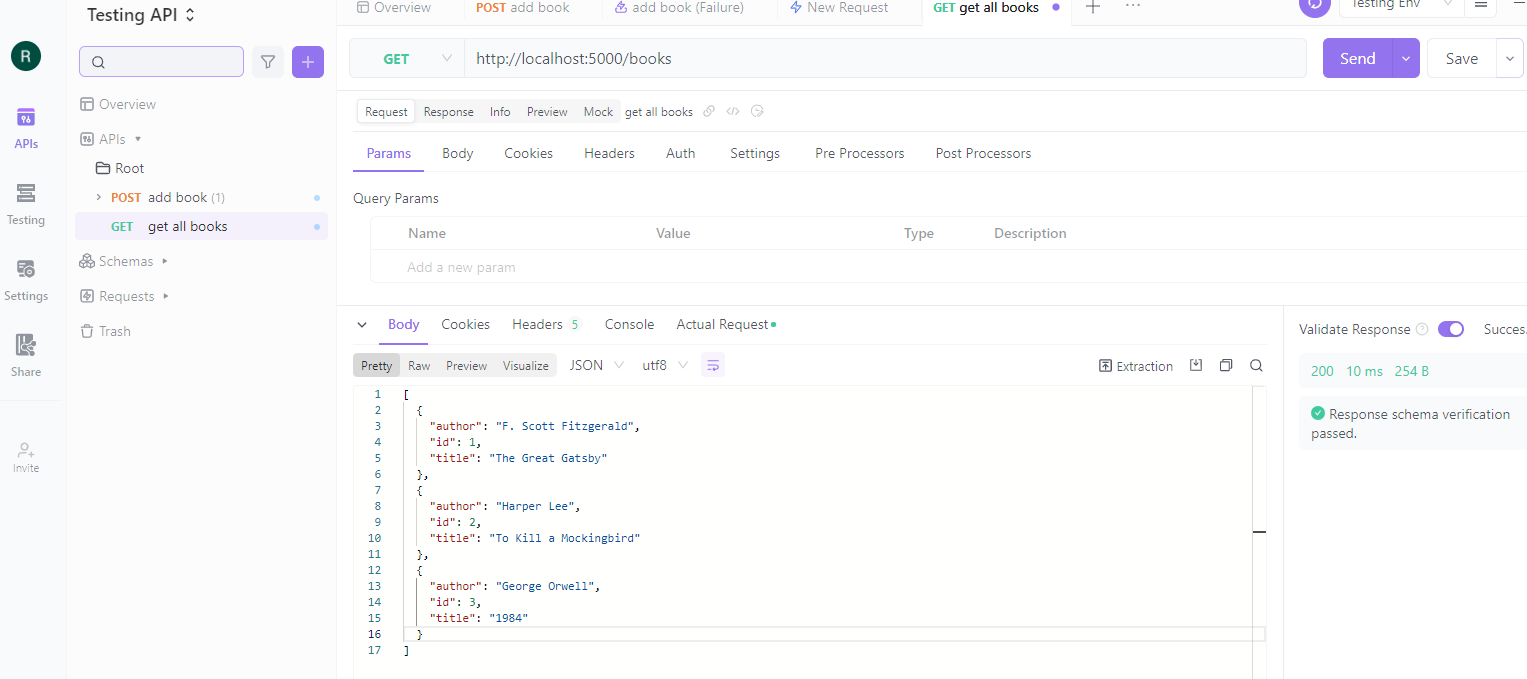
To add your API to Apidog, click the "Add API" button and provide the necessary details, including the endpoint, method, and authentication information. For example, To create the "GET all books" endpoint in Apidog, click on the "Add Endpoint" button and fill in the details like this:
- URL: http://localhost:5000/books
- Method: GET
- Endpoint name: Get all books
Configure Your APIs
Apidog's platform simplifies the management of multiple APIs from a single dashboard. The platform also supports a range of authentication methods, including OAuth and API keys, to ensure secure access to your APIs. It allows developers to choose the authentication method best suits their project's requirements.
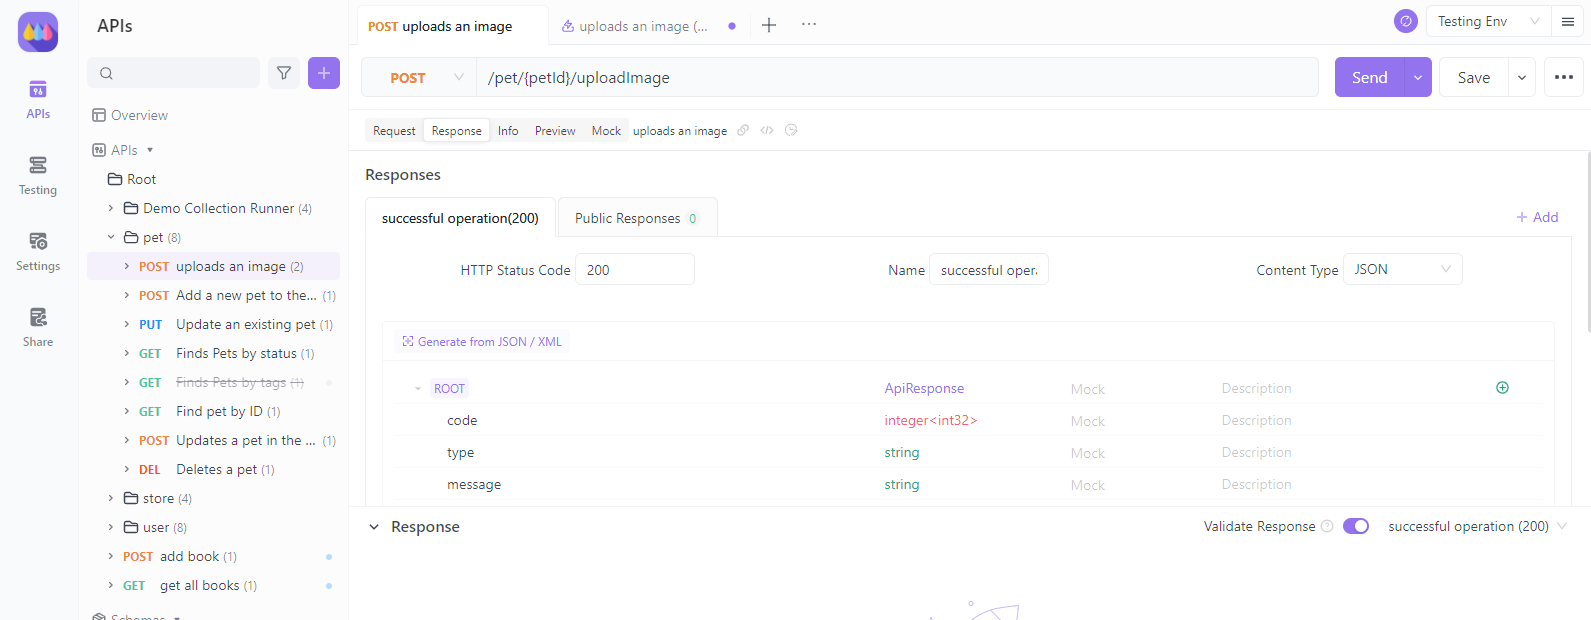
Design Your Test Scenarios
Using Apidog's Visual API Builder, create test scenarios and assertions. The intuitive interface allows you to build complex test scenarios without writing any code.
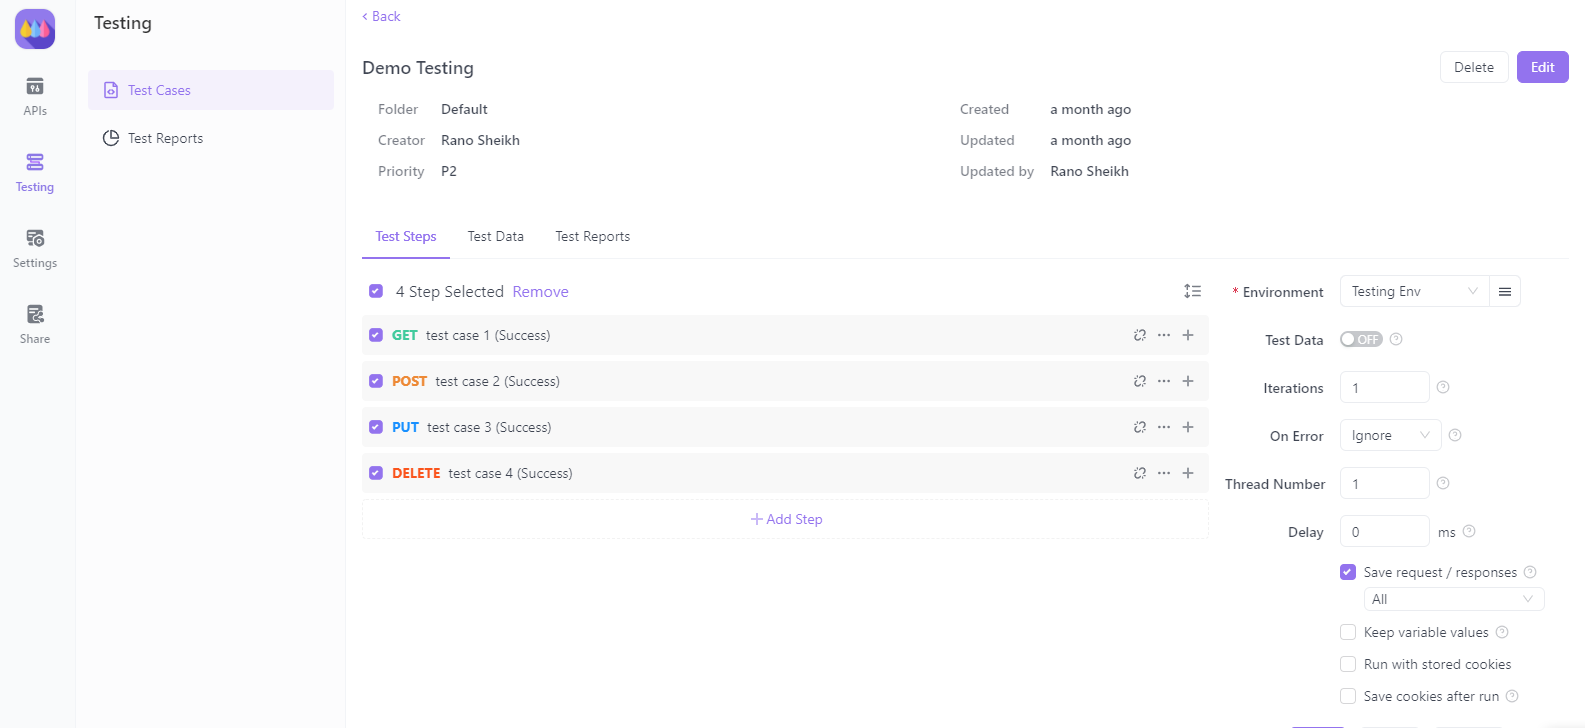
Run Your Tests
Apidog allows you to run tests individually or in groups, enabling you to thoroughly assess your APIs' functionality, reliability, and security.
Analyze Test Results and Optimize
After executing your tests, analyze the results using Apidog's detailed reports and analytics. Identify areas for improvement, optimize your APIs, and ensure they meet the highest performance and reliability standards.
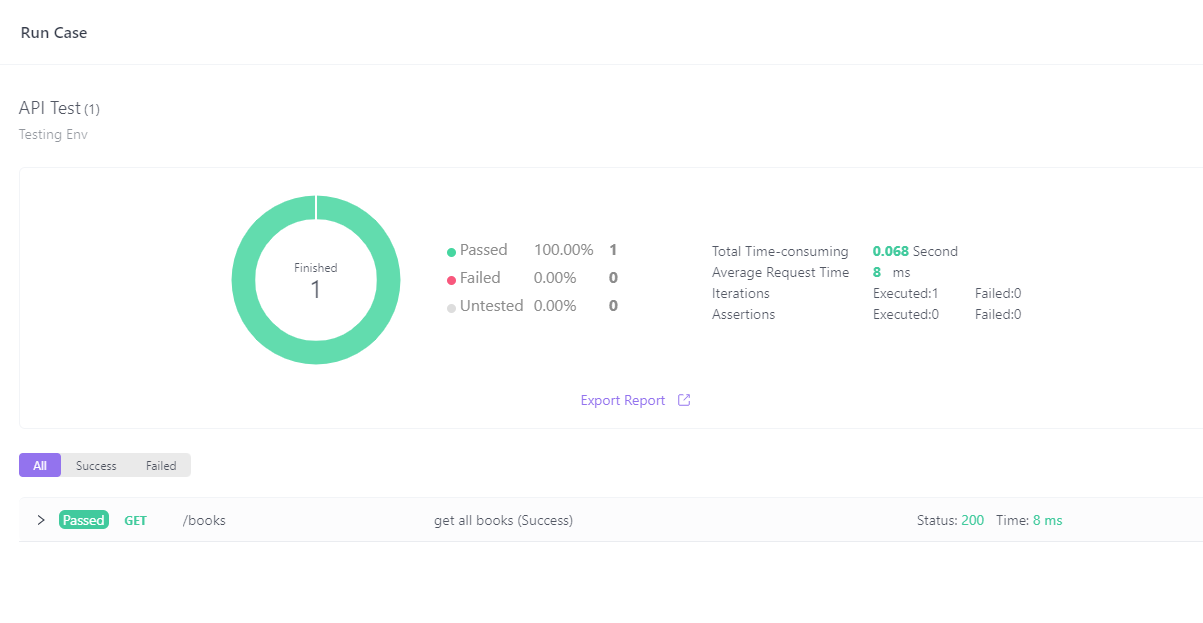
For a more detailed walkthrough, check out the Apidog Getting Started Guide. By following these steps, you'll be well on your way to mastering API testing automation with Apidog and improving your development workflow.
Conclusion
Both Visual Studio and Visual Studio Code are excellent choices for writing Playwright tests, each with its own strengths. Visual Studio shines in .NET-centric environments and offers powerful debugging tools, while Visual Studio Code provides a lightweight, flexible solution that's ideal for cross-platform development and various programming languages.
Ultimately, the choice between Visual Studio and Visual Studio Code for Playwright testing depends on your specific project requirements, team preferences, and development environment. Consider the factors discussed in this article, and don't hesitate to experiment with both IDEs to find the one that best suits your needs.
Remember, the most important aspect is not the tool you use, but how effectively you write and maintain your Playwright tests to ensure the quality and reliability of your web applications. Whichever IDE you choose, focus on writing clear, efficient, and maintainable test scripts to get the most out of Playwright's powerful features.


