
Apidog is an API collaboration and management platform that supports importing API specifications in many formats. It can directly import almost all mainstream API spec formats, including OpenAPI/Swagger, Postman Collections, HAR files, and cURL commands.

However, in many real projects, the main challenge isn't about how to import API specs — it's that there are no API specs available to import in the first place. Some older or legacy systems never maintained API documentation and do not have OpenAPI or Swagger files.
In these cases, if you need to quickly rebuild missing API documentation or create test cases so testers can work with real data, using a packet capture tool is often the fastest approach.
By capturing the application's HTTP/HTTPS traffic, filtering useful requests, exporting them as HAR or cURL, and then importing them into Apidog, you can quickly generate API documentation and lay the groundwork for further API testing.
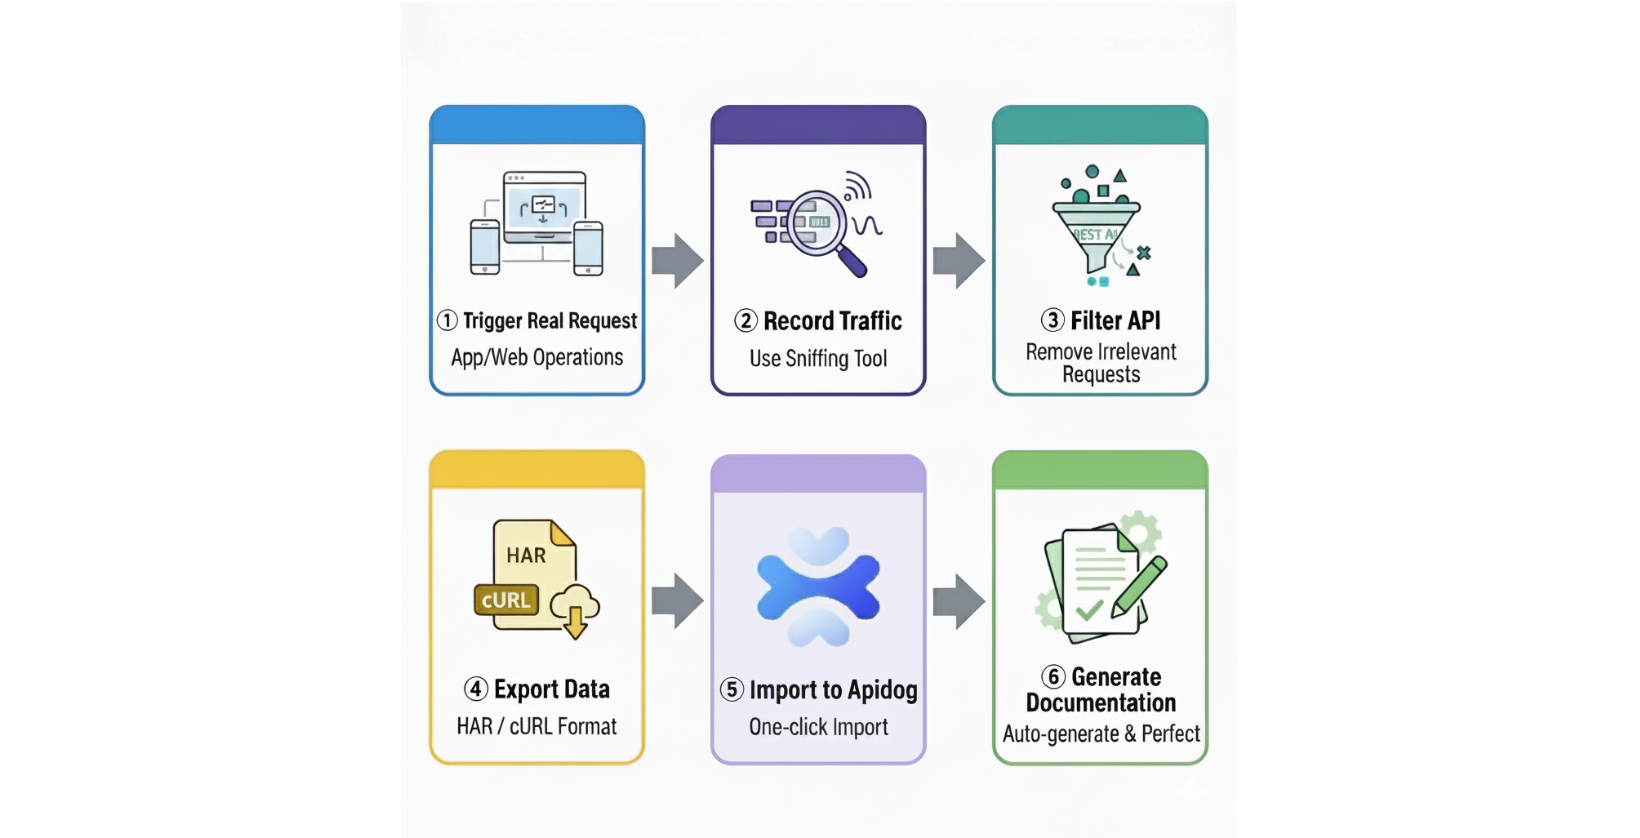
There are many tools available for traffic recording. This article uses Charles Proxy as an example to demonstrate the specific operations involved, but you can also use alternatives such as Proxyman, Fiddler, or the developer tools built into your browser for packet capture. The core workflow is essentially the same across these tools.

Charles Installation and Basic Configuration
Charles offers a 30-day free trial. You can download the latest version from the official website and install it on your system.
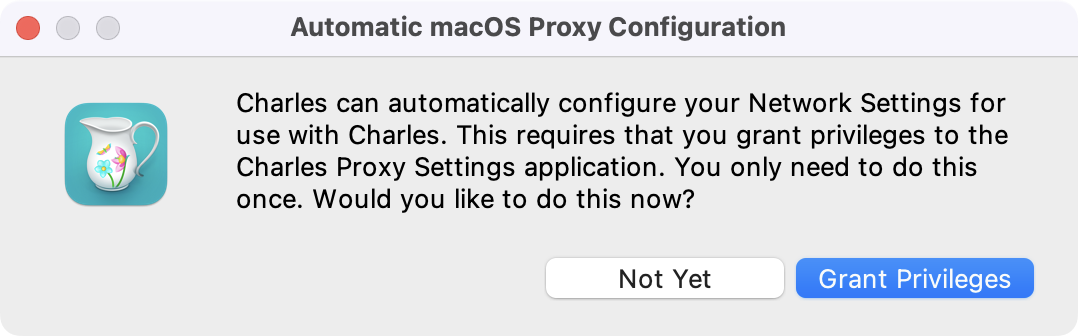
When you launch Charles for the first time, it may ask whether to automatically configure the Network settings. It is recommended to select "Grant Privileges" to grant the necessary permissions. This allows Charles to automatically capture HTTP traffic from your system.
Installing Charles Root Certificate for HTTPS Capture
To capture HTTPS traffic, you need to install Charles's root certificate. This step is essential because most modern APIs use HTTPS.
On macOS:
- Click "Help → SSL Proxying → Install Charles Root Certificate" from the menu bar
- The Keychain Access application will open automatically
- Search for and locate the Charles Proxy certificate
- Double-click it and change the trust setting to "Always Trust"
On Windows:
- Click "Help → SSL Proxying → Install Charles Root Certificate" from the menu bar
- During the installation process, install the certificate to the "Trusted Root Certification Authorities" store
Enabling SSL Proxying
After the certificate is installed, you need to enable SSL proxying:
- Select Proxy → SSL Proxying Settings from the Charles menu bar
- Check the "Enable SSL Proxying" option
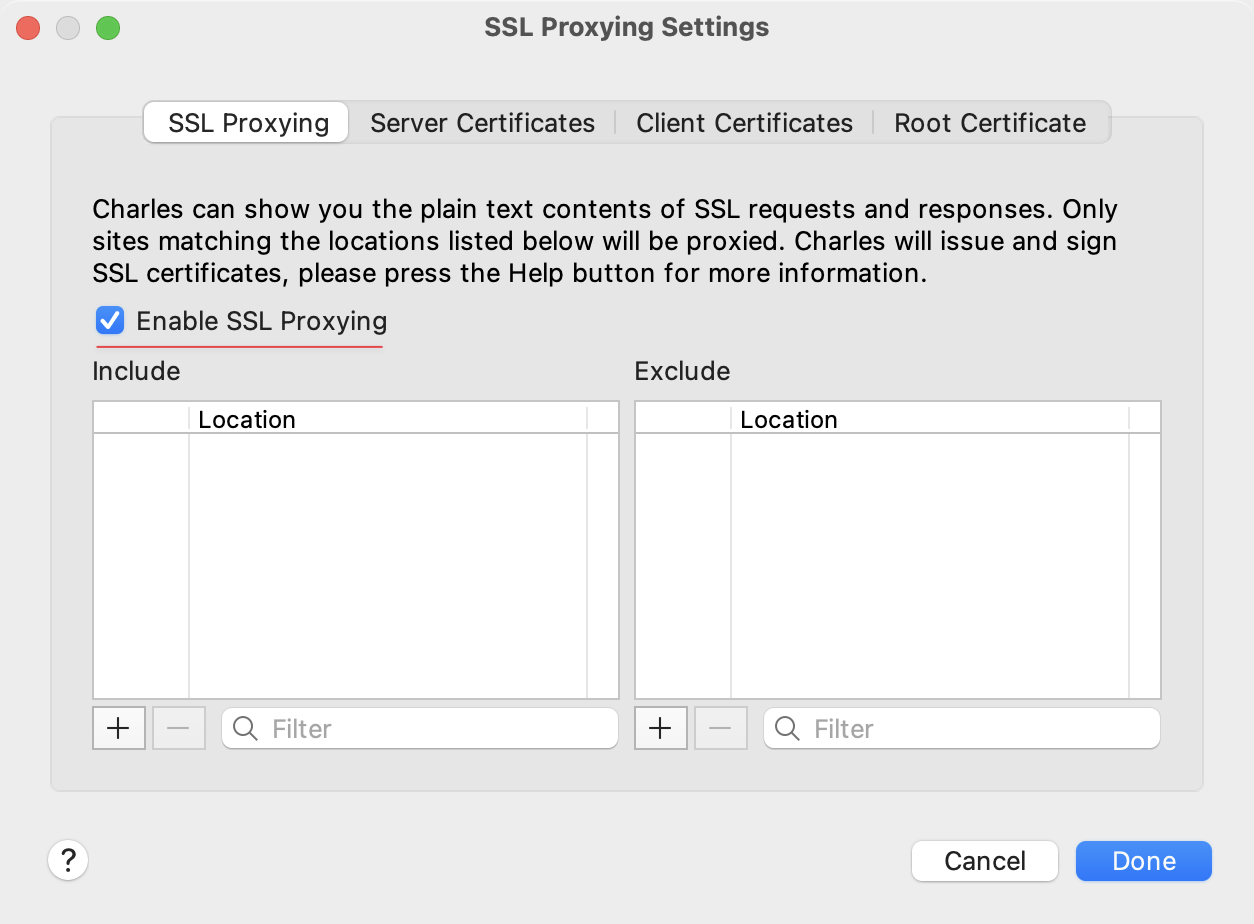
3. Add the domain names (Host) and ports (Port 443) you want to capture to the list
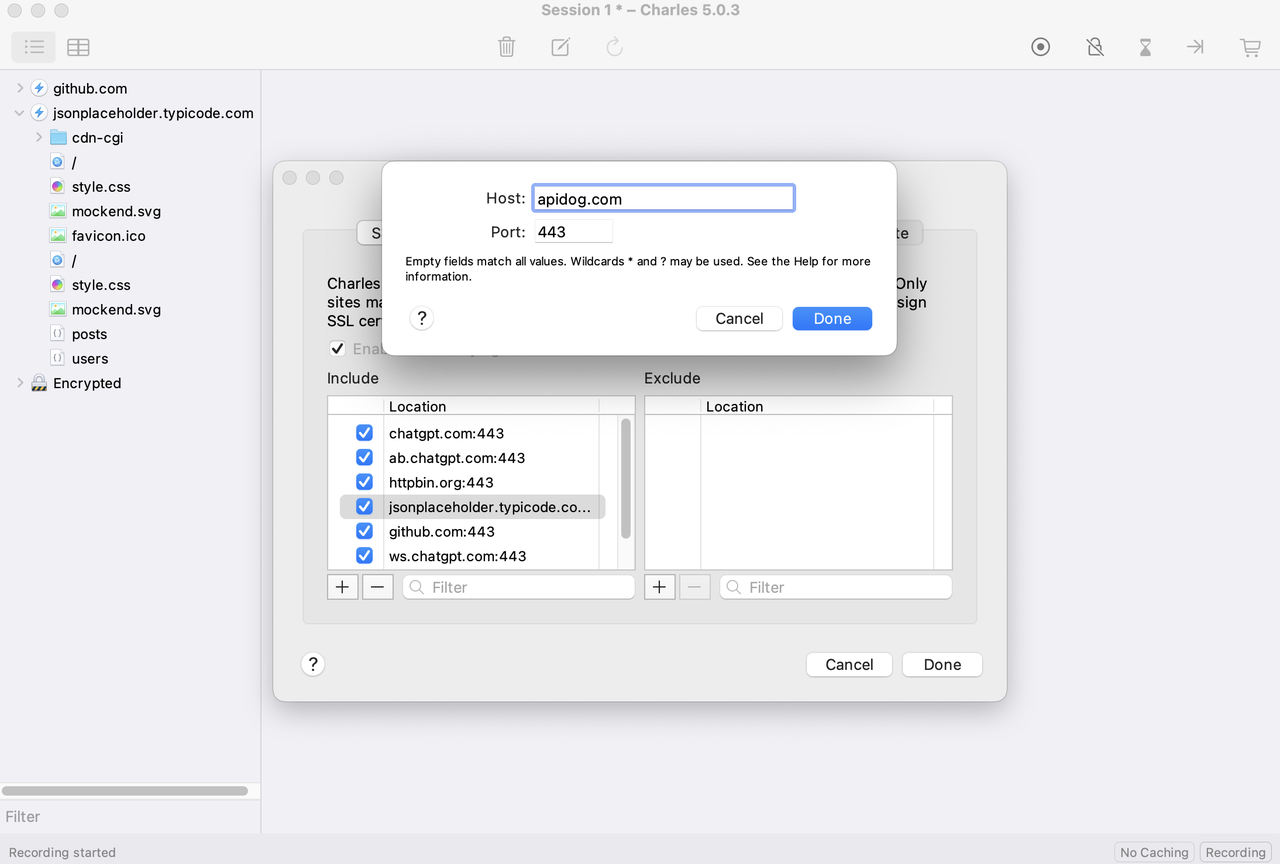
4. You can also use * to monitor all domains
After the configuration is complete, Charles can capture full HTTP/HTTPS requests and responses.
Tip: If you're unsure which domains your application uses, you can first operate the application freely and then observe the requests under "Encrypted" in the Charles session list. Note the corresponding domains and then add them to Charles's SSL Proxying settings.
Recording API Traffic from Your Application
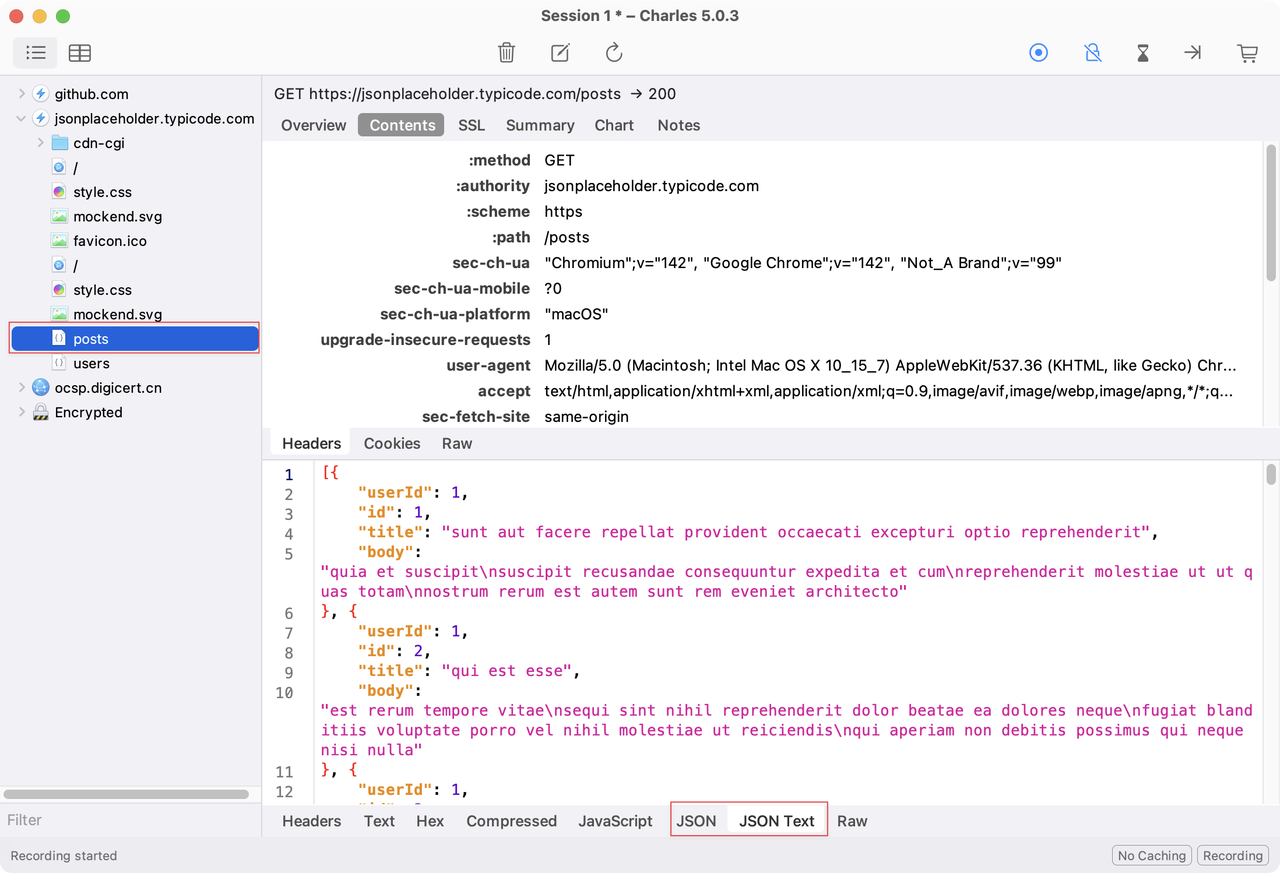
Launch the application or webpage you want to analyze and interact with various features, such as logging in, querying data, submitting forms, or uploading files. The session tree on the left side of Charles will update in real-time, grouping requests by domain and URL.
When you select a specific request, the right panel displays the basic information and response content of that request. In the Contents tab, JSON and other responses are collapsed into a tree structure, making it easy to quickly understand the data structure and fields.
Filtering and Exporting API Endpoints
After recording is complete, you may find that a large number of requests have been captured. In addition to actual API calls, there are various static resource requests, third-party service calls, and other network traffic. At this point, you need to filter and retain only the endpoints you care about.
Filtering Options
1. Focus on specific domains or paths:
-
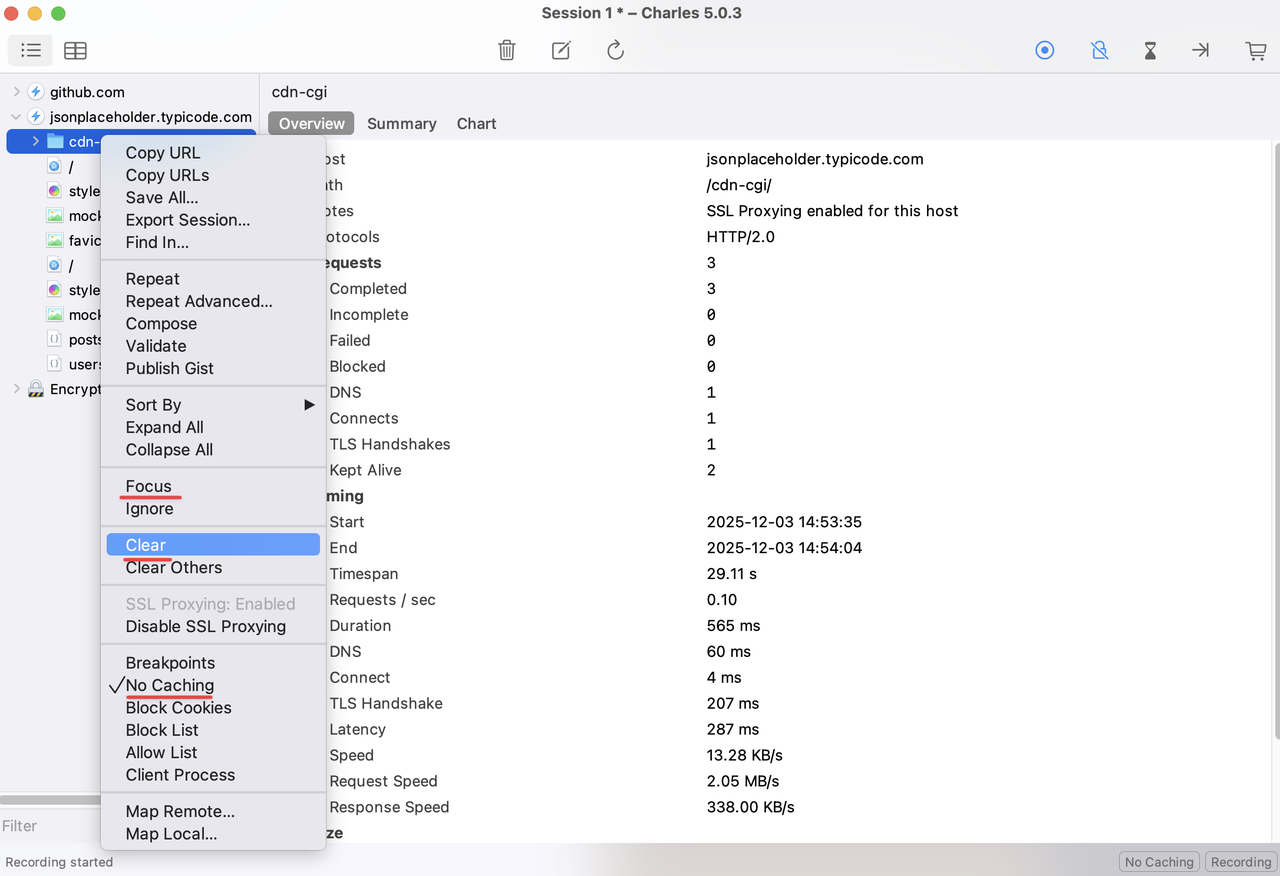
Right-click on a domain or path and select "Focus"
-
Charles will retain only the requests under that node, making it convenient to your analysis
2. Remove unrelated requests:
-
Right-click on unrelated requests and select "Clear" to remove them
-
Or select multiple requests and delete them in bulk
3. Handle caching issues:
-
If caching causes HTML or JSON to not display correctly, right-click and select "No Caching"
-
This causes Charles to ignore caching in subsequent requests, allowing you to capture the complete response content
Exporting as HAR File
After filtering is complete, export your selected sessions:
- Select the sessions you want to export:
-
You can select an entire domain node, or
-
Hold Cmd (Mac) or Ctrl (Windows) and select specific requests individually
-
Select File → Export Session from the menu bar
-
In the export dialog, choose to export in "HTTP Archive (.har)" format to create a HAR file

Importing into Apidog to Auto-Generate API Documentation
Now it's time to import your captured traffic into Apidog:
- Open the Apidog client
2. Go to Project Settings → Import Data → .har File
3. Select the HAR file you exported from Charles
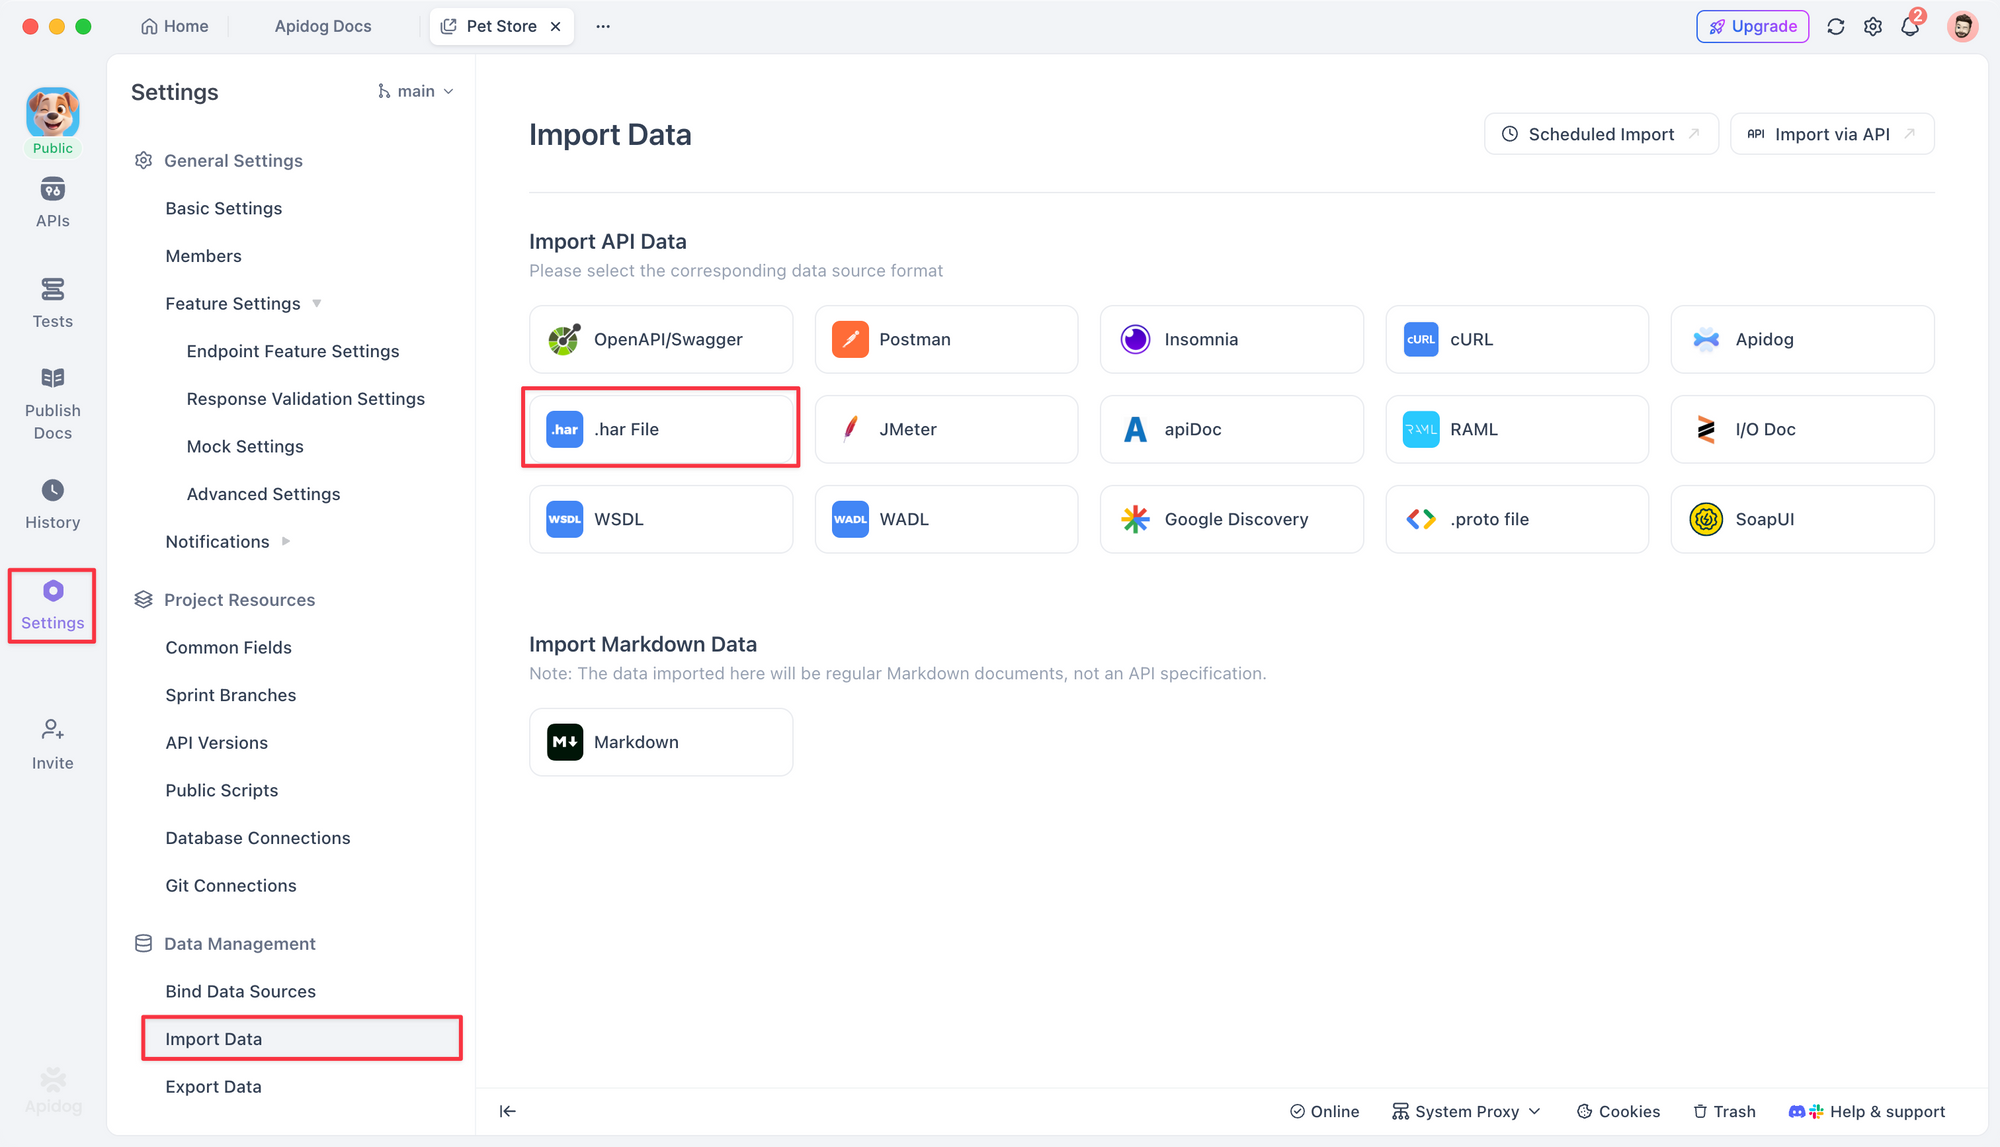
Apidog will automatically parse the file content and display the detected endpoint information in the preview area, including:
- The number of endpoints detected
- Request methods (GET, POST, PUT, DELETE, etc.)
During the import process, you can configure options such as:
- Which module to import into
- Whether to overwrite existing endpoints
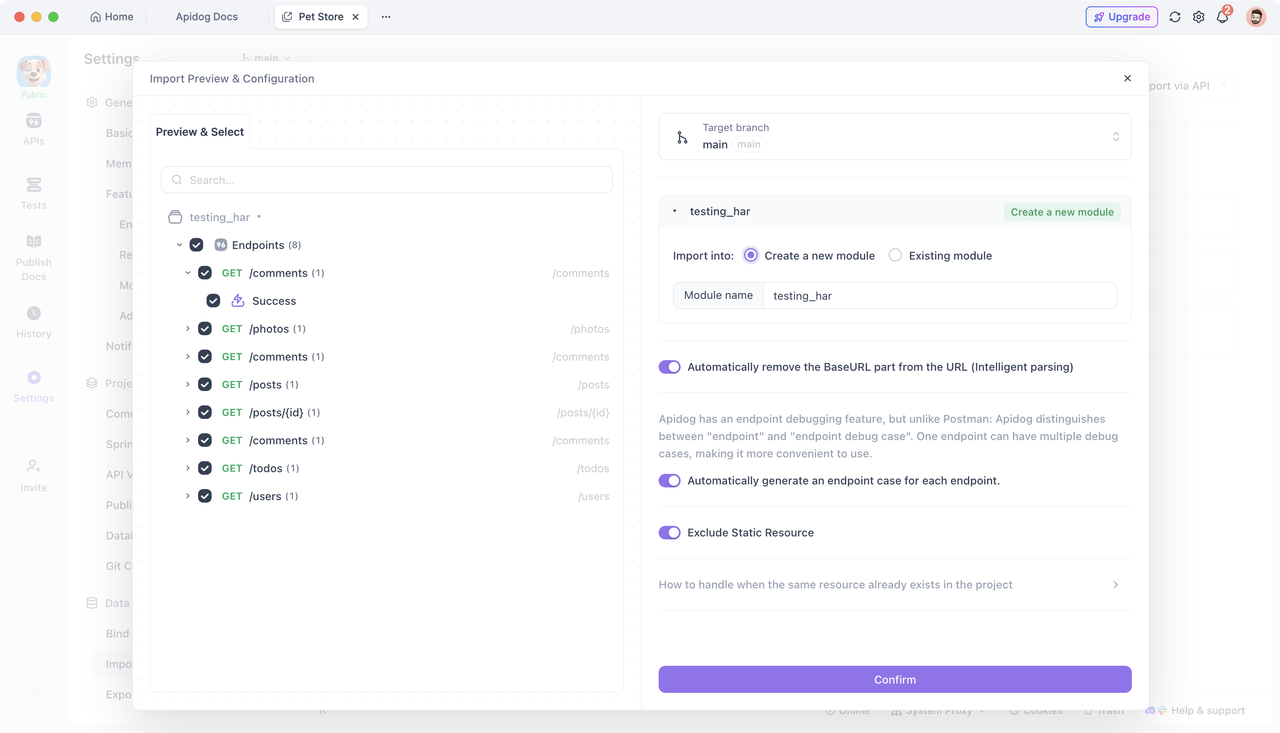
After the import is complete, you can view the endpoints in the corresponding module.
Refining and Optimizing API Documentation
Auto-generated API documentation is a great starting point, but it usually requires further adjustments to meet your business requirements. Here are some common improvements:
- Improve endpoint names: Change generic names to more descriptive ones
- Add parameter descriptions: Document what each parameter does and when to use it
- Refine response components: Organize response components to match your business logic
- Add examples: Include sample requests and responses
- Configuring auth: If an endpoint requires auth, configure the corresponding information in Apidog's environment variables or Auth settings. This ensures that your API calls work correctly when testing.
Final Take-away
By recording HTTP/HTTPS traffic using packet capture tools and then importing into Apidog, you can quickly generate API documentation and provide real data support for testing.
Whether it's a browser, desktop client, or mobile application, this method can significantly reduce the time spent preparing API documentation and allow your team to quickly get started with API testing and development.


