
OK, So How Does osmosis-structure-0.6b Get Its Name?
The model you're interested in, osmosis/osmosis-structure-0.6b, is available through the Ollama platform. The name itself offers some valuable clues:
osmosis/: This indicates the publisher or namespace on Ollama, suggesting it's provided by a group or individual known as "Osmosis."osmosis-structure: The "Structure" part strongly implies that this model is fine-tuned or designed specifically for tasks involving structured data. This could range from code generation, text-to-SQL, JSON manipulation, to other forms of structured text output.0.6b: This signifies the model has approximately 600 million parameters. This places it in the category of smaller, efficient language models.- Size: Search results indicate this model is around 350 MB in GGUF format. This compact size means it's highly quantized and optimized for running efficiently on consumer hardware, requiring less RAM and disk space than larger models.

While the exact specifications, training data, specific benchmarks, and primary intended use cases are best found on its official model card on the Ollama website (the link you have), we can infer general expectations for a 0.6B parameter model focused on "structure":
Its small size allows for fast loading times and lower resource consumption (CPU, RAM) compared to multi-billion parameter models.
Its "Structure" designation suggests it would perform better on tasks like:
- Generating or understanding SQL queries.
- Creating or parsing JSON, XML, or YAML data.
- Assisting with code generation in common programming languages.
- Following instructions that require specifically formatted text output.
Performance: For a model of this size, it would aim for strong performance on its specialized tasks, rather than trying to be a generalist knowledge powerhouse like much larger models. Its benchmarks (which you should check on its model card) would likely reflect its capabilities in these structured domains.
Let's Run osmosis-structure-0.6b with Ollama
Ollama is a tool that radically simplifies running open-source large language models on your local machine. It packages the model weights, configurations, and a serving mechanism, allowing for easy setup and interaction.
Ollama enables you to harness the power of LLMs like osmosis/osmosis-structure-0.6b without relying on cloud-based APIs. This ensures privacy, allows for offline usage, and provides a cost-effective way to experiment and build applications. It's available for macOS, Windows, and Linux.
First, You Need to Install Ollama
The installation procedure differs slightly based on your operating system.
For macOS: Typically, you would download the Ollama application from its official website. The download is usually a .zip file containing the Ollama.app. Extract it and move Ollama.app to your /Applications folder. Launching the app starts the Ollama background service, often indicated by a menu bar icon.
For Windows: An installer executable is available from the Ollama website. Download and run it, following the on-screen prompts. Ollama on Windows often integrates with the Windows Subsystem for Linux (WSL 2), which the installer can help set up if it's not already configured. Once installed, Ollama runs as a background service.
For Linux: The common way to install Ollama on Linux is via a curl command provided on their website, which fetches and executes an installation script:
curl -fsSL [<https://ollama.com/install.sh>](<https://ollama.com/install.sh>) | sh
This command sets up Ollama, and it usually runs as a systemd service.
After installation, open your terminal (or PowerShell/Command Prompt on Windows) and issue the following command:
ollama --version
This should display the installed Ollama version, confirming that the CLI is working correctly.
Running osmosis/osmosis-structure-0.6b Locally with Ollama
With Ollama installed and running, you can now pull and interact with the osmosis/osmosis-structure-0.6b model.
Hardware Considerations:
- RAM: For a ~350MB model, you'll likely need at least 1-2 GB of free RAM for it to load and run smoothly, though Ollama's memory management and the model's GGUF format are efficient.
- CPU/GPU: Ollama will automatically use your CPU. If you have a compatible GPU (Apple Metal, NVIDIA CUDA, AMD ROCm on Linux), Ollama will leverage it for significantly faster inference. The 0.6B size should be quite responsive even on modern CPUs.
- Storage: The model itself is small (~350MB), so disk space is not a major concern.
Step 1. Fetching the Model
To download the model to your local system, use the ollama pull command with the model's full identifier:
ollama pull osmosis/osmosis-structure-0.6b
Ollama will then:
- Connect to its model registry.
- Download the model manifest and its layers (you'll see progress indicators).
- Store the model locally, making it ready for use. Given its ~350MB size, this should be a relatively quick download.
While ollama pull gets you the default configuration, you can customize model behavior by creating a custom Modelfile if you wish to change parameters like temperature (randomness), num_ctx (context window size), or the system prompt. You would then use ollama create your-custom-osmosis -f ./YourModelfile (using the original model as a base FROM osmosis/osmosis-structure-0.6b). Check the official Ollama documentation for Modelfile syntax. The default settings for osmosis/osmosis-structure-0.6b are likely already optimized by its publisher.
Step 2. Interactive Chat via Command Line
The simplest way to interact with your newly downloaded model is through the ollama run command:
ollama run osmosis/osmosis-structure-0.6b
This loads the model into memory and provides you with an interactive prompt (e.g., >>>). You can type your questions or instructions, press Enter, and the model will generate a response.
For example, if you want to test its SQL capabilities (assuming this is one of its strengths based on its "Structure" focus):
>>> Given a table 'users' with columns 'id', 'name', 'email', and 'signup_date', write a SQL query to find all users who signed up in the year 2024.
The model would then provide its generated SQL query.
To exit this interactive session, you can typically type /bye, /exit, or press Ctrl+D.
Step 3. Interacting via the Ollama API
Ollama serves models through a local REST API, typically available at http://localhost:11434. This allows you to integrate osmosis/osmosis-structure-0.6b into your own applications and scripts.
Here's a Python example using the requests library to interact with the API. First, ensure requests is installed:
pip install requests
Now, the Python script:
import requests
import json

OLLAMA_ENDPOINT = "<http://localhost:11434/api/generate>"
MODEL_NAME = "osmosis/osmosis-structure-0.6b" # Correct model name

def generate_response(prompt_text, stream_output=False):
    """
    Sends a prompt to the Ollama API for the specified model.
    Returns the consolidated response text.
    Set stream_output=True to print parts of the response as they arrive.
    """
    payload = {
        "model": MODEL_NAME,
        "prompt": prompt_text,
        "stream": stream_output
    }

    full_response_text = ""
    try:
        response = requests.post(OLLAMA_ENDPOINT, json=payload, stream=stream_output)
        response.raise_for_status()

        if stream_output:
            for line in response.iter_lines():
                if line:
                    decoded_line = line.decode('utf-8')
                    json_object = json.loads(decoded_line)
                    chunk = json_object.get('response', '')
                    print(chunk, end='', flush=True)
                    full_response_text += chunk
                    if json_object.get('done'):
                        print("\\\\n--- Stream Complete ---")
                        break
        else:
            response_data = response.json()
            full_response_text = response_data.get('response', '')
            print(full_response_text)

        return full_response_text

    except requests.exceptions.RequestException as e:
        print(f"\\\\nError connecting to Ollama API: {e}")
        if "connection refused" in str(e).lower():
            print("Ensure the Ollama application or service is running.")
        return None
    except json.JSONDecodeError as e:
        print(f"\\\\nError decoding JSON response: {e}")
        print(f"Problematic content: {response.text if 'response' in locals() else 'No response object'}")
        return None

if __name__ == "__main__":
    # Ensure Ollama is running and the model is loaded or available.
    # Ollama typically loads the model on the first API request if not already loaded.

    prompt1 = "Write a Python function to serialize a dictionary to a JSON string."
    print(f"--- Sending Prompt 1: {prompt1} ---")
    response1 = generate_response(prompt1)
    if response1:
        print("\\\\n--- Model Response 1 Received ---")

    print("\\\\n" + "="*50 + "\\\\n") # Separator

    prompt2 = "Explain how a LEFT JOIN in SQL differs from an INNER JOIN, in simple terms."
    print(f"--- Sending Prompt 2 (Streaming): {prompt2} ---")
    response2 = generate_response(prompt2, stream_output=True)
    if response2:
        # The full response is already printed by the streaming logic
        pass
    else:
        print("\\\\nFailed to get response for prompt 2.")
This script defines a function to send prompts to the osmosis/osmosis-structure-0.6b model. It can handle both streaming and non-streaming responses. Remember that the Ollama service must be running for this script to work.
- If you are having errors, verify the Ollama service/application is running. Check firewall settings if you're accessing it from a different machine (though default is localhost). Consult Ollama logs for errors (
~/.ollama/logson macOS/Linux).
Step 4. Try Some Prompts
The specific strengths of osmosis/osmosis-structure-0.6b are best understood by reviewing its model card on the Ollama website. However, for a "Structure" focused 0.6B model, you might try prompts like these:
Text-to-SQL:
- Prompt: "Consider a table
inventorywith columnsitem_id (INT),item_name (VARCHAR),quantity (INT),last_stocked_date (DATE). Generate a SQL query to find all items with a quantity less than 10 that were last stocked before '2024-01-01'." - (Observe the accuracy and syntax of the generated SQL.)
JSON Manipulation/Generation:
- Prompt: "Create a JSON object for a book titled 'The Local LLM Handbook', authored by 'AI Community', published in 2025, with ISBN '978-0-LOCAL-LLM-0'."
- (Check if the output is well-formed JSON and accurately reflects the prompt.)
Simple Code Generation (e.g., Python):
- Prompt: "Write a Python script that defines a class
Rectanglewith a constructor for width and height, and a method to calculate its area." - (Evaluate the correctness and completeness of the generated code.)
Instruction Following for Formatted Output:
- Prompt: "List three advantages of using local language models. Present them as a bulleted list, with each point starting with 'Advantage:'."
- (Assess how well it adheres to the formatting instructions.)
Experimentation is key! Try different types of prompts related to structured data to discover the model's strengths and weaknesses. Refer to its Ollama model card for guidance on its primary design functions.
Testing Ollama Local API with Apidog
Apidog is an API testing tool that pairs well with Ollama’s API mode. It lets you send requests, view responses, and debug your Qwen 3 setup efficiently.
Here’s how to use Apidog with Ollama:
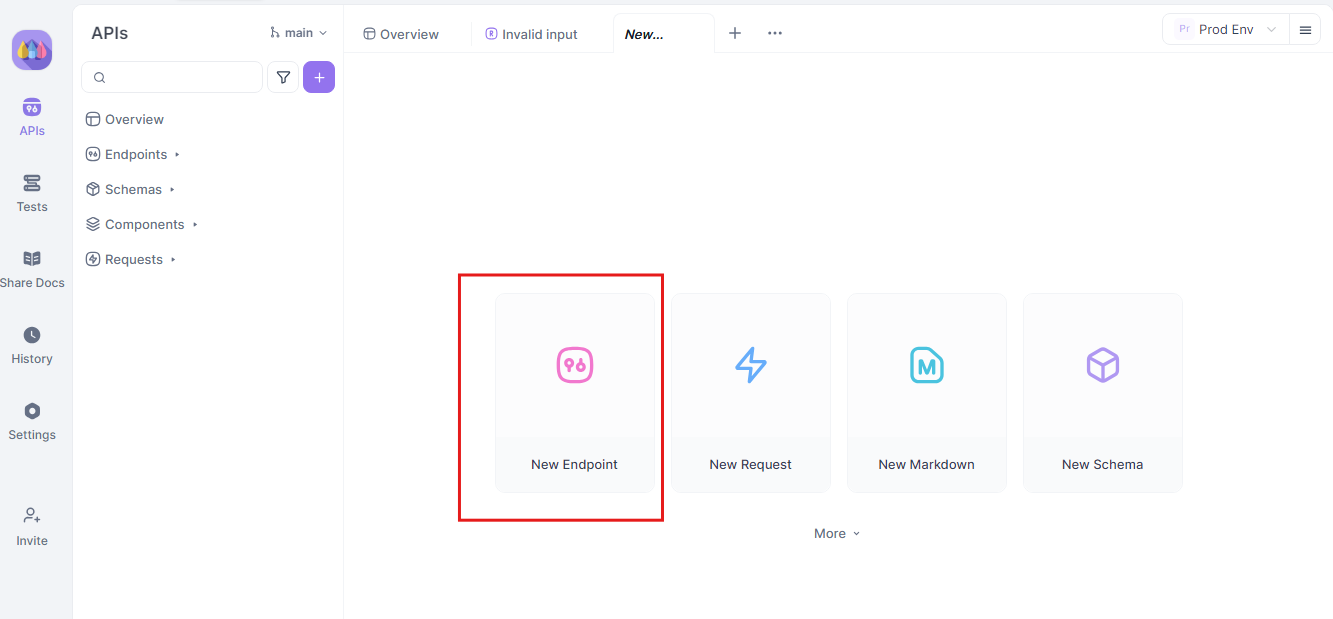
- Create a new API request:
- Endpoint:
http://localhost:11434/api/generate - Send the request and monitor the response in Apidog’s real-time timeline.
- Use Apidog’s JSONPath extraction to parse responses automatically, a feature that outshines tools like Postman.

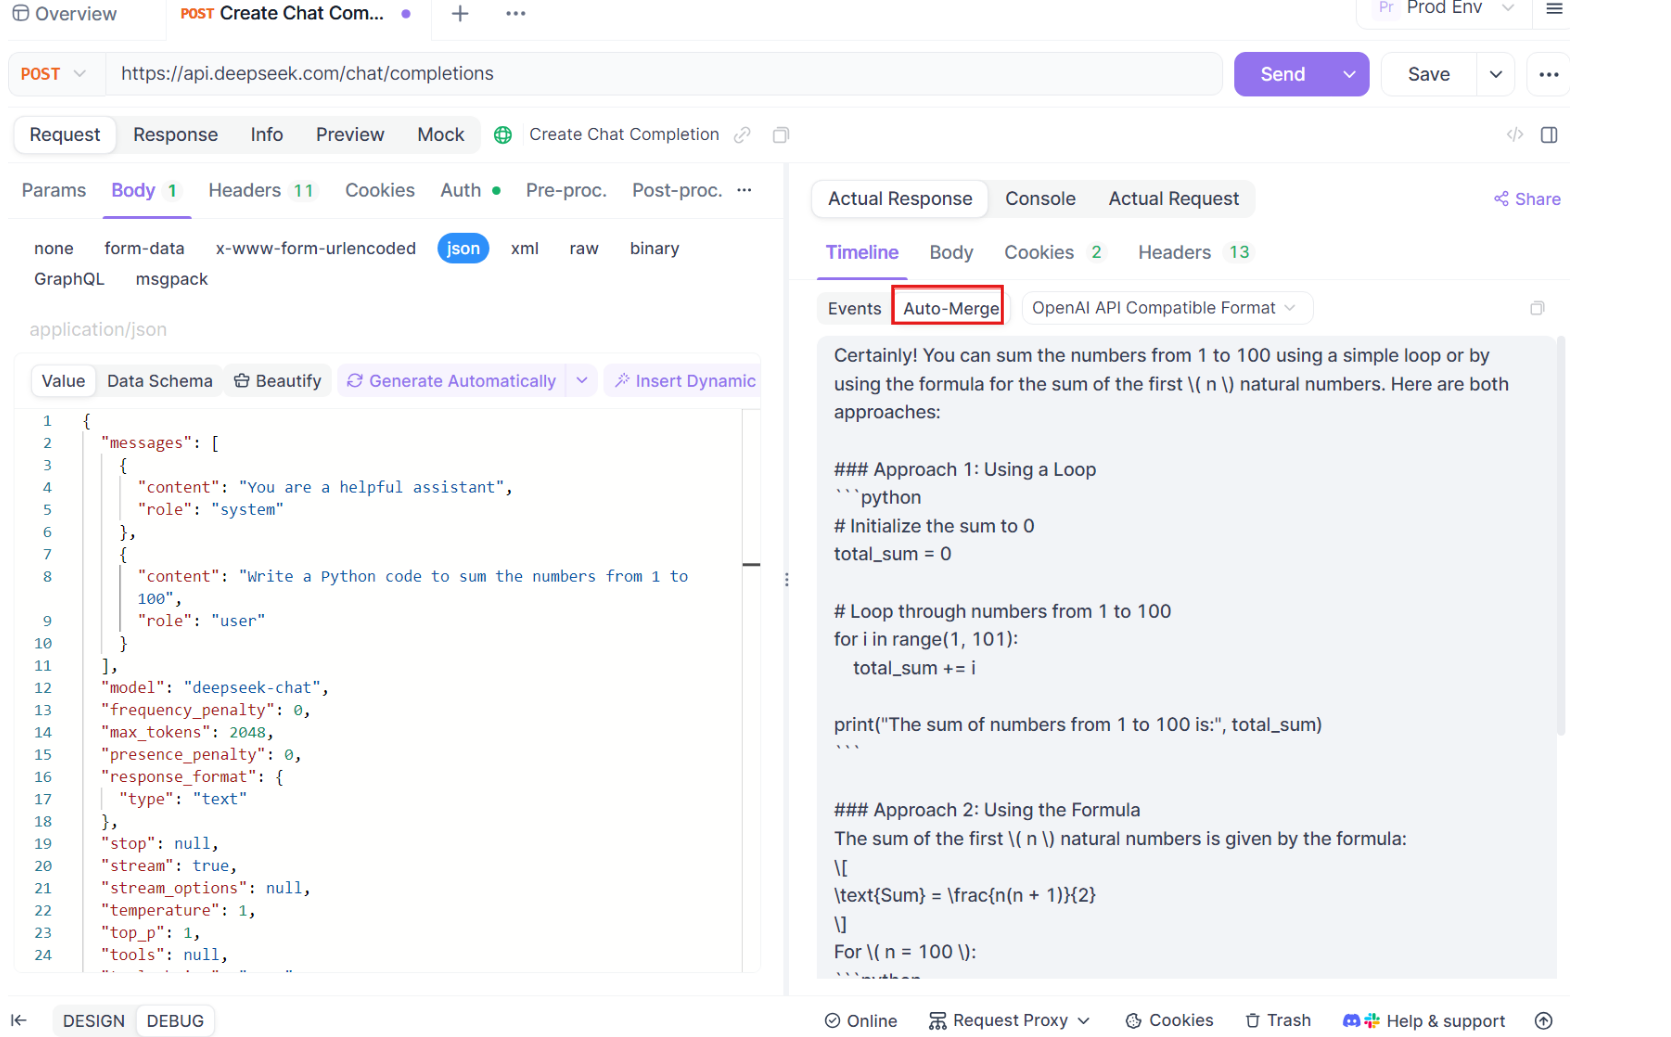
Streaming Responses:
- For real-time applications, enable streaming:
- Apidog’s Auto-Merge feature consolidates streamed messages, simplifying debugging.
curl http://localhost:11434/api/generate -d '{"model": "gemma3:4b-it-qat", "prompt": "Write a poem about AI.", "stream": true}'
This process ensures your model works as expected, making Apidog a valuable addition.
Want an integrated, All-in-One platform for your Developer Team to work together with maximum productivity?
Apidog delivers all your demands, and replaces Postman at a much more affordable price!
Conclusion
The osmosis/osmosis-structure-0.6b model offers an exciting opportunity to run a compact, structure-focused language model locally. Thanks to Ollama, the process of downloading and interacting with it is accessible to a wide audience. By leveraging its capabilities, you can explore applications in data processing, code assistance, and other domains requiring structured output, all with the privacy and control of local execution.
Always refer to the model's official page on Ollama (ollama.com/osmosis/osmosis-structure-0.6b:latest) for the most authoritative information from its developers. Enjoy experimenting with local AI!


