
The command line interface (CLI) is where professional developers find speed, control, and seamless integration in their daily workflows. Imagine having an AI coding assistant right in your terminal—capable of understanding your codebase, editing files, running shell commands, and iterating on solutions—all without ever leaving the comfort of your CLI. That’s exactly what OpenAI Codex CLI delivers: a lightweight, developer-first coding agent available via npm as @openai/codex.
Unlike generic chatbots, Codex CLI combines ChatGPT-level reasoning with direct task execution in your local repository. It interacts securely with your files, runs shell commands, and integrates with version control, making it a powerful partner for developers who prefer chat-driven, context-aware development.
💡 Looking for an API testing platform that generates beautiful API documentation and streamlines team collaboration for maximum productivity? Apidog brings together everything your developer team needs, replacing Postman at a much more affordable price.

What Is OpenAI Codex CLI?
OpenAI Codex CLI is an open-source AI coding agent designed for developers who work in the terminal. It brings advanced AI reasoning and automation directly into your codebase, letting you:
- Understand, refactor, and generate code
- Automate repetitive development tasks
- Interact with your repository contextually
- Safely run and approve shell commands
- Integrate AI into CI/CD pipelines
By minimizing context switching and embedding AI where you already work, Codex CLI helps teams move faster and maintain code quality.
Getting Started with OpenAI Codex CLI
[ ]
]
Setting up Codex CLI is quick—just install the package and provide your OpenAI API key. Here’s what you’ll need:
System Requirements:
- OS: macOS 12+, Ubuntu 20.04+/Debian 10+, or Windows 11 via WSL2
- Node.js: Version 22 or newer (LTS recommended)
- Git: Version 2.23+ (recommended for full repo integration)
- RAM: 4GB minimum, 8GB recommended
Explore the OpenAI Codex GitHub repository for source code and updates.
[ ]
]
Installation Steps
Install globally with npm:
npm install -g @openai/codex
Tip: Avoid
sudo npm install -gfor best security; configure npm permissions as needed.
API Key Setup
Set your OpenAI API key as an environment variable:
export OPENAI_API_KEY="your-api-key-here"
To make this persistent, add it to your shell profile (~/.zshrc, ~/.bashrc, or ~/.bash_profile).
How to Use Codex CLI
There are three primary ways to interact with Codex CLI:
-
Interactive Mode:
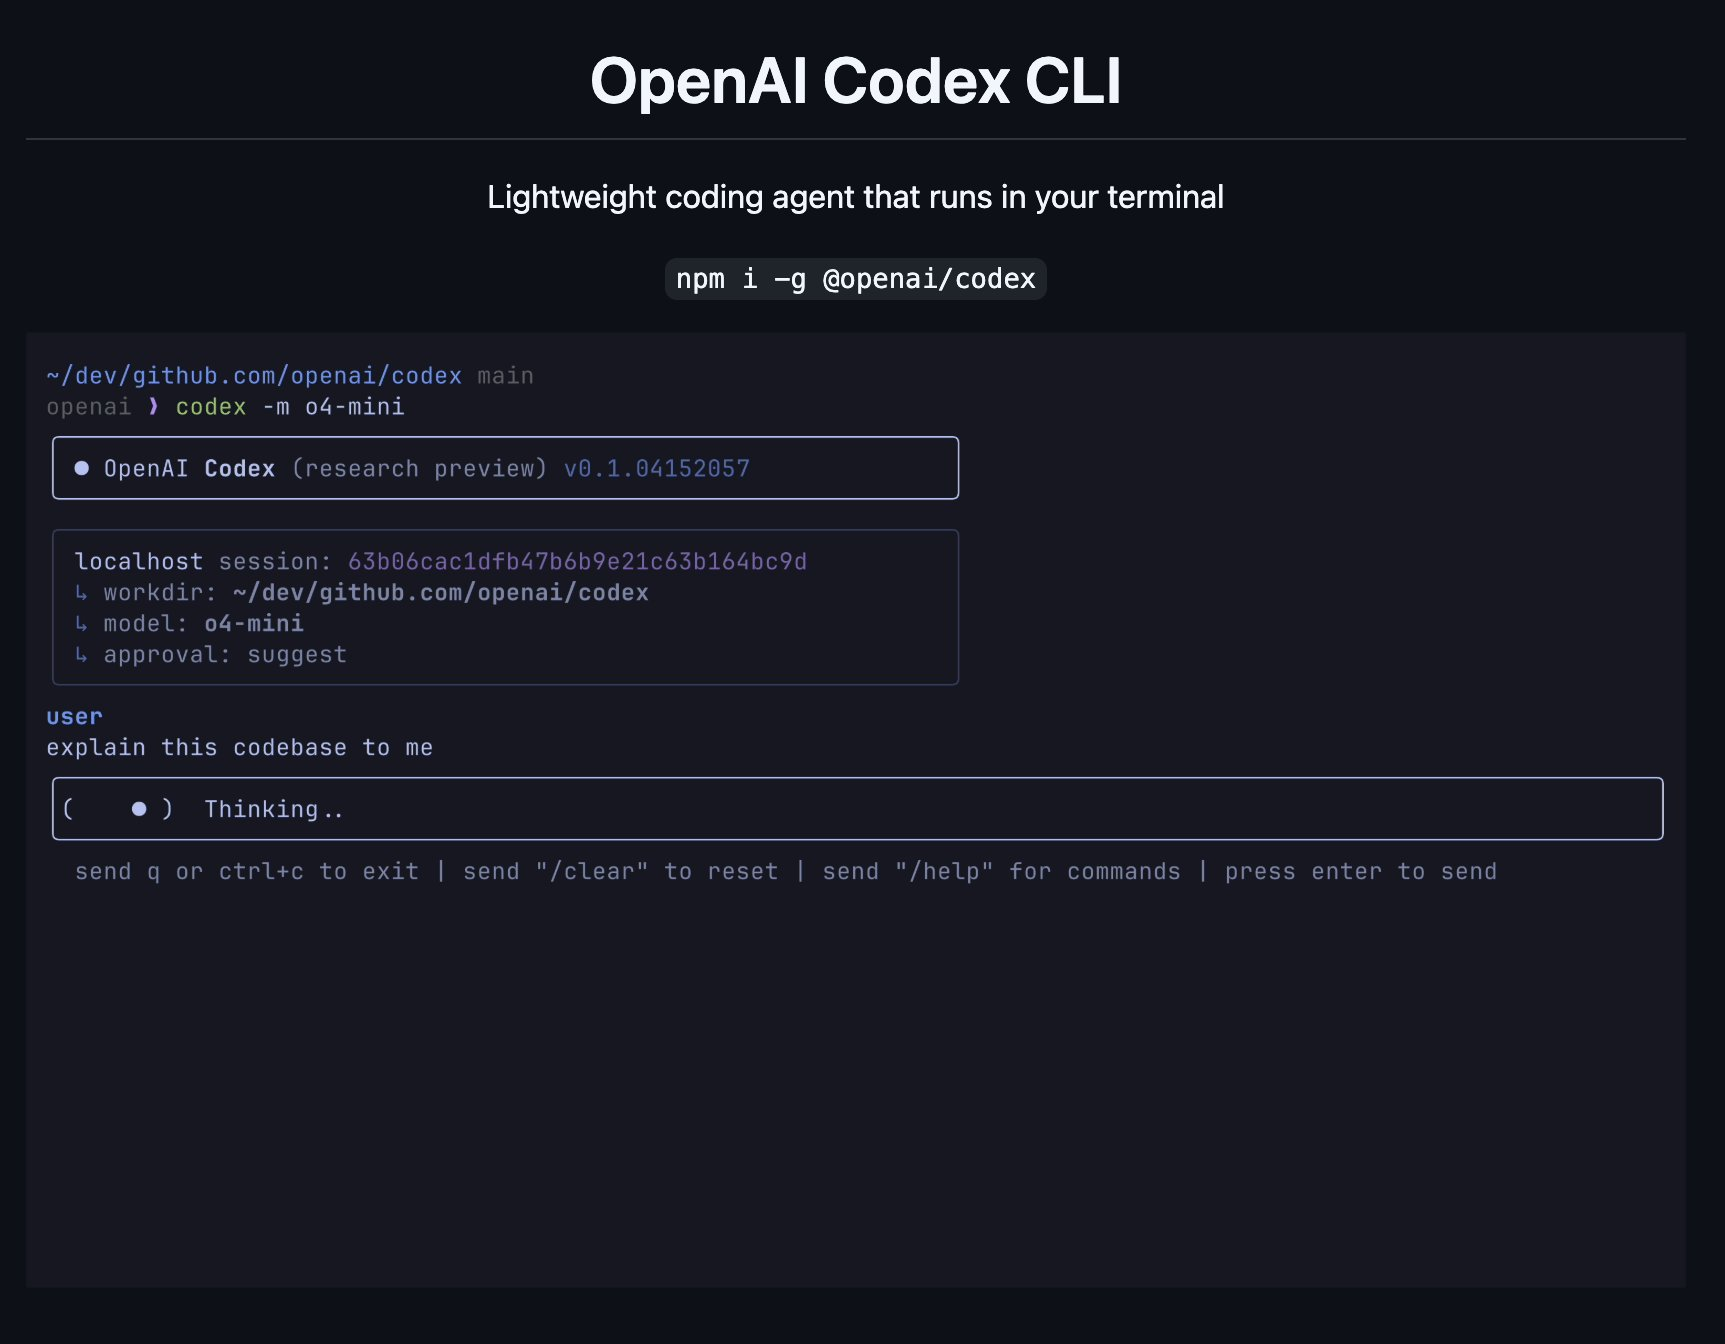
Launch withcodexfor a REPL session where you can issue commands and view results in real time. -
Direct Prompt:
Run a task directly from the command line:codex "explain this codebase to me" -
Automated Execution:
Combine with approval modes for automation:codex --approval-mode full-auto "create the fanciest todo-list app"
Codex CLI will analyze your repository, suggest or apply changes, and let you review outputs before committing. It scaffolds files, runs code in secure sandboxes, and manages dependencies as needed.
Why Developers Choose OpenAI Codex CLI
[ ]
]
Codex CLI stands out for developers who want AI integrated naturally into their CLI workflow. Its strengths include:
- Terminal-Native: No need to switch to external web apps—work directly in your CLI.
- Reasoning + Execution: Not just code suggestions, but real file edits and command execution.
- Repo Awareness: Interprets your codebase context for smarter, safer automation.
- Minimal Setup: Just install, configure your API key, and start coding.
- Configurable Automation: Select your trust level with different approval modes.
- Multimodal Input: Accepts screenshots and diagrams for even richer context.
- Open Source: Transparent, community-driven development.
For API teams, pairing Codex CLI with a powerful platform like Apidog ensures your API workflows—from design to testing and documentation—are as automated and collaborative as your codebase.
Codex CLI Approval Modes: Balancing Automation & Security
Granting AI access to your files and shell requires robust controls. Codex CLI introduces three approval modes, settable via --approval-mode or interactive onboarding:
1. Suggest Mode (Default)
- Reads: Any file (no approval needed)
- Writes/Commands: Always require user approval
- Best For: Learning the tool, sensitive repos, maximum control
2. Auto Edit Mode
- Reads/Writes: File reading and editing without approval
- Commands: Shell commands still require approval
- Best For: Faster code changes while keeping command safety
3. Full Auto Mode
- Reads/Writes/Commands: All actions allowed (within sandbox)
- Best For: Trusted, routine automation
Built-in Safeguards
- Sandboxing: In full-auto, commands run with network disabled and directory confinement
- Git Awareness: Warns you if auto-modes are enabled outside version-controlled directories
- Platform-Specific Security:
- macOS: Uses Apple Seatbelt sandbox
- Linux: Runs in Docker with firewall rules
- Windows: Supported via WSL2
Advanced Configuration and Integration
Codex CLI is designed for both interactive use and automation in complex workflows.
CLI Usage Reference
codex: Start interactive modecodex "...":Interactive mode with an initial promptcodex -q "..."orcodex --quiet "...":Non-interactive/quiet mode, ideal for scripting or CI- Key Flags:
-model/-m: Specify the AI model (e.g., gpt-4)-approval-mode/-a: Set automation level-quiet/-q: Suppress interactive UI
Project Context & Memory
Codex CLI leverages Markdown files for project instructions and context:
~/.codex/instructions.md: Global personal guidancecodex.mdat repo root: Project-wide standards or notescodex.mdin subdirectories: Context for packages or modules
Disable project doc loading with --no-project-doc or CODEX_DISABLE_PROJECT_DOC=1.
CI/CD Automation Example
Run Codex CLI in CI pipelines using quiet mode:
- name: Update changelog via Codex
  run: |
    npm install -g @openai/codex
    export OPENAI_API_KEY="${{ secrets.OPENAI_KEY }}"
    codex -a auto-edit --quiet "update CHANGELOG for next release based on recent commits"
Custom Configuration Files
~/.codex/config.yaml: Set default model, error handling behavior, etc.~/.codex/instructions.md: Persistent global instructions
Real-World Use Cases for Codex CLI
Codex CLI excels at automating repetitive or complex coding tasks. Here are practical ways API and backend teams can use it:
- Refactor Components:
codex "Refactor the Dashboard component to React Hooks" - Generate Database Migrations:
codex "Generate SQL migrations for adding a users table" - Write Unit Tests:
codex "Write unit tests for utils/date.ts" - Bulk File Renaming:
codex "Bulk-rename *.jpeg → *.jpg with git mv" - Explain Regex or Code:
codex "Explain what this regex does: ^(?=.*[A-Z]).{8,}$" - Suggest High-Impact PRs:
codex "Carefully review this repo, and propose 3 high impact well-scoped PRs" - Security Audits:
codex "Look for vulnerabilities and create a security review report"
By integrating Codex CLI into your workflow, you can automate code maintenance, improve code quality, and explore new ways to optimize your team’s velocity.
Conclusion: Level Up Your Terminal Workflow
OpenAI Codex CLI brings powerful AI coding assistance directly to the CLI, empowering developers and API teams to automate, iterate, and innovate—right where they work best. Its open-source nature, strong security model, and seamless developer experience make it a compelling addition to any modern engineering toolkit.
For teams prioritizing API quality and collaboration, combining Codex CLI with a robust platform like Apidog delivers an end-to-end developer workflow—from smart code assistance to beautiful API documentation and productive team workspaces.


