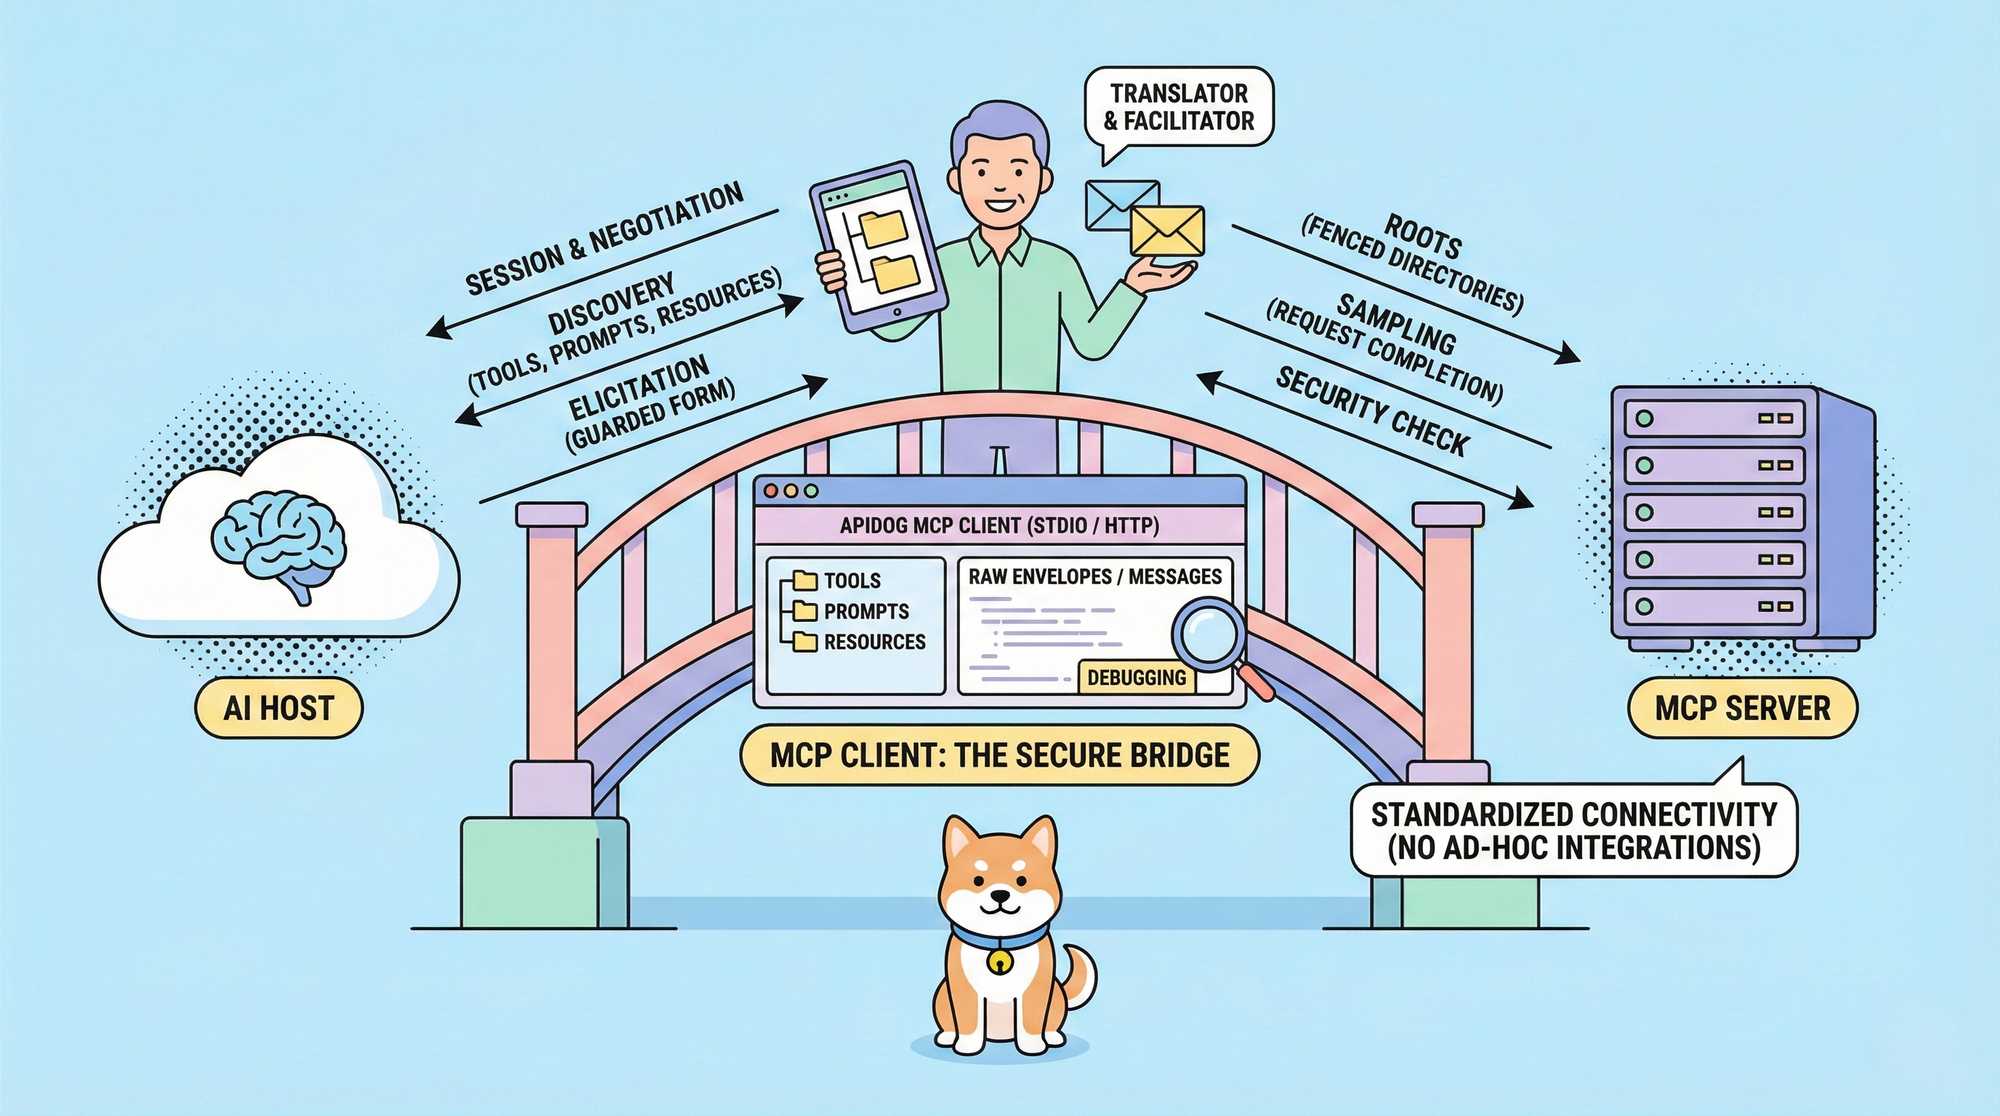
Hey there, fellow developers! Ever dreamt of having your own AI command center, a place where you can orchestrate interactions between different AI models and your applications, all while keeping your data secure and under your control? Well, buckle up because in this article, we're going to dive into building your very own self-hosted MCP server using guMCP – Gumloop's Unified Model Context Protocol.
What exactly is the MCP, you ask? Think of it as a universal language for AI. It's a standardized way for different AI models and applications to communicate and share information. This means you can build complex workflows where different AI models handle different parts of a task, all working together seamlessly. And guMCP makes building your own MCP server incredibly accessible.
We’re thrilled to share that MCP support is coming soon to Apidog! 🚀
— Apidog (@ApidogHQ) March 19, 2025
Apidog MCP Server lets you feed API docs directly to Agentic AI, supercharging your vibe coding experience! Whether you're using Cursor, Cline, or Windsurf - it'll make your dev process faster and smoother.… pic.twitter.com/ew8U38mU0K
I know, it might sound a bit daunting at first, but trust me, it's easier than you think. We'll break it down into manageable steps, so even if you're not a seasoned DevOps guru, you'll be able to follow along. Let's get started!
What is Gumloop Unified Model Context Protocol (guMCP)?
guMCP is an open-source implementation of the Model Context Protocol designed to make it easy to build and deploy your own self-hosted MCP servers. It provides a flexible framework for connecting AI models and applications, enabling you to create powerful AI-driven workflows.

Why self-host? Self-hosting gives you complete control over your data and infrastructure, making it ideal for privacy-sensitive applications or situations where you need to customize the MCP server to meet specific requirements. Plus, it’s a fantastic learning opportunity!
Why Build Your Own MCP Server?
Okay, so you might be wondering, "Why should I bother building my own MCP server? Aren't there cloud-based solutions that do the same thing?" That's a valid question! Here's why self-hosting can be a game-changer:
- Data Privacy and Security: This is a big one. When you self-host, your data stays on your servers. You're not relying on a third-party to protect your sensitive information, which is crucial for projects dealing with personal data, financial information, or proprietary algorithms.
- Customization and Control: Cloud-based solutions often come with limitations. Self-hosting allows you to tailor the MCP server to your exact needs. You can add custom features, integrate with specific APIs, and fine-tune the performance to optimize for your specific workflows.
- Cost-Effectiveness: Depending on your usage patterns, self-hosting can be more cost-effective than relying on a cloud provider, especially if you have existing infrastructure and expertise.
- Learning and Experimentation: Building your own MCP server is a fantastic way to learn about AI infrastructure, networking, and server administration. It's a great opportunity to expand your skillset and gain a deeper understanding of how these systems work.
Prerequisites for guMCP
Before we jump into the installation process, let's make sure you have everything you need. Don't worry, it's not a long list!
- Python 3.11: This project requires Python 3.11 or higher. You can download the latest version from the official Python website.
- Git: Git is used for cloning the repository. If you don't have Git installed, you can download it from the official Git website.

- For Windows Users: A bash-compatible shell is recommended. This could be Git Bash (included with Git for Windows) or the Windows Subsystem for Linux (WSL). This will make it easier to follow the commands in this tutorial.
guMCP Installation Guide
Alright, let's get this show on the road! Follow these steps carefully, and you'll have your guMCP server up and running in no time.
Step 1: Clone the guMCP Repository
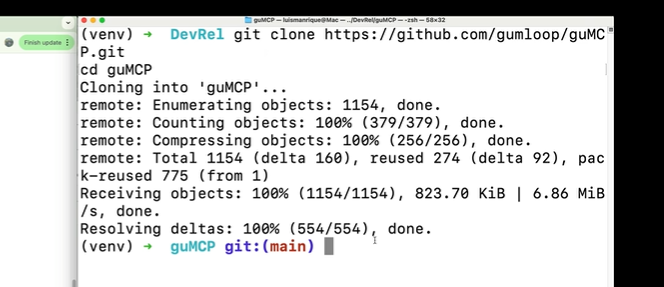
First, we need to get the guMCP code onto your machine. Open your terminal (or Git Bash if you're on Windows) and run the following command:
git clone https://github.com/gumloop/guMCP.git
cd guMCP
This will download the guMCP repository from GitHub and then change your current directory to the guMCP folder.
Step 2: Set Up a Virtual Environment for guMCP
A virtual environment is like a sandbox for your Python project. It isolates the project's dependencies from your system's Python installation, preventing conflicts and ensuring that your project works correctly. This is best practice for Python development.
To create a virtual environment, run the following commands:
python -m venv venvThis command creates a new virtual environment in a folder named venv. Now, you need to activate the virtual environment. The activation command depends on your operating system:
On Unix/macOS:
source venv/bin/activateOn Windows (Command Prompt):
venv\Scripts\activateOn Windows (PowerShell):
.\venv\Scripts\Activate.ps1On Windows (Git Bash):
source venv/Scripts/activateYou'll know your virtual environment is active when you see (venv) at the beginning of your command prompt. This indicates that you're working within the isolated environment.

Step 3: Install guMCP Dependencies
Now that your virtual environment is active, you can install the project's dependencies. These are the libraries and packages that guMCP relies on to function correctly.
Run the following command to install the core dependencies:
pip install -r requirements.txtThis command uses pip (the Python package installer) to read the requirements.txt file and install all the listed packages.
If you plan on contributing to the guMCP project (which is awesome!), you'll also want to install the development dependencies:
pip install -r requirements-dev.txtThese dependencies are used for testing, linting, and other development-related tasks.
Step 4: Configure Environment Variables for guMCP
Environment variables are used to store configuration settings that your application needs to access, such as API keys, database credentials, and other sensitive information. This keeps your code clean and avoids hardcoding secrets directly into your application.
guMCP uses a .env file to manage environment variables. To create a local environment file, run the following command:
cp .env.example .envThis command copies the .env.example file to a new file named .env. The .env.example file contains a template for the environment variables that guMCP requires.
Now, you need to open the .env file in your favorite text editor (like VS Code) and update the values as needed.
# Open and edit with vs code
code .env

# Open and edit in cursor
cursor .env
The .env file contains configuration settings for the following:
- API Keys for Service Integrations: If you plan on integrating with third-party services like OpenAI or other AI model providers, you'll need to provide the corresponding API keys in the .env file.
- Authentication Settings: You can configure authentication settings to control access to your MCP server. This might involve setting up usernames, passwords, or API keys for clients that want to interact with the server.
- Server Configuration Options: The .env file may also contain settings related to the server's configuration, such as the port number it listens on, the hostname, and other server-specific parameters.
- Development Environment Settings: Some settings might be specific to the development environment, such as debugging flags or logging levels.

Make sure to carefully review and update the .env file with the correct values for your environment. Never commit your .env file to version control! This file contains sensitive information that should not be shared publicly.
Using guMCP
Now that you've installed and configured guMCP, let's see how to use it! guMCP supports two main types of servers: SSE (Server-Sent Events) servers and Stdio servers. Let's explore each of them.
Running guMCP SSE Servers
SSE servers provide a simple and efficient way to stream data from the server to the client. In the context of guMCP, this is often used for real-time updates and notifications.
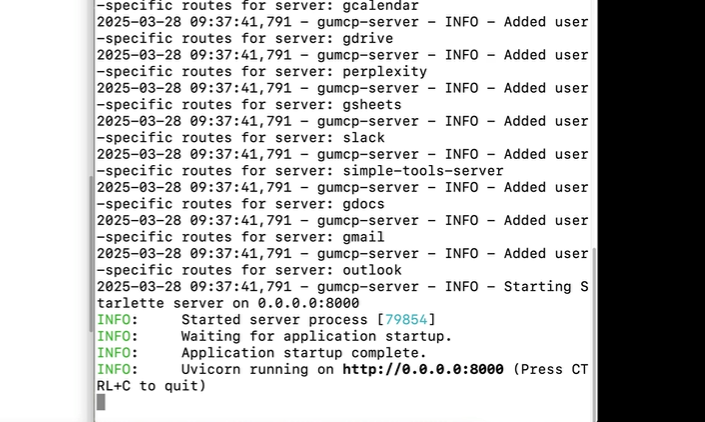
guMCP provides a convenient script to start an SSE development server locally. This server will host all available servers under a single URL. To start the SSE development server, run the following command:
./start_sse_dev_server.shThis script will start the server and print the URL to the console. By default, the server runs on port 8000. So the url will be something like: http://localhost:8000/simple-tools-server/local
Using the Remote MCP Test Client
guMCP also provides a lightweight MCP Client to connect to SSE servers. This client is useful for testing and interacting with the server. To use the client, run the following command:
python tests/clients/RemoteMCPTestClient.py --endpoint=http://localhost:8000/simple-tools-server/localReplace http://localhost:8000/simple-tools-server/local with the actual URL of your SSE server.
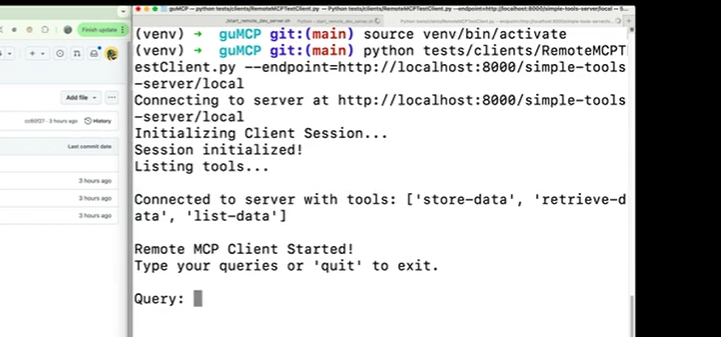
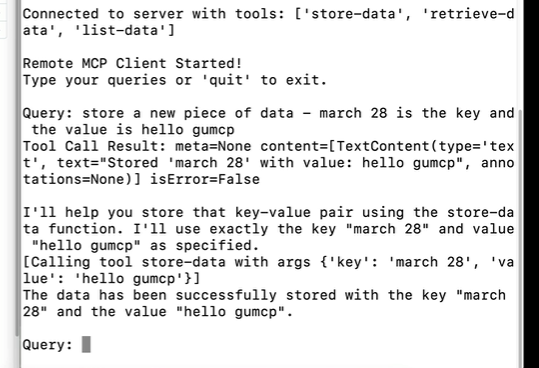
This command will start the MCP client and connect it to the specified SSE server. You can then use the client to send commands to the server and receive responses.
Running guMCP Stdio Servers
Stdio servers communicate with clients through standard input and output streams. This is a more traditional approach to server communication, and it's often used for command-line tools and applications.
To start a Stdio server, run the following command:
python src/servers/local.py --server=simple-tools-serverReplace simple-tools-server with the name of the server you want to run.
Using the guMCP Local MCP Test Client
guMCP provides a lightweight MCP Client to start and connect to stdio servers. To use the client, run the following command:
python tests/clients/LocalMCPTestClient.py --server=simple-tools-serverReplace simple-tools-server with the name of the server you want to run.
This command will start the MCP client and connect it to the specified Stdio server. You can then use the client to send commands to the server and receive responses.
Understanding guMCP Server Configurations
The --server flag is your key to selecting which tools and functionalities your MCP server exposes. Think of it as choosing which modules to load into your AI command center. In the provided example, simple-tools-server is used, which likely offers a basic set of tools for testing and demonstration. However, guMCP is designed to be modular, so you can create or extend server configurations to include more specialized functionalities.
Digging into the src/servers directory, you'll find Python files that define different server configurations. These files specify which tools are available, how they're exposed via the MCP, and any specific dependencies they require. By examining these files, you can get a sense of how to customize your server and integrate your own AI-powered tools.
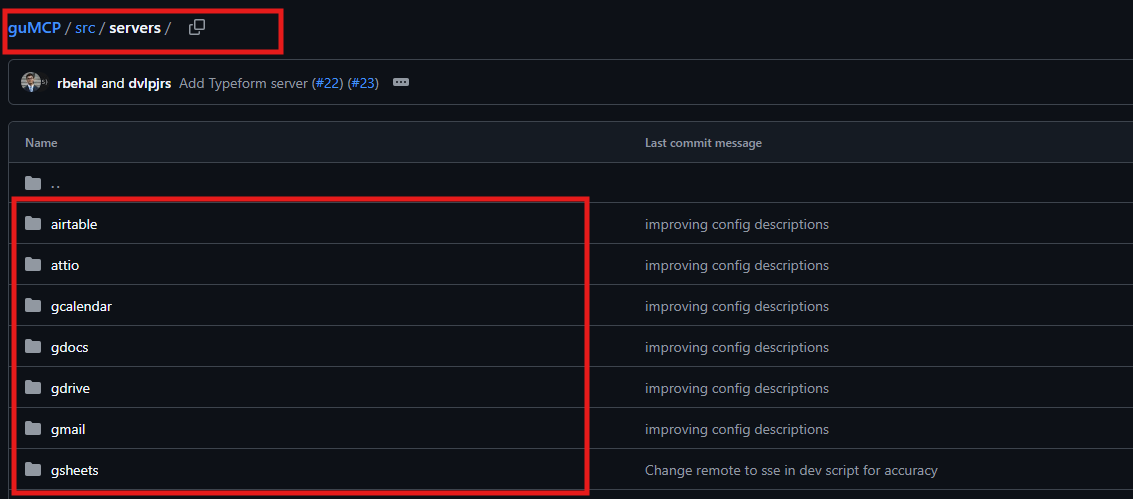
Expanding the guMCP Toolkit: Creating Your Own MCP Tools
The real power of guMCP lies in its ability to be extended with your own custom tools. Imagine you want to create a tool that summarizes text using a specific AI model or one that interacts with a particular API. guMCP makes this surprisingly straightforward.
While a full deep dive into creating custom tools is beyond the scope of this introductory guide, here's a taste of the process:
- Define Your Tool: Start by outlining the functionality of your tool. What inputs does it need? What output does it produce?
- Implement the Logic: Write the Python code that performs the desired task. This might involve calling an AI model's API, processing data, or interacting with external services.
- Integrate with guMCP: Use guMCP's API to register your tool and make it accessible through the MCP. This involves defining the tool's name, input parameters, and output format.
- Configure the Server: Modify your server configuration file to include your new tool. This tells the MCP server to load and expose your tool to clients.
By creating your own tools, you can tailor guMCP to your specific needs and build powerful AI-driven workflows that solve real-world problems.
Conclusion: Your Journey into AI Orchestration Begins
Congratulations! You've successfully built your own self-hosted MCP server using guMCP. This is a significant step towards unlocking the full potential of AI in your projects.
Remember, this is just the beginning. Explore the guMCP documentation, experiment with different server configurations, and create your own custom tools. The possibilities are endless.
By self-hosting your MCP server, you gain complete control over your data, customize your workflows, and gain valuable experience in AI infrastructure. As the AI landscape continues to evolve, having a solid foundation in MCP and self-hosting will be a valuable asset. So, go forth and orchestrate your AI dreams!


