Obsidian has become a popular tool for knowledge management, and with the Obsidian MCP Server, you can now connect your knowledge base directly to AI assistants. The Model Context Protocol (MCP) server for Obsidian enables AI tools to interact with your Obsidian vaults, providing capabilities for reading, creating, editing, and managing notes and tags. This integration represents a significant step forward in how developers can organize and access their documentation.
Understanding Obsidian MCP Server for Knowledge Management
Obsidian MCP Server works by establishing a connection between your Obsidian vault and AI assistants like Claude. Once configured, the AI can access your notes, search through content, and even help manage your knowledge base. This functionality is particularly valuable for developers who maintain extensive documentation about their projects, including API specifications and development notes.
Before diving into the installation process, it's important to note that Obsidian MCP Server requires careful handling as it has both read and write access to your vault. Always back up your Obsidian vault before using this tool. A version control system like Git is recommended, but any backup method will suffice. While the tools have been tested, they are still in active development, and caution is advised when granting write access to your valuable documentation.
The server offers a range of features that make it a powerful addition to your development toolkit:
- Content Access: Read and search notes throughout your vault
- Content Creation: Create new notes and directories as needed
- Content Management: Edit existing notes, move files, and delete content
- Tag Organization: Add, remove, and rename tags across your vault
- Search Capabilities: Perform comprehensive searches across vault contents
These capabilities make Obsidian MCP Server a valuable tool for developers who need to maintain and access extensive documentation during their development process.
Setting Up Obsidian MCP Server: A Step-by-Step Guide
Setting up Obsidian MCP Server requires a few technical steps, but the process is straightforward if you follow these instructions carefully. The server requires Node.js 20 or higher and an existing Obsidian vault to function properly.
Manual Installation Process for Obsidian MCP Server
The most reliable way to install Obsidian MCP Server is through manual configuration. This approach gives you complete control over the setup process and helps ensure that the server connects properly to your specific vault.
Locate your Claude Desktop configuration file:
- On macOS: Navigate to
~/Library/Application Support/Claude/claude_desktop_config.json - On Windows: Find the file at
%APPDATA%\Claude\claude_desktop_config.json
Add the MCP server configuration to your file:
{
   "mcpServers": {
       "obsidian": {
           "command": "npx",
           "args": ["-y", "obsidian-mcp", "/path/to/your/vault"]
       }
   }
}
Replace the vault path with the absolute path to your Obsidian vault:
- For macOS/Linux: Use the format
/Users/username/Documents/MyVault - For Windows: Use the format
C:\\Users\\username\\Documents\\MyVault(note the double backslashes)
Save the configuration file and restart Claude Desktop to apply the changes.
Verify the connection: After restarting, you should see a hammer icon appear in Claude Desktop, indicating that the MCP server is connected successfully.
If you encounter any connection issues, check the logs located at:
- MacOS:
~/Library/Logs/Claude/mcp*.log - Windows:
%APPDATA%\Claude\logs\mcp*.log
These logs can provide valuable information about what might be preventing the server from connecting properly.
Alternative Installation via Smithery
While manual installation is recommended for most users, you can also install Obsidian MCP Server automatically using Smithery. This method may be more convenient for some users, though it hasn't been as extensively tested as the manual approach.
To install via Smithery, run the following command in your terminal:
npx -y @smithery/cli install obsidian-mcp --client claudeThis command will automatically configure the MCP server for use with Claude Desktop. However, you should still verify that the configuration points to the correct vault path after installation.
Leveraging Obsidian MCP Server for API Development
Once you've successfully set up Obsidian MCP Server, you can begin using it to enhance your API development workflow. The server provides several tools that can be particularly useful for developers working with API documentation:
- read-note: Access API documentation stored in your vault
- search-vault: Find specific API endpoints or parameters across your documentation
- create-note: Generate new documentation for API endpoints
- edit-note: Update existing API documentation as your endpoints evolve
- manage-tags: Organize your API documentation with consistent tagging
These tools allow you to maintain comprehensive API documentation in Obsidian and access it directly through AI assistants during your development process. This can significantly streamline your workflow, especially when working with complex APIs that have extensive documentation requirements.
However, while Obsidian MCP Server provides valuable functionality for general knowledge management, it lacks specialized features for API development. This is where Apidog MCP Server enters the picture as a more powerful alternative specifically designed for API developers.
Apidog MCP Server: The Superior Solution for AI-Assisted API Development
While Obsidian MCP enhances knowledge management, the Apidog MCP Server focuses specifically on streamlining the API development lifecycle. Developed by Apidog, this MCP server acts as a bridge, connecting AI assistants directly to your API specifications. Whether your specs are stored within an Apidog project, published as online Apidog documentation, or exist as local/remote OpenAPI/Swagger files, the Apidog MCP Server makes them accessible to AI.
This connection is transformative for API assisted development. Instead of manually translating API requirements into code or constantly cross-referencing documentation, developers can instruct the AI to perform these tasks directly, using the API specification as the single source of truth. This significantly reduces errors, ensures consistency, and accelerates the development process. It enhances the quality of AI coding by grounding the AI's suggestions and generated code firmly in the actual design of your API.
Core Capabilities of the Apidog MCP Server
The Apidog MCP Server empowers AI with deep understanding and interaction capabilities related to your APIs:
- Specification Awareness: The server reads and caches API specification data locally, allowing the AI to query endpoints, schemas, parameters, and descriptions.
- Code Generation: Generate client/server code snippets, data transfer objects (DTOs), record types, or entire controllers based on the API specification. Example: "Use MCP to generate Java records for the 'Order' schema."
- Code Modification: Update existing code (like DTOs or service interfaces) to reflect changes in the API specification. Example: "Based on the API spec, add the 'discountCode' field to the 'Order' DTO using MCP."
- Documentation Assistance: Add comments or documentation blocks to code based on descriptions in the API specification. Example: "Add Javadoc comments to the 'ProductService' methods based on the API specification via MCP."
- Intelligent Search: Search through the API specification for specific endpoints, schemas, or fields.
Note: Since specifications are cached, if you update your API design in Apidog, remember to ask the AI to refresh its MCP data source to ensure it's working with the latest version.
Setting Up Apidog MCP Server: A Comprehensive Guide
Apidog MCP Server offers flexible configuration options to meet different development needs. The server supports three primary data sources, allowing you to choose the approach that best fits your workflow.
Prerequisites for Apidog MCP Server
Before setting up Apidog MCP Server, ensure you have:
- Node.js version 18 or higher (latest LTS version recommended)
- An IDE that supports MCP, such as Cursor or VS Code with the Cline plugin
Option 1: Using Apidog Project as the Data Source
This approach is ideal when you want to use AI to access API specifications within your Apidog team.
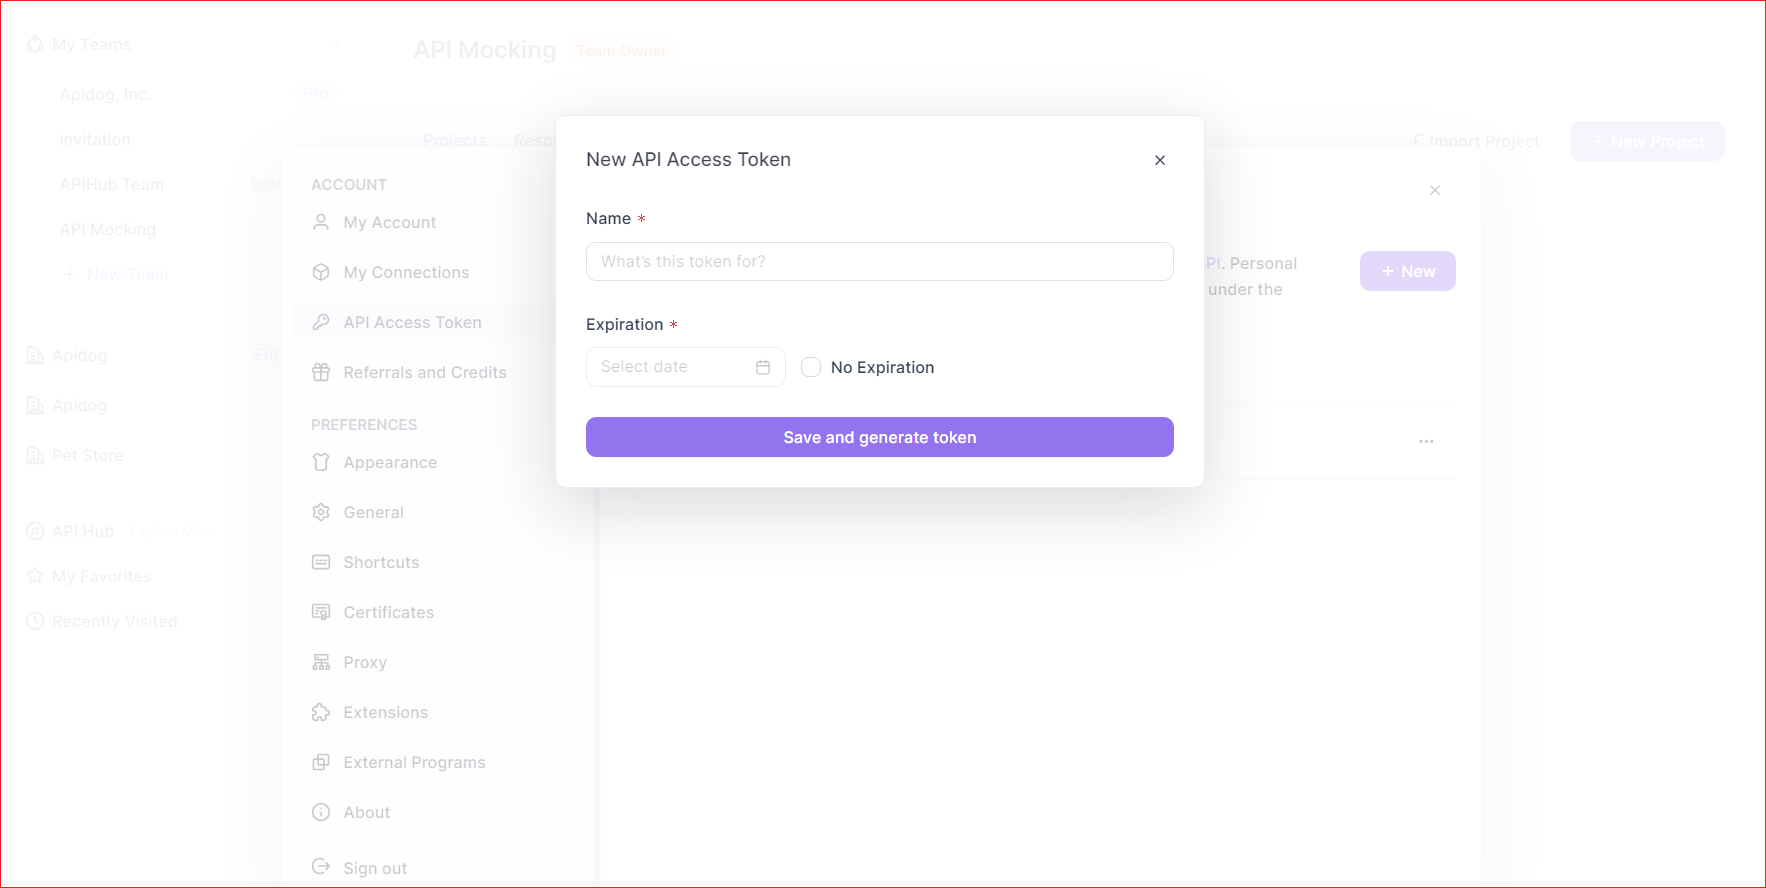
Generate an API Access Token:
- Open Apidog and navigate to Account Settings → API Access Token
- Create a new API access token
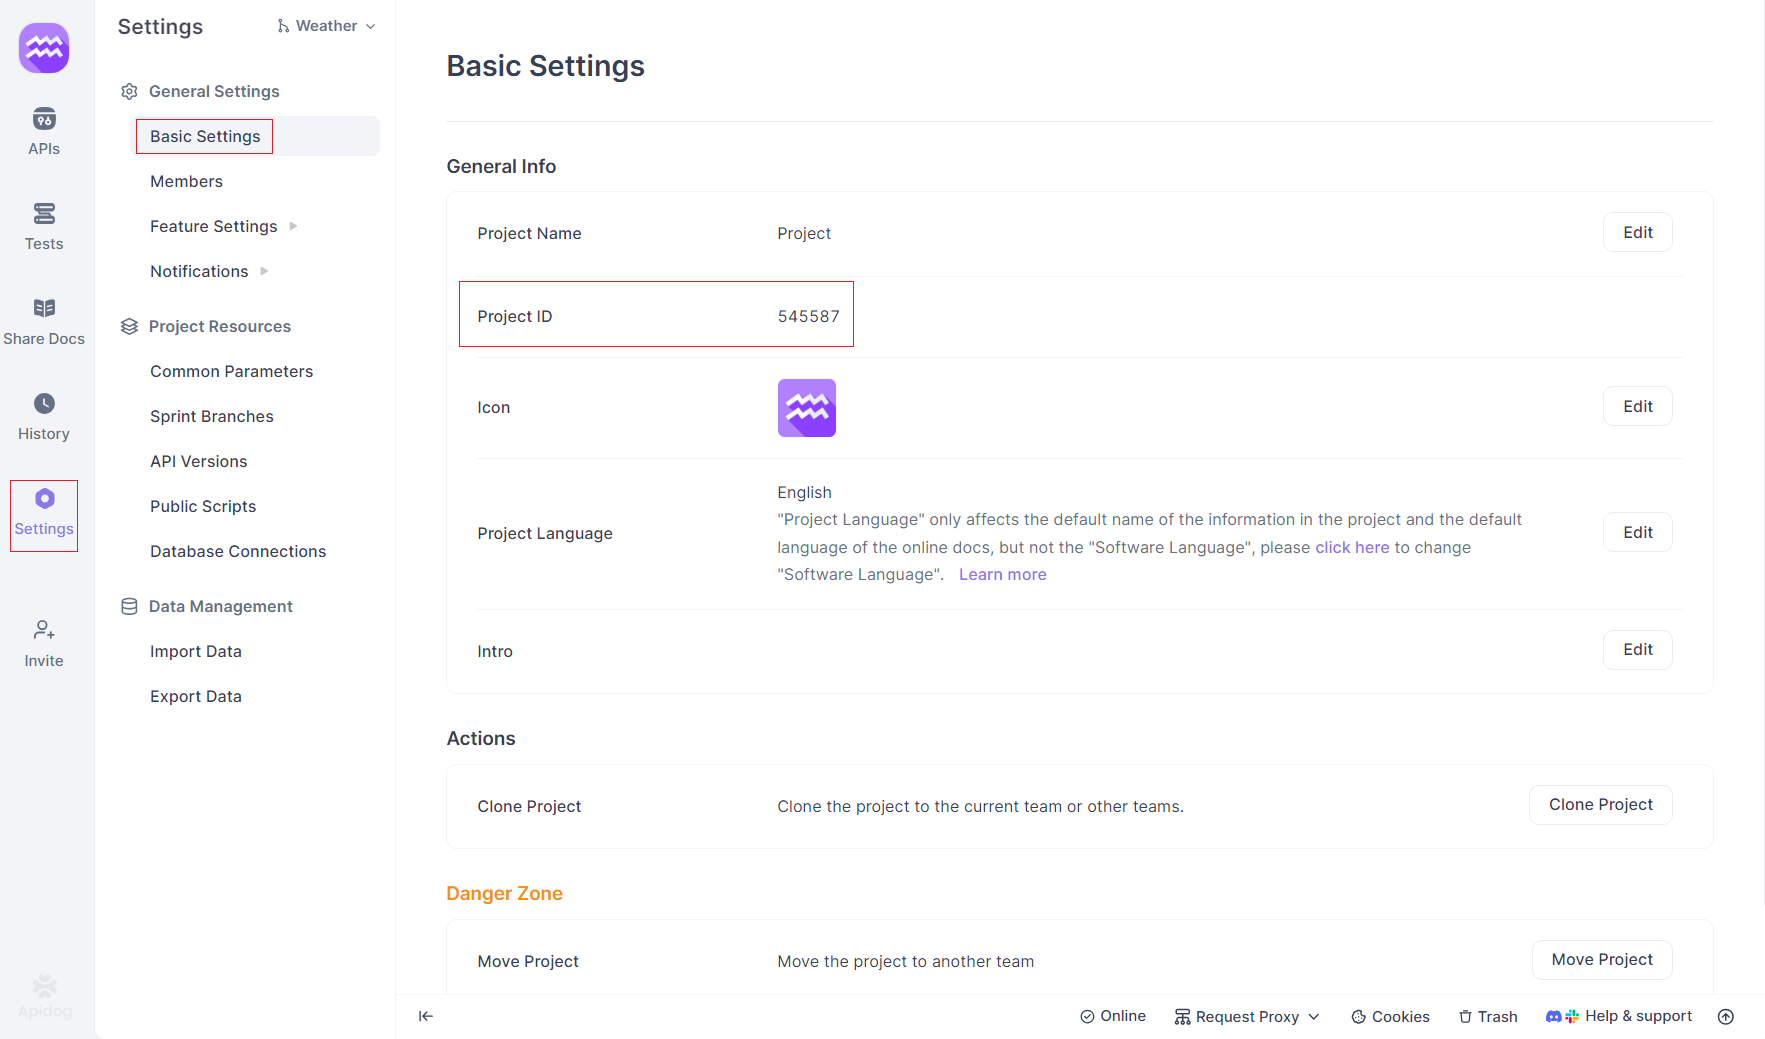
Get your Apidog Project ID:
- Open your target project in Apidog
- Click "Project Settings" in the left sidebar
- Copy the Project ID from "Basic Settings"
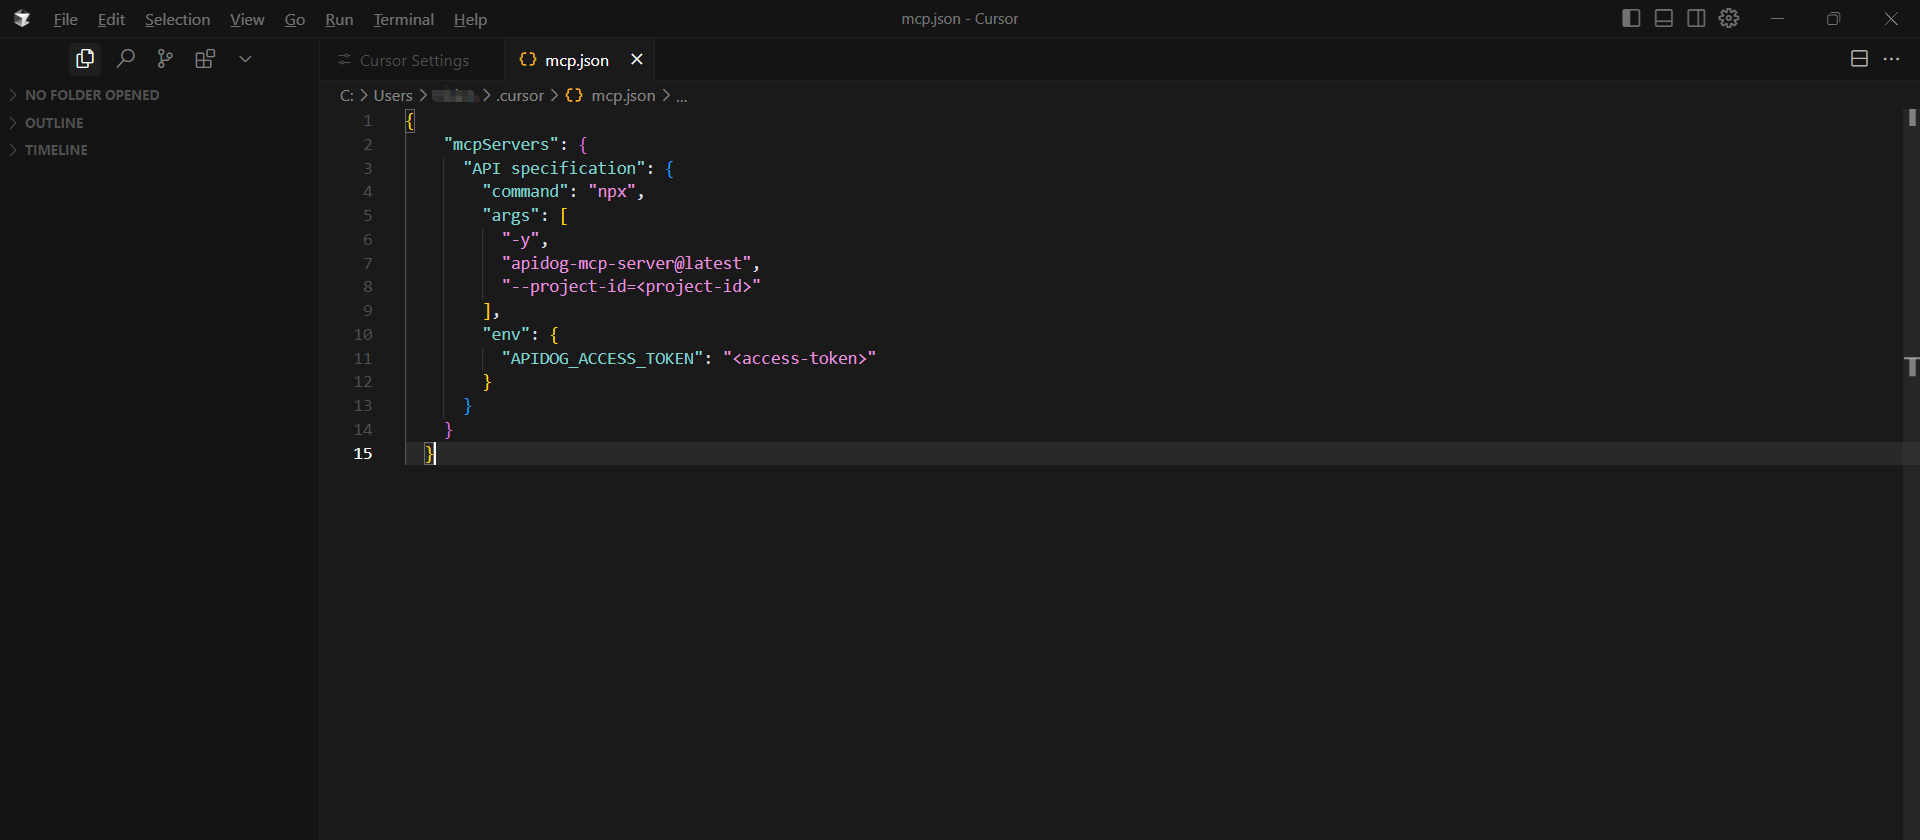
Configure MCP in your IDE:
- Open your IDE's MCP configuration
- Add the following configuration (replacing the placeholders with your actual values):
{
 "mcpServers": {
   "API specification": {
     "command": "npx",
     "args": [
       "-y",
       "apidog-mcp-server@latest",
       "--project=<project-id>"
     ],
     "env": {
       "APIDOG_ACCESS_TOKEN": "<access-token>"
     }
   }
 }
}
Verify the configuration by asking the AI to fetch API specifications via MCP
Option 2: Using Online API Documentation as the Data Source
This approach works well when you need to access publicly available API documentation published through Apidog.
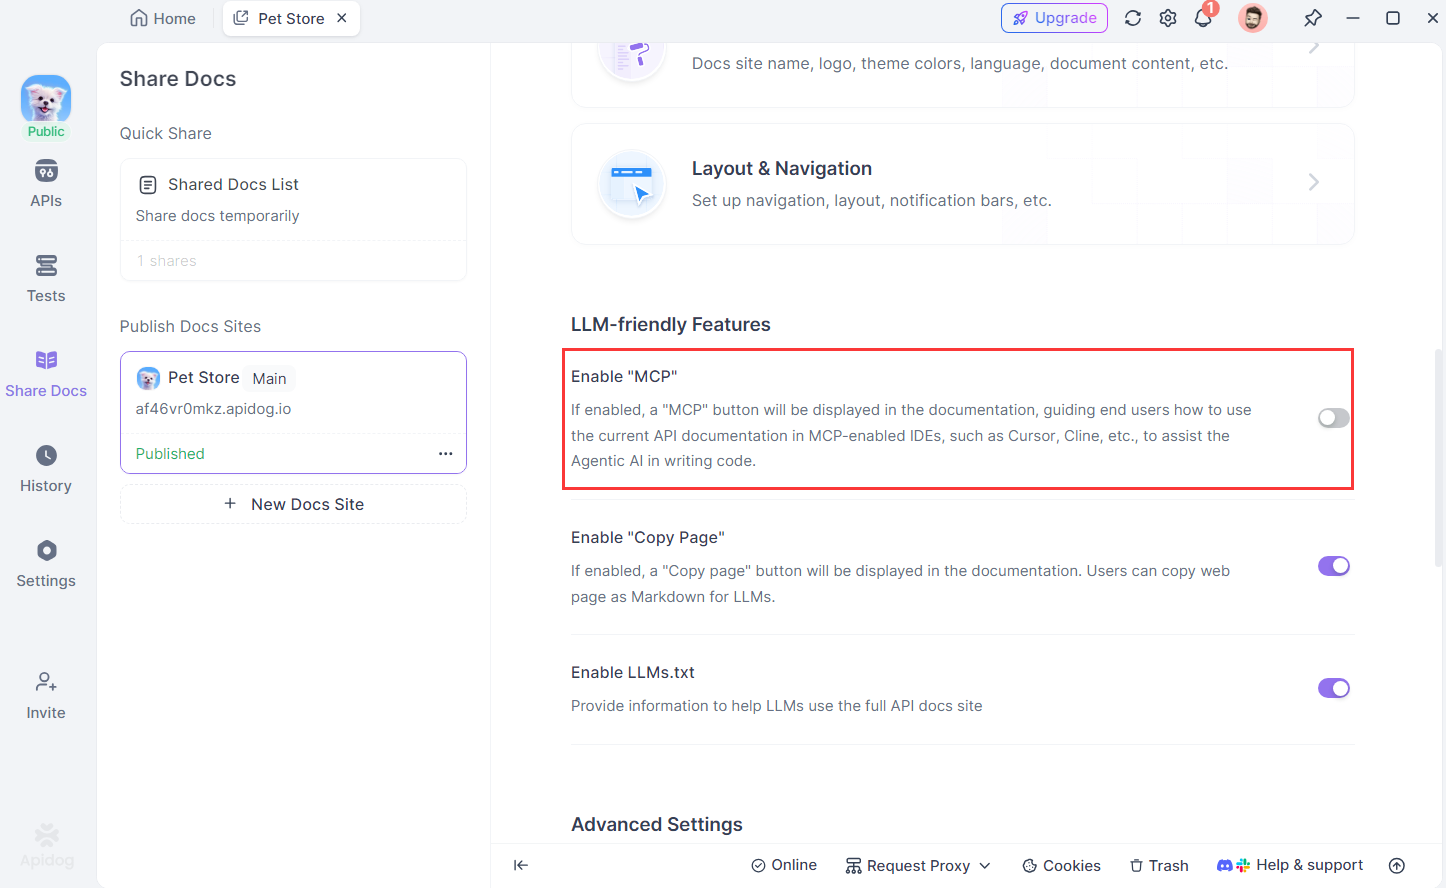
Enable MCP Service:
- Navigate to your Apidog project
- Go to Share Docs → Publish Docs Sites → LLM-friendly Features
- Enable the "MCP" service
Get the Configuration File:
- Access your online documentation
- Click the "Vibe Coding(via MCP)" button
- Copy the provided configuration
Configure MCP in your IDE using the copied configuration:
{
 "mcpServers": {
   "apidog-site-123456": {
     "command": "npx",
     "args": [
       "-y",
       "apidog-mcp-server@latest",
       "--site-id=123456"
     ]
   }
 }
}
Test the connection by asking the AI to fetch API documentation via MCP
Option 3: Using Swagger/OpenAPI Files as the Data Source
This option is perfect for working with local or online Swagger/OpenAPI files independently of Apidog projects.
Prepare your OpenAPI File:
- Ensure you have a URL or local path to a Swagger/OpenAPI file
- Supported formats include JSON and YAML
Configure MCP in your IDE:
- Add the following configuration (replacing the placeholder with your actual file path or URL):
{
 "mcpServers": {
   "API specification": {
     "command": "npx",
     "args": [
       "-y",
       "apidog-mcp-server@latest",
       "--oas=https://petstore.swagger.io/v2/swagger.json"
     ]
   }
 }
}
Verify the configuration by asking the AI to fetch API documentation via MCP
Conclusion: Embracing the Future with MCP Servers
Model Context Protocol servers like the Obsidian MCP Server and the Apidog MCP Server represent a significant leap forward in human-AI collaboration. They break down the barriers between generalist AI assistants and the specific tools and data sources we use daily, paving the way for more personalized and efficient workflows.
The Obsidian MCP Server empowers users to turn their personal knowledge base into an interactive environment, allowing AI to assist in organizing, retrieving, and even generating information within their Obsidian vault. This enhances productivity for anyone who relies on structured notes, including developers managing project documentation.
For development teams, the Apidog MCP Server offers a targeted solution to accelerate the API development lifecycle. By providing AI with direct access to API specifications, Apidog enables truly API assisted development. This leads to faster coding, improved accuracy, greater consistency, and ultimately, higher quality software. The AI coding capabilities of modern assistants become significantly more powerful when grounded in the specific context of your team's Apidog MCP-connected APIs.