Unlocking seamless productivity requires connecting your AI assistants directly to your favorite tools. This guide covers how to set up a Notion MCP (Model Context Protocol) server, enabling Anthropic's Claude to read, write, and automate workflows in your Notion workspace—all from your desktop. Whether you’re building custom automations or streamlining API development, this tutorial is designed for technical professionals seeking practical, reliable integrations.
If you’re looking to enhance your API workflow while building these integrations, tools like Apidog offer an all-in-one solution for API design, testing, and collaboration, making it easier to manage and document the endpoints that power your Notion MCP connections.

What Is MCP Server? (Model Context Protocol Explained)
The Model Context Protocol (MCP), introduced by Anthropic, is a standardized framework that allows large language models (LLMs) to interact directly with external applications. Unlike traditional AI integrations that only generate text-based suggestions, MCP enables two-way, structured communication between AI agents and productivity apps.
Key capabilities when connecting MCP to Notion:
- Create, update, and organize Notion pages
- Read and extract structured information from databases
- Query, filter, and manipulate Notion content in real time
For API developers, this opens the door to advanced automation and workflow orchestration directly from within your AI assistant.
Prerequisites
Before you get started, ensure you have:
- Claude Desktop installed
- Node.js (version 16.0 or higher)
- Basic terminal/command line knowledge
- A Notion account with workspace access
Step 1: Clone and Build the Notion MCP Server
To create the bridge between Claude and Notion, clone the MCP Notion server repository:
git clone https://github.com/suekou/mcp-notion-server.git
cd mcp-notion-server
npm install
npm run build
This compiles the server and prepares it for integration.
Step 2: Create a Notion Integration and API Token
Your bridge needs permission to work with your Notion workspace.
- Go to the Notion Integrations page.
- Click New Integration.
- Name it (e.g., "Claude MCP").
- Select your target workspace.
- Keep the integration type as Internal.
- Submit to generate the integration.
Copy the Internal Integration Token—you’ll use this as an environment variable.
Security Note: Never share this token. It grants access to your Notion data.
Step 3: Configure Claude Desktop for the MCP Server
Claude Desktop uses a JSON config file to manage server connections.
- Find or create
claude_desktop_config.json:- macOS:
~/Library/ApplicationSupport/Claude/claude_desktop_config.json - Windows:
%APPDATA%\Claude\claude_desktop_config.json
- macOS:
- Open it in a text editor, and configure as follows (replace paths and tokens):
{
  "mcpServers": {
    "notion": {
      "command": "node",
      "args": [
        "/full/path/to/mcp-notion-server/notion/build/index.js"
      ],
      "env": {
        "NOTION_API_TOKEN": "your_notion_api_token"
      }
    }
  }
}
- Use the full absolute path to the built
index.js. - Insert your Notion API token.
- Use forward slashes
/for all file paths.
Step 4: Connect Your Integration to Notion Pages
For security, Notion requires you to explicitly connect integrations to specific pages:
- Open the target Notion page.
- Click the "..." menu (top right), then Add connections.
- Select your integration.
- To reference a page, copy its ID from the URL (e.g.,
1234567890abcdef1234567890abcdef).
Step 5: Restart and Test the Connection
- Restart Claude Desktop.
- Click the tools (hammer) icon in Claude.
- Check if "notion" appears under "From Server".
If it does, your MCP server is live. If not, double-check config paths, environment variables, and token validity.
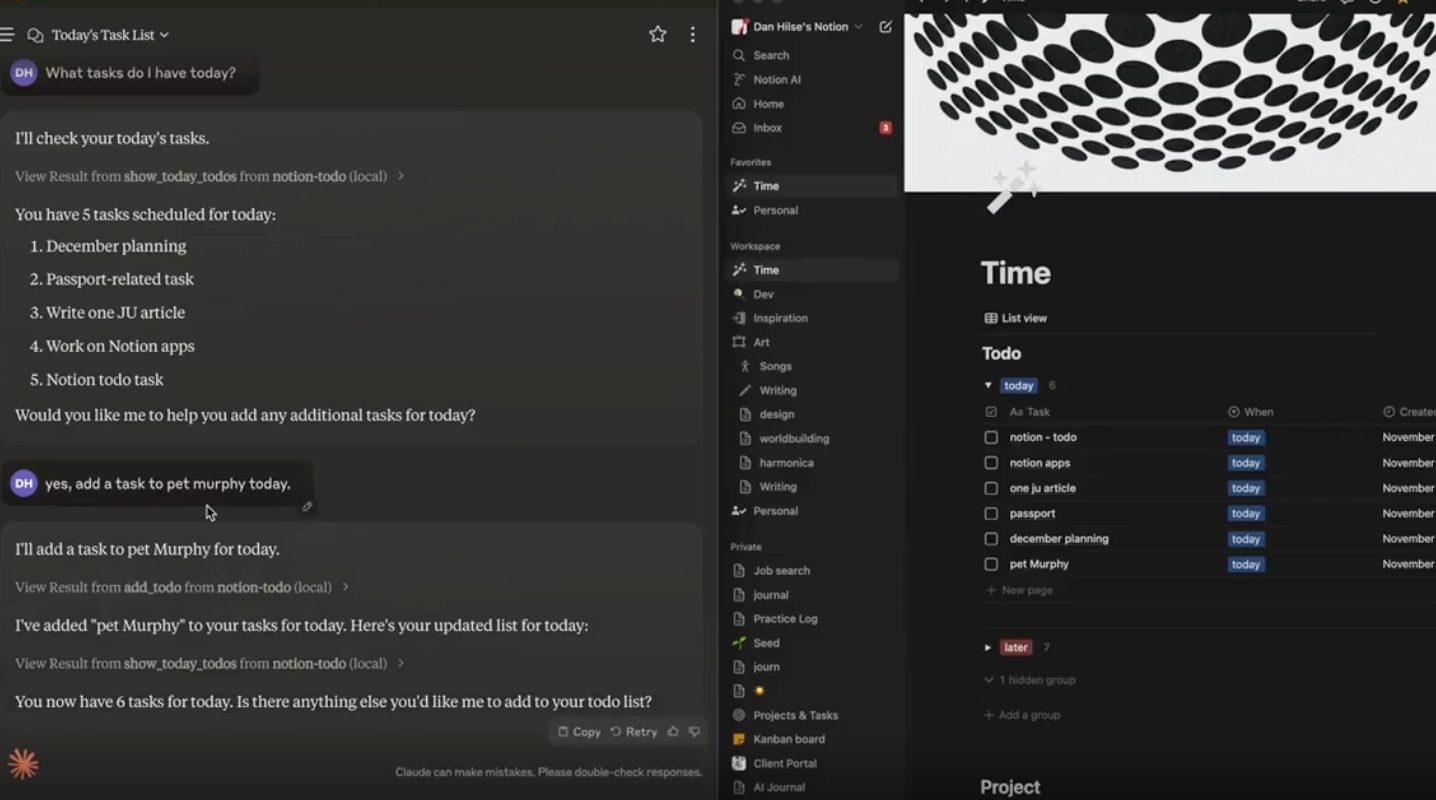
Practical Use Cases: Claude + Notion Automation
Save Content to Notion
Ask Claude to draft content (e.g., meeting notes or summaries) and say:
I want to save this content to Notion with [your-page-id]
Claude will request permission and, once approved, create a new Notion page with your content.
Query Notion Databases
Connect your integration to a Notion database and ask:
Tell me movies rated ⭐️⭐️⭐️⭐️⭐️ in my movie database
Claude will filter and return matching entries, making data retrieval effortless.
Advanced Configuration Tips
Environment Variables
You can add further environment variables for debugging or environment control:
"env": {
  "NOTION_API_TOKEN": "your_token",
  "NODE_ENV": "production",
  "NOTION_DEBUG": "true"
}
Set NOTION_DEBUG to true for verbose logs.
Multiple MCP Servers
You can connect Claude to several MCP servers (e.g., Notion and SQLite):
{
  "mcpServers": {
    "sqlite": {
      "command": "uvx",
      "args": [
        "mcp-server-sqlite",
        "--db-path",
        "/Users/USERNAME/test.db"
      ]
    },
    "notion": {
      "command": "node",
      "args": [
        "/Users/USERNAME/Desktop/mcp-notion-server/notion/build/index.js"
      ],
      "env": {
        "NOTION_API_TOKEN": "API_TOKEN"
      }
    }
  }
}
Troubleshooting Your Notion MCP Server
If the Server Doesn’t Appear in Claude
- Check
claude_desktop_config.jsonfor syntax errors. - Verify the absolute path to
index.js. - Ensure your Notion API token is correct.
- Always restart Claude Desktop after changes.
API Token Issues
- Regenerate your Notion API token if you see authentication errors.
- The environment variable must be
NOTION_API_TOKEN. - Confirm your integration is connected to the correct Notion pages.
Connection Problems
- Ensure Node.js is installed (v16+).
- Check your internet and firewall/VPN settings.
- On M1/M2 Macs, ensure Rosetta 2 is installed and consider specifying the full Node path:
"command": "/opt/homebrew/bin/node"
Streamline API Development with Apidog
While setting up your Notion MCP server, managing APIs becomes crucial—especially for custom endpoints and integrations. Apidog provides an integrated environment for API design, documentation, debugging, automated testing, and mocking, all in one platform.

For teams building and maintaining APIs to interact with your MCP server, Apidog’s powerful request builder, environment variable management, and team collaboration features help ensure your API layer is robust and well-documented. This reduces context-switching and simplifies the lifecycle from design to deployment.
Looking Forward: The Future of MCP and Notion Integration
Anthropic is actively developing MCP, and future versions may unlock:
- Direct Notion UI manipulation
- Advanced querying/filtering of databases
- Integration with Notion's AI features
- Multi-app workflows via MCP
By deploying your own Notion MCP server, you’re future-proofing your productivity stack and gaining granular control over how Claude and Notion interact.
Conclusion
Setting up a Notion MCP server empowers technical teams to automate, query, and organize workspace content through Anthropic's Claude. By following the steps above, you’ll create a secure, flexible bridge between AI and Notion—boosting efficiency and unlocking new automation opportunities.
For API-driven teams, leveraging tools like Apidog alongside your MCP setup ensures your endpoints are reliable, well-documented, and easy to maintain. As MCP adoption grows, mastering these integrations today gives your team a head start on the workflows of tomorrow.