
The Node.js Fetch API has become a cornerstone of modern JavaScript development, streamlining the process of making asynchronous HTTP requests. This comprehensive guide delves into the intricacies of Fetch, empowering you to effortlessly retrieve data, interact with web services, and construct robust applications.
If you are struggling with mastering different programming languages, then you should give Apidog, a comprehensive API tool, a try. With Apidog, you can generate client code with a few clicks of a mouse.
If you are keen on optimizing your API development workflow, then you can start now today by clicking on the button below to download Apidog! 👇
Whether you're a seasoned developer or just starting your JavaScript journey, this in-depth exploration will equip you with the knowledge and techniques to leverage the full potential of Fetch within your Node.js projects.
What is Node.js Fetch?
The Node.js Fetch API is a standardized mechanism for initiating asynchronous HTTP requests from within a Node.js application. It provides a promise-based approach, offering a cleaner and more concise syntax compared to the older XMLHttpRequest (XHR) method.
Fetch enables developers to retrieve data from various web servers, interact with APIs, and manage the flow of information within their Node.js programs. It simplifies error handling and streamlines asynchronous operations, promoting a more modern and efficient way to perform HTTP communication in the Node.js environment.
Benefits of Using Node.js Fetch
1. Cleaner and More Concise Syntax:
- Fetch boasts a more intuitive and readable syntax compared to the verbose callbacks and nesting often associated with XHR.
- It utilizes Promises, a core JavaScript feature, which allows for cleaner handling of asynchronous operations.
- This translates to code that is easier to write, maintain, and understand for both you and other developers.
2. Promise-Based Asynchronous Handling
- Fetch leverages Promises, a built-in JavaScript mechanism for handling asynchronous operations.
- Promises offer a more structured and readable way to manage the flow of code execution after an HTTP request is initiated.
- You can chain multiple
.then()and.catch()methods to handle successful responses and potential errors gracefully, resulting in cleaner and more maintainable code.
3. Streamlined Error Handling
- Fetch provides a more straightforward approach to dealing with errors encountered during HTTP requests.
- Instead of relying on complex error events and callbacks with XHR, Fetch throws standard JavaScript errors that are easier to catch and handle.
- This simplifies debugging and ensures your application reacts appropriately to network issues or server-side errors.
4. Automatic JSON Parsing:
- Fetch offers the ability to automatically parse JSON responses from the server.
- By simply using the
.json()method on the response object, you can effortlessly convert the raw JSON data into a native JavaScript object, eliminating the need for manual parsing logic.
5. Improved Readability and Maintainability
- The overall structure and syntax of Fetch code are more concise and readable compared to XHR.
- This translates to applications that are easier to understand, maintain, and modify in the long run.
- New developers joining the project can more readily grasp the logic behind the HTTP interactions.
6. Built-in Support for Headers and Body
- Fetch provides a straightforward way to define request headers and body content.
- You can easily specify headers like
Content-TypeorAuthorizationand include data for POST or PUT requests within the Fetch API call itself.
7. Flexibility and Configurability
- Fetch offers a high degree of flexibility, allowing you to customize various aspects of the HTTP request.
- You can specify the request method (GET, POST, PUT, etc.), define headers, include body content, and configure additional options like caching behavior or timeouts.
Potential Drawbacks to Node.js Fetch
1. Limited Browser Support (Partially Mitigated)
- While Fetch is now a standardized API, its native browser support wasn't always ubiquitous.
- This might be a concern if you need to ensure compatibility with older browsers. However, with the rise of polyfills (code libraries that provide functionality for older browsers), this limitation is becoming less significant.
2. Not a Replacement for All Scenarios
- Fetch excels at making basic HTTP requests and retrieving data.
- However, for more complex use cases like uploading files with progress tracking or advanced authentication mechanisms, you might need to explore additional libraries built on top of Fetch or consider alternative approaches.
3. Single-Threaded Nature of Node.js
- It's important to remember that Node.js itself is single-threaded.
- While Fetch handles asynchronous operations efficiently, if your application involves a large number of concurrent HTTP requests that require significant processing, it could still lead to performance bottlenecks.
Code Examples Demonstrating Node.js Fetch API
1. Basic GET Request
const fetch = require('node-fetch');

const url = 'https://api.example.com/data';

fetch(url)
  .then(response => response.json())
  .then(data => {
    console.log('Retrieved data:', data);
  })
  .catch(error => {
    console.error('Error fetching data:', error);
  });
Code explanation:
The code fetches data from the specified URL using a GET request. It then parses the JSON response and logs the retrieved data. If it encounters an error, it logs the error message.
2. POST Request with JSON Data
const fetch = require('node-fetch');

const url = 'https://api.example.com/data';
const data = { name: 'John Doe', age: 30 };

fetch(url, {
  method: 'POST',
  body: JSON.stringify(data),
  headers: { 'Content-Type': 'application/json' }
})
  .then(response => response.json())
  .then(data => {
    console.log('Data posted successfully:', data);
  })
  .catch(error => {
    console.error('Error posting data:', error);
  });
Code explanation:
The code example demonstrates sending a POST request with JSON data. It stringifies the data object and sets the appropriate headers before making the request.
3. Handling Errors with Status Codes
const fetch = require('node-fetch');

const url = 'https://api.example.com/data/invalid';

fetch(url)
  .then(response => {
    if (!response.ok) {
      throw new Error(`Error: ${response.status} - ${response.statusText}`);
    }
    return response.json();
  })
  .then(data => {
    console.log('Retrieved data:', data);
  })
  .catch(error => {
    console.error('Error fetching data:', error);
  });
The code explanation above demonstrates checking the response status code before processing the data. If the response indicates an error (status code aside from 200), it throws a custom error for handling.
4. Fetching Text Content
const fetch = require('node-fetch');

const url = 'https://www.example.com/about';

fetch(url)
  .then(response => response.text())
  .then(text => {
    console.log('Retrieved HTML content:', text.slice(0, 100)); // Limit output for brevity
  })
  .catch(error => {
    console.error('Error fetching content:', error);
  });
This example fetches the content of a website and demonstrates using the .text() method to retrieve the response as plain text.
Apidog - Skip the Coding Phase by Generating Code
It is no longer so efficient to code your own APIs, especially with the sheer amount of other elements you need to ensure works. Therefore, you should consider using Apidog, an all-in-one API development platform that provides users with an environment to build, test, mock, and document APIs.
Generate Fetch Client Code With Apidog
Apidog provides users a client code generation feature, allowing them to quickly produce the necessary code for development. This speeds up the API development process, saving both time and effort for the developer to channel elsewhere more urgent.
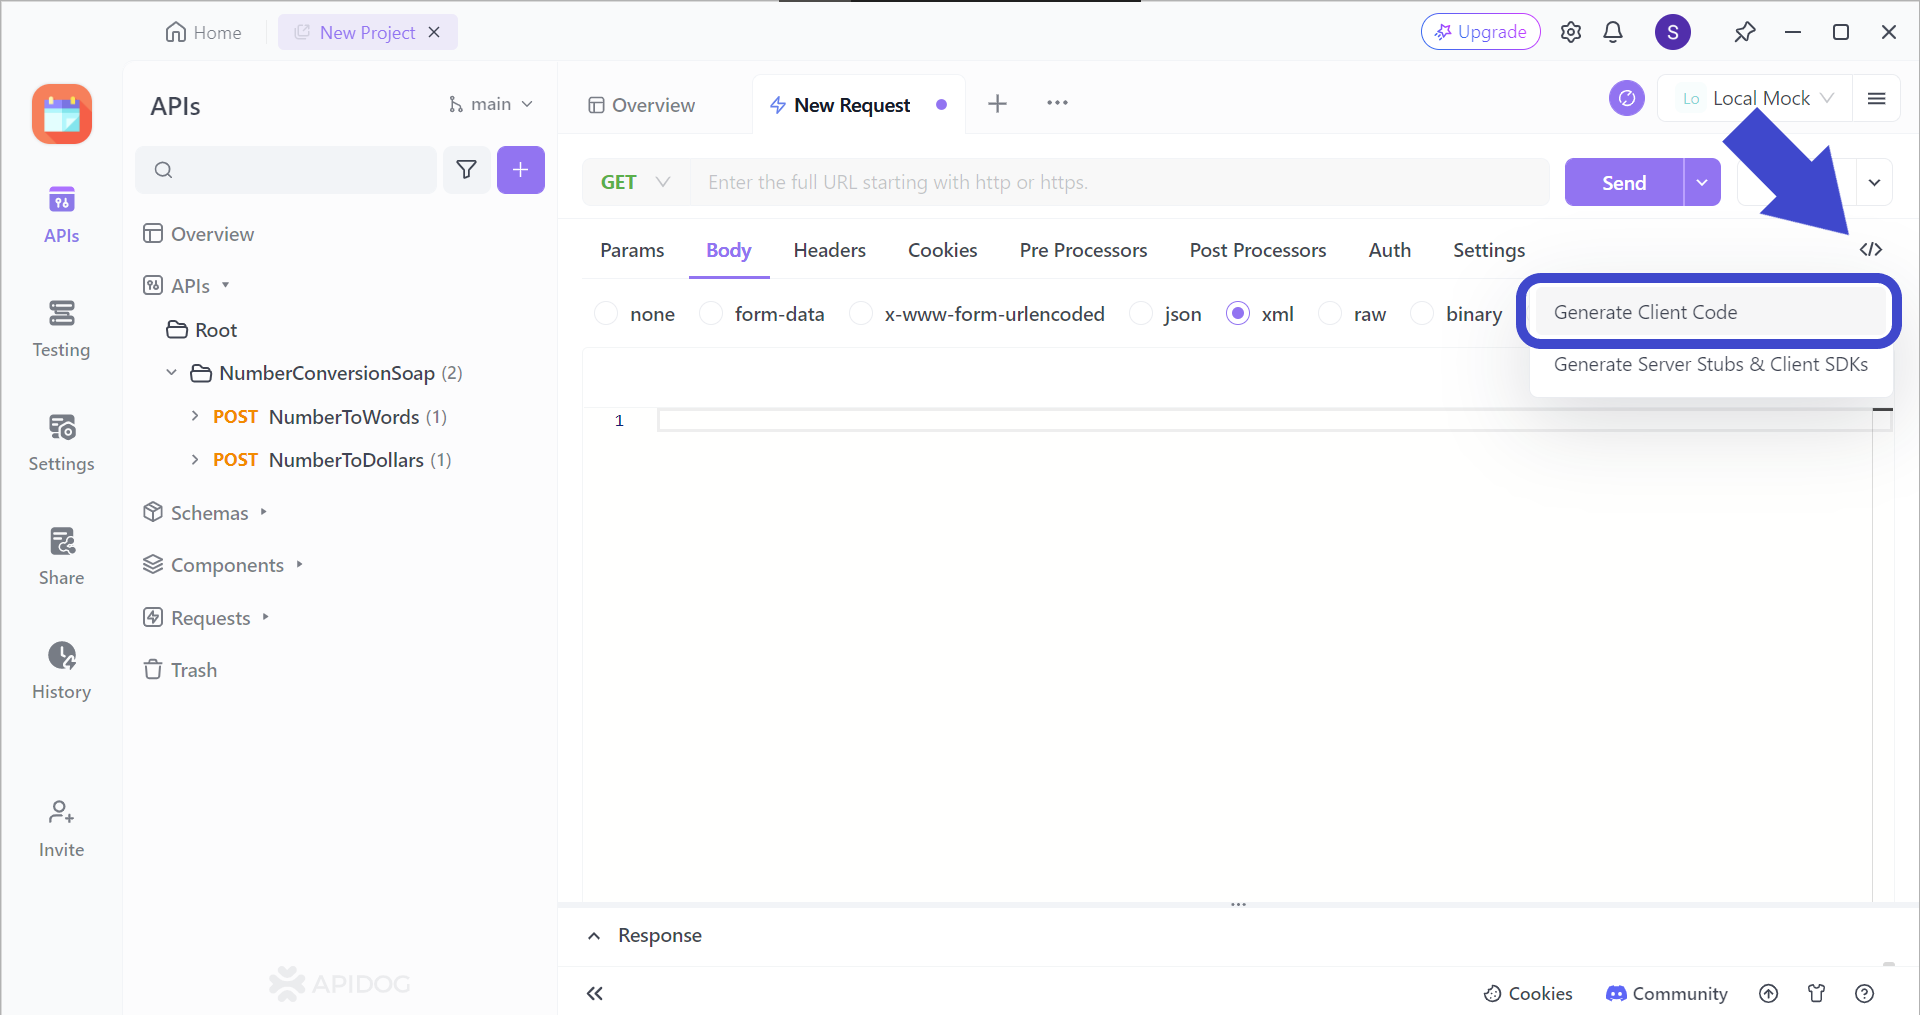
Firstly, locate this </> button located around the top right of the Apidog window. Then, press Generate Client Code to proceed with the code generation.
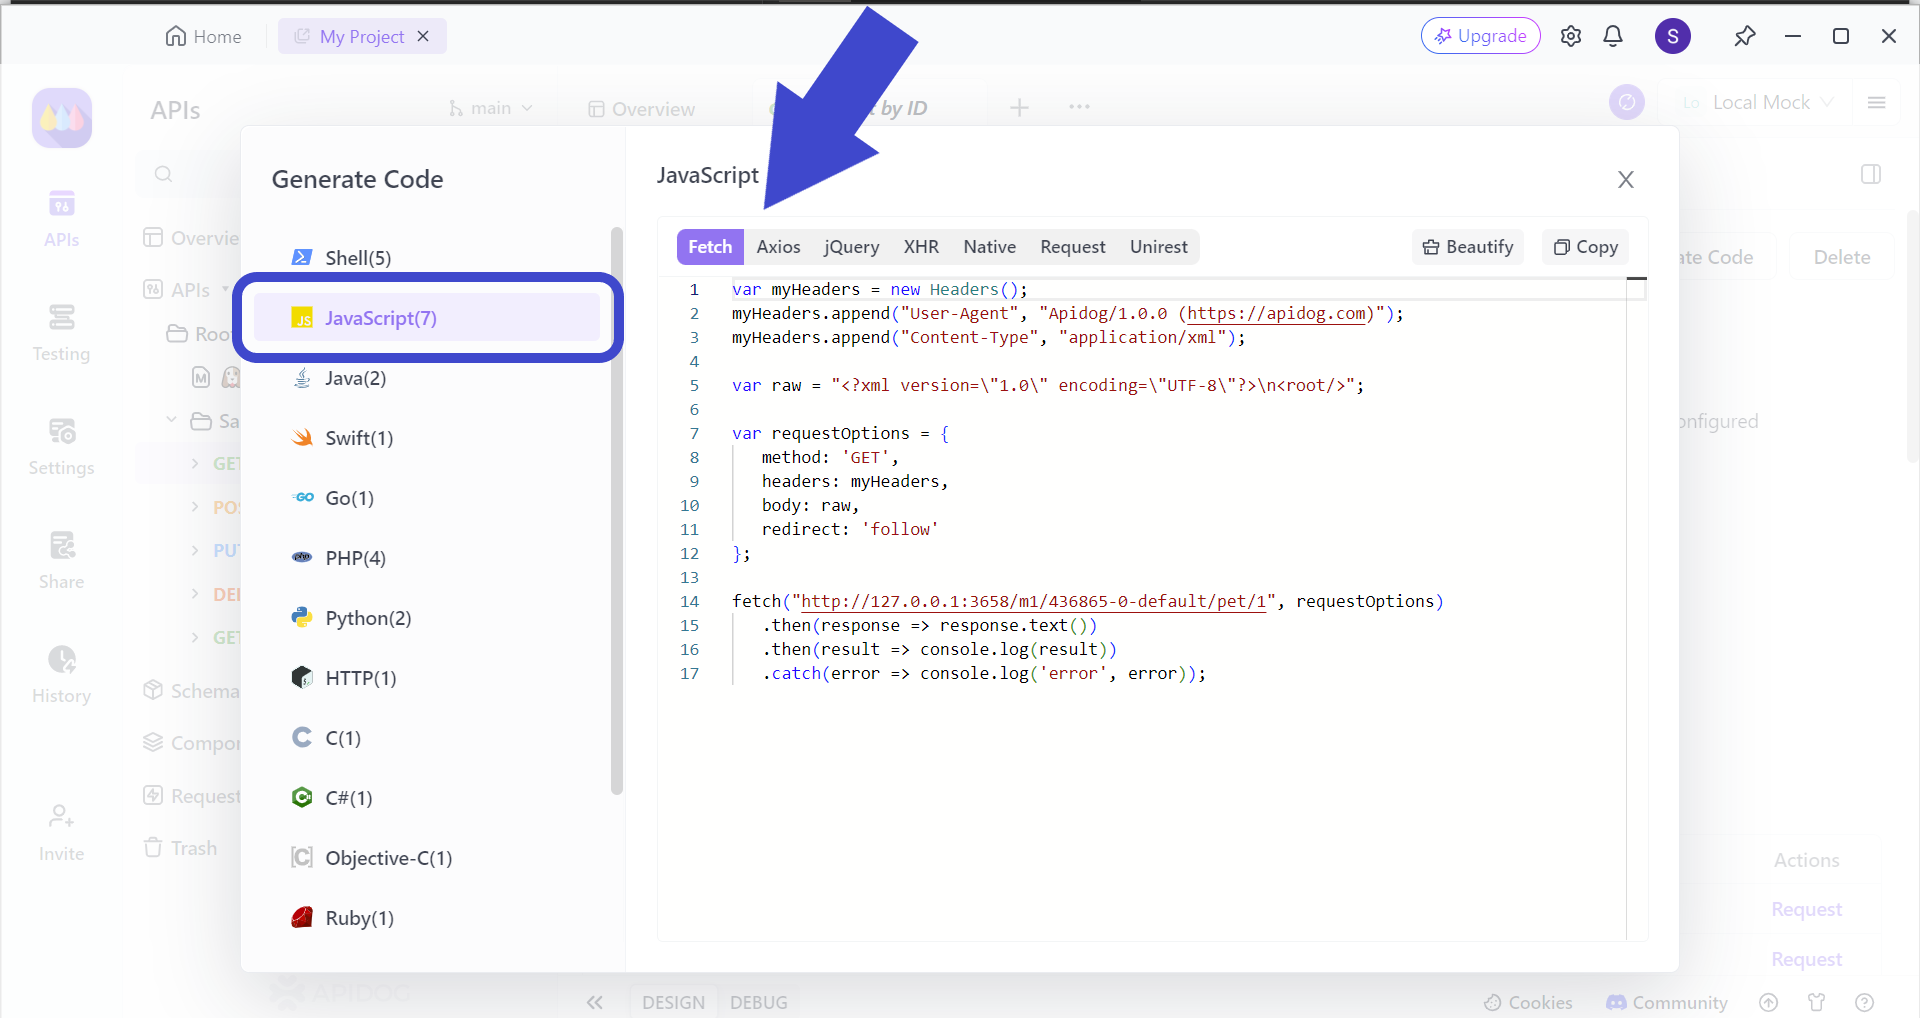
Next, you are greeted with a pop-up window. Select JavaScript, then the Fetch header. On your screen, you should have several lines of code ready for you to copy and paste into your IDE (Integrated Development Environment).
Testing API Endpoints Using Apidog
After you have finished importing the client code and API designing phase, you should proceed to testing your API.
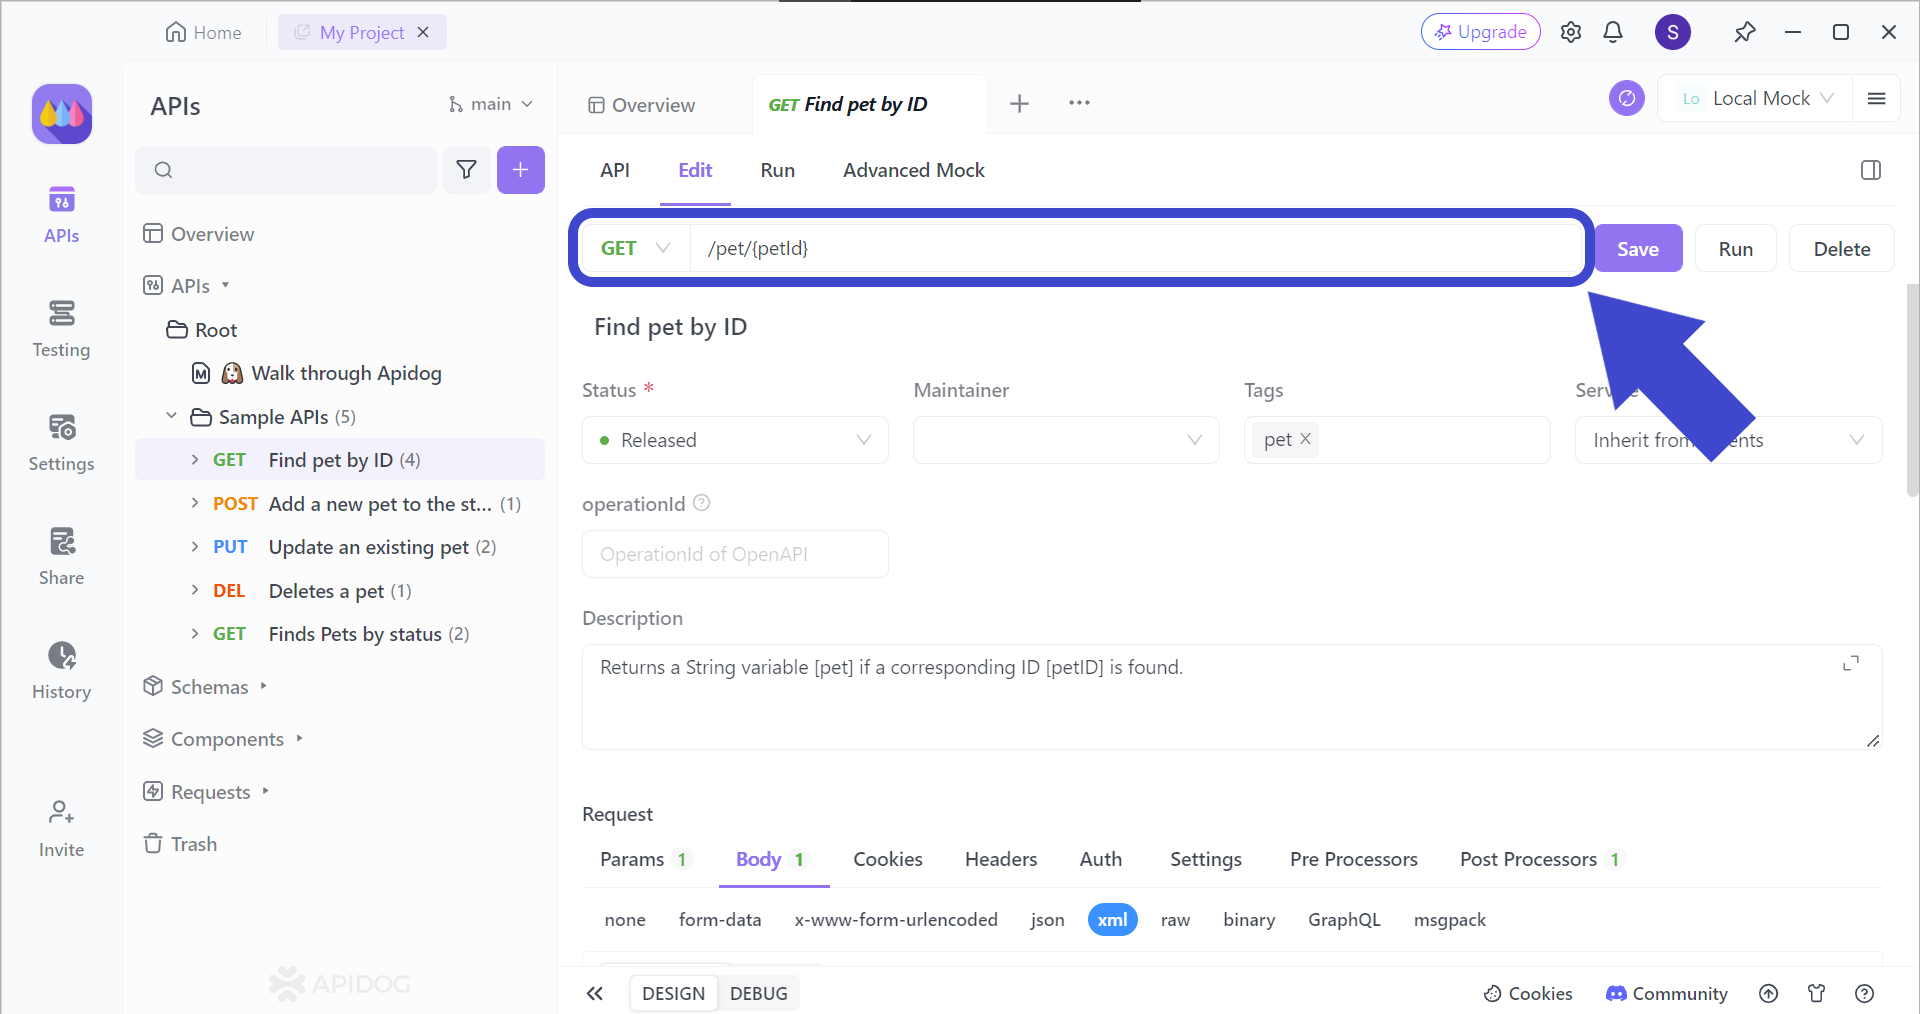
To target the correct API endpoint, you first have to insert the corresponding API endpoint that you want to test. Once you have included the intended API URL, include the parameters that you want to use for the endpoint (if relevant).
In case you are unfamiliar with passing multiple parameters in an API URL, check out this article to find out how you can specifically target a resource inside a rich collection of data!

Conclusion
The Node.js Fetch API has emerged as a powerful and versatile tool for crafting modern Node.js applications. By embracing Promises and offering a cleaner syntax, Fetch simplifies asynchronous HTTP requests, streamlines error handling, and enhances code readability.
Whether you're a seasoned developer or embarking on your JavaScript journey, this comprehensive guide has equipped you with the knowledge and practical examples to leverage the full potential of Fetch within your Node.js projects.
As you integrate Fetch into your development workflow, you'll experience the benefits of efficient data retrieval, seamless interactions with web services, and the ability to construct robust and maintainable applications.
If ever you feel like using the Node.js Fetch API framework but do not have the coding knowledge required, you can always rely on Apidog to provide you with automatic code generation. By removing the requirement for you to learn an entire programming language from scratch, you can channel your effort into areas of your expertise, thus creating a better application in the long run!


