
Welcome to the world of APIs, where data flows seamlessly and connections are made. Today, we’re diving deep into the comparison of two popular tools: node-fetch and the browser-native fetch. If you're a developer, you’ve likely encountered these tools when making API calls. Understanding their differences can be crucial for your projects. So, let’s embark on this journey to explore which one is right for you.
What is Fetch?
First things first, let’s talk about the fetch API. Fetch is a native browser API designed to make HTTP requests. It’s modern, promise-based, and quite straightforward to use. Here’s a simple example:
fetch('https://api.example.com/data')
  .then(response => response.json())
  .then(data => console.log(data))
  .catch(error => console.error('Error:', error));
Pretty clean, right? Fetch is great for client-side applications because it’s built into the browser. No need for additional packages or configurations. However, it’s not available in Node.js by default, which brings us to our next topic.

Introducing Node-fetch
When working with Node.js, you can’t use the browser-native fetch. That’s where node-fetch comes into play. It’s a lightweight module that brings the fetch API to Node.js, allowing you to make HTTP requests within a server environment. Here’s an example similar to the one above but using node-fetch:
const fetch = require('node-fetch');

fetch('https://api.example.com/data')
  .then(response => response.json())
  .then(data => console.log(data))
  .catch(error => console.error('Error:', error));
As you can see, the syntax is nearly identical. This similarity makes it easy for developers to switch between client-side and server-side environments without relearning new APIs.
Key Differences Between Node-fetch and Fetch
While node-fetch and fetch share similar syntax, they have some notable differences due to their environments. Let’s break down these differences to understand which one might be better suited for your needs.
Environment
- Fetch: Runs in the browser, making it ideal for client-side applications.
- Node-fetch: Runs in Node.js, perfect for server-side operations.
Availability
- Fetch: Native to modern browsers, no installation required.
- Node-fetch: Needs to be installed via npm (
npm install node-fetch).
Features
- Fetch: Integrated with browser features like Service Workers, Web Workers, and Cache API.
- Node-fetch: Lacks browser-specific features but integrates well with Node.js modules and environments.
Performance
- Fetch: Performance is typically consistent across browsers but can be affected by browser-specific optimizations or limitations.
- Node-fetch: Performance can be optimized through various Node.js configurations and packages.
When to Use Fetch
Fetch shines in client-side applications. Here are some scenarios where fetch is the go-to choice:
- Single Page Applications (SPAs): When building SPAs with frameworks like React, Angular, or Vue,
fetchis your friend for making API calls. - Progressive Web Apps (PWAs): PWAs often rely on the
fetchAPI for seamless data retrieval and background syncing. - Simple API Calls: For straightforward API calls directly from the browser,
fetchis easy to implement and debug.
When to Use Node-fetch
Node-fetch is tailored for server-side operations. Here’s when you should consider using it:
- Server-Side Rendering (SSR): When rendering content on the server with frameworks like Next.js,
node-fetchhelps fetch data before sending the final HTML to the client. - Backend Services: In a Node.js backend,
node-fetchis useful for interacting with external APIs or microservices. - Automation and Scripting: For automated tasks and scripts that run on the server,
node-fetchprovides a reliable way to make HTTP requests.

Advanced Usage and Features
Now that we’ve covered the basics, let’s explore some advanced usage scenarios and features of both fetch and node-fetch.
Handling Errors
Both fetch and node-fetch handle errors similarly. However, it’s important to note that fetch doesn’t reject the promise on HTTP error statuses (like 404 or 500). You need to handle these manually:
fetch('https://api.example.com/data')
  .then(response => {
    if (!response.ok) {
      throw new Error('Network response was not ok');
    }
    return response.json();
  })
  .then(data => console.log(data))
  .catch(error => console.error('Fetch error:', error));
Streaming Responses
Both fetch and node-fetch support streaming responses. This can be particularly useful for handling large datasets or real-time data streams. Here’s an example using node-fetch:
const fetch = require('node-fetch');

fetch('https://api.example.com/stream')
  .then(response => {
    const reader = response.body.getReader();
    return new ReadableStream({
      start(controller) {
        function push() {
          reader.read().then(({ done, value }) => {
            if (done) {
              controller.close();
              return;
            }
            controller.enqueue(value);
            push();
          });
        }
        push();
      }
    });
  })
  .then(stream => new Response(stream))
  .then(response => response.text())
  .then(data => console.log(data))
  .catch(error => console.error('Streaming error:', error));
Authentication
Handling authentication is another critical aspect of making API calls. Both fetch and node-fetch can handle various authentication mechanisms like Basic Auth, Bearer tokens, and more:
const token = 'YOUR_ACCESS_TOKEN';

fetch('https://api.example.com/protected', {
  headers: {
    'Authorization': `Bearer ${token}`
  }
})
  .then(response => response.json())
  .then(data => console.log(data))
  .catch(error => console.error('Auth error:', error));
Testing with Apidog
Testing your API calls is crucial, and this is where Apidog comes in. Apidog offers a comprehensive suite of tools to test your APIs effectively. It supports both fetch and node-fetch, making it easier to validate your API interactions regardless of the environment.
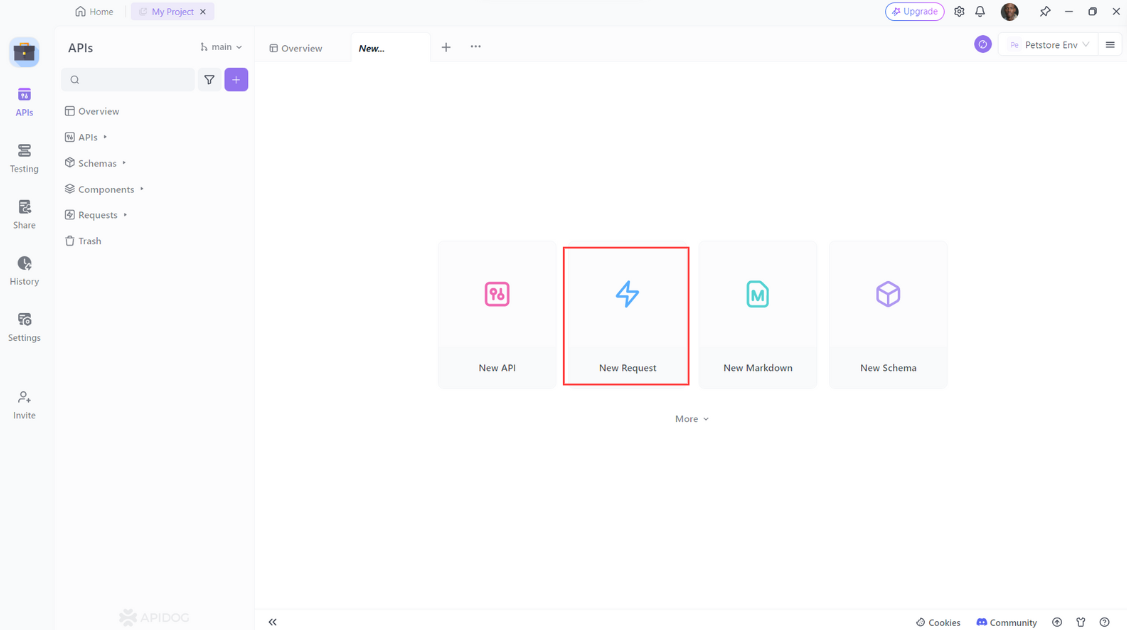
For example to send your API Request using Apidog:
- Open Apidog and click on the "New Request" button to create a new request.
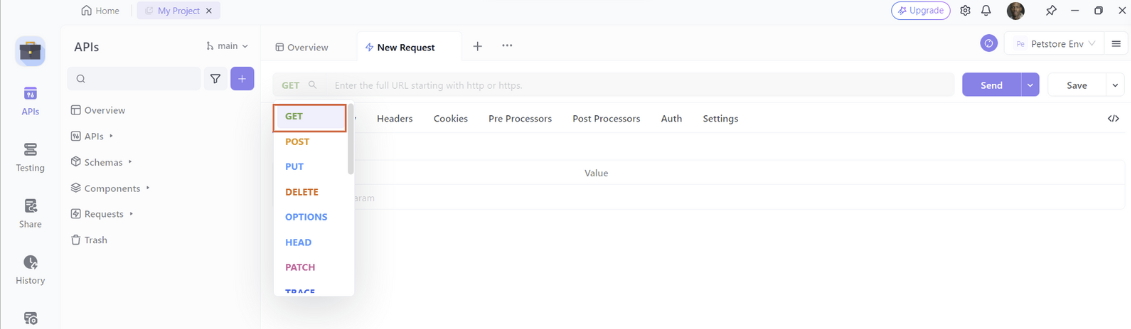
2. Select "GET" as the method of the request.
3. Enter the URL of the API endpoint
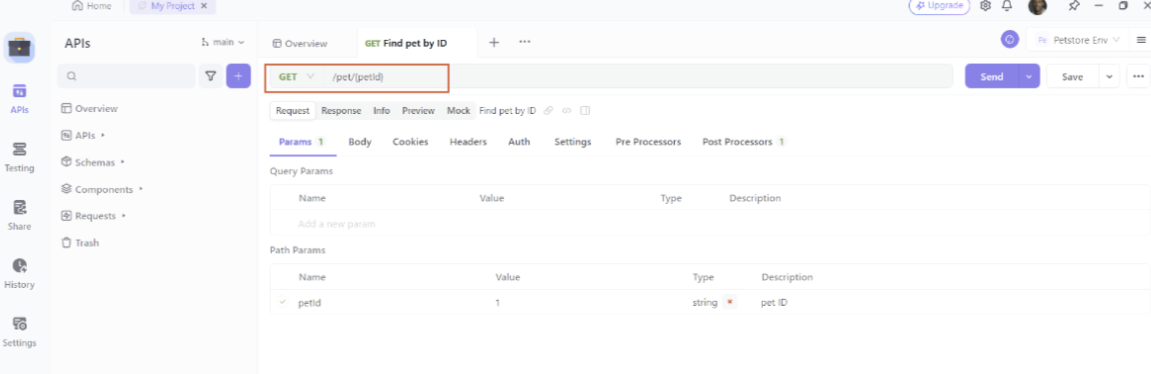
Then click on the “Send” button to send the request to the API.
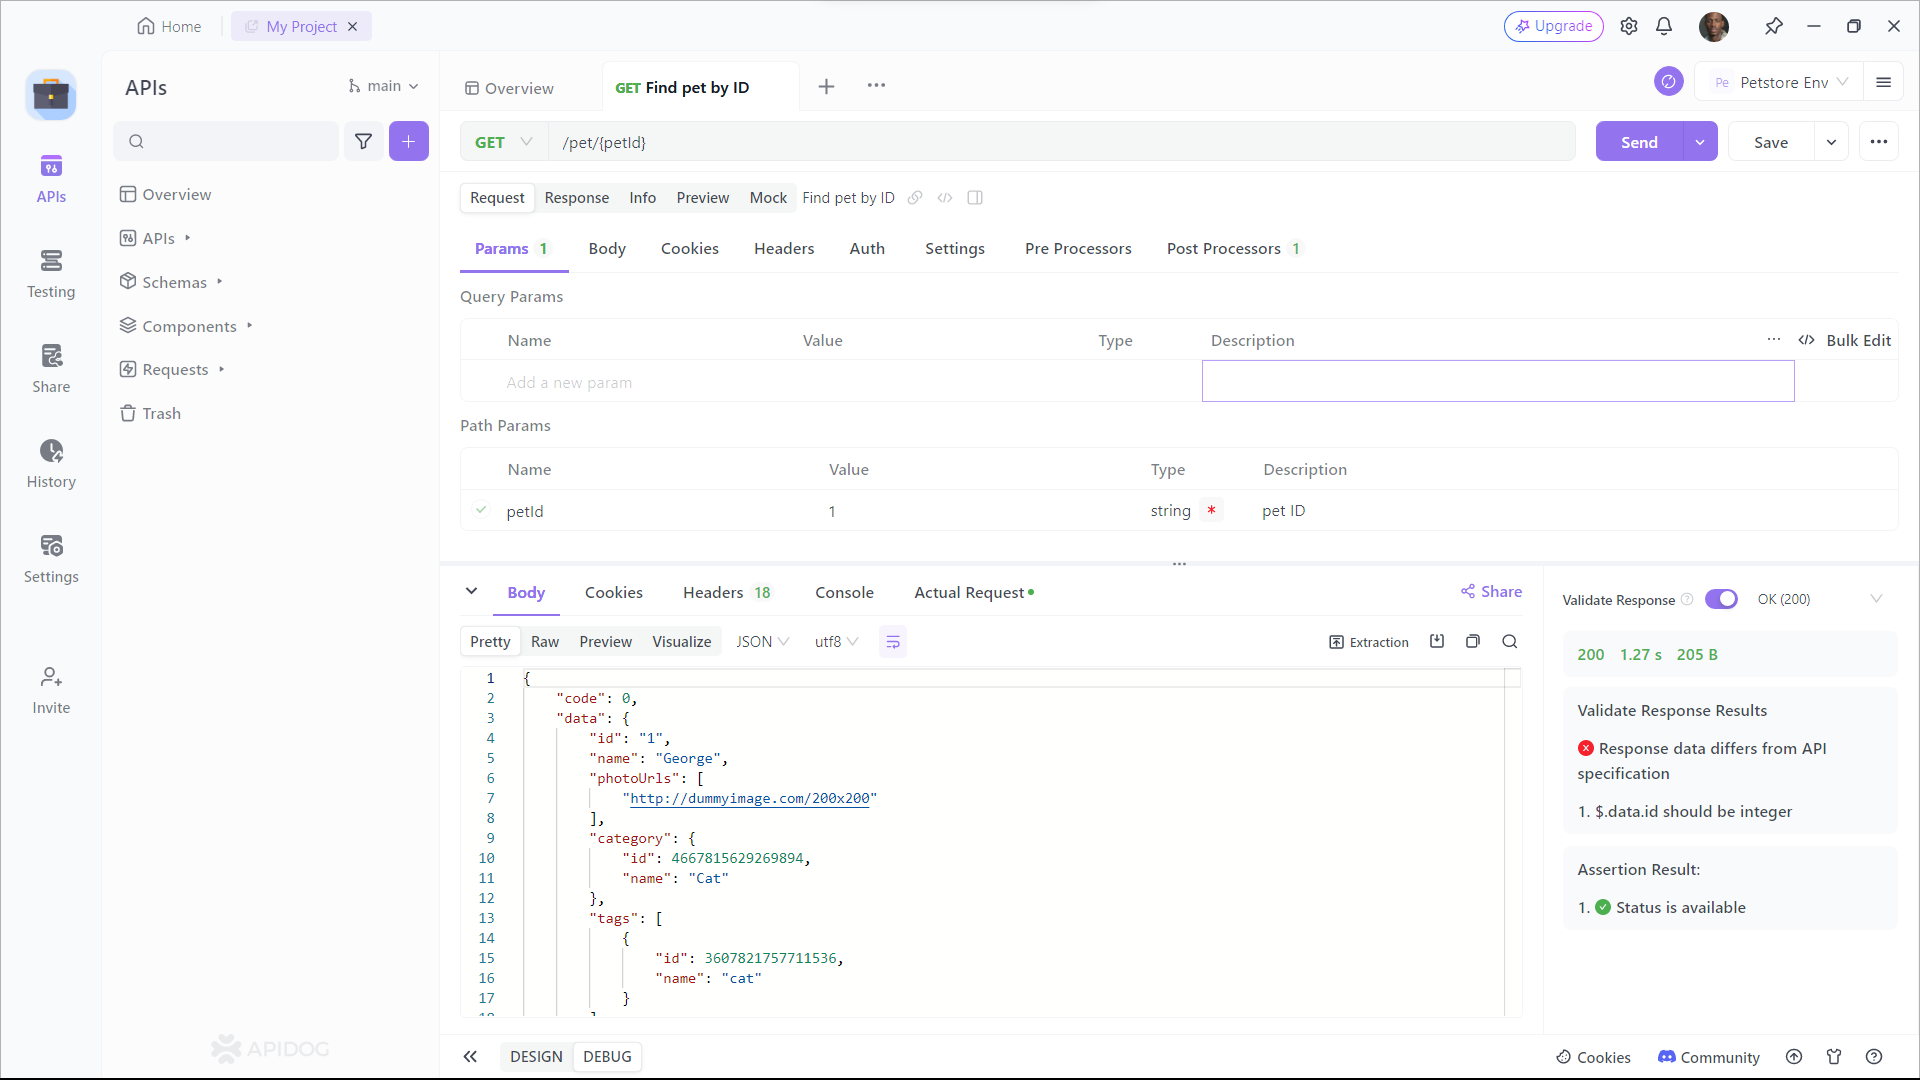
Generate Fetch Client Code With Apidog
Apidog provides users a client code generation feature, allowing them to quickly produce the necessary code for development. This speeds up the API development process, saving both time and effort for the developer to channel elsewhere more urgent.
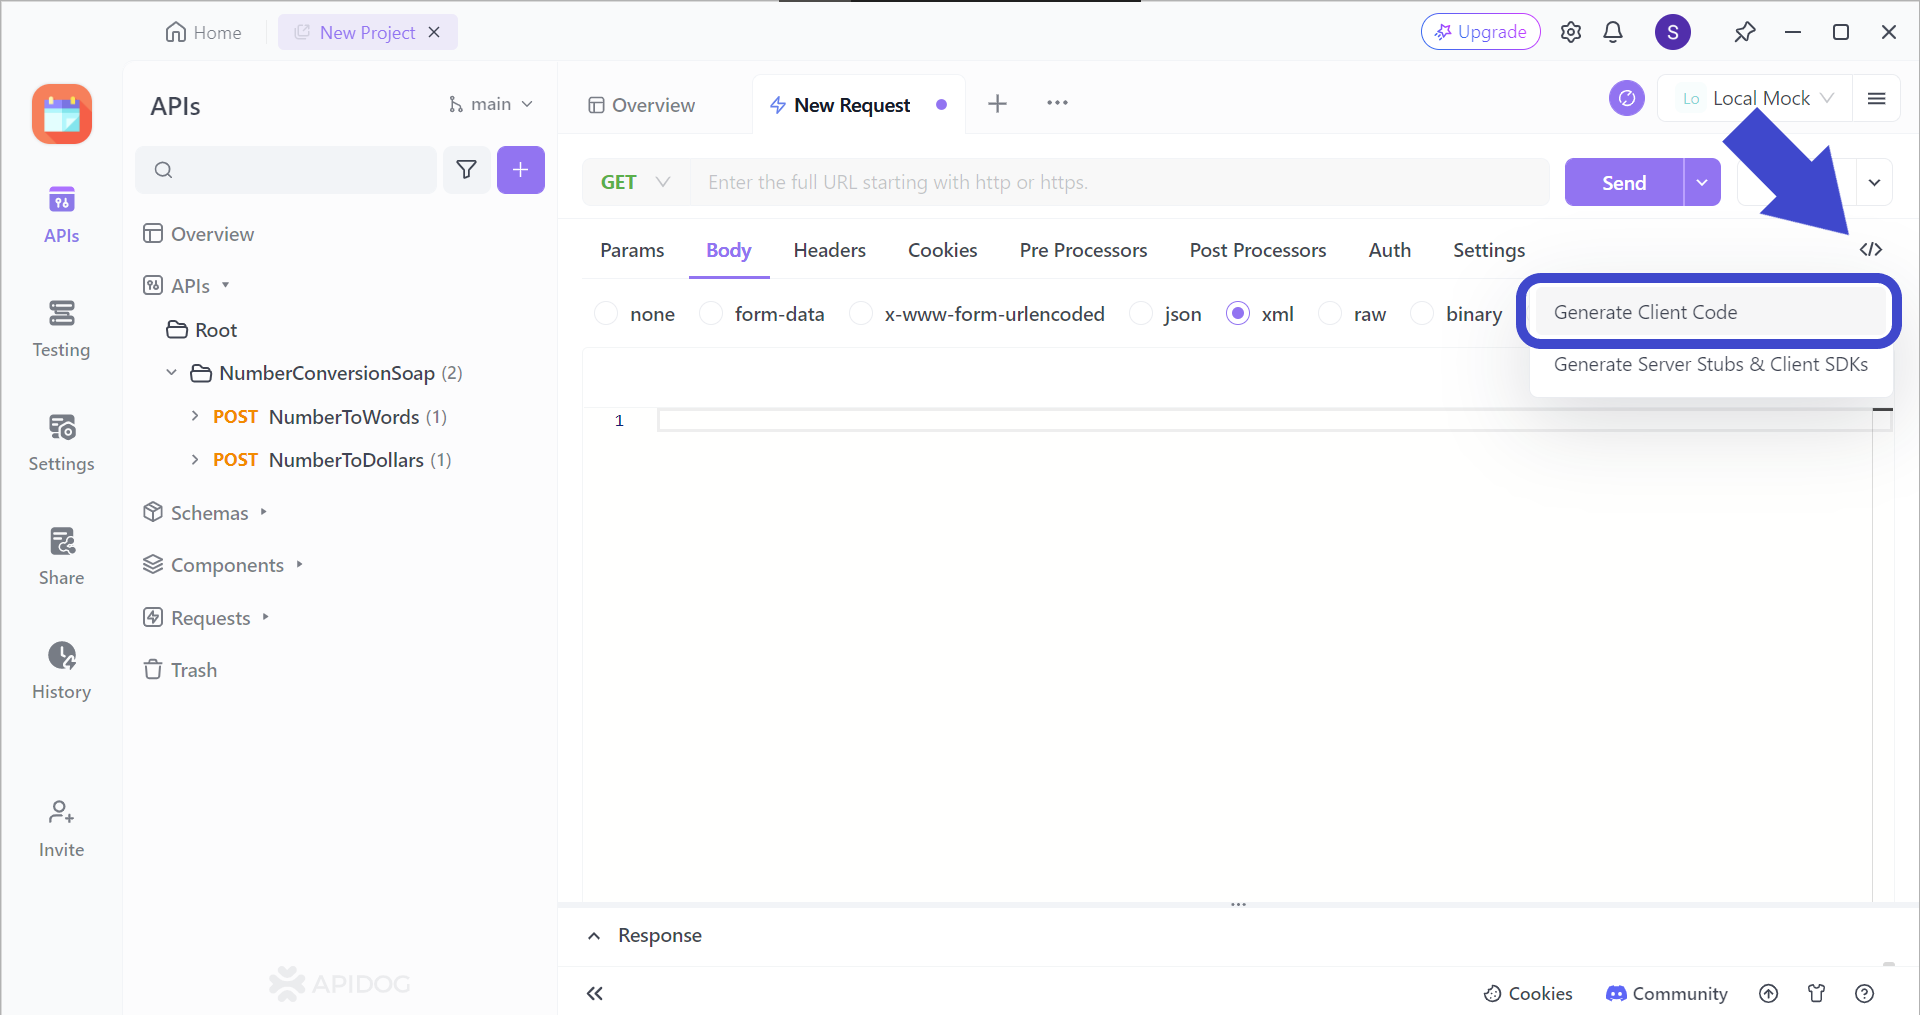
Firstly, locate this </> button located around the top right of the Apidog window. Then, press Generate Client Code to proceed with the code generation.
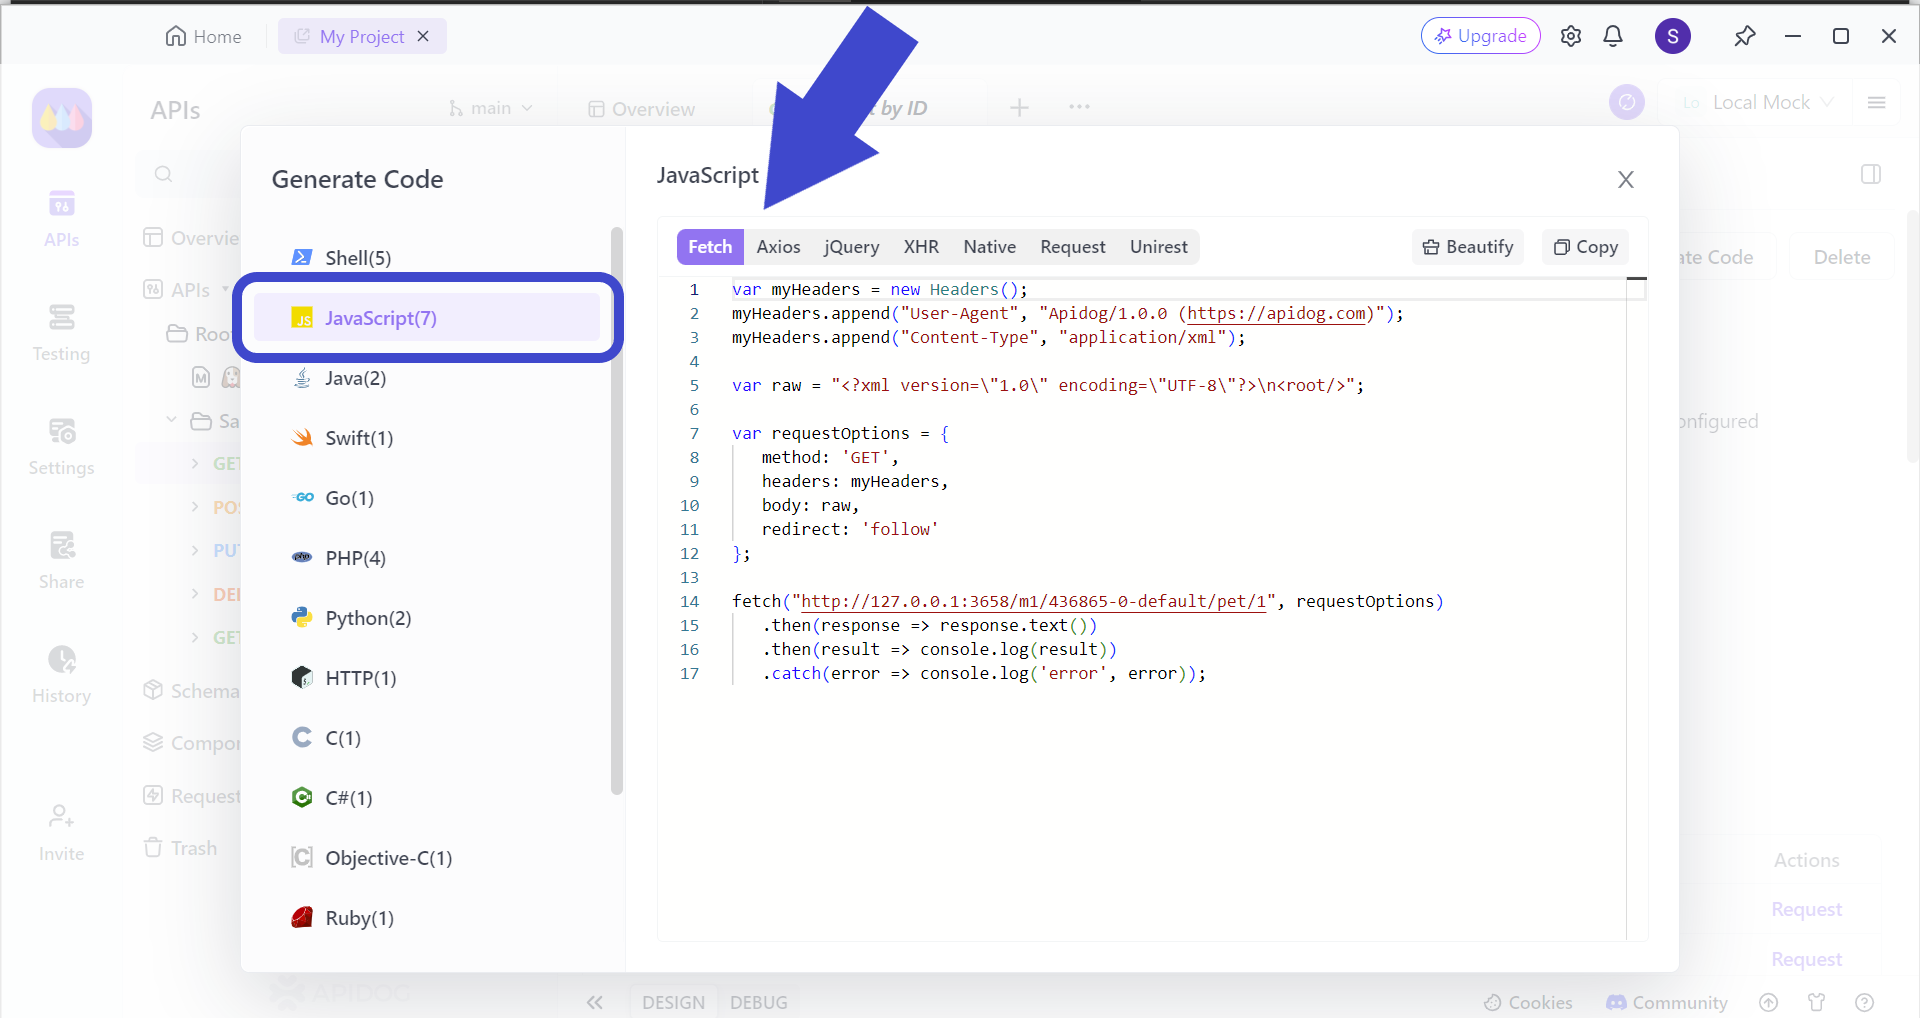
Next, you are greeted with a pop-up window. Select JavaScript, then the Fetch header. On your screen, you should have several lines of code ready for you to copy and paste into your IDE (Integrated Development Environment).
By integrating Apidog into your workflow, you can simulate various scenarios, test different endpoints, and ensure your API calls are robust and reliable. Plus, with Apidog’s user-friendly interface, even complex testing becomes straightforward.
Conclusion: Node-fetch vs Fetch – Which One to Choose?
In the node-fetch vs fetch debate, the right choice depends on your specific needs. If you’re working on a client-side application or a PWA, fetch is the obvious choice due to its native support and seamless integration with browser features. On the other hand, if your project involves server-side rendering, backend services, or automation scripts in Node.js, node-fetch is your best bet.
Remember, both tools share similar syntax and functionality, making it easier to switch between them based on your project requirements. The key is understanding their unique features and how they fit into your development environment.
Lastly, don’t forget to leverage tools like Apidog to streamline your API development and testing process. It’s a game-changer that can save you time and improve the reliability of your applications.


