
Hey there, fellow developers! Are you looking to make your Next.js app more dynamic and interactive? Well, you’ve come to the right place. Today, we’re diving into the world of APIs and how you can seamlessly integrate them into your Next.js projects. So, grab a cup of coffee, and let’s get started!
Understanding APIs
APIs, or Application Programming Interfaces, are a set of protocols and tools that allow different software applications to communicate with each other. They enable developers to use functionalities of one application within another by sending requests and receiving responses. This is crucial for building complex software systems that rely on integrating various services and components.
For a more detailed understanding, here are some key points about APIs:
- Protocols & Data Transfer: APIs define the methods and data formats for requesting and sending information between systems.
- Types of APIs: There are different types of APIs like REST, SOAP, and GraphQL, each with its own set of rules and use cases.
- Real-World Examples: APIs are used in many everyday applications, such as logging in with a social media account or displaying weather information from a third-party service.
Why Next.js and APIs are powerful combination?
Next.js is a popular React framework that’s designed to make building web applications more efficient and scalable. When it comes to APIs, Next.js offers a unique feature called API Routes, which allows you to create server-side API endpoints within your Next.js application. This means you can write backend code that’s integrated with your frontend, simplifying the development process and reducing the need to manage separate codebases for the frontend and backend.
Here’s why Next.js and APIs are a powerful combination:
- Server-Side Processing: Next.js can handle API requests server-side, which can improve performance and SEO.
- Full-Stack Capabilities: With API Routes, Next.js becomes a full-stack framework, allowing you to build both the client and server parts of your application in one place.
- Ease of Use: Next.js abstracts away much of the complexity involved in setting up a server, making it easier to build APIs.
- Flexibility: You can use any data source with your API Routes, whether it’s a database, a third-party API, or even file-based content.
In essence, Next.js and APIs allow developers to build fast, scalable, modern web applications that can efficiently handle dynamic data.

Calling an API in Next.js
Calling an API in a Next.js application is straightforward. You can use the built-in API routes feature to create server-side API endpoints, or you can make HTTP requests directly from your Next.js frontend code using the fetch API or other libraries like axios.
Here’s a basic example of how to set up an API route in Next.js:
// pages/api/hello.js
export default function handler(req, res) {
  res.status(200).json({ message: 'Hello from Next.js!' });
}
This file inside the pages/api directory will be treated as an API endpoint. When you visit /api/hello, it will return a JSON response with a message.
To call an external API from the frontend, you can use the fetch API like this:
// Inside your React component
const fetchData = async () => {
  const response = await fetch('https://api.example.com/data');
  const data = await response.json();
  console.log(data);
};

// Call this function when you want to fetch data, for example, on button click or component mount.
Remember to handle the loading and error states appropriately when making API calls to ensure a smooth user experience. Would you like to see a more detailed example or have any specific questions about using APIs in Next.js?

Handling Apis Responses in NextJS
Handling responses in API routes in Next.js involves sending back data to the client after processing the request. Here’s a simple example of how you might handle a GET request and send a response:
// pages/api/user.js
export default function handler(req, res) {
  if (req.method === 'GET') {
    // Fetch or compute data
    const userData = { name: 'John Doe', age: 30 };

    // Send the response
    res.status(200).json(userData);
  } else {
    // Handle any other HTTP method
    res.setHeader('Allow', ['GET']);
    res.status(405).end(`Method ${req.method} Not Allowed`);
  }
}
In this example, when a GET request is made to /api/user, the server will respond with a JSON object containing user data. If a different method is used, it will return a 405 Method Not Allowed status.
For error handling, you can use try...catch blocks to catch any errors that occur during the request processing and send an appropriate response:
// pages/api/user.js
export default async function handler(req, res) {
  try {
    // Your logic here
    const result = await someAsyncOperation();
    res.status(200).json(result);
  } catch (error) {
    console.error(error);
    res.status(500).json({ message: 'Internal Server Error' });
  }
}
This way, if an error occurs, the server will log the error and respond with a 500 Internal Server Error status, along with a JSON object describing the error.
Remember to always send back a response to avoid leaving the client hanging. This includes sending back appropriate status codes and messages that can help the client understand what happened with their request.
How to Test NextJs HTTP GET Request Using Apidog?
To Test HTTP Get request using Apidog, you need to follow these simple steps:
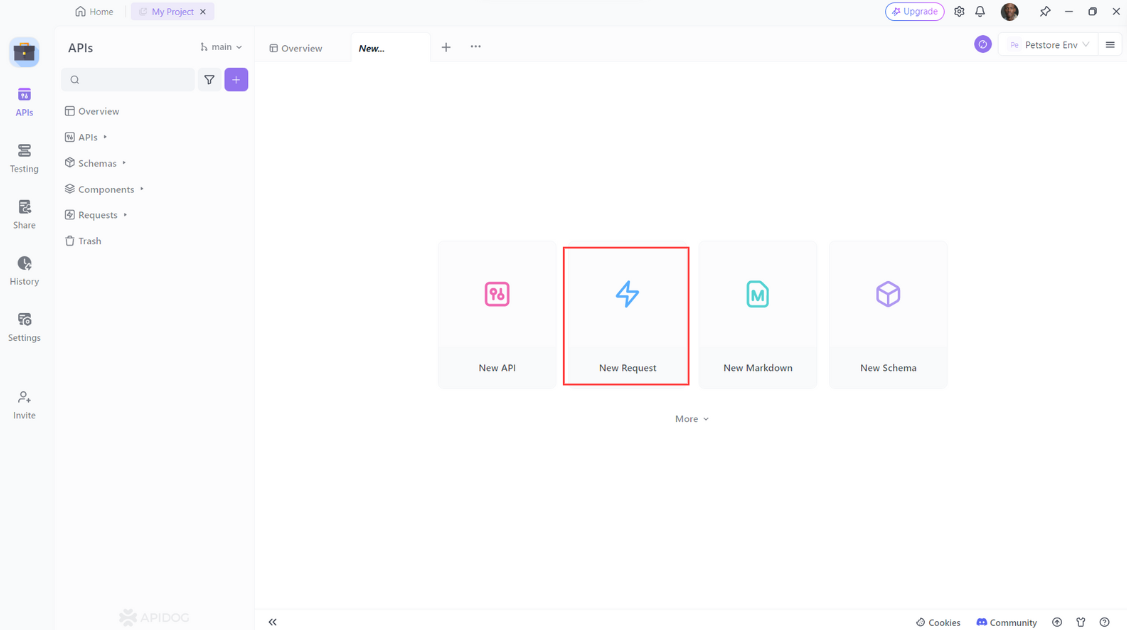
- Open Apidog and click on the "New Request" button to create a new request.
2. Select "GET" as the method of the request.
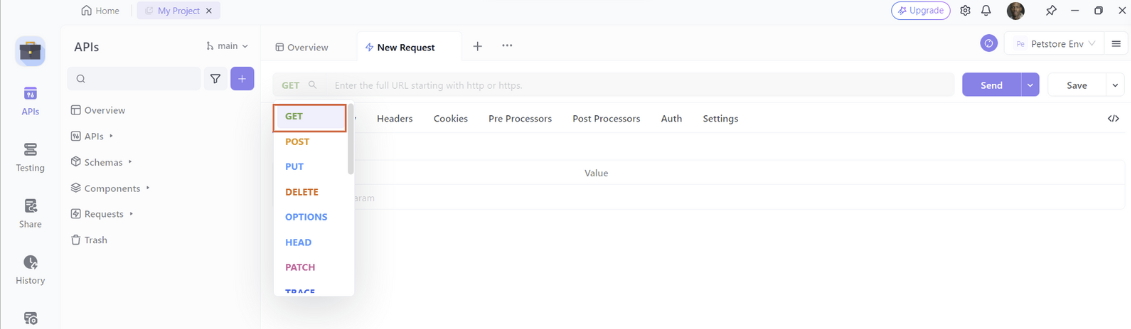
3. Enter the URL of the API endpoint
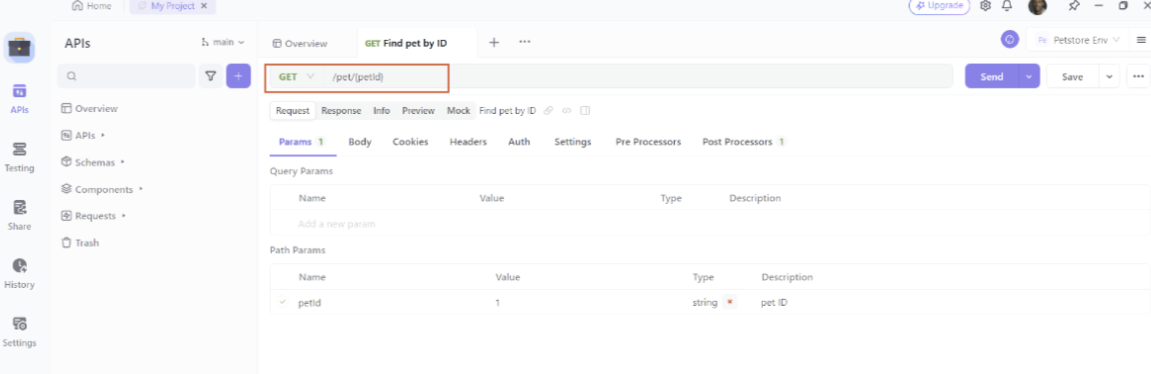
Then click on the “Send” button to send the request to the API.
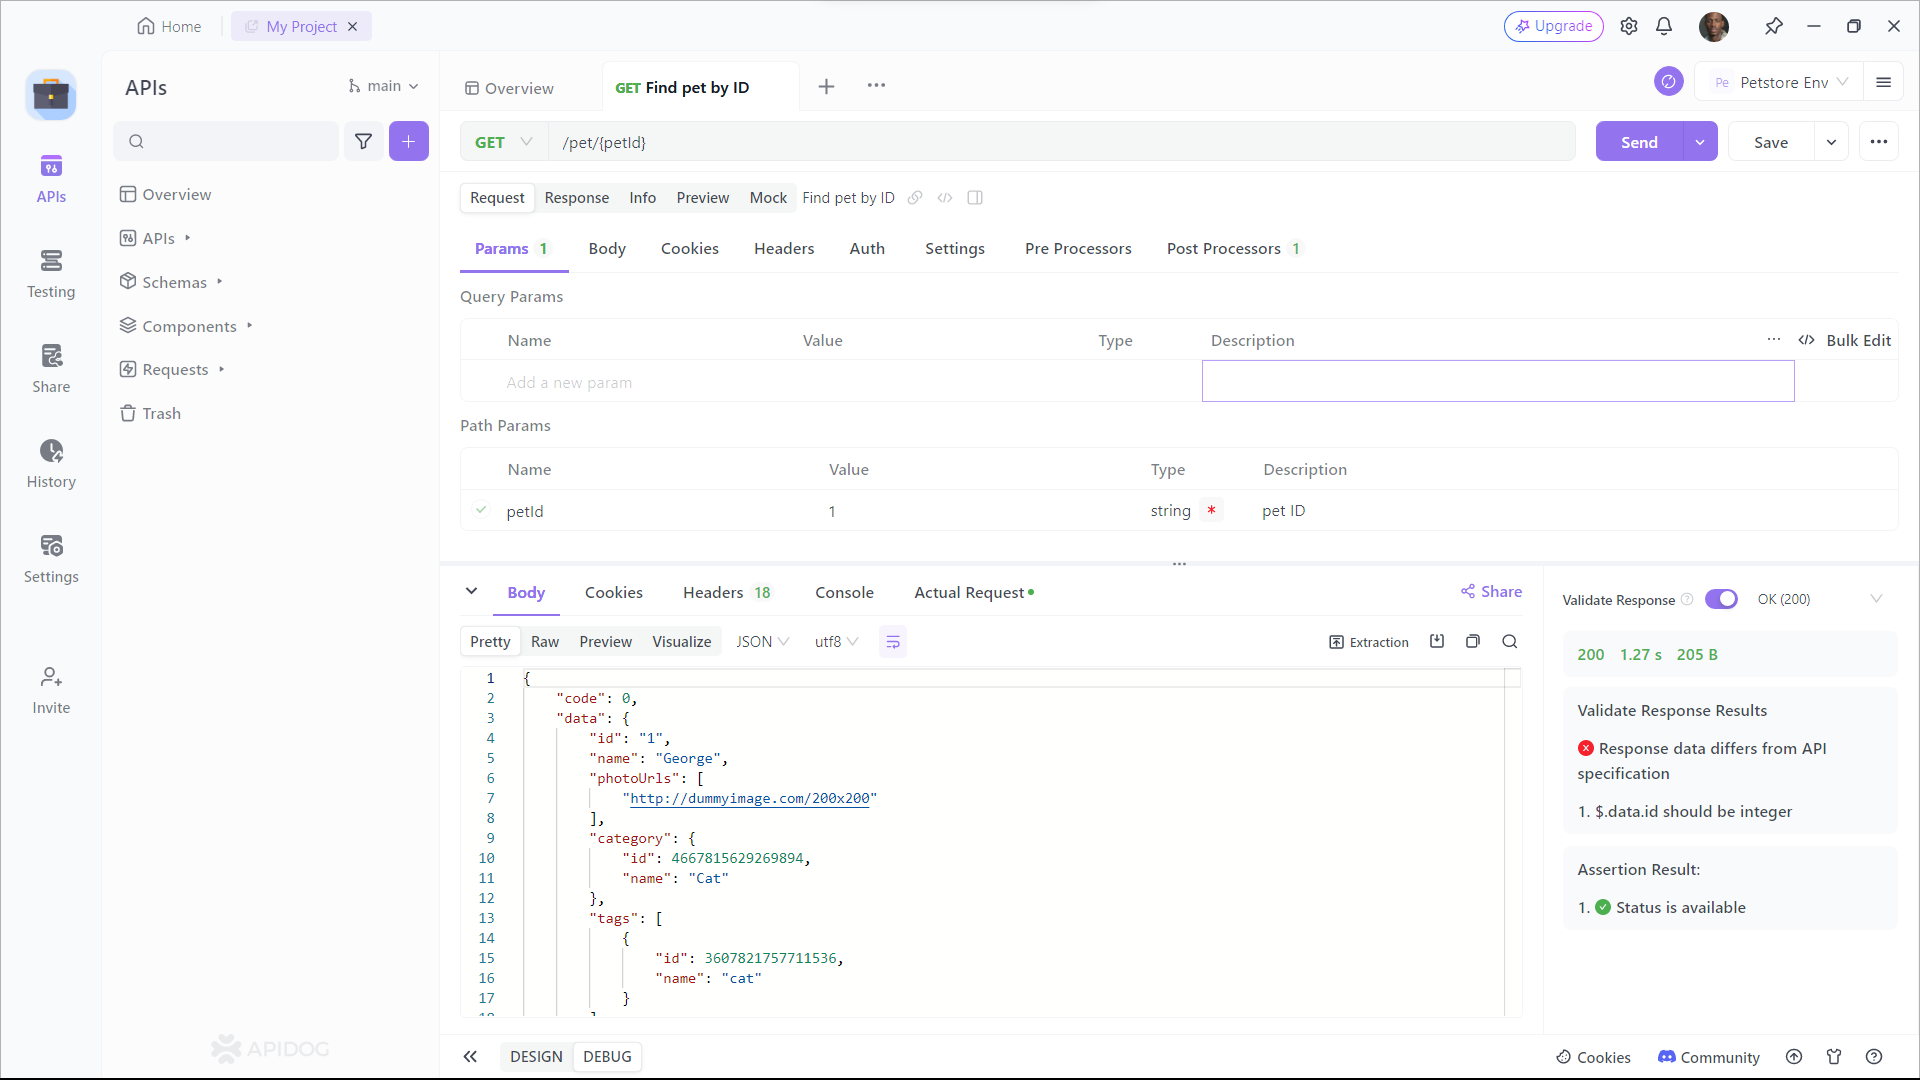
As you can see, Apidog shows you the URL, parameters, headers, and body of the request, and the status, headers, and body of the response. You can also see the response time, size, and format of the request and response, and compare them with different web APIs.
Conclusion
Next.js offers developers a seamless and efficient way to integrate APIs into their web applications. By leveraging the framework’s built-in API routes, you can easily create server-side endpoints that coexist with your frontend code, simplifying the development process and enabling full-stack capabilities. Whether you’re fetching data from external sources or handling server-side logic, Next.js provides the tools necessary to build dynamic, data-driven applications.


